1
RICi-4E1/T1, RICi-8E1/T1 Installation and Operation Manual
Chapter 4 Configuration
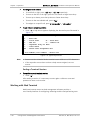
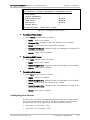
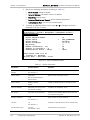
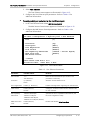
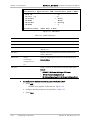
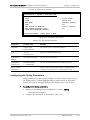
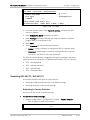
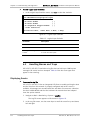
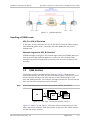
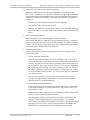
3. Move the cursor to the Manager IP cell you wish to modify by pressing <Tab>.
The selected cell is highlighted and the value appears in the “Change cell”
field.
4. Press <1>, press <Enter>, and then enter a new IP address for the selected
network manager.
5. Move the cursor to the Manager IP Mask field and enter the subnet mask for
the network manager IP address.
6. Move the cursor to the Trap field and toggle between Mask and Unmask to
mask or unmask traps for the selected management station.
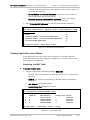
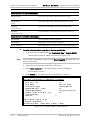
RICi-4E1/T1, RICi-8E1/T1
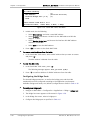
Main Menu > Configuration > System > Management > Manager List
Manager ID
1
2
3
4
5
Manager IP
1.1.1.1
2.2.2.2
3.3.3.3
4.4.4.4
5.5.5.5
Manager IP Mask
255.255.255.0
255.255.255.0
255.255.255.0
255.255.255.0
255.255.255.0
Manager Trap Mask
Unmask
Unmask
Mask
Unmask
Unmask
1. Change cell
... (1.1.1.1)
>
A-Add; R-Remove; C-Clear; x-Clear Table
ESC-Previous menu; !-Main menu; &-Exit; ?-Help
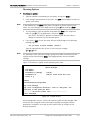
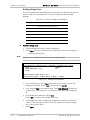
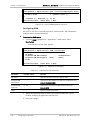
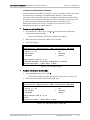
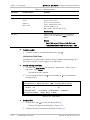
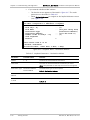
Figure 4-6. Manager List Menu
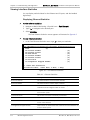
RICi-4E1/T1, RICi-8E1/T1
Configuration > System > Management > Manager List
Manager ID
(1)
1. Manager IP
... (0.0.0.0)
2. Manager IP Mask
... (255.255.255.0)
3. Manager Trap Mask
... (Unmask)
>
S-Save
ESC-prev menu; !-main menu; &-exit;
1 user(s)
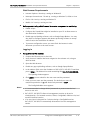
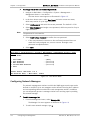
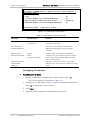
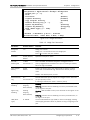
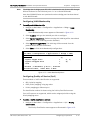
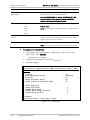
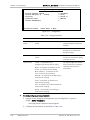
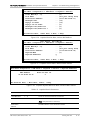
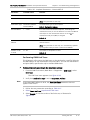
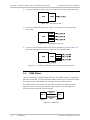
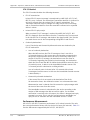
Figure 4-7. Manager List Menu, Add Mode
Configuring Radius Client
RICi-4E1/T1, RICi-8E1/T1 provides connectivity to up to four Radius authentication
servers.
³
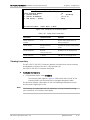
To configure Radius parameters:
1. From the Management menu (Configuration > System > Management), select
Radius Parameters.
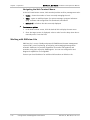
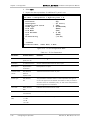
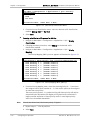
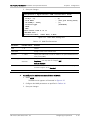
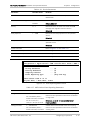
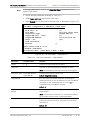
The Radius Parameters menu appears as illustrated in Figure 4-8.
RICi-4E1/T1, RICi-8E1/T1 Ver. 2.0
Configuring for Management
4-7