1
Setup Guide
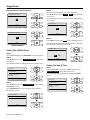
Daylight Savings Time (Continued)
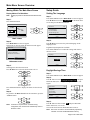
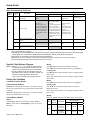
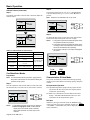
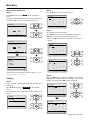
Daylight Saving Time
Observe Daylight Saving Time
ON
Step 4.
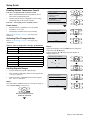
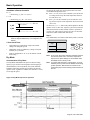
By default, the time display is set to the 12H format.
Press ▼▲ buttons to select 12H
24H on the 12H/24H
clock screen.
The confirmation screen will appear when the Menu/OK button is pressed.
12H/24H Clock
Setting
Clock is set one hour ahead
12H
Daylight Saving Time
Setting
Observe Daylight Saving Time
OFF
Step 5.
Press ◄► buttons to select Yes on the confirmation screen.
Pressing the Menu/OK button confirms the 12H or 24H and
takes you back to the main menu screen.
Setting
Clock is restored
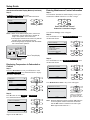
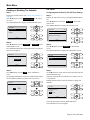
Setting The 12H/24H Clock
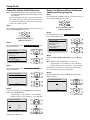
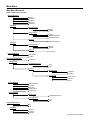
Step 1.
Press Menu/OK button, the “Main Menu” screen will appear.
Step 2.
Press ▼▲ buttons to select Clock & Calendar on the main
menu screen.
Press Menu/OK button to display the clock & calendar screen.
Main Menu
2/2
Configuration
Current Settings
Clock & Calendar
Daylight Saving Time
Language
Setting
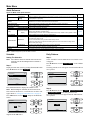
Step 3.
Press ▼▲ buttons to select 12H/24H Clock on the “Clock
& Calendar” screen.
The “12H/24H Clock” screen will appear when the Menu/
OK button is pressed.
Clock & Calendar
Date & Time
12H/24H Clock
Setting
Page 10 of 36 / OM 1169-1
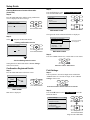
12H/24H Clock
Save the settings?
Yes
No
Setting
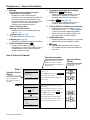
Setting The Date & Time
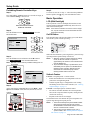
Step 1.
From the Main Menu screen, press ▼▲ buttons to select
Clock & Calendar on the main menu screen.
Press Menu/OK button to display the “Clock & Calendar”
screen.
Main Menu
2/2
Configuration
Current Settings
Clock & Calendar
Daylight Saving Time
Language
Setting