1
EPSON
®
C82346*
EPSON Type B Ethernet
Interface Card
For:
Cl Novell ® NetWare ® 2.x, 3.1x, and 4.x Print Server or
Remote Printer
Cl EtherTalk (Apple? Printer
0 Windows ® NT Printer Using DLC Protocol or TCP/IP
Q UNIX® lpd Printer or ftp Printer
0 IBM® OS/2 LAN® Server Printer
User's Guide
4005969
EH3-01
All rights reserved, No part of this publication may be reproduced, stored in a retrieval
system, or transmitted in any form or by any means, electronic, mechanical, photocopying,
recording, or otherwise, without the prior written permission of Seiko Epson Corporation,
No patent liability is assumed with respect to the use of the information contained herein.
Neither is any liability assumed for damages resulting from the use of the information
contained herein.
Neither Seiko Epson Corporation nor its affiliates shall be liable to the purchaser of this
product or third parties for damages, losses, costs, or expenses incurred by purchaser or
third parties as a result of: accident, misuse, or abuse of this product or unauthorized
modifications, repairs, or alterations to this product, or (excluding the U.S.) failure to
strictly comply with Seiko Epson Corporation’s operating and maintenance instructions
Seiko Epson Corporation shall not be liable against any damages or problems arising from
the use of any options or any consumable products other than those designated as Original
EPSON Products or EPSON Approved Products by Seiko Epson Corporation.
EPSON and EPSON ESC/P are registered trademarks and EPSON ESC/P2 is a trademark
of Seiko Epson Corporation.
General Notice: Other product names used herein are for identification purposes only and
may be trademarks of their respective owners. EPSON disclaims any and all rights in
those marks.
Copyright 0 1996 by Seiko Epson Corporation, Nagano, Japan.
ii
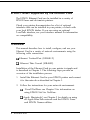
Notice for Ethernet Card Users
Using OS/2
If the Ethernet Cards firmware version is 4.00 or
below, it does not support NetBIOS over TCP/IP
protocol. Therefore use the NetBEUI protocol provided
by OS/2 Warp or OS/2 Warp Connect.
The following programs are not supported in the
NetBIOS over TCP/IP protocol:
RPRINT, RSTAT-LPT redirection
REMPRT, REMSTAT- pipe support
Using Apple EtherTalk-Renaming Your Printer
When the Card is installed in some printers and you
use Epson Namer to rename the printer, the original
factory name may reappear in the Select Printer list.
Rename the printer again and this name will be
properly saved.
Copyright © 1996 by Seiko Epson Corporation,
Nagano. Japan
Printed in U.K. 96.9-5
4006276
EH3-01
FCC Compliance Statement
For United States Users
This equipment has been tested and found to comply with the limits for a Class A digital
device, pursuant to Part 15 of the FCC Rules. These limits are designed to provide
reasonable protection against harmful interference in a residential installation. This
equipment generates, uses and can radiate radio frequency energy and, if not installed and
used in accordance with the instructions, may cause harmful interference to radio or
television reception. However, there is no guarantee that interference will not occur in a
particular installation. If this equipment does cause interference to radio and television
reception, which can be determined by turning the equipment off and on, the user is
encouraged to try to correct the interference by one or more of the following measures.
0 Reorient or relocate the receiving antenna
0 Increase the separation between the equipment and receiver
Cl Connect the equipment into an outlet on a circuit different from that to which the
receiver is connected
Cl Consult the dealer or an experienced radio/TV technician for help.
This device complies with Part 15 of the FCC Rules. Operation is subject to the following
two conditions:
(1) this device may not cause harmful interference, and
(2) this device must accept any interference received,
including interference that may cause undesired operation.
WARNING
The connection of a non-shielded equipment interface cable to this equipment will
invalidate the FCC Certification of this device and may cause interference levels which
exceed the limits established by the FCC for this equipment. It is the responsibility of the
user to obtain and use a shielded equipment interface cable with this device. If this
equipment has more than one interface connector, do not leave cables connected to
unused interfaces.
Changes or modifications not expressly approved by the manufacturer could void the
user’s authority to operate the equipment.
For Canadian Users
This Class A digital apparatus meets all requirements of the Canadian InterferenceCausing Equipment Regulations.
Cet appareil numerique de la classe A respecte toutes les exigences du Reglement sur le
materiel brouilleur du Canada.
...
111
For European Users
This product conforms to CE marking requirements in accordance
with EC Directive 89/336/EEC.
WARNING
This is a Class A product. In a domestic environment this product
may cause radio interference in which case the user may be
required to take adequate measures.
iv
Declaration of Conformity
According to ISO/IEC Guide 22 and EN 45014
Manufacturer:
Address:
SEIKO EPSON CORPORATION
3-5, Owa 3-chome, Suwa-shi,
Nagano-ken 392 Japan
Representative:
Address:
EPSON EUROPE B.V.
Prof. J. H. Bavincklaan 5 1183
AT Amstelveen
The Netherlands
Declares that the Product:
Product Name:
Type Name:
Model:
EPSON Type B Ethernet
Interface Card
C823462
C82346*
Conforms to the following Directive(s) and Norm(s):
Directive 89/336/EEC:
EN 55022 Class B
EN 50082-l
IEC 801-2
IEC 801-3
IEC 801-4
May 1996
M. Hamamoto
President of EPSON EUROPE B.V.
V
Contents
Introduction
Supported Network Protocols and Features . . . . . . . . . .
Ethernet Card Hardware . . . . . . . . . . . . . . . . . . . . .
Ethernet Card Software . . . . . . . . . . . . . . . . . . . . . .
EPSON Printers Supported by the Ethernet Card . . . . . . .
Overview . . . . . . . . . . . . . . . . . . . . . . . . . . . . . .
Terms and Concepts . . . . . . . . . . . . . . . . . . . . . . . .
1
3
3
4
4
5
lnstalling the Ethernet Card
Chapter 1
Hardware Installation . . . . . . . . . . . . . . . . . . . . . . .
Installing in a printer . . . . . . . . . . . . . . . . . . . . . .
Connecting the network cable . . . . . . . . . . . . . . . . .
Setting up the printer . . . . . . . . . . . . . . . . . . . . . .
Ethernet Card Operation . . . . . . . . . . . . . . . . . . . . .
Lights . . . . . . . . . . . . . . . . . . . . . . . . . . . . . . .
Status sheet printing . . . . . . . . . . . . . . . . . . . . . .
Using the EPSON PostScript card . . . . . . . . . . . . . . .
Network installation . . . . . . . . . . . . . . . . . . . . . .
1-1
1-2
1-3
1-3
1-4
1-4
1-5
1-6
1-6
vi
Chapter 2
Using Novell Net Ware
Ethernet Card Configuration Software . . . . . . . . . . . .
Before setting up . . . . . . . . . . . . . . . . . . . . . . .
Installing the utility software . . . . . . . . . . . . . . . .
Print Server mode . . . . . . . . . . . . . . . . . . . . . . .
Remote Printer mode . . . . . . . . . . . . . . . . . . . . .
Auto Print Server/Remote Printer mode . . . . . . . . . .
Using the Ethernet Card in Print Server Mode . . . . . . . .
Assigning print queues on a file server . . . . . . . . . . .
Assigning print queues on multiple file servers . . . . . .
Changing the configuration in Print Server mode . . . . .
Renaming the print server . . . . . . . . . . . . . . . . . .
Entering the password . . . . . . . . . . . . . . . . . . . .
Setting the queue polling time interval . . . . . . . . . . .
Using the Ethernet Card in Remote Printer Mode . . . . . .
Configuring the card as a remote printer . . . . . . . . . .
Changing the port number . . . . . . . . . . . . . . . . . .
Enabling/disabling Hunting . . . . . . . . . . . . . . . . .
Using the Ethernet Card in Auto Print Server/
Remote Printer Mode . . . . . . . . . . . . . . . . . . . .
Using Apple EtherTalk
Chapter 3
Installation Overview . . . . . . . . .
Renaming Your Printer . . . . . . . .
Using EPSON Namer . . . . . . . .
Selecting a Zone with EPSON Zoner
Using EPSON Zoner . . . . . . . .
2-1
2-1
2-2
2-3
2-3
2-4
2-5
2-5
2-8
2-10
2-10
2-11
2-11
2-12
2-13
2-15
2-15
2-16
. . . . . . . . . . . . .
. . . . . . . . . . . . .
. . . . . . . . . . . . .
. . . . . . . . . . . . .
. . . . . . . . . . . . .
3-1
3-2
3-2
3-6
3-7
Chapter 4
Using Windows NT
Installing on Windows NT with DLC Support . . . . . . . .
Requirements . . . . . . . . . . . . . . . . . . . . . . . . .
Installation for Windows NT . . . . . . . . . . . . . . . . .
Configuring the printer . . . . . . . . . . . . . . . . . . . .
Installing on Windows NT with TCP/IP Support . . . . . .
Requirements . . . . . . . . . . . . . . . . . . . . . . . . .
Installing LPR Software . . . . . . . . . . . . . . . . . . .
Configuring the Ethernet Card . . . . . . . . . . . . . . .
Configuring your printer . . . . . . . . . . . . . . . . . . .
4-1
4-1
4-1
4-2
4-3
4-3
4-4
4-5
4-7
vii
Using UNIX
Chapter 5
Installing and Printing with the Ethernet Card . . . . . . . . . 5-1
Setting up the Card . . . . . . . . . . . . . . . . . . . . . . .5-1
Printing via lpr . . . . . . . . . . . . . . . . . . . . . . . . .5-3
Printcap file . . . . . . . . . . . . . . . . . . . . . . . . . . . 5-4
Operation. . . . . . . . . . . . . . . . . . . . . . . . . . . . .5-5
Setting Up Various UNIX Systems . . . . . . . . . . . . . . . 5-9
Setting up for SCO UNIX. . . . . . . . . . . . . . . . . . . . 5-9
Setting up for IBM AIX Systems (RS/6000) . . . . . . . . . 5-11
Setting up for HP-UX System . . . . . . . . . . . . . . . . . 5-13
Using OS/2
Chapter 6
Installing on an OS/2 System . . . . . . . . . . . . . . . . . .
Requirements . . . . . . . . . . . . . . . . . . . . . . . . . .
Installing Redirection Software . . . . . . . . . . . . . . . . .
Getting printer driver status information . . . . . . . . . .
Printing through Pipes . . . . . . . . . . . . . . . . . . . . . .
Installing the software . . . . . . . . . . . . . . . . . . . . .
Configuring New Printers . . . . . . . . . . . . . . . . . . . .
Sharing the Card among Multiple Workstations . . . . . . . .
6-1
6-1
6-2
6-3
6-4
6-4
6-5
6-7
Specifications
Appendix
Environmental . . . . . . . . . . . . . . . . . . . . . . . . . . .
Network Software . . . . . . . . . . . . . . . . . . . . . . . . .
Ethernet Network Hardware Connectors . . . . . . . . . . . .
Regulatory Approvals . . . . . . . . . . . . . . . . . . . . . . .
Reliability . . . . . . . . . . . . . . . . . . . . . . . . . . . . . .
A-1
A-1
A-1
A-2
A-2
...
Vlll
II
lntroduction
The C82346* EPSON® Type B Ethernet Interface Card is a
combination of hardware and software that lets you connect an
EPSON printer equipped with an optional Type B interface slot
directly to your network. Just install the Ethernet Card into
your printer’s optional interface slot (see your printer guide or
contact your EPSON dealer for applicable models), and
connect it anywhere on your network.
Use the EPSON Ethernet Card software to quickly and easily
set up the interface as a print server or remote printer on a
Novell ® NetWare ®, EtherTalk® (Apple ®), Windows’ NT (with
TCP/IP), or IBM® OS/2 LAN® Server network. Utility
software is not needed for installation on a Windows NT (with
DLC Transport protocol) or UNIX network.
The Ethernet Card can be directly connected to a 10BASE or
10BASE-T network. It automatically selects the connected
network when powered on. In addition, it supports IEEE 802.2,
IEEE 802.3, and Ethernet II network protocols.
Supported Network Protocols and Features
The Ethernet Card supports the following network protocols:
Novell NetWare
0 Supports NetWare 2.x, 3.x, and 4.x (Bindery Emulation
Mode).
Cl Allows your printer to function as a print server or remote
printer. An additional mode, Auto Print Server/Remote
Printer, automatically switches between print server and
remote printer modes, depending on network conditions.
P Services up to 32 print queues on up to eight file servers.
Introduction 2
0 Provides the same functions as NetWare’s PSERVER
program in print server mode and RPRINTER in remote
printer mode.
AppleTalk
0 Supports EtherTalk Phase I and Phase II communication.
0 Provides easy installation with EPSON Zoner and EPSON
Namer utilities. Requires only the EPSON Zoner utility to
set up in EtherTalk Phase II.
0 Works with optionally equipped EpsonScript
(PostScript TM) printers.
Windows NT
0 Supports Windows NT 3.5x.
Cl Compatible with Hewlett Packard® network printers.
P Easy to configure and change the IP address and other
settings with the EPSON Net! utility when using TCP/IP.
UNIX
0 Supports most major commands, including lpd, ftp, and
ping.
0 Requires no setup utility. The IP address is allocated by
sending the arp and ping commands directly from the host
computer.
OS/2
Cl Supports IBM OS/2 Warp and Warp Connect with or
without an OS/2 LAN Server.
P Provides easy installation with the EPSON Net! utility.
2 Introduction
Ethernet Card Hardware
The Ethernet Card is an interface card that plugs into an
EPSON printer’s optional Type B interface slot. It has
connectors for either an Ethernet Thin Coaxial (10BASE2) or an
Ethernet Twisted-Pair (10BASE-T) network connection.
Ethernet Card Software
The interface software consists of the following programs used
to install and configure the card on any network:
0 EPSON Net! for NetWare (DOS, Windows) is an
easy-to-use menu-driven installation and configuration
utility for installing on a Novell NetWare network.
0 EPSON Zoner is a utility for installing the Ethernet Card
on an EtherTalk (Apple) network.
0 EPSON Namer is a utility that assigns a unique name to
your printer on an EtherTalk (Apple) network.
0 EPSON Net! for Windows NT is a menu-driven utility for
configuring IP addresses and other settings with TCP/IP.
0 EPSON Net! for OS/2 is a character based utility for
installing on an OS/2 NetBIOS network.
Introduction 3
EPSON Printers Supported by the Ethernet Card
The EPSON Ethernet Card can be installed in a variety of
EPSON laser and dot-matrix printers.
Check your printer documentation for a list of optional
interfaces that can be installed in your printer, or check with
your local EPSON dealer. If you are using an optional
LocalTalk interface, see your interface manual for information
on compatibility.
Overview
This manual describes how to install, configure, and use your
Ethernet Card in a variety of network environments using the
following cable connections:
0 Ethernet Twisted-Pair (10BASE-T)
0 Ethernet Thin Coaxial (10BASE2)
Installation of the Ethernet Card in your printer is simple and
is described in Chapter 1. The following steps provide an
overview of the installation process.
1.
Install the Ethernet Card in your EPSON printer and connect
it to the network as described in Chapter 1.
2.
Follow the instructions for your network environment.
Cl
Novell NetWare: see Chapter 2 for information on
using EPSON Net! for NetWare.
Cl Apple Macintosh®: see Chapter 3 for details on using
an Apple EtherTalk network and the EPSON Zoner
and EPSON Namer utilities.
4 Introduction
Windows NT: see Chapter 4 for information on using a
Windows NT environment with DLC Transport
protocol or TCP/IP.
cl UNIX: see Chapter 5 for details about using several
variations of UNIX. This chapter includes information
about using UNIX with TCP/IP.
0 OS/2: see Chapter 6 for details on using an OS/2
system and installing extra software.
Note:
0 The default Net Ware condition of the Ethernet card is disabled.
You must configure the card with EPSON Net! for NetWare to
work on a Net Ware network.
cl
The default interface setting is Print Server mode. Zf you are
setting up the card for use in a Net Ware environment, you will
need to determine whether you want to set up the Ethernet Card
in Print Server, Remote Printer, or Auto Print Server/Remote
Printer mode.
cl If you want to operate your printer in more than one network
environment, install the interface for each network as described in
the following chapters.
Terms and Concepts
A node address is a set of numbers that gives a unique identity
to any piece of equipment connected to a network.
The file server stores data required for the Ethernet Card to
operate as a print server.
A print queue is an area where a print job is stored as a file,
until the print server sends the job to the assigned printer.
A print serves moves jobs from print queues to printers.
Introduction 5
A remote printer is a shared printer connected elsewhere on the
network, but under the control of a NetWare print server.
Traditionally, a remote printer is connected to a network
workstation running NetWare’s RPRINTER, but the Ethernet
Card can also function as a remote printer.
A status sheet prints each time the Status Sheet button of the
Ethernet Card is pushed. If the Card is installed as a print
server, the status sheet lists the configurations of the Ethernet
Card on each network.
EtherTalk is AppleTalk’s communication protocol governing
Ethernet transmissions.
A print spooler is an application that places print jobs or
requests in a queue.
TCP/IP (Transmission Control Protocol/Internet Protocol) is a
layer of protocols that provides communications between
nodes on a network.
ftp is a TCP/IP application protocol for file transfer.
lpd is a TCP/IP remote printing protocol application,
Resetting the Ethernet Card causes it to initialize. You can reset
the Ethernet Card in the following ways:
0 Switching the EPSON Ethernet Card-equipped printer off
and back on again.
0 Using the reset function or buffer clearing operation from
the control panel of your EPSON printer.
6 introduction
Chapter 1
Installing the Ethernet Card
This chapter explains how to install the Ethernet Card in your
printer. Subsequent chapters describe how to install the
interface on your network. See the section that applies to your
particular network for more information.
Hardware Installation
You must install the interface card in the printer, connect it to
the network, and turn on the printer before you can set up the
software.
Your interface package includes:
Cl The Ethernet Card
0 A coaxial Y-connector
0 Utility software disks for installing on Novell NetWare,
EtherTalk (Apple), Windows NT (using TCP/IP), and
IBM OS/2 LAN Server networks
Your interface package requires:
0 A network connection for the Ethernet Card (10BASE-T
or 10BASE2)
Cl The host EPSON printer
You need to install the Ethernet Card in the optional interface
slot of your EPSON printer. See your printer guide for the
location of the optional interface slot.
Installing the Ethernet Curd
1-1
Installing in a printer
Before installing the Ethernet Card, see your printer manual
for instructions on installing the optional interface card; these
will be in the section on using printer options.
Note:
After installing the Ethernet Card, do not connect a cable to the
printer’s parallel port until after the card is booted and operating
(green status light on, red off). Otherwise, it may not boot properly.
For your own convenience, locate the hexadecimal serial
number on the component side of the card and write it here:
The serial number may be necessary for some software
installations to identify the Ethernet Card. When installing this
card on a Novell, EtherTalk, Windows NT (using TCP/IP), or
OS/2 NetBIOS network using the accompanying setup utility
software, this number is automatically recorded and displayed.
1-2
Installing the Ethernet Card
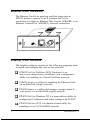
Connecting the network cable
Once the board is installed in your printer, you must attach the
network cable to the interface. The Ethernet Card can accept
either a 10BASE-T or 10BASE network cable.
The Ethernet Card is an intelligent interface that can detect
which kind of cable is attached; you do not need to make any
hardware or software settings to specify the cable type.
However, you must not attach more than one cable at a time.
Attach the network cable to the appropriate connector on the
interface, as shown in the diagram.
Twisted-Pair (10BASE-T)
Thin Coaxial (10BASE2)
Setting up the printer
Some EPSON printers require you to use the printer’s control
panel or DIP switches to select the interface you plan to use.
The method of making control panel settings on EPSON
printers may be called SelecType or default-setting mode. See
your printer manual for instructions on making the necessary
interface settings.
Installing the Ethernet Card
Z-3
Ethernet Card Operation
The LED lights and the status sheet function can provide you
with important information about the operation of the Ethernet
Card.
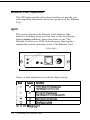
lights
This section describes the Ethernet Card indicator light
behavior, including when you first turn on the host printer,
during normal conditions, and when errors occur. The
Ethernet Card has two LEDs (red and green) that together
indicate the current operating status of the Ethernet Card.
Status lights
,
I
I
Here is a brief explanation of indicator light activity:
1 Red
1 Green
1 Function
.0I,
.0I,
I
1I
.,
I-I
0
b
Recogniring the network
(lights flash alternately on and oftI
l
0
Normal operating mode
0
0
Error has occurred
On 0 Off 0 Flashing
1-4
Waiting for printer initialization
(lights flash simultaneously)
6
Installing the Ethernet Card
Printer initialization
After Ethernet Card installation, the red and green status lights
on the interface flash simultaneously during printer initialization.
Network recognition and normal
operation
At start up, the Ethernet Card checks all active NetWare file
servers. While the card is recognizing the network, the red and
green status lights flash alternately on and off.
After recognizing the network, the Ethernet Card is ready to
send and receive data. In this mode, only the green status light
is lit.
Data Transmission light
When the Ethernet Card receives a data packet, it
automatically recognizes the protocol of the packet and
switches to that protocol mode. When the card sends data, the
Data Transmission light (green) is lit.
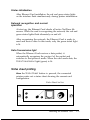
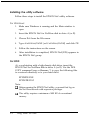
Status sheet printing
the Status Sheet button is pressed, the connected
printer prints out a status sheet showing the current card
configuration.
When
Status Sheet button
Installing the Ethernet Card
1-5
Note:
If the status sheet does not print, first make sure that the printer is
on line. If it is on line but the status sheet still does not print, you
will have to reset the printer by turning it off and back on.
R
Caution:
After turning off the power, wait at least five seconds before
turning it back on; otherwise you may damage the printer.
Report printing is available after the printer is turned on and has
completed its initialization routine. The Status Sheet is not
available when the printer has started printing or when the
printer is off line or not ready.
Under normal operating conditions, the status sheet will print
in one of the following emulation modes: ESC/P*-**, ESC/Page,
PCL (LJ-2P, S/P/Si, LJ-4P), GL (HP-GL, HP-GL2, EP-GL),
EpsonScript (PostScript), PR-201, GQ.
Using the EPSON PostScript card
If your printer has an EpsonScript (PostScript) card installed,
allow a minute for the printer to initialize before trying to install
or configure the Ethernet Card on the network. The Ethernet
Card may not respond if initialization has not been completed.
Network installation
See the appropriate chapter in this guide for instructions on
installing the card on a specific network.
1-6
Installing the Ethernet Card
Using Novell Net Ware
The Ethernet Card can function as a print server or remote
printer running under Novell NetWare. It also has an Auto
Print Server/Remote Printer mode that allows it to switch
modes depending on network conditions. The following
sections describe how to configure the interface card to operate
in each of these modes.
Ethernet Card Configuration Software
The Ethernet Card comes with EPSON Net! for NetWare,
EPSON’s proprietary network printer management utility
program. You must configure the card using EPSON Net!. The
disk provided with the card includes a Windows-based
version and a DOS version of this easy-to-use, menu-driven
program.
Use the appropriate version to set up your card as a print
server or a remote printer. You can use EPSON Net! to add or
delete queues, change port configurations, rename the print
server, configure the interface to service queues on other file
servers, and other tasks.
Before setting up
0 First decide whether you want to use the interface card as a
dedicated print server or remote printer, or in Auto Print
Server/Remote Printer mode.
Cl Install the Ethernet Card and connect it to the network
following the instructions in Chapter 1. The card must be
connected to the network and the host printer must be
turned on before setting up.
Using Novell Net Ware
--___-
2-1
~ .’
lnstalling the utility software
Follow these steps to install the EPSON Net! utility software.
For Windows:
1.
Make sure Windows is running and the Main window is
open.
2.
Insert the EPSON Net! for NetWare disk in drive A (or B).
3.
Choose Run from the File menu.
4.
Type a:windows/install (or b:windows/install) and click OK.
5.
Follow the instructions on the screen.
6.
After installation is completed, EPSON Net!(NW) appears in
the EPSON Net! group.
For DOS:
At a workstation with a high-density disk drive, insert the
EPSON Net! for NetWare disk in drive A (or B). Use the DOS
COPY command (copy a:filename. *) to copy the following files
to a network directory or to your hard drive:
EPNWDE.EXE
EPNWDE.DAT
Note:
0 Before running the EPSON Net! utility, you must first log on
the Net Ware network with supervisor privileges.
0
2-2
This utility requires a minimum of 480 KB of conventional
memory.
Using Novell Net Ware
Print Server mode
In Print Server mode, the card performs all print server
functions and can service up to 32 queues and eight file
servers. No VAP (Value-Added Process) or NLM (NetWare
Loadable Module®) is required. When you send a print job
from your application, the file server assigns the print job to a
print queue. When the corresponding printer is ready, the print
server sends the print job to the printer.
The Ethernet Card operates like any Novell NetWare print
server, servicing the assigned queues in a round robin fashion.
In queues of the same priority, the Ethernet Card services the
first job in a queue before those in a lower priority queue. The
card also supports encrypted passwords.
This mode provides the highest printing speed while retaining
the control, security, and convenience of a NetWare print
server.
To use the card in Print Server mode, see page 2-5.
Remote Printer mode
As a remote printer, the Ethernet Card emulates a workstation
running Novell’s RPRINTER program, and operates under the
control of a Novell NetWare print server. The print server can
be either a dedicated workstation running PSERVER or a file
server.
At power-up, the interface will attempt to attach to a print
server (elsewhere on the network) and act as a particular
printer of that print server. To do this, it needs to know which
print server to attach to, and which printer of that print server
to use. This is similar to the need to specify these parameters in
the RPRINTER command line (or to interactively choose them
from the RPRINTER program).
Using Novell NetWare
2-3
You can set up these parameters on the Ethernet Card with the
EPSON Net! utility. Once the interface card is set up, it will
store these settings, which means that you will normally only
need to do this once at the time of installation. However, as
with all Novell remote printers, the card’s print speed is slower
in Remote Printer mode than in Print Server mode.
The main advantage of Remote Printer mode is that connection
to a file server is not required, making this mode desirable in
installations with limited available file server connections.
Each NetWare print server can support up to 16 printers and
requires only one file server connection.
To use the card in Remote Printer mode, see page 2-12.
Auto Print Server/Remote Printer mode
In Auto Print Server/Remote Printer mode, the Ethernet Card
provides automatic switching between print server and remote
printer operation, depending on network conditions. If the
Ethernet Card has the same name as the main Novell print
server on your network, it detects the presence of the print
server and operates as a remote printer. If your primary print
server becomes unavailable, the Ethernet Card automatically
switches modes to provide print server backup.
As a print server, the Ethernet Card requires a connection to a
file server. For more information about operating the Ethernet
Card as a print server, see the following section.
As a remote printer, the Ethernet Card emulates a workstation
running Novell’s RPRINTER program. For more information
about this mode, see “Using the Ethernet Card in Remote
Printer Mode” on page 2-12.
As a print server/remote printer, the Ethernet Card acts as and
needs to be set up as both a print server and a remote printer.
To use the card in Auto Print Server/Remote Printer mode, see
page 2-16.
2-4
Using Novell Net Ware
Using the Ethernet Card in Print Server Mode
The Ethernet Card is set to Print Server mode by default, so
you don’t have to make any special settings to use it in this
mode. However, you must assign a print queue(s) to the card
in a file server. See the following section for instructions.
The Ethernet Card can service up to 32 queues and eight file
servers in print server mode. See page 2-8 for information
about assigning print queues on multiple file servers.
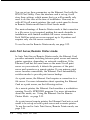
Assigning print queues on a file server
To set up queues on a file server in print server mode, follow
the steps below.
1.
From any NetWare workstation, log on with supervisor
privileges.
2.
Run the EPSON Net! utility.
3.
After searching the network, the following dialog box
appears.Highlight the printer you want to configure from
the list and then click Open.
Using Novell Net Ware
2-5
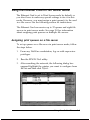
2-6
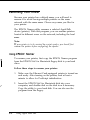
4.
In the NetWare Status dialog box, click Edit to configure the
printer.
5.
The NetWare config dialog box appears. Make sure the Print
Server radio button is selected as shown below.
Using Novell Net Ware
6.
The default printer name appears in the Print Server name
box. If you want to rename the printer, simply type the
new name into the box.
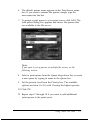
7. To assign a print queue to your print server, click Add. The
Add queue dialog box appears and shows the queues that
are available to the file server.
Note:
If you want to set up queues on multiple file servers, see the
following section.
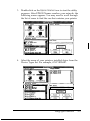
8.
Select a print queue from the Queue drop-down list, or create
a new queue by typing its name in the Queue box.
9.
Set the priority level from the Priority box. The available
options are from 1 to 10, with 1 having the highest priority.
10. Click OK.
11. Repeat steps 7 through 10 if you want to add additional
print queues to the print server.
Using Novell Net Ware
2-7
12. To save your settings, click Save.
e
Caution:
Once you make changes to the Ethernet Curd, you must wait
for at least five minutes before turning off or rebooting your
printer.
Assigning print queues on multiple file servers
The EPSON Net! utility allows you to configure print queues
on multiple file servers. However, you must have supervisor
privileges and the correct password for each file server.
Follow these steps to configure multiple file servers:
1.
2-8
Access the NetWare config dialog box, and click Add.
Using Novell Net Ware
2.
Select the file server you want to attach to the printer from
the File Server list. If you have not already logged on to the
selected file server, the Login Fileserver dialog box appears.
3.
Enter a user name with supervisor privileges and the
password; then click OK.
4.
Select the file server you want to attach to the printer and
then select a print queue from the Queue list box, or create
a new queue by typing a name in the box. Next, click OK.
5.
Repeat steps 1 through 4 if you wish to attach additional file
servers to the printer.
6.
To save your settings and exit EPSON Net!, click OK and
then click Save in the NetWare config dialog box.
7.
To delete a queue, highlight the queue in the NetWare config
dialog box and then press Delete. At the prompt, click OK.
Using Novell Net Ware
2-9
Changing the configuration in Print Server mode
In Print Server mode, you can use the EPSON Net! utility to do
the following:
Cl Rename the print server
0 Enter a password
Cl Set the queue polling time
Before editing the Ethernet Card configuration with EPSON
Net!, you must first log on to the network with supervisor
privileges.
Renaming the print server
Always use EPSON Net! to rename the printer on the master
file server. Never use PCONSOLE to perform this operation.
1.
Access the NetWare config dialog box, and type the new
print server name in the Print Server name box. You can
enter up to 32 characters. The following characters are not
allowed: Ctrl / \ : ; , * I + = [ I ” and space. A period (.) is
allowed if it is not the first character.
2. Click Save.
Note:
If the first part of the new printer name is the same as the product
name, the last four characters of the the hexadecimal serial number
will affix themselves automatically to the end of the new name.
2-10
Using Novell Net Ware
Entering the password
A password is not required for Ethernet Card operation.
However, if you wish to connect to a restricted file server, you
will need to use EPSON Net! to enter the encrypted password.
To enter the password, follow these steps:
1.
From the NetWare config dialog box, click Password. The
following dialog box appears:
2.
Type in the same password that you used to log on to the file
server and click OK.
e
Caution:
Once you make changes to the Ethernet Card, you must wait
for at least five minutes before turning off or rebooting your
printer.
Setting the queue polling time interval
Use EPSON Net! to change the interval at which the parallel
port(s) check queues for waiting print jobs. To reduce network
traffic, you can change the polling interval from 1 second up to
90 seconds. The default setting is 5 seconds.
Using Novell Net Ware
2-11
1.
From the NetWare config dialog, enter a value, in seconds,
from 1 to 90 in the Poll Time (sec) box.
2.
Click Save to save your setting changes.
e
Caution:
Once you make changes to the Ethernet Card, you must wait
for at least five minutes before turning off or rebooting your
printer.
Using the Ethernet Card in Remote Printer Mode
Before using an Ethernet Card as a remote printer, you must
define it using PCONSOLE on any Novell print server. When
defined, the remote printer may have its printer port defined,
such as LPT1 or COM2. However, to maintain compatibility,
you should define a remote printer as LPT1.
Defining the Ethernet Card
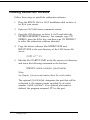
Before using the EPSON Net! setup utility to install the
Ethernet Card as a remote printer, you must do the following:
1.
From any NetWare workstation, log on to the network with
supervisor privileges.
Note:
If you use Net Ware 4.x, menu screens will differ slightly and
Bindery Emulation has to be selected. Press F4 to switch between
Directory Services and Bindery Emulation.
2-12
2.
Type PCONSOLE at the DOS prompt.
3.
From the Available Options screen, select Print Server
Information. Next, select the print server name from the
Print Servers list and press Enter.
Using Novell Net Ware
4.
From the Print Server Information list, select Print Server
Configuration and press Enter.
5.
Select Printer Configuration from the menu and then press
Enter.
6.
From the Configured Printers list, highlight a port number
and press Enter.
7.
From the Printer Configuration screen, enter the printer
name. Next, highlight the Printer Type and select LPT1.
8.
Press ESC; then press Enter to save changes.
9.
Select Queues Serviced by Printer from the Print Server
Configuration menu and assign a queue to the print server
port from the Available Queues list.
10. Press ESC to exit.
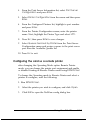
Configuring the card us a remote printer
after changing the Operating Mode option Remote Printer
mode, you can change the printer port assignment and enable
or disable Hunting in Remote Printer mode using EPSON Net!
To change the Operating mode to Remote Printer and select a
printer to configure, read the following:
1. Run EPSON Net!.
2.
Select the printer you wish to configure, and click Open.
3.
Click Edit to open the NetWare config dialog box.
Using Novell NetWare
2-13
4.
Make sure the Operating Mode is set to Remote Printer.
5.
Click on the printer you want to configure from the Print
Server name drop-down list or type in a new name for the
printer.
6.
Click Save to save your changes.
See the next sections to change the port number and enable or
disable Hunting.
2-14
Using Novell Net Ware
Changing the port number
Use the EPSON Net! utility to change the parallel port number
for the remote printer as follows:
1.
In the NetWare config dialog, enter the number for any
available port in the Port No. box. The available settings for
Novell NetWare versions 3.x and below are from 0 to 15.
For NetWare 4.x and higher, the available settings are from
0 to 254.
2.
Click Save to save the port setting.
Enabling/disabling Hunting
You can use EPSON Net! to turn the Ethernet Card’s Hunting
feature on or off. When Hunting is on, the interface card
connects to the first available unassigned active port. This
feature is useful if the Novell print server has many printer
ports. To change this setting, follow these steps:
1.
In the NetWare config dialog, click On under Hunting to
enable the function. The default setting is Off.
2.
Click Save to save the setting.
Using Novell Net Ware
2-15
Using the Ethernet Card in Auto Print
Server/Remote Printer Mode
To use the Ethernet Card-equipped printer in Auto Print
Server/Remote Printer mode, you must configure it for both
print server and remote printer operation. For information on
changing the various print server and remote printer settings,
see the appropriate sections earlier in this chapter. To select the
Auto Print Server/Remote Printer mode, follow these steps:
2-16
1.
First make sure the host printer is turned on and the
interface is connected to the network.
2.
Log on to the selected file server with supervisor privileges.
3.
Run the EPSON Net! utility.
4.
Select the printer you wish to configure and click Open.
5.
Click Edit to open the NetWare config dialog box.
6.
Click the Auto PrintServer/Remote option button under
Operating Mode to select auto switching mode.
Using Novell Net Ware
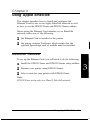
Chapter 3
Using Apple EtherTalk
This chapter describes how to install and configure the
Ethernet Card for use on an Apple EtherTalk network as well
as how to use the EPSON Zoner and EPSON Namer utilities.
Before using the Ethernet Card interface on an EtherTalk
network, make sure of the following:
0 the Ethernet Card is installed in the printer
0 the printer contains PostScript, which means that the
optional EpsonScript card or module must be installed.
lnstallation Overview
To set up the Ethernet Card, you will need to do the following:
0 Install the EPSON Zoner and EPSON Namer setup utilities.
0 Rename your printer using EPSON Namer.
Cl Select a zone for your printer with EPSON Zoner.
I
Note:
EPSON Zoner works only on a Phase II EtherTalk network.
Using Apple EtherTalk
3-1
Renaming Your Printer
Because your printer has a default name, you will need to
rename it to avoid having multiple printers on the same
network with the same name. Choose any name you like for
your printer.
The EPSON Namer utility renames a selected AppleTalk
device (printer). With this program, you can rename printers
located in different zones on the network, including the local
zone.
Note:
If your printer is to be serviced by a print spooler, you should first
rename the printer before configuring the spooler.
Using EPSON Namer
To rename your printer, first copy the EPSON Namer program
from the EPSON Net! for Macintosh floppy disk to your hard
drive.
Follow these steps to rename your printer:
3-2
1.
Make sure the Ethernet Card-equipped printer is turned on
and ready. After turning on the printer, wait at least a
minute to allow for PostScript initialization.
2.
Insert the EPSON Net! for Macintosh disk into your
computer, and double-click on the disk icon if necessary.
Copy the utility to your hard disk. You can also run the
program from the floppy.
Using Apple EtherTalk
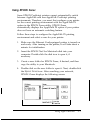
3.
Double-click on the Epson Namer icon to start the utility
program. After EPSON Namer searches your network, the
following screen appears. You may need to scroll through
the list of zones to find the one that contains your printer.
Device Types:
Select Printer:
AppleTalk Zones:
New Name:
11 hc TP SWR ether
hd TP System
hd TP Sustem 2
4.
Select the name of your printer’s installed driver from the
Device Types list. For example, AT-LP1500ART.
Select Printer:
EPL-8000-FFOF
AppleTalk Zones:
hc TP SWR
hc TP SWR ether
New Name:
Using Apple EtherTalk
3-3
5.
Choose the zone, if any, that contains the printer you want to
rename from the AppleTalk Zones list.
6.
Select the printer you want to rename from the Select Printer
list. If the zone has only one printer of the type specified in
the Device Types list, that printer will be selected
automatically.
Device Tuoes:
ADDleTalk Zones:
hc TP SWR
hc TP SWR ether
1 hc TP VAX
1 hd TP HDANGER
3-4
Using Apple EtherTalk
New Name:
tEPL-8000-FFOF
7.
Enter a new name in the New Name box. The name can be
up to 32 characters long.
bevice Tuoes:
rppleTalk Zones
Epson Namer
I Select Printer:
INew Name:
Allison’s printer
Note:
Do not use a name that is already assigned to an existing printer.
8.
Click Rename. After a few moments, the new name will
appear in the Select Printer list.
Device Types:
Select Printer:
AppleTalk Zones:
hc TP SWR
hc TP SWR ether
New Name:
1 Allison’s printed
Using Apple EtherTalk
3-5
Note:
cl If you have installed several printers of the same type on the
network, they may all have the same name in the Select Printer
list. To differentiate between printers, highlight a printer name
and then click Identify. The selected printer will print a page to
identify itself providing the printer name, type, and zone (if any).
Rename the printer and then repeat the process, if necessary, for
other printers on the network.
cl Clicking Reset returns the printer to its default name. For
example, “EPSON.”
9.
Click Done to exit EPSON Namer.
After changing printer names, you will need to notify everyone
on the network of the new names. Network users will then
have to reselect the renamed printer with the Chooser.
Selecting a Zone with EPSON Zoner
A zone is a group of users, computers, and devices, including
printers. Zones can be grouped according to physical location,
work groups, or departments. For example, Zone 1 could
contain all of the printers used by a company’s marketing
department or publications group.
Use the EPSON Zoner utility to assign your printer to a specific
zone on a Phase II EtherTalk network.
Note:
EPSON Zoner cannot be used on a Phase I network.
3-6
Using Apple EtherTalk
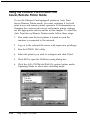
Using EPSON Zoner
Some EPSON PostScript printers cannot automatically switch
between AppleTalk and non-AppleTalk PostScript printing
environments. Therefore, you must first configure your printer
for the correct printing environment with the AppleTalk PS
option in the EPSON Zoner utility. EPSON Zoner
automatically displays the AppleTalk PS option if your printer
does not have an automatic switching feature.
Follow these steps to configure the AppleTalk PS printing
environment and select a zone for your printer:
1.
Make sure the Ethernet Card-equipped printer is turned on
and ready. After turning on the printer, it will take about a
minute for initialization.
2.
Insert the EPSON Net! for Macintosh disk into your
computer. Double-click the disk icon to open it, if
necessary.
3.
Create a new folder for EPSON Zoner, if desired, and then
copy the utility to your Macintosh.
4.
Double-click on the new folder to open it. Next, double-click
the Epson Zoner icon. After searching your network,
EPSON Zoner displays the following screen:
Using Apple EtherTalk
3-7
5.
Highlight your printer name in the Printers list. If there are
many devices on the network, you may have to scroll
through the list to find your printer.
6.
Select the network zone that you want your printer to appear
in from the Zones list.
Note:
The default zone appears as an asterisk (*) in the Zones list.
7.
To use a non-AppleTalk PS printer (all EPSON printers), set
the AppleTalk PS option to Inactive. For AppleTalk PS
printers, make sure the AppleTalk PS option is set to
Active.
8.
Click Set to assign your printer to the selected zone.
If you are assigning a zone to more than one printer, repeat
steps 5-7 for each printer.
Your printer will stay in the new zone as long as the zone
is available.
Caution:
If you changed the AppleTalk PS option, wait at least 30
seconds after clicking the Set button before rebooting your
printer.
9.
Click Quit to exit EPSON Zoner.
Be sure to notify all network users of the new zone for your
printer. They will have to reselect the rezoned printer in the
Chooser.
3-8
Using Apple EtherTalk
Chapter 4
Using Windows NT
The Ethernet Card provides network printing support in the
Windows NT environment with DLC Transport protocol and
can be configured without a setup utility. The card also
provides printing support for Windows NT when installed
with TCP/IP using a special setup utility.
lnstalling on Windows NT with DLC Support
Requirements
Before you can install the Ethernet Card in the Windows NT
environment, make sure that Windows NT is installed with
DLC protocol.
Installation for Windows NT
1. Run Windows NT.
2.
Double-click on the Control Panel icon.
3.
Double-click on the Network icon.
4.
Click on the Advanced box.
5.
Select DLC Transport protocal from the Network Software
list.
6.
Install the DLC Transport protocol and Driver by choosing
Install Software from the Advanced Network screen.
Using Windows NT
4-1
A
E
7.
Reboot your system for the installation to take effect.
Note:
To verify that the DLC protocol is installed correctly, check the
list of installed Network Software in the Networks dialog box.
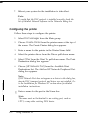
Configuring the printer
Follow these steps to configure the printer:
1.
Select Print Manager from the Main group.
2.
Choose Create Printer from the printer menu at the top of
the screen. The Create Printer dialog box appears.
3.
Enter a name for the printer in the Printer Name field.
4.
Select the printer driver from the Driver pull-down menu.
5.
Select Other from the Print To pull-down menu. The Print
Destination dialog box appears.
6.
Choose (HP Network Port) from the Available Print
Destinations list. The Add an HP Network Peripheral Port
dialog box appears.
Note:
If HP Network Port does not appear as a choice in the dialog box,
then the DLC transport protocol and driver are not installed. Go
to the Installation for Windows NT section above for detailed
installation instructions.
Enter a name for the port in the Name box.
Note:
The name must not be identical to an existing port, such as
LPT1, or any other existing DOS device.
4-2
Using Windows NT
8.
9.
Select LAN Hardware Address (Node Address) from the
Card Address list. This address matches the one listed
under Node Number on the status sheet.
Click the Timer button and select the Job Oriented option.
click OK.
Then
10. Click OK to exit the Add a Network Peripheral Port dialog
box.
Note:
You may share the new printer if you wish. To do so, click the
Share the Printer on the Network box. The share name
defaults to the printer name and can be changed if necessary.
11. Click OK to exit the Create Printer dialog box. A dialog box
from the selected model’s device driver appears.
12. Set any printer-specific options, and click OK.
You are `now ready to print.
Installing on Windows NT with TCP/IP Support
Before you can set up the software, the interface card must be
installed in the printer and the printer must be connected to the
network and turned on.
Requirements
To use the Ethernet Card with LPR (TCP/IP), you need to
install the standard TCP/IP software in Windows NT and set
the IP address for the Ethernet Card with EPSON Net!.
See the Windows NT User’s Guide for more information on
using Windows NT.
Using Windows NT
4-3
Installing LPR Software
Follow the steps below to set up Windows NT to print with the
Ethernet Card using LPR, or if you have already installed the
TCP/IP Network Print Service from TCP/IP Protocol and
Related Components, skip to “Configuring your printer” on page
4-7.
4-4
1.
Click the Network icon in Control Panel.
2.
After the Network Configuration dialog box appears, look for
Microsoft TCP/IP Print in the Installed Software list box. If
the option is listed, it is already installed, and you can skip
to “Configuring your printer.” If the TCP/IP option is not
listed, click Add Software.
3.
After the Add Network Software dialog appears, choose
TCP/IP Protocol and Related Components from the
Network Software list box; then click Continue.
4.
In the Windows NT TCP/IP Option for Installation dialog
box, select TCP/IP Network Print Support, and click
Continue. If you cannot select this option, cancel the
operation, and proceed to “Configuring your printer.”
5.
The next dialog box will ask for the setup disk for Windows
NT. Insert the appropriate disk, and follow the instructions
on the screen.
6.
After setup is finished, the Network Installation dialog box
appears again. Make sure that Microsoft TCP/IP Print appears
in the Installed Network Software list; then click OK.
7.
When the TCP/IP Components dialog box appears, set the IP
address and the subnet mask of the Windows NT server or
workstation. If you want to use the gateway (router), set
the IP address of the nearest gateway as the default
gateway. If you do not use the gateway, do not set the
default to gateway.
Using Windows NT
8.
When the Modify the Network Setting dialog box appears,
click Restart System.
Configuring the Ethernet Card
To communicate with the Ethernet Card using TCP/IP on
Windows NT, the network supervisor needs to set the IP
address for the Ethernet Card using any TCP/IP capable NT
system.
1.
After installing the Ethernet Card in the printer as described in
your printer’s user’s guide, connect it to the computer and
turn on the printer.
2.
Turn on your computer, insert the EPSON Net! for Windows
NT disk, and run INSTALL.EXE from Program Manager or
File Manager. The EPSON Net! group appears in Program
Manager and the EPSON Net! (NT) icon is registered.
3.
Double-click the EPSON Net! (NT) icon to start EPSON Net!.
The following dialog box appears:
File
1
smid
IPaddreft
status
109013B5
._ .-.-. --_._11.2233.~-__~-----__-!
Using Windows NT
4-5
4.
Select the correct serial numbers for the Ethernet Card from
the list shown in the dialog box; then click Open. The IP
Config dialog box appears on the screen and shows the
current IP address.
5.
Set the following options in the IP Config dialog box:
0 IP address: determine and assign an IP address
Cl Subnet mask: assign the subnet mask
Cl Auto IP address: set to Off
Note:
Cl The Auto IP address option is a function designed
specifically for UNIX users. Windows NT overrides this
function, so you can leave it off.
0 To prevent the assigned IP address from changing
unexpectedly in UNIX, UNIX users should set the Auto IP
address option off.
Serial No.
104676F9
IP address
11.22.33.44
Subnet mask 255.255.0.0
‘Auto IP address
0 On
0 Off
i
6.
4-6
1
After making your settings, click the Save button. To change
these settings, repeat steps 3 through 5.
Using Windows NT
Note:
It takes a few seconds to register the IP address change, so there
may be a short delay before it is displayed.
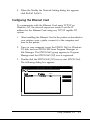
Configuring your printer
Follow the steps below to configure your printer using
Windows NT.
1.
Click Print Manager in the Main program group.
2.
Choose the Create Printer command from the Printer menu.
3.
After the Create Printer dialog box appears, enter the name of
your printer in the Printer Name text box.
4.
Choose your printer driver from the Driver pull-down menu.
5.
Choose Other from the Print To pull-down menu.
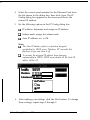
6.
After the Print To dialog box appears on the screen, select
LPR Port from the Available Print Monitor list, and click
OK.
7.
After the Add LPR-compatible Printer dialog box appears on
the screen, enter the previously specified IP address of the
Ethernet Card in the first text box.
8.
Click the Printer Name of the Computer text box; then enter
an appropriate printer name, and click OK.
9.
After the Create Printer dialog box, appears, make sure that
all your settings have registered and are correct. Make
changes if necessary, and click OK.
You can change the printer driver settings from the Create
Printer dialog box at any time.
Using Windows NT
4-7
Chapter 5
Using UNIX
The Ethernet Card supports many standard UNIX commands
and can be configured from a host computer without using a
special setup utility.
Installing and Printing with the Ethernet Card
See the following sections for general information concerning
setting up (with TCP/IP) and printing. See page 5-9 for more
information about various UNIX systems.
The Ethernet Card is able to function as a remote printer on
systems using TCP/IP Ethernet transfer with Berkeley’s
popular lpr remote printing protocol, or standard ftp (file
transfer protocol).
Setting up the Card
All devices operating with TCP/IP have to be assigned a
unique “IP Address node.” This address must be different
from that assigned to any other device to which your network is
capable of communicating. This unique address acts like a
telephone number, enabling all other devices on the network to
be able to “dial up” and “talk to” the Ethernet Card, as long as
they know its number.
There are conventions surrounding how to make up an IP
address, which are discussed later. In the most complex case,
where a network is capable of communicating with other
networks worldwide, it is necessary to have some of the
numbers assigned by an international body that coordinates
the numbering.
Using UNIX 5-1
Unless the network is not yet in existence, however, an address
will already have been given to the network section that the
Ethernet Card is to be plugged into. In this case, the interface
card should be given an address that has the same first three
sets of numbers as the other devices on that network section,
and be given a unique last (4th set) number different from that
of any other device on that network section. The network
supervisor should be able to determine what addresses are in
use at the site.
How to input the IP address
Use arp or ping to set the IP address for the Ethernet Card, as
described below:
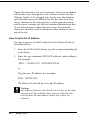
1.
Press the Status Sheet button to print a report including the
node address.
2.
Enter the arp command: ARP-S (IP address) (node address).
For example:
ARP-S 133.200.3.181 00:00:48:92:DA:35
or
Ping the new IP address. For example:
PING 133.200.3.181
The Ethernet Card will be set to this IP address.
e
5-2
Caution:
Two different Ethernet cards should not be active on the same
network until their addresses have been set, otherwise they
will both have the same address (which will confuse the
network).
Using UNIX
Updating the Hosts file
Once the IP address is defined, the /etc/hosts file needs to
have this IP address and host name added. For example:
132.147.69.4 Allison
Testing the connection
Use ping to test if the Ethernet Card is responding. For
example, send the following command:
PING Allison
or
PING 132.147.69.4
If the card responds, you are ready to print. If it doesn’t
respond, print a status sheet and check the IP address, also
check the information contained in the /etc/host file.
Printing via lpr
Once the internet address has been assigned to the Ethernet
Card, all the host computers that will be sending print jobs to it
need to have its address added to their “telephone directories.”
The method for achieving this differs from system to system,
and so the systems administrator should be consulted.
Each Ethernet Card to be used on a particular host is given a
different name, and each name is given the IP address set up
on its corresponding card. It does not matter what name is
given to the Ethernet Card. The name, which is easier to
remember than the IP address, is used thereafter to refer to the
Ethernet Card printer device.
Using UNIX 5-3
After entering the card as a valid network device, it is
necessary to set up the remote printer details. Here, the lpr
protocol program is given the name of a remote printer, and a
host name on which it resides. It is looking for three names to
link together:
0 The name of the local printer which will now be
redirected to the Ethernet Card. The default printer
name is often used here (for example, 'lP').
0 The name of the remote printer. This may be any name,
as the Ethernet Card will always honor a print request.
The name given here will appear in print enquiry
status returns.
0 The host name to which the printing is to be sent. This
must be the name assigned to the Ethernet Card IP
address (above).
Printcap file
Typically, the above information is stored in the /etc/Printcap
file, examples of which are shown below:
Printer1:\
: Ip= : rm = Allison : rp = Ipb : sd = /vor/spool/printer1 :
For UNIX systems without Printcap files, see the section on
scripts at the end of the chapter.
5-4 Using UNIX
Operation
After setting up the card, you can use the lpr command from
any host to direct a print file to the Ethernet Card. The card
does not have to interpret any of the incoming print data,
allowing binary image files, font download files, as well as
ASCII text to be printed transparently.
The interface card can handle many separate communication
channels simultaneously. Unless coupled with a compatible
spooling unit, the Ethernet Card will not have any
disk-spooling capability, so incoming print requests from other
hosts when the card is already servicing a print job are
“stacked,” and serviced in rotation.
The Ethernet Card will respond to an lpq print query by
sending back details of the current print job, as well as all
stacked prints. If a connection request is received after all
available connections are taken up, the card will not respond to
the connection attempt.
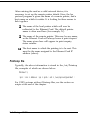
Note:
An lpr enquiry may show “missing” stack entries; for example, only
jobs 2, 5, and 7 appear. The missing entries (3, 4, and 6) will be print
jobs sent by a different protocol, such as Novell or EtherTalk.
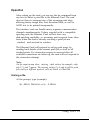
Printing a file
At the prompt, type (example):
lpr -Allison filename or Ip - d Allison
Using UNIX 5-5
Technical
For programmers’ information, the Ethernet Card TCP/IP
mode responds only to arp packets and to TCP/IP connections
made to socket number 0x0203 and the ftp socket. You must
use lpr protocol to send data to socket 0x0203. Also, connection
attempts to other sockets will meet with no response.
Instead of lpr, which may strip control characters, (use - 1 to
avoid this), ftp may be used to print. Enter ftp, then open the
Ethernet Card by entering its host name (for example, “open
Allison”). A file may be printed simply by sending it (“send
filename”). You can use console commands or Scripts to
automate this process, and create ftp spool queues.
Filters for ftp and lpr
Both ftp and lpr have output filters which are capable of:
0 translating a UNIX line-end to a normal line-end by
inserting a carriage return code
0 sending a form feed code at the end of a file in order to
eject a page.
The means of invoking these filters differ between ftp and lpr
as follows:
As a default, ftp runs with binary file transfer. This may be
changed to ASCII file transfer by simply entering the
command “ASCII” on the ftp command line. When in ASCII
mode, the Ethernet Card will convert incoming UNIX
line-ends to include a carriage return. To change back to
BINARY mode, enter the command “BINARY” on the ftp
command line.
5-6 using UNIX
ftp (Form feed)
The Ethernet Card will append a form feed to the end of the
print job if the destination file is given the name of “FEED” or
“feed.” For example, to send a text file called “txtfile” to the
Ethernet Card in ASCII mode and append a formfeed, use the
following ftp commands:
ascii
send txtfile feed
lpr filters
Filters for lpr are controlled by the name given to the remote
printer. When setting up an lpr printer entry, a name is entered
for:
0 the local printer name to be redirected
0 the host name of the station to which the print is sent
0 the remote printer name (name of the printer port on the
remote station).
It is this last name that the Ethernet Card uses to determine
which filters to use.
Many different remote printer names may be set up, all
directed to the same Ethernet Card remote host, and each is
given a different local printer name to be redirected. Different
types of print jobs may thus be sent to different printer names,
which will then all print out on the same printer, through the
same Ethernet Card interface, but using different filters.
Using UNIX 5-7
The remote printer name options used to invoke the different
filters are as follows:
1Pb
1Pa
1pbf
1paf
Binary files (no filters)
ASCII files (carriage returns at line
ends)
Binary file with form feed at file end
ASCII file with form feed at file end
All other remote printer name options will be treated the same
as lpb.
Note:
Some versions of lpr strip out all control characters and carriage
return characters from a file before it is sent, making it unsuitable for
bit-image files or font download files. In many cases the “4” option
may be used on the lpr command line to prevent this happening
(worth tying even if this option is not documented).
The following is an example of sending a text file, “txtfile,” via
lpr with a form feed appended:
lpr -Plpaf txtfile
5-8 Using U N I X
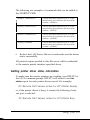
Setting Up Various UNIX Systems
This section shows some scripts and setup examples for
different types of UNIX systems:
Setting up for SCO UNIX
Some UNIX systems, such as SCO, do not support the Berkeley
lpr print function. The following script allows you to print
from within some applications using ftp, which is supported
on most TCP/IP systems. The two scripts have been tested for
SCO UNIX, but may require modification for other systems.
You can use either script.
In SCO UNIX the original printer model scripts are located in
directory usr/spool/lp/model.
The process of creating a printer using the SCO administration
program (SYSADMSH) copies these files to:
/usr/spool/lp/admins/Ip/interfaces.
You can place the script directly into your interface directory.
Also, you can
/usr/lib/lpadmin-pPRINTER-v/dev/null-i/etc/lNTERFACESCRIPT
where PRINTER is the printer name used in lp-dprinter and
INTERPACESCRIPT is the file name containing the next ftp
script.
Using UNIX 5-9
Script 1
General interface program file:
NETPRINTER=“basename$0”
copies=$4
shift;shift;shift;shift;shift;
files=“$*”
i=1
while (Si -le $copies)
do
for file in $files
do
echo binary > /tmp/ftp.$$
echo put $file >> /tmp/ftp.$$
echo quit >>/tmp/ftp.$$
/usr/bin/ftp -n SNETPRINTER c /tmp/ftp.$$
/bin/rm/tmp/ftp.$$
done
i=‘expr $i+1’
done
exit 0”
*end of script*"
Script 2
The following script should have the same name as the host
name you gave the printer.
TEMPFILE=/tmp/ftpprint.SS
printer=‘epsonprt’
/usr/spool/lp/model/standard
ftp -n Sprinter <<EOF
send $TEMPFILE
quit
EOF
rm $TEMPFILE
exit
5-10 Using UNIX
‘33” >STEMPFILE
Script 2 intercepts the print command and runs another printer
interface script, in this case the printer “standard” using the
same options ($@) to redirect the output to a temporary file.
The script then opens an ftp session with the printer, sets
binary mode and sends the temporary file to the printer. The
temporary file is then removed.
Note:
The name of the model and interface directories used by your UNIX
system may differ from SCO.
Setting up for IBM AIX Systems (RS/6000)
AIX implements the lpr function, which is set up using the
SMIT utility.
1.
Set up the print server as detailed in the manual. To set the IP
address you can use arp and ping.
2.
Modify the \etc\hosts file to include the print server, and
verify network operation using ftp to copy a file to the
print server.
3.
Invoke SMIT as the super user and follow the sub menus as
shown below:
select “DEVICES”
“PRINTER/PLOTTER”
“MANAGE REMOTE PRINTER SUBSYSTEM”
“CLIENT SERVICES”
REMOTE PRINTER QUEUES”
“ADD REMOTE QUEUE”
Uing UNIX 5-11
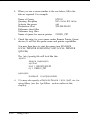
4.
When you see a screen similar to the one below, fill in the
data as required. For example:
Name of Queue
Queuing discipline
Activate the queue
Destination Host
Pathname short filter
Pathname long filter
Name of queue for remote printer
5.
EPSON
first come first serve
yes
200.200.200.99
C82331_PRT
Check the entry for your queue under Remote Printer Queue
devices. It will list the queue name and printer capabilities.
You may then have to start the queue (use MANAGE
LOCAL PRINTER SUBSYSTEM, AND LOCAL PRINTER
QUEUES).
The /etc./qconfig file will look like this:
epson:
device =epsonprn
up=true
host = 200.200.200.99
rq = C82331_PRT
epsonprn:
6.
5-12
backend =/usr/lp/rembak
You may also specify a Remote Device = Ipa:, Ipaf:, etc. for
using filters, (see the “lpr-Filters” section earlier in this
chapter).
using UNIX
Setting up for HP-UX System
There are two methods of printing from HP UX, ftp and rlp
(lpr). Both are set up using SAM. Enter the IP address and Host
name in the /etc/hosts file before starting SAM.
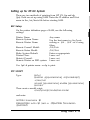
RLP Setup
On the printer definition page of SAM, use the following
settings:
Printer Name:
Remote System Name:
Remote Printer Name:
Remote Council Model:
Remote Status Model:
Make System Default:
Printer Class:
Restrict Council:
Remote Printer on BSD system:
Any name
Use the host name in /etc/hosts
nothing or ‘Ipa’, ‘Ipaf’ etc if using
filters.
/bin/true
/bin/true
Enter as appropriate
Leave out
Leave out
Leave out
Use ‘lpd -d printer name’ or rlp to print.
FTP SCRIPT
lpshut
lpadmin -p{spoolername} -m{modelscript}
-v/dev/null
accept {spoolername} enable {spoolername)
lpsched
Then create a model script:
vi/usr/spool/lp/model/lan.model
Type:
and enter:
MODEL=‘basename $0’
REALMODEL=‘echo $0 /sed -e “s%$MODEL %model.lan
/$MODEL%“’
Using UNIX 5-13
# This variable may be initialized when the script is installed
in the spooler.
PERIPH= if (“SPERIPH”=““)
then
PERIPH=SMODEL
fi
# Path for output of the original model
TMPPATH=/tmp/SMODEL.data
# invoke original model and write to temporary file
$REALMODEL “$@"TMPPATH
# Log in to peripheral switch to binary and send the temporary
file
( echo user xx
echo binary
echo put $TMPPATH
echo bye
1 ftp -i -n $PERIPH
ERRSTAT=$?
/bin/rm $TMPPATH
exit $ERRSTAT
l
End of Script
5-14 Using U N I X
l
Chapter 6
Using OS/2
This chapter explains how to configure and use the Ethernet
Card with an IBM OS/2 System. See Chapter 1 for information
on hardware installation.
Installing on an OS/2 System
Before you set up the software, you must install the card in the
printer, connect it to the network, and turn on the printer.
Requirements
OS/2 Warp and Warp Connect must be installed with
NetBEUI protocol and OS/2 Warp Connect must be installed
with NetBIOS over TCP/IP protocol. EPSON Net! for OS/2
provides the following programs:
NETBEUI
RPRINT3, RSTAT3-LPT redirection
REMPRT3, REMBEU, RBMSTAT3-pipe support
TCP/IP
RPRINT, RSTAT-LPT redirection
REMPRT, REMSTAT-pipe support
Using OS/2 6-1
i;
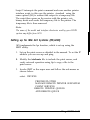
Installing Redirection Software
Follow these steps to install the redirection software:
1.
Place the EPSON Net! for OS/2 Installation disk in drive A
(or B) of your server.
2.
Open an OS/2 full screen command session.
3.
Open the OS2 directory on drive A (or B) and select the
NETBEUI\REDIRECT directory. For example, type CD
NETBEUI, press the Enter key, and then type CD REDIRECT
to select the redirection software directory.
4.
Copy the driver software files RPRINT3.EXE and
RSTAT3.EXE to the root directory of the LAN Server file
server.
COPY A:*.* C:\
5.
Edit the file STARTUP.CMD in the file server root directory
and insert the following command as the last line:
RPRINT3 <serial number> (/portname)
Note:
See Chapter 1 for more information about the serial number.
The optional (/portname) designates the port that will be
redirected to the remote printer specified by its serial
number <serial number>. If no optional port name is
defined, the program assumes LPT1 as the port.
6-2
Using OS/2
The following are examples of commands that can be added to
the STARTUP.CMD:
6.
RPRINT3 10900416/LPT1
Causes print files directed to LPT1 to be
received by an interface with the serial
number 10900416.
RPRINT3 10900701/LPT2
Causes print files directed to LPT2 to be
received by an interface with the serial
number 10900701.
RPRINT3 1090328F/LPT3
Causes print files directed to LPT3 to be
received by an interface with the serial
number 1090328F.
RPRINT3 10903605
Causes print files directed to LPT1 to be
received by an interface with the serial
number 10903605.
Re-boot the LAN Server file server and make sure the driver
starts successfully.
All printed output spooled to this file server will be redirected
to the remote printer interface specified above.
Getting printer driver status information
To make sure the remote printers are working, type RSTAT3 at
the OS/2 command prompt. RSTAT3 will return a one line
status report for each printer driver served. For example:
ITC Remote Print Servers active for LPT1-Printer Ready
or, if the printer driver is busy, it returns the following if only
one port is selected:
ITC Remote Print Servers active for LPT1-Printer Busy
Using OS/2 6-3
If several ports are redirected, RSTAT3 returns a message
similar to the following:
ITC Remote Print Servers active for LPT1-Printer Busy
ITC Remote Print Servers active for LPT2-Printer Ready
ITC Remote Print Servers active for LPT3-Printer Ready
Printing through Pipes
This section describes how to install the software necessary for
printing through named pipes.
Installing the software
1.
Place the EPSON Net! for OS/2 Installation disk in drive A
(or B) of your server.
2.
Open an OS/2 full screen command session and create a
directory for Remote Print Services on your hard disk.
MD C:\EPNET
3.
Open the OS2 directory on drive A (or B) and select the
NETBEUI directory. For example, type CD NETBEUI and
then type CD PIPES to select the pipes directory.
4.
Copy all files to the new directory from the installation disk
in drive A.
COPY A:*.* C:\EPNET
6-4 Using OS/2
Software components
You should now have the following list of files in the
C:\EPNET directory:
ADDPORT.CMD
DELPORT.CMD
PORTCHG.EXE
REMPRT3.EXE
REMBEU.EXE
REMSTAT3.EXE
Command to add ports on the server
Command to remove ports from the server
Program used by the above commands
Remote Print Service program
Remote Print Service driver
Printer status program
Configuring New Printers
This section explains how to configure new printers on a LAN
Server for use with remote print service.
Note:
You must have supervisor rights on the server to configure printers
and queues.
1.
Open an OS/2 full screen command session from your server.
2.
Change to the remote print service directory:
CD \EPNET
3.
Create ports for your new printers using the ADDPORT
command. Choose names that will help to identify the
printers, using up to a maximum of 7 characters for each
name (for example, EPLASER or PUBSPRT). However, do
not use the following characters when assigning a name to
the printer:
/ \.[I:; I ><+=?*$‘I
4.
See your OS/2 documentation for instructions on installing
printers and creating queues attached to the server.
Using OS/2 6-5
Note:
Cl To set up and use the card through a shared OS/2 print
queue(s) that will receive print jobs from other workstations,
you must install and select either the IBMNULL or
MSNULL printer driver. For the DEVICE to connect to,
choose a port name from those added in step 3 above (for
example, EPLASER).
Cl To connect the card directly to a workstation(s), you must
install the proprietary OS/2 printer driver.
5.
In the EPNET remote print service directory, create an
initialization file called REMPRT.INI. This file is used by
the remote print service at start-up and assigns the remote
printer names to the device port names. The format of the
file is as follows:
<serial number> <device port>
Example:
10900701 EPLASER
10900416 PUBSPRT
6.
Edit your STARTUP.CMD file and add the following line at
the end:
\EPNET\[email protected]
This line ensures that the remote print service is initialized
each time you start the server. If you wish to start the print
service manually, you can execute the REMPRT3.EXE file
from the OS/2 command prompt.
7.
6-6
Use the LAN Server Administration facility (NET ADMIN)
to add newly created printers to the list of shared resources.
using OS/2
8.
To obtain printer driver status information on the REMPRT3
process, type REMSTAT3. The following are examples of
information returned by this command:
ITC Remote Print Servers active for PUBSPRT-Printer Ready
ITC Remote Print Servers active for EPLASER-Printer Busy
Sharing the Card among Multiple Workstations
If two or more OS/2 Warp Connect and/or OS/2 Warp with
LAN Server workstations will be printing to the Ethernet Card,
use the Pipes method instead of the Redirect method and
configure a unique port name for each workstation. For
example, if one Ethernet Card will be used by three OS/2 Warp
Connect workstations, the Card’s serial number is 10900416
and the workstations should be configured as PortA, PortB,
and PortC (or any other unique port names).
First workstation:
ADDPORT
REMPRT3
PORTA
10900416 PORTA
Second workstation:
ADDPORT
REMPRT3
PORTB
10900416 PORTB
Third workstation:
ADDPORT
REMPRT3
PORTC
10900416 PORTC
See “Configuring New Printers” on page 6-5 for more
information.
Using OS/2 6-7
I
Appendix
Specifications
Environmental
Operating temp.:
5”to35’C(41°t095”F)
Storage temp.:
0” to 70°C (32’ to 158°F)
Operating humidity:
20% to 80%
Storage humidity:
5% to 95%
Network Software
Novell NetWare 2.1x, 3.x, or 4.0 (Bindery Emulation Mode)
Ethertalk (AppleTalk)
DLC
lpr,ftp over TCP/IP protocol
NetBEUI
NetBIOS over TCP/IP protocol
Ethernet Network Hardware Connectors
IEEE 802.3 10BASE2 RG-58A/U coaxial cable via BNC
connector or
IEEE 802.3 10BASE-T straight-through twisted pair modular
cable via RJ45 connector
Specifications A-1
Regulatory Approvals
Safety:
UL/CSA approved
EMI:
FCC Class A
Reliability
MTBF:
A-2 Specifications
10,000 hours (power on, 100% duty)
Index
A
C
Add a Network Peripheral Port
dialog box, 4-3
Add queue dialog box, 2-7
Address, IP, 2, 4-6, 5-1-4, 5-11
Apple Ethertalk network, 1-2,
1-2, 3-1
AppleTalk,
defined, 6
device, 3-2
installing on, 3-1
AppleTalk zones, 3-2, 3-4
arp, 2, 5-2, 5-6
ASCII
command, 5-6
file, 5-8
mode, 5-6-7
text, 5-5
Auto Print Server/Remote
Printer mode, 1, 5, 2-1-2, 2-4,
2-16
Cable connection types
Ethernet Twisted-Pair
(10BASE-T), 3-4, 1-3, A-1
Ethernet Thin Coaxial
(10BASE2), 3-4, 1-3, A-1
Chooser, 3-6, 3-8
Coaxial
cable, 1-1
Y-connector, 1-1
Communications Toolbox, 3-2
COM2, 2-12
Configuration, changing
in Auto Print Server /Remote
Printer mode, 2-16
in Print Server mode, 2-10-12
in Remote Printer mode,
2-13-15
Configuring port, 2-1, 2-15
Connection Manager, 3-2
Connecting network cable, 1-3
Create Printer dialog box, 4-2-3
B
D
Berkeley lpr, 5-1, 5-10
Bindery Emulation, 2-12
Button, Status Sheet, 5, 1-5-6
Data packet, 1-5
Data Transmission light, 1-4-5,
Default setting, 5
Default-setting mode, 1-3
Default zone, 3-8
Device Types, 3-3
DLC Transport protocol,
1, 4-1-2
DOS Copy command, 2-2
Apple, 1, 3
Index IN-1
E
Emulation mode, 1-6
EPSON Net! utility
assigning print queues, 2-5-9
changing queues serviced by
printer, 2-5-9
configuring printer port, 2-1,
2-12, 2-15
disabling/enabling Hunting,
2-15
DOS version, 2-2
entering password, 2-11
installing, 3, 4, 2-1-2, 4-5
renaming print server,
2-1, 2-10
selecting printer mode,
2-1, 2-3-4
setting queue polling
time, 2-11
setting queue priority, 2-7
Windows version, 2-l-2,
EPSON Namer, 3, 2-4, 3-1-3, 3-5
EPSON Zoner, 3,2-4,3-l, 3-6-8
EpsonScript (PostScript) card,
2,1-6,3-l
Error
clearing, 1-6
detecting, 1-4, 1-6
Error Resume button, 1-5-6
Ethernet Card
configuration software, 1, 3-4,
2-1-2, 3-1-3, 3-6-8
hardware installation, 4-5,
1-1-3
network installation, 1-6, 2-1,
3-1, 4-1, 5-1
Ethernet Thin Coaxial, 3-4
Ethernet Twisted-Pair, 3-4
IN-2 Index
Ethertalk
installing in, 3-1
network, 3, 3-l,
Phase I, 2,3-6
Phase II, 2, 3-1, 3-6
F
File server
checking, 1-5
defined, 5
setting up queues on, 2-5-9
setting up queues on
multiple, 2-8-9
File transport protocol. See ftp
ftp, 2, 6, 5-1, 5-6-7, 5-10, 5-11, 5-13
ftp filters, 5-6-7
ftp socket, 5-6
ftp spool queues, 5-6
H
Hardware Address, 4-2
Hardware installation, 1-1
Hewlett-Packard, 2
Host name, 5-4, 5-6-7, 5-10
Host printer, l-l, 2-2,
Hosts file, 5-3, 5-11, 5-13
HP Network Peripheral Port
dialog box, 4-2
HP-UX, 5-13-14
Hunting
disabling, 2-15
enabling, 2-15
I
IBM AIX, 5-11-12
IEEE 802.2 protocol, 1, A-1
Indicator lights
behavior, 1-4-5
location, 1-4-5
Initialization, 1-4-5, 1-6
Installation
Apple Ethertalk, 3-1
Ethernet Card, 4, 1-1-3
hardware, 1, 3-4, 1-1-3
in printer, 1, 3-4, 1-1-3
Novell NetWare, 2-1
software, 1, 3, 2-1-3, 3-1-2,
3-6-7
UNIX, 5-1
Windows NT, 4-l
Interface, Type B, 1, 3
Interface slot, optional, 1, 3-4,1-2
Internet address, 5-3
IP address, 2, 4-6, 5-14, 5-11
L
LEDs
behavior, 1-4-5
location, 1-4-5
Lights
Data Transmission, 1-2, 1-4-5
Status, 1-2, 1-4-5
Local printer, 5-4, 5-7-8
Local zone, 3-2
Log on, 2-2, 2-5, 2-10, 2-12, 2-16
Login Fileserver dialog box, 2-9
lpd, 2, 6
lpq, 5-5
lpr, 5-3, 5-5-8, 5-10,5-11,5-13
lpr filters, 5-6-8
lpr protocol, 5-4, 5-6
LPT1, 2-12-13, 4-2, 6-3-4
M
Mode, emulation, 1-6
Multiple file servers, installing
on, 2-10-11
N
NetWare Config dialog box, 2-8,
2-10-11, 2-14, 2-16, 2-18
NetWare Loadable Module See
NLM
NetWare Status dialog box, 2-7
Network cable, connecting, 1-3
Network node, 6
Network recognition, 1-4-5
Networks supported
Ethertalk, 1-2, 1-2, 3-1
Novell NetWare, 1, 3-5, 1-1-2,
2-1, 2-3
OS/2, 2, 1-2, 6-1-6
UNIX, 2, 1-2, 1-2, 5-1
Windows NT, 2, 1-2, 1-2, 4-1
NLM (NetWare Loadable
Module), 2-3
Node address, 5, 4-2, 5-3
Node number, 4-2
Novell NetWare, 1, 3-5, 1-1-2,
2-1-16
Index IN-3
O
Operating mode
Auto Print Server/Remote
Printer, 1, 5, 2-1, 2-4, 2-16
Print Server, 1, 5, 2-1-3, 2-5-12
Remote Printer, 1, 5, 2-1-2,
2-3, 2-12-15
Optional interface slot, 1-2
P
Packet, data, 1-5
Parallel port, 1-2
Password, entering, 2-11
PCONSOLE, 2-10, 2-12
Phase I, Ethertalk, 2,3-6
Phase II, Ethertalk, 2, 3-1, 3-6
ping, 2, 5-2-3
Pipes, 6-4
Polling time, 2-10, 2-11-12
Port
address, 5-6
configuration, 2-1, 2-12, 2-15
number, 2-15
socket, 5-6
PostScript, 2, 3-1, 3-2, 3-7
PostScript (EpsonScript) card, 2,
1-6, 3-1
Printcap file, 5-4
Print Destination dialog box, 4-2
Printer initialization, 1-4-5, 1-6
Printer port, 2-1, 2-12, 2-15
Printers, supported, 4
Printing, report, l-5
Print Server
assigning queues to, 2-5-9
changing configuration of,
2-10-12
IN-4 Index
configuring, 2-5-9
default mode, 5
defined, 5,2-3
installing as, 2-6-11
mode, 1, 5, 2-3
operating mode, 2-1, 2-3
renaming, 2-1, 2-10
status, 2-6-8
Print spooler, 6, 3-2,
Print queue
assigning, 2-1, 2-5-9
defined, 5
deleting, 2-1, 2-9
setting priority, 2-7
Priority, setting, 2-7
Protocol, DLC Transport, 1,
4-1-2
PSERVER, 2,2-3
Q
Qw;f~$ling time, setting,
Queue, print. See Print Queue
R
Remote printer
changing configuration,
2-12-15
defined, 5
installing as, 2-l-2,2-4,
2-12-13
mode, 1, 5, 2-1-2, 2-3
redirecting in UNIX, 5-4, 5-7,
5-12
Rename printer, 3-1-5
Rename print server, 2-1, 2-10
Report printing, 1-5
Resetting
interface, 6
RPRINTER, 2, 5, 2-34
S
SCO UNIX, 5-10-11
Scripts, 5-6, 5-10-11, 5-13
Selecting interface
with Default-Settings Mode,
1-3
with SelecType, 1-3
SelecType, selecting interface
with, 1-3
Serial number, 1-2, 2-10
Set queue polling interval,
2-11-12
Setup variations for UNIX OS
general printer interface
file, 5-9
HP-UX, 5-13-14
IBM AIX, 5-11-12
SCO UNIX, 5-10-11
Specifications
environmental, A-1
hardware, A-1
software, A-1
Spooler, print, 6, 3-2,
Status lights, 1-2, 1-4-6
Status sheet, 5, 1-5-6, 4-2, 5-2
Status Sheet button, 5, 1-5-6
Supervisor privileges, 2-5, 2-10,
2-12, 2-16
System 7.x, 3-2
T
TCP/IP, 6, 4-3-5, 5-1, 5-6
10BASE2, 1, 4, 1-1, 1-3, A-1
10BASE-T, 1, 4, 1-1, 1-3, A-1
Type B interface, 1, 3
U
UNIX
commands, 1-2, 5-1
configuring for different OS,
5-9-14
general interface program file,
5-9
network, 1, 5-1-4
scripts, 5-6, 5-10-11, 5-13
Utility software, 1-4, 1-1, 2-1-3,
3-1-3, 3-6-8
V
VAP (Value-Added Process), 2-3
W
Windows NT
configuring, 41-7
installing with DLC Transport
protocol, 1, 4-1-2
installing with TCP/IP, 43-5
network, 1-2
Y
Y-Connector, coaxial, 1-1
Index IN-5
Zone, AppleTalk, 3-2, 3-4
Zones, selecting, 3-1, 3-6-8
IN-6 Index