1
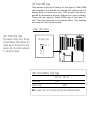
Example 3: Two Hard Disks
To install this configuration:
1. Make sure one drive is configured as a Master drive
and the other as a Slave drive. Most drives are set
to Master at the factory.
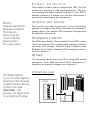
Alternate Installation
You can also install these as follows:
Hard Disk 1: Primary Master
Set drive as Master.
Attach to end of 1st IDE cable, attach
other end to PR5 IDE1 connector.
Hard Disk 2: Secondary Master
Set drive as Master.
Attach to end of 2nd IDE cable, attach
other end to PR5 IDE2 connector.
2. Connect the Master end of the IDE ribbon cable to
the Master drive aligning the Pin 1 positions and
install it in the system case.
3. Install the Slave drive in the system case and connect the IDE ribbon cable’ s Slave connector to it,
aligning the Pin 1 positions.
4. Plug the other end of the IDE cable onto the IDE1
connector on the mainboard with the Pin 1 positions aligned.
4. Use the BIOS CMOS Setup Utility to enter the drive
parameters for the Primary Master and Primary
Slave as described in the Standard CMOS Setup
section of Section 3.
5. Format the drives as required by the operating system you will use. The Primary master is the boot
(start-up) drive.
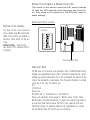
Example 4: Two Hard Disks & One CD-ROM Drive
To install this configuration:
Alternate Installation
You can also install these as follows:
Hard Disk 1: Primary Master
Set drive as Master.
Attach to end of 1st IDE cable, attach
other end to PR5 IDE1 connector.
Hard Disk 2: Secondary Master
Set drive as Master.
Attach to end of 2nd IDE cable.
CD-ROM: Secondary Slave
Set drive as Slave.
Attach to middle of 2nd IDE cable.
Connect other end of 2nd IDE cable to
PR5 IDE2 connector.
1. Make sure one hard disk is configured as a Master
drive and the other as a Slave drive. Most drives
are set to Master at the factory.
2. Connect the Master end of the IDE ribbon cable to
the Master drive aligning the Pin 1 positions and
install it in the system case.
3. Install the Slave drive in the system case and connect the IDE ribbon cable’ s Slave connector to it
aligning the Pin 1 positions .
4. Plug the other end of the IDE cable onto the IDE1
connector on the mainboard with the Pin 1 positions aligned.
5. Connect the Master end of the other IDE ribbon
cable to the CD-ROM drive aligning the Pin 1 positions and install it in the system case.
6. Plug the other end of the IDE cable onto the IDE2
connector on the mainboard with the Pin 1 positions aligned.