1
Recording with STING Mini
Recording with STING Mini
This chapter explains how to start and stop a recording session, receive
status indications, and review the buttons and lights on the STING Mini
device.
There are two ways to start or stop a recording session:
•
Via the remote control cable included with the STING Mini package.
•
Via the Record button on the device.
The STING Mini's lights may show through thin fabrics. When
wearing the STING Mini under your clothing, it is advisable to
have the lights facing the body, or to cover them with maskingtape.
Before Recording
Before using the STING Mini to record, it is likely that you will want to do
the following:
•
Set the time and date (see page 5).
•
Set the recording mode and quality (see page 16)
Recording Readiness Indication
When the STING Mini turns on, there is a 25-second warm-up period. You
cannot record until the warm-up is finished. You also cannot record while
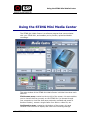
the device is connected to the STING Mini Media Center. The solid green
light in the Record button indicates that the device is ready to record. The
green light beside the three buttons is the Status light. This only indicates
whether the unit is connected to an electricity source for charging. Only the
green light on the Record button indicates that the unit is ready to record.
If the lights are flashing green and red, this indicates that the STING Mini is
still warming up and is not yet ready for recording. If the LED is flashing
red on the Record button, this indicates the unit is already recording.
Setting Recording Mode & Quality
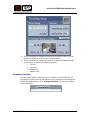
During the time that the STING Mini is preparing to start recording, you can
change the recording quality. The main impact of this action is to enable
the STING Mini to record for a longer period of time. The higher the quality,
the shorter the recording period.
Mini-STING User Guide
7