1
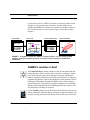
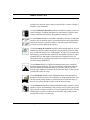
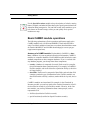
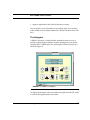
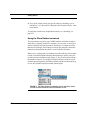
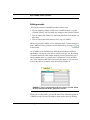
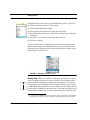
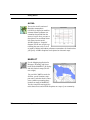
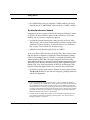
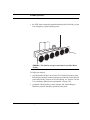
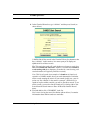
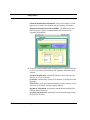
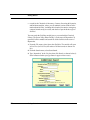
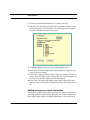
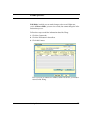
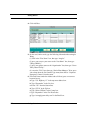
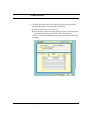
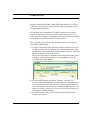
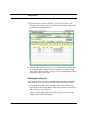
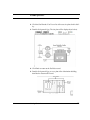
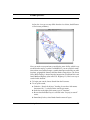
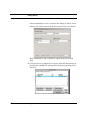
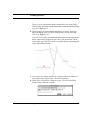
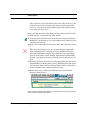
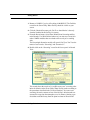
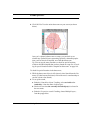
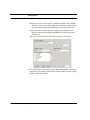
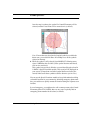
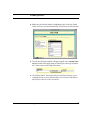
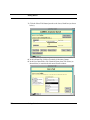
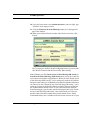
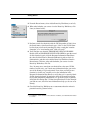
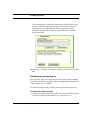
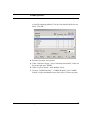
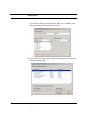
CHAPTER 3
Getting Started
This chapter contains an overview of the basic features of CAMEO and an
explanation of how you use them. It also includes a Guided Tour for learning how to use CAMEO to complete basic planning and response tasks.
CAMEO’s components
The complete CAMEO system consists of two kinds of components:
• Modules (or databases): the Chemical Library of response-related information about thousands of hazardous substances, and eight other modules you use for response and planning record-keeping.
• Programs: ALOHA, a model for predicting the dispersion of hazardous
gases, and MARPLOT, an electronic mapping program.
To complete various tasks, you’re likely to use two or three CAMEO components in sequence. For example, suppose you want to assess the potential
hazard posed to your community by a particular chemical in the inventory
of a local chemical processing plant. As part of your investigation, you
might (1) find the record for that plant in CAMEO’s Facilities module, then
(2) view the location of the plant on a map in MARPLOT. You then might
Getting Started
21
Getting Started
(3) check the record in CAMEO’s Chemicals in Inventory module for the
chemical of concern in the plant’s inventory. You then might (4) use
ALOHA and MARPLOT to predict the extent of the area that could be at
risk, if that chemical were to be released. Figure 1 shows this example
sequence.
1. Check Facilities.
3. Check chemical inventory.
2. View on map.
4. Plot ALOHA footprint.
MARPLOT - River County
MARPLOT - River County
Gr. Valley Water Fac.
Green Valley
Water Facility
Water Facility
CHLORINE
Elm St.
FIGURE 1. A sequence of tasks in CAMEO: viewing a facility’s record; viewing its map
location; viewing its chemical inventory; assessing a release scenario in ALOHA and
MARPLOT.
CAMEO’s modules in brief
The Chemical Library module contains records for more than 6,000 hazardous substances. Each record describes a chemical or substance, including its chemical name, trade names and other synonyms, identification
numbers, regulatory information, and labeling conventions. For emergency
responders and planners, the most important part of each chemical record is
the Response Information Data Sheets (RIDS) section, which contains a
general description of the chemical, its physical properties, fire and health
hazards, and recommendations for firefighting and non-fire response, first
aid, and protective clothing for response.
Use the Facilities module to store information about facilities where chemicals are maintained, including address, emergency contact information, and
site plans showing the layout of the facility. You can link any record in this
22
Getting Started
CAMEO’s modules in brief
module to an electronic map so that you can quickly see where a facility is
located in your community.
Use the Chemicals in Inventory module to maintain inventory records for
stored chemicals, including descriptions of each chemical’s physical state,
storage conditions and locations, and quantities routinely on site.
Use the Contacts module as a telephone and address directory of important
contacts, such as chemical experts, government agencies and organizations,
contacts for facilities, response resources, and other people who can help
you with emergency planning or response.
Use the Screening & Scenarios module to make hazards analyses for your
community, using procedures described in the guidebook, Technical Guidance for Hazards Analysis (see “Bibliography” on page 276). In such a hazards analysis, you estimate the extent of the area around a facility, or other
potential spill site, that might be affected by the accidental release of a
chemical of concern. You then can plot this area (called a threat zone) on an
electronic map in MARPLOT.
Use the Routes module to compile information about routes commonly
used to transport chemicals. You also can maintain information about the
particular chemicals transported along a given route, and you can link
records in this module to routes shown on electronic maps, so that you can
quickly find a route on a map.
Use the Incidents module to track information about accidental spills of
hazardous chemicals, either at fixed facilities or along transport routes. You
can link records in this module to symbols shown on electronic maps, so
that you can quickly find the location of an incident on a map.
Use the Resources module to maintain information about resources, such as
supplies, experts, and contractors, that you may need to quickly access during a response, or that are useful to you in your planning activities. You can
link Resources records to symbols on an electronic map so that you can
quickly find resources on your map.
Getting Started
23
Getting Started
Use the Special Locations module to keep descriptions of schools, nursing
homes, hospitals, and other facilities that require special protection and consideration during emergencies. You can link records in this module to symbols shown on electronic maps, so that you can quickly find a special
location on a map.
Basic CAMEO module operations
The following explanations of basic operations and features apply to the
CAMEO modules only. ALOHA and MARPLOT look and work differently. Check their manuals to learn how to use them (download those manuals from the MARPLOT and ALOHA download pages at www.epa.gov/
ceppo/cameo/request.htm).
Anatomy of a CAMEO module. Each module in CAMEO is a database. A database is just an organized collection of information; CAMEO’s
modules are computer databases. Each CAMEO module includes the same
standard components as other computer databases. If you’ve worked with
any database program, you already know those components:
• records. A database is composed of records. Each record is a compilation of information about a particular entity. For example, in CAMEO’s
Facilities module, each record describes a particular facility (or division
of a large facility).
• data fields. Each record is composed of data fields, and each data field
contains a particular type of information. In the Facilities module, one
data field contains a facility’s address; another holds its zip code, and so
on.
CAMEO’s modules are interrelated. For example, in the Chemicals in
Inventory module, you can keep track of the chemical inventories of facilities described on records in your Facilities module. Likewise, in the Contacts module, you can keep information about contact people, such as
representatives of
• facilities (described on Facilities records).
• special locations (described on Special Locations records).
24
Getting Started
Basic CAMEO module operations
• response organizations (described on Resources records).
You can quickly access information in one module when you’re working
with a related record in another module (the Guided Tour shows how to do
this).
The Navigator
CAMEO’s Navigator is a small window containing buttons you use to
quickly navigate among CAMEO’s modules and programs, or to quickly
complete basic CAMEO tasks, like searching the Chemical Library for a
chemical (Figure 2).
Navigator.CAM
FIGURE 2. CAMEO’s Navigator.
To display the Navigator, either select Show Navigator from the File menu,
or click the Navigator button in the toolbar.
Getting Started
25
Getting Started
The Toolbar
CAMEO contains a simple toolbar that’s visible when any CAMEO module
is open (except when you’re searching the module or editing a record). It
contains:
• Buttons for common operations.
Click
to open the Navigator.
Click
or
to switch between List view, where you
see a list of records in the module, and Record view, where you see the
contents of a single record. See “List and Record views” on page 26.
Click
when you need to edit the record you’re currently
viewing (see “Editing records” on page 29). This button does not appear
in the Chemical Library, because you can’t edit the records in that module.
If you’ve run a search and found a set of records that matched the criteria
you used in your search, then in List view, you’ll see just the matching
records. You’ll also see a
button. Click this button to show all
the records in the module in List view (instead of just the matching
records).
• Navigation buttons. Click the four navigation buttons on the right side of
the Toolbar to move forwards or backwards through the records in a
module:
Click to see the first record in the module.
Click to see the previous record.
Click to see the next record.
Click to see the last record.
List and Record views
Whenever you have a CAMEO module open, you’re viewing that module
in either List or Record view. When you first open a module, you’re in List
26
Getting Started
Basic CAMEO module operations
view, where you see a list of all the records in that module. The example at
left shows part of the record list in the Facilities module. Records appear in
the list in the order in which you create them, unless you sort them into a
different order (see “Sorting records in CAMEO modules” on page 255). In
List view, you click on a record name to select that record. Once a record is
selected, a small black rectangle appears to the left of its name. In the example at left, General Hardware and Garden is selected.
In Record View, you see one or another of the records in that module. When
you’re in Record View, you can view the information contained in all the
individual fields on that record.
You can go back and forth between the two views by clicking the
and
buttons in the toolbar. If you’re in List view, you
also can double-click on the name of any record in the list to see that record
in Record view.
Searching and browsing
You can browse through the records in a CAMEO module in four ways:
• in List view, scan the list of records visually until you find the one you
want. Use the scrollbar to review the entire list if it’s too long to fit in the
window.
• in Record view, click the navigation buttons on the right side of the toolbar to navigate from record to record.
• click the pages of the book icon in the upper left corner of the module
window to page through the records in the module (the book icon is
shown at left).
• From the Record menu, select Go To, then select either First, Previous,
Next, or Last to navigate to the first, previous, next, or last record in the
module.
If you can’t find a record you need by browsing, search the module to find
that record:
1. Select Start Search from the Search menu.
Getting Started
27
Getting Started
2. For a quick, simple search, just type the word(s) or number(s) you’re
looking for—e.g., the name of a chemical in the Chemical Library—then
press Search.
To learn how to make more complicated searches, see “Searching” on
page 251.
Using the Show Related command
You can associate records in your CAMEO modules with other records to
which they’re logically related. For example, you can create a record for a
school in the Special Locations module, then create a Contacts record for
that school’s principal. That Contacts record for the principal is then automatically associated with the school’s record in Special Locations.
When you’re working with a record that’s associated with one or more other
records, select Show Related from the Record menu to quickly access the
records associated with that record (Figure 3). You’ll also need to indicate
the module of interest. For example, from the Facilities record for a local
chemical processing plant, select Show Related, and then Contact Records,
to view the Contacts records associated with the plant.
FIGURE 3. The Show Related command, used to find the Contact
records associated with the selected Facilities record.
28
Getting Started
Basic CAMEO module operations
Editing records
You can edit records in CAMEO’s modules in three ways:
• You can manually change records in any CAMEO module except the
Chemical Library. You can’t make any changes to the Chemical Library.
• You can import Tier II data (see “Importing data from Tier2 Submit” on
page 206).
• You can import data from someone else’s copy of CAMEO.
Whenever you start CAMEO, you’re in Browse mode. To make changes to
your CAMEO records, you must switch to Edit mode by pressing
in the toolbar.
On a CAMEO record in Edit mode, different data fields have different
appearances: one may be a text box (in which you’d type, say, the amount
of a stored chemical), while another might be a menu (from which you’d
choose amount units: e.g., pounds, tons, or kilograms). To tell the difference, click within the data field: a menu will drop down so you can select
from all the choices it contains; a text box will not (Figure 4).
FIGURE 4. Type is a menu that drops down when you click within
the data field (in Edit mode); Phone is a text box.
When you’re in Edit mode, you can edit some of the menus that appear in
CAMEO records. You can tell whether a menu can be edited by looking
Getting Started
29
Getting Started
through the choices in the menu. In an editable menu, “Edit” is at the bottom of the list of menu choices. To edit a menu,
1. Click the Edit button in the toolbar.
2. Click within the menu data field to drop down the menu.
3. Select Edit from the menu (as at left). A list of all the items in the menu
is displayed.
4. Add, remove, or edit items in the menu, then click OK.
5. Click Save Changes.
To delete a record from a CAMEO module, select that record, then select
Delete <module name> from the Record menu (e.g., in the Special Locations menu, select Delete Special Location; in the Facilities module, select
Delete Facility, as in Figure 5).
FIGURE 5. Deleting a Facility record.
Getting Help. Whenever CAMEO is running on your computer, you can
access its online help system, if you have installed a web browser such as
Internet Explorer or Netscape Navigator on your computer.1 To view the
online help, click the Help button in the Navigator (shown at left) or select
CAMEO Help from the Help menu. Your web browser will start up and display the table of contents for the online help. Click on any topic title to read
about that topic. Whenever you want to return to the table of contents, click
1. If you’re running CAMEO in Classic Mode in OS X on a Macintosh, to avoid problems
accessing Help, be sure to run your web browser in Classic Mode as well, not in OSX.
30
Getting Started
ALOHA and MARPLOT
the TOC button in the upper right corner of the Help window. If you would
rather look up a topic in the help index, click the Index button.
Things to ignore
There are some items in CAMEO’s windows that you won’t need to use
directly to perform your work with CAMEO. However, these items are
needed in order for CAMEO to function normally. Just ignore the following
items—but please don’t try to remove them:
• the Scripts menu.
• the button just above the book icon in the upper left corner of CAMEO’s
windows (shown at left).
• the Window menu. This menu lists the file names of open modules,
along with the names of support files that CAMEO needs in order to
operate normally, but that you won’t ever need to work with directly.
Rather than using the Window menu when you need to navigate to a
module, use the Navigator, select Open from the File menu, or select
Show Related from the Record menu.
• in Windows, the minimized window buttons that appear along the bottom of your screen. CAMEO needs to keep certain files open in order to
complete its operations.
ALOHA and MARPLOT
ALOHA and MARPLOT aren’t modules, but are programs included in
CAMEO (you also can use either of them separately from CAMEO). To use
them in CAMEO, you use the Sharing menu, which you’ll find in the menu
bar of all CAMEO components (all the modules, as well as ALOHA and
MARPLOT).
Getting Started
31
Getting Started
ALOHA
You use the Areal Locations of
Hazardous Atmospheres
(ALOHA) air dispersion model to
estimate airborne pollutant concentrations downwind from the
source of a spill. Once you enter a
description of an accidental chemical release into the model,
ALOHA displays a “footprint”
diagram, like the one at right, representing the area at risk, as well
as graphs of indoor and outdoor pollutant concentrations for locations that
you specify. ALOHA footprints can be plotted on electronic maps.
MARPLOT
Use the Mapping Application for
Response, PLanning, and Operational Tasks (MARPLOT) to display
and edit electronic maps (like the
one at right).
You can link CAMEO records for
facilities, special locations, transport routes, and other items of interest to symbols representing those
locations on maps in MARPLOT .
You also can plot Screening & Scenarios threat zones and ALOHA footprints on a map of your community.
32
Getting Started
A CAMEO guided tour
A CAMEO guided tour
Take this tour of a planning and response scenario for Prince William
County, Virginia, to learn how to use CAMEO along with MARPLOT to
complete common emergency planning and response tasks.2 We’ve entered
sample data into CAMEO for the purpose of this tour. When you’ve finished the tour, you can delete the sample data (we’ll explain how to do this
at the end of the tour).
Preparing for the tour
To complete the tour, you must already have installed CAMEO and MARPLOT. If you haven’t already done that,
• follow the instructions in Chapter 2, beginning on page 13, to install
CAMEO on your computer.
• follow the installation instructions in the MARPLOT manual (download
it from www.epa.gov/ceppo/cameo/marplot.htm) to install MARPLOT.
Note to users of LandView 5 or the LandView 5 demo: If you have installed
LandView or the LandView demo on your computer, you also have MARPLOT (which is a component of LandView). Do not install a second copy
of MARPLOT.
You also need two MARPLOT maps, which are automatically installed
when you install CAMEO and MARPLOT:
• a map of Prince William County, Virginia. This map is installed when
you install MARPLOT. (If you have installed the LandView 5 Demo,
you'll find the Prince William County map on your hard drive. If you
have purchased a copy of LandView 5 on a CD or DVD, and don’t have
the map, you can download a copy from www.epa.gov/ceppo/cameo/
marmaps: click Virginia, then click Prince William.)
2. This tour does not cover ALOHA. To learn to use ALOHA, take the guided tour in Chapter 3, “Learning the Basics,” of the ALOHA user’s manual (download it from
www.epa.gov/ceppo/cameo/aloha.htm).
Getting Started
33
Getting Started
• the CAMEO Map (when you install the CAMEO modules, this map is
installed into the “CAMEOMAP” folder inside the “CAMEO” folder).3
A potential chemical hazard
Imagine that you are a member of the Local Emergency Planning Committee (LEPC) for Prince William County.4 At the committee’s most recent
meeting, you were asked to complete two projects:
• evaluate the potential hazard to the county posed by the Green Valley
Water Facility. You’ll use the hazards analysis procedures outlined in the
guidebook, Technical Guidance for Hazards Analysis (see “Bibliography” on page 276 to find out how to obtain a copy).
• update the records describing this facility in CAMEO.
At its site in Prince William County, the Green Valley Water Facility stores
and uses chlorine in amounts exceeding the Threshold Planning Quantity
(TPQ) of 100 pounds (Figure 6). Chlorine is a designated Extremely Hazardous Substance (EHS) that’s frequently shipped to the facility along
James Madison Highway, a major route that passes through populated areas
within the county. Because the facility stores an EHS in quantities greater
than the TPQ, some of the requirements of EPCRA, the Emergency Planning and Community Right-to-Know Act, come into play. In particular,
• the facility’s operator must submit a chemical inventory report (called a
Tier II form) annually to state and local emergency planning authorities
and the fire department.
3. If you’ve just updated from the previous (FoxPro) version of CAMEO for Windows,
check “Transferring your CAMEO Map” on page 203 to learn what to do with your existing CAMEO Map so that it will work with your new copy of CAMEO. Note that your
existing map may not contain the sample map symbols for the Green Valley Water Facility and the Central Elementary School used in this tour; however, this is the only problem
you should encounter. You can create the two symbol objects if you’d like (check your
MARPLOT manual to learn how to create symbols).
4. An LEPC’s role is to design, then regularly review and update a comprehensive emergency plan for a particular local emergency planning district. See “Section 301-303:
emergency planning” on page 268.
34
Getting Started
A CAMEO guided tour
• the LEPC must evaluate the potential hazard posed by the facility, as part
of its emergency response planning work.
FIGURE 6. The chlorine storage room in the Green Valley Water
Facility.
To begin your analysis,
• you obtained the facility’s most recent Tier II chemical inventory form,
indicating the amounts, locations, and storage conditions for the chlorine
stored at the facility (for more on Tier II reporting, see “Sections 311 and
312: community right-to-know requirements” on page 270).
• you talked with the facility’s senior manager, Ms. Angela Wong, to
familiarize yourself with daily operations at the plant.
Getting Started
35
Getting Started
Starting CAMEO
Begin the Guided Tour by starting CAMEO:
Navigator.CAM
• in Windows, in the Start menu, point to Programs, then CAMEOfm, then
CAMEO. CAMEO will start up, and the Navigator window will be displayed.
• on a Macintosh, open the CAMEO folder and double-click on
CAMEOfm to display the Navigator window.
The Navigator (shown at left) is the starting point for common CAMEO
tasks.
Assessing chlorine’s hazards
The first step in your assessment is to familiarize yourself with the hazards
posed by chlorine. The Chemical Library contains information about chlorine in a record for that chemical, so you’ll search the library for this record.
You can search the Chemical Library for many kinds of information about a
given substance: its chemical name (including trade names or synonyms),
formula, United Nations accession number, Chemical Abstract Service registry number, labeling requirements, or other identifying attributes.
To search the Chemical Library for the record for chlorine:
1. In the Navigator, click
. (If the Navigator
isn’t visible, from the File menu, choose Show Navigator.)
36
Getting Started
A CAMEO guided tour
2. In the Chemical Name box, type “chlorine” and then press Search (as
shown below).
CAMEO finds all the records in the Chemical Library for substances that
have “chlorine” in their name or in a name synonym. It displays an
alphabetical list of those records.
Tip: This particular search will work whether you choose to search for a
name that contains the characters “chlorine” or a name that contains a
word starting with those characters. (Searches for a word starting with
certain characters will typically find fewer records.)
Note: This list of records is an example of a found set. A found set is
created in a CAMEO module when you search that module. It includes
all the records meeting the criteria of your search (in this case, your criterion was “has ‘chlorine’ in the name or synonym”). While there’s a
found set in place within a module, you can see just those records. To see
all the records, you need to clear the found set by selecting either Clear
Search from the Search menu or Show All Records from the Record
menu.
3. Find and double-click “CHLORINE” in the list.
You’re now viewing the record for chlorine (shown below). It contains
information about chlorine under two main tabs:
Getting Started
37
Getting Started
Chemical Identification Information—this section contains (a) information used to identify the chemical and (b) regulatory information.
Response Information Data Sheets (RIDS)—the RIDS section contains emergency response recommendations and information for
responders and planners.
4. Under the Chemical Identification Information tab, click the smaller tabs
to review five kinds of identification and regulatory information about
chlorine:
Chemical Identification: common ID numbers, labels, and codes for
chlorine, as well as its formula.
Synonyms: common name synonyms for chlorine, in English and other
languages.
NFPA Codes: codes representing the hazards posed by chlorine (0 indicates little or no hazard; 4 indicates highest hazard).
Regulatory Information: designations and thresholds established for
chlorine under Federal laws.
Screening and Scenarios: information used for hazards analysis under
the Technical Guidance.
38
Getting Started
A CAMEO guided tour
5. Click the Response Information Data Sheets tab, then click the smaller
tabs in that section to see information about each of 10 emergency
response-related topics.
Each piece of information in RIDS is notated to indicate its source.
These notations appear as abbreviations in parentheses (check “Sources
of CAMEO’s chemical data” on page 100 to see more information about
each source).
In the example below, the general description of chlorine is from the
Association of American Railroads (AAR).
As you review the RIDS information about chlorine, consider the following questions, and note where you would check to find the kinds of
information you would need quickly during a response:
What are the main hazards of chlorine? Could it become an airborne
toxic gas hazard? Is it flammable? Is it reactive?
Getting information about a facility
You can keep a record in the Facilities module for each facility that reports
Tier II chemical inventory information to the LEPC. You then can crossreference any facility record to
• a symbol representing its location on a MARPLOT map.
Getting Started
39
Getting Started
• records in the Chemicals in Inventory, Contacts, Screening & Scenarios,
and Incidents modules, where you can maintain various kinds of information about facilities, including their chemical inventories, emergency
contacts, hazards analysis results, and details of past incidents at given
facilities.
You can search the Facilities module just as you searched the Chemical
Library. The Green Valley Water Facility is in the town of Haymarket. To
open the Facilities module and search for all the facilities in the town of
Haymarket:
1. From the File menu, select Open, then Facilities. The module will open
in List View (in List View, the names of all the records are shown in a
list).
2. From the Search menu, select Start Search.
3. Type “haymarket” in the City box, then click Search, as shown below (it
doesn’t matter whether you type letters in upper or lower-case).
40
Getting Started
A CAMEO guided tour
You’ll see a list of the three facilities located in Haymarket, including the
Green Valley Water Facility. You’ll work with the record for this facility.
4. In the list, double-click “Green Valley Water Facility (DEMO)” to open
this record in Record View. In Record View, you can view the entire
record and all the information in it.
5. Click the tabs on the record to review the information about this facility.
Check Table 1 on page 114 if you’d like to see definitions of all the
kinds of information on a Facilities record. Later, you’ll navigate to
related records in the Chemicals in Inventory and Contact modules to
look more closely at the chemical inventory and contacts information for
this facility.
6. From the File menu, select Make Report. You’re about to create a printable report describing this facility.
Getting Started
41
Getting Started
7. Click the Current Record button if it isn’t already selected.
8. Either (a) click Select All to include all the information from the record
in the print report, or (b) click the box for each of the kinds of information you would like to include in the report.
9. Click Make Report. You’ll see a view of the printable report.
10. Click Print. The Print Setup window will be displayed. Adjust any set-
tings you’d like to change.
11. Click OK to display the Print window. Adjust any settings you’d like to
change, then click OK to print the report. The report will be printed, and
the view of the printable report will be displayed again.
12. Click Cancel to return to the Report setup window, then click Cancel
again to return to the Facilities record for the Green Valley Water Facility.
Adding emergency contact information
This facility record does not include any emergency contact information, so
you’ll add information about Angela Wong, the senior plant manager at the
Green Valley Water Facility. To add that information, you’ll need to enter
42
Getting Started
A CAMEO guided tour
Edit Mode, in which you can make changes to the record. Right now,
you’re in Browse Mode: you can view records, but cannot change the information that you see.
Follow these steps to add the information about Ms. Wong:
1. Click the Contacts tab.
2. Click the Edit button in the toolbar.
3. Click Add Contact.
You’ll see a list of contacts in CAMEO, but the list doesn’t yet include a
record for Ms. Wong.
Getting Started
43
Getting Started
4. Click Add New.
5. On the new, blank record, type the following information about Angela
Wong:
(1) click in the “First Name” box, then type “Angela.”
(2) press TAB to move your cursor to the “Last Name” box, then type
“Wong (DEMO).”
(3) press TAB again to move to the “Organization” box, then type “Green
Valley Water Facility.”
(4) TAB to the “Title” box, then type “Senior Plant Manager.” Next, press
TAB to drop down the first Contact Type menu, then choose “Corporate
Emergency Contact” from the menu.
6. Fill out the items under the Address tab as follows (press TAB to move
between boxes):
a. Type “U.S. Highway 15” in the top street address box.
b. Type “Haymarket” in the City box.
c. Select “VA” from the State menu.
d. Type “87530” in the Zip box.
e. Type “Prince William” in the County box.
f. Type “Haymarket” in the Fire District box.
g. Type “[email protected]” in the Email box.
44
Getting Started
A CAMEO guided tour
7. Click the Phones tab, then click in the top Type box to drop down a
menu of phone types. From the menu, select Work.
a. In the next box, type “703-232-5667.”
b. Press TAB twice to drop down the next Type menu, select Emergency
from the menu, then type “703-232-7556” in the next box.
The new Contacts record displayed on your screen should look like the
one below.
Getting Started
45
Getting Started
8. Press Save Changes. You’ll see the list of contacts for the water facility,
which now includes Ms. Wong.
9. Press Save Changes again to save the new record.
Reviewing the facility’s chemical inventory
CAMEO’s Chemicals in Inventory module is one of several modules in
which records related to facilities can be kept. In the Chemicals in Inventory
module, you can keep records on the hazardous substances stored or used at
facilities, or transported along routes in your community. From a Facilities
record for a facility, you can quickly jump to the Chemicals in Inventory
records for chemicals in that facility.
Under the Emergency Planning and Community Right-to-Know Act
(EPCRA) of 1986, Tier II forms must be submitted each year by operators
of facilities that maintain certain hazardous materials in more than minimum threshold amounts. On a Tier II form, the facility provides information
about its inventory of hazardous materials (e.g., storage locations and
amounts). Tier II forms are submitted to each state’s State Emergency
46
Getting Started
A CAMEO guided tour
Response Commission (SERC). Many SERCs then share the Tier II data
with county- and local-level response and planning organizations, such as
fire departments and LEPCs.
You can keep Tier II information in CAMEO’s Chemicals in Inventory
module. A Chemicals in Inventory record is similar to the actual Tier II
form, with some exceptions. In particular, you can describe only one chemical or mixture on each Chemicals in Inventory record.
Now, you’ll take a closer look at the chemical inventory information for
Green Valley Water Facility:
1. Click the Chemical Inventory tab on the Facilities record for Green Val-
ley Water Facility. You’ll see a space where stored chemicals are listed.
Just chlorine is listed on the Water Facility’s record, because it’s the only
hazardous substance stored at the facility.
When you see the name of a substance in the Chemical Inventory list on
a facility’s record, that means there’s a corresponding record in the
Chemicals in Inventory module.
2. Click the RIDS button to the right of “Chlorine” in the list. The
Response Information Data Sheet section of chlorine’s Chemical Library
record is displayed. This is the same set of response recommendations
you reviewed earlier. As you can see, clicking the RIDS button for a substance in a facility’s inventory is a quick way to access the response recommendations for that substance.
3. From the File menu, select Close. The Green Valley Water Facility
record is visible again.
Getting Started
47
Getting Started
4. Double-click on the name “chlorine” (or on its CAS number). The
Chemicals in Inventory record for chlorine at Green Valley Water Facility should open (as shown below).
5. Click the tabs on this record to review the information it contains about
the storage amounts, storage locations, and hazards of chlorine at the
water facility. Refer to Table 3 on page 132 to see explanations of all the
information items on the record.
Viewing the site plan
You can store facility site plans in CAMEO along with other information
about facilities. To see the site plan for the Green Valley Water Facility,
1. From the Record menu in the Chemicals in Inventory record, select
Show Related, then Facility/Route. The Facility record for Green Valley
Water Facility will be displayed.
Note: Use Show Related when you need to quickly navigate among
related records in different modules.
48
Getting Started
A CAMEO guided tour
2. Click the Site Plan tab. You’ll see a list of the two site plans for this facil-
ity.
3. Double-click grenval1.jpg. The site plan will be displayed (as below).
4. Click Back to return to the Facilities record.
5. Double-click grenval2.jpg, to see a plan of the chlorination building,
then Back to return to the record.
Getting Started
49
Getting Started
You can create site plans like these in any graphics program, save them in
common graphic file formats, and then include them with your Facilities
records (see “Adding and editing site plans” on page 121).
Working with a map
MARPLOT is the electronic mapping program included in CAMEO. In this
section of the tour, you’ll learn how to display a map in MARPLOT, search
for a particular location on a map, and link symbols on a map to records in
CAMEO modules.
First, you’ll open the map of Prince William County in MARPLOT, and
then find and view the location of the Green Valley Water Facility:
1. To start MARPLOT, from CAMEO’s Sharing menu, select MARPLOT,
then select Go to MARPLOT.
MARPLOT will start up and be displayed. You might first be asked to
locate MARPLOT:
• Unless you have LandView installed, navigate through the files on
your hard drive to locate the MARPLOT folder (its default location in
Windows is C:/MARPLOT). Open the folder and select the “MARPLOT.EXE” file (in Windows) or the “MARPLOT” file (on a Macintosh) inside the MARPLOT folder.
• If you have LandView installed, locate the LandView folder (its
default location in Windows is C:/LV5). Open the folder, then select
the “MARPLOT.EXE” file.
2. MARPLOT displays a greeting window. Click OK (in Windows), or just
click within the window (on a Macintosh). A map showing Prince William County is then displayed, as shown below. (If you’ve used this map
50
Getting Started
A CAMEO guided tour
before, the view you see may differ from the view below; the difference
will not cause problems.)
Next, you need to set up and run a search for the water facility, which is represented on the map by a symbol. In MARPLOT, you can search for roads,
intersections, street address ranges, symbols that represent facilities or other
locations, geographical features, and other kinds of map objects. The Green
Valley Water Facility is located near the intersection of Loudoun Drive and
James Madison Highway (also called U.S. Highway 15). Here’s one way to
search for this location:
3. To begin your search, choose Search from the List menu.
4. To set up the search,
a. Under the “Search for objects:” heading, be sure that “with names
that start with...” is selected in the search types menu.
b. In the box to the right of this menu, type in “Loudoun.”
c. Be sure that Individual Layer is selected in the “Layer(s) to search”
menu.
d. Immediately below, select Roads from the menu of layers.
Getting Started
51
Getting Started
e. Be sure that Maps in view is selected in the “Map(s) to search:” menu.
f. When your search criteria look like those shown below, click Search.
Both “Loudoun Ave” and “Loudoun Dr” appear in the list of found
items.
5. Click just once on “Loudoun Dr” to select it, then click Intersections (as
shown below). MARPLOT will search for all intersections along Loudoun Drive.
52
Getting Started
A CAMEO guided tour
There are seven intersections along Loudoun Drive; the Green Valley
Water Facility is located near the intersection with James Madison Highway (U.S. Highway 15).
6. Click just once on “James Madison Highway” to select it, then click
Show on Map & Zoom. (if you’re using an older version of the map,
click “U.S. Highway 15”).
You’ll see a view of the area around the intersection on your map (shown
below; names may not appear in your view). The intersection is in the
center of the view. To its left, you’ll see a symbol object, representing the
Green Valley Water Facility.
7. To give this view a name and save it, so that you can easily return to it
later, choose Save Current View... from the View menu.
8. In the “Save Current View” dialog box, type “View of Green Valley
Water Facility” and then click OK.
Getting Started
53
Getting Started
Later, whenever you want to return to this or any other saved view, you
would select Go to View from the View menu, select the name of the
view (e.g., View of Green Valley Water Facility) from the list of saved
views, then click Go to View.
Next, you’ll link the Green Valley Water Facility symbol to the Green Valley Water Facility’s record in the Facilities module:
9. To create a link, first check to be sure that the arrow tool is selected in
MARPLOT’s tool palette, as it is in the example at left. If this tool is not
selected, click on it once.
10. Next, click on the symbol for the Green Valley Water Facility, to select
it.
When you select an object, you can see four small boxes around the
object, indicating that it is selected (as at left). MARPLOT displays
some basic information about the object along the lower map margin.
Also, the Focus Point, a small, flashing, target-shaped icon that marks
the most recent point of interest on the map, moves to the point of your
click.
11. While the symbol is still selected (is still surrounded by the four boxes),
from MARPLOT’s Sharing menu, select CAMEOfm, then Link Object.
You’ll be taken back to the Green Valley Water Facility’s record in the
Facilities module (if not, find and open that record).
12. While that record is visible, from the Link menu, select Link this
Record (as shown below).
Once you have created a link between a symbol and record, you can easily
move back and forth between them:
54
Getting Started
A CAMEO guided tour
13. To go from the Green Valley Water Facility record to the map symbol,
from the Sharing menu, select MARPLOT, then Show on Map.
You’ll be taken to MARPLOT. The Green Valley Water Facility symbol
will be selected, and the Focus Point will appear centered on the symbol.
Tip: If the map is more zoomed-in that you’d like, click the zoom-out
button in MARPLOT’s toolbar (shown at left), then click several times
on the water facility’s symbol.
When you select a linked symbol on a map, you can also quickly go to the
CAMEO record to which it is linked:
14. While the symbol remains selected, from MARPLOT’s Sharing menu,
select CAMEOfm, then Get Info. (If the symbol has become unselected,
click on the arrow tool button, then click in the symbol to reselect it.)
You’re taken back to the Green Valley Water Facility record in
CAMEO’s Facilities module.
Working with Screening and Scenarios
Next, you’ll try out using the Screening & Scenarios module to perform the
hazards analyses explained in the Technical Guidance for Hazards Analysis (see “Bibliography” on page 276).
In a hazards analysis, you estimate the size of the area around a facility or
other potential spill site that could be affected by the accidental release of a
chemical of concern. That area is called the threat zone. You can use
MARPLOT to display threat zones on an electronic map of your community. Once you have an estimate of the radius of the threat zone, you can
plot the zone on a map in MARPLOT. You can choose to estimate the size
of the threat zone around a facility or along a transportation route either by:
• using EPA’s “credible worst case” assumptions to obtain a worst-case
threat zone estimate (a screening estimate).
• entering weather conditions and other information that you believe to be
more typical of the region and facility (a scenario estimate).
Now, you’ll review the results of a screening for the Green Valley Water
Facility:
Getting Started
55
Getting Started
1. Return to CAMEO if you’re still working in MARPLOT. The Facilities
record for the Green Valley Water Facility should be visible on your
screen.
2. Click the Chemical Inventory tab. You’ll see that chlorine is the only
chemical included in this facility’s inventory.
3. From the Record menu, select Show Related, then Screening and Scenario Records. Use Show Related whenever you want to see records in
other CAMEO modules that are related to the record you’re working
with.
The Screening & Scenarios module will open in List View. You’ll see the
names of two records: “Screening” and “Scenario #1.”
4. Double-click on the “Screening” record in the list to open it in Record
View.
This record shows the results of a “credible worst-case” screening calculation for chlorine at the Green Valley Water Facility, made according to
the procedures described in the Technical Guidance. In a worst-case
screening, the entire contents of one of the facility’s chlorine tanks are
assumed to escape into the atmosphere over 10 minutes, forming a gas
cloud that would drift away from the plant in whatever direction the
56
Getting Started
A CAMEO guided tour
wind is blowing. A worst-case screening assumes a low wind speed,
very little atmospheric turbulence to dilute the chlorine cloud, and a conservative estimate of the concentration of chlorine that might cause
adverse health effects in people.
In the Threat Zone Radius box, you’ll see the estimate of the threat zone
radius. You’ll see that under these worst-case conditions, the threat zone
—the area potentially at risk—is predicted to extend more than 10 miles
downwind. Depending on the wind direction, chlorine concentrations
within the zone could reach or exceed the level of concern shown on the
Screening & Scenarios record. Check the Technical Guidance or review
“Using Screening & Scenarios to assess hazards” on page 137 to learn
more about making screening calculations.
5. Click the right arrow button in the upper right corner of the “Screening”
record (shown at left), to view the next record in the module. This record
shows the threat zone estimate for a more likely scenario.
The highest-risk operation at the plant is the changing of chlorine tanks,
done only during daytime hours. This record shows the results of a hazards analysis calculation for a release of chlorine through the valve of a
Getting Started
57
Getting Started
single 1-ton chlorine cylinder, which is sheared off while the cylinder is
being transferred by forklift from a transport vehicle to the facility.
In this scenario, the amount released is the same as before—the contents
of one tank—but the chlorine is expected to escape over 30 minutes
rather than 10 minutes. Local meteorologists were able to provide a
description of the most common weather conditions observed at Haymarket: instead of “worst case” weather conditions, wind speed is higher
and the atmosphere is more turbulent (so that air is more quickly mixed
into the chlorine cloud, diluting it to below hazardous concentrations).
This time, the threat zone is predicted to extend only 0.8 miles from the
accident site.
Working with a threat zone on a map
To plot this threat zone on the map,
1. click Show on Map. MARPLOT will come forward, and the zone will
automatically be plotted on the map, centered on the Green Valley Water
Facility symbol.
2. However, at the current map scale, it’s not possible to see the entire
threat zone at once. To adjust the map scale, choose Set Scale from
MARPLOT’s View menu.
3. In the “Set Scale” dialog box, next to the “1 in =” heading, type “0.50” to
change the map scale to 1 inch = 0.5 mile (as below). (Your “Current
Window Width” might not match the value shown in the diagram.)
58
Getting Started
A CAMEO guided tour
4. Click OK. You’ll see the entire threat zone on your screen (as shown
below).
Once you’ve plotted a threat zone on a map, you can check to see
whether any symbol objects representing especially vulnerable populations, such as schools or hospitals, are within the threat zone.
Tip: You can use the same procedure to check for special locations
within an ALOHA footprint that you have plotted on a map. See “Checking for special locations within a footprint or threat zone” on page 160.
To check for special locations in the threat zone,
1. While the threat zone object is still selected, select Search from the List
menu. (If it has become unselected, click on the zone’s outer boundary to
reselect it, then select Search.)
2. To set up the search,
a. Under the “Search for objects:” heading, select are inside of or
touched by... from the menu of object types.
b. Check to be sure that the currently selected object(s) is selected in
the next menu.
c. Under the “Layer(s) to search:” heading, choose Multiple layers...
from the popup menu.
Getting Started
59
Getting Started
d. In the list of layers, click on the “CAMEO Hospitals” and “CAMEO
Schools” layers to place checkmarks next to the names of those layers
(the checkmarks indicate that MARPLOT will search these layers).
e. Click the names of any other layers that have checkmarks next to
them, to remove the checkmarks (MARPLOT will then not search
these layers).
When your search criteria look like the ones below, click Search.
3. The symbol object representing Central Elementary School is inside the
threat zone, so it appears in the search collection. While its name is highlighted, click Show on Map.
60
Getting Started
A CAMEO guided tour
Once the map is redrawn, the symbol for Central Elementary will be
selected, and the Focus Point will be centered on it (as below).
Note: If more than one school and or hospital symbol was within the
threat zone, you could click Show All on Map to see all the symbols
selected on the map.
4. While the symbol is still selected, from MARPLOT’s Sharing menu,
select CAMEOfm, then Get Info. (If the symbol becomes unselected,
click on it to reselect it.)
This symbol was previously linked to a record describing the school in
CAMEO’s Special Locations module. This record will be displayed on
your screen. (If more than one linked symbol had been selected, the
records linked to all those symbols would be shown to you in a list.)
You can use the Special Locations module to keep information describing
vulnerable locations in your community, including emergency phone numbers you could use to quickly contact the location during the response to an
incident.
In a real emergency, you might need to call a contact person at the Central
Elementary School. In CAMEO, there are two ways to quickly find an
emergency phone number for the school, as follows.
Getting Started
61
Getting Started
1. First, click the Phones tab to see the emergency phone number for Cen-
tral Elementary School (shown below).
Tip: In an emergency, you can quickly print out a list of phone numbers
for one or more special locations to hand to a dispatcher. To do this, from
the File menu, you would select Make Report. You then would click the
Phones checkbox and the checkboxes for any other items you’d like
included, then Make Report, then Print.
2. Second, from the Record menu, select Show Related, then Contact
Records. A list of the Contacts records for the school, containing just one
name, will be displayed. Double-click that name (or click the Record
button in the toolbar) to open the Contacts record for Brenda Stephens,
the Central Elementary School Principal. Click the Phones tab to see her
telephone number (as below).
62
Getting Started
A CAMEO guided tour
Making an advanced search
Having evaluated the hazard posed by the Green Valley Water Facility,
you’ll next check to see which other facilities in Haymarket store or use
chlorine. To find that out, you’ll run an advanced search of the Facilities
module.
1. From the File menu, select Open, then Facilities. Note that you can open
any CAMEO module via the Open command.
2. From the Search menu, select Start Search, then click Go to Advanced
Search (as shown below).
Getting Started
63
Getting Started
3. Click Select Field (as shown below).
In the next steps, you’ll indicate
a. which module you want to search—you’re offered a choice whenever
you’re searching for facility records because information about facilities is stored in more than one module in CAMEO.
b. which data field you want to search, within that module.
64
Getting Started
A CAMEO guided tour
4. Make sure the Facilities button is highlighted, then, in the list of data
fields, click City to select that data field. Click Select (as shown below).
5. The Advanced Search window is displayed again; leave contains char-
acters selected in the popup menu of search types, then type “Haymarket” in the text box to the right of the menu.
6. Click Add a Choice. You need to add a second choice because you’re
searching for two criteria: facilities that (1) are located in Haymarket
and (2) have chlorine in their inventories.
Getting Started
65
Getting Started
7. Click the Select Field button just above the lower, blank box (as shown
below).
8. In the left-hand list, click the Chemicals in Inventory button.
9. In the list of data fields, click Chemical Name, then click Select (as
shown below) to return to the Advanced Search window.
66
Getting Started
A CAMEO guided tour
10. Leave the lower menu set to contains characters, and to its right, type
“Chlorine” in the empty text box.
11. Click the Search for all of the following button (it’s in the upper left
part of the window).
12. When your Advanced Search window looks like the one below, click
Search.
You’ll see that two facilities located in Haymarket store or process chlorine: M & S Chemicals and the Green Valley Water Facility.
Note: Whether you click Search for any of the following (OR search) or
Search for all of the following (AND search) when you set up a search for
two or more criteria makes a big difference. When you click “Search for all
of the following (AND search),” you’re setting up a search for all facilities
that are located in the town of Haymarket and that also maintain chlorine on
site. When you click “Search for any of the following (OR search),” you’re
setting up a search for all facilities that are located in the town of Haymarket or that maintain chlorine on site. If you select Start Search from the
Search menu again, type the same search criteria again, then click “Search
for any of the following (OR search),” then click Search, you’ll discover
that the search collection contains three records instead of two: Adams
Petroleum Refinery now is included in the list because it meets one of your
Getting Started
67
Getting Started
criteria—it’s located in Haymarket. But it doesn’t meet the other criterion: it
doesn’t include chlorine in its inventory.
Predicting chemical reactivity
Not only are you a member of Prince William County’s LEPC; you’re also a
member of Haymarket’s volunteer fire department. In that role, you receive
a call to head out along James Madison Highway to the scene of a new incident:
A train has collided with a truck at an intersection in the industrial section
of Haymarket. A tankcar and a flatbed car filled with containers have
derailed. Now the tankcar is lying in a ditch alongside the tracks, surrounded by some containers that have broken loose from the flatbed car
(Figure 7).
• The tankcar is labeled “hydrogen fluoride.”
• the UN/NA number shown on all the containers is 1806.
You want to know: What problems could occur if these chemicals were to
accidentally mix together when crews right the tankcar and collect the containers?
You can use CAMEO to answer this question. You'll “mix” the two chemicals by finding their Chemical Library records and then adding both chemicals to the Reactivity Worksheet. CAMEO will then predict the mixture's
potential reactivity.
Working the problem. First, you'll need to search the Chemical Library
for the two chemicals you want to add:
1. Click the Navigator button in the toolbar, then click Search for a Chemi-
cal.
2. Type “hydrogen fluoride” in the Chemical Name box, then press Search
(searching for either a name that “contains characters” or a “word starting with” hydrogen fluoride will work).
68
Getting Started
A CAMEO guided tour
FIGURE 7. Schematic overhead view of the accident scene.
In the list of found records, you should find “HYDROGEN FLUORIDE,
ANHYDROUS.” If it’s not there, repeat your search, this time checking
your spelling carefully: in “fluoride,” “u” comes before “o.”
3. In the list, double-click on HYDROGEN FLUORIDE, ANHYDROUS
to open that record, then click the Response Information Data Sheets tab.
4. Check the reactivity characteristics of hydrogen fluoride as follows:
a. Click the Reactive Hazards tab to see the especially acute hazards of
hydrogen fluoride. You’ll see that hydrogen fluoride is both waterand air-reactive.
b. Click the Reactivity tab to learn more about its reactions with air and/
or water and to view its Chemical Profile to review more details
about the reactivity of hydrogen fluoride.
Getting Started
69
Getting Started
5. From the Record menu, select Add to Reactivity Worksheet (as at left).
6. When asked whether you want to view the Reactivity Worksheet, click
Later (as shown below).
7. Perform a search for chemicals with the UN/NA number of 1806: from
the Search menu, select Start Search; type “1806” in the UN/NA Number box, then press Search (searching for either a word that “contains
characters” or a “word starting with” 1806 will work).5
8. You'll find just one chemical, PHOSPHORUS PENTACHLORIDE.
Double-click on PHOSPHORUS PENTACHLORIDE to open the record
for this chemical. Again, click the Response Information Data Sheets
tab, then click the Reactive Hazards and Reactivity tabs to check its
characteristics, and then select Add to Reactivity Worksheet from the
Record menu. This time, when asked whether you want to view the
Reactivity Worksheet, click Yes.
Note: In many cases, more than one chemical have the same UN/NA
number. In such cases, you’ll need more information before you can be
sure of the identity of a given chemical. Even when you find just one
chemical, as in this case, carefully review the information in the
Response Information Data Sheets to verify that you’ve correctly identified the chemical at hand. In particular, check the General Description.
(It says that phosphorus pentachloride is a “greenish-yellow crystalline
solid with an irritating odor.”) If that description doesn’t fit the chemical
you find on scene, check for more information to help you be sure of its
identity.
9. Check the Reactivity Worksheet to see statements about the mixture's
potential reactivity (shown below):
5. To CAMEO, a “word” includes a series of letters or numbers, so an identification number
is a “word.”
70
Getting Started
A CAMEO guided tour
These statements tell you that the response team would need to be prepared for a possible explosion and release of a toxic gas if these two
chemicals were to accidentally mix. The toxic gas that would be
liberated in this reaction would be hydrogen chloride, but CAMEO
doesn't report this.
10. When you’ve finished reviewing the worksheet, click Done/Close Win-
dow.
Finishing up and moving on
You can choose either to keep the sample records, map symbols, and map
used in this Guided Tour, or to delete them. Keeping them will not interfere
with your other uses of CAMEO.
To delete the sample records, symbols, and map, follow the steps below.
To delete the sample records:
1. Click the Navigator button in the toolbar, then click the Facilities button.
Click the List button in the toolbar if you’re not in List view.
Getting Started
71
Getting Started
2. From the Search menu, select Clear Search. This module still displays
3.
4.
5.
6.
7.
8.
9.
just the found set of records that match your most recent search; clearing
the search allows you to access and work with all the records.
From the Record menu, select Delete All Records. The five sample
records in this module are deleted, along with all records related to the
deleted facilities in the Chemicals in Inventory, Screening & Scenarios,
and Contacts modules.
Important: Select Delete All Records in this and other modules only if
you have not yet entered any other data into the module that you’d like
to keep. If you have entered data, select each sample record (all have
“DEMO” in their names), then select Delete Facility from the Record
menu.
Click the Navigator button in the toolbar, then click the Contacts button.
From the Record menu, select Delete All Records to delete the sample
records in this module (or, if you have entered data you want to keep,
select each sample record, then select Delete Contact from the Record
menu).
Click the Navigator button in the toolbar, then click the Special Locations button.
From the Record menu, select Delete Special Location to delete the single sample record in this module.
Click the Navigator button in the toolbar, then click the Routes button.
From the Record menu, select Delete Route to delete the single sample
record in this module.
To delete the sample map symbols and map: Follow these steps to
delete the sample map symbols (which are located on your CAMEO Map)
and the sample Prince William County map from your hard drive.
1. Click the Navigator button in CAMEO’s toolbar, then click the MAR-
PLOT button to go to MARPLOT.
2. From MARPLOT’s List menu, select Layer List.
3. Click the lock icons next to CAMEO Facilities, CAMEO Hospitals, and
CAMEO Schools to unlock these layers (when clicked, the icons change
72
Getting Started
A CAMEO guided tour
to look like unlocked padlocks). The layer list should look like the one
below. Click OK.
4. From the List menu, select Search.
5. Under “Search for objects,” select “with names that contain.” In the text
box to the right, type “DEMO”.
6. Under “Layers to search,” select Multiple Layers.
7. Click on “CAMEO Facilities,” “CAMEO Hospitals,” and “CAMEO
Schools” to place checkmarks next to these layers. Click on any other
Getting Started
73
Getting Started
layers that are checked, to uncheck them. When you’ve finished, your
search criteria should look like the ones below.
8. Click Search. The eight sample symbols should appear in the search col-
lection (as shown below).
74
Getting Started
A CAMEO guided tour
9. Click Show All on Map. All six symbols will appear selected on the
map.
10. From the Edit menu, select Clear (as at left). The sample objects are
deleted from your CAMEO map.
11. Quit (Exit) from MARPLOT.
12. On your hard drive, find and open the “MARPLOT” folder.
13. Move the PWC_MAP folder to the Recycle Bin (in Windows) or Trash
(on a Macintosh).
Getting Started
75
Getting Started
76
Getting Started