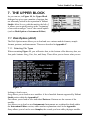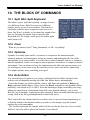
1
Velvet Studio User Manual
Velvet Studio version 1.1
Programmed by Patrik Oscarsson and David Broman
Documentation User Manual Version 2.0 rev 1
Written by Peter A. Kudenov
Additional text: Pontus Munck, David Broman and Patrik Oscarsson
Quality Assurance by Marcus Nilsson
Velvet Studio is a Copyright owned by Velvet Development, 1994-1998.
All rights reserved.
Note: This is the PDF version of the manual and the manual protection section is left out. New features in
Version 2.x of Velvet Studio are not included in this manual. Also note that the format of this file is A5.
-i-
Velvet Studio User Manual
TABLE OF CONTENTS
1.
INTRODUCTION ..............................................................................................1
1.1
1.2
1.3
1.4
1.5
2.
INSTALLATION ...............................................................................................3
2.1
2.2
2.3
3.
DISCLAIMER .....................................................................................................1
BACKGROUND ..................................................................................................1
WHAT IS A TRACKER?.......................................................................................2
THE MANUAL....................................................................................................2
STATISTICS .......................................................................................................2
DOS INSTALLATION .........................................................................................3
WINDOWS 3.1 INSTALLATION ...........................................................................3
WINDOWS 95 INSTALLATION ............................................................................3
GETTING STARTED........................................................................................5
3.1
3.2
3.3
3.4
LOADING A SONG ..............................................................................................5
PLAYING A SONG ..............................................................................................5
COMPOSING YOUR OWN SONG ..........................................................................5
MODIFY A SAMPLE ...........................................................................................6
4.
THE MOUSE......................................................................................................7
5.
CONFIGURATION ...........................................................................................9
5.1
5.2
5.3
5.4
5.5
5.6
5.7
CONFIGURE SOUND CARD ................................................................................9
OPTIONS ...........................................................................................................9
AUTOSAVE .....................................................................................................10
PATHS ............................................................................................................10
COLORS ..........................................................................................................11
KEYMAP .........................................................................................................11
PATTERN DEFAULTS .......................................................................................11
6.
MAIN SCREEN................................................................................................13
7.
THE UPPER BLOCK......................................................................................14
7.1 DISK OPTION (ALT-D) ....................................................................................14
7.1.1
Selecting File Types .............................................................................14
7.1.2
Loading Files .......................................................................................15
7.1.3
Saving Files..........................................................................................15
7.1.4
Renaming a File...................................................................................16
7.2 TOGGLE PIANO (ALT-G).................................................................................16
7.3 TOGGLE EQUALIZER (ALT-Q).........................................................................17
- ii -
Velvet Studio User Manual
7.4
7.5
8.
DOS SHELL ....................................................................................................17
EXIT TRACKER (ALT-X) .................................................................................17
LOWER BLOCK FUNCTIONS.....................................................................18
8.1 PROTRACKER PATTERN ..................................................................................18
8.2 SCREAMTRACKER PATTERN ..........................................................................18
8.3 EDITING A PATTERN ........................................................................................18
8.4 SAMPLE EDITOR (ALT-S)................................................................................21
8.4.1
Wave form Field...................................................................................21
8.4.2
Bottom-Left zone ..................................................................................21
8.4.3
Sample view functions..........................................................................22
8.4.4
Sample edit functions ...........................................................................22
8.4.5
Sample..................................................................................................23
8.4.6
Resample..............................................................................................23
8.4.7
Volume .................................................................................................24
8.4.8
Effects...................................................................................................24
8.4.9
Fix Loop, Mix, and DC ........................................................................28
8.4.10 Loop types ............................................................................................28
8.4.11 Edit boxes in lower-right zone .............................................................29
8.4.12 Desc Editor (Alt-E) ..............................................................................30
8.4.13 Instrument Editor (Alt-I) ......................................................................30
9.
LEFT BLOCK FUNCTIONS..........................................................................35
9.1
9.2
9.3
10.
PATTERN INFO ................................................................................................35
SAMPLE INFO..................................................................................................35
POSITION EDITOR ...........................................................................................35
THE BLOCK OF COMMANDS ....................................................................36
10.1
10.2
10.3
10.4
10.5
10.6
10.7
10.8
10.9
10.10
10.11
10.12
10.13
10.14
10.15
SPLIT KBD: SPLIT KEYBOARD....................................................................36
CLEAR .......................................................................................................36
OPTIMIZE ...................................................................................................36
ECHO EDITOR ............................................................................................36
INFO ..........................................................................................................37
UNDO ........................................................................................................37
PIANO: (ALT-G).........................................................................................37
PLAY SONG: (RIGHT CTRL)........................................................................37
PLAY PATT: PLAY PATTERN (RIGHT ALT) .................................................38
REC SONG: RECORD SONG (RIGHT SHIFT).................................................38
REC PATT: RECORD PATTERN (SHIFT SHIFT).............................................38
STOP ..........................................................................................................38
EDIT: (SPACEBAR) .....................................................................................38
EQUALIZER: (ALT-Q).................................................................................38
SONG SPECIFIC SETTINGS ..........................................................................38
- iii -
Velvet Studio User Manual
11.
CLEAR SECTION ...........................................................................................39
12.
BUG FIXES ......................................................................................................40
13.
APPENDIX A - GLOSSARY ..........................................................................41
14.
APPENDIX B - DEFAULT KEY MAP..........................................................47
14.1
14.2
14.3
14.4
14.5
14.6
14.7
14.8
14.9
15.
APPENDIX C - FILE FORMATS..................................................................52
15.1
15.2
15.3
15.4
15.5
16.
OVERVIEW.................................................................................................52
MODULES ..................................................................................................52
INSTRUMENTS............................................................................................52
SAMPLES ...................................................................................................52
PATTERN DATA .........................................................................................52
APPENDIX D - COMMAND REFERENCE ................................................53
16.1
16.2
16.3
16.4
17.
SURVEYING CURRENT SONG .....................................................................47
PLAYING AND RECORDING CURRENT SONG;..............................................47
PATTERN EDITING......................................................................................48
BLOCK MARKING COMMANDS ..................................................................49
CHANNEL COMMANDS...............................................................................49
TRANSPOSING ............................................................................................50
SELECTING SAMPLES .................................................................................50
MENUS & SCREEN BLOCKS .......................................................................50
MISCELLANEOUS KEYS..............................................................................51
OVERVIEW.................................................................................................53
PROTRACKER COMMANDS.........................................................................53
FINER PROTRACKER COMMANDS ..............................................................61
NEW COMMANDS ......................................................................................62
INDEX...............................................................................................................67
- iv -
Velvet Studio User Manual
1. INTRODUCTION
Welcome into the world of exciting sound experiences and interesting, stimulating music
creation! In your hand right now, you’ve got one of the most impressive and powerful
music program that has ever been made. You will soon experience the ease and
comfortability that this program provides you with, along with the huge amount of
technical features making your music editing a real pleasure. We hope that we have
succeeded in creating a tool for your delighted usage and satisfactory, that will bring
inspiration to your composing talent!
1.1
Disclaimer
There is no warranty for the program, to the extent permitted by applicable law. Except
when otherwise stated in writing the copyright holders and/or other parties provide the
program "as is" without warranty of any kind, either expressed or implied, including, but
not limited to, the implied warranties of merchantability and fitness for a particular
purpose. The entire risk as to the quality and performance of the program is with you.
Should the program prove defective, you assume the cost of all-necessary servicing,
repair or correction.
In no event unless required by applicable law or agreed to in writing will any copyright
holder, or any other party who may redistribute the program as permitted above, be liable
to you for damages, including any general, special, incidental or consequential damages
arising out of the use or inability to use the program (including but not limited to loss of
data or data being rendered inaccurate or losses sustained by you or third parties or a
failure of the program to operate with any other programs), even if such holder or other
party has been advised of the possibility of such damages.
1.2 Background
Why did we ever start making such a big project? Well, we had a very good music system
back in 1994 that have been developed by Patrik Oscarsson since 1992. We wanted to do
something creative with it and when we started coding there were no good trackers
around. That seemed to be a good starting point and our goal was not set very high in the
beginning. Time passed and our bugtesters gave us plenty of ideas that one can
implement in a tracker and the program became more and more advanced. People got
interested in the product, and we felt that we had to create something good. After one and
a half year, we were almost finished with the program, and we started thinking of how we
should release it. We didn’t want to release it for free because we have spent uncountable
hours creating the program so we decided to make it shareware. We wanted to have a
printed manual in the package so we asked one of our bugtesters to write it.
Unfortunately he got sick and we lost the contact when the manual was almost finished.
We became desperate! Who could write a manual for us now? Lucky enough, we had
-1-
Velvet Studio User Manual
another bugtester that was willing to write the manual for us, and two months later we
finally got it from him (rewritten from scratch since the other bugtester never gave us any
text). And you now see the final result in your hands.
1.3 What is a tracker?
A tracker is a music program based on digital reproduction of analogue sounds, i.e.
samples. That means that you can sample (convert from analogue to digital) any sound
you like and use it in the song. Mostly you sample e.g. a bass drum and a snare drum to
create the drum rhythm in your song, and not long drum loops (a sequence of drums
sampled from an existing song) since they consume a vast amount of memory. This idea
differs a lot from a MIDI program since they most often use pre-sampled sounds that
comes from different synthesizers. The idea behind a tracker is ease of use. You don’t
have to know much of how music is build up using notes. You maybe know what note
you want to use, and it’ll be represented in an easy way e.g. C-4 which means note C on
octave 4. There’s also another big advantage: You don’t have to own expensive
equipment; your computer and sound card is all you need!
1.4 The manual
This manual will guide you through most functions in the program and it will describe
the most interesting parts more thoroughly. There are so many features everywhere that
even we can’t remember them all. Our advice is to test it a lot, especially the options in
the configuration since there you can find plenty of interesting stuff!
1.5 Statistics
• The program is written totally in assembler using Pmode/W as DOS extender.
• It contains over 100,000 rows of source code.
• The source code’s file size is over 2 Megabytes.
-2-
Velvet Studio User Manual
2. INSTALLATION
2.1 DOS Installation
The installation of Velvet Studio is very easy. Put disk number one in your disk drive and
type INSTALL at the command prompt A:\ or B:\.
Each copy of Velvet Studio has an unique serial number that is connected to your name,
so you can be sure that your copy is personal. Please enter your name and the serial
number that we gave to you in the package when prompted. You’ll also have to answer a
question concerning where you want the program to be installed. If you are satisfied with
the default path C:\VS just press the OKAY button. Velvet Studio also has a manual
protection which is built up with different symbols. The installation will check your
hardware so that you cannot copy the installed program to another computer. Illegal
copying of the program is strictly forbidden.
2.2 Windows 3.1 Installation
Velvet studio is not designed to run with Windows 3.1, so you have to run the installation
from DOS. (NOT a DOS prompt).
2.3 Windows 95 Installation
Running the program under Windows 95 is not tested very much, but you might get it
working.
To install Velvet Studio for Windows 95 do the following:
1. If you are running Windows 95, Please Restart your computer in DOS mode, using
the START button and select SHUT DOWN, Restart the computer in MS-DOS
mode.
2. Follow the steps in the section "DOS Install"
3. Restart your computer to load Windows 95.
To start Velvet Studio from Windows 95 follow these steps:
1. Start up your computer and start Windows 95.
2. Click with your right mouse button on the desktop.
3. Select NEW -> SHORTCUT
4. Browse to the directory where you installed Velvet Studio.
5. Press Next.
6. Type an appropriate name, and press next.
7. Select an icon for Velvet Studio.
-3-
Velvet Studio User Manual
8. Now when you see the icon on the desktop, press your right mouse button on the
icon and select PROPERTIES
9. Select the PROGRAM tab
10. Press the advanced button.
11. Check the MS-DOS mode checkbox.
12. Press OKAY until you see the desktop again.
Now you can run Velvet Studio from Windows 95. After exiting the program, you may
have to type exit at the DOS prompt to return to Windows 95.
-4-
Velvet Studio User Manual
3. GETTING STARTED
If you’ve never used a tracker before, read this chapter because here we will describe the
basics in the program.
3.1 Loading a song
Assuming you have installed the program described above we will now guide you
through the program, and we will start loading a song. When you have started the
program, you’ll see the main screen. In the top of the screen you see the command bar.
Move the mouse to the part that reads “upper block” and press left mouse button. There
you’ll see some different menu choices. Select the “Disk option” and see how a part of
the screen changes to a file requester. In the lower part of that screen you see different
buttons. Unless the “SONG” button is pressed, press it using left mouse button. If you
have installed everything correct you’ll now see the example songs that are included in
the program. Double click on any of the filenames and soon the song is loaded. You’ll
see that some parts of the screen gets some data - the song.
3.2 Playing a song
Assuming you have followed the above steps you are now ready to start the song. You do
that by pressing the right CTRL key on your keyboard. If everything went fine you
should now hear some music through your speakers. If no sound is heard, check the
cables and your amplifier. If that don’t help, check if any other program produces sound.
You might need to configure your sound card if everything else fails. Check the
configuration section later in this manual.
To stop the playing of the song, press SPACE.
3.3 Composing your own song
After you’ve loaded a song, you can use the instruments in it to create your own song. If
you are still in the disk option block, change to the main screen via the “upper block”
choice in the command bar. Now press “CLEAR” in the middle of the screen, and clear
the song. Now you can use the instruments that the composer have used in his music
piece to create your own song! If you press SPACE one more time, the border around the
screen will change, and that means that you have entered the edit mode. Now when you
are in that mode, you are able to edit the pattern. Pressing the key “I” on the keyboard
will insert the note C-5 in the pattern. Pressing other keys will insert other notes;
experiment! Depending on which instrument that is selected in the upper right part of the
screen you’ll hear different sounds. To the left of the instrument name is a small dot on
those instrument-slots that have usable sounds, the others are just empty space. To select
an instrument, use the mouse and click on any name using the left mouse button. You can
-5-
Velvet Studio User Manual
test your song any time by pressing right CTRL key, and stop the playback using the
SPACE key. For more information on how to create your song, keep reading the manual.
3.4 Modify a sample
Maybe you want to change a particular sound a bit. Maybe it’s too loud, or you want to
cut a part from it, you can use the sample editor. Via the command bar select “lower
block” and “sample editor” to change the lower part of the screen to a fully featured
sample editor. If you have selected an instrument you’ll see the wave form in the sample
editor and there you can edit it in any way you like. In this example we will cut away a
part of the sound. Using the mouse, click and drag the pointer across a part of the wave
form, it doesn’t really matter how much you select since this in just an example. You’ll
see that the wave form have inverted the colors where you have selected. Now press the
“cut” button on the screen and see how the selected part disappears from the wave form.
If you want to undo the action, press the “undo” button.
-6-
Velvet Studio User Manual
4. THE MOUSE
Within Velvet Studio, the Mouse plays
an important role for sample editing,
navigating the interface, and
enhancing the ease of use. The first
example, Figure 1, shows a pull down
menu, which you access by clicking on
it with the Left Mouse Button, move
your pointer over the function you
Figure 1
wish to use and release the button and
you will enter, for example, the Disk Option screen.
Also, you will be presented with many options which are presented in a push-button style.
Figure 2 shows an example of these, as found in the Disk Option screen.
As you can see in Figure 2, the Song button is pressed. Also, to the right of Song is the
*.AMS button; in our example, Velvet Studio is currently looking for Songs, of the AMS
format (Advanced Module System). The function behind these will be explained in the
Disk Option section. At this moment, we are specifically looking where the mouse are
involved. To Enable an option, move the mouse pointer over the button, for example,
*.MOD, and click on it
once using the Left
Mouse Button. To
Disable an option, click
on the enabled (recessed)
Figure 2
box again, with the Left
Mouse Button.
In Figure 3, we see two buttons to the right
of a number; an arrow pointing up, and the
other pointing down. Clicking on either with
the Left Mouse Button increases or
decreases the amount shown to the left (or
right, depending on the location of the arrow
buttons in relation to the numbered dialogue),
at a relatively slow pace. Clicking on either
with the Right Mouse Button increases or
decreases the number at a medium rate. To
speed through a number rapidly, click upon
either arrow button with both the Left AND
Right Mouse Buttons. The combination of
-7-
Figure 3
Velvet Studio User Manual
both mouse buttons increases or decreases the number at the fastest speed.
Velvet Studio incorporates Drag Bars which dramatically speed the process
of combing through a field of information. In Figure 4, we see two vertical
drag bars. The function behind the drag bars in our example are explained in
the Pattern Editor section. Above and below each drag bar are arrow
buttons, one pointing up and the other down. With your mouse, you may
position the pointer over one of the two arrows, depending on which direction
you wish to go, and click with the Left Mouse Button. This increments or
decrements the data within the field at a slow rate. Clicking with the Right
Mouse Button scrolls through the data within the field at a medium rate.
Clicking with both the Left AND Right Mouse Button scrolls through the
field at the fastest speed.
The drag bars also allow you to "grab" the bar with your mouse to scroll
through the field; this can be accomplished by positioning your pointer on the
slide bar, and holding the Left Mouse Button while you drag the bar up or
down the slide. When you reach the point within the field you wish, simply
release the mouse button.
Figure 4
Although the Command Bar resides on the top of our screen, as we shall see
later, most features allow you to access internal options simply by clicking on
the box shown in Figure 5. This box is located in the upper-left hand corner of
each feature, and always possesses three parallel lines, the center being longer
than the outer two. Accessing the commands within each of these dialogue
boxes are done exactly as those of Figure 1.
User fields are accessible with the mouse. In most input fields you can press
Figure 5
the left mouse button to edit the names. The instrument-, sample names and the
position editor are a bit different because you select with the left mouse button.
By pressing the right mouse button on those names, you can edit the text. Also
try to hold down the left mouse button while pressing the right. You will notice that the
old text disappears and then you can edit a new text, without having to remove the old
one by hand.
-8-
Velvet Studio User Manual
5. CONFIGURATION
After growing accustomed to utilizing the Mouse,
and understanding how to navigate through Velvet
Studio, you will most likely want to configure Velvet
Studio to your preferences. There are many
configurable options that you may change. We begin
the process of editing our parameter’s by selecting
Config on the Command Bar.
Figure 6
5.1 Configure Sound Card
If the installation went fine, you don’t have to
configure your sound card at all, but if some error occurred so that you cannot hear any
music, you have to use the sound card configuration. There are several input fields
available and they differ depending on which sound card you have. The different options
are:
DMA - Depending on if this is the playback DMA or Record (Sample) DMA, select the
correct value found in your sound card manual. In playback DMA there’s an option to
turn off DMA use for the Gravis Ultrasound card. Use this if no DMA works.
IRQ - Check the sound card’s manual for information. This parameter is not required if
you’ve disabled the DMA.
BASEPORT - Mostly this is set to 220h, but can differ from different sound cards.
Again, refer to your sound card manual.
CODEC - Only GUS MAX. This is the base port used by the CS4231 chip. Check your
Ultrasound manual.
5.2 Options
Activating the Config, Options,
feature allows you to enter the
dialogue box shown in Figure 7.
There are three fields of
information within the Options
selector. There are also a number of
push-button’s; each push-button
represents a section of options: for
example, Desc Ed. allows you to
configure the specifics of the
Description Editor.
Figure 7
-9-
Velvet Studio User Manual
Basically, the Options dialogue can be thought of in a linear manner: Area > Options >
Specifics, Information. The push-buttons located on the left of Figure 7 are Area; the
center field, with the long drag-bar, are Options; the right field, with no drag-bar, are
Specifics; lastly, the bottom field, with the short drag-bar, are Information.
To choose a specific Area, click on it with the Left Mouse Button once. The information
within the fields (Options, Specifics, Information) will change accordingly.
To choose a parameter in Options, click on it with the Left Mouse Button once. The list
of configurables within the Specific field will change accordingly, as will the text within
the Information field.
To choose a parameter in Specifics, click on it with the Left Mouse Button once. Velvet
Studio will then respond to your choice either automatically, or when you exit Options.
To find out more about the Options, utilize the Information field’s drag-bar.
5.3 Autosave
After you finish configuring Velvet Studio to your liking, you can save your preferences
by clicking on the Config, Save Config, resource. Or, you can enable the auto-save
feature by clicking on the Config, AutoSave Config, resource. From that point on, any
alteration to the configuration is saved automatically when exiting the program.
5.4 Paths
After configuring Velvet Studio in your best interests, you will want to edit the pathways for your Song (Module), Inst (Instrument), Samp (Sample), and Patt (Pattern)
directories. To edit these, you must click on the Configure Paths option within the
Command Bar > Config dialogue
box. As you will note, from Figure 8,
there are four push-buttons to the left
of the various Module types. To
configure the tracker to locate your
AMS collection, you must click upon
the black user-field adjacent to the
AMS marker. Then, simply type the
directory in which your modules are
located. For example:
AMS: C:\SOUND\MODULES\AMS
Figure 8
- 10 -
Velvet Studio User Manual
If you press the button to the left of the input-field you’ll automatically get the path that
currently is active in the disk option.
Similarly, configuring the sample directory(ies) involves clicking upon the Samp pushbutton, and following the same suite.
5.5 Colors
If you don’t like the colors in Velvet Studio, you may configure them as you like. The
Config, Colors is a pretty self explanatory dialog with three drag bars for Red, Blue
and Green. If you have tried any program containing color composing ingredients you
should be familiar with this way of defining a specific color.
The push buttons in the left part of the dialog indicates which color you want to
modify, e.g. Background for changing the background color, Surface for changing
the surface color etc.
There is also an extra drag bar for some parts, like Contrast for the surface, and
Shadow for the font on the surface. The additional parameter gives you a greater
control of the visual appearance of Velvet Studio, and lets you define exactly how
colors will behave when mixed together. To fully understand each feature, just try it
and see how it works!
The Pre.Def buttons are some predefined palettes that you may use if you just want
some changes in the colors but haven’t the wits to do it yourself. Just press one of the
buttons and you will see the entire palette change instantly.
5.6 Keymap
If you want, you may redefine the keys used as shortcuts in Velvet Studio. Config,
Key map has push buttons at the leftmost of the dialog that tells you for which part you
are configuring the keys. In the list box all different shortcut possibilities are listed
along with the currently selected key. If you want to change a key, just press the right
line in the list box and then press the key. If it isn’t used for any other option it will be
inserted in the list box as the new shortcut key.
At the bottom of the dialog there are three buttons for predefined keysets. They are
Velvet Studio default (VS), Screamtracker 3 (S3M) and Fasttracker 2 (FT2). If
you are more familiar with their key sets, you will probably want to use them instead.
5.7 Pattern defaults
In this configuration dialog you can specify the default parameters used when creating
a new pattern in your song.
- 11 -
Velvet Studio User Manual
Rows - The number of rows you want.
Channels - The number of channels you want.
Commands - The number of commands you want for each note.
Notice that these are only default values. Velvet Studio uses a sophisticated dynamic
allocation technique for handling of the channels, rows and commands, so you can
change them anytime, anywhere in the song. Each unique pattern in your song can
have a different number of channels, rows and commands, which adds a flexible, nice
touch to editing.
- 12 -
Velvet Studio User Manual
6. MAIN SCREEN
When you first enter Velvet Studio, you are viewing the Main Screen.
As Figure 9 shows, a Command Bar resides over the top of the screen, beginning with
the Upper Block. Click upon the Command Bar at any point, and a menu will appear
with specific options (depending upon the nearest name).
Figure 9
- 13 -
Velvet Studio User Manual
7. THE UPPER BLOCK
As you can see, in Figure 10, the Upper Block
dialogue box gives you a number of options that
are inherently critical to the operation of Velvet
Studio. Main Screen, with the mark to the left of
it, allows you to quickly arrive at the "beginning"
of our session and get "out of" the current option
(such as Disk Option or Instrument Editor).
Figure 10
7.1 Disk Option (Alt-D)
The Disk Option menu allows you to load and save various module formats, sample
formats, patterns, and instruments. These are described in Appendix C.
7.1.1 Selecting File Types
When examining Figure 11, you will notice that, to the bottom of the directory box, are
four push- buttons: Song, Patt, Inst, and Samp. These allow you to choose what you are
Figure 11
looking to load or save.
Song allows you to load or save modules. A list of module formats supported by Velvet
Studio exists within the Appendix C.
Patt allows you to load or save individual Patterns. Patterns are the essence of the
module.
Inst allows you to load or save Instruments. Instruments are explained in detail within
the Instrument Editor section, while another explanation exists in the Appendix.
Samp allows you to load or save Samples, the sounds you hear while playing a module.
- 14 -
Velvet Studio User Manual
After pressing one of the four push-buttons, a number of various file format selections
become available. You will note that, in Figure 11, the Song button is pushed, and
various module formats are arrayed to the immediate right, in the form of larger pushbuttons. In our example, we would click on the *.ULT button to look for UltraTracker
modules. Velvet Studio will then reference the path-way configuration, and if a directory
is specified for the ULT file format (under the Song directory, look to the previous
chapter (Figure 7) for more information), the file selections displayed in the large
dialogue box will change.
Tip: If you press the right mouse button when selecting a file type you will remain in the
current directory, and set it as a temporary default for the file type. (It will not be saved in
the config file, unless you specify it. See the Configuration section for more information.)
7.1.2 Loading Files
To load a file, click on a filename within the current directory, (it’s contents are shown to
the left of the drag-bar featured in Figure 11 ) and press the Load button. You can also
click twice (double click) with the Left Mouse Button upon the selection you want. The
file you just loaded will be high-lighted by (in the default color scheme) a white bar.
Above the Rename button, in Figure 12, are five smaller push-buttons.
For Loading purposes, the CNVRT button should be pushed if you want
Amiga Samples to be automatically converted to PC format.
Loop, while activated, will try to recognize the looping points in RAW
samples.
Pack plays no significant role in the loading of files.
Figure 12
Name allows you to see the file’s header in the directory list. You will most certainly want
to enable this function. Basically, this allows you to look at an extended name for the file.
The head of a file are typically the first few bytes; these bytes are filtered through our
tracker’s file system, and names such as "The Fires Fury/AN95" appear. Much easier than
"TFFAN95.MOD".
7.1.3 Saving Files
To save a file, enter a file name within the user field located directly above the large
dialogue box. It does not matter if you clear the text within the field; your file will be
saved in the default directory for it’s type. Click on the Save button and your work is
- 15 -
Velvet Studio User Manual
saved. If you press once on any other file in the directory, that filename will appear in the
field, and you can use that name when saving.
CNVRT, Convert, plays no role in the save process.
Loop plays no role in the save process.
Pack will compress your file using the compression method internal to Velvet Studio.
There is an option within the tracker’s configuration which chooses the compression
method; currently, however, there are only one available. If disk space is tight, enabling
this function can dramatically decrease your files size. This process takes slightly longer
than a conventional save.
Name does not directly play a role in the save process.
Auto enables a function that gets the save name from what is found in the NAME user
field, (for Modules) found in the Main Screen. This means that, if your song’s name is
"Powers that Be," you’ll most commonly see within the file names user field,
"Powersth.AMS" in the case of saving a module.
7.1.4 Renaming a File
To rename a file, you select the file you want to rename and click on the Rename button.
Then simply type in the new name within the user field.
7.2 Toggle Piano (Alt-G)
Toggling the Piano paints a keyboard you can trigger with your mouse. You can change
which octave range the
keyboard responds to by
clicking on one of the two
buttons to the left of the
piano, Hi, or Lo. This feature
Figure 13
is handy for recognizing the
corresponding key on a
keyboard, the current note, in
the current track, are corresponding to.
- 16 -
Velvet Studio User Manual
7.3 Toggle Equalizer (Alt-Q)
Toggling the Equalizer allows
you to view the activity on all
your tracks, like a volume
indicator, or VU Meter. By
examining Figure 14, it is
obvious that the numbers that
are arrayed across the top of the
Equalizer indicate specific
tracks.
Figure 14
In our example, track 4 is Struck, as designated with a
large "X". You can strike a track by clicking upon it
once. This mutes (turns off) all activity present within the
track.
In track’s 5 and 8, a Key icon are present. When you key
a track, you are "locking" it; a safe-guard against making
a horrendous mistake. The track’s that are keyed can not
be edited; they remain static. This feature is useful for
editing drum-tracks.
If you do not like the look of the default Equalizer bar,
you may edit it in the Config > Equalizer Editor as shown
in Figure 15.
Figure 15
7.4 DOS Shell
When you use the DOS Shell, you access DOS. Simply type "EXIT" at the command
prompt to return to the tracker. Unlike ’other’ trackers this DOS Shell actually has a good
chunk of memory for you to use.
7.5 Exit Tracker (Alt-X)
Exit Tracker end’s your session with Velvet Studio.
- 17 -
Velvet Studio User Manual
8. LOWER BLOCK FUNCTIONS
8.1 Protracker Pattern
For those of you familiar with Protracker, the module tracker which set the standard for
all others for too many years (on the Amiga platform), Velvet Studio allows you to have a
Protracker style track layout.
8.2 ScreamTracker Pattern
And on the other side of the tracker spectrum, ScreamTracker set the standard for all
other trackers on the PC platform. Basically, you’ll have to make up your own mind as to
which one suits you better. If you are familiar with one, and not the other, the ability to
choose the track layout helps shorten the learning curve.
8.3 Editing a pattern
The Edit Board is the big thing on the lower part of the screen, filled with digits and
characters (provided that you’ve loaded a demonstration module). This Edit Board
displays the NOTE data and the COMMANDS that the song consists of. A song contains
notes and commands fitted together in PATTERNS. These patterns are then accessed in a
special order as written in the POSITION LIST. The musical notes from C to B are
represented by the same letter and an octave number, like for example C-3, E-2 or G-5. A
single channel in a pattern can look like this:
00
01
02
03
E-4
--A-4
D-5
010000
000000
010209
010103
When this channel is played, Velvet Studio will first play the tone E at the fourth octave,
then tone A, also at the fourth octave, and at last note D at the fifth octave. The first two
digits contains the instrument number, the following two the command number and the
last two digits are the command input data. (The different commands will be described
further down.) If you didn't understand that, have a look at this:
02 A-2 010209
(09) This is the command input.
(02) This is the command (slide down).
(01) This is the instrument number.
(A-2)This is the note and the octave.
(02) This is the position in the pattern.
- 18 -
Velvet Studio User Manual
If the command is 00 and the command input is 00 then the tone is played without any
special effect, just like it was sampled, at the correct note and octave. If the sample
number is 00 then the current note will be played with the previously used instrument (on
that channel) and with the same settings unless a new command overrides it. To enter
notes in the Edit Board, or to simply play an instrument, the computer keyboard can be
used to simulate a real synthesizer keyboard. The layout is built like a normal piano,
starting with the key Z as the lowest C tone. Here is an explanation of the NOTE KEYS:
Normal synth keyboard:
C#
C
Computer keyboard:
S
Z
D#
F#
G#
A#
D
E
F
G
A
B
D
X
C
G
V
H
B
J
N
M
When pressing the V key you get the tone F, for the key H you get the halftone G# and so
on...
You can also access a higher octave by using the following keys instead:
Computer keyboard (high):
2
Q
3
W
5
E
R
6
T
7
Y
U
The other keys are not mentioned here, like O or P, work just like the keyboard continued
to work as a synth, so it’s possible to reach even higher octaves by just playing on. But, as
Velvet Studio has got ten octaves you cannot reach them all at the same time without
switching between them. If you use the mouse then you can increase the octave number
by pressing it with the LMB and decrease it by using the RMB. Otherwise you can use
the keys F1 to decrease or F2 to increase the number.
Now to edit the current pattern you choose a sample instrument, either by using the
mouse and picking one from the instrument list in the upper right corner, or using the
keypad key shortcuts that are explained in the appropriate chapter).
If you press some keys on the keyboard you can hear the instrument sound in your
speakers. Now press the EDIT gadget, or the spacebar key for a shortcut.
Now, if the screen border changed colors, you entered the Edit Mode. In this mode you
can enter notes into the pattern data, in any channel you like. You can move around in the
pattern by using the arrows keys, or by clicking with the mouse anywhere in the data and
the cursor will automatically move to the desired position.
Try pressing some of the note keys and study how the pattern is filled with note data.
If you press the PLAY PATT gadget you can listen to what you just composed.
By pressing the STOP gadget the playing will stop. The EDIT gadget will do the same,
and at the same time take you into the Edit Mode.
- 19 -
Velvet Studio User Manual
Now (in Edit Mode) move the cursor to the digits to the right of the notes. Leave the
sample number intact, but try command 01 with input 20. This command is called Note
Slide Up, and with speed 20 things will sound pretty weird.
If you didn’t really understand it, try to make the line look like this:
00 C-5 xx0120
Speed is 20
Command is 01, which is Note Slide Up
Don’t change this, because it’s the sample number
C-5 is mostly the normal sample frequency
This is only the position and can’t be edited
Now play this again and listen to the difference. Hopefully you heard how weird it
sounded.
Also try to write some notes in the other channels with other instruments to hear how
Velvet Studio plays them at the same time. Notice that only six channels can be seen at
the same time on screen. If you use more than six channels (up to 32) you can use the
drag bar at the bottom of the screen to scroll to the next channels, or just move the cursor
out of the screen (using the cursor keys or TAB) and new channels will appear. The
number of channels can be changed by pressing the mouse on the number and entering a
new value or by pressing one of the arrows.
You can mark an area of the pattern by pressing CAPS LOCK simultaneous with any
arrow key, or by pressing the left mouse button within the pattern area and drag the
mouse. When you’ve marked an area, you can copy it and paste somewhere else. Check
the keyboard shortcuts in the Appendix for full information.
Above each channel there is a small panel used for changing the
channel status (see Figure 15b). By changing the value in the edit
box, you can display any channel in the pattern. Just type in the
number of the channel you want to view, and it will be displayed.
Figure 15b
The digit to the left is the current volume for the channel. When a song is playing you
will be able to see the volume change as instruments play in the channel.
If you press the small button to the right of the edit box it will change states between M
for muted, L for locked and empty for normal state. If muted, the channel will not output
any sound. If locked, it will not be editable. The button to the far right indicates which
command that is currently active. You can change it by pressing either mouse button.
- 20 -
Velvet Studio User Manual
Tip: By pressing the mute button with the right mouse button you will mute all channels
except the channel you selected. This is a useful shortcut when you want to listen to a
specific channel that you are currently editing without having to press the Mute All gadget
and then enable the channel.
There are two gadgets (shown in Figure 15c) used for muting or unmuting
all channels.
8.4 Sample Editor (Alt-S)
Figure 15c
When you enter the Sample Editor, it covers your view of the tracks. For
the purpose of simplicity, the Sample Editor can be thought of as three zones.
8.4.1 Wave form Field
Our top zone shows the Wave form of your sample. On the far left of the screen, a loop
point exists, with a box facing left. To the far right, another loop point resides, with it’s
box facing right.
When you play a sample, a red ’position’ indicator crawls across the sample. You can
highlight a block of the wave form by using your mouse and clicking your left mouse
button while dragging the pointer over the area you wish to highlight. You can change the
loop points of the sample by clicking on the left or right boxes of each loop position and
placing them where you want. Note that the left box can not be placed beyond the right
box, and vice versa.
8.4.2 Bottom-Left zone
The Bottom-Left zone has a ton of sampling functions and features.
Play Plays the sample from the beginning.
Tune Fork Sets a fixed tone to judge one sample versus another to
see if the pitch is the same. The tone played is C-5 at 16726 Hz.
All, Area, Screen and Offset are buttons that affect options such
as Play, Cut, Copy, Paste, Volume, Clear, and Zero.
These buttons are fairly apparent: When the All button is pushed,
and you Play the sample, the entire sample is played.
When the Area button is pushed, you’ll only play the marked area
instead of the whole sample.
- 21 -
Figure 16
Velvet Studio User Manual
When the Screen button is pushed, only the sample displayed within the Wave form box
is played.
The Offset button is used to play the sample from the current location of the red line.
Note that there are large + and - buttons that are also a part of Row 1; push + and the
sample displayed in the Wave form box expands (zooms in); likewise, push - and the
sample in the Wave form box zooms out.
8.4.3 Sample view functions
View All Expands the view of the sample in the Wave form box
quickly to see the entire sample after zooming a lot.
Zoom Area Used in conjunction with the mouse; highlight an area
of the sample, and press Zoom Area; the Wave form box is filled
with a zoom in of the area you highlighted.
Zoom Back Reverses the process of any Zoom command, allowing
you to step back through your work.
Undo Simply undoes what you just did to the sample. A
very useful (and used) button!
Figure 17
Draw Allows you to edit the actual wave form within the Wave form box. Draw is useful
for editing zoomed portions of the sine wave. When you push the Draw button, it remains
depressed, so you have to click on it again to turn the Draw mode off.
8.4.4 Sample edit functions
Cut, Copy, and Paste, are all commands that must be used with block commands (using
the mouse).
Clear asks you if you want to clear the sample. Obviously, clicking on yes clears your
wave form. You can also use Clear to clear a specific portion of the sample.
Zero Works in much the same way as Clear; allows you to zero the entire
sample, or highlight an area of the sample and zero it out. Note that Clear
deletes a portion of the sample, while Zero flat-line’s it.
Keep Allows you to ’keep’ a highlighted amount of wave form as the main
sample. Keep deletes everything around it, and the block you highlighted
becomes the sample.
Figure 18
- 22 -
Velvet Studio User Manual
8.4.5 Sample
When you press Sample, a box opens up which has a left and right scope (oscillator), and
equalizer bar. On the left side of the box are the commands for your internal CD-ROM
drive, with the buttons play, pause, stop, forward, reverse, forward track, reverse track,
eject, jump, save, and volume.
The center has the sample information, with sample rate, set at 16726, which can be set
manually, or according to a desired pitch. To the bottom of this is the Peak indicator,
which shows the highest sampled amplitude. To the bottom of that are the stereo left and
right volume levels, or the MONO volume level.
The right of the Sample box contains the options, Scopes, which turns the scopes on or
Figure 19
off, Equalizer, which again turns the equalizers on or off, Stereo, which determines if you
are sampling in MONO or stereo mode, 16 Bits, which tells if you are sampling in 8-bit
or 16-bit mode, Line In, Mic, and CD Input determine the source of your recording
material.
The very bottom buttons of the Sample box are Sample CD, which you push when
sampling something from your internal CD player, Sample, for all other sampling
options, and Exit, to get back to the Sample Editor.
8.4.6 Resample
Resampling allows you to ’pitch shift’ the sample from one note to another.
- 23 -
Velvet Studio User Manual
8.4.7 Volume
Is that sample of yours too loud? Too soft? Whatever it may be, you can use the Volume
feature to change the level the sample takes, from too loud to ’normal’ (depending on your
definition of it), or too soft to too loud; whatever sound level your looking for in the
sample. This feature is also handy for making bizarre wave forms, say, a chaotic string
section, where the volume goes about in random ways. Mark an eighth of your sample,
and edit the volume so it is soft. Then, go to the next eighth and make it rip-roaring loud,
and so on. Of course, you don’t have to do this, but it’s fun, if not musically wise.
8.4.8 Effects
Is your sample somewhat bland? Want to spice it up a bit? Their are a multitude of
effects to apply to your work-- Chorus, Crossfade, Crowd, Cucumber?, Echo, Vibrato,
Time Invariation, Strange Sounds, Super Echo, Slowdown, Slow up and down, Robots,
Pitch Curve, Pitch Up, Pitch Down, Reverbs, Reverse, Flangers, and variations of each
one listed. You also have the ability to make your own effects. There are individual
effects, in the upper-right box, and multiple effects, in the larger left box. In each list, you
have the ability to edit new effects.
Apply an effect
When you apply an effect to your sample, you have the ability to preview what the
sample will sound like in advance. If you push the preview button with your left mouse
button, the effect engine will just preview a part of the sample, but if you use the right
mouse button it will calculate the whole sample. You can also use the right mouse button
to click direct on the effect name for a preview.
Create multiple effects
You can combine many single effects to one multiple effect. This is very useful if you
want a more powerful effect. Choose the different effects in the effect list and press
“ADD MULTI” or just double click on the names. The effects that you have chosen are
shown in the list box. If you want to save it as a multi effect; press the “SAVE TO LIST”
button.
When you have created some different multiple effects that you are pleased with; press
the “SAVE TO DISK“ button.
- 24 -
Velvet Studio User Manual
Figure 20
Create single effects
It is also possible to create your own effects. Simply press the new button in the upper left
corner and another screen will be shown.
The whole effect engine in built up of different voices. A voice is simply a copy of the
sample, but this copy can be modified in many different ways. All the different voices can
also be mixed together so that you can hear all of them at the same time. This may seem
to be a little bit hard to understand, but when you have worked with the effect editor for a
while it’s quite logical.
Each voice can be modified in four different ways; Delay, Pitch, Volume and Time
compress. The delay is the same thing as it sounds. You can decide in micro seconds for
how long the delay of the voice should be. The Pitch function is a little bit more complex.
This function changes the frequency of the voice. In the “Time comp./ real pitch” part
you can choose whether you want the pitch to be time invariant or not. When the time
- 25 -
Velvet Studio User Manual
invariant option I selected, you can change the frequency of the sample, but the sample
will remain the playing time. The volume function simply changes the volume of the
sample and time compress is the opposite to real pitch. It changes the playing time, but
keeps the same frequency.
Figure 21
Top part
In the top of the screen you can write in a name of the effect. Below that there is a gadget
where you can change the number of total voices. This is how many voices you would
like to hear at the same time.
Smooth part
Then you have a part which is called smooth. You should use this function to improve the
sound quality when you use real pitch or time compress. Otherwise this function should
be turned off.
Voice break part
The part named voice break is used to determine the size of the calculated sample. There
are two different ways to break the sample; time variant and time invariant. Time variant
is the most common. If you create simple effects like vibrato, you usually choose “End
- 26 -
Velvet Studio User Manual
of sample”. In this case you write in how many percent of the source sample you want the
target sample to be. “End of voice” can be selected if you for example create an echo.
Then you write in the most delayed voice as the voice break number. Then we’ve got the
time invariant break. This means that the target sample will get the size that it takes to
calculate one envelope part (How the envelopes works will be explained later in the text).
The envelope loop switch hasn’t got any effect on the sample if this switch is selected.
You can choose which envelope that should break by selecting either “after delay”, “after
pitch” or “after volume”. You should also decide which voice that is activated.
Master part
Below that we’ve got the “Master part”. Here you can type in the master delay, pitch and
volume for each voice. To the right you see a graphical window which shows all the
voices’ master selections. If you click on this window with the left mouse button you will
change the data directly, but if you use the right mouse button only one voice is selected.
Miscellaneous options
The section at the bottom of the screen is divided into two different parts. With the
buttons to the left you select which information that should be shown in the lower part.
You can choose between “Delay envelope”, “Pitch envelope”, “Volume envelope” and
“Time compress / Real pitch”. To the right of these buttons you have three other
functions. “Voice repeat” is what it sounds like. When a voice have reached the end of
the sample it starts from the beginning again. The “Feed back” function is a little bit more
abstract. You should use this function when you create different echoes, so that the effect
gets a little bit richer sound. “Bwd Direction” simply makes the voice to go backwards
instead. In the “Voice start offset” you can type in where you want the voice to start. If
you for example enter 100% the voice will start at the end. By also selecting “Bwd
Direction” you have created a voice, which will play a sound backwards.
Effect envelopes
The three envelopes Delay, Pitch and Volume look almost the same. With an envelope
you can change the behavior of the effect exactly as you want. These envelopes are all
time variant, which means that you edit everything in micro seconds. Therefore it’s very
important that the sample rate in the sample editor is entered correctly. The whole effect
engine is based on that frequency.
In the left part of the effect envelope editor you can see six different edit boxes. They are
the same for all three envelopes, except for the value box. For delay it’s in microseconds,
for volume it’s percent and for pitch it’s a unit called hf, which stands for half notes. With
edit box “NR. of pt.” you can add and remove points in the envelope. The result is
shown in the black field to the right. It’s quite hard to edit an envelope with only the edit
boxes and therefore you can click and drag on the dots that are connecting the curves
together. If you use the left mouse button, only the selected point will be moved, but if
you instead press the right, everything behind this point will also be affected.
- 27 -
Velvet Studio User Manual
To the right of the black edit field you’ve got icons of different curves. These are related
to the selected point. Below that there is an option “Loop”. If you activate it you will
notice two new lines in the edit field. You can move these lines by changing in the edit
boxes “Loop start” and “Loop end”. There are also some arrow symbols with plus and
minus sign. This is a zoom function which hasn’t any effect on the sound. It’s only there
for simpler editing.
Preview and apply a new effect
When you have edit and want to hear how it sounds the effect engine offers you a
flexible preview function. This function works the same way as multiple effects (see
Apply an effect earlier in the text). The Apply function applies the effect directly without
saving the effect in the list.
The effect engine is a complex function with which you can create almost any effect you
want. The default effects that are included in Velvet Studio are just a sample of what you
can do with it. The best way to learn how it works is to test the different function and to
look at the default effects and see how they are created. Play with the functions and have
fun.
8.4.9 Fix Loop, Mix, and DC
Loop editing is a pain and Fix Loop helps you smooth that annoying click that won't go
away. Simply highlight an area that would sound better within the loop, and press the
button. The area you choose will swap and smooth itself over the area around the rightmost loop point. Mix allows you to overlay the clipboard (what is in memory) onto the
current sample. DC allows you to flip a particular area of the wave form up, or down,
center the block, or do other weird things to it. Experiment with DC, for it might lead you
to something you like a lot.
8.4.10 Loop types
In Row 5, their are 5 push buttons for different loop types, No Rep, Fwd Rep, Bwd Rep,
Bidi F Rep, and Bidi B Rep. Their are also two other functions, Mark, and Bits. First, the
looping options. No Rep (No Repeat - no looping). Fwd Rep
(forward repeat, standard form of looping). Bwd Rep (backward
repeat, is the opposite of forward). Bidi F Rep (Bidi Forward
Repeat, creates a forward Ping-Pong effect). Bidi B Rep (Bidi
Backward Repeat, plays the sample in reverse, and like wise,
repeats in a Ping-Pong way, only in reverse). Mark may be used in
conjunction with Offset, and positions the block in reference to the
Figure 22
loop points and where the red, play-indicator bar is. (The red bar
may not be red, depending upon your choice of colors.) There are a
number of different things to do with the Mark function, so you can
- 28 -
Velvet Studio User Manual
experiment. Velvet Studio is a simple matrix of complex features, and Mark is another of
them that saves you, the tracker, time. Bits, allows you to change your sample between 8
and 16-bit resolution. When you decide to change the sample’s resolution, you can
convert the sample data, or not. Likewise, this process works in reverse, changing 16-bit
samples into 8-bit ones.
8.4.11 Edit boxes in lower-right zone
Samp: Sample
Indicates which sample in the sample list you are viewing.
Pos: Position
Indicates where in the sample the play indicator resides. Typically, the play indicator is a
red bar. (You know, the one that scrolls across the wave form really fast when you press
Play, or a key on the keyboard.)
Value
Value has a maximum value of 255 for 8 bit samples and 65535 for 16 bit ones.
Smp Size: Sample Size
Shows how large the sample is in samples (not bytes).
Mrk Size: Mark Size
Shows how large the highlighted block is.
Smp Rate: Sample Rate
Shows what the base sample rate is.
RepBeg: Repeat Begin
Shows the byte position of the repeat start marker, the line with the box to the left.
RepEnd: Repeat End
Shows the byte position of the repeat end marker, the line with the box to the right.
C-4 Rate
The middle C rate for the sample. This can be handy for tuning disparate sample sources
to each other. Use this with the Tune Fork function to speed the process.
FineTune
From -8 to +7, you can alter the pitch of the sample in subtle ways. This is also useful in
setting pitch’s correctly against other samples.
- 29 -
Velvet Studio User Manual
PanPot: Pan Position
The positions within the panning field range from -7 to +7, hard left to hard right,
respectively. 0 represents center channel, or, ’MONO’ (although MONO in terms of
stereo arrangement is something completely different than true monophonic sound).
Volume
Volume, typically represented in hexadecimal, represents the "base" volume level for the
sample. Ranges in hex from 00h to 07Fh, in decimal from 0 to 127. Velvet Studio allows
twice the volumatic sensitivity of other trackers, making for smoother fading in of chords,
etc.
8.4.12 Desc Editor (Alt-E)
The Description Editor allows the composer of the song to type long-winded passages
about their greatness, with lots of room to greet everyone, leave your address, and, if
you’re patient enough, draw your own ASCII art. The editor has line and word wrap,
which are useful text
editing functions. The word
wrap works as in other text
editors, where words wrap
at the edge of the line, but
do not wrap back if text is
deleted.
8.4.13 Instrument
Editor (Alt-I)
Instruments are basically a
number of envelopes that
Figure 23
effect the sample in many
different ways. The concept
of instruments date back to the first line of affordable, professional, synthesizers. Yamaha
manufactured the first broad market synth, which spawned many other producers-- the
world had a taste of technology that they could use affordably to produce professional
sounding music. A prime example of a modern day synthesizer that uses the concept of
'Instruments', in lieu of how they are used in Modules, are the E-Mu Morpheus. The
Morpheus is a wonderful synth, taking up one rack space-- it's a pain to program, for it's
envelopes are all based in a Matrix shaped like a cube. You can route one signal to
anything else, one envelope to another, etc. Korg X5R's, Roland JV-880's, and just about
any modern synthesizer are similar in many ways, allowing the user to route a number
based in Velocity to PLFO (Pitch Low-Frequency Oscillator) which is commonly used to
produce vibrato in samples. I.E., the harder you press the key, the more vibrato you hear.
- 30 -
Velvet Studio User Manual
The instruments modules
such as FastTracker 2,
Impulse Tracker and
Velvet Studio use are not
as advanced as what are
on current synthesizers,
but they suffice for now.
However, in this case,
Velvet Studio has a better
and more flexible system
of editing the envelopes
within the instrument than
any of the currently
available music trackers.
Figure 24
The basic Velvet Studio instrument consists of one sample, and one volume, panning,
and vibrato envelope.
Volume Envelope
Your sample can have its own attack and release velocities. The generic model, what you
see when you first enter Instrument Edit mode, consists of four linear points; 1
representing attack, 2 representing decay, 3 positional of sustain, and 4 positional of
release. You can adjust the points on the envelopes by clicking and dragging them around
in the envelope box. Dragging them with the LMB will only affect the current point,
while dragging them with the RMB will drag the entire end of the envelope. This is
useful if you have created an end of the envelope that you want to keep, but you want to
change the beginning.
Value
X
X
X
X
Time
To add or delete a point, press the Up/Down buttons on the Points field respectively.
Pressing Up will add a point at exactly halfway between the current point and the next
point, and pressing Down will delete the current point.
Value indicates the ’strength’ of the point, on a scale of 00h to 07Fh. Time can be thought
of as the amount of time between each point. Time is directly reliant upon Envelope
Speed, which determines the scale time goes forward. I.E., faster or slower. A value of
zero will cause the current song BPM to be used instead, which will make the envelope
song-speed dependent. You can fine-tune each point value by selecting the point, and
- 31 -
Velvet Studio User Manual
modifying the fields directly. Pretty much, it takes time to gain experience with crafting a
useful envelope, so practice. Your songs will sound better with properly constructed
instruments.
The top On button to the right of the envelope box toggles whether the envelope is active
or not.
You can also sustain a point until a KeyOff is reached in the pattern; i.e.: the envelope
will stop at a specified point and not advance any further until a KeyOff is encountered.
To activate Sustain, select the point which the envelope should halt at in the Sustain field,
and
press the On button to make this active.
You can also specify a part of the envelope which should be looped; to do this, select the
points of the envelope which represent the start and end of the loop, and press the On
button next to the Start Loop field. If the B button located beneath the field is activated,
the
tracker will Break out of the loop when a KeyOff is encountered.
The type of curve which a point can produce to the next point can also be changed. The
default curve is a line curve, but a positive and negative parabolic curve to the next point
can also be used instead. Press the appropriate curve beneath the Curve button to change
it.
There are pre-defined envelopes available for your use. Click on one of the Pre-defined
buttons to choose them.
Often-used envelopes can be temporarily saved by pressing a User defined button with
the right mouse button. Pressing the left mouse button on these buttons will recall the
saved envelope. You can use these buttons to copy envelopes from one instrument to
another.
Tip: To permanently store user a user defined envelope to disk, use the menu choice
Config, Save Config after having stored it temporarily.
The Scale buttons can be used to adjust compress or expand the envelope, both
horizontally and vertically. It’s hard to describe, so experiment with them to see how
they work.
The fadeout is used in conjunction with the normal volume envelope, to fade out a sound
after a KeyOff is encountered. The value decides how many frames the fade will use until
the sound is completely faded away.
- 32 -
Velvet Studio User Manual
Note: When experimenting with the envelope functions, try using a looped sample
rather than a non-looped one. Envelope functions will of course work on non-looped
samples as well, but it’s easier to hear the effects on a looped sample.
Note: To enter a KeyOff in the pattern, press ‘, the tilde key (it’s located to the left of the
number 1 key on most keyboards).
When you press a note on your keyboard, the sample is played according to the volume
envelope-- if point 1 is located high, the attack, or how long the sample takes to ’fade’ in,
is sharp-- short. Likewise, if point 2 is low, while point 3 is somewhere in the middle,
you’ll experience a whooshing sound, as the sample is at it’s sustain point, positioned
higher than 2 (louder than 2). When you let go of the key, the release point, or, in this
case, point 4, is triggered, and depending upon the slope of the line, it could take a long
time to ’fade’ out, or, it could simply maintain a constant volume level, until a note-off
command is triggered.
Panning Envelope
In many ways, the Panning Envelope are very similar to Volume, but with different
effects. The default envelope shows many points-- 12, forming an inverse cone. As it
stands, you would want to alter it from it’s basic inception, for a wiggling chord just
doesn’t sound right.
The envelope itself is constructed exactly the same as Volume, but effects panning.
Therefore, once you have some experience with the former (Volume), editing the panning
positions should be a breeze.
Vibrato Envelope
Exactly like the other envelopes, in most respects; slightly different, due to the ability to
choose four different wave forms that affect the vibrato of your instrument. This is
especially useful with samples such as clarinet’s, oboes, and siner’s (you get the point).
Using one of the four predefined vibrato wave forms, Sine, Square, Up Saw, and Down
Saw, your sample can have vibrato as an integral function, rather than using an effect
within the track editor. Also added to the envelope are the Vibrato Amplifier, which has
four levels, ranging from 0 to 3. This effects how dramatic the vibrato will be for your
sample.
Multi-Sample Instruments
When you access the Instrument Edit mode, it allows you to load up to sixteen samples
into a ’matrix’ of sorts; you access each sample by assigning a key within the HI or LO
octaves (the large piano located directly above the Instrument Editor). Simply find the
tone you want to assign the instrument to; Example: A drum set using sixteen samples,
- 33 -
Velvet Studio User Manual
the eighth being the DistKick-- you drag your mouse cursor to the key you feel
comfortable with, in this case, G, and click on that key until the number ’8’ appears. It’s
really fairly simple. Now, when you select the instrument, every time you trigger G (HI
octaves, G-4) the DistKick will play. You can select the tone the drum is triggered at by
choosing the semitone you prefer in the Rel. Note box.
Shadow Instruments
An interesting innovation Velvet Studio incorporates are Shadow Instruments. The
samples are totally unchanged (as found in a Multi-Sample Instrument) but the envelopes
and pitch rates can be completely different.
In other words, a shadow instrument uses the sample from another instrument, thus
taking nearly no space at all of your memory. As quoted from the online help text within
Velvet Studio:
"This is extremely useful if you have limited sample memory, such as if you are
restricted by a memory-based sound card."
Make sure you have an Instrument slot open for the new Shadow-- click on the Shad
button located beneath the sample listing; your pointer will have an S beside it: click on
the instrument you want to shadow, and shazam!, the Shadow appears. Edit away to your
hearts desire. Depending upon memory available, as many Shadow’s may be created as
you desire.
Toggle Zoom (Alt-Z)
Zooming in on a track allows you to view all of the effects at once. Obviously, zooming
out shows only one effect, the tone, and the sample number. Therefore, zooming in shows
the aforementioned, along with the rest of the effects. Velvet Studio allows you to have
up to seven effects at work at one time.
- 34 -
Velvet Studio User Manual
9. LEFT BLOCK FUNCTIONS
The upper left corner has a bar of numbers indicating the current position, pattern, total
song length, speed (SPD), and beats per minute (BPM) of the current song.
9.1 Pattern Info
You can toggle the Left Block view from Pattern Info to Sample Info: the difference
being, Pattern Info shows you the total number of channels, commands, rows, patterns,
and the current sample and/or instrument selected.
9.2 Sample Info
Sample Info shows you the specifics of each sample-- length, repbeg, repend, C-4 rate,
fine-tune, panpot, and volume. These options are also found within the Sample Editor.
9.3 Position Editor
Position Editor allows you to edit the flow of the composition. You can insert patterns
anywhere you want, while deleting ones that do not work for you. Simply click on INS
(insert) or DEL (delete) to, well, you know-- insert or delete a pattern. You click on the
second row of numbers, underneath the title Pattern, to edit in which pattern the insert is.
- 35 -
Velvet Studio User Manual
10. THE BLOCK OF COMMANDS
10.1 Split Kbd: Split Keyboard
This allows you to ’split’ the keyboard, or range of notes,
over different Zones. Each Zone can use a different
sample, and be set at it’s own semitone. This feature is
especially useful for those composers who love to use
those Zen Wave’s to death, or, for drum kits, sound effect
kits, etc. Pressing the button Active turns the Split
Keyboard on. Like a light switch, press the button again
and it turns it off.
Figure 25
10.2 Clear
"What do you want to clear?" Song, Instrument, or All-- everything?
10.3 Optimize
Optimize is actually quite useful-- it removes or compresses the unused samples,
channels, patterns, and instruments, freeing up memory and making the file size of the
final product (your song) smaller. You can remove unused channels, remove or compress
unused commands, remove or compress unused patterns, and remove or compress unused
instruments. You can choose to have the optimization only affect the current pattern you
are working on, or the entire song. Be sure that you save your work before optimizing.
You might optimize away something you regret!
10.4 Echo Editor
You can add a level of echo to your song by utilizing the Echo Editor. Instead of the
tedious work of manually inserting the echo, this feature does it automatically.
Select the channel you wish to add the echo to, and figure the gradient of Delay and
Rate (explained further down). Then, choose the Decay amount for each gradient (Delay
and Rate), each based at 0% to 200%. Note that utilizing an Echo can muddy your song;
adding too many layers of unwanted sound will cause horrible aliasing-- just as with
Reverb;- just a reminder. Applying the right amount of Echo can make particular parts of
a song, such as the Moog accompaniment, sound really sweet.
The From field is the channel which you wish to echo. It uses zero-based numbering, so
to find out which is the channel number you wish to echo simply copy the channel
number above the patterndata.
The To field represents the channel which will be used for the first echo. If you set this
field to 2, the echo will be placed on channel 2 (zero-based).
- 36 -
Velvet Studio User Manual
The Chan # field is the number of channels to use for echoing. For example, if you set the
To field to 2, and the Chan # to 3, the tracker will echo to channels 2, 3 and 4. The Delay
field indicates how much to delay the first echo. The tracker will delay the initial echo by
one row, plus the number in this field. The Decay percentage next to this field is how
loud the delayed echo should be, as a percentage of the original volume. So if you set the
delay to 5, and the decay to 67%, the tracker will set the initial echo to occur 6 rows later,
at around 2/3 of the original volume.
The Rate field, along with the other decay field represents how fast you wish to make the
echo fade out. This affects the initial echo and not the original volume; the decay field is
the percentage of the last volume echoed, and the rate field is the number of rows plus
one on which the echo will take place. So for example, if you have a rate of 1 and a decay
of 33%, the tracker will "re-echo" every 2 rows, and that re-echo will have a third of the
last echo’s volume.
You can also save and restore echoes you’ve made by pressing the right mouse button on
the digits to save the current echo settings in that slot, and pressing the left mouse button
to restore them. The echoes are saved in the configuration file. If the Wrap button is
pressed the echo engine will wrap the echo to the beginning of the pattern if it goes
beyond the end of it.
10.5 Info
Shows what type of Sound card you are using; in the case of Gravis UltraSound users,
total GUS memory, total free GUS memory, and how much GUS memory is being used.
Info also shows how much XMS memory you have, how much is free, and the amount of
XMS presently being utilized. If you a Registered User, your Serial Number shows up.
10.6 Undo
"$@*%! I didn’t mean to do that!" Thankfully, there’s the calcium enriched flavor of
Undo to fix your problem! It costs your heart absolutely nothing, and might save you
money! Use Undo today!
10.7 Piano: (Alt-G)
The Piano button toggles the piano box. You can play the piano by clicking on keys, or,
you can see what note you are triggering corresponds with a real keyboard. If you are
using a MIDI keyboard (as defined in the Options menu, explained later) you can trigger
notes that way.
10.8 Play Song: (Right Ctrl)
Click on this button or use the right ctrl key and your module plays.
- 37 -
Velvet Studio User Manual
10.9 Play Patt: Play Pattern (Right Alt)
Click on this button or use the right alt key and the current pattern plays.
10.10 Rec Song: Record Song (Right Shift)
Click on this button or use the right shift key and the tracker records what you are
playing, similar to a MIDI sequencer. Note that, unlike a MIDI sequencer, playing chords
will trigger notes in a linear way, one after another, on opposing tracks. However, this
method of developing a module is useful for playing a lead over the rest of your song.
Simply go back through the track and fix the timing errors-- apply effects, and add or
subtract notes where you feel they best belong.
10.11 Rec Patt: Record Pattern (Shift Shift)
The same as Rec Song but affecting the current pattern only.
10.12 Stop
Stops all activity, be it module playback, or sample playback.
10.13 Edit: (Spacebar)
Invokes the track editor. You will now be able to edit the information within the tracks.
Your screen will be highlighted by, (depending upon your color scheme) a white bar.
10.14 Equalizer: (Alt-Q)
Clicking on the button toggles the Equalizer on or off. For more information, look to the
previous explanation of the Equalizer, located within the Upper Block Section.
10.15 Song Specific Settings
You can change the frequency system utilized for pitch through this option box. Linear
Freq., and Amiga Freq. (Frequency) are the two choices of pitch modulation. Strikingly
enough, a linear frequency denotes a constant rate of change between two pitches, as
witnessed with a portamento to note command. The speed at which the frequency
changes, stays the same for all pitches within all 10 octaves. Amiga frequency operates in
a nonlinear way. From the Song Specific Settings dialogue box, you can also change the
base Speed and BPM (beats per minute) of your module.
- 38 -
Velvet Studio User Manual
11. CLEAR SECTION
Overview
True enough, Clear does exactly that to
the different facets listed below.
Therefore, an elaborate explanation of
each is unnecessary.
Song
Clears the patterns of the module.
Instruments
Clears the instruments of the module.
Figure 26
Everything
Kills everything.
Current Instrument (Key Pad Delete)
Kills selected instrument.
Inst. and Sample Names; Instrument and Sample Names
Clears both the sample text and data.
Pattern Names
Wipes the Pattern Names away.
Channel Names
Washes the Channel Names clean.
Description
Erases the Description (accessed by Alt-E).
- 39 -
Velvet Studio User Manual
12. BUG FIXES
We have bugtested Velvet Studio for a very long time and we hope that it doesn’t
contain many serious bugs. But as you probably know it’s impossible to make a
program that hasn’t got any bugs. Bugfixed versions may be downloaded from our
homepage: http://www.velvet.home.ml.org/
- 40 -
Velvet Studio User Manual
13. APPENDIX A - Glossary
A
Additive Synthesis
The process of constructing a complex sound using a series of fundamental frequencies
(pure tones or sine waves). Each of the fundamental frequencies usually has its own
amplitude envelope which allows independent control of each partial(harmonic). Pipe
organs or Hammond organs are both instruments which are based on additive
synthesis.
ADSR
Abbreviation for Attack, Decay, Sustain, and Release. These are the four parameters
found on a basic synthesizer envelope generator. An envelope generator is sometimes
called a transient generator. The Attack, Decay, and Release parameters are rate or ime
controls. Sustain is a level. When a key is pressed, the envelope generator will begin to
rise to its full level at the rate set by the attack parameter, upon reaching peak level it
will begin to fall at the rate set by the decay parameter to the level set by the sustain
control. The envelope will remain at the sustain level as long as the key is held down.
Whenever a key is released, it will return to zero at the rate set by the release
parameter.
Amplifier
A device which increases the level of a signal.
Amplitude
Amplitude is a term used to describe the amount of a signal. It can relate to volume in
an audio signal or the amount of voltage in an electrical signal.
Amplitude Modulation
A change in the level of a signal. For example, if a Voltage Controlled Amplifier
(VCA) were being modulated by a Low Frequency Oscillator (LFO), the result would
be a periodic increase and decrease in the audio level of the signal. In musical terms
this would be referred to as Tremolo. The abbreviation of Amplitude Modulation is
AM.
Analog
Data (signal) presented in a non-digital, continuous form.
Wave form
Wave form that does not have a repeating pattern.
- 41 -
Velvet Studio User Manual
Attack
The first parameter of an envelope generator which determines the rate or time it will
take for the event to reach the highest level before starting to decay.
Audible Range
The range of frequencies that the human ear can hear. A healthy young human can
usually hear from 20 cycles per second to around 20,000 cycles per second (20-20,000
Hz), less after prolonged exposure to Heavy Metal music or Opera.
Auto Correlation
A process that determines optimum start and ending loop points to produce minimum
discontinuity.
Binary
Of or based on the number two or the binary numeration system (base 2). Digital
computers use this form of numbering because the values of 0 and 1 can easily be
represented by an open or closed switch.
Bit
A Bit is a single piece of information assigned a value of 0 or 1 as used in a digital
computer. Computers use digital words which are combinations of bits. A Byte is a
digital word consisting of eight Bits. The Emulator III uses a 16 bit number to
represent a sound word. A 16 bit word can represent 65,536 different numbers.
Buffer
An area of computer memory that is used to temporarily store data.
Bug
An error in a computer program that causes it to work incorrectly. Very annoying.
Byte
A computer word made up of eight bits of data.
Chorus
A voice doubling effect created by layering two identical sounds with a slight delay
(20-50 ms) and slightly modulating the frequency of one or both of the sounds .
Clipboard
A temporary holding place in RAM for what you last cut or copied.
Copy
- 42 -
Velvet Studio User Manual
To make a copy of something, either a sound or segment, by selecting it and choosing
the copy function from the module menu. What is copied is placed on the clipboard.
Crossfade
To gradually fade out one sound while fading in another so that a seamless transition is
made between the two sounds.
Cut
To remove something, either a sound or a segment, by selecting it and choosing the cut
function from the module menu. What you cut is placed on the clipboard.
Data
Information a computer needs in order to make decisions or carry out a particular
action.
Decay
The second stage in an ADSR type envelope generator. See ADSR.
Decibel (dB)
A reference for the measurement of sound energy. The minimum change in volume
that the human ear can perceive. Named after Alexander Graham Bell. A decibel is
1/10th of a Bel. Delay A controllable time parameter giving the ability to start an event
only after a predetermined amount of time. The Delay function on the EIII allows you
to delay the start of a sound from 0 to 1.5 seconds from the time a key is pressed.
Depth
The amount of modulation. Sometimes called Amount, Width, Intensity or Modulation
Index.
Digital
Equipment that uses quantities represented as binary numbers. In a digital synthesizer
every aspect of the sound generation is handled as a numeric calculation. The digital
information is not audible and so must be converted to analog form by a DAC before it
is output.
Digital to Analog Converter (DAC)
A device which interprets Digital information and converts it to an Analog form. All
digital musical instruments must have a DAC so that we can hear their output.
Edit
To change or modify information. To change parameters or alter existing data.
- 43 -
Velvet Studio User Manual
Error Message
A message shown in the display to alert the user that an error of some type has
occurred.
Flange
An effect created by layering two identical sounds with a slight delay (1- 20 ms) and
slightly modulating the delay of one or both of the sounds. The term comes from the
early days of tape recording when delay effects were created by grabbing the flanges
of the tape reels to change the tape speed.
Frequency
The number of cycles of a wave form occurring in a second.
Glissando
A rapid slide through a series of consecutive tones in a scale like passage. On the
Emulator III arpeggiator, when two notes are played with glissando on, every note in
between the two notes will be played in a sequential order. Similar to portamento
except that the pitch changes in semitone steps.
Hertz/Hz
A unit of frequency equal to 1 cycle per second. Named after Heinrich R. Hertz.
K
Abbreviation for Kilo or 1000
Keyboard Assignment
The assignment of specific sounds to an area of the keyboard. For example, the lowest
octave could be drum sounds, the next octave could be an electric bass, the rest of the
keyboard could have various piano samples assigned to it.
LMB
Left Mouse Button
Loading
To transfer from one data storage medium to another. This is generally from disk to
RAM memory or vice-versa, as opposed to saving from RAM to disk.
Lock
To prevent data from being edited, discarded or renamed, or to prevent entire banks or
disks from being altered.
Looping
- 44 -
Velvet Studio User Manual
Looping is the process of repeating a portion of a sample over and over in order to
create a sustaining sound. The looped sound will continue as long as the key is
depressed. A sound is usually looped during a point in its evolution where the
harmonics and amplitude are relatively static in order to avoid pops and glitches in the
sound.
Low Note Priority
When more than one note is played on a monophonic synthesizer, only the lowest note
will sound.
M
Abbreviation for Mega or million.
Memory
The part of a computer responsible for storing data.
Merge
To combine or unite. To Merge means to combine sequences, sounds, tracks, MIDI
data, etc.
Monophonic
A musical instrument that is only capable of playing one note at a time. Music with
only one voice part.
Normalize
A digital processing function that increases the amplitude of a sound file until the peak
amplitude of its loudest sample reaches 100% of full scale.
Panning
To move an audio signal from one output to the other. Panning a sound between two
speakers changes the apparent position of the sound.
Paste
To put a copy of the contents of the clipboard (whatever was last copied or cut) in at
the specified insertion point.
Patch
Referring to a particular sound created on a synthesizer. Comes from the use of patch
cords on the original modular synthesizers.
Polyphonic
- 45 -
Velvet Studio User Manual
A musical instrument that is able to play more than one note at the same time. Music
with more than one voice part.
RAM
Acronym for Random Access Memory. The memory in a computer in a computer that
stores data temporarily while you are working on it. Data stored in RAM is lost forever
when power is interrupted to the machine if it has not been saved to another medium,
such as floppy or hard disk.
RMB
Right Mouse Button
Sample Rate
When digitally sampling a signal, the rate at which level measurements of the signal
are taken.
Sampling
The process of recording a sound into digital memory.
Tremolo
A cyclic change in amplitude, usually in the range of 7 to 14 Hz. Usually achieved by
routing a LFO (low frequency oscillator) to a VCA (voltage controlled amplifier).
Undo
Cancels the results of the last operation.
Vibrato
A cyclic change in pitch, usually in the range of 7 to 14 Hz.
- 46 -
Velvet Studio User Manual
14. APPENDIX B - default key map
14.1 Surveying Current Song
Shift ArrLeft
Shift ArrRight
Ctrl ArrLeft
Ctrl ArrRight
Alt ArrLeft
Alt ArrRight
Shift Arrup
Shift ArrDn
Ctrl Arrup
Ctrl ArrDn
Home
-
End
Arrows
Tab
Shift Tab
PGUP
PGDN
CTRL PGUP
CTRL PGDN
ALT PGUP
ALT PGDN
-
Decrease Current Position
Increase Current Position
Decrease Current Instrument
Increase Current Instrument
Decrease Current Pattern
Increase Current Pattern
Fast Decrease row
Fast Increase row
Fastest Decrease row
Fastest Increase row
First press-- Go to first row.
Second press-- Go to first channel
Go to last row
Browse the pattern data
Next Channel
Prev Channel
Jump 8 notes Up
Jump 8 notes Down
Jump 16 notes Up
Jump 16 notes Down
Jump 32 notes Up
Jump 32 notes Down
14.2 Playing and Recording Current Song;
Enter
Backspc
Right Ctrl
Right Alt
Ctrl Ctrl
Ctrl Alt
Right Shift
Shift Shift
Ctrl Shift
Alt F6-F10
Ctrl F6-F10
-
Play Current Row; advance
Play Current Row; don’t advance
Play Module
Play Pattern
Play Module from current row
Play Pattern from current row
Record Pattern
Record Song
Record Pattern from current row
Play pattern from stored row
Record pattern from stored row
- 47 -
Velvet Studio User Manual
14.3 Pattern Editing
‘
Alt K
Ctrl K
Alt O
Ctrl O
Alt V
Ctrl V
Shift F3
Ctrl F3
Alt F3
Shift F4
Ctrl F4
Alt F4
Shift F5
Ctrl F5
Alt F5
Del
Shift Del
Alt Del
Shift Return/Ins
-
Shift Backsp/Ins
-
Alt Return
Alt Backspace
Ctrl Return
Ctrl Backspace
Shift 0-9
Alt 0-9
Ctrl 0-9
Alt ,
Alt .
-
Alt -
-
Ctrl ,
Ctrl .
-
Ctrl -
-
CAPS .
-
Insert a Note Off. (the tilde key on some keyboards)
Kill current sample at current channel
Kill rest of channel
Contract Pattern
Contract Channel
Expand Pattern
Expand Channel
Cut Channel to buffer
Cut Commands to buffer
Cut Pattern to buffer
Copy Channel to buffer
Copy Commands to buffer
Copy Pattern to buffer
Paste Channel-buffer to Channel
Paste Command-buffer to Channel
Paste Pattern-buffer to pattern
Delete note under cursor
Delete note+command under cursor
Delete command under cursor
Insert blank note at cursorposition and move the others
down. Notes beyond pattern position 63 will be lost!
Delete note above cursor position and move the others up.
You can not do this if you’re at pattern position 0!
As above, but with pattern
As above, but with pattern
Push cmds one down
Drag cmds one up
Store current command on selected key
Insert all commands in current track
Insert one command in current track
Copy all commands above cursor to current row
Copy all commands above cursor to current row and add one
to the value.
Copy all commands above cursor to current row and subract
one from the value.
Copy command above cursor to current row
Copy command above cursor to current row and add one to
the value.
Copy command above cursor to current row and subract one
from the value.
Halve C4 Rate
- 48 -
Velvet Studio User Manual
CAPS ,
ALT U
ALT B
- Double C4 Rate
- Undo. Exchanges Pattern with the stored Undo Buffer. This
will NOT undo small changes in the pattern!
- Backup Pattern to Undo buffer
14.4 Block Marking Commands
CAPS ARROWS
CAPS PGUP
CAPS PGDN
CAPS HOME
CAPS END
Caps F6-F10
Ctrl B
Ctrl C
Ctrl D
Ctrl F
Ctrl I
Ctrl J
Ctrl L
Ctrl M
-
Ctrl
Ctrl
Ctrl
Ctrl
-
P
U
Y
X
Mark a block (also with Mouse)
Mark a block
Mark a block
Mark a block
Mark a block
Mark to stored row
Mark Block Begin (PT compatible)
Copy Marked Block
Delete block, drag notes up
Quick Mark a block.
Insert block, push notes down
Join-Paste Block (Mix)
Quick Mark Channel/Pattern
Interpolate command data at marked
channels.
Paste BlockBuffert To CursorPos
Unmark Block
Change Inst in area to curr. Inst
Cut Marked block
14.5 Channel Commands
Ctrl A
Ctrl Q
Ctrl S
- Mute/Lock/Unmute current channel
- Unmute all channels
- Solo channel (Mute all except current channel)
- 49 -
Velvet Studio User Manual
14.6 Transposing
<CAPS LOCK> Plus keys below:
Sample/Track
1 - Note Up
Q - Note Down
A - Octave Up
Z - Octave Down
Sample/Pattern
2 - Note Up
W - Note Down
S - Octave Up
X - Octave Down
Sample/Block
5 - Note Up
T - Note Down
G - Octave Up
B - Octave Down
All/Track
3 - Note Up
E - Note Down
D - Octave Up
C - Octave Down
All/Pattern
4 - Note Up
R - Note Down
F - Octave Up
V - Octave Down
All/Block
6 - Note Up
Y - Note Down
H - Octave Up
N - Octave Down
14.7 Selecting Samples
On the numeric keyboard:
0
- Select Sample 0
1st row
- Select Sample 1-4
2nd row
- Select Sample 5-8
3rd row
- Select Sample 9-C
4th row
- Select Sample D-F
Pressing a shift key simultaneous with above:
<CAPS LOCK>
- Sample 10-1F
<SHIFT>
- Sample 20-2F
<CONTROL>
- Sample 30-3F
<ALT>
- Sample 40-4F
14.8 Menus & Screen Blocks
Alt
Alt
Alt
Alt
Alt
Alt
Alt
Alt
C
D
E
G
H
I
P
Q
-
Config Screen
Disk Option
Description Editor
Toggle Piano
Help popup
Instrument Editor
Position Editor
Toggle Equalizers
- 50 -
Velvet Studio User Manual
Alt R
Alt S
Alt Z
- Restore to main screen
- Sample Editor
- Toggle Zoom pattern
14.9 Miscellaneous Keys
Ctrl E
Ctrl W
Shift+Ctrl E
Shift+Ctrl W
Ctrl T
F6-F10
Shift F6-F10
Ctrl R
Alt N
Alt X
Space
Shift Space
Keypad Del
Shift+Keypad Del
<
Shift <
Esc
F1
F2
-
Increase CommandNr on current channel
Decrease CommandNr on current channel
Increase CommandNr on every channel
Decrease CommandNr on every channel
Toggle Rowskip when using arrows.
Go to the stored row
Store current row on F-key
Restore F6-F10 positions (0,16,32,48,63)
Load next selected song.
Exit the tracker
Toggle edit. Stop all voices
Invoke Pulldown menu at mousepos
Kill Instrument
Kill Sample
Increase RowSkip
Decrease RowSkip
Main PullDownMenu
Decrease Octave
Increase Octave
- 51 -
Velvet Studio User Manual
15. APPENDIX C - File Formats
15.1 Overview
Velvet Studio can manipulate the following file formats. (Those with an asterix can
also be saved.)
15.2 Modules
* .AMS
* .MOD
* .S3M
.STM
* .XM
.MTM
.ULT
- Advanced Module System (Velvet Studio).
- Protracker, FastTracker 6/8 channel, xxCH module (Protracker,
FastTracker, TakeTracker, FastTracker II, etc).
- ScreamTracker revision 3.0 module (ScreamTracker III)
- ScreamTracker module (ScreamTracker).
- Extended Module (FastTracker 2, DigiTrekker).
- MultiTracker Module (Multitracker Module Ed.)
- Ultratracker Module
15.3 Instruments
* .AIS
.XI
.PAT
- Advanced Instrument System (Velvet Studio).
- Extended instrument (FastTracker 2).
- Gravis UltraSound patch (PatchMaker).
15.4 Samples
* .ASE
* .SMP
.S3I
.IFF
.WAV
- Advanced Sample System (Velvet Studio).
- Raw sample format (FastTracker, Velvet Studio).
- ScreamTracker III instrument (ScreamTracker III, Advanced
DigiPlayer).
- AIFF sample (FastTracker 2).
- Microsoft RIFF wave sample (CoolEdit).
15.5 Pattern Data
* .APS
* .ACS
.XT
- Advanced Pattern System (Velvet Studio).
- Advanced Clip System (Velvet Studio).
- Extended Track (Fast Tracker 2)
- 52 -
Velvet Studio User Manual
16. APPENDIX D - Command Reference
16.1 Overview
Velvet Studio has many different commands to use with your tracks. There are three
types; Protracker, Finer Protracker, and New commands.
16.2 Protracker Commands
00xy: Arpeggio
01xx: Portamento up
02xx: Portamento down
03xx: Tone portamento
04xy: Vibrato
05xy: Portamento + volumeslide
06xy: Vibrato + volumeslide
07xy: Tremolo
09xx: Sampleoffset
0Axy: Volumeslide
0Bxx: Jump position
0Cxx: Set volume
0Dxx: Break pattern
0Eyx: Extended commands
0E1x: Fineslide up
0E2x: Fineslide down
0E3x: Glissando control
0E4x: Set vibrato wave form
0E5x: Set finetune
0E6x: Patternloop
0E7x: Set tremolo wave form
0E9x: Retrigger
0EAx: Fine volumeslide up
0EBx: Fine volumeslide down
0ECx: Note cut
0EDx: Note delay
0EEx: Pattern delay
0Fxx: Set speed
- 53 -
Velvet Studio User Manual
00xx: Arpeggio
Usage: $00 + 1st halfnote add + 2nd halfnote add [halfnote add: $0-$F]
Arpeggio is used to simulate chords. This is done by rapidly
changing the pitch between 3(or 2) different notes. It sounds very
noisy and grainy on most samples, but OK on monotone ones.
Example:
C-5 00 0047
C-5 00 0037
C-major chord: (C+E+G or C+4+7 halfnotes)
C-minor chord: (C+D#+G or C+3+7 halfnotes)
01xx: Portamento Up
Usage: $01 + portamento speed
[portamento speed: $00-$FF]
Portamento up will simply slide the sample pitch up. You can NOT
slide higher than B-3!
Example:
C-5 00 0103
1 is the command, 3 is the portamentospeed.
NOTE: The portamento will be called as many times as the speed of
the song. This means that you’ll sometimes have trouble sliding
accurately. If you change the speed without changing the slide rates,
it will sound bad...
02xx: Portamento Down
Usage: $02 + portamento speed
[portamento speed: $00-$FF]
Just like command 1, except that this one slides the pitch down
instead. (Adds to the period).
You can NOT slide lower than C-1!
Example:
C-5 00 0203
2 is the command, 3 is the portamentospeed.
03xx: Tone-portamento
Usage: Dest-note + $03 + slidespeed
[slidespeed: $00-$FF]
- 54 -
Velvet Studio User Manual
This command will automatically slide from the old note to the new.
You don’t have to worry about which direction to slide, you need
only set the slide speed. To keep on sliding, just select the command
$3 + 00.
Example:
A-2 00 0000
C-5 00 0305
First play a note.
C-5 is the note to slide to, 3 the command,
and 5 the speed.
04xy: Vibrato
Usage: $04 + vibratorate + vibratodepth
[vibratorate:$0-$F, vibratodepth:$0-$F]
Example:
C-5 00 0481
4 is the command, 8 is the speed of the vibrato,
and 1 is the depth of the vibrato.
To keep on vibrating, just select the command $04 + 00. To change
the vibrato, you can alter the rate, depth or both. Use command
$0E4x to change the vibrato-wave form.
05xy: Tone-portamento + Volumeslide
Usage: $05 + upspeed + downspeed
[upspeed: $0-$F, downspeed: $0-$F]
This command will continue the current toneportamento and slide
the volume at the same time.
Example:
C-5 00 0503
C-5 00 0540
3 is the speed to turn the volume down.
4 is the speed to slide it up.
06xy: Vibrato + Volumeslide
Usage: $06 + upspeed + downspeed
[upspeed: $0-$F, downspeed: $0-$F]
This command will continue the current vibrato and slide the volume
at the same time.
Example:
C-5 00 0605
C-5 00 0640
5 is the speed to turn the volume down.
4 is the speed to slide it up.
- 55 -
Velvet Studio User Manual
07xy: Tremolo
Usage: $07 + tremolorate + tremolodepth
[tremolorate: $0-$F, tremolodepth: $0-$F]
Tremolo vibrates the volume.
Example:
C-5 00 0794
7 is the command, 9 is the speed of the
tremolo, and 4 is the depth of the tremolo.
To keep on tremoling, just select the command $07 + 00. To change
the tremolo, you can alter the rate, depth or both. Use command
0E7x to change the tremolo-wave form.
09xx: Set SampleOffset
Usage: $09 + offset
[offset: $00-$FF]
This command will play from a chosen position in the sample, and
not from the beginning. The two numbers equal the two first
numbers in the length of the sample. Handy for speech samples.
Example:
C-5 00 0923
Play sample from offset $2300 (8960).
0Axy: Volumeslide
Usage: $0A + upspeed + downspeed
[upspeed: $0-$F, downspeed: $0-$F]
Example:
C-5 00 0A05
C-5 00 0A40
5 is the speed to turn the volume down.
4 is the speed to slide it up.
NOTE: The slide will be called as many times as the speed of the
song. The slower the song, the more the volume will be changed on
each note.
0Bxx: Position-jump
Usage: $B + position
[position: $00-$7F]
- 56 -
Velvet Studio User Manual
This command will stop playback of the current position after the
current row and will jump to the specified position number.
Example:
C-5 00 0B01
B is the command, 1 is the position to restart the
song at.
This command will also perform a pattern-break (see below).
0Cxx: Set volume
Usage: $0C + volume
[volume: $00-$7F]
Well, this old familiar command will set the current volume to your
own selected. The highest volume is $7F. All volumes are
represented in hex.
Example:
C-5 00 0C10
C is the command, 10 is the volume
(16 decimal).
0Dxx: Pattern-break
Usage: $0D + pattern-position
[pattern-position: 00-64]
This command just jumps to the next song-position, and continues
play from the patternposition you specify. Note that this uses
decimal values and not hexadecimal values, unlike most other
commands.
Example:
C-5 00 0D32
Jump to the next song-position and continue
play from patternposition 32.
0E1x: Fineslide up
Usage: $0E1 + value
[value: $0-$F]
This command works just like the normal portamento up, except that
it only slides up once. It does not continue sliding during the length
of the note.
Example:
- 57 -
Velvet Studio User Manual
C-5 00 0E11
Slide up 1 at the beginning of the note.
0E2x: Fineslide down
Usage: $0E2 + value
[value: $0-$F]
This command works just like the normal portamento down, except
that it only slides down once. It does not continue sliding during the
length of the note.
Example:
C-5 00 0E26
Slide up 6 at the beginning of the note.
0E3x: Glissando Control
Usage: $0E3 + status
[status: $0-$1]
Glissando must be used with the tone-portamento command. When
glissando is activated, toneportamento will slide a halfnote at a time,
instead of a straight slide.
Example:
C-5 00 0E31
C-5 00 0E30
Turn Glissando on.
Turn Glissando off.
0E4x: Set vibrato wave form
Usage: $0E4 + wavetype
[wavetype: $0-$6]
Example:
C-5 00 0E40
C-5 00 0E44
C-5 00 0E41
C-5 00 0E45
C-5 00 0E42
C-5 00 0E46
Set sine(default)
Don’t retrig WaveForm
Set Ramp Down
Don’t retrig WaveForm
Set Squarewave
Don’t retrig WaveForm
0E5x: Set finetune
Usage: $0E5 + finetune-value
[finevalue: $0-$F]
Example:
- 58 -
Velvet Studio User Manual
C-5 00 0E51
Set finetune to 1.
Use these tables to figure out the finetune-value.
Finetune:
Value:
+7
7
+6
6
+5
5
+4
4
+3
3
+2
2
+1
1
0
0
Finetune:
Value:
-1
F
-2
E
-3
D
-4
C
-5
B
-6
A
-7
9
-8
8
0E6x: PatternLoop
Usage: $0E6 + loopnumber
[loopnumber: $0-$F]
This command will loop a part of a pattern.
Example:
C-5 00 0E60
Set loopstart.
C-5 00 0E63
Jump to loop 3 times before playing on.
0E7x: Set tremolo wave form
Usage: $0E7 + wavetype
[wavetype: $0-$2]
Example:
C-5 00 0E70
C-5 00 0E71
C-5 00 0E72
Set sine (default)
Set Ramp Down
Set Squarewave
0E9x: Retrig note
Usage: $0E9 + tick
[tick: $0-$F]
This command will retrig the same note before playing the next.
Where to retrig depends on the speed of the song. If you retrig with
1 in speed 6 that note will be trigged 6 times in one note slot. Retrig
on hi-hats!
Example:
C-5 00 0F06
C-5 00 0E93
Set speed to 6.
Retrig at tick 3 out of 6.
- 59 -
Velvet Studio User Manual
0EAx: Fine volumeslide up
Usage: $0EA + value
[value: $0-$F]
This command works just like the normal volumeslide up, except
that it only slides up once. It does not continue sliding during the
length of the note.
Example:
C-5 00 0EA3
Slide volume up 1 at the beginning of the
note.
0EBx: Fine volumeslide down
Usage: $0EB + value
[value: $0-$F]
This command works just like the normal volumeslide down, except
that it only slides down once. It does not continue sliding during the
length of the note.
Example:
C-5 00 0EB6
Slide volume down 6 at the beginning of the
note.
0ECx: Cut note
Usage: $0EC + tick
[tick: $0-$F]
This command will cut the note at the selected tick, creating
extremely short notes.
Example:
C-5 00 0F06
C-5 00 0EC3
Set speed to 6.
Cut at tick 3 out of 6.
Note that the note is not really cut, the volume is just turned down.
0EDx: Delay note
Usage: $0ED + tick
[tick: $0-$F]
This command will delay the note to the selected tick.
- 60 -
Velvet Studio User Manual
Example:
C-5 00 0F06
C-5 00 0ED3
Set speed to 6.
Play note at tick 3 out of 6.
You can play the same note on two channels, delay one, and get a
nice flanging effect.
0EEx: Pattern Delay
Usage: $0EE + notes
[note: $0-$F]
This command will delay the pattern the selected numbers of notes.
Example:
C-5 00 0EE8
Delay pattern 8 notes before playing on.
All other effects are still active when the pattern is being delayed.
0Fxx: Set speed
Usage: $0F + songspeed
[songspeed: $00-$FF]
This command will set the speed of the song.
Range 00 - Stop song.
Range 01-FF - Set speed
Range 20-FF - Set BPM speeds, range 32-255.
16.3 Finer Protracker Commands
11xx: Extra Fine Slide Up (4 times finer than normal)
12xx: Extra Fine Slide Down (4times finer than normal)
15xx: Just Like 5, but with 2 times finer volslide.
16xx: Just Like 6, but with 2 times finer volslide.
1Axx: 2 times finer volslide than A.
1E1x: Just like E1, but this uses all octaves.
1E2x: Just like E2, but this uses all octaves.
- 61 -
Velvet Studio User Manual
1EAx: 2 times Finer volslide than EA.
1EBx: 2 times Finer volslide than EB.
21xx: Just like 1, but this uses all octaves.
22xx: Just like 2, but this uses all octaves.
Notes:
Finer Protracker Commands are exactly that-- finer, more precise.
For the most part, full blown explanations are not necessary. Imagine
using portamento down (02xx); now imagine using fineslide down
(0e2x); they are implemented the same. Now, with extra fine slide
down (12xx), you implement the pitch bend in exactly the same way,
but the command itself is four times as fine as is typically
encountered.
16.4 New Commands
08xx: Set panposition
0E80: Break sampleloop
10xx: Direction control
13xy: Retrigger w/volume slide
1Cxx: Channel mastervolume
1Dxx: Long pattern break
1F0x: Set decimal BPM value
18xy: Slide panposition
20xx: Keyoff at tick
23xx: Volume Envelope Jump
24xx: Panning Envelope Jump
25xx: Vibrato Envelope Jump
2Cxx: Global volume
2Axy: Global volumeslide
08xx: Set PanPosition
Usage: $08 + panpot
This command will set the current channel pan position.
Example:
C-5 00 0805
Set the panpot to -3.
- 62 -
Velvet Studio User Manual
Use this table to work out the value from the panpot.
Panpot: -8 -7 -6 -5 -4 -3 -2 -1 0 +1 +2 +3 +4 +5 +6 +7
Value: 0 1 2 3 4 5 6 7 8 9 A B C D E F
0E80: Break SampleLoop
Usage: $0E80
This command will set the volume to 00 if the sample has reached
the end loop-point at least once.
10xx: Sample Directional Control
Usage: $10 + value [value: $00-$02]
This command controls which direction the sample is played in, as
well as the types of loops the sample can have (bidirectional or
unidirectional).
Value
00 - Play sample forwards
01 - Play sample backwards
02 - Play w/bidirectional loop (only for
looped samples)
Example:
C-5 00 1001
Play sample backwards.
- 63 -
Velvet Studio User Manual
13xy: Retrigger with Volume Slide
Usage: $13 + volumeslide_value + tick
[volumeslide_value: $0-$F]
[tick: $0-$F]
This command is very similar to the $0E9x command, except that it
allows volume slides between the retrigs.
Example:
C-5 00 1343
Retrig note every 3 ticks with -4 volume
between each retrig.
Use this table to work out the volumeslide value.
0: 0 (No volslide)
1: -1
2: -2
3: -4
4: -8
5: -16
6: 2/3 * the orig. vol.
7: 1/2 * the orig. vol.
8: 0 (No volslide)
9: +1
A: +2
B: +4
C: +8
D: +16
E: 3/2 * the orig vol
F: 2 * the orig.vol.
1Cxx: Set Channel Mastervolume
Usage: $1C + new channel volume
[new channel volume: $00-$7F]
This command will set the current channel volume, where $7F (127)
is the default and maximum volume.
Example:
C-5 00 1C20
C-5 00 0C40
Set channel volume to $20 (32).
Play sample with volume of $40 (64), but
since channel vol is set to $20, the real volume is
(32/127) * 64 = 16.
1Dxx: Long Patternbreak
Usage: $1D + pattern-position
[pattern-position: $00-$FF]
- 64 -
Velvet Studio User Manual
This command just jumps to the next song-position, and continues
play from the patternposition you specify. Note that it is very similar
to the 0Dxx command, except that it uses hexadecimal values so that
patterns over 64 rows long can be accommodated.
Example:
C-5 00 1D80
Jump to the next song-position and continue
play from patternposition $80 (128).
1F0x: Set BPM Decimal Value
Usage: $1F0 + bpm_value
[bpm_value: $0-$9]
This command sets the 1/10th fine BPM value (the value after the
decimal point).
Example:
C-5 00 0F82
C-5 00 1F07
Sets the tempo to 128 BPM.
Sets the tempo to 128.7 BPM.
18xy: Slide Panposition
Usage: $18 + left_speed + right_speed
[left_speed: $0 - $F]
[right_speed: $0 - $F]
This command will slide the current channel panning position to
either the left or the right.
Example:
C-5 00 1805
Slides the panpot to the right by 5.
NOTE: The slide will be called as many times as the speed of the
song. The slower the song, the more the panpot will be changed on
each note.
20xx: KeyOff at Tick
- 65 -
Velvet Studio User Manual
Usage: $20 + tick
[tick: $00-$FF]
This command will send a KeyOff event on a certain tick.
Example:
C-5 00 2003
Sends a KeyOff signal at tick 3.
2Cxx: Set Global Volume
Usage: $2C + global volume
[global volume: $00-$7F]
This command will set the current global volume, where $7F (127)
is the default and maximum volume.
Example:
C-5 00 2C20
C-5 00 0C40
Set global volume to $20 (32).
Play sample with volume of $40 (64), but
since global vol is set to $20, the real
volume is (32/127) * 64 = 16.
2Axy: Global Volumeslide
Usage: $2A + upspeed + downspeed
[upspeed: $0-$F]
[downspeed: $0-$F]
Example:
C-5 00 2A05
C-5 00 2A40
Slides the global volume down at speed 5.
4 is the speed to slide the global vol up.
NOTE: The slide will be called as many times as the speed of the
song. The slower the song, the more the volume will be changed on
each note.
- 66 -
Velvet Studio User Manual
17. INDEX
DMA..................................................9
DOS Installation ...............................3
DOS Shell ........................................17
Drag Bars..........................................8
Draw................................................22
A
ADD MULTI ...................................24
Amiga Freq.......................................38
Apply an effect ................................24
Auto..................................................16
Autosave ..........................................10
E
Echo .................................................27
Echo Editor ......................................36
Edit ..................................................38
EDIT ................................................20
Editing a pattern...............................18
effect engine .....................................25
Effect envelopes ..............................27
Effects..............................................24
Equalizer....................................17, 38
Equalizer Editor ...............................17
Exit Tracker .....................................17
B
Background.................................1, 11
BASEPORT .......................................9
Bits...................................................29
BPM.................................................38
BUG FIXES.....................................40
C
CD Input...........................................23
CD-ROM..........................................23
channel .............................................18
Channels .........................................12
Clear.................................................36
CLEAR SECTION ..........................39
CNVRT .............................................15
CODEC..............................................9
Colors...............................................11
command ..........................................18
command bar ......................................5
Command Bar...............................8, 13
Command Reference........................53
Commands ......................................12
CONFIGURATION...........................9
Configure Sound Card .......................9
Contrast ..........................................11
F
fadeout .............................................32
Fasttracker 2 ..................................11
Feed back .........................................27
File Formats .....................................52
Fix Loop ..........................................28
G
Getting started .................................5
Glossary ...........................................41
GUS MAX .........................................9
H
hf......................................................27
D
I
DC ...................................................28
Delay................................................25
Desc Editor ......................................30
Disclaimer .........................................1
Disk Option......................................14
Info ..................................................37
Inst .............................................10, 14
Installation........................................3
Instrument Editor .............................30
IRQ ....................................................9
- 67 -
Velvet Studio User Manual
Patt.............................................10, 14
Pattern defaults ................................12
Pattern Info ......................................35
PATTERNS .....................................18
Peak indicator...................................23
Piano ..........................................16, 37
Pitch .................................................25
PLAY PATT ....................................19
Play Pattern......................................38
Play sample .....................................21
Play Song.........................................38
POSITION .......................................18
Position Editor .................................35
Pre.Def ............................................11
preview............................................28
Protracker Pattern ............................18
pull down menu ..................................7
K
Keep ................................................23
Key map...........................................47
Keymap............................................11
L
LEFT BLOCK FUNCTIONS ..........35
Linear Freq .......................................38
Loading a song..................................5
Loading Files ...................................15
locking..............................................17
Loop .................................................15
loop point ........................................21
Loop types .......................................28
Lower block functions .....................18
M
R
Main Screen......................................13
manual................................................2
Mark................................................28
MIDI ..................................................2
Mix ..................................................28
Mouse.................................................7
Multiple effects ...............................24
Multi-Sample Instruments .............33
music system.......................................1
mute .................................................17
Mute .................................................21
Mute All............................................21
Record Pattern .................................38
Record Song ....................................38
Renaming a File ...............................16
Resample .........................................24
Rows................................................12
S
Samp ..........................................10, 14
sample ................................................2
Sample .............................................23
Sample edit functions.......................22
Sample Editor ..................................21
Sample Info......................................35
Sample view functions .....................22
SAVE TO DISK...............................24
SAVE TO LIST................................24
Saving Files .....................................15
Scale.................................................32
Scopes ..............................................23
Screamtracker 3.............................11
ScreamTracker Pattern.....................18
Shadow............................................11
Shadow Instruments.......................34
Single effects....................................25
N
Name ................................................15
O
Offset................................................22
Optimize ..........................................36
Options ..............................................9
P
Pack .................................................16
Panning Envelope ...........................33
Paths.................................................10
- 68 -
Velvet Studio User Manual
Smooth ............................................26
Song ...........................................10, 14
Song Specific Settings .....................38
Stop..................................................38
STOP................................................20
Surface ............................................11
T
THE BLOCK OF COMMANDS.....36
Time compress .................................25
time invariant....................................26
time variant.......................................26
tracker ...............................................2
Tune Fork .......................................21
U
Upper Block ....................................14
User fields ..........................................8
W
Wave form.......................................21
Vibrato Envelope ............................33
Windows 3.1 Installation ..................3
Windows 95 Installation ...................3
voice.................................................25
Voice break .....................................26
Voice repeat .....................................27
Voice start offset...............................27
Volume ......................................24, 25
Volume Envelope ...........................31
Z
Zero .................................................23
Zoom................................................34
- 69 -