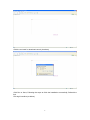
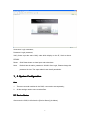
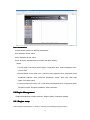
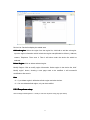
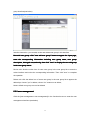
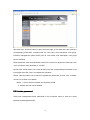
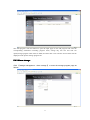
1
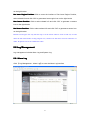
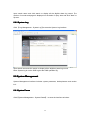
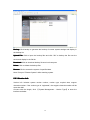
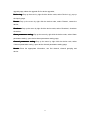
CMS USER MANAUL
CMS USER MANUAL
CMS USER MANAUL
Content
1、 System Summarize................................................................................................................ 4
2、 System Requirement............................................................................................................. 4
3、 Software install and uninstall................................................................................................ 4
3.1 Software Install.................................................................................................................4
3.2 Software Uninstall............................................................................................................ 6
4、 System instructions................................................................................................................ 6
4.1System Login..................................................................................................................... 6
5、 System function configuaration............................................................................................ 8
5.1 Device Status................................................................................................................... 8
5.2 Region Management....................................................................................................... 9
5.2.1Region Setting........................................................................................................9
5.2.2Dropdown setting.................................................................................................10
5.3User Management.......................................................................................................... 11
5.3.1User Group Setting.............................................................................................. 11
5.3.2User Setting.......................................................................................................... 11
5.3.3Modify Password................................................................................................. 12
5.4Store Management......................................................................................................... 13
5.4.1Storage Server..................................................................................................... 13
5.4.2Storage Scheme.................................................................................................. 14
5.4.3Alarm Storage...................................................................................................... 14
5.5 Device Management..................................................................................................... 16
5.5.1 Device Management.......................................................................................... 16
5.5.2Channel Grouping............................................................................................... 17
5.5.3 Sequence Setting............................................................................................... 18
5.5.4 Upgrade Management....................................................................................... 19
5.6 Alarm Management....................................................................................................... 20
5.6.1 Alarm Input.......................................................................................................... 20
5.6.2 Motion Detection.................................................................................................21
5.7 E-map function............................................................................................................... 22
5.8 Log Managemen............................................................................................................ 23
5.8.1 Alarm Log.............................................................................................................23
5.8.2 System Log..........................................................................................................24
5.9 System Management.................................................................................................... 25
5.9.1 System Parameters............................................................................................25
5.9.2 Backup/Restore.................................................................................................. 25
5.9.3 version information............................................................................................. 26
5.10 Real-time Monitoring................................................................................................... 27
5.10.1 Screen Switch................................................................................................... 28
5.10.2 Device List Tree................................................................................................28
5.10.3 Parameters Setting.......................................................................................... 29
5.10.4 Video Playback................................................................................................. 30
5.10.5 System Menu.................................................................................................... 30
CMS USER MANAUL
5.11 Historical Playback...................................................................................................... 32
5.11.1 Screen Switch................................................................................................... 33
5.11.2 Function Button.................................................................................................34
5.11.3 Playback Control...............................................................................................34
5.11.4 AVI file conversion Function......................................................................... 35
5.12 Instant Alarm................................................................................................................ 36
6、System function Summarize.................................................................................................37
6.1Cental storage operation............................................................................................... 37
6.2 concatenation operation............................................................................................... 37
6.3Softdog function operation............................................................................................ 38
1、 System Summarize
CMS is composed by CMS Server and Client. CMS Server supports. Resource, Device
centralized management and Stream Media Server, Alarm Management functions.
2、 System Requirement
Server
Item
Soft
ware
Hard
ware
Minimum Configuration
Recommended
Configuration
OS
Window server 2003
standard Edition Service
Pack 2
Window server 2003
standard Edition Service
Pack 2
Database
Mysql5.0
More than Mysql5.0
CPU
Intel(R) Pentium(R) Dual
CPU E2180 2.00GHZ
Intel(R) Pentium(R) Dual
CPU E2180 2.80GHZ
RAM
1G
2G or above
HDD
80G
160G
NIC
10/100M
10/100M
Others
N/A
Description
We suggest user to install the CPU and RAM higher than
recommended.
3、Software install and uninstall
3.1 Software installation
Please install the package, double-click "PSService.exe" , and then install
"PCTerminal.exe". Run the wizard.
4
click the“ Next” button, To next operation.(As above)
programme default installation under the program File of System disk, Or click the
navigation button to select the installation directory;
Set the HTTP port and Media Server port(Default are 80 and 8000).
Click “Install” to start installation;
Install finished, click finish to quit the installation.
(As below)
5
3.2 Software uninstall
Click start, Point to Settings, Click Control Panel, Click add programme/Delete
programme,
Select CMS, Click Delete to finish uninstall.(As below)
3
6
4. Software instruction
4.1 Software Login
Open the IE Browser, Type the correct URL address in the Address bar.(Such as
http://xxx.xxx.xxx.xxx) And “xxx.xxx.xxx.xxx” is the server ip address, Click Enter to eject a
login interface.
First login, The System give the tip automatically to download the control for
PCControl.exe
(As below)
7
Click the red word for download control (As above)
Click Run or Save, Following the steps to finish the installation successfully, Refresh the
link,
First login interface (as below)
8
Username: Login username;
Password: Login password;
Verify Code: Input the same Verify code which display on the IE, Such as above
RTRRB.
Reset: Click Reset button to clear input and select bars.
Note:
Default User is admin, password: 123456. After Login, Please change the
password in time. The super admin have the all permission.
5. System Configuration
1、5.
Hint:
1.
There are several modules in the CMS, user need to set separately;
2.
All the settings need to save to take effect.
5.1 Device Status
After enter the CMS, it will show the [Device Status] (As below)
9
Icon introduction
introduction::
Indicate working status for different equipments
Grey indicates device offline.
Green indicates device online.
Green lock icon indicates device is online and alarm setting.
Notes:
1. At this page it will show current region, Equipment Sum, Online equipment sum,
On line Rate.
2 Put the Mouse on the green Icon, It will show the equipment zone, equipment name,
equipment address, video channels, Equipment version, Disk sum, Disk total
space, Free Disk space.
3. Put the mouse on the Grey Icon, It will show the equipment zone, Equipment Name,
Equipment name, Equipment address, Video Channels.
5.2 Region Management
Region Management include submenu: Region Setting, Dropdown settting.
5.2.1 Region setup
Click the Regional Management -> Modify to enter the regional settings page (see below)
10
Device List: Device list display the added area
Add sub-region: Select the region from the region list, click Add to add the sub-region.
Input the region information which include the region name(Should be offered ), Address,
contact, Telephone. Then save it. Then it will show under the device list which be
selected.
Delete Region: Click to delete selected region.
Modify Region: Click to modify region information. Select region in the device list, click”
Modify region” button, showing a new page need to be modified. It will successful
modification after save it.
Hint:
(2)If you delete region it will delete all sub-region and also devices.
(3)Can not delete default region, only can be modified.
5.2.2 Dropdown setup
Click the Regional Management -> Modify to enter the dropdown setup page (see below)
11
New add inferiority: this button means add the inferiority area of some area. Choose some
area in the area list, then click "add new inferiority" button to appear the input page of "add
new inferiority" and enter the corresponding information in the input page, including
inferiority name, description, address, contact person, contact tel, register code(name
must be filled), then click "sure" and the new added area information will display on the
right frame in the area list.
Notes: 1. Register code is existed automatically. Send the register code to the inferiority,
and the supervisor can supervise the inferiority after the inferiority sets successfully in the
functional module.
2. When add inferiority successfully, you can revise and delete inferiority information
5.3 user management
User management including submenu: group management, user management, revise
password.
5.3.1 user group management
Click [user management-user group management]in the functional menu to enter the user
12
group interface(see below)
Interface instruction: you can add, revise and delete user group in this interface
New add user group: click "new add user group" button to appear the input page,
enter the corresponding information including user group name, user group
description, belonged area,authority, then click "sure" to display the new add group
in the user group menu
Revise role: click the revise icon of some user group in the user group list to enter the
revise interface and revise the corresponding information. Then click "sure" to complete
the operation
Delete role: click the delete icon of some user group in the user group list to appear the
delete tips, choose "yes" to delete, choose "no" means not to delete;
Notes: default user group can not be deleted
5.3.2 user management
Click the [user management--user management] in the functional menu to enter the user
management interface (see below)
13
New add user: click this button to open the input page of new add user, then enter the
corresponding information, including user ID, user name, user description, user group,
inferiority management option frame( user ID, user name, user description, user group
have to be filled)
Reset password: click reset password button in the user list to appear the reset tips, click
"yes" to reset the user password to "123456"
Revise: click revise button in the user list and revise the corresponding information in the
input page, then click "sure" to complete the operation.
Delete: click the button in the user list to appear the delete tips, choose "yes" to delete,
choose "no" means not to delete.
Notes: 1. User id must be number and character mixed
2. Default user can not be deleted
5.3.3 revise password
Click [user management-revise password] in the functional menu to enter the revise
password interface(see below)
14
This function revises the present logging user password, enter the former password and
the new password, click "revise password" to revise.
5.4 Storage management
Storage management including submenu: storage server, storage program, alarm
storage.
5.4.1 Storage server
Choose “Store manager ” – “Store server ” to enter interface as follows:
15
Alteration
lteration:: click this button to open the new added input interface of storage server, and then
enter the corresponding information in the input interface including server name, describe
information, belonging area, storage route ( belonging area must be revised) , click "sure", and the
saved information will be displayed in the storage server list.
Remark: 1.Storage server and platform server can be installed in different PC, once a storage
server was installed, it will be displayed under the corresponding storage server list. To make
identification easy, you should revise the storage information once a storage server was installed
because there will be no more tips when stalling, as shown in the picture above.
2. Click "add" to add storage route, there will appear the actual existed disk drive(for example D,E)
for choosing. Each time can only add, revise or delete one disk.
5.4.2 Storage program
Click “Storage management”—“storage program” in the functional menu to enter the
storage program page as follows
16
New add program: click this button to open the input page of new add program and enter the
corresponding information including program name, storage day, file size and time bar
option(storage program name must be filled) and then click "sure" and the saved content will be
displayed in the present storage program list.
5.4.3 Alarm storage
Click 【 storage management - alarm storage 】 to enter the storage program page as
follows.
17
This page includes start alarm storage option, storage time, file size, storage disk
number,storage day.
Remark: Disk number 1,2 ... corresponds with the order of storage route. For example, the order of
storage route from top to bottom is E,D,B, here 1 stands for E, 2 for D, 3 for B, the rest may be
deduced by analogy
18
5.5 Device Management
Device management include: Device Management, Sequence setting, Upgrade
Management
5.5.1 Device Management
Click “Device Management
Management”” to enter the interface as below:
Add Device: Click to add new device, After input the device information, click “OK
OK””
to save to device list
Modify: Click to modify the device information
information.. Click “Save
Save”” to finish setting.
Device search: Click “Search” , it will auto search device in network connected, click target
device to device list.
Notes:
1. Make sure added device information no mistake, otherwise it will occur some errors
when do device management.
2. User can directly dragging one device in the list to other device region list.
3. When auto search device in network connected and adding to the list, it will auto
connected by default username and password, alarm input and alarm output channel is 0,
19
you can modify it according the real device info.
4. The totally channels No of all device in the list couldn’t more than 800 channels.
Channel Authority: Click “Channel
Channel”” in the device list to set the channel authority as
below.
Set the channel authority in this page. (Default setting: all the channel authorities enabled)
Device store setting: Click "Device Store Setting" to enter the interface as below
The data of Store Strategy and the Store Disk No. will display only after setting in the
Store Manager interface.
Remark: Click the button of "Copy to all channels" and the copy will start without prompt of
accomplishment
20
Remark: Click the button of "Copy to all channels" and the copy will start without prompt of
accomplishment
5.5.2 Channel Group
Device Management - Channel Group
Click 【Device
Group】 to enter the interface as below
Add group: Click to inter the add group interface, enter channel name and the channel
group saved will display in related areas of area list.
Modify: Click to pop up the modify interface, modify the related info and click "
OK"
Remove: Click to enter the remove interface. Choose "OK" to remove and "Cancel" to
cancel removing.
Remark: Channel group is convenient to open channels of different devices when real time
monitoring
5.5.3 Sequence Setting
Device Management - Sequence Setting
to enter the interface as below
Click 【Device
Setting】to
21
Add Time Period: Click to enter the time period interface. After input information, click
"OK" to save.
Modify: Click to enter the modify interface. After modify information, click "OK" to save.
Delete: Click to delete selected time period
Auto Sequence: Click to set the current time period sequence
Specified Sequence: Click set the current channel sequence
Drag Device: Drag the device to set sequence channels
Delete Channel
Channel:: Click to delete sequence channel
5.5.4 Upgrade Management
Click 【 Device Management - Upgrade Management 】
Management interface
22
to enter the Upgrade
Upload File: Click to enter select file interface. After select upgrade file, click upload file to
Server and display on file list.
Download: Click to download upgrade file to local
Delete: Click to delete upgrade file
5.6 Alarm Management
Alarm Management includes: Alarm input, Motion Detection
Alarm Input
5.6.1
5.6.1Alarm
Click【Alarm Management - Alarm Input】to enter alarm input interface
23
Click Related to display Alarm Relation Setting
24
Set the Alarm channel related video and input. Related to all channels and inputs in
default. User can set snapshot No.m interval and alarm to preset point.
Drag the device in the device tree of the list to set.
5.6.2 Motion Detection
Click 【Alarm Management - Motion Detection】to enter Motion Detection interface.
Motion Detection setting is the same as Alarm input
25
Map Function
5.7 EE-M
Map - Map
to enter the Map interface
Click 【Map
Map】to
Remark: Select the position and right-click the blank in the right border to enter the interface as
below. (Operations below can only be done after selecting the positon)
Set Region Map: Click to select the map(JPE form), click "OK" and the map will display
26
on the right border
Set lower Region Position: Click to enter the interface of Set lower Region Position,
select related info and click "OK" to generate a lower region icon on the right border
Set Camera Position: Click to select related info and click "OK" to generate a camera
icon on the right border
Set Sensor Position: Click to select related info and click "OK" to generate a sensor icon
on the right border
Remark: Each region can only add one map. Use the mouse wheel to zoom in and out, or hold
down the left mouse button to drag. Region icon, camera icon and sensor icon are referred to as
nodes. Properties can be set to delete the nodes.
5.8 Log Management
Log management includes Alarm Log and System Log.
5.8.1 Alarm Log
Click 【Log Management - Alarm Log】to enter the Alarm Log interface
27
Input search terms and click search to display all the eligible alarm log record. The
number of records and pages is displayed on the basis of query time and click "Next" to
flip over.
5.8.2 System Log
Click 【Log Management - System Log】to enter the System Log interface
Input search term and click search to display all the eligible system log record.
Note: System log is not the DVR log but the CMS operation log.
5.9 System Management
System Management interface includes system parameter, backup/restore and version
info.
System Param
5.9.1
5.9.1System
Click【System Management - System Param】 to enter the interface as below:
28
HTTP Port Modify: Modify HTTP Port and click "Modify" to finish
Media Port Modify: Modify Media Port and click "Modify" to finish
Note: No prompt when modifying successfully.
5.9.2 Backup/Restore
Backup function is to backup the system settings of CMS, such as device info, sequence
settings, alarm settings.
Restore function is to restore the system settings via backupped system files.
Backup/Restore functions can be used for restoring the system settings of CMS.
Click 【System Management - Backup/Restore】 to enter the interface below:
29
Backup: Click backup to generate the backup of current system settings and display in
the backup list
Upload File: Click to input the backup files and click "OK" to backup the file onto the
server and display in the file list
Download: Click to download backup file onto local computer
Delete: Click to delete the backup files
Restore: Click to restore the system of specified date
Note: Prompt of "Restart System" while restoring system.
5.9.3 Version Info
Version info includes system version number, version type, expired date, support
channels number. If the version type is "registered", the support channels number will be
more than 800.
Connect with the dongle, click 【 System Management - Version Type 】 to enter the
interface as below:
30
Registered version: When expired, version type will still display as "registered", and the
expired date will not change, but the support channels numbers will turn into 800.
5.10 Real-Time Monitoring
Click 【 Real-Time Monitoring 】 to pop up the real-time monitoring page (as below). Real
time monitoring can pop up multiple pages, in order to monitor simultaneously with
multiple monitors.
31
5.10.1 Screen Switch
Click the function icon on the upper right corner of the screen to switch screens, set the
screen division.
Screen segmentation including 1/4/9/16/25/6/8/13, also can be set manually, click on the
icon of
'?', the maximum can be set with 10 x 10, the last icon will indicate the image
screen by Real time monitoring .
5.10.2 Device list tree
Expand Device: Click on the tree control nodes, expand the lower nodes;
Double click to play: Double-click the device node or the channel node, play the video in
the current selection window;
Direct Play: Pop up the menu by right click the device node, select 'Direct play', can play
the real-time date of host directly;
Arm: Pop up the menu by right click the device node, select 'Arm', the device start to arm;
Timing: Pop up the menu by right click the device node, select 'Timing', the device start to
arm;
Upgrade: Pop up the menu by right click the device node, select 'Upgrade', pop up the
32
upgrade page, select the upgrade file for device upgrades;
Device Log: Pop up the menu by right click the device node, select 'Device Log', pop up
the inquiry page;
Restart: Pop up the menu by right click the device node, select 'Restart', restart the
device;
Shutdown: Pop up the menu by right click the device node, select 'Shutdown', shutdown
the device;
Alarm parameters setting: Pop up the menu by right click the device node, select 'Alarm
parameters setting', open device alarm parameters setting page;
Channel parameters setting: Pop up the menu by right click the device node, select
'Channel parameters setting', open device channel parameters setting page;
Search: Enter the appropriate information, can find channel, channel grouping and
device.
33
5.10.3 Parameter Setting
Channel Video Parameter Setting
etting:: Real time setting to select video parameters of
channels, including brightness, contrast, saturation, hue;
PTZ control: Click the corresponding button to adjust、control PTZ, user can the control
PTZ up/ down / left / right, aperture, focus, zoom, wipers and lights. And also, user can
control the PTZ via preset, call simultaneously.
34
5.10.4 Video Playback
The playback device, channel and speed are displayed on the top of the window.
Close
Close:: Click on the video window on the top of the 'off' button, close the currently playing
video;
Channel Parameter: Click on the video window on the top of the 'Channel parameter'
button, open channel parameter setting page;
Snapshot: Click on the video window on the top of the 'snapshot' button, take a snapshot
for the current view;
Record: Click on the video window on the top of the 'Record' button, record for current
video, save to local path.
Voice: Click on the video window on the top of the 'Voice' button, open/close for current
channel play voice.
5.10.5 System Menu
Click the button "
" on the upper right corner to pop up the menu below:
35
Start Sequence: Select 'Start Sequence', start the video sequence according to current
sequence setting;
All Stop: Select 'All Stop', to stop all the playback;
Voice Intercom: Select 'Voice Intercom', pop up voice intercom page, move device to the
intercom list to execute device intercom or voice broadcasting;
Start Decode Output: Select 'Start Decode Output', start the decode window, move
device to the windows and decode on the wall;
Play the linkage video: Select 'Play the linkage video', when receive alarm signal, will
play the linkage channel video immediately;
Play View included: Toolbar、Ratio Display、Play Sub Window、Record Bitrate、Network
Bitrate,see picture 1
Toolbar
Play Sub Window see picture 2
Real time image can switch window hereon to open Record Bitrate or Network Bitrate, but
need to re-open the image.
Users can select Main Stream or Sub Stream on preview, but need to re-open the image.
36
Pic 1
Pic 2
System Setting: Select "System Setting" , pop up system setting page to set the
snapshot and recording file path.
37
5.11 Historical Playback
Click the 【Historical Playback】 under function menu bar to pop up Historical Playback
page (as below).
Select video device or storage server in the "Store Place", then drag the device (in the
device list) into time list manually, wait for 1~2s, the related data will appear as below:
Blue part means video data exists in that time point, orange part means selected shift
38
playback channel. After selected the channels, double click any video-data-time-point to
play. Gray part means no data or no selected channel.
5.11.1 Screen Switch
Click the function icon on the left corner to switch the screen, set the screen division.
5.11.2 Function Button
Local Play: Click to pop up the file dialog box, choose a video file to play in the specified
window.
Search: Click to pop up the file dialog box, drag video channel of right device list into the
file dialog box, select searching time, then click "Search" to seek eligible video record wich
will display on the video list above.
Play: Select one record in the video record list, click "Play" to play this video in the
specified window.
Download: Select one record in the video record list, click "Download" to download this
video into local PC. If the capacity of download disk is full, there will be a prompt which
says "Not enough free disk space".
39
5.11.3 Playback Control
The bottom of the playback window displays the current device, channel and speed.
Stop: Click to stop the current video
Progress Bar: Display the current playback progress. User can drag the progress bar to
select the playback time
Fast Forward: Click the fast forward button to fast forward the current video
Pause: Click to pause the current video
Continue: Click to continue the current video
Snapshot: Click to get the snapshot of the current video
Audio: Click to close/open the current channel audio
sion Function
5.11.4 AVI file conver
convers
Click the
button on the upper right corner in the Playback interface to pop up the
menu below:
40
Click "Convert to AVI" to pop up the menu below:
Select a downloaded file or a file from storage server, system acquiescently locates the
converted file in the original path. Prompt will be given after success conversion.
5.12 Instant Alarm
Instant Alarm includes 2 submenus: Photo and Map
Click 【Instant Alarm】 to enter the interface as below:
41
When the instant alarm triggers, the alarm hint will pop up on the upper right corner as
below. Click Instant Alarm Events to enter the instant alarm interface as above:
The left side is alarm snapshot and alarm video, and the right side is instant alarm e-map,
which displays the node of the current alarm, when it's red and twinkling, double click the
video icon to check alarm channel real-time video; double click the sensor icon to check
all the real-time videos ganged from the alarm sensor.
Red alarm record indicates it's unread. Double click to check it and it'll turn gray. If the
platform is once closed, the record will be in Alarm Log next time when opening.
System Function Overview
6、System
6.1 Central Storage
1. Store data into the Storage Server PC
42
Set the storage server first, mainly set its path (Storing in C disk is not recommended).
Secondly set the storage path, which corresponds to the disk; Finally set central storage
in device management interface. The storage is operable if the device connection is
normal.
2. Store data into disk array
First set disk array into a letter according to the disk array introduction, then platform is
able to store data in Z disk(the disk array)
3. Read stored data
(1) Enter the disk according to the storage path, find file below, it can be played via
player. See the file name below:
(2) In Historical Playback menu, select "Storage Server", double click device or drag
device into time search box to play videos from storage server directly.
4. The implementation of central storage consults device management quick operation.
6.2 Cascading
Add a subordinate in area management - subordinate settings to gain the registration
code, send the registration code to subordinate, then subordinate fills IP address, port,
registration code and save to complete. If network connection is normal, new added
subordinate can be seen in the device list of superior, of which the icon is
43