1
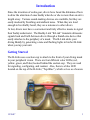
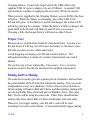
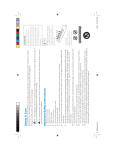
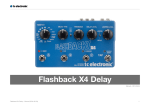
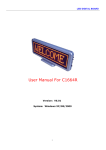
Preliminary
Buddy-Link (B-Link)
User Manual
(16 December 2007)
12/26/07
1
INTRODUCTION......................................................................................................... 3
GETTING STARTED .................................................................................................. 3
THE VIRTUAL “BUTTON” ............................................................................................ 4
TURNING YOUR B-LINK ON/OFF ................................................................................ 4
MATING YOUR B-LINKS ............................................................................................. 5
CHANNELS .................................................................................................................. 5
FEATURES ................................................................................................................... 6
AUTOMATIC ACKNOWLEDGEMENT AND RESEND ........................................................ 6
SIGNAL STRENGTH / RANGE INDICATION .................................................................... 6
AMBIENT LIGHT SENSING ........................................................................................... 7
RECHARGING THE BATTERY ............................................................................... 7
PROPER CARE............................................................................................................ 8
MATING AND UN-MATING ..................................................................................... 8
DIVING WITH A GROUP / DIVEMASTER ............................................................ 9
MATING CHANNEL 2 FOR GROUP LEADER .................................................................. 9
CHECKLIST............................................................................................................... 10
ABOVE WATER ......................................................................................................... 10
ENTERING WATER .................................................................................................... 10
AFTER DIVE .............................................................................................................. 10
INDICATORS ............................................................................................................. 10
ABOVE WATER ......................................................................................................... 10
UNDERWATER ........................................................................................................... 11
BOTH ABOVE AND UNDERWATER ............................................................................. 11
IN CHARGING STATION ............................................................................................. 11
SPECIFICATIONS..................................................................................................... 12
LED MATRIX............................................................................................................. 16
INDICATORS .............................................................................................................. 16
SIGNAL RESPONSES................................................................................................... 16
Single Tap ........................................................................................................... 16
Double Tap.......................................................................................................... 16
Press & Hold....................................................................................................... 16
Group Leader...................................................................................................... 16
12/26/07
2
Introduction
Since the invention of scuba gear, divers have faced the dilemma of how
to draw the attention of ones buddy when he or she is more than an arm’s
length away. Various sound-making devices are available, but they are
easily masked by breathing and ambient noise. When they are loud
enough to be reliably heard, they are a nuisance to other divers.
At last, divers now have a convenient and truly effective means to signal
their buddy underwater. The Buddy-Link “B-Link” transmits ultrasonic
signals back and forth between divers through a thumb-size device that
easily attaches to the periphery of a mask. The B-Link alerts your
diving Buddy by generating a tone and flashing lights in his/her B-Link
when you tap your unit.
Getting Started
The B-Link uses a suction cup to attach to the front of your diving mask
in your peripheral vision. There are four different color LEDs (red,
yellow, green, and blue) located behind the suction cup. They are used
for signaling, configuring, and readout. Also, there is a blue LED
located on the top of the B-Link (“Top-Blue”), which serves as a beacon.
12/26/07
3
The Virtual “Button”
The B-Link is controlled via a single virtual “Button”. This is a
depression located on the side opposite the suction cup and indicated by
the “B-Link” name and two concentric circles. When you touch the
Button, your finger blocks an infrared light beam, which activates it.
There are no moving parts or seals to leak underwater. When your
B-Link recognizes that you have “pressed” the Button, it turns on one of
the LEDs as feedback to you.
Like clicking the single mouse button on an Apple Macintosh, the
B-Link uses Tapping of its Button, once or multiple times, to initiate
different functions. The Button may also be pressed and Held to
perform certain operations. For proper recognition of multiple taps, your
tapping speed should be constant (i.e. the duration of each tap should be
roughly the same). Taps (single or multiple) are recognized when you
stop tapping and release the Button.
When first entering the water, wipe the Virtual Button depression to
remove any bubbles. Bubbles adhering to the light beam windows can
scatter the beam such that the Button appears to be pressed.
Turning Your B-Link On/Off
The B-Link is activated automatically when submerged. While activated, the
blue LED on the top of the unit flashes once every 4 seconds. The B-Link can
be activated above water by touching both of the terminals on the top of the
unit with a moistened finger. (Dipping the unit in water also works.) When
the B-Link first turns on, it flashes one of the LEDs for a second. The LED
color indicates the battery charge (see Indicators, below).
The B-Link automatically enters Low-Power Mode after 5 minutes of
inactivity above water. (It is always on while submerged.) In LowPower mode, one of the LEDs flashes faintly once per second. The LED
color indicates the battery charge (see Indicators, below). Your B-Link
can be forced to enter Low-Power mode by pressing and holding the
12/26/07
4
Button for approximately 10 seconds, until the unit flashes all four LEDs
in quick sequence.
If the B-Link has shut down because of insufficient battery charge, the red
LED will flash faintly every 4 seconds, and the unit will refuse to wake up.
At this point, the only way to activate the unit is to recharge the battery.
Mating Your B-Links
B-Links use 500 different codes such that multiple pairs (or groups) of divers
can have their own private communication link in the same area. Before you
use your B-Links for the first time, you must “mate” them so that they use the
same code. The procedure is performed above water as follows:
• Activate all units by touching both of the terminals on the top of each
unit with a moistened finger.
• Position the units a few inches apart.
• Choose one unit. Press and hold its Button until whichever LED
is lit turns off (about 2 seconds). Release the Button and then tap
it once within the next 2 seconds. The unit will transmit a special
mating signal followed by its channel code to the other B-Links.
This will take approximately 2 seconds.
• The other B-Links should flash all 4 color LEDs in response to
the mating signal and twinkle their LEDs when they receive the
channel code. If any of the other units do not mate successfully,
repeat the previous step.
Note that this procedure works with a group of B-Links as well as a pair.
Simply position all of the B-Links close together, and perform the
mating procedure above.
Channels
You may send two different private signals to your buddy’s B-Link by
tapping once or twice. One tap causes the LEDs on your Buddy’s unit to
“twinkle”. Two taps causes the green, yellow, and red LEDs to triple12/26/07
5
blink in sequence. In both cases, when your Buddy’s unit receives your
signal, his unit will generate a warbling tone for approximately ½
second.
There is a third Public channel that is activated while underwater by
pressing and holding the Button for about 3 seconds or tapping the
Button 3 times. Any B-Links within range, independent of their mated
codes, will respond by twinkling their red and yellow LEDs.
Features
Automatic Acknowledgement and Resend
When your Buddy’s B-Link receives a signal from you, it automatically
sends an acknowledgement back to you. When your B-Link receives the
acknowledgement, it flashes all four LEDs (appears white) for a tenth of
a second to indicate that your Buddy received your signal. If your
B-Link does not receive an acknowledgement, it resends your signal and
waits again for an acknowledgement. The absence of a white flash
indicates that your B-Link still did not receive an acknowledgement.
Signal Strength / Range Indication
Your B-Link measures the signal strength whenever it receives a valid
message. The color of the LED that lights while the Button is pressed
indicates the signal strength. Green means ample signal strength, yellow
means reduced, and red means marginal or no signal strength.
The signal strength is only a crude measure of distance to your Buddy,
but the stronger the signal is, the closer your Buddy is. Moreover, if
your Buddy is out of range, then you cannot signal each other in case of
an emergency.
You can display your B-Link’s current estimate of signal strength (and
thus distance to your Buddy) without sending a signal. Simply press and
hold the Button until whichever LED is lit flashes on and off. Then
12/26/07
6
release the button. (If you continue to hold the Button for more than two
seconds, your B-Link will start transmitting on the Public channel.)
To maintain a current estimate of signal strength, your B-Link will
automatically “ping” your Buddy’s B-Link once per minute, but no
LEDs will flash.
Ambient Light Sensing
Your B-Link senses the ambient light level and adjusts the brightness of
its LEDs accordingly. This feature will dim the LEDs for night, wreck,
or cave diving.
Recharging the Battery
Your B-Link uses a rechargeable lithium polymer battery that is capable
of operating for up to 15 dives (600 minutes) before recharging
(depending on how often you communicate with your Buddy).
However, the maximum range of
operation is obtained with a fully
charged battery.
To recharge your B-Link, remove
the unit from your mask and
unhook the safety lanyard from the
stainless steel ring. Insert the top
end with the ring contacts into the
Charging Station, and align the
suction cup with the notch in the
Charging Station. Press the
B-Link into the Charging Station
until you feel it click into place.
Connect the small end of the
supplied USB cable to the
connector at the base of the
12/26/07
7
Charging Station. Connect the larger end of the USB cable to the
supplied USB AC-power adapter or to any USB port. A normal USB
port should be capable of supplying the necessary 100 ma of current.
When power is supplied to the Charging Station, a green LED in the base
will glow. While the battery is recharging, the yellow LED in the
B-Link will glow. If the battery is mostly discharged, the yellow LED
will delay glowing for a minute. When the battery is fully recharged, the
green LED in the B-Link will flash on and off once per second.
Charging a fully discharged battery will take less than 2 hours.
Proper Care
Between dives, your B-Link should be rinsed and dried. Leaving your
B-Link where it will stay wet will cause the battery to run down, since
B-Links are always active while underwater.
Avoid dropping or banging your B-Link on hard surfaces. The
ultrasonic transducer is made of a ceramic material and can crack if
abused.
The suction cup is User replaceable, if necessary. Use a screwing
motion to remove the old one and insert the supplied replacement.
Mating and Un-Mating
The code that is used to provide separate private channels is derived from
the serial number of the B-Link that initiates the mating. This can create
complications in very rare situations. If diver Alice uses her B-Link to
initiate mating with divers Bob and Cherie, and then initiates mating with
new diving Buddy Dave, then both pairs of Buddies, Alice / Dave and
Bob / Cherie will be using the same code. Either Dave should initiate
mating with Alice and/or Bob or Cherie should mate with each other.
Whenever you trigger mating, your B-Link’s code will be reset
according to its own serial number. If you inadvertently trigger mating
12/26/07
8
without your Buddy’s B-Link nearby (this cannot happen underwater),
you should explicitly mate your B-Link with your Buddy’s unit again
Diving with a Group / Divemaster
In the “Getting Started” section, the instructions for “Mating Your
B-Links” configured your Buddy’s B-Link and yours to work the same
way with Channel 1 (one tap) and Channel 2 (two taps). This section
explains how to configure a group of B-Links such that Channel 1 acts
like a “party line” and Channel 2 serves as a directed link to and from the
Group Leader or Divemaster.
By “party line” is meant that a signal sent by any member of a group
with mated-together B-Links will twinkle the LEDs of all other
members. A directed link means that any member of a group can trigger
a “whooshing” light pattern in the leader’s B-Link only, whereas, the
Group Leader can trigger a triple-blink pattern in all other member’s
B-Links.
When the Divemaster is the Group Leader, the directed link feature can
allow any of the divers to get the Divemaster’s attention if, for example,
they are running low on air.
Mating Channel 2 for Group Leader
The above water procedure is the same as normal except the Group
Leader’s Button is tapped twice as follows:
• Activate all units by touching both of the terminals on the top of each
unit with a moistened finger.
• Position the units a few inches apart.
• Press and hold the Button on the Group Leader’s B-Link until
whichever LED is lit turns off (about 2 seconds). Release the
Button and then tap it twice within the next 2 seconds. The unit
will transmit a special mating signal followed by its channel code
to the other B-Links.
12/26/07
9
•
The other B-Links should flash all 4 color LEDs in response to
the mating signal and twinkle their LEDs when they receive the
channel code. If any of the other units do not mate successfully,
repeat the previous step.
Checklist
Above Water
• Check that all B-Links have adequate battery charge.
• Confirm that all B-Links are mated together.
Entering Water
• Wipe the Virtual Button depression to remove any bubbles.
After Dive
• Rinse all B-Links and wipe them dry.
Indicators
Above Water
Low-Power Mode: One of the LEDs flashes faintly once per second.
The color indicates battery charge:
Blue - Full battery charge.
Green - Battery charge good for multiple dives.
Yellow - Recharge after current dive.
Red
- Recharge before using. Unit
will not activate until recharged.
Battery Charge:
When first activated, one of the LEDs flashes for a
second. The color indicates battery level as per
Low-Power mode.
Mating Signal:
The receiving units will flash all 4 color LEDs.
12/26/07
10
Underwater
Signal Strength:
The green, yellow, or red LED lights up whenever
the Button is pressed. The color indicates signal
strength:
Green - Ample signal strength; Buddy nearby.
Yellow - Reduced signal strength.
Red
- Marginal or no signal; Look for Buddy.
Both Above and Underwater
Activated:
The blue LED on the top flashes once every 4 seconds.
Transmitting:
The Blue-Top LED lights up while transmitting a
User initiated signal.
In Charging Station
Charging:
The yellow LED (in the B-Link) glows continuously.
Fully Charged:
The green yellow LED (in the B-Link) flashes on and
off once per second.
12/26/07
11
Specifications
Battery:
120 mAh Lithium Polymer - greater than 500
recharges
Contacts:
Tin-plated stainless steel
Encapsulation:
Polyurethane
Modulation:
Frequency Shift Keying of a 58 KHz
ultrasonic carrier
Radiated Power: 1 watt, episodic
Weight:
18.9 grams
Affinity Devices, Inc.
5950 Lucas Valley Road
Nicasio, CA 94946
415-662-2055 Phone
415-662-2056 Fax
www.affinitydevices.com
12/26/07
12
12/26/07
13
12/26/07
14
12/26/07
15
LED Matrix
Indicators
Top-Blue
Blue
Green
Yellow
Red
Faint Flash
Low-Power
Full battery
charge
Battery good for
multiple dives
Turning-on
Full battery
charge
Battery good for
multiple dives
Recharge after
dive
Recharge battery
before using
1 Second Flash
Activated
Transmitting
Recharge after
dive
Flashes once
every 4 seconds
Lights for 1 sec.
While Button is Pressed
Signal Strength
Ample signal strength, Buddy nearby
Reduced signal
strength
Marginal signal,
look for Buddy
4 Color Flash
Mating Signal
In Charger
Recharged
Charging
Signal Responses
Single Tap
4-color “Twinkling” random mix
nnnnnnnnnnnnnnnnnnnnnnn
Double Tap
Triple-blink in sequence (G-Y-R)
nnnˆnnnˆnnnˆnnnˆnnnˆnnn
Press & Hold
2-color “Twinkling” (R-Y)
nnnnnnnnnnnnnnnnnnnnnnn
Group Leader
4-color mix “Whooshing”
12/26/07
16