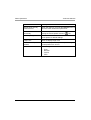
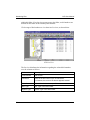
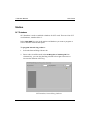
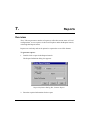
1
CoralVIEW Designer (CVD) User Manual (Version 2.5.0) The flexible way to communicate The information contained in this document is proprietary and is subject to all relevant copyright, patent and other laws protecting intellectual property, as well as any specific agreement protecting TADIRAN TELECOM BUSINESS SYSTEMS LTD.'s (herein referred to as the “Manufacturer”) rights in the aforesaid information. Neither this document nor the information contained herein may be published, reproduced or disclosed to third parties, in whole or in part, without the express, prior, written permission of the Manufacturer. In addition, any use of this document or the information contained herein for any purposes other than those for which it was disclosed is strictly forbidden. The Manufacturer reserves the right, without prior notice or liability, to make changes in equipment design or specifications. Information supplied by the Manufacturer is believed to be accurate and reliable. However, no responsibility is assumed by the Manufacturer for the use thereof nor for the rights of third parties which may be effected in any way by the use thereof. Any representation(s) in this document concerning performance of the Manufacturer's product(s) are for informational purposes only and are not warranties of future performance, either express or implied. The Manufacturer's standard limited warranty, stated in its sales contract or order confirmation form, is the only warranty offered by the Manufacturer in relation thereto. This document may contain flaws, omissions or typesetting errors; no warranty is granted nor liability assumed in relation thereto unless specifically undertaken in the Manufacturer's sales contract or order confirmation. Information contained herein is periodically updated and changes will be incorporated into subsequent editions. If you have encountered an error, please notify the Manufacturer. All specifications are subject to change without prior notice. © Copyright by TADIRAN TELECOM BUSINESS SYSTEMS LTD., 2001-2004. All rights reserved worldwide. All trademarks contained herein are the property of their respective holders. Protected by U.S. Patents 6,594,255; 6,598,098; 6,608,895; 6,615,404 Table of Contents 1. Introduction.............................................................................................................. 1-1 Overview.................................................................................................................... 1-1 About this Manual ..................................................................................................... 1-1 Conventions Used in this Manual .............................................................................. 1-2 Typographical Conventions................................................................................ 1-2 Disclaimer.................................................................................................................. 1-3 Related Documentation.............................................................................................. 1-3 System Requirements................................................................................................. 1-4 Software.............................................................................................................. 1-4 Hardware ............................................................................................................ 1-4 2. System Setup ............................................................................................................ 2-1 Overview.................................................................................................................... 2-1 Packing List ............................................................................................................... 2-1 ODB-API Software Installation ................................................................................. 2-2 CVD Software Installation......................................................................................... 2-6 Connecting the CVD (PC) to Coral FlexiCom........................................................... 2-9 PI Database Settings ................................................................................................ 2-13 Terminal Setup (Route: TERM, 0) ................................................................... 2-13 3. Getting Started......................................................................................................... 3-1 Logging on and the CVD Start Window.................................................................... 3-1 System Administration............................................................................................... 3-3 Site Definition..................................................................................................... 3-4 User Definition ................................................................................................... 3-7 Profiles Definition ............................................................................................ 3-10 Connecting to the Coral FlexiCom .......................................................................... 3-12 Before Connecting to the Coral ........................................................................ 3-12 Connecting to Coral.......................................................................................... 3-15 Changing the Communication Protocol............................................................ 3-17 i Table of Contents CVD Main Window................................................................................................. 3-18 Menu Bar .......................................................................................................... 3-18 Toolbars Display............................................................................................... 3-19 Coral Explorer .................................................................................................. 3-19 Shortcuts Pane .................................................................................................. 3-20 Working Window ............................................................................................. 3-20 Status Bar.......................................................................................................... 3-21 4. Basic Operations ...................................................................................................... 4-1 Overview.................................................................................................................... 4-1 Customizing the Main Window ................................................................................. 4-2 Resizing Panes .................................................................................................... 4-2 Customizing Toolbars......................................................................................... 4-2 Customizing Menus and Icons............................................................................ 4-5 Using Forms............................................................................................................... 4-7 Entering Information in Forms ........................................................................... 4-9 Entering Multiple Values.................................................................................. 4-10 Browsing Forms Using Links ........................................................................... 4-11 Navigating Through the CVD.................................................................................. 4-12 Navigating with the Menu Bar.......................................................................... 4-12 Navigating with Coral Explorer........................................................................ 4-13 Creating Shortcuts.................................................................................................... 4-19 Viewing CVD Loggers ............................................................................................ 4-20 5. Numbering Plan ....................................................................................................... 5-1 Overview.................................................................................................................... 5-1 Modifying the List View............................................................................................ 5-4 Operating Dial Numbers in the List View ................................................................. 5-6 Viewing Dial Number Properties ....................................................................... 5-7 Adding Dial Numbers......................................................................................... 5-8 Updating Dial Numbers ...................................................................................... 5-9 Deleting Dial Numbers ..................................................................................... 5-10 Erasing the NPL................................................................................................ 5-10 Using NPL Links .............................................................................................. 5-10 6. CVD Forms............................................................................................................... 6-1 Overview.................................................................................................................... 6-1 System Forms ............................................................................................................ 6-2 Card List ............................................................................................................. 6-2 Hardware Data .................................................................................................... 6-4 ii Table of Contents Hardware Graphic Map .................................................................................... 6-11 Port List ............................................................................................................ 6-14 Toll Barrier ....................................................................................................... 6-17 VFAC (Verified Forced Account Code)........................................................... 6-18 Gains................................................................................................................. 6-19 Ringers.............................................................................................................. 6-22 Offset Filter....................................................................................................... 6-23 Tone Plan.......................................................................................................... 6-25 Libraries............................................................................................................ 6-27 Night Service .................................................................................................... 6-29 Coral Time........................................................................................................ 6-32 Trunk........................................................................................................................ 6-33 Default Configuration ....................................................................................... 6-33 Digital Trunk Configuration ............................................................................. 6-34 DTDB Synchronizing ....................................................................................... 6-35 Station ...................................................................................................................... 6-37 SLT Database ................................................................................................... 6-37 Keyset Preference ............................................................................................. 6-39 DLIS ................................................................................................................. 6-41 Keyset Button Programming ............................................................................ 6-43 Timers............................................................................................................... 6-46 Features Control................................................................................................ 6-47 Groups...................................................................................................................... 6-51 Hunt Group ....................................................................................................... 6-51 Alternate Route ........................................................................................................ 6-54 LCR/ARS................................................................................................................. 6-56 ISDN ........................................................................................................................ 6-58 BCCOS & NSF................................................................................................. 6-58 ISDN Signaling Channel .................................................................................. 6-60 Hotel ........................................................................................................................ 6-61 Hotel ................................................................................................................. 6-61 SMDR............................................................................................................... 6-63 Network ................................................................................................................... 6-64 Node NPL ......................................................................................................... 6-64 Node Contents .................................................................................................. 6-65 7. Reports...................................................................................................................... 7-1 Overview.................................................................................................................... 7-1 Stations ...................................................................................................................... 7-3 iii Table of Contents Trunks ........................................................................................................................ 7-3 Boss Group ................................................................................................................ 7-4 COS (Class of Service) .............................................................................................. 7-5 Hunt Group ................................................................................................................ 7-6 LCR............................................................................................................................ 7-7 PLIS ........................................................................................................................... 7-7 Private Libraries......................................................................................................... 7-8 Public Libraries.......................................................................................................... 7-9 Free NPL Numbers .................................................................................................... 7-9 8. CVD Wizards ........................................................................................................... 8-1 Overview.................................................................................................................... 8-1 Working with Wizards............................................................................................... 8-2 Add/Modify Station Wizard ...................................................................................... 8-4 Choose Dial Number .......................................................................................... 8-6 Class of Service .................................................................................................. 8-7 Add/Remove Features ........................................................................................ 8-8 Keyset Button Programming ............................................................................ 8-10 Add to Group .................................................................................................... 8-11 Add/Modify Trunks Wizard .................................................................................... 8-13 Choose Trunk ................................................................................................... 8-15 Choose Dial Number ........................................................................................ 8-16 Class of Service ................................................................................................ 8-17 Choose LS/GS Circuit Type ............................................................................. 8-18 Choose Trunk Group ........................................................................................ 8-20 Station Data Transfer Wizard .................................................................................. 8-22 Step 1 Choose Primary and Secondary Stations .............................................. 8-22 Step 2 Choose Data to Transfer ....................................................................... 8-23 LCR/ARS Wizard .................................................................................................... 8-26 Choose Dial Sequence ...................................................................................... 8-27 Check Overlaps................................................................................................. 8-28 Choose Position ................................................................................................ 8-29 Dial Sequence Path–Finish ............................................................................... 8-30 Call Coverage Wizard.............................................................................................. 8-32 Forwarding Options .......................................................................................... 8-34 Pickup Groups .................................................................................................. 8-36 Sequential Call Hunting.................................................................................... 8-39 iv Table of Contents Line Key Appearance ....................................................................................... 8-42 v ,QWURGXFWLRQ 2YHUYLHZ 7KH&RUDO9,(:'HVLJQHU&9'LVD:LQGRZVEDVHGFRQILJXUDWLRQDQG GDWDEDVHPDQDJHPHQWV\VWHPRIWKH&RUDO)OH[L&RP7KH&9'RIIHUVD IULHQGO\JUDSKLFDOXVHULQWHUIDFHZKLFKHDVHVDQGVSHHGVXSWKHSURFHVVRI SURJUDPPLQJDQGPDLQWDLQLQJWKH&RUDOGDWDEDVH 7KLVLVDFFRPSOLVKHGXVLQJWKH&9'FRPSUHKHQVLYHVHWRIIRUPVWKDWJUDSKLFDOO\ SUHVHQWDOOWKHLQIRUPDWLRQQHHGHGIRULQLWLDOFRQILJXUDWLRQDQGRQJRLQJ PDLQWHQDQFHRIWKH&RUDOV\VWHP $VHWRIZL]DUGVDXWRPDWHVIUHTXHQWO\XVHGWDVNV7KHVHZL]DUGVDUHKLJKO\ XVHIXOIRUQRYLFHXVHUVDVZHOODVIRUH[SHULHQFHGWHFKQLFLDQVE\VWUHDPOLQLQJ FRPSOH[SURFHVVHVDQGHQVXULQJWKDWDOOWKHQHFHVVDU\LQIRUPDWLRQLVHQWHUHG 9DULRXVUHSRUWVFRYHULQJDOODVSHFWVRIWKH&9'RSHUDWLRQFDQEHJHQHUDWHGWR LPSURYHSURGXFWLYLW\ $ERXWWKLV0DQXDO 7KH&9'8VHU0DQXDOLVWDUJHWHGWRZDUGVWKHGLVWULEXWRU¶VVHUYLFHHQJLQHHUV DQGGHVFULEHVKRZWRLQVWDOOLQLWLDWHDQGRSHUDWHWKH&9'PDQDJHPHQWV\VWHP 7KLVPDQXDOFRYHUVWKHRSHUDWLRQRIWKH&9'DSSOLFDWLRQLQWHUPVRIXVHU LQWHUIDFHDQGJHQHUDOSURFHGXUHV7KHFRPSOHWH3URJUDP,QWHUIDFH3,RIWKH &RUDO)OH[L&RPLVRXWVLGHWKHVFRSHRIWKLVPDQXDO 7KLVPDQXDOFRPSOLHVZLWK&9'YHUVLRQ Introduction CVD User Manual Conventions Used in this Manual Before you start the installation, it is important to understand the symbols and typographical conventions used in this manual. These conventions and symbols indicate information that requires special attention. Q CAUTION: Be aware of risk of damage to the CVD system or its database. c NOTE: Indicates important information. Typographical Conventions The following typographical conventions have been used throughout this manual. Menu Options Menu options are displayed in capitalized letters. The > sign denotes a new menu option. For example: Station > Station Definition > DKT 1-2 Fields Fields are displayed in Bold Arial typeface. Buttons Command buttons are displayed in Bold Arial typeface. CVD User Manual Introduction Disclaimer The illustrations and other views, telephone displays or screen captures appearing in this manual are examples used to explain more clearly, how the features and controls are used. Therefore, what appears on the display or screen capture in the illustrations may differ from what appears on the actual equipment, and some of the illustrations may represent something impossible in actual operation. The function that can be used and the information that can be displayed will differ depending on the telephony-state and external equipment being connected. The names of companies, products, people, characters, and/or data mentioned herein are fictitious and are in no way intended to represent any real individual company, product, or event, unless otherwise noted. Related Documentation Refer to the following documentation, as required, during the installation procedure. Program Interface Reference Manual, CN# 7244-7180708 Ver. 10.38 and later. 1-3 ,QWURGXFWLRQ &9'8VHU0DQXDO 0LQLPXP6\VWHP5HTXLUHPHQWV %HIRUHSURFHHGLQJZLWKWKH&9'LQVWDOODWLRQFKHFNWKHIROORZLQJOLVWVWRHQVXUH WKDWDOOWKHPLQLPXPSUHUHTXLVLWHVRIDVXFFHVVIXOLQVWDOODWLRQDUHSUHVHQW 6RIWZDUH q q q q &RUDO)OH[L&RPYHUVLRQ[[ :LQGRZV17ZLWK6HUYLFH3DFNDQGKLJKHURU:LQGRZV ,I&XVWRPLQVWDOODWLRQLVVHOHFWHGPDNHVXUHWRLQVWDOOWKH+\SHU7HUPLQDO RSWLRQ ,QWHUQHW([SORUHURUKLJKHU 0LFURVRIW:RUGRUKLJKHU +DUGZDUH q q q q q q q q 3HQWLXP,,0+] 0%5$0 0%IUHHKDUGGLVNVSDFH &'520GULYH ´&RORU0RQLWRU69*$´UHFRPPHQGHG 0%JUDSKLFDGDSWHUVXSSRUWLQJ[UHVROXWLRQ )UHHVHULDO&20SRUW /RFN'HYLFH+$63 2. System Setup Overview Setting up the CVD system divides into three steps: ODB-API Software Installation page 2-2 CVD Software Installation page 2-6 Connecting the CVD (PC) to Coral FlexiCom page 2-9 Once the ODB-API and CVD software are both installed, restart the computer. Packing List The CVD kit contains the following items: G Installation CD containing the CVD software G Lock Device (HASP) G CVD User Manual 2-1 System Setup CVD User Manual ODB-API Software Installation Log on to the computer using an account with local administrator permissions. To install the ODB-API software, place the installation CD in the CD drive of the computer. The following splash window appears. We recommend closing all other applications that may be running in the background. Figure 1. CVD Splash Window 1. Click Install ODB-API and follow the instructions provided by the Setup wizard. Click Exit to close the Setup wizard. 2. Click the Install ODB option to launch the installation wizard; the Welcome window appears. 2-2 CVD User Manual System Setup Figure 2. ODB-API Setup, Welcome Window 3. Read the information presented in this window and click Next to proceed or Cancel to exit. 2-3 System Setup CVD User Manual ODB-API Setup, Destination Window 4. In the Destination Location window, click Next to proceed with the installation or click the Browse button to select a different folder for the installation. The Setup wizard starts copying files into the specified directory. Allow the wizard a few minutes to finish copying files. At any point in the procedure, click Cancel to stop the installation. The Setup Complete window appears when copying files is finished. 2-4 CVD User Manual System Setup ODB-API Setup, Setup Complete Window 5. Click Finish to complete the ODB-API software installation. After the PC restarts, continue with the CVD software installation in the following section. 2-5 System Setup CVD User Manual CVD Software Installation After you have installed the ODB-API software, log on to the computer. 1. In the CVD Splash window (Page 2-2), click Install CVD. A message box appears indicating that files are being copied. After the required files have been copied, the Setup Welcome window appears. CVD Setup, Welcome Window 2. Close any applications that might be running and click OK to proceed with the setup or click Exit Setup to exit. The destination window appears. 2-6 CVD User Manual System Setup CVD Setup, Destination Window 3. Click the button to install the software into the default directory. Alternatively, click Change Directory to select a different directory. The Program Group window appears. 2-7 System Setup CVD User Manual CVD Setup, Program Group Window 4. Click Continue to install the application under the default Coral View Designer Group. Alternatively, you can select a different group under Existing Groups. During the installation process, a bar indicates the progress of the installation. Click Cancel to stop the installation at any point during this process. When the installation completes, a Successful Installation message box appears. You should now reset the computer. ? 2-8 NOTE: If the Setup wizard finds DLL files with newer version than the version to be installed, click Keep in the message box that appears. CVD User Manual System Setup Connecting the CVD (PC) to Coral FlexiCom The connection between the CVD computer and the Coral serial port permits database transfer at up to 38.4Kbps via the Coral system. The CVD PC communicates with the Coral via an RS-232 channel. All the PI channels also function as ODB channels. The user can therefore work with PI and ODB (CVD) channels concurrently. The connection can be done via the following three channels: Remote CVD Coral FlexiCom RMI-Modem cvd Local CVD 8DRCM/RMI MSX/MEX/ MCPsl/ MCP-ATS (KB0) Local CVD CVD Connection 2-9 System Setup CVD User Manual To connect the CVD to Coral FlexiCom: 1. Connect the RS-232 CVD cable to the Coral serial port cable. a. Select the correct cabling option (according to the Coral RS-232 type). The options are described in Figure 3, Figure 4 and Figure 5. 25 20 14 13 7 Signal Ground 3 Rx Data to KB0 2 Tx Data from KB0 1 Signal Ground 5 4 Tx Data from CVD 3 Rx Data to CVD 2 1 KB0 Serial Data Port 9 6 CVD COM Serial Port (9 pin male connector) (25 pin male connector) Figure 3. FlexiCom to CVD PC–KB0 port 25-pin male connector 9 8 7 6 5 4 3 2 1 KB0 Serial Data Port (9 pin male connector) Signal Ground Data Terminal Ready Transmit Data Receive Data 5 4 3 2 1 6 CVD COM Serial Port (9 pin male connector) Figure 4. FlexiCom to CVD PC–KB0 Port 9-Pin Connector 2-10 9 CVD User Manual System Setup Refer to Chapter 5 in the Coral Installation Manual to identify the I/O connections MDF SGRND Signal Ground 5 9 RXD TXD Transmit Data 3 Receive Data 2 1 6 RMI or 8DRCM Cards RS-232 Serial Data Ports CVD COM Serial Port (9 pin male connector) Figure 5. FlexiCom to CVD PC-RMI and 8DRCM Port b. Run the cable from the Coral’s MDF/KB0/KB1 RS-232 serial data port to the COM socket located on the CVD computer. c. Place the DB-9 plug into the COM socket located on the CVD computer. 2. Connect the other end of the cable to the Coral Serial Port Interface located on the KB0/KB1 socket or RMI/8DRCM Coral Peripheral card through the MDF. 3. Insert the CVD Lock Device (HASP) into the parallel port of the CVD computer. Q CAUTION: The earth ground connection to the CVD computer should be the same earth ground connection supplied to the Coral system whenever possible. 4. Write down the serial port number and its physical location for future administration needs and database programming. RMI/8DRCM Location: Shelf_______ Slot_______ Port #_______ 2-11 System Setup CVD User Manual PI Terminal # (0-3, 5-7)__________ Refer to Chapter 17 in the Program Interface Reference Manual for PI Interface Terminal number. For more information about RMI or 8DRCM RS-232 Interface pin number and function assignments, see Chapter 5, External Connections (Peripheral Cards Connections) of the relevant Coral Installation Procedure and Hardware Manual. For more information about FlexiCom 200 and Coral SL KB1 RS-232E Interface pin number and function assignments, see Section 9.4, Remote Maintenance and Auxiliary Functions (RMI) of the Coral SL (FlexiCom 200 Base Unit) Installation Procedure and Hardware Manual. 2-12 CVD User Manual System Setup PI Database Settings Connecting the CVD system to Coral FlexiCom affects the Coral database. The following PI settings must be entered in the Coral prior to operating the CVD. For more information, see Coral Program Interface Reference Manual. Terminal Setup (Route: TERM, 0) Terminal Setup is used to define parameters such as baud rate, terminal type and parity. Set the options as described in Chapter 17 of the Coral Program Interface Reference Manual. Set the RS-232 interface parameters. 2-13 3. Getting Started Logging on and the CVD Start Window 1. To log on to the CVD, click and then select Programs > CoralVIEW Designer > CoralVIEW Designer. Or Double-click the desktop shortcut. The Login dialog box appears. Login Dialog Box 2. On initial log on, use the default user name (Admin) and password (Admin) to log on to the application. The CVD Start window appears. The Start window is used to: q q q Connect or disconnect to Coral FlexiCom. Manage and configure sites, users, and user profiles. Open a terminal emulation session. 3-1 Getting Started CVD User Manual CVD Start Window By default, the Start window displays the CVD Loggers window that logs system information in three tabs: q Connection tab—keeps a record of logged-in users and time and date q Errors tab—keeps errors that have occurred in the system q Database tab—keeps a record of get/update database operations For more information on the Loggers window, see “Viewing CVD Loggers” on page 4-20. 3-2 CVD User Manual Getting Started System Administration CVD administration includes the following: q Site Definition—defining sites and their connection settings q User Definition—defining the users of the system q User Profiles Definition—defining access profiles to users in the system 3-3 Getting Started CVD User Manual Site Definition The Site Definition form allows defining sites with different connection settings. This saves the need to change the connection setting every time you want to connect to a different site. Sites that are no longer used can be deleted or modified to suit changing needs. To define sites: 1. In the Start window, select Start > Sites Definition. The Site Definition form appears. Site Definition Form, Communications Tab The Site Definition form includes two tabs configured separately. q q 3-4 Communications tab—used to enter essential information required by the Coral FlexiCom. Information tab—used to enter other information regarding the site. CVD User Manual Getting Started 2. Enter the necessary information, as detailed in the following sections. 3. Click Add New The fields are cleared and you can enter the necessary information for the new site. 4. In the Name box, type in the name of the site. 5. Enter the Coral password in the HI Password box. You can enter any of the four Coral password levels. 6. Enter values for the other parameters according to the following table. Field Name Description Default/Range Dial Number Dial number for the site. Used Not Available in modem communication. Country Code The country code. Used in modem communication. Not Available Area Code Not Available The area code. Used in modem communication. Data Bits Default: 8 Range: 7-8 Stop Bits Default: 1 Range: 1-2 *Baud Rate Default: 9600 Range: 1200-115200 bps Parity Default: None Range: Even, Odd, None, Mark, Space * Mandatory field. 3-5 Getting Started CVD User Manual 7. Click Apply to save the changes. The system checks the validity of the new site. In case one of the values is not valid, an error message appears and the action is not confirmed. c NOTE: The Apply button is not available until you enter values in the mandatory fields (Name, HI Password, Baud Rate). 8. Select the Information sheet, and type in values for the field(s). 9. Click Apply to save the changes. To delete an existing site: 1. Select the site in the Name box. 2. Click Delete. A warning message appears and the site is erased after the deletion has been confirmed. The Properties sheet displays details of the next site in the database. To modify an existing site: 1. Type the new value in one of the fields (or more). Click Clear All to clear information from all the fields. Click Cancel to close the Properties sheet without applying changes. 2. Click Apply to confirm the changes and save the new configuration in the system. If one of the mandatory fields is still blank, the Apply button appears grayed out (disabled) and changes cannot be confirmed. 3-6 CVD User Manual Getting Started User Definition The User Definition form allows for management of users in the CVD system. This includes adding new users, deleting users, and modifying existing users. Only users with Admin permission can manage other users in the system. On initial entry to the system, only one user (Admin) is defined. This user can not be deleted. c NOTE: We recommend changing the password of the Admin user for security reasons. Make sure not to lose this password. To define a new user: 1. In the Start window, select Start > CVD Users Definitions. Users Definition Window 2. Click Add New. All the fields in the window are cleared. 3-7 Getting Started CVD User Manual 3. Enter parameter values for the new user as detailed in the following table. Field Name Description Range *UID User ID. A string of characters First Name User first name 28 alphanumeric char. Last Name User last name 28 alphanumeric char. Phone User phone number 12 numeric char. *User Type Permissions assigned to this user. Depends on the profiles defined in “Profiles Definition” on page 3-10. * Mandatory field. 4. Click Change Password. The Password Definition dialog box appears. Password Definition Dialog Box 5. Type in the user password in the top field, and re-type it in the bottom field. The password may contain a maximum of 24 alphanumeric characters. 6. Click OK to close this dialog box and to return to the Users Definition window. 3-8 CVD User Manual Getting Started 7. Click Apply to save the new user in the system database. The new user is added to the system. In case one of the values is not valid, an error message appears and the action is not confirmed. c NOTE: The Apply button is not available until you enter values in the mandatory fields (UID and User Profile). To delete a user: 1. In the UID box, select the user you want to delete. 2. Click Delete. 3. In the warning message that appears, click OK to confirm the deletion. 3-9 Getting Started CVD User Manual Profiles Definition The User Type Definition form allows for assignment of access profiles to users. Only users with Admin permissions can manage other user profiles. By default, the CVD application creates one profile (Admin) upon initial connection to the system. This profile cannot be deleted. To define a user profile: 1. In the Start window, select Start > CVD User Type Definition. The User Profiles window appears. User Profiles Definition Window Under the Security Record list, all the forms, wizards and reports are displayed. 2. Click Add New. The User Profile field is cleared. 3-10 CVD User Manual Getting Started 3. In the User Profile field, type in the name of the new profile. 4. To set the type of access you want to grant to this profile, select a form or wizard and check the boxes in the Display or Modify columns as follows: q q q Check the boxes in both columns to allow modifying the form. Check only the box in the Display column to allow viewing the form only. Uncheck the boxes in both columns to deny access to the form. Alternatively, click Select All to allow modifying all the forms and wizards. 5. Click Apply. The new profile is added to the database. To delete a profile: 1. In the User Profile field, select the profile you want to delete. 2. Click Delete, and click OK in the warning message that appears. You cannot delete the default Admin profile, or any profile that is currently in use. To modify a profile: 1. In the User Profile field, select the profile you want to edit. 2. Check the Display/Modify columns in the forms you want to edit. 3. Click Apply to save the changes. 3-11 Getting Started CVD User Manual Connecting to the Coral FlexiCom Before Connecting to the Coral Using a Terminal Emulation session, check the following before initial connection to the Coral FlexiCom: q Cable connection q Baud rate q COM port settings To open a terminal emulation session: 1. Select Start > Terminal Emulation. A blank HyperTerminal window appears. HyperTerminal Window 2. To check the cable connection, press Enter. The PI Configuration menu appears. If the Configuration menu does not appear check the following: 3-12 CVD User Manual q q q Getting Started The cable connections between the PC and the Coral are correctly inserted. The HyperTerminal uses the same port to which the cable was inserted. Baud rate of the HyperTerminal is set to 9600. 3. To check the baud rate, select File > Properties or click the Properties icon. The PC Terminal Properties sheet appears. PC Terminal Properties Sheet 4. Click Configure. The COM# Properties sheet appears. 3-13 Getting Started CVD User Manual COM# Properties Sheet 5. Set the parameters in the COM# Properties sheet as follows: Parameter Value Bits per second (baud rate) 9600 Data bits 8 Parity None Stop bits 1 Flow control None 6. Click OK to save the change and to close the Property sheets. 7. To start a session with the new settings, click Disconnect reconnect c 3-14 and then . NOTE: Setting the communication parameters on the site definition does not affect the communication parameters for the HyperTerminal and vice versa. CVD User Manual Getting Started Connecting to Coral After setting the site definition as described in the previous sections, you are ready to connect to the Coral FlexiCom. To connect to the Coral: 1. In the Start window, select Start > Connect. The Connect Coral Site window appears. Connect Coral Site Window 2. In the Coral Site list, select the site to which you want to connect. 3. In the NPL Option list, select the required option as explained below. q q For initial connection to the site: Select Download NPL & Sizes. This option downloads the Coral numbering plan and size definitions to the CVD. The download process takes about 2 minutes (depending on the size of the NPL, the baud rate, and the computer type). For subsequent connections to the site: 3-15 Getting Started CVD User Manual Select Existing NPL. This option uses the Coral numbering plan and sizes that was last loaded to the PC (per site name). Connecting in this way is much faster and we recommended it whenever you are certain that all changes were made via the CVD. 4. In the PORT# list, select the physical port that connects to the Coral. Alternatively, click the Connect by Modem checkbox if you use an internal or external modem to connect to the Coral. The COM # list changes to the Modem # list and you can select a modem in the list of available Modems. 5. Click OK to start the connection. The CVD changes the channel protocol to ODB, and begins transferring system configuration information from the Coral FlexiCom to the PC. At the end of this process the CVD main window appears. Allow the CVD a few seconds to build its database. The progress bar at the lower left-hand corner of the main window indicates this process. 3-16 CVD User Manual Getting Started Changing the Communication Protocol The CVD connects to the Coral using a unique protocol called ODB (Open DataBase). Enabling this protocol disables the Coral standard ASCII protocol. This means you cannot use terminal emulation concurrently with a CVD session once its started. To disable the ODB protocol and revert to the standard ASCII protocol do one of the following: G In the Start menu, choose Disconnect or close the CVD main window. -OrG Perform RESTART by pressing <CTRL> Y in any other HI terminal. All terminals are reverted to an ASCII protocol. 3-17 Getting Started CVD User Manual CVD Main Window Following a successful login, the CVD main window appears. This window provides a menu bar, toolbars, the Coral Explorer pane, and the shortcuts pane to navigate between the various forms through which the system is configured and monitored. These tools are described in the following sections. Menu Bar Working Window Toolbars Display Coral Explorer Shortcuts pane Status Bar CVD Main Window Menu Bar The menu bar contains 13 main menus. Each of these menus provides access to a particular aspect of the Coral system configuration, and tools to monitor the system. The menu bar groups forms according to subject, for example the Station menu or the Trunks menu. 3-18 CVD User Manual Getting Started Toolbars Display The toolbars provide quick access to all CVD forms. Similar to the menus, the icons in the toolbars are grouped according to subjects. By default, only a few toolbars appear automatically when you connect to the CVD. To display other toolbars, right-click anywhere in the toolbar area, and select the required toolbar in the list that appears. For more information on the CVD toolbars and toolbars customization, see “Customizing Toolbars” on page 4-2. Coral Explorer The Coral Explorer pane displays CVD features in a hierarchical tree, and includes five main branches: q Coral Configuration Interface (CCI) Branch, see page 4-14 q Numbering Plan, see Chapter 5 q Envelope Branch, see page 4-18 q Reports, see Chapter 6 q Wizards, see Chapter 7 Click these branches to reveal the lists of sub-branches. Some of the branch folders are marked with a plus (+) symbol to indicate that these folders have underlying subfolders. Folders with (all) their branches displayed are marked with a minus (-) symbol. To open a form in the Coral Explorer, double-click the form. More than one form can be displayed simultaneously and located anywhere on the screen. 3-19 Getting Started CVD User Manual Right-clicking a form in the Coral Explorer, opens a list of form display options: Option Description Run Linked Form with Entry Value Displays the selected form with the specific entry selected in the Coral Explorer. Run Linked Form Displays the selected form with no entry value. Add to Shortcuts Adds the selected form to the Shortcut bar. Refresh Explorer Reloads data from the database. View Picture Available only for stations and cards. Shortcuts Pane The shortcut bar provides quick access to frequently used items. On initial connection to the CVD the shortcut bar is empty, but once shortcuts are added they will remain there for your next CVD session unless removed manually. To add an item to the shortcut bar, drag and drop the item onto the shortcut bar. To remove and item, right-click and select Remove from Shortcuts. Working Window The working window displays a list of dial numbers selected in the NPL. 3-20 CVD User Manual Getting Started Status Bar The CVD Status bar provides information on the current CVD session and connection settings. The information is presented from left to right. Current logged on user ID Name of Site Connection Mode Current Time Current Date Status Bar 3-21 4. Basic Operations Overview Basic Operations cover general operation procedures of the CVD application. This includes the following issues: Customizing the Main Window page 4-2 Using Forms page 4-7 Navigating Through the CVD page 4-12 Creating Shortcuts page 4-19 Viewing CVD Loggers page 4-20 4-1 Basic Operations CVD User Manual Customizing the Main Window You can customize the main window setup in various ways. Resizing Panes The width of the Shortcut bar and the Coral Explorer are resizable to fit more information conveniently. To resize these panes, place the mouse pointer over the borderline. The mouse pointer turns into a double-headed arrow. Click and drag the borderline left or right as required. Customizing Toolbars The CVD offers 12 different toolbars, which provide access to every form. Only a few toolbars appear with the default setup. Each toolbar hosts a set of related icons that open the CVD forms. Place the mouse pointer over an icon to view the name of the form it opens. Toolbars in the CVD are fully customizable. You can display or hide toolbars, move toolbars to other locations on the screen and create new toolbars. To display or hide toolbars: 1. Right-click anywhere in the toolbar display area. A list of all the toolbars appears. 2. Check toolbars you wish to show and uncheck toolbars you wish to hide. The toolbars are displayed or disappear accordingly. To move a toolbar, click and drag the toolbar by its handle 4-2 to a new location. CVD User Manual Basic Operations If you drag the toolbar outside the area of the toolbars display, a title with the toolbar’s name appears above the toolbar. To create a new toolbar: 1. Right-click anywhere on the toolbar display. A list of toolbars appears. 2. Select Customize. The Customize dialog box appears. 3. Click New. The New Toolbar box appears. 4-3 Basic Operations CVD User Manual 4. Enter a name and click OK. The New Toolbar dialog box closes and the newly created toolbar appears under the existing toolbars in the main window. 5. Select the Tools tab. 6. Under Categories, select a category. All the possible menu options and icons in this category appear under the Tools list. To view a description of the menu option or icon, select the icon and then click Description. 7. Drag and drop icons or menus onto the new toolbar. 8. Repeat Steps 6 and 7 for other categories. Click Close to finish. 4-4 CVD User Manual Basic Operations Customizing Menus and Icons The CVD provides options to customize the way menus and icons appear in the main window. To set these options, right-click anywhere in the toolbars display and select Customize in the list that appears. 1. In the Customize dialog box, select the Options tab. 2. Check or clear options in this window according to the following table. 4-5 Basic Operations CVD User Manual Option Description Menus show recently used tools first Check this option if you want the System menu to show the most used menu options first. Show full menus after a short delay Check this option to show all menu options after icon. placing the mouse pointer over the Reset my usage data Click this button to reset the list of most used menu options to default settings. Large icons Check to display large icons Show Screen Tips on toolbars Check to display screen tips when positioning the mouse pointer over an icon. Menu animation Select the type of menu animation: • • • • 4-6 None Random Unfold Slide CVD User Manual Basic Operations Using Forms Programming and maintenance of the Coral FlexiCom using the CVD involves entering information in forms. The forms are dialog boxes that normally display an entry (e.g., trunk, station, etc.) and the properties or features associated with this entry. In most of the forms in the CVD you are required to make an entry to view information in the form. There are several types of entries: q Dial # as in the Station Definition form q Index # as in the COS form q Shelf, Slot as in the CLIS form q Shelf, Slot, Port as in the DLIS form Some entry forms let you choose the type of entry (Q-SIG Channel and DLIS). Other forms do not require an entry. These forms usually display system-wide parameters, and the information is displayed automatically when the form opens. c NOTE: A “Do you want to save the changes” message appears when trying to close a form, change an entry, or click another tab after updating a parameter in the form. 4-7 %DVLF2SHUDWLRQV &9'8VHU0DQXDO 6WDWLRQ'HILQLWLRQ)RUP 6L[EXWWRQVDSSHDUDWWKHERWWRPRIHYHU\IRUP7KHVHEXWWRQVDUHXVHGWR SHUIRUPJHQHUDORSHUDWLRQVZLWKWKHIRUP %XWWRQ 'HVFULSWLRQ 2. 6HQGVWKHFKDQJHVWRWKH&RUDOGDWDEDVHDQGFORVHVWKHIRUP $SSO\ 6HQGVWKHFKDQJHVWRWKH&RUDOGDWDEDVHZLWKRXWFORVLQJWKH IRUP &DQFHO &ORVHVWKHIRUPZLWKRXWVHQGLQJFKDQJHV 5HIUHVK 5HFROOHFWVGDWDIURPWKH&RUDOGDWDEDVH +HOS 2SHQVRQOLQHKHOSUHJDUGLQJWKHFXUUHQWIRUP 2SHQVDOLVWRIUHODWHGIRUPVVHH³%URZVLQJ)RUPV8VLQJ/LQNV´ RQSDJH CVD User Manual Basic Operations Entering Information in Forms CVD forms may contain several elements that differ in the manner in which you enter information. The following table summarizes the most typical ways of entering information in the CVD forms. Element To enter information Text box Click inside the box and type in the required value. Listbox Click the down arrow next to the box and select a value. Or Click inside the box and type in a value. Listbox with multiple values See “Entering Multiple Values” on page 4-10. String box Click the down arrow next to the box and select elements to build a string of instructions. Elements can be numbers and operators that perform a function on these numbers. Table Cell Click inside the table cell. A down arrow appears. Click the arrow and select the value in the list that opens. q To view current values of parameters, place the mouse pointer over the parameter. A ToolTip with the parameter’s value appears. q To view full names of parameters, place the mouse pointer over the parameter. A ToolTip with the parameter’s full name appears. 4-9 Basic Operations CVD User Manual Entering Multiple Values Many parameters in the CVD forms allow setting multiple values. This type of parameter is indicated by the word Multiple in the adjacent text box of the parameter (instead of showing the parameter’s value). To view all the values set for a specific parameter, place the mouse pointer over the word Multiple. A ToolTip appears displaying all assigned values. This is illustrated in the following figure. Parameter with Multiple Values To enter multiple values: 1. Click the down arrow next to the parameter. The dialog box that appears features two lists, as shown in the figure below. Multiple Values Dialog Box The Selected Numbers list on the left includes values that are part of the parameter definition. The right-hand list includes all available values for this parameter. 4-10 CVD User Manual Basic Operations 2. To add more values, select a value in the right-hand list and click the icon. To remove values, reverse the process by selecting the unwanted value and clicking the icon. 3. Click the parameter down arrow to close the Multiple Values dialog box and return to the form. Browsing Forms Using Links Adjusting system settings often requires resetting parameters for a number of different forms. Therefore, each form in the CVD features the Links at the bottom-left corner of the form. icon Click this button to open a context-sensitive list of forms related to the currently open form. Since all other forms also feature this button, this is an excellent method to quickly browse between related forms. If the source form and the related form require the same entry, the related form will open with the entry currently opened in the source form. If the source and related form do not require the same entry, the related form will open with no entry. See the Appendix for a list of source and linked forms. 4-11 Basic Operations CVD User Manual Navigating Through the CVD The CVD offers several fully interchangeable ways to navigate through the application. Users can choose the most suitable way to fit their needs. Navigating with the Menu Bar The menu bar in the CVD operates like any other menu bar in a Windows-based application. The menu bar divides forms into menu options according to specific Coral issues. To open a form, click the relevant menu option. If a form distributes information over several tabs, a small arrow next to the form’s name indicates it. Click the arrow to display the tabs and then select one of the tabs. The form opens to the selected tab. Station Menu, SLT Database Options 4-12 CVD User Manual Basic Operations Navigating with Coral Explorer Coral Explorer occupies the middle pane of the main screen display. It offers a hierarchical approach to all the features of the CVD (forms, dial numbers, wizards, and reports), and makes use of standard Windows Explorer conventions. Two types of nodes appear in the Coral Explorer tree: q q Folder nodes–represented by the underlying nodes or elements. icon. These nodes may open to Icon nodes–represented by different Coral icons. These nodes are linked to different items depending at which branch the node is located. Icon Nodes in: Open to: CCI and Envelope branches Forms NPL branch A List view of dial numbers Reports branch Reports Wizards branch Wizards To open an Icon node, double-click it. Coral Explorer divides into five main branches described in the following sections. 4-13 %DVLF2SHUDWLRQV &9'8VHU0DQXDO &RUDO&RQILJXUDWLRQ,QWHUIDFH&&,%UDQFK 7KH&&,EUDQFKJURXSVIRUPVXQGHUWKUHHPDLQWRSLFV q q q 6\VWHP²DOOIRUPVQHHGHGWRFRQILJXUHDQGPDLQWDLQWKH&RUDOV\VWHP 6WDWLRQ²DOOIRUPVQHHGHGWRFRQILJXUHDQGPDLQWDLQVWDWLRQVLQWKH&RUDO 7UXQNV²DOOIRUPVQHHGHGWRFRQILJXUHDQGPDLQWDLQWUXQNVLQWKH&RUDO <RXFDQULJKWFOLFN,FRQQRGHVLQWKH&&,EUDQFKWRRSHQDPHQXZLWKWKH IROORZLQJRSWLRQV 2SWLRQ 'HVFULSWLRQ 5XQOLQNHGIRUPZLWKHQWU\YDOXH 2SHQVWKHOLQNHGIRUPZLWKWKHVHOHFWHG HQWU\ 5XQOLQNHGIRUP 2SHQVWKHOLQNHGIRUPZLWKQRHQWU\ 5HIUHVK&RUDO([SORUHU 5HEXLOGV&RUDO([SORUHUIURPWKH&9' GDWDEDVH $GGWR6KRUWFXWV $GGVWKHLFRQWRWKH6KRUWFXWVEDU 9LHZ3LFWXUH 2SHQVWKH37\SHRUWKH,7\SHSLFWXUHRI VWDWLRQV CVD User Manual Basic Operations The LCR under the System topic operates dynamically by displaying branches with information drawn directly from the Coral system. LCR/ARS in the CCI Branch Other topics in the CCI branch display information according to the Coral NPL and sizes. 4-15 Basic Operations CVD User Manual Numbering Plan (NPL) Branch The NPL branch provides a tree view of Coral dial numbers according to NPL Types. Each folder in the NPL branch represents a different NPL Type. System Types appear as subfolders under the NPL Type folders. To view dial numbers in the system, click the required NPL Type. A plus sign (+) appears next to the folder. Click the plus sign to reveal System Types or dial numbers. Click a single dial number or a range of numbers to view the dial numbers in a list view, as shown in Figure 6. Figure 6. Example NPL List You can sort columns in the list view in ascending or descending order by clicking the column header. Right-click a dial number to display a menu with the following options. 4-16 CVD User Manual Basic Operations Option Description View Determines display options for the dial numbers. The options are: Large Icons, Small Icons, List, and Details. Arrange Icons Determines the order of the icons: Left (left to right) or Top (top to bottom). Available only if View set to Large Icons or Small Icons. Refresh View Rebuilds the Coral Explorer tree according to information in the CVD database. Add Item Allows adding another item to the NPL. Update Item Allows editing dial number names and number. Delete Item Deletes the selected dial number. Erase NPL Deletes the entire NPL. Q Important: Properties The NPL cannot be recovered. Displays the Properties sheet of the selected dial number. List of related forms Select one of the forms in the list. Displays the form without an entry. Additionally, the Add, Update, and Delete Item options described in the above table can be applied to more than one dial number or to a range of dial numbers using the standard multiple selection techniques of Windows. For more information on NPL see Chapter 5, “Numbering Plan”. 4-17 Basic Operations CVD User Manual Envelope Branch The Envelope branch is used for system administration. This includes Site Definition, User Definition, and Profiles Definition. For more information, refer to “System Administration” on page 3-3. Reports This branch opens the various reports the CVD can generate. The reports are read-only and you can print them or export them to other file formats. For more information about the reports, see Chapter 8, “Reports”. Wizards The Wizards branch offers access to the five wizards in the CVD. Wizard Description Add/Modify Trunks Wizard Adding trunks to the Coral station or modifying existing trunks Add/Modify Station Wizard Adding stations to the Coral system or modifying existing stations Station Data Transfer Wizard Transferring data between two stations Add/Modify LCR/ARS Wizard Adding LCR/ARS to the Coral system or modifying existing LCR/ARS Add/Modify Call Coverage Groups Wizard Adding or modifying Call Coverage groups. For more information about working with wizards, see Chapter 7, “CVD Wizards”. 4-18 CVD User Manual Basic Operations Creating Shortcuts Every item with an icon (excluding folders) in the Coral Explorer can be dragged and dropped onto the shortcut bar. This creates a shortcut icon named after the item from which it was created. In this way you can create shortcuts to forms, stations, or even wizards that you frequently use. To create shortcuts: Select an item and then drag it to the shortcut bar. Or Right-click an item and select the Add to Shortcuts option. To delete shortcuts: Right-click a shortcut and select Remove from Shortcuts. 4-19 Basic Operations CVD User Manual Viewing CVD Loggers The Loggers window displays recorded information regarding system use and users. The window divides into three different records distributed over three tabs accordingly. Loggers Window The loggers are described in the following table. 4-20 Logger Description Connection List of users who have logged into the system with their login and logout times. Error List of errors that occurred during the current session. The information is deleted when you logout. Database List of operations that were executed during the operation of the CVD. By default, the Database logger logs only Put operations. &9'8VHU0DQXDO %DVLF2SHUDWLRQV 7RRSHQWKH/RJJHUVZLQGRZVHOHFW6WDUW!6KRZ/RJJHUVLQWKHPDLQPHQXRU FOLFNWKH)IXQFWLRQNH\ 5LJKWFOLFNLQDQ\ORJJHUWRDFFHVVWKHIROORZLQJRSWLRQV 2SWLRQ 'HVFULSWLRQ 6DYH$V 6DYHVWKHGDWDEDVHILOHLQFRPPRQILOHIRUPDWV 3ULQW 3ULQWVWKHGRFXPHQWWRWKH3&GHIDXOWSULQWHU /RJJHU2SWLRQV /HWV\RXVHOHFWEHWZHHQWZRORJJLQJRSWLRQV RQO\UHOHYDQWIRU 'DWDEDVHORJJHU 8SGDWH)HWFK±DOO3XWDQG*HWRSHUDWLRQV 8SGDWH±RQO\3XWRSHUDWLRQVGHIDXOW &OHDU'DWDEDVH 'HOHWHVDOOUHFRUGVLQWKHFXUUHQWORJJHU$YDLODEOH RQO\WR$GPLQXVHUV ,QWKHERWWRPSDQHO\RXFDQVFUROOWKURXJKORQJOLQHVWKDWGRQRWILWLQWRWKH /RJJHUVZLQGRZ 5. Numbering Plan Overview The Numbering Plan (NPL) is used to determine the Coral system-wide numbering scheme. Dial numbers in the NPL are grouped into folders according to NPL Types. This includes all the folders under the NPL branch in the Coral Explorer (Trunks, SLT, Keyset, etc.). In some of these NPL Types, dial numbers are further grouped into subfolders according to System Type. For example, the Keyset NPL Type divides into five System Types: EKT, DKT, DST, GKT, and WST. This is shown in the following figure. The NPL database resides on the CVD computer and is updated concurrently with the Coral database. NPL Type Folder System Type Folder The Unclassified folder is a default System Type reserved for dial numbers that were not defined in other System Types. To reveal dial numbers under an NPL Type folder, click the required NPL Type. If a plus sign (+) appears next to the folder, System Types or dial numbers exist 5-1 Numbering Plan CVD User Manual within this folder. If no plus sign appears next to the folder, no dial numbers are defined for this folder in the current system database. Click a range of dial numbers to view them in a list view, as shown below. NPL List View The list view distributes the information regarding the selected dial numbers over the columns as follows: Column Description From Number Dial number Full Name Name of the dial number up to 16 characters. For features, the name of the feature appears instead. 5-2 Short Name Name of the dial number up to 5 characters. NPL Type NPL Type of the dial number System Type System Type of the dial number CVD User Manual Numbering Plan Column Description Shelf, Slot, Ckt Displayed for dial numbers with physical location (e.g., stations, and trunks) the columns represent the physical location of the dial number. Index Displayed for dial numbers with logical location (e.g., features and groups). Shows the index number of the feature or group. Node Number Displayed for dial numbers of network nodes. 5-3 Numbering Plan CVD User Manual Modifying the List View You can control the manner in which dial numbers are displayed in the list view. When you click a dial number range in Coral Explorer, the default display is a detailed list of the dial numbers. To change the list view display: 1. Right-click anywhere in the list view and select View in the shortcut menu that appears. The View option offers four different displays of the list view: Large Icons—displays the dial numbers in large icons and no details. Small Icons—displays the dial numbers in small icons and no details. List—displays dial numbers in a list view and no details. Details—displays dial numbers in a list view with details. If you choose to display dial numbers in a list, you can arrange the list in top-down or left-right order by selecting Arrange Icons in the shortcut menu. 2. To refresh the list view, right-click anywhere in the list view and select Refresh in the shortcut menu that appears. 5-4 CVD User Manual Numbering Plan In addition, you can change the width of columns in the list view to fit information more conveniently. To change the width of columns: 1. Place the mouse pointer over the borderline between two column headings. The mouse pointer turns into a double-headed arrow as shown in the figure below. 2. Drag the borderline left or right as required. You can also sort the list view in ascending or descending order. To sort columns: 1. Click any column heading once to sort the list view in ascending order. 2. Click the column heading again to sort the list view in descending order. 5-5 Numbering Plan CVD User Manual Operating Dial Numbers in the List View Right-click in the list view to open a menu with the following options: 5-6 Viewing Dial Number Properties page 5-7 Adding Dial Numbers page 5-8 Updating Dial Numbers page 5-9 Deleting Dial Numbers page 5-10 Erasing the NPL page 5-10 Using NPL Links page 5-10 CVD User Manual Numbering Plan Viewing Dial Number Properties When the list view displays a long list of dial numbers it is easier to view the properties of one dial number in a single dialog box. To do this, right-click a dial number in the list view and select Properties in the shortcut menu that appears. The Properties sheet displays the selected dial number information in a dialog box as shown in the figure below. 5-7 Numbering Plan CVD User Manual Adding Dial Numbers You can add dial numbers in the list view to any NPL Type. 1. Right-click anywhere in the list view and select Add Item in the shortcut menu that appears. The Add New Number dialog box appears. 2. In the NPL Type list, select the type of dial number you wish to add. The address (ShelfSlotCkt, Index, Node) of the dial number is automatically checked according to the type of dial number selected. 3. Enter other required information for the new dial number and click either Apply or OK. 5-8 CVD User Manual Numbering Plan Updating Dial Numbers Updating dial numbers in the list view is done in similar way to adding new dial numbers. 1. Right-click anywhere in the list view and select Update Item in the shortcut menu that appears. The Update Dial Number dialog box appears. Update Number Dialog Box 2. Update the required information. Fields that appear grayed out (disabled) are read-only fields that cannot be updated. 3. Click either Apply or OK. 5-9 Numbering Plan CVD User Manual Deleting Dial Numbers You can use the list view to delete one or more dial numbers. 1. To delete dial numbers, select a dial number or multiple dial numbers using standard Windows selection techniques. 2. Right-click the selected dial number or numbers, and select Delete Item in the shortcut menu that appears. 3. Confirm the deletion in the message box that appears. Erasing the NPL One other option of the list view is erasing the entire NPL. 1. Right-click anywhere in the list view and select Erase NPL in the shortcut menu that appears. 2. Confirm the deletion in the message box that appears. Q WARNING: After erasing the entire NPL there is no way to recover it. Using NPL Links At the bottom of the shortcut menu, a list of forms related to the currently open NPL branch appears. You can use this list to open the forms. To open a form, select it from the list. If you selected a form that opens with an entry, the forms displays the selected dial number as the form’s entry. 5-10 6. CVD Forms Overview The following sections describe forms with special user-interface elements. The forms are divided into eight Coral issues according to the entries in the menu bar from left to right: System page 6-2 Trunk page 6-33 Station page 6-37 Groups page 6-51 Alternate Route page 6-54 ISDN page 6-58 Hotel page 6-61 Network page 6-64 6-1 CVD Forms CVD User Manual System Forms Card List The Card List form (CLIS) provides a list of cards installed in the Coral system. By default, the CLIS form opens with the Filter tab to allow filtering the card list. Card List (CLIS) Form 6-2 CVD User Manual CVD Forms The form contains two tabs: q CLIS—for viewing the card list and updating two parameters: I Type—type of card initialized (first time card identified by the system) in the designated slot. Card DB—Identifies the card database number assigned to the card type in the designated slot. q Filter—to filter the card list, so as to view only those cards required: 1. Click the Filter tab and check Use Filter. 2. Under Filter Parameters, click Add and select the From/To Shelf range and the From/To Slot range, as shown in the figure below. You can add as many filters as you like. CLIS Filter Tab, Filter Parameters 3. Click CLIS Refresh. The Filter sheet closes and the Card List is refreshed according to the chosen filter parameters. c NOTE: You can double-click a card in the CLIS tab to open the Port List form of the card filtered by the card location. 6-3 CVD Forms CVD User Manual Hardware Data The Hardware Data form provides hardware information pertinent to the Coral FlexiCom connected to the CVD. The CVD downloads this data from the Coral and allows configuring physical data in order to build an accurate representation of the Coral. Configuration of physical layout data is done when setting up the system, and is saved into the Coral database. You can reconfigure this data when the Coral physical layout changes. Read-only fields in the Hardware Data form display the Coral type, some of the hardware components, and fixed data such as number of cards, location of the MCP unit, etc. q Coral FlexiCom 200 (Coral SL) Data Map q Coral FlexiCom 300 (Coral I) Data Map q Coral FlexiCom 400 (Coral II) Data Map q Coral III SVC Data Map q Coral FlexiCom 5000 (Coral III 4GC) Data Map q Coral FlexiCom 6000 Data Map (TBD) Each of these forms allows modifying hardware layout parameters to provide an accurate representation of the Coral FlexiCom system. 6-4 CVD User Manual CVD Forms Coral FlexiCom 200 (Coral SL) The Coral FlexiCom 200 Data Map form contains four tabs to define the hardware layout of a Coral FlexiCom 200 unit. Data Map Form, Coral FlexiCom 200 1. In the General tab, select the number of DBXs and the number of expansion units according to the system hardware layout. The Coral FlexiCom 200 Exp. 1 and 2 tabs become available accordingly. 2. Configure the Base unit parameters in the Coral FlexiCom 200 (SL) Base tab. 6-5 CVD Forms CVD User Manual 3. In the Coral FlexiCom 200 (SL) Exp. 1 and 2 tabs, define CSLX expansion unit parameters. These tabs are not available if you do not select expansion units in the General tab. Coral FlexiCom 300 and 400 (Coral I, II, III SVC) By default, the Hardware Data form of FlexiCom 300 and 400 is initially configured to FlexiCom 400, as shown in the figure below. Hardware Data Form, Coral FlexiCom 400 1. To change the type, select the required type in the Coral Type box. The form changes accordingly and the title of the form indicates the selected type. 6-6 CVD User Manual Q CVD Forms IMPORTANT: Before changing Coral system type, make sure to close all other hardware configuration forms (Card List and Hardware Graphic). 2. After selecting the required Coral type, select the number of DBXs and other data in the General tab. 3. For Coral III SVC, you can also define PPS and RPS in the Shelf Info tab. Coral FlexiCom 5000 (Coral III 4GC) The Hardware Data form of Coral FlexiCom 5000 contains a general tab and up to five additional tabs corresponding to the five cabinets available on the Coral FlexiCom 5000. You can select the number of cabinets and the Control Unit cabinet according to the hardware layout of the system. 6-7 CVD Forms CVD User Manual Figure 7. Hardware Data Form, Coral FlexiCom 5000 To specify the number of cabinets: 1. In the General tab, select the required number in the Number of Cabinets box. The selected number determines how many Cabinet tabs become available. In the example in Figure 7 the number of cabinets is 1. Therefore, only the Cabinet 1 tab is available. 2. In the Control Unit Cabinet # box, select the cabinet that hosts the Control unit. The control unit always resides on the lowest shelf of the cabinet and cannot be more than two cabinets away from any cabinet. For example: 6-8 CVD User Manual CVD Forms If the number of cabinets is five, the control shelf must reside on cabinet 3. If the number of cabinets is four, the control shelf can reside on cabinet 2 or 3. If the number of cabinets is three, the control shelf can reside on any of the shelves. Each cabinet tab that becomes available hosts a subsequent General tab and up to four Shelf Info tabs. In the general tab of each cabinet, select the number of shelves in this cabinet. According to the selected number, Shelf Info tabs become available. In the following figure, the number of shelves is 3. Therefore, three Shelf Info tabs are available. Hardware Data Form, Coral Flexicom 5000, Cabinet 1, General Tab 6-9 CVD Forms CVD User Manual Use the Shelf Info tabs to define the required hardware layout of the system. Parameter Description Shelf Physical Location Shelves in the Coral FlexiCom 5000 system are numbered from the bottom. Range is 0 to 3, according to the number of shelves selected for the cabinet. Shelf Logical Location This is the Coral logical address of the shelf and is numbered 0 to 15 in duplication system. 0 to 7 in non duplicate system. The range shows even or odd numbers according to the PB setting. The user should indicate for each physical location the proper shelf logical address or indicate No Shelf in this location. PPS Select Yes or No according to the system hardware configuration. RPS Select Yes or No according to the RPS system hardware configuration. Remote Select Yes for a shelf in a remote location. Remote Site Name Available only if Yes is selected in the Remote box. The name will appear in the Graphic Map. PB Card PB and PB 24 generate an even range values of logical locations. No PB generates an odd range of values. 6-10 CVD User Manual CVD Forms Hardware Graphic Map The Hardware Graphic Map form graphically displays the Coral system configuration. The picture that is displayed depends on the information drawn from the Coral (slot assignment) and information that has been configured manually in the Hardware Data form (coral type, number of DBXs, etc.). The following figure illustrates a Hardware Graphic Map of the Coral FlexiCom 400 system. Hardware Graphic Map, Coral FlexiCom 400 The LEDs on the card denotes the status of the card: q Green–active q Red–not active (any other status) The hardware graphic map provides the following: 6-11 CVD Forms CVD User Manual Viewing cards information Right-click a peripheral card and select Card Information in the shortcut menu that appears. Information relating to the card appears in a yellow box to the left of the card. c NOTE: Double-click a peripheral card to open its Port List form. You can then proceed to editing ports for this card. See “Port List” on page 6-14 for more information on this form. Viewing Present Type (P Type) vs. Initialized Type (I Type) The P Type and the I Type options are located at the bottom left corner of the Hardware Graphic Map form. 6-12 q Click P Type to view present types of the Coral peripheral cards. q Click I Type to view initialized types of the Coral peripheral cards. CVD User Manual CVD Forms Editing Cards Information (Only in I Type) While you are in I Type display mode, you can edit card information to reflect recent changes in the Coral system. 1. Right-click a peripheral card and select Card Edit in the shortcut menu that appears. The following dialog box appears. Card Edit Dialog Box The title of the dialog box displays the system type and the card slot number. 2. In the I Type list, select the type of the new card. 3. In the Card DB Num list, select the new card database. 4. Click Update Form to update the Card Graphic Map form, and Cancel to close the Edit Card dialog box. 5. In the Hardware Graphic Map form, click Apply or OK to save the changes to the Coral database. 6-13 CVD Forms CVD User Manual Port List Initially, the Port List form opens with no table entries. You can display ports by dial number or by physical location. Alternatively, if required, all ports can be viewed. To display the Port List: 1. Under Select by, select a filter to apply to the port list. 2. Enter filter parameters: q q q For Dial Number, enter From Dial Number and To Dial Number range in the box to the left. For Physical Location, enter From/To Shelf range and From/To Slot range in the box to the left. For All no parameters are required. 3. Click Retrieve. The Port List appears with the following parameters (regardless of which filter was used to display the port list): Dial #, Port Type, Port DB#, Short Name, Long Name, Shelf #, Slot #, Ckt and Note. A status bar at the bottom of the form indicates currently applied filter and sort information. Figure 8. Port List, Status Bar If the text in the status bar exceeds its box, place the mouse pointer over this box to view the entire text. 6-14 CVD User Manual CVD Forms Editing Port List Parameters The Port DB#, Short Name and Long Name parameters can be changed by clicking on the item you want to edit. c q Port DB#: select a new database number in the listbox. q Short/Long Name: enter the new name. NOTE: Changing names in the Port List affects the List view of the NPL only after refreshing the Coral Explorer. Searching in the Port List 1. Right-click anywhere in the list to open a shortcut menu. 2. Select the Search (F3) option. Port List, Search Option 3. Enter the required search string. The system searches the entire table and highlights the first occurrence of the string. 6-15 CVD Forms CVD User Manual Sorting the Port List The Port List can be sorted by ascending or descending order for any one of the parameters, as required. 1. Click the heading of the column you wish to sort. 2. Right-click and select either Sort Ascending or Sort Descending. The port list is sorted accordingly and the sort parameter is indicated in the status bar of the form. See Figure 8 on page 6-14. Adding Additional Filters Further condense the Port List by filtering a specific parameter. 1. Select the required column. 2. Right-click, and select the Add Filter option. 3. Enter the specific text or number that you would like to view. For example, in the Slot # column, you may wish to display only the ports in Slot 7. The current Port list is re-filtered, according to the new filter (i.e., only Dial Numbers that reside on Slot 7 are displayed in the Port List). The filter information is indicated in the status bar of the form, see Figure 8 on page 6-14. Refreshing the Port List To return to the original Port List format, right-click anywhere in the list and select Remove All Filters. 6-16 CVD User Manual CVD Forms Toll Barrier Toll Barrier contains the programming instructions for defining Toll Barrier elements and defines illegal numbers that cannot be dialed depending on the station’s COS definition. When this form is displayed, Toll Elements already defined appear as a list on the left side of the form. To view the parameter values of any of these elements, click the required Element #. Parameter values of the elements appear in read-only fields and cannot be updated. To add a Toll Barrier element: 1. Click the Add button. A new element is automatically added to the Toll Elements box. 2. Define the five parameters for the new element. To remove a Toll Barrier element: 1. Select the Toll Barrier element you wish to remove. 2. Click the Remove button at the bottom of the form. Toll Elements are automatically renumbered when an element is removed. To update a Toll Barrier element: The Toll Barrier elements cannot be updated. Therefore, to update an element, first remove the element from the list and then add a new element with updated values. 6-17 CVD Forms CVD User Manual VFAC (Verified Forced Account Code) The VFAC form contains three tabs to program and allocate the VFAC feature: Tab Description Init Codes Use this tab to select one of the 32 available Init Types. Code Use this tab to assign codes to stations and to COS. SMDR Use this tab to define the account code on the SMDR report. To change Init Type: 1. Select the Init Codes tab. 2. Click the Any_Specific_Init_Type list and select Yes–Change by Programmer. 3. Click Enter_New_Init_Type and select an Init number in the list. 4. Click Apply to apply the change. To assign codes to stations and COS: 1. Select the Code tab. 2. Choose the code to be updated and/or changed by selecting and highlighting a line in the table. Stations assigned to this code appear in the Assign To box. Type of COS assigned to this code appears in the COS box. 3. Change the attributes as required by selecting pertinent values in the Assign To or COS lists. 4. Click Apply to confirm the assignment. 6-18 CVD User Manual CVD Forms Gains Adjust the audio transmission levels between any port or card by using the Card Gains, Compensation Port Gains, and Feature Control. Tab Description Card Gains Defines gain values for the different system paths (all types of ports). Port Gains Enables fine-tuning the gain control for each individual port, using the Port Gains Compensation elements. Port Gains–Compensation Defines a set of 32 compensation elements. These elements apply to all system ports. When adjusted by the proper values, these compensating elements can either increase or decrease the port’s gain as required. Feature Control Allows defining transmission values for port types (cards) not engaged in conversation, for example, dial tones, system tones, music, etc. To filter the Card Gains table: 1. In the Card Gains tab, check the Filter box. If the Filter box is not checked, the form may take several minutes to load. 2. Select the Source card type and the Destination card type. The Card Gains table is updated accordingly. If you do not select a filter, the Card Gains table displays the gain between all card types. 6-19 CVD Forms CVD User Manual To change RCV (Rx) and TRX (Tx) values in Card Gains: 1. In the Card Gains table, select source and destination combination. 2. Click the Rx or Tx table cells of this port. A appears at the right-hand side of the selected cell. 3. Click the down arrow and select a value in the list that opens. To change the Compensation Element for a specific port dial number: 1. In the Port Gains tab, select a port type in the Port Type list. All the dial numbers of this port type appear in the table below. 2. Select the required port dial number. 3. Click the compensation element of this port. A appears at the right-hand side of the selected cell. 4. Click the down arrow, and select a new compensation element value in the list that opens. To change the Rx or Tx values for compensation elements: 1. Select the required element. 2. Click the Rx or Tx table cells of this element, and select a new value in the list that opens. 6-20 CVD User Manual CVD Forms To change the Rx or Tx values for specific port types in the Features Control Tab: 1. In the Feature Control Gains tab, select the required port type. 2. Click Rx or Tx table cells of this port type. A appears at the right-hand side of the selected cell. 3. Click the down arrow and select a new value in the list that opens. 6-21 CVD Forms CVD User Manual Ringers The Ringers form displays Coral shelf numbers and their relevant ring numbers. To change a ring number for a specific shelf, click the ring number of the shelf you want to change. Click the button that appears next to the ring number, and select a new number in the list that opens as shown in the following figure. Ringer Form 6-22 CVD User Manual CVD Forms Offset Filter The Offset Filter form is used to define offset filter ranges for the Coral system. By default, four offset filters can be defined, each with up to 32 elements (received number ranges). You can add, delete, and modify elements in the Offset Filter form. Additionally, you can increase the number of offset filters defined for your system, by changing the suitable parameter in Size Def. To view elements defined for an offset filter, select one of the available filters in the Select Offset Filter # box. The elements of this filter appear in the table below. Offset Filter Form, Filter Number 0 6-23 CVD Forms CVD User Manual To add an element: 1. Click Add. A new empty line is added after the last line in the table. 2. Enter the range of the element in the From Received # and To Received # columns. 3. Enter the new sequence number in the From Dial # column. 4. Click Apply to confirm. To delete an element: 1. Select the entire line of the element or place the cursor anywhere in the line you wish to delete. 2. Click Remove. To modify an element: 1. Place the cursor the table cell you wish to change and type in a new number. 2. Click Apply to confirm. In case the value you entered is not valid, an error message appears. 6-24 CVD User Manual CVD Forms Tone Plan To view or change a Tone, select a tone number in the Index list. The name of the tone appears in the Name box. This name cannot be changed. Tone Plan Form Continue to define Type, Number of Segments, Basic Tone, and MS Time (i.e. Duration) by clicking the down arrow and selecting values in the list that opens. Alternatively, you can drag the tone border left or right to increase or decrease the duration of the tone as shown in the following figure. 6-25 CVD Forms CVD User Manual Changing Tone Duration at the upper To hear an example of the tone sound, click right-hand corner of the form. The tones are played using the PC speaker. Multi-Burst tones will be heard three times. The differences in the basic tones frequencies is defined according to Coral defaults (depending on country of installation). 6-26 CVD User Manual CVD Forms Libraries The Libraries form has two tabs: Public Libraries and Private Libraries. To switch between the two libraries, click Private Libraries or Public Libraries. The form changes accordingly. Libraries Form, Public Library q Public Libraries—used to establish an abbreviated common access to frequently dialed numbers. The Public Library is also known as the systemwide speed dial. For public libraries, select a library number in the Public Library list. Continue to define or change values for the library parameters below. q Private Libraries—used to establish an abbreviated personal (stationspecific) access to frequently dialed numbers. The Private Library is also known as personal speed call. 6-27 CVD Forms CVD User Manual For private libraries, select a Station Number and a Private Library number. Continue to define or change values for Enter Dial Number and Specific Tk parameters. 6-28 CVD User Manual CVD Forms Night Service Information of the Night Service form is distributed over four different tabs. Each tab can be accessed separately from the Night Service option in the main menu. Timers The Timers tab displays a graphic representation of the three time blocks. A different color is used for each time block. The window shows 4 blocks, although only three time blocks actually exist (only three colors are used). When the 3rd Service Time begins before 23:59 and ends after 00:00 it connects with the 1st Service Time to form a ring. To change the Service Times: In the 1st/2nd/3rd Serv Time list, select the hour to start the service. Or Drag the borders between the time blocks to change time settings. The setting in the 1st/2nd/3rd Serv Time list is automatically updated. Definition The Definition tab displays a graph defining the three time blocks. In the From # box, enter the type of Service Mode 0 (Day), 1 (Night1), 2 (Night2) to update and the Night Service–Definition parameters for this Service Mode. Alternatively, you can click the corresponding color block to select the required service mode. 6-29 CVD Forms CVD User Manual Weekend Enter the time periods at the bottom of the window. The window automatically updates and displays a graphic representation of the weekend times. Night Service Form, Weekend 6-30 CVD User Manual CVD Forms Holiday To add holidays: Click the Add button to define the time span of the holiday, by defining the holiday begin and end time. Continue defining the holiday by choosing the Holiday Type Mode and the start and end dates for the holiday on the same line. The maximum number of holidays that can be entered is 15. To remove holidays: 1. Highlight the Holiday line that you wish to remove. 2. Click the Remove button. 6-31 CVD Forms CVD User Manual Coral Time Coral Time form is used to set the system time, date, and offset. Use the Time tab to set the system time and date, and the Time Adjust tab to set the system offset. To set the system time and date: 1. In the Coral Time box, type in the required hour or use the arrows to change hours and minutes. 2. In the Date box, click the down arrow. The Date Navigator appears. 3. Click the month name and then select a month in the list that opens to quickly go to another month. Alternatively, use the Left and Right arrows to move between months. 4. Click a date to set the system’s date. A red circle marks today’s date. 5. Click the year and then scroll up or down to go to another year. 6-32 CVD User Manual CVD Forms Trunk Default Configuration The default configuration form is used to display or modify the default configuration of digital cards. This default will be applied to digital trunk cards that may be installed in the future. The three tabs in the Default configuration form correspond with the four digital card types: 30TE, 30T, 30TM and T1. Digital card types differ from one another in trunk types and in the number of ports. To display or modify the default: 1. Select the tab that corresponds to the required card type. 2. Select a port, and click the box in the column of the required trunk type to mark this trunk as default. A check mark appears inside the box. Click to select a port Click to mark as default 6-33 CVD Forms CVD User Manual Digital Trunk Configuration The Digital Trunk Configuration form is used to display or modify the signaling protocol for each installed digital trunk according to card location, by entering the card’s physical location in the system. The CVD only displays slots equipped with digital cards. To display or modify trunk configuration: 1. Select a shelf and a slot. Only slots equipped with digital cards are displayed. The type of card is shown in the Card read-only field below the Shelf and Slot boxes. 2. Select a circuit (Ckt) number, and click the box under the column of the required trunk type. 6-34 &9'8VHU0DQXDO &9')RUPV '7'%6\QFKURQL]LQJ 7KH'7'%6\QFKURQL]DWLRQIRUPGHILQHVWKHFORFNUHIHUHQFHVRXUFHZLWKZKLFK WKH&RUDOVZLWFKLQJLVV\QFKURQL]HG2QO\FDUGVDYDLODEOHIRU'7'% 6\QFKURQL]LQJDUHGLVSOD\HG 8QGHU3ULPDU\ VHOHFWVKHOIDQGVORWWRGHILQHWKHSULPDU\V\QFKURQL]DWLRQ GLJLWDOWUXQN 8QGHU6HFRQGDU\ VHOHFWVKHOIDQGVORWWRGHILQHWKHVHFRQGDU\V\QFKURQL]DWLRQ GLJLWDOWUXQN 8QGHU6WDWXVWKH&9'GLVSOD\VV\QFKURQL]DWLRQSDUDPHWHUVLQUHDGRQO\ILHOGV DVVKRZQLQWKHIROORZLQJILJXUH &9')RUPV &9'8VHU0DQXDO '7'%6\QFKURQL]LQJ CVD User Manual CVD Forms Station SLT Database SLT Database is used to establish a database for SLT cards. There are four SLT card databases, numbered 0 to 3. In the Card DB # list, type in the station card database you want to program or select a number in the list that opens. To program internal ring cadence: 1. Select the Internal Ring Cadence tab. 2. Enter values in milliseconds in the Int Ring On and Int Ring Off lists. Alternatively, you can drag the Ring column left or right to decrease or increase the duration of the ring. SLT Database, Internal Ring Cadence 6-37 CVD Forms CVD User Manual 3. Click the icon to hear an example of the ring cadence. To program external ring cadence: 1. Select the External Ring Cadence tab. 2. External ring cadence is composed of three ring cycles, each can be programmed separately by entering values (milliseconds) in the Ext Ring On 1/2/3 lists and the Ext Ring Off 1/2/3 lists respectively. Alternatively, you can drag the corresponding Ring columns left or right to increase or decrease the duration of the ring cycles. 3. Click to hear an example of the ring cycles cadence. To program SLT database parameters: 1. Select the Parameters tab. The SLT Card database parameters define various timers and features for the different SLT Card Databases. 2. Enter value into the parameter box or select a number in the list that opens. 6-38 CVD User Manual CVD Forms Keyset Preference The Keyset Preference form is used to define preference destinations of each keyset in the system. Enter the keyset dial number or select a number in the Keyset Dial Number listbox. A list of preference destinations (if already defined) appears in the form. Preference Form 6-39 CVD Forms CVD User Manual To add a destination to the Preference list: 1. Click Add. The Add Preference dialog box appears. Add Preference Dialog Box This dialog box presents a list of Preference programming options: any system trunk number, trunk group number, routing access number, dial service number, phone loop feature, loop originating only feature or boss group number (only numbers in which the station is a member). 2. Select an item. If you selected a boss group number, then you are required to select a line number. The range of this parameter is pertinent to the selected boss group. 3. Click Add to close the dialog box and add the item to the Preference list. To remove a destination, select the destination line you want to remove and then click the Remove button. 6-40 CVD User Manual CVD Forms DLIS The Digital Port List parameters identify individual digital ports on a Digital Terminal or Telephone Peripheral card: 8SKD, 8SVD, 8SDT, 8 SFT, 8SDTsl, 8D8Ssl, 16SDT, 16SFT, 16SDTsl, 16SKD, 24 SDT or 24SFT. The DLIS parameters can be accessed by either: q selecting the Shelf #, Slot # and Port # Or q by entering a Dial Number Only valid Shelf, Slot, Port and Dial numbers are available in the listbox. The following figure is an example of a DLIS form. DLIS Form An I Type box and a P Type box represent each external device (numbered 0 to 7) connected to the port. 6-41 CVD Forms q q CVD User Manual P Type (for display only): identifies the external device type, which is currently installed and located in the designated ID. A figure of the presently installed device type appears in the P Type box. I Type: identifies the external device type initialized (the external device identified by the system, but not necessarily installed) in the designated ID. To change the I Type of external devices: Click the listbox under the picture of the external device and select a new device in the list that opens. Select Remove in the list to remove the device. DPEMs can be entered in logical locations 4 to 6 on the internal bus, and only for specific keyset types. The DPEMs must be entered sequentially. 6-42 CVD User Manual CVD Forms Keyset Button Programming Use Keyset Button Programming to adapt the keyset to the user’s personal and professional needs. Features can then be activated or deactivated at the press of a programmed button. Features requiring feature destinations, such as Divert Call can also be programmed on a keyset button for immediate activation of the feature. The number of programmable keys varies according to keyset type. All keysets include four Fixed System keys, numbered F1 to F4 (located on the lower left-hand corner of the keyset) that are defined system-wide. Changing the programming for one of the Fixed System keys at any station will automatically update this button system-wide. Keyset Button Programming, GKT 6-43 CVD Forms CVD User Manual Place the mouse pointer over one of the programmable keys. A ToolTip appears showing the content of the button and its dial number. The button label is generated automatically by the CVD and indicates the programming content of this button. For example: q Stations station name if available or station number q Feature abbreviated feature name q Network number the string Net # q Trunk Group name if available or trunk group number To program buttons: 1. Right-click a button and then select the required option in the shortcut menu that opens. These options include: Option Description Add New Number To program a button that has not been defined previously. This option is only available if the button is not already programmed. Clear Content Clears the content of the button. Edit Number Updates the current programmed content of the button. Copy Button Copies the current programmed content of the button. Paste Button Pastes the copied content to a different button. You can also click an empty button to open the Add Button Number dialog box, or click a pre-programmed button to open the Edit Button Number dialog box. Icons of DPEMs connected to this keyset appear above the keyset picture, click the required DPEM icon to display a picture of DPEM button programming. 6-44 CVD User Manual CVD Forms Add Button Dialog Box 2. In the Type listbox, select an NPL type. If the selected type is Network Numbers, a Range listbox appears to let you select a range within the network numbers. 3. In the Function/Dial Number listbox, type in the dial number of a feature or a station, or select a number in the list that opens. The label of this function/dial number automatically appears in the Label box. 4. Click Update Form to update the Keyset Button Programming form. 5. To change stations within the Keyset Button Programming form, select a new station number in the Station listbox. 6. To print button labels, click the form. icon at the top right-hand corner of the Special paper with perforated button labels, (CN 7244-7400406: DKT Blank Labels) can be acquired from the manufacturer. 6-45 CVD Forms CVD User Manual Timers The Timers form is used to define Coral timers. Timers are distributed over four tabs as follows: q Station Timers defines timers for all the system stations. q Feature Timers defines timers for all the system features. q Keyset Timers defines the timers that relate to keyset stations only. q Cadence defines the keyset ring cadences. To define keyset ring cadences: 1. In the Cadence tab, click the Cadence # listbox and select a number from 0 to 7. The default cadence is 4. 2. Define the On and Off periods for each cadence level by dragging the corresponding Ring column left or right. 3. Click the the ring cadence. 6-46 icon at the top right-hand corner of the form to hear CVD User Manual CVD Forms Features Control The Features Control form allows modifying the features list of dial numbers that can be activated from either the CVD or from the Attendant Console. Dial numbers include trunks, SLT stations, keyset stations, Hunt Groups, and Boss Groups. To program features: 1. Under Port Numbers, select the dial number type and range. Available dial numbers for the selected type and range appear in the Port Dial Numbers list below. Place mouse pointer to view name of destination (when destination is defined) Features Control Form 2. In the Port Dial Numbers list, select the required dial number. Currently programmed features appear on the right, under the Features List. 6-47 CVD Forms CVD User Manual The Features List divides into two columns: Source—displays the name of the feature. Target—displays the destination dial number for features with destination. Place the mouse pointer over this target to view the destination name. 3. Click Features Edit to add, remove, or update features as follows. To add features: 1. Click Features Edit and select Add Feature. A list of features appears. The list is pertinent to the type of dial number selected in the Port Numbers list. 2. Click the required feature. The feature is added to the Features List. If the feature you selected requires a destination, a list of destination types appears. This is illustrated in the following figure. Click to select a feature Click to select destination type Click to add feature Add Feature Options 3. In the destination type list that opens, select a destination type. The Destination Numbers dialog box appears. 6-48 CVD User Manual CVD Forms Figure 9. Destination Numbers Dialog Box This dialog box lists in columns all the destination dial numbers available for the selected destination type along with Names, NPL Type, System Type, and Location (Shelf, Slot, Ckt). q q Click column headings to sort columns in ascending or descending order. Click and drag column headings to change width of columns. 4. Select a destination dial number. 5. Click OK to apply the destination number and to add the feature to the Features List. 6-49 CVD Forms CVD User Manual To remove features: 1. Select the required feature in the Features List. 2. Click Features Edit and then select Remove Feature in the list that opens. The selected feature is removed from the list. To update features: 1. Select a feature with destination in the Features List. 2. Click Features Edit and then select Update Feature in the list that opens. 3. Click the name of the feature that appears. A list of destination types appears. 4. Select the required destination and then select the destination dial number in the Destination Numbers dialog box (see Figure 9). 5. Click OK to close the dialog box and apply the new destination. 6-50 CVD User Manual CVD Forms Groups All the group forms follow the same conventions as described in the Hunt Group section. Hunt Group By default, the Hunt Group form opens in the Group Members tab, in which you can define the hunt group members. Hunt Group Form, Group Members 6-51 CVD Forms CVD User Manual The Group Members tab is composed of two tables: q Possible NPL Entries—this table lists all the NPL entries available to be members in the Hunt Group. Right-click anywhere in the Possible NPL Entries table to search the entire table. Click F3 to find the next item. Select a column and then right-click to access the following options: q q q Sort Ascending–sorts the table in ascending order according to the selected column. Sort Descending–sorts the table in descending order according to the selected column. Hunt Group Members—this table lists all the members in the hunt group. To add members to the Hunt Group: 1. Select an NPL entry in the Possible NPL Entries table. 2. Select a group member in the Hunt Group Members table. 3. Do one of the following: q Drag the NPL entry over to the Hunt Group Members tables and drop it in the required location. Or q Click either Append or Insert. Append adds the selected NPL entry as the last member of the list. Insert adds the selected NPL entry before the selected group member. To remove members from the Hunt Group: Select a group member in the bottom list and click Remove, or click the Delete keyboard key. 6-52 CVD User Manual CVD Forms To replace members in the group: 1. Select an NPL entry in the Possible NPL Entries table. 2. Select a group member in the Hunt Group Members table. 3. Click Replace. The NPL entry replaces the selected group member. In the Announcers tab, the announcers range includes only SLTs in which the announcer parameter is set to Yes. 6-53 CVD Forms CVD User Manual Alternate Route The Alternate Route form is used to determine the outgoing call route when all the trunks of a selected trunk group are busy. Alternate Route Form To add routes: 1. Click Add. A number is added to the Defined Group#/Lib# list. 2. Select a different number in the Group#/Lib# box, if this is not the required number. 3. Set the route active time in the From Time and To Time lists. 6-54 CVD User Manual CVD Forms To update routes: 1. Select a route and click Update. The icon appears next to the route. 2. In the Group#/Lib#, From Time, and To Time boxes, change values as required. To remove routes: Select the required route and click Remove. 6-55 CVD Forms CVD User Manual LCR/ARS The LCR/ARS form is used to define routings in the Coral system. This form distributes LCR/ARS information over seven tabs as follows: q General Definitions q Dial Services q Elements q NPL q Route Translators q COS q System Parameters You can access each tab directly from the LCR menu on the menu bar. In the NPL tab, you can add and remove dial sequences. To add a dial sequence: 1. Click Add. An empty line is added at the bottom of the list. 2. Click inside the cells of the new line and select items in the list that opens. If you select an item combined with NPX characters in the From column, the To column is disabled. To remove dial sequences, select the required dial sequence and click Remove. 6-56 CVD User Manual CVD Forms LCR/ARS Form, NPL 6-57 CVD Forms CVD User Manual ISDN BCCOS & NSF The BCCOS & NSF form defines the communication characteristics of incoming and outgoing ISDN trunks, and defines services provided by various carriers. The form distributes information over four tabs individually accessible under BCCOS & NSF in the ISDN menu. Tab Description Template The templates define the values that are sent/received to/from the network to indicate requested BCCOS. There are 32 templates available, the first two are preprogrammed and cannot be modified; the remaining 30 templates are pre-programmed but can be modified. Control Selects the template or several templates to be included in each BCCOS. One of the templates should match the Bearer Capability values sent by the network. NSF NSF (Network Specific Facility) defines the services provided by various carriers. The NSF is required to implement Dial Services. TO change an NSF value, click in the required table cell under the Parameter 1 column, then click the down arrow and select a new value in the list that opens. Alternate Line ID 6-58 Allows sending an alternate Automatic Number Identification (ANI). Also known as Calling Party Number (CPN). CVD User Manual CVD Forms To modify BCCOS: 1. In the Control tab, select a BCCOS number. Under Available Templates, all the 32 templates appear. Under Defined Templates, appear templates defined for the selected BCCOS number. BCCOS & NSF Form, Control Tab 2. Add templates to the Defined Templates list in one of the following ways: q q Select a template in the Available Templates list and drag it to the Defined Templates list. Select a template in the Available Templates list and click Append. This adds the selected template to the end of the Defined Templates list. 6-59 CVD Forms CVD User Manual q Select a template in the Available Templates list and click Insert. This adds the selected template before the highlighted template in the Defined Templates list. ISDN Signaling Channel The PRI and BRI card signaling parameters identify individual D-Channels on an ISDN card. Access parameters by entering the physical location of the card (Shelf and Slot) or the index number called Signaling Channel assigned to the card. In both cases, the displayed information is identical except for the order of appearance. Open the form by selecting the required method Signaling Channel or Card Location in the ISDN Signaling Channel option, under the ISDN menu. q If you open the form in Card Location, enter values in the Shelf, Slot, and DSL boxes (only PRI and BRI card are available). The CVD collects the information according the location you entered, the signaling channel is displayed in read-only field. q If you open the form in Signaling Channel, select the required number in the Signaling Channel box. The CVD collects information according to the channel that you entered, the physical location is displayed in read-only fields. While you are in one of the modes, you can switch to the other mode by clicking either Signaling Channel or Card Location buttons, which ever is active. 6-60 CVD User Manual CVD Forms Hotel Hotel The Hotel form is divided into five tabs: q q Wake-Up Control Wake-Up Report—this tab is used to retrieve Wakeup information of hotel rooms. q Names q Room Status q Busy Display To generate a Wakeup report: 1. Select the Wake-Up Report tab. 2. Enter the range of the report in the From Station # and the To Station # boxes. 3. Click Report. The CVD starts loading data from the Coral. During this process, a Loading Data message is displayed. When loading of data ends, information appears at the table below. This table includes the station number on the left-hand column and the required wakeup time on the right-hand column as shown in the following figure. 6-61 CVD Forms CVD User Manual Hotel Form, Wake-Up Report 6-62 CVD User Manual CVD Forms SMDR The SMDR (Station Message Detail Recording) form is used to set SMDR parameters. The form distributes information over four tabs individually accessible from the SMDR option in the Hotel menu. Tab Description Control SMDR control is used to set the SMDR report display, storage, and call data requirements to generate a record. Click required parameters and select values in the list that appears. Format Parameters Allows you to define which information (parameter codes) will be shown in the On-Line report. Place the mouse pointer over any parameter code to view a description of this parameter in the adjacent box. Check parameters that you want to include in the report, uncheck parameter that you want to exclude from the report. Auto On-Line Sets the periods at which the system generates SMDR On-line reports for outgoing calls (available only if Display Out is set to No). Click required parameters and select the values in the list that appears. Charge To display and reset the charges, or charge individual stations. Select an individual station or a range of stations, and click Report to generate the charge report. To reset charges for a station: 1. Click in the relevant table cell under the Charge column. 2. Click the down arrow that appears, and select Reset in the list that opens. 6-63 CVD Forms CVD User Manual Network Node NPL Node NPL is a numbering plan unique to the network nodes. It operates similarly to the General Numbering Plan but deals with manipulating network nodes and NOT their dial numbers. The dial numbers are manipulated as usual in the General Numbering Plan. The Network node number is limited to eight digits and is not displayed on the keyset. In the Node NPL form you can add, delete, and edit network nodes. To add a network node: 1. Click Add. The Add Node dialog box appears. Add Node Dialog Box 2. Enter information in the From Node, To Node, and Index fields. Note that you must work your way from top to bottom in order to be able to enter information in lower fields. 6-64 CVD User Manual CVD Forms 3. Click Add to add the new node to the Node NPL table. To delete a network node: 1. In the Node NPL table, select a node. The pertinent row in the table is highlighted. 2. Click Remove. The selected node is deleted from the Node NPL. To edit a node’s properties: 1. Click inside the table cell of the node you want to edit. 2. Delete the old value and type in a new one. 3. Repeat steps 1 and 2 for other table cells of the node. Node Contents The Node Contents form displays information regarding nodes in the Coral network. To view the content of a node, select it in the Node # list box. You can only view contents of nodes already defined in the Node NPL. 6-65 7. Reports Overview The CVD can generate a number of reports to reflect the current status of Coral configurations. Access reports via the Coral Explorer under the Reports branch, or through the Reports menu. Reports are read-only and can be printed or exported to several file formats. To generate reports: 1. Double-click a report in the Reports branch. The Report Definition dialog box appears. Report Definition Dialog Box, Stations Report 2. Enter the required information for the report. 7-1 Reports CVD User Manual This usually requires selecting the type of report you want to be generated and the range of dial numbers to be covered by the report. 3. Click Start to start generating the report. Allow the Report Viewer window a few minutes to appear. The report name and its type appear in the title of this window. Report Viewer Click Help to get assistance regarding this report, or click Cancel to close the Report Definition dialog box without generating the report. 4. Click to print the report, or click to export the report into other file formats (available formats are: text, htm, and html). If the report spans over more than one page, use the Left and Right arrows on the bottom of the window to browse through the report pages. The following sections describe each report in detail. 7-2 CVD User Manual Reports Stations The Stations report generates three types of station reports in the Coral system. q General—general information on the station. q Features—general information, followed by a list of the station’s features. q DLIS—available only for keyset stations. General information followed by DLIS information. The default report type is General. Except for the DLIS report, which can be generated only for keyset stations, the other two reports can be generated for either keyset or analog stations. After selecting the Report Type, select the Station Type, and the Station Dial Number. If you do not select a specific dial number, the report is generated for all station numbers in the Coral system. Trunks The Trunks report generates two types of reports: q Details—general information on the trunk. q Group Memberships—general information followed by a detailed list of the trunk groups. After selecting the report type, select a Trunk Dial Number. If you do not select a specific dial number, the report is generated for all the trunks in the Coral system. 7-3 Reports CVD User Manual Boss Group The Boss Group report generates six types of reports: Report Type Description General General information on the Boss group. Trunks Directed Towards General information followed by a list of trunks, in which this Boss group is the value of the Trunks Directed Towards parameter. Trunks Reserved General information, followed by a list of trunks, in which this Boss group is the value of the Trunks Reserved parameter. Features General information followed by a list of the Boss group features. Night 1 General information followed by a list of trunks, in which this boss group is the value of the Night 1 parameter. Night 2 General information followed by a list of trunks, in which this boss group is the value of the Night 2 parameter. To generate the report: 1. Select the report type. 2. Select a Boss Group dial number. If you do not select a specific dial number, the report is generated for all Boss Groups in the Coral system. 7-4 CVD User Manual Reports COS (Class of Service) The COS (Class of Service) generates two types of reports. Report Type Description COS COS information Toll Patterns COS information. In addition lists all the Toll Barrier patterns that share the selected Toll pattern number. To generate the report: 1. Select the report type. 2. Select a COS number. If you do not select a specific number, the report is generated for all COS numbers in the Coral system. 7-5 Reports CVD User Manual Hunt Group The Hunt Group generates five types of reports. Report Type Description General General information on the Hunt group. Trunks Directed Towards General information followed by a list of trunks, in which this Hunt group is the value of the Trunks Directed Towards parameter. Features General information followed by a list of the Hunt group features. Night 1 General information followed by a list of trunks, in which this Hunt group is the value of the Night 1 parameter. Night 2 General information followed by a list of trunks, in which this Hunt group is the value of the Night 2 parameter. To generate the report: 1. Select the report type. 2. Select a Hunt Group dial number. If you do not select a specific dial number, the report is generated for all Hunt Groups in the Coral system. 7-6 CVD User Manual Reports LCR The LCR report provides a hard copy of the entire LCR/ARS information in the Coral system. To generate the report, select a Routing Access dial number and click Start. If you do not select a specific number, the report is generated for all Routing Access dial numbers defined in the LCR. PLIS The PLIS report records the information in the PLIS form. You can generate the report to sort ports by dial numbers or by physical location. This report also provides Primary and Secondary COS information for each port. To generate the report, select the sort criteria (Dial Number or Physical Location), and then select a range of dial numbers. 7-7 Reports CVD User Manual Private Libraries The Private Libraries report provides private libraries information for selected stations. This information includes the Private Library number, the Destination number, and the Trunk number. To generate the report: 1. Select a range of stations in the From/To Station Dial Number boxes. If you do not specify a range, the report is generated for all stations in the system. 2. Select a range of private libraries in the From/To Lib Dial Number boxes. If you do not specify a range, the report is generated for all private libraries of the selected stations. 7-8 CVD User Manual Reports Public Libraries The Public Libraries report provides information on public libraries. Additionally, you can generate the report to sort information by Name or by Dial Number. To generate the report: 1. Select a range of public library numbers in the From/To Dial Number boxes. If you do not specify a range, the report is generated for all public libraries in the system. 2. Select the sort criteria (dial number or name). Free NPL Numbers The Free NPL Numbers report, lists free dial numbers in the Coral system. To generate the report, set the report’s range in the From Number and the To Number boxes. c NOTE: To reduce the time associated with calculating free dial numbers, enter a small range (between 100 to 1000). The default is the entire range of public library numbers. 7-9 8. CVD Wizards Overview This chapter describes how to work with the CVD wizard and then provides the flow of steps and major steps in each wizard. Working with Wizards page 8-2 Add/Modify Station Wizard page 8-4 Add/Modify Trunks Wizard page 8-13 Station Data Transfer Wizard page 8-22 LCR/ARS Wizard page 8-26 Call Coverage Wizard page 8-32 8-1 CVD Wizards CVD User Manual Working with Wizards Wizards, are specially adopted programs that guide you step-by-step through the processes of frequently used tasks. The wizards are useful for novice users to ensure that no step will be accidentally skipped, and for experienced users to streamline complex tasks and to save time. All wizards feature a set of steps (windows) that require specific input. You can move freely back and forth through the wizard’s steps to change your input. However, in some specific steps moving to the next step updates the Coral system. In this case, the wizard issues a warning message to let you know that moving to the next step will update the system. Each wizard window has four buttons: Back—returns to the previous step. Next—continues to the next step (changes to Finish in the final step). Cancel—cancels the operation and closes the wizard. Help—gets assistance regarding the current step. The final step of each wizard generates a wizard report that summarizes all the actions performed by the wizard. c 8-2 NOTE: While working with wizards, you cannot make changes to forms. CVD User Manual CVD Wizards Wizard Report Window The information in the wizard report is distributed over six columns: Column Description Parameter Name Name of the wizard parameter Old Value Parameter value before running the wizard New Value Parameter value after running the wizard Exception Status of the action Action Type Name of the action performed by the wizard Slide The wizard window in which the action took place To print the report, click the To export the report, click the (text or html). icon. icon and then select the type of file format To view other pages of the report, use the arrows on the bottom of the window. 8-3 CVD Wizards CVD User Manual Add/Modify Station Wizard This wizard allows adding and modifying stations in the Coral system. Figure 10 and Figure 11 illustrate the flow of windows in the Add/Modify Station wizard. Opening Window Select Adding a new station or Modifying an existing station. Adding a new station Modifying existing station Choose Station Type Click the type of station you wish to add. Choose Station Select the station you wish to modify in the tree pane on the left. Select Shelf Number Select a shelf to which the new station is added. Choose Card Type Select the card location of the of the new station. Available locations are colored white. Free Port Choose Station Port Location Select a free port and enter Short Name and Long Name. Choose Dial Number Select a free NPL dial number. Assigne d Port Class of Service Assign Primary and Scondary COS and other station features. Figure 10. Add/Modify Station Wizard 8-4 CVD User Manual CVD Wizards Class of Service Assign Primary and Scondary COS and other station features. Programming Features Define programming features in the displayed parameters. Add/Remove Features Add and remove station feature. Keyset or WST Keyset Button Programming Program keyset buttons according to user requirements. SLT Choose Group Types Select the group types to which the station is added. Choose Groups Select a specific group number to which the station is added. Figure 11. Add/Modify Station Wizard, Continue The following sections describe some of the Station wizard steps in greater detail. 8-5 CVD Wizards CVD User Manual Choose Dial Number In this step, you are required to select a free dial number from the Coral NPL. 1. Enter a range of dial numbers in the From Number and To Number fields. To reduce the time associated with calculating free dial numbers, enter small ranges (between 100 to 1000). The default is the entire range of station dial numbers. 2. Click Calculate Fragments. Allow the wizard a few seconds to calculate free dial numbers within the specified range. This is indicated by a progress bar at the bottom of the window. Free dial numbers are displayed in a list, as shown in the figure below. 3. Select one of the free dial numbers and click Next to update the Coral system with the new dial number. A suitable message appears. Station Wizard, Choose NPL Dial Number 8-6 CVD User Manual CVD Wizards Class of Service In this step, select Primary and Secondary COS numbers in the required boxes. The table of features changes according to the COS number selected. Click View COS to display the parameters of the selected COS in a read only window. Station Wizard, Class of Service 8-7 CVD Wizards CVD User Manual Add/Remove Features This step allows adding, updating, and removing station features. For more information on this step, see “Features Control” on page 6-47. Station Wizard, Add and Remove Features 8-8 CVD User Manual CVD Wizards To add features: 1. Click Features Edit and select Add Feature. 2. Select the required feature from the list that appears. A small, black triangle next to the feature’s name indicates that this feature requires a destination. 3. Click the feature and select the required destination from the list that appears. The selected feature is added to the list of features. To update features: 1. Select a feature with a destination. Features with destination have the destination number showing under the Target column in the features list. 2. Click Features Edit and select Update Feature from the list that appears. A list of possible destinations appears. 3. Select the required destination and click OK. The feature is updated to reflect the new destination. To remove features: 1. Click Features Edit and select Remove Feature. 2. Select the required feature fromthe list that appears. The feature is deleted from the list of features. 8-9 CVD Wizards CVD User Manual Keyset Button Programming This step allows programming of buttons in keyset stations (this step is not available for SLT stations). Station Wizard, Keyset Button Programming To program buttons: 1. Click the required button. This can be a free button or a previously programmed button. Accordingly, the Add/Edit Button Number dialog box appears. 2. Enter information in the Add/Edit Button Number dialog box, and click Update Form to apply the programming. 3. Repeat Steps 1 and 2 for all the buttons you want to program. For more information on the Keyset Button Programming window, see “Keyset Button Programming” on page 6-43. 8-10 CVD User Manual CVD Wizards Add to Group In this step, the wizard searches for station memberships in all the groups of the selected group type. These groups appear in the list on the left-hand side of the window. Station Wizard, Add to Group q If the station is a member of one of the groups, the wizard highlights this group and displays the group dial numbers under the Group Members list. Remove the station from this group and continue with the search. Or Click Next to continue to the next step. q If the station is not a member in any of the groups, no dial numbers are displayed. 8-11 CVD Wizards CVD User Manual Select a group and click: Append, to add the station to the end of the list. Or Select a dial number in the Group Members list, and click the Insert option to add the station before the selected member. 8-12 CVD User Manual CVD Wizards Add/Modify Trunks Wizard This wizard allows adding and modifying trunks in the Coral system. Figure 12 and Figure 13 illustrate the flow of steps in the Add/Modify Trunks wizard. Opening Window Select adding a new trunk or modifying an existing one. Adding a new trunk Modifying existing trunks Choose Trunk Type Click the type of trunk you want to add. Choose Trunk Select the trunk you want to modify in the tree pane on the left. Select Shelf Number Select a shelf to which the new trunk is added. Choose Card Type Select the card type of the new trunk. Possible card types are colored white. Choose Dial Number Select a free NPL dial number. Class of Service Assign a COS number. Free Port Choose Port Location Select a port and enter Short Name and Long Name. Assigned Port Figure 12. Add/Modify Trunks Wizard 8-13 CVD Wizards LGS LGS Trunks Define LS/GS circuit types. CVD User Manual DID DID Trunks Define DID circuits. T1 E&M E & M Trunks E & M trunk definitions. T1 Trunks Configure T1 Trunks. Power Fail Destination Select dial number destination for trunk PF. General Trunk Setup Define general parameters shared by all trunks. Choose Trunk Group Select the trunk group to which the new trunk is assigned. DID/E&M Trunk Group Select the DID/E&M group to which the new trunk is assigned. Finish Click Finish to add the new trunk or apply changes for an existing trunk. Figure 13. Add/Modify Trunks Wizard, continued The following sections describe some of the Trunk wizard steps in greater detail. 8-14 CVD User Manual CVD Wizards Choose Trunk In this step, select the trunk that you wish to modify. The following list will help you to select the required trunk. Option Includes the following trunks: T1 Trunks All trunks on T1 cards in the system. Analog LGS Trunks All trunks of LGS type, including analog cards and circuits on digital trunks (T1). E&M Trunks All trunks of E&M type on analog cards, not including E&M trunks on T1 cards. DID Trunks All trunks of type DID. 8-15 CVD Wizards CVD User Manual Choose Dial Number In this step, you are required to select a free dial number from a pre-selected list of Coral NPL dial numbers. 1. Enter a range of dial numbers in the From Number and To Number fields. To reduce the time associated with calculating free dial numbers, enter small ranges (between 100 to 1000). The default is the entire range of trunks dial numbers. 2. Click Calculate Fragments. Allow the wizard a few seconds to calculate free dial numbers within the specified range. A progress bar at the bottom of the window indicates this. Free dial numbers appear in the list at the bottom. 3. Select one of the free dial numbers, and click Next to update the Coral system. The Coral NPL is updated to reflect the new dial number and a pertinent message appears. c 8-16 NOTE: After this step, the new dial number remains in the Coral database even if you do not complete the wizard. CVD User Manual CVD Wizards Class of Service In this step, assign a COS number by clicking the required box. The parameter values change accordingly. Click More COS to display a read-only window with all COS parameters associated with the selected COS number. Trunks Wizard, Class of Service 8-17 CVD Wizards CVD User Manual Choose LS/GS Circuit Type This step allows defining trunks as LS or GS and is available only for trunks that originate from LS/GS ports of the relevant cards. By default, each trunk is already defined according to the Card DB and changes according to the selected Card DB number. The trunk’s current type is stated in bold typeface (in the figure below it is GS). Trunks Wizard, Choose LS/GS Circuit Type 8-18 CVD User Manual CVD Wizards To change the trunk type, click one of Card DB boxes numbered 0 to 3. The complete port mapping of the selected Card DB number, appears in the table on the right. Modifying the Card DB number entails the following: q q q q The table at the bottom of the window is updated to reflect all trunks that will be affected by the change. In the CLIS form of the selected trunk, the Card DB parameter is updated. In the Trk LGS Definition form of the selected trunk, the value of the LS/GS parameter is updated. A warning appears to remind you that changing the trunk type requires updating the strapping of the trunk’s card. Click the More CDB button to view the entire Card DB parameters. 8-19 CVD Wizards CVD User Manual Choose Trunk Group In this step, the wizard searches for trunk memberships in the trunk group numbers appearing on the left-hand side of the window. Trunks Wizard, Choose Trunk Group q If the trunk is a member in one of the groups, the wizard highlights this group and displays the group dial numbers under the Group Members list. Click Next to continue to the next step in the wizard. q 8-20 If the trunk is not a member in any of the groups, no dial numbers are displayed. CVD User Manual CVD Wizards Select a group and add the trunk to the Group Members list. q q Click the Append option on the bottom to add the trunk to the end of the list. Click the Insert option to add the trunk before the selected dial number. 8-21 CVD Wizards CVD User Manual Station Data Transfer Wizard The Station Data Transfer wizard allows you to transfer an entire station record to another extension, without the need to move the keyset itself. You can swap data between two stations or transfer information from one station to program or reprogram another. The Station Data Transfer wizard comprises two steps. These steps are described below. Step 1 Choose Primary and Secondary Stations 1. Under the Primary and Secondary panes, select two stations that will exchange data. P Type pictures of the selected stations appear below the lists. To view an I Type picture of a station, right-click it and select I Type from the menu that opens. 8-22 CVD User Manual CVD Wizards Station Data Transfer Wizard, Step 1 2. Click Next to continue to Step 2. Step 2 Choose Data to Transfer 1. Under the Primary and Secondary panes, click the required boxes to select the data you want to transfer. 8-23 &9':L]DUGV &9'8VHU0DQXDO 6WDWLRQ'DWD7UDQVIHU:L]DUG6WHS 'DWDFDQEHWUDQVIHUUHGEHWZHHQWKHVWDWLRQVLQWZRZD\V q q &RS\²FRSLHVVHOHFWHGGDWDIURPWKHSULPDU\VWDWLRQWRWKHVHFRQGDU\ DQGYLFHYHUVD 6HOHFWGDWDLQHLWKHUWKHSULPDU\VWDWLRQRUWKHVHFRQGDU\VWDWLRQ 5HSODFH²VHOHFWHGGDWDIURPWKHSULPDU\VWDWLRQUHSODFHVGDWDLQWKH VHFRQGDU\VWDWLRQDQGYLFHYHUVD 6HOHFWGDWDLQERWKVWDWLRQV 7RVHOHFWDOOWKHGDWDW\SHVFOLFN7UDQVIHU$OOWKHWRSPRVWER[LQWKH UHTXLUHGSDQH 5XOHVIRUHDFKGDWDW\SHGHILQHKRZH[DFWO\GDWDLVWUDQVIHUUHGEHWZHHQWKH VWDWLRQV7KHVHUXOHVDUHGHVFULEHGLQWKHIROORZLQJWDEOH &9'8VHU0DQXDO &9':L]DUGV 'DWD7\SH 5XOH .H\'HILQLWLRQV 2YHUZULWHVWKHWDUJHWVWDWLRQGHILQLWLRQV'HILQLWLRQV WKDWGRQRWDSSO\IRUWKHWDUJHWVWDWLRQZLOOEHVNLSSHG 6KRUWDQG/RQJ 1DPHV 2YHUZULWHVWKHWDUJHWVWDWLRQLQFOXGLQJEODQNQDPHV %XWWRQ 3URJUDPPLQJ 2YHUZULWHVWKHGHILQLWLRQVRIWKHWDUJHWVWDWLRQ,QFDVH WKHQXPEHURIEXWWRQVGRHVQRWPDWFKWKHVWDWLRQZLWK WKHIHZHUEXWWRQVGHILQHVKRZPDQ\EXWWRQVDUH WUDQVIHUUHG )HDWXUHV 2YHUZULWHVWKHVDPHIHDWXUHVDWWKHWDUJHWVWDWLRQ )HDWXUHVDWWKHWDUJHWVWDWLRQWKDWDUHQRWGHILQHGDW WKHVRXUFHVWDWLRQZLOOUHPDLQWKHVDPH 3UHIHUHQFH 'HOHWHVWKHSUHIHUHQFHVDWWKHWDUJHWVWDWLRQDQG XSGDWHVWKHSUHIHUHQFHDFFRUGLQJWRWKHVRXUFH VWDWLRQ 3LFNXSJURXS ,IWKHJURXSPHPEHUVKLSVDWWKHVRXUFHVWDWLRQDQG WKHWDUJHWVWDWLRQDUHGLIIHUHQWWKHQWKHWDUJHW¶V PHPEHUVKLSVDUHUHPRYHGDQGUHDVVLJQHGDFFRUGLQJ WRWKHVRXUFHVWDWLRQ 2WKHUJURXSV &RPSOHWHWKHWDUJHWVWDWLRQ¶VPHPEHUVKLSVDFFRUGLQJ WRWKHVRXUFHVWDWLRQ 6ZDS13/ 7UDQVIHUVH[WHQVLRQQXPEHUVEHWZHHQWKHWZR VWDWLRQV &OLFN)LQLVKWREHJLQWUDQVIHUULQJGDWD CVD Wizards CVD User Manual LCR/ARS Wizard The LCR/ARS wizard allows adding, modifying, and removing LCR/ARS dial sequences. The following flowchart illustrates the steps in this wizard. Opening Window Select creating a new dial sequence, modifying a dial sequence, or removing a dial sequence. Choose Routing Access Select a routing access number. Removing dial sequence Choose a Dial Sequence Select the dial sequnece you want to remove. Creating new dial sequence Enter New Dial Sequence Select a new dial sequence. Modifying dial sequence Choose a Dial Sequence Select the dial sequence you want to modify. Check Overlaps Check for overlaps with existing dial sequences. Choose Position Select the position of the dial sequence within the routing access. Enter Number of Digits Type in the number of digits and select the dial type. Dial Sequence Path - Finish Select an element to which the dial sequence applies. Report LCR/ARS Wizard Flowchart 8-26 CVD User Manual CVD Wizards The following sections describe some of the LCR/ARS wizard steps in greater detail. Choose Dial Sequence This step appears if you selected to modify an existing dial sequence. To select the required dial sequence, place the mouse pointer over the left-most , click the required line to column. When the mouse pointer changes into select it. Alternatively, you can type in dial numbers in the From Dial # and To Dial # boxes at the bottom of the window. LCR/ARS Wizard, Choose Dial Sequence to Modify 8-27 CVD Wizards CVD User Manual Check Overlaps This step provides overlap information on dial sequences already existing in the system. LCR/ARS Wizard, Check Overlaps There are two types of overlaps: q General—the overlapped range is colored green. One of the ranges in the N(2-9), P(0-1) or X(0-9) overlaps with the current dial sequence. You can proceed to the next step, but the dial sequence will overwrite the general sequence. q 8-28 Specific—the overlapped number is colored red. A specific number overlaps with the current dial number. CVD User Manual CVD Wizards You cannot proceed to the next step when a specific overlaps occur. Click Back to return to the previous step to resolve this overlap. Choose Position In this step, select the position of the dial sequence within the routing access. LCR/ARS Wizard, Choose Position To select a position: 1. Place the mouse pointer over the left-most column. 2. When the mouse pointer changes into and click the mouse button. , point it to the required position 8-29 CVD Wizards CVD User Manual The entire row is highlighted, and the dial sequence will be located before the highlighted row. Alternatively, you can select the position in the Position box. The highlighted row changes accordingly. Dial Sequence Path–Finish In this step, select the element to which the dial sequence applies. Click the required element to select it, or select an element in the Element # box at the bottom of the window. The selected element is colored green. For your convenience, drill down an element to view its routing definitions and other information regarding the element. 8-30 q Double-click a Routing Destination entry to view its form. q Double-click a Dial Service entry to view its form. CVD User Manual CVD Wizards LCR/ARS Wizard, Dial Sequence Path After selecting the element, click Finish to end the wizard and generate a report. 8-31 CVD Wizards CVD User Manual Call Coverage Wizard The call coverage wizard aims to simplify the process of designing a call coverage group, allowing stations to answer calls directed to other stations. This is achieved via four different methods: q Forwarding Options Routing calls to other destinations using a pre-defined set of conditions. q Pickup Groups Stations can draw calls ringing on other stations. Sequential Call Hunting Incoming calls are routed from one station to the other in a pre-defined sequence. Line Key Appearance Dial number of the calling station appears on other stations, along with different ring options such as Delay Ring, Simultaneous Ring, and No Ring. q q Select the required method in the Opening step, as shown in the following figure. 8-32 CVD User Manual CVD Wizards Call Coverage Wizard Opening Step 8-33 CVD Wizards CVD User Manual Forwarding Options The forwarding options allow routing incoming calls to various destinations using specific conditions. The following flowchart illustrates the steps in this method. Opening Window Choose the required call coverage option. Call Forward Options Select a station and the Call Forward options. Finish Click Finish to apply the wizard and generate the wizard report. Forwarding Options Flowchart 8-34 CVD User Manual CVD Wizards 1. In the Call Forward Options step, select a station in the Coral Explorer list from the selections on the left as shown in the following figure. If the selected range has more than one dial number, select one in the Dial Numbers list. Call Forward Options 2. Click Features Edit, and select forwarding features in the list that appears. 3. Select the required destination type. 4. Select the required destination dial number in the Destination Dial Numbers dialog box that appears. You can add other forwarding features to the same station. 8-35 CVD Wizards CVD User Manual Pickup Groups Pickup group is a group of stations, in which each station can answer calls originally directed to other stations in the group. A station can be a member of only one Pickup group. The following flowchart illustrates the steps in this method. Opening Window Choose the required call coverage option. Choose Group Stations Select the stations to include in the pickup group. Next Station Check Conflicts For stations that appear in more than one group, select the required group. Last Station Finish Click Finish to apply the wizard and generate the wizard report. Pickup Groups Flowchart 8-36 CVD User Manual CVD Wizards 1. In the Choose Group Stations step, select the stations that will comprise the pickup group. You must select at least two stations. The order of the stations is not important. Choose Group Stations 2. To create a group, drag stations from the Possible NPL Entries table to the Pickup Group Members table at the bottom. Or Select a station or stations, and click either Append or Insert. For more information about this step, see “Groups” on page 6-51. The wizard checks if the selected stations are already members in other Pickup groups. 8-37 CVD Wizards CVD User Manual 3. In the Check Conflicts step, the wizard displays stations that were found in other groups. This step does not appear if no memberships were found. Check Conflicts q q Click Remove Station to remove the station from the old group and assign it to the group you are now creating. Click Keep Station to leave the station in the original group. If by the end of this process, the number of group members is less than two a warning message appears. 4. Click Finish to create the group. The wizard uses the first empty Pickup group to create the new Pickup group. 8-38 CVD User Manual CVD Wizards Sequential Call Hunting The sequential Call Hunting causes incoming calls to route from one station to the other in a pre-defined order. The following flowchart illustrates the steps in this method. Opening Window Choose the required call coverage option. Choose Primary Extension Number Select the primary extension. This extension is the dial number for the call routing sequence. Choose Secondary Stations Select the following stations and their order in the sequence. Choose Ring Duration Select the ring duration before the call is routed to the next station. Choose Overflow Destination Select an alternative destination in case all stations in the sequence are unavailable. Sequential Call Hunting Flowchart 8-39 CVD Wizards CVD User Manual In the Choose Secondary Stations step, drag stations from the Possible NPL Entries table to the Hunt Group Members table. Or Select a station or stations under Possible NPL Entries, and click either Append or Insert to add the station. q q Append–adds the selected station to the end of the list. Insert–adds the selected station before the selected station under Hunt Group Members. For more information about this step, see “Groups” on page 6-51. Choose Secondary Stations 8-40 CVD User Manual CVD Wizards Click Finish in the final step to create the Sequential Call Hunting group. The wizard finds the first empty (i.e. with no members) Hunt group and performs the following procedures: c q Swaps the primary station number with the Hunt group dial number. q Sets default values to Hunt group parameters not specified in the wizard. q Renames the Hunt group with the name of the primary station. q Inserts the primary and secondary stations as members in the group. q Generates the wizard report. NOTE: The wizard report includes the empty Hunt group number, which was found by the wizard. This number is the new dial number of the primary station. Use this number should you need to modify settings in the primary station. 8-41 CVD Wizards CVD User Manual Line Key Appearance Line Key Appearance creates a group of stations, in which a call arriving at the primary station also appears at other stations in the group. You can also define dialing options for the stations Ring Delay, Simultaneous Ring, and No Ring. The following flowchart illustrates the steps in this method. Opening Window Choose the required call coverage option. Choose Primary Extension Number Select the primary station that receives the call. Choose Secondary Stations Select the stations, which will share the call. Choose Number of Line Appearances Select the number of calls (lines) and the ring time for delayed stations. Choose Line Keys For each station, select the keys that flash when a call arrives at the Primary station. Next Station Line Key Appearance Flowchart 8-42 CVD User Manual CVD Wizards 1. In the Choose Primary Extension Number step, select the station that shares calls with other stations. 2. In the App Ring Control box, select the ring option for the primary station. Choose Primary Extension Number 8-43 CVD Wizards CVD User Manual 3. In the Choose Secondary Stations step, drag stations from the Possible NPL Entries table to the Boss Group Members table. Or Select a station or stations under Possible NPL Entries, and click either Append or Insert to add the station. q q Append–adds the selected station to the end of the list. Insert–adds the selected station before the selected station under Hunt Group Members. For more information about this step, see “Groups” on page 6-51. Choose Secondary Stations 4. For each member in the group, click the table cell under the App Ring Ctrl column and select a ring option in the list that opens. 8-44 CVD User Manual CVD Wizards 5. In the Choose Line Keys step, click a button to assign the Line Key Appearance feature. The number of lines depends on the value entered in the Line Key Appearance parameter. Line keys cannot be assigned to system keys. Choose Line Keys When a call arrives at the primary station, the lamp on the line key flashes. 6. Repeat this step for all the stations in the group, excluding wireless and analog stations. 8-45 CVD Wizards CVD User Manual 7. Click Finish in the final step to create the Line Key Appearance group. The wizard finds the first empty Boss group and performs the following procedures: q q q q q q q c 8-46 Swaps the primary station number with the Boss group dial number. Sets default values to Boss group parameters not specified in the wizard. Renames the Boss group with the name of the primary station. Inserts the secondary stations and their ring options as members in the group. Sets the line buttons for the stations. Preference table of the primary station (now it is the boss group number) is updated with the line key appearance features according to the number of lines. Generates the wizard report. NOTE: The wizard report includes the empty Boss group number, which was found by the wizard. This number is the new dial number of the primary station. Use this number should you need to modify settings in the primary station. Glossary This section provides explanations and definitions to common terms and abbreviations used in this manual. Term/Acronym Description API Application Programming Interface serves as an interface between an application program and the operating system on which it resides. Similar to a driver. ARS Automatic Route Selection. In this manual, interchangeable with Least Cost Routing (LCR). ARU Automatic Response Unit (also known as IVR). ASCII American Standard Code for Information Interchange. A seven-level code (128 possible characters) used for data transfer. Baud Unit of signaling speed equivalent to the number of discrete conditions or events per second. If each signal event represents only one bit condition, baud rate equals Bps (bits per second). BCCOS Bearer Capability COS. Channel A path for electrical transmission between two or more points. Also called a link, line, circuit or facility. CLA CoralLink Adapter–A daughter board that connects to the MEX in the large Corals and to the MCPsl in the Coral FlexiCom 200. This card links the Coral to a computer LAN using Ethernet. This link is CSTA compliant for CTI application use. If the Coral is using duplicated common control, two CLA cards will be required. G-1 Glossary G-2 CVD User Manual Term/Acronym Description CNF Conference cards. Can be installed in any universal or shared service card slot. COS Class of Service. CVD CoralVIEW Designer application Database As related to telephony, the information in a PBX that consists of the site unique programming. DB Database. DDI Direct Dialing In. DID Direct Inward Dialing trunks. DPEM Digital Programmable Extension Module. E&M Tie Line signaling leads. E&M Signaling Voice transmission system that uses separate paths for signaling and voice. The “M” lead (mouth) transmits signals to the remote end of the circuit while the “E” lead (ear) receives incoming signals. GS Trunk Ground Start Trunk HI Human Interface. Same as PI (Program Interface). ISDN Integrated Services Digital Network–A carrier provided service that accommodates a variety of switched digital data and voice transmissions simultaneously. IVR Interactive Voice Response function similar to voice mail systems, but have the added ability to request or act upon information gained from the caller. KB0 Communication port (RS-232) to the Coral system. KB0 always resides on the MCP. CVD User Manual Glossary Term/Acronym Description KB1 Keyboard Number 1 on the Coral FlexiCom 200. Kbps Kilo (thousands) bits per second. Keyset EKT/VDK/DKT/DST/GKT/FlexSet Telephones LCR/ARS Least Cost Routing also known as Automatic Route Selection (ARS). LS Trunk Loop Start. A trunk that gets dial tone when a 600 ohm loop resistance is put on it by a KSU/PBX or analog phone. Network (1) an interconnected group of nodes. (2) A series of points, nodes, or stations connected by communications channels; the collection of equipment through which connections are made between data stations. Node A point of interconnection to a network. NPL Numbering Plan. The NPL determines system-wide dialing plan for all hardware and software identifiers used for programming purposes (up to 8 digits). ODB-API Open DataBase-Application Programming Interface. The CVD application uses this protocol to interface with the Coral FlexiCom. PEM Programmable Expansion Module for use with VDKs and enhanced EKTs. PI Program Interface. A menu-driven interface system for programming the Coral FlexiCom. Uses terminal emulation to connect to the Coral. PRI Primary Rate Interface (ISDN T-1), or PRI card for Coral FlexiCom PSTN Public Switched Telephone Network. The telecommunications network commonly accessed by ordinary telephones, key systems, PBX trunks and data G-3 Glossary G-4 CVD User Manual Term/Acronym Description equipment. RMI Remote Maintenance Interface circuit card to be installed in any universal card slot. It supplies 3 RS-232 ports, a 300-baud modem, relay contacts for night bells or alarm notification, music on hold input and paging output.. SLT Single Line Telephone (same as IST). SMDR Station Message Detail Recording. TK, Trk Trunk. Trunk A single circuit between two points, both of which are switching centers or individual distribution points. A trunk usually handles many channels simultaneously. UNA Universal Night Answer is a generic term used to describe a bell or device used to announce a ringing call. VFAC Verified Forced Authorization Codes are used to make users accountable for their calls by attaching a unique code to each SMDR record for billing or toll fraud prevention. Appendix The following table lists forms and the forms linked to them. Linked forms that open with the same entry as in the source form are marked by a * symbol next to them. No. Source Form Linked Forms 1 Numbering Plan (NPL) 12, 14, 30, 31, 32, 33, 35, 36, 2, 27 2 Station Definition 23*, 24*, 25*, 27*, 29, 30, 31, 32, 33, 35, 36, 15*, 10, 20, 22, 9, 21, 4*, 19 3 Routing and Cost Calculation (LCR) 37, 46, 45, 47, 48, 49, 10 4 Keyset Buttons Programming 1, 14, 2*, 25*, 27*, 10 6 Time 18 7 SMDR 26 8 Hotel 19 9 Timers 2 10 Class Of Services 2, 38 12 Card List 1, 14 13 Card Graphic layout 1, 12, 14 14 PLIS 1, 12, 13, 15, 2, 38 15 DLIS 1, 22, 2* 18 Night 6, 19 19 System Features 8, 18 20 Tone Plan 2 21 SLT Database 2, 14, 13 A-1 Appendix A-2 CVD User Manual No. Source Form Linked Forms 22 APA Setup 1, 2, 14, 15 23 Gains (Card & Port) 2*, 4*, 14 24 Features 1, 2*, 4*, 35, 36, 25*, 10 25 Preference 1, 24*, 2*, 4*, 10 26 Terminal Setup 7 27 Libraries 1, 2*, 4*, 24*, 25* 28 NPL: Special Feature Codes 1 29 VFAC 1, 2*, 37 30 Pickup Group 1, 2, 10 31 Bell/UNA Group 1, 10 32 Call Group 1, 10 33 Zone Group 1, 10 34 DID Group 1, 37, 47, 10 35 Boss Group 1, 10, 2 36 Hunt Group 1, 10, 2 37 Trunk Group 1, 10, 38, 3, 48, 49, 34, 47 38 Trunk Definitions 1, 37, 39, 43, 44, 45, 46, 47, 48, 49, 1 39 Trunk Database 1, 38, 37 40 E&M Pulsed (4TEMP) 1, 38, 37 41 E&M Continuous (4TEM) 1, 38, 37 42 Default Configuration 53, 54, 55 43 Port Database 38, 48, 49, 1 44 DTDB Synchronizing 38, 37, 46 45 DTDB (ISDN) Signal Channel 46 46 BCCOS & NSF 37, 44 47 Extended DID Filters 1, 37, 48, 49, 34 CVD User Manual Appendix No. Source Form Linked Forms 48 Node Content 1, 37 49 Node NPL 1, 37 50 ALS Card DB 1, 51, 52 51 ALS Card Configuration 1, 50, 52 52 ALS Port DB 1, 50, 51 53 30TE Card Database 44, 38, 37, 34, 42 54 30T/T1 Card Database 44, 38, 37, 34, 42 55 30TM Card Database 44, 54, 38, 37, 34, 42 56 Digital Trunk Configuration 42, 53, 54, 55, 44 A-3 ,QGH[ $ DERXWWKLVPDQXDO DGGLQJGLDOQXPEHUV DGPLQLVWUDWLQJWKH&9' % EDVLFRSHUDWLRQV EURZVLQJIRUPV FUHDWLQJVKRUWFXWV PXOWLSOHYDOXHV QDYLJDWLQJ XVLQJIRUPV YLHZLQJORJJHUV EHIRUHFRQQHFWLQJWR&RUDO)OH[LFRP ERVVJURXSVUHSRUW EURZVLQJIRUPV & &DOO&RYHUDJHZL]DUG &&, FRQQHFWLQJWKH&9'WR&RUDO,6%; FRQQHFWLQJWR&RUDO FRQQHFWLQJWR&RUDO)OH[LFRP EHIRUHFRQQHFWLQJ FRQQHFWLQJ FRQYHQWLRQVXVHGLQWKLVPDQXDO &RUDO&RQILJXUDWLRQ,QWHUIDFH6HH&&, &RUDOH[SORUHU &&, HQYHORSH QDYLJDWLQJ 13/ UHSRUWV ZL]DUGV &26UHSRUW FUHDWLQJVKRUWFXWV FXVWRPL]LQJ PDLQZLQGRZ PHQXVDQGLFRQV WRROEDUV ' GHILQLQJVLWHV GHILQLQJXVHUSURILOHV GHILQLQJXVHUV GHOHWLQJGLDOQXPEHUV ( HQWHULQJLQIRUPDWLRQLQIRUPV HQYHORSH HUDVLQJ13/ ) IRUPV $OWHUQDWH5RXWH %&&2&16) EURZVLQJ &DUG/LVW &RUDO7LPH 'LJLWDO7UXQN&RQILJXUDWLRQ '/,6 '7'%6\QFKURQL]LQJ HQWHULQJLQIRUPDWLRQ )HDWXUHV&RQWURO *DLQV +DUGZDUH'DWD +DUGZDUH*UDSKLF0DS +RWHO +XQW*URXS ,6'16LJQDOLQJ&KDQQHO .H\VHW%XWWRQ3URJUDPPLQJ .H\VHW3UHIHUHQFH /&5$56 I-1 $SSHQGL[ &9'8VHU0DQXDO /LEUDULHV OLQNV PXOWLSOHYDOXHV 1LJKW6HUYLFH 1RGH&RQWHQWV 1RGH13/ 2IIVHW)LOWHU 3RUW/LVW 5LQJHUV 6/7'DWDEDVH 60'5 7LPHUV 7ROO%DUULHU 7RQH3ODQ 7UXQN'HIDXOW&RQILJXUDWLRQ XVLQJ 9)$& IUHH13/QXPEHUVUHSRUW * JORVVDU\ + KDUGZDUHV\VWHPUHTXLUHPHQWV KXQWJURXSVUHSRUW , LFRQV FXVWRPL]LQJ LQVWDOOLQJ&9' LQVWDOOLQJ2'%$3, LQWURGXFWLRQ DERXWWKLVPDQXDO FRQYHQWLRQVXVHGLQWKLVPDQXDO RYHUYLHZ V\VWHPUHTXLUHPHQWV / /&5$56ZL]DUG OLQNVEURZVLQJ ORJLQ I-2 0 PDLQZLQGRZ &RUDOH[SORUHU FXVWRPL]LQJ FXVWRPL]LQJPHQXVDQGLFRQV FXVWRPL]LQJWRROEDUV PHQXEDU UHVL]LQJSDQHV VKRUWFXWVSDQH WRROEDUVGLVSOD\ ZRUNLQJZLQGRZ PHQXEDU PHQXV FXVWRPL]LQJ PRGLI\LQJOLVWYLHZ PXOWLSOHYDOXHV 1 QDYLJDWLQJLQWKH&9' QDYLJDWLQJZLWK&RUDOH[SORUHU 13/ 6HH1XPEHULQJ3ODQ 13/OLQNV 1XPEHULQJ3ODQ DGGLQJGLDOQXPEHUV GHOHWLQJGLDOQXPEHUV HUDVLQJ13/ OLQNV PRGLI\LQJOLVWYLHZ RYHUYLHZ XSGDWLQJGLDOQXPEHUV YLHZLQJGLDOQXPEHUSURSHUWLHV 1XPEHULQJ3ODQ13/ 3 SDFNLQJOLVW 3,GDWDEDVHVHWWLQJV 3/,6UHSRUW SULYDWHOLEUDU\UHSRUW SXEOLFOLEUDU\UHSRUW 5 UHSRUWV ERVVJURXSV &26 &9'8VHU0DQXDO $SSHQGL[ IUHH13/QXPEHUV KXQWJURXSV RYHUYLHZ 3/,6 SULYDWHOLEUDU\ SXEOLFOLEUDU\ VWDWLRQV WUXQNV UHVL]LQJSDQHV 6 VKRUWFXWV FUHDWLQJ VKRUWFXWVSDQH VRIWZDUHV\VWHPUHTXLUHPHQWV VWDUWZLQGRZ VWDWLRQGDWDZL]DUG VWHS VWHS VWDWLRQZL]DUG VWDWLRQVUHSRUW V\VWHPDGPLQLVWUDWLRQ VLWHGHILQLWLRQ XVHUGHILQLWLRQ XVHUSURILOHVGHILQLWLRQ V\VWHPUHTXLUHPHQWV KDUGZDUH VRIWZDUH V\VWHPVHWXS FRQQHFWLQJWKH&9'WR&RUDO LQVWDOOLQJ&9' LQVWDOOLQJ2'%$3, RYHUYLHZ SDFNLQJOLVW 3,GDWDEDVHVHWWLQJV 7 WRROEDUV FXVWRPL]LQJ WRROEDUVGLVSOD\ WUXQNVUHSRUWV WUXQNVZL]DUG W\SRJUDSKLFDOFRQYHQWLRQV 8 XSGDWLQJGLDOQXPEHUV XVLQJIRUPV 9 YLHZLQJGLDOQXPEHUSURSHUWLHV YLHZLQJORJJHUV : ZL]DUGV $GG0RGLI\6WDWLRQ $GG0RGLI\7UXQNV &DOO&RYHUDJH /&5$56 6WDWLRQ'DWD7UDQVIHU ZRUNLQJZLWK ZL]DUGVLQ&RUDOH[SORUHU ZRUNLQJZLQGRZ ZRUNLQJZLWKZL]DUGV I-3 TELECOM BUSINESS SYSTEMS Tadiran Telecom Business Systems Ltd. International Headquarters Tadiran Telecom Business Systems Ltd. 18 Hasivim St., P.O.Box 450 Petach-Tikva 49105, Israel Tel. +972-3-9262000, Fax. +972-3-9262310 USA Headquarters Tadiran Telecom, Inc. 4 Tri Harbor Court Port Washington, NY 11050 Tel. +1-516-632-7200, Fax. +1-516-632-7210 Visit us at our website http://www.tadirantele.com Email: [email protected] C o r a l V I E W TM D e s i g n e r ( C V D ) 2 . 5 . 0 User Manual CN7244-7161901 Issue 1