1
CHAPTER 7 ■ ADVANCED FUNCTIONS
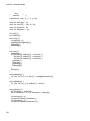
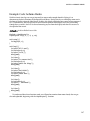
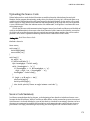
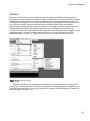
int readSensor(int sensorPin) {
int sensorValue = 0;
for (int i=0; i<5; i++) {
sensorValue = sensorValue + analogRead(sensorPin);
delay(10);
}
sensorValue = map(sensorValue, 0, 5115, 0, 255);
return sensorValue;
}
Function parameters are kind of like variables, but they are declared inside the parenthesis in the
function declaration. Let’s look at the following revised function declaration:
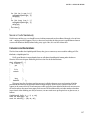
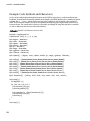
int readSensor(int sensorPin) {
Here we have added the function parameter of sensorPin and assigned it the integer data type. That
tells the function what kind of value to expect being passed to it. Elsewhere in the function we can use
the function parameter just like we would another variable. We did that in the following line:
sensorValue = sensorValue + analogRead(sensorPin);
Here, sensorPin will correspond to the function parameter being passed to the function. As long as
we make sure that the specified data type matches the value being sent to the function, all should be
fine. The following is what the function call would look like in the loop() function:
int sensorValue = readSensor(A0);
All we have done is given the function call the expected data inside the parenthesis, in this case the
pin number we want to get our value from. With this modified function, it will now work for all six analog
input pins just by specifying which pin we want to read from as a function parameter.
Now, this example only has one function parameter, but it is also possible to have multiple function
parameters as long as commas separate them as we did in our project code with the fadeToHSB()
function. It is also possible to specify parameters with any valid data type, not just integers. Remember
though, just like a function return value, the parameters passed to a function are only temporary—they
will not be remembered by that function once the function ends.
Building on this idea of writing functions, we can use a type of function that is triggered by a
condition in hardware called an interrupt. This would be pretty handy for interrupting the code for a
short time to perform a specific action. Let’s look at a second project, HSB Color Mixer, using the BlinkM
again to see how interrupts work.
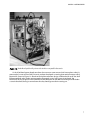
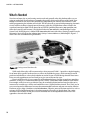
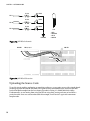
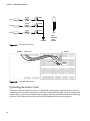
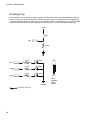
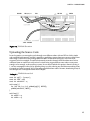
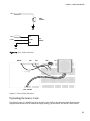
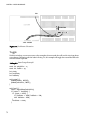
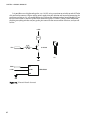
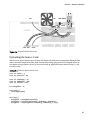
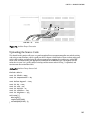
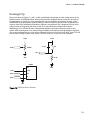
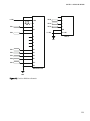
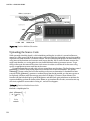
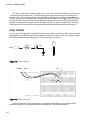
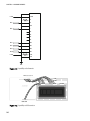
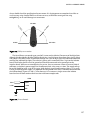
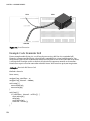
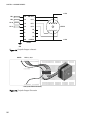
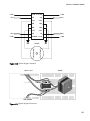
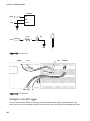
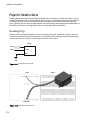
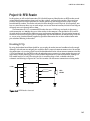
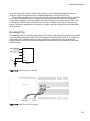
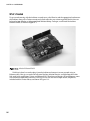
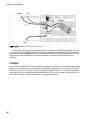
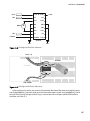
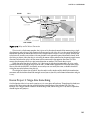
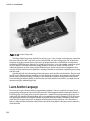
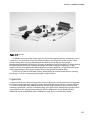
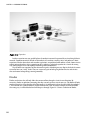
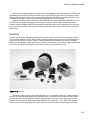
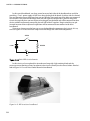
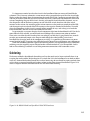
Project 7: HSB Color Mixer
In this project, we’ve kept the BlinkM MinM, but we replaced the TMP36 temperature sensor with a
pushbutton like we used in Chapter 5 in addition to a trimpot, also known as a potentiometer, although
some other variable resistor could work as well. This project will allow us to cycle through hue,
saturation, and brightness on the BlinkM to set a specified color. Better yet, it gives us a good excuse for
using a special kind of function that uses hardware interrupts, which we will explain in this chapter.
112