1
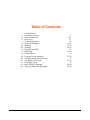
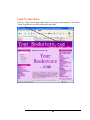
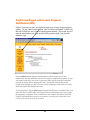
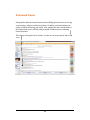
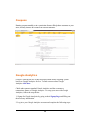
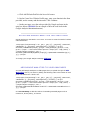
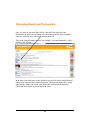
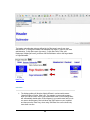
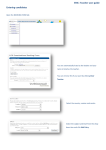
CHRISLANDS.COM Online Bookstores built for Online Booksellers User Manual Chrislands.com 195 University Park Drive Suite 107 Edwardsville ,IL 62025 [email protected] Table of Contents i. ii. iii. iv. v. vi. vii. viii. ix. x. xi. xii. xiii. xiv. xv. xvi. xvii. Getting Started Login into your store Store Admin Areas Store Area Taxes and Inventory Orders and Shoppers Shipping Uploads Paypal/Paypal IPN Marketing Featured Items Coupons/Google Analytics Changing Email and Passwords Accepting Credit Cards Disk Space Usage Basic HTML Commands Wysiwyg Editor and Hyperlinks 2 5-12 13 14 15-16 17-21 22-24 25 26-33 34 35-36 37 38-43 43 44-48 49-60 Getting Started The best way to learn is the hands on approach. Just start clicking, testing, buying, selling, and see what happens. We hope you find the functions for your Chrislands Bookstore intuitive and easy to use. 2 Login To Your Store There is a “Login” near the upper right corner of every page in your bookstore. Click on the “Login” hyperlink and you will be taken to the login page. 3 On the login page enter the store administration username and password you were assigned and click “Login”. You are now logged into your bookstore as the store administrator. Your bookstore will look similar to the picture on the next page. 4 To enter the bookstore administration area click on “Administration” in the upper left-hand corner. The bookstore administration area will look similar to the picture below. 5 Store Admin Areas There are 13 functional areas within you bookstore administration. Listed below are the 10 functional areas. These areas are listed across the of the store administration pages. 1. Add Web Pages - This area allows you to add web pages that you have built on your own to the bookstore. 6 2. Advanced Features - Features in this area allow you to add/edit functions beyond the basic functions of the bookstore. 7 3. Coupons – You can manage store coupons from this area. 8 4. Gift Cards – You can manage store Gift Cards from this area. 5. Inventory – You can view and edit your inventory from here. 9 6. Orders – This is the place to retrieve order information and payment information. 7. Shipping – This is the area to establish/update your shipping rates. 10 8. Shoppers – You can view/update shopper information from here. 9. Site Layout – You can edit the look of the store from this area. 11 10. Statistics - You can find web site data in this area. You can find information such as which of your pages have been visited and how many times the pages have been visited. 11. Store – This is the area you provide/update information about your store. 12 12. Taxes – This is the area to establish/update your sales tax rates. 13. Upload – This is the area with uploading instructions. FTP upload settings can be found here and an option to upload straight from your browser. 13 Store Area Store area is the default area that opens when you enter the bookstore administration. The picture on the previous page shows the functions within the “store” area along the left hand side of the screen. 1. Edit Store Info – This function allows you to update general information about your store. You should verify all the information in this area and update as necessary. 2. List Payment Methods – Simply provides a list of payment methods you accept. Clicking the delete button will remove a payment method as one of your accepted payment methods. 3. Add Payment Method – This provides a list of payment methods you do not accept. Clicking “Add” will add a payment as one of your acceptable payment methods. 4. Edit Your Pages – You can edit the content of your pages from here. Knowledge of HTML is not required, but HTML code is allowed, thus if you know some HTML you can spruce up your page anyway you please. 5. Add New Page – You can use this link to add new pages to the store. 6. Edit Meta/Titles – Editing the Title may improve your search engine placement; it is generally accepted that search engines consider the information in the Page Title important. You can also edit your meta-tags. However, it is generally accepted that search engines pay little attention to meta tags anymore. 7. Building Bookstore Links – This section explains how to link to books in your inventory. 8. Marketing – Suggestions to help increase the reach of your bookstore. 9. Basic HTML – A list of simple HTML commands you can use when editing your bookstore pages 10. Email Administration – Links to the email administration area. 11. Update Chrislands Billing Info – Area to update your billing information with Chrislands. 14 Tax Area The tax area has two choices; list tax rates and add tax rates. Tax rates are entered in decimal values thus a state sales tax of 6.75% would be entered as .0675. The default rate is set to 0% for every state and country. Inventory Area The inventory area has several functions. 1. View Inventory – This function will list your online inventory and allow you to edit any online inventory. 2. Add Item – This function will allow you to add one item at a time to your online store inventory. 3. Featured Items – View items that have been selected as Featured Items. 4. Gift Wrapping – Allows you to offer Gift Wrapping during the checkout process. 5. List Categories – Displays all your online categories and how many items are in each category. 6. Add Category – Allows you to add categories to your online bookstore. 7. Price Change Current Inventory – Allows you to make bulk changes to your store inventory. 8. Price Change During Uploads – Allows you to have the store change prices of items as the items are added to the store during upload processing. 9. Download Inventory – Allows you to download your inventory. 10. Stock Data- Use stock images for your inventory if you do not have images already to use. ****** The most important thing to remember is to ensure all your fields are filled out correctly or an upload will not reflect what you actually may have or could fail to upload.****** 15 Orders Area Orders area has several basic functions. 1. List Orders – This function allows you to view all your orders. A page will be displayed that list all your orders. When you click on an order number an order information page will appear. The page will contain book information, shipping information and payment information. There is also a “Print View” option, which you can use to print invoices for customers or for your records. 2. List Wants – This function works similar to ‘List Orders’ except it is information about books visitors have indicated they would like to purchase, but you did not have listed online. 3. Cart Contents and Tell a Friend Information – Displays a listing of items shoppers have added to the shopping cart and items added using the “Tell a Friend” function. . 4. Re-List – Provides instructions for how to re-list items that were sold in the store. 5. Email Configuration – Allows you to edit portions of the Order Confirmation Email sent to customers when an order is placed. 6. Order Status (Add Type and List Types) – Options for adding and editing order status options in the store. You may want to use these functions as you become more proficient in using the store, but you should not need to initially use these two functions. 7. Download Orders – Allows you to download order information. Shoppers Area Shoppers area has five functions. 1. List Shoppers – This function allows you to view all list of all your bookstore shoppers. When you click on a shoppers email address, you can view/edit the shopper’s information. 2. Add Shopper – This function allows you to add a shopper to your database of shoppers. 3. Download Shoppers – You can download shopper information from this area. 16 4. Block Creation of New Shopper Account – Allows you to restrict shopping at the store to only customers that already have an account with your store. 5. Make Creating Store Account Optional – Provides you the option to allow customers to place orders from the store without creating an account with the store. 17 Shipping Area Shipping is managed using "zones." There are three functions to use to set shipping rates. 1. Manage Shipping Methods – This function allows you to establish all the shipping methods and fees. 2. Assign Methods to Shipping Zones – This function allows you assign the Shipping Methods established in "Manage Shipping Methods" to the appropriate shipping zones. 3. Assign Zones to Countries, States, or Provinces - This function allows you to assign the proper zone to the proper Countries, States, or Provinces. Hints for setting shipping rates: 1. The first step in establishing/editing should be determining what Countries, States, or Provinces have the same shipping rates (this will be the basis for forming your shipping "zones"). 2. After you have determined what Countries, States, or Provinces share the same shipping fees, then you will want to give a name to each group of Countries, States, or Provinces that share the same shipping fees. For example, If United Kingdom, Norway, and Germany all shared the same shipping fees, then you may want to call that group (group will later equal zone) "Europe 1." If California, Oregon, and Washington all shared the same shipping fees, then you may want to call that group "US West Coast." 3. After you have determined what Countries, States, or Provinces share the same shipping fees and given a name to each group, you should write down on paper the associations. For example United Kingdom, Norway, and Germany are part of group/zone "Europe 1." All countries in "Europe 1" use the following shipping methods Air Mail $10 for first book, $5 for each additional book Surface $8 for first book, $3 for each additional book 18 California, Oregon, and Washington are part of group/zone "US West Coast." All states in "US West Coast" use the following shipping methods. Priority Mail $5 for first book, $1.50 for each additional book Media Mail $3.50 for first book, $1 for each additional book 4. After you have determined the proper associations (as outlined above in step 3) between country, zone, and method then you are ready to assign/edit your shipping options in your store administration. a. The first step is to add the shipping methods using "Manage Shipping Methods." Using the examples from bullet number 3 you would want to add the following shipping methods Air Mail $10 for first book, $5 for each additional book Surface $8 for first book, $3 for each additional book Priority Mail $5 for first book, $1.50 for each additional book Media Mail $3.50 for first book, $1 for each additional book b. The next step is to assign the proper methods to the proper zones. You will do this from within "Assign Methods to Shipping Zones." a) The first step within "Assign Methods to Shipping Zones" is to establish the zones. You can add new zones near the bottom of the "Assign Methods to Shipping Zones" page. Enter in the name of the new zone and click "Save." b) After you have established the Zone names, then you will want to associate shipping methods with those zones. You can associate shipping methods to zones by clicking on the "Assign Shipping Methods" link for the appropriate zone. When the "Assign/Edit Shipping Methods" page appears add or delete shipping methods as appropriate so that the shipping methods you want used in that zone are listed in the "Methods Currently assigned to this zone" area. 19 c. The final step is to assign the proper zone to the proper country. You do this by clicking on the "Assign Zones to Countries, States, or Provinces" link. a) This step requires that the previous two steps were completed and we already have the following two zones established within our store. Europe 1 Air Mail $10 for first book, $5 for each additional Surface $8 for first book, $3 for each additional US West Coast Priority Mail $5 for first book, $1.50 for each additional Media Mail $3.50 for first book, $1 for each additional b) You would then want to click on "Assign Zones to Countries, States, or Provinces" and click on the appropriate hyperlinks until you reached "United Kingdom." When you get to the page that displays United Kingdom, then use the drop down menu to select "Europe 1" and then click "Update." This will then associate the United Kingdom with the shipping zone "Europe 1" which provides the buyer the choice of the following shipping methods for shipping to the United Kingdom. Air Mail $10 for first book, $5 for each additional Surface $8 for first book, $3 for each additional 5. You would then need to follow a similar procedure as outlined above to establish other Shipping Methods and Shipping Zones, and then to associate those new Shipping Methods to Zones and new Shipping Zones to the appropriate Countries, States or Provinces. 20 Other Shipping Notes: 1. There are over 300 country, state, and province choices in your bookstore. Updating each one individually may become tedious. In the "Assign Zones to Countries, States, or Provinces" area we added the "Make Bulk Zone Assignments" to make updating your shipping fees easier. The "Make Bulk Zone Assignments" allow you to assign the same shipping zone to many Countries, States, or Provinces with just a couple mouse clicks. 2. Chrislands cannot reliably and accurately distinguish between different binding types and book sizes (there is too much variation in how items are listed), thus your bookstore does not have the capability to offer different shipping rates between paperbacks, hard covers, and oversize books. 3. You modify your shipping methods by: Login -> Administration -> Shipping (top menu) Shipping is a three step process. Shipping Methods - you can have as many as you like. A shipping method defines the Name, Length of Time, price for first item (or unit of measure), price for each additional item (or unit of measure) Shipping Zones - these are buckets to group your shipping methods. You can have as many Zones as you like. You assign Shipping Methods to Zones. A Zone can have zero to as many shipping methods as you want. One shipping method can be assigned to zero or many shipping Zones. Assigning Zones to Countries - once you have your Zones with the shipping methods then assign these Zones to geographical regions. One Zone can be assigned to many Geographical regions but a geographical region can only have one Zone. So when someone from a geographical region checks out they are presented with the shipping methods assigned to the Shipping Zone that is assigned to that Geographical region. If up do not want to ship to a country, create an empty Zone, do not add any shipping methods, then assign that zone to any country you do not want to ship to. The customer has to be able to choose a shipping method to checkout. An empty Zone presents no shipping methods. 21 There are many other areas of the Admin you might find interesting, taxes, coupons, gift cards, the base areas are at the top menu and the sub menus are in the left column. 22 Uploads The upload area has two features. 1. Browser Upload – Use this feature to send your upload files to chrislands for processing. You have the option prior to uploading to select whether you want the upload to be a purge/replace upload. If you select ‘Yes’ all of your current online listings (and categories) will be deleted prior to processing the uploaded file. The ‘replace’ file will then upload all the “For Sale” books in the file and build new categories for your store based on the categories in the upload file. 2. You can also upload by FTP. Your FTP settings are available on the first page of the Upload area. 3. Your FTP account is not hooked to the site web root. When you login you will see four directories, home, images, book_images_by_isbn, and inv_upload_files. Our process moves your files from these directories to the right location on a timed basis. You can place inventory upload files in the FTP root or the inv_upload_files directory. Images – named by your seller id (sku) for each item are placed in this 23 directory. For example if you have item 1234 and an image 1234.jpg you can place that image here and our process will connect it to your item at the store. Book_images_by_isbn – same as images above except these have been named by isbn number. Home – this directory is sort of a catch all you can put images, pdfs, additional html files and then you can access those files by: http://www.youdomainname.com/home/nameoffilethatyouuplaoded You can see this location (/home/) in the store admin by Login -> Administration -> Add Web Pages (top menu) Here you can upload files directly to the ‘home’ directory. You can find your FTP login information by: Login -> Administration -> Upload (top menu) You can also upload inventory at this location by Use Browser Upload, there are some options you may choose before clicking the save button. When FTP file you have three naming options. 1. Any name that does not contain purge or del will be an add or modify name 2. Any file name with del in it, this will be strictly a delete file and all items in the file will be deleted 3. Name the file with purge in the name somewhere, the inventory will be purged before the upload starts. You can edit page content within the site by: Login -> Administration -> Click any title/area in the left menu This will open up a wysiwyg editor. There is a link to a help file at the top of the page. You can also edit the source directly by clicking the HTML Source button at the bottom of your editor. 4. Email Reports – You have the option to not receive email upload reports after each time a file processes for uploads. 24 5. You can manually upload inventory and images through your ChrisLands store in the administration area. 25 PayPal and Paypal with Instant Payment Notification (IPN) PayPal - First step is to make sure PayPal is listed as one of your accepted payment options. Use the “Add Payment Method” and “List Payment Methods” to add/verify that you list PayPal as one of your accepted payment methods. The second step is to enter the email address you use to accept PayPal payments on the “List Payment Methods” page. . Paypal without Instant Payment Notification records the order at your store immediately and then sends the customer to Paypal to complete the payment. So you will want to make sure you receive a payment, make sure the customer completed payment at Paypal, before shipping the order. The benefit is that if they do not complete the payment you have a record of their information in the order to contact them and maybe still complete the order. As you may know, Paypal with Instant Payment Notification is a method where your store does not record the order until Paypal sends a notification to your store saying the payment is completed. If the customer does not complete the order at PayPal or Paypal's notification does not arrive at your store, you may never know they were even at your store as no order is recorded. 26 Marketing 1. A lot of success has to do with what the store owner has put into it. Marketing is just as important for an online store as an offline store, if not more so. Without Marketing, well, nothing happens. We also suggest you look in the store Administration Marketing area, specifically for Search Engines for Books. You can see more at your store as the administrator: Login -> Administration -> Marketing (left menu first page of admin). 2. Have BookFinder.com search your inventory. To signup for this feature go to your store Administration, on the first page of Administration, click the Marketing link in the left menu, on the page that comes up click the Search Engine for Books link, then on that new page click the Bookfinder.com link. Read through the information on that page, click Yes and save the form. ChrisLands has servers dedicated to this search, additional resources, so there is a fee for this. 3. Show Featured Items on your home page. To configure Featured Items, click Featured Items in the Advanced Features area of your store administration. Fill out the form and click save at the bottom. You can specify featured items in the Inventory area of your store administration. Click View Inventory find the items you want to feature and click Add in the far right hand side of the listings. 4. Show New Items on your home page. To configure New Items, click New Items in the Advanced Features area of your store administration. Fill out the form and click save at the bottom. The newest items are automatically selected to display on y our home page. 5. Getting a good listing on a search engine has a lot to do with content and keywords. Your keywords should be as unique to you and your products as possible. For instance, the keywords "used books" would not be unique as there are many using that same keyword combination. Put some thought it into what you want to use for your keywords. I would look at a few keywords, or keyword phrases that: Are as unique as possible to you and your product Are keywords you think your clients would use to search for you. I suggest at least 3 keyword combinations. Then use those keywords/keyword phrases as often as you can throughout the content of your site. In your Meta Tags, in your page content, in lists on your page content, and as a strong keyword. Say your keywords are "William Shakespeare". 27 In your Meta Tags (description, title, keywords) make sure William, Shakespeare, and William Shakespeare appear. You can edit your Meta/Title in the left menu of the first page of your store's admininistration. Then use "William Shakespeare" in as many paragraphs on as many pages as you can find and that makes sense. Use them in the content of these paragraphs. Highlight them a few times using the HTML <strong> tag for emphasis. <strong>William Shakespeare</strong> Then use them in an HTML <ul> list if possible. <ul> <li>William Shakespeare</li> <li>Something Else</li> <li>More else</li> </ul> You can manually add these types of entries using the HTML Source button (lower right) of the page editor. I have read that simply listing a bunch of keywords on your weg pages (not used in the content of your paragraphs) may actually hurt your placement in search engines. This is considered "keywords spamming" by search engines. So please keep that in mind. The following lists are a couple of items I believe help in search engine placement, but do not know if they are true. Let me say that again, I do not know if these are true. To me, they just make sense. The longer your site is up the better your placement. Time works in your favor. Updating the content of your web pages periodically keeps it fresh. This shows activity on your site. I recently was asked about changing the color of the Add to Cart link so it stands out more on the page. Sort of a call to action for a site visitor. I thought I would share what I did to accomplish this with everyone. You can change the link in the store administration by: Login -> Administration -> Advanced Features -> Layout Options -> Search and Browse Page Options -> Edit Layout of Browse/Search Results Pages 28 Then enter the following in the Add to Cart Label entry: <font color="#e16920">Add to Shopping Cart</font> Notice the color code is #e16920. This is the Hex code for the color orange. You can use any Hex code you like. Please go to 500+ colors to find other colors. You can also change the color of the Checkout link on the shopping cart by adding similar code in the store administration by: Login -> Administration -> Advanced Features -> Checkout Options -> Option to change the Checkout Link on the Shopping Cart page. You may also use an image for this link by adding an image in the Add Web Pages (top menu) are of your store administration. Then instead of using the code mentioned above for the Add to Cart label, to chagne the font color, use the following. <img src="home/thenameofthefileyouploaded.extension" title="Add to Shopping Cart" alt="Add to Shopping Cart"> 29 In this article I want to explain how to use an "Add to Cart" button on appropriate pages at your store. The next two images display an example of using buttons. Notice they stand out from the rest of the page. Usually the button is a distinct color that stands out from your sites overall coloring. Notice the distinct Call to Action, "Add to Cart" buttons on the category listing page. 30 These same buttons are on the product detail pages. You can do the same thing using any button (image) that you want. You can find many examples online. Make sure they are not copyrighted and they are royalty free so you don't get in trouble in the future. I have four images at the end of this article that are royalty free and you are welcome to use. I'm going to go through the steps to upload the image and add the correct code to display the image in these locations. First, find yourself a Call to Action image. Save it to your local computer and remember where you saved it for later. I would recommend that the image is no more than 130 pixels in width. Then as the store administrator login to your store's Administration. 31 Once in your store's administration, click Add Web Pages along the top menu. Here is where you can add various file types including images Once in the Add Web Pages area of your store's administration, scroll down until you see the form depicted in this image. Click the "Choose File" button. A dialog box will open that allows you to find your button image. You do remember where it is right? After you select that image file, click Upload File. The file will be uploaded in alllowercase. Remember this. Once you have the image uploaded, click Advanced Features along the top menu. 32 Then click Layout Options along the left menu in the Advanced Features area of the store administration. Then click Search and Browse Page Options a link on the page. Finally click Edit Layout of Browse/Search Result Pages. We are there! 33 Scroll down until you find the Add To Cart Label header. In the form entry for Label for "Add To Cart" Link depicted in the image above, enter the following: <img src="home/yourbuttonimagename.ext" title="Add to Cart"> Change the file name in bold above to the name of the button image you uploaded. Remember when you uploaded the file, the name was made all lowercase. Only change the file name, do not change any other parts of this HTML tag. Cick Save at the bottom of the form. Here are some buttons you may use that are royalty free. To save them to your computer, right click on the image and select "Save Image As". Save it to your computer. Remember where you save it. Below each image is the correct HTML tag to put in the form as long as you upload it according to the directions above and save it with the current name. <img src="home/addtocartb.png" title="Add to Cart"> <img src="home/addtocartg.png" title="Add to Cart"> <img src="home/addtocartr.png" title="Add to Cart"> <img src="home/addtocarty.png" title="Add to Cart"> We hope this helps your sales!!! 6. Social Media through Facebook, Twitter, and Google Plus are all good tools to help connect you to new, current, or past customers. Also, it helps with brand awareness, and communication through one direct source. 34 Featured Items Putting books under the featured items section will help guide customers in viewing your inventory, and more inclined to purchase. Switching your featured items out weekly will help roll through your books. Also, putting your more valued books on the featured item section will help with giving that certain item more marketing toward customers. This can put to the right of your website, or where new items are placed, and vice versa. 35 Coupons Running coupons monthly or in a certain time frame will help draw customers to your store, and may increase in revenue from current customers. Google Analytics Google is offering the use of their advanced online traffic reporting system known as Google Analytics for free. To find out more about Google Analytics click here. ChrisLands supports standard Google Analytics and the ecommerce transactions feature of Google Analytics. To setup your store with Google Analytics, follow the steps below. 1. Signup for Google Analytics by going to their Signup Page and filling out the necessary information. 2. Log in to your Google Analytics account and complete the following steps. 36 a. Click Add Website Profile in the lower left corner. b. On the Create New Website Profile page, enter your domain in the form provided, set the country and the timezone. Click Continue. c. On the next page, copy the code provided by Google and enter in the entry box below (click here for an example of how the code looks in the Google Analytics administration area). AC T IVA T IN G GOOG LE AN AL YT IC S F OR YOU R S TO R E Google Analytics is activated in your store. Your store is using the Google Tracking code listed below. <script type="text/javascript"> var _gaq = _gaq || []; _gaq.push(['_setAccount', '18699148-1']); _gaq.push(['_trackPageview']); (function() { var ga = document.createElement('script'); ga.type = 'text/javascript'; ga.async = true; ga.src = ('https:' == document.location.protocol ? 'https://ssl' : 'http://www') + '.google-analytics.com/ga.js'; var s = document.getElementsByTagName('script')[0]; s.parentNode.insertBefore(ga, s); })(); </script> To change your Google Analytics settings click here. ADD GOO GLE AN ALYTICS TO YOUR O W N PAGES You may add Google Analytics to HTML pages that you upload through the Add Web Pages area of your store by adding the following code to the bottom of each page right before the </body> tag. <script type="text/javascript"> var _gaq = _gaq || []; _gaq.push(['_setAccount', '18699148-1']); _gaq.push(['_trackPageview']); (function() { var ga = document.createElement('script'); ga.type = 'text/javascript'; ga.async = true; ga.src = ('https:' == document.location.protocol ? 'https://ssl' : 'http://www') + '.google-analytics.com/ga.js'; var s = document.getElementsByTagName('script')[0]; s.parentNode.insertBefore(ga, s); })(); </script> It is not necessary to add this code to ChrisLands generated pages such as Contact Us, Privacy Policy, or Footers. 37 Changing Email and Passwords Once you log in to your store there will be a link to the left called Account Maintenance in which you can change your email and password. This will update what you would like to be your log in and new password. This can be changed within your store, for example: “Account Maintenance” can be renamed “My Account.” In the past we have had store owners who have not received emails of notification of orders when a customer has completed payment. This has been mainly due to email spam settings. Simply check your spam folder, and mark any notification from ChrisLands as non-spam to prevent this in the future. 38 Accepting Credit Cards This page will contain more information concerning accepting credit cards at your store. We will update this page when we add new methods for you to accept credit cards. Please Note: You can only have one Payment Gateway (manual processing, braintree, propay, authorize.net, sagepay, etc) enabled at one time. If you want to enable or disable a Payment Gateway, please submit a support ticket and ask us to do it for you. Paypal does not count as payment gateways. You may use Paypal and up to one other Payment Gateway If you use a Payment Gateway (braintree, propay, authorize.net, sagepay), your store does not save the credit card information as it is not needed. Manually Processing Credit Cards If you have a method to manually process credit cards such as a point of sale system at your brick and mortar store or a virtual online terminal with your merchant account, you may accept credit cards in your store. Please note the following applies - The Card Security Code, commonly referred to as the CVV, is only displayed once when viewing your order in the store administration. You must retrieve this code to process your payment the first time you view the order. There is no way to recover this CVV code. - The Credit Card number is only displayed three (3) times. Ensure you retrieve this number or use it to process your order payment before viewing the order details four or more times. - Fourteen (14) days after the order, the credit card number will be deleted. - Once the credit card number is deleted, there is no way to retrieve it.. 39 - Once you retrieve your payment information from the order details page, it is your responsibility to safeguard it in accordance with the Payment Card Industries Data Security Standard See PCI DSS. By Manually Processing credit cards, when your shopper chooses to pay by a credit card, the shopper remains at your site. They securely enter the credit card details on your checkout page. Your shopper never leaves your site as they do with other payment methods (PayPal for instance). This counts as a payment gateway and you may only have one payment gateway configured for your store as mentioned above. To enable manual processing of credit cards, if you are using any other payment gateway, have ChrisLands disable it. Then simply add the credit cards that you want to accept in the list on the Add Payment Method page. During checkout this will display those options under Select Payment Method and will display a form to enter the credit card information on the final page of checkout. Then you retrieve this payment information from the order detail page in the Orders are of your store administration. BraintreePayments.com (low cost, supports many countries) Automatically accept credit cards through BraintreePayments.com. BraintreePayments offers the ability to accept credit cards in the background for a low per transaction fee. They have NO monthly or annual fees. Although we have not researched every possible payment processor, in our experience, this is one of the lowest cost processors available. They also have no limits on the transaction amounts. No merchant account is required and Braintree supports many countries, United States, Canada, Australia, United Kingdom, and more. Have a look at BraintreePayments.com By using Braintree, when your shopper chooses to pay by a credit card, your system will interact in the background to securely process the credit card. Your shopper never leaves your site as they do with other payment methods (PayPal for instance). If you choose to use Braintree Payments, once you register and you login for the first time at BrainTreePayment.com, on the first page there will be four API Keys. 40 To configure your store to use BrainTree, ChrisLands will need those four keys. These keys are: Merchant ID Private Key Public Key CSE Key Record this information, keep it secure, and have it available to provide to ChrisLands so we can properly configure your store to use Braintree. I've added BrainTreePayment support to your site. You should now select the Credit Cards you want to accept. The third section on this page talks about what you can accept. https://support.braintreepayments.com/customer/portal/articles/1080425-paymentprocessing-101 To update your payment methods, at your store as the administrator: Login -> Add Payment Methods (left menu) Then you should do a test order on your site. Following that, you should go to your BrainTree account and see how the activity shows up there. Read more at BraintreePayments.com This counts as a payment gateway and you may only have one payment gateway configured for your store as mentioned above. Use Authorize.net as Your Payment Gateway Whether you have a merchant account or not our partner, Authorize.net, can assist you in establishing an online payment gateway. An online payment gateway is required to interact with your merchant account and accept credit card payments at your online store.Authorize.net is one of the premier companies providing this service today with no monthly or per transaction minimums. Find out more at: Authorize.net 41 By using Authorize.net, when your shopper chooses to pay by a credit card, your system will interact in the background to securely process the credit card while the shopper remains at your site. Your shopper never leaves your site as they do with other payment methods (PayPal for instance). In order to configure your store for Authorize.net please do the following: - Create an account (or make sure your account is current) at Authorize.net - Login to your Authorize.net account. - Click Settings in the left menu (of your authorize.net account). - Find the link Api Login ID and Transaction Key (should be on the page) and retrieve the API Login ID and Transaction Key. - Create a support ticket at ChrisLands.com and send us your store's domain name (mystoredomain.com), the Authorize.net API Login ID and the API Transaction Key. - We'll configure your store to use Authorize.net. This counts as a payment gateway and you may only have one payment gateway configured for your store as mentioned above. Use ProtectPay from Propay as Your Payment Gateway (USA and Canada) Automatically accept credit cards through our partner Propay.com (Only available for stores in the USA and Canada) who acts as both a merchant account and payment gateway in one. By using ProtectPay, when your shopper chooses to pay by a credit card, your system will interact in the background to securely process the credit card while the shopper remains at your site. Your shopper never leaves your site as they do with other payment methods (PayPal for instance). By using this link ChrisLands members receive the Propay service for $45.95 annually. Canadian Store Owners please use the following link ProPay Canada to create your ProPay Account. 42 This counts as a payment gateway and you may only have one payment gateway configured for your store as mentioned above. In order to configure your store for ProtectPay from Propay go to the Propay Configuration page and follow the directions there. This counts as a payment gateway and you may only have one payment gateway configured for your store as mentioned above. Use SagePay.com (UK and Ireland) Sage Pay Europe Ltd is the UK and Ireland’s leading independent payment service provider. Every year Sage Pay processes billions of pounds worth of secure payments for its 45,000 customers making the process of accepting payments online, over the phone, or in person simpler, faster, safer and more profitable for businesses of all sizes. Sage Pay is a subsidiary of FTSE 100 business management software and services company The Sage Group plc. By using SagePay, when your shopper chooses to pay by a credit card, your system will interact in the background to securely process the credit card while the shopper remains at your site. Your shopper never leaves your site as they do with other payment methods (PayPal for instance). This counts as a payment gateway and you may only have one payment gateway configured for your store as mentioned above. SagePay has multiple configuration steps. - Register for an account at SagePage.com - Set the valid IP Addresses to receive payments from in your SagePay account. This is done in your SagePay Account -> Settings -> Valid IPs -> click Add (button on lower right). Then enter the following -- Ip address: 66.201.105.128 -- Subnet mask: 255.255.255.224 -- Description: Any Name you want 43 - Place your account in Test Mode. I believe Sagepay places it in test mode when you initially create the account. - Send ChrisLands your SagePay's Vendor Name. - We will integrate your store with SagePay in Test Mode. - Run at least one test order and one test refund. - Place your SagePay Account in Live Mode. - Tell Us to switch your integration from Test Mode to Live Mode. SagePay.com has a FAQ page that details the integration steps. Find Out more at SagePay.com This counts as a payment gateway and you may only have one payment gateway configured for your store as mentioned above. Disk Space Usage This shows disk space used, so it is important to keep your eye on it because if you go over your allotted disk space additional charges can be made. 44 Basic HTML Commands The following is a list of basic HTML commands you can use when editing your bookstore web pages. <BR> - Line Break <B> </B> - Bold <U> </U> - Underline <I> </I> - Italics <CENTER> </CENTER> - Center <FONT SIZE=‘ ’ COLOR= ‘ ’> </FONT> - Font size and color <BR> = This command works like a “carriage return” on a type writer. Here is an example. If you enter – April has 30 days. May has 31 days. It will display as April has 30 days. May has 31 days. If you enter – April has 30 days. <BR> May has 31 days. It will display as April has 30 days. May has 31 days. If you enter – April has 30 days. <BR><BR>May has 31 days. 45 It will display as April has 30 days. May has 31 days. The remainder of the commands have a start tag (command) and an end tag (command). We will first cover three easy to use tags. <B> </B> - Bold <U> </U> - Underline <I> </I> - Italics Each set of HTML tags does what you would expect; make the text bold, underlined, or italicized. To modify text just place it between the tags. For example If you enter – April has <B>30 days.</B> May has <B>31 days.</B> It will displays as April has 30 days. May has 31 days. If you enter – April <U>has</U> 30 days. May <U>has</U>31 days. It will displays as April has 30 days. May has 31 days. 46 If you enter – <I>April</I> has 30 days. <I>May</I> has 31 days. It will display as April has 30 days. May has 31 days. If you use all the commands we have covered – <I>April</I> <U>has</U> <B>30 days.</B>. <BR><BR> <I>May</I> <U>has</U> <B>31 days.</B> It will display as April has 30 days. May has 31 days. The HTML center tags work very simply. <CENTER> </CENTER> If you enter – April has 30 days. <BR> May has 31 days. It will display as April has 30 days. May has 31 days. If you enter – <CENTER>April has 30 days. <BR> May has 31 days. </CENTER> 47 It will display as April has 30 days. May has 31 days. Last basic command controls font size and color. <FONT SIZE=‘ ’ COLOR= ‘ ’> </FONT> If you wan to change the default font size and color use these HTML tags. It will take some trial and error to determine what font size and color you want to use. Enter font size as an integer value (both positive and negative values allowed) between the single quotes. Color can be entered as a 6 digit HTML value (such as ‘#000000’ is black and ‘#ffffff’ is white) or as a basic color name (such as ‘RED’ or ‘WHITE’ or ‘BLUE’). If you enter – <FONT SIZE=‘3’ COLOR= ‘BLUE’> April has 30 days. May has 31 days.</FONT> It will display as April has 30 days. May has 31 days. If you enter – <FONT SIZE=‘4’ COLOR= ‘RED’> <CENTER>April has 30 days. <BR> May has 31 days. </CENTER></FONT> It will display as April has 30 days. May has 31 days. 48 There are a number of HTML/text editors available to help make editing HTML easier. My favorite amongst the HTML editing programs is EditPlus. You can download a 30-day trial version for free at http://www.editplus.com. Good luck and remember often times the simplest layout is the best layout. 49 Wysiwyg Editor Help Page including Hyperlinks ****Updating Browsers effect the Wysiwyg editor. To fix this you will have to: The Fix: Click on Tools > Compatibility View Settings ADD: ssl-secure-server.net or ssl3-secure.net To see if you are SSL or SSL3 simply press Login at your store and look in the address bar. 1. Wysiwyg Menu Bar 2. Adding Images 3. Adding Hyperlinks (links) 4. Adding Tables 5. Editing Table Cells 6. Text Font, Size, Attributes and Colors 7. Paragraph, Normal, Header, and Subheaders 8. Other Notes The Wysiwyg editor in your store will look similar* to the image below. 50 * The Wysiwyg editor may appear slightly different in your store depending upon the type of web browser you are using and the width of your web browser. Menu Bar The function of the items in the toolbar is explained below. Cut, Copy and Paste (These buttons do not display in Firefox. If you FireFox, then on your keyboard use the Delete button to delete, us Copy, and Ctrl-V to Paste) Undo or Redo Ordered list and Bullet list Insert Hyperlink, Remove Hyperlink, Insert Image, Edit Image prop Insert Flash, and Insert Horizontal rule Bold, Italic, Underline, and Strikethrough Left Justification, Center, Right Justification, or Full Justification Indent and Unindent 51 SuperScript and SubScript Header and Subheader Styles Create tables, Table properties, Cell properties, Insert row, Insert c Delete row, Delete column, Merge right, Merge down, Split cell hori Split cell vertically Font Face and Size Foreground Color, Background Color Remove Font, Size, and Colors Switch from design mode to HTML mode. (Located bottom right ha of editor.) * HTML Source - Only use if you have advanced HTML kn Back To Top Images To add images use your mouse to click on the insert image icon in the toolbar. After clicking it a popup window will appear as shown here... 52 Choose an image and then click the 'Ok' button and the image will be placed in the text area. You can upload images from your computer. To upload images, click on the “Browse…” button and then a pop-up window will open that will allow you to choose an image to upload from your computer. After you have selected the image to upload then click on the “Upload” button. After you have used the insert image function then you can use the 'Image Properties' icon to edit the properties of the image. 53 ‘Alternate text’ is the text that displays if for some reason the image does not display for a visitor. Some web browsers also display the ‘Alternate text’ when a user’s mouse hovers over the image. The ‘Align’ properties of 'left, right, top, middle, bottom, absbddle, texttop and baseline’ are for aligning the image in relationship with the other items nearby on the page. ‘Hor. space’ and ‘Vert. space’ designate how much blank space to place around the image. The space value is measured in pixels. Valid values to enter are integers greater than or equal to 0. Note: Animated Gifs may be used in your text area. Back To Top Hyperlinking Setting or creating hyperlinks is easy with the Wysiwyg Editor. By pressing down your mouses' left button and holding it, sweep the text that you wish to make a link into, this 54 will highlight the text. Then click on the hyperlink icon in the menubar dialong box. 55 which will open the following The ‘Type’ dropdown box presents two choices; ‘Manual’ and ‘Quick Links.’ The ‘Manual’ choice allows you to enter any URL (website address, such as http://www.something.com) you desire. The ‘Quick Links’ choice allows you to easily select a page from a list of some of the pages in your store. One of the options in the “Quick Links” choices is to create an email link. The email link (mailto link) allows visitors the option to easily send you an email. Pictures or images can be made into a hyperlink by first selecting the image and then following the instructions above. Back To Top Tables The Wysiwyg Editor allows for the use of tables. You can create a table by clicking on the 'Create Tables' icon which will open a ‘Table properties’ pop-up window. 56 Once the ‘Table properties’ pop-up window has opened type in the number of rows and columns you want in your table. Set the 'Width' and 'Height' of your table by selecting either '%' or 'px'. ‘%’ is the width of table in percentage to the width available in the user’s browser window. 'px' is a set width not dependent upon the size of user’s browser window. If you do not have an exact width or height that you want to use for the table, then we recommend using the '%' setting. Valid entries when selecting ‘%’ is a positive integer up to 100 (100 is a valid entry). Valid entries when selecting ‘px’ is an integer greater that 0. 'Border' is the width of the outside border of the table. 'Cell padding' is the minimum space allocated for each table cell. 'Cell spacing' is the amount of space between each table cell. Integer values greater than or equal to 0 are valid entries for Border, Cell padding, and Cell spacing. You can change the Background color of the table by using the button with the three dots (…) to the right of the ‘Background Color’ field. Back To Top Editing Table Cells You may enter text, images, and hyperlinks in each individual cell of a table. You can edit individual cell properties by using the 'Cell Properties Icon'. You can activate the ‘Cell properties’ dialog by placing you computer cursor in the cell you want to edit and then clicking on the 'Cell Properties Icon' in the tool bar. 57 Back To Top Text Font, Size, Attributes and Colors. To change the Font, Size, Fore color, or Background color for text on a page, select the text you want to modify by pressing down your mouses' left button and holding it, sweep the text that you wish to change. After the text is highlighted then you can use the any of the following functions to edit the text. Bold, Italic, Underline, Strikethrough, Superscript, Subscripot, Font Face, Size, Foreground Color, or Background Color 58 Back To Top Paragraph, Normal, Header, and Subheaders To specify text as either a Header or Subheader, select the text you want to modify by pressing down your mouses' left button and holding it, sweep the text that you wish to change. After the text is highlighted then you can use Paragraph drop down to change the text. 59 The header and subheader style are defined in the 'Site Layout' area of your store administration. To change the header and subheader font styles, 1) login to your store administration, 2) click Site Layout (top menu), 3) click Site Colors, Fonts, and Background Images (left menu), and then click the Edit button next to the Page Header or Page Subheader. Back To Top Other Notes 1. The Wysiwyg editor will function slightly different in various web browsers (Internet Explorer, Firefox, Safari, etc). For example, in some web browsers when you use the ‘Enter’ key on your keyboard the cursor in the Wysiwyg editor will automatically double space. If this happens in your web browser and you do not want to double space, then hold down the ‘Shift’ button on your keyboard and then press the ‘Enter’ key; when using ‘Shift-Enter’ the cursor should only move down one line. 60 2. You should experiment with how the various functions of the Wysiwyg editor function. None of the edits you make in the Wysiwyg editor are saved until you click the ‘Save’ button near the bottom of the editing page. 3. If you find that you have made editing changes that you do not want to keep, then clicking the ‘Store’ link in the header area of the page will discard all the new edits you made to the page. Clicking the ‘Store’ link only discards changes that have been made if you have not clicked the ‘Save’ button. Once the ‘Save’ button has been clicked then the changes have saved to your store and cannot be undone. 4. If you have ‘Saved’ changes that you want to undo, then you will need to start the process over of editing that page again. 5. If you have advanced knowledge of HTML and add a java script to a page by using ‘HTML Source’ tab, then the function that the java script powers will not display within the Wysiwyg editor ‘Design’ tab. You will only be able to preview items that use a java script by using the ‘Preview’ button that is near the bottom of each editing page. 61