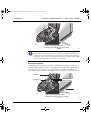
1
MAN0318-3.0 - MPT-2 Autotitrator.book Page i Friday, January 12, 2007 2:42 PM MPT-2 Autotitrator User Manual MAN0318 Issue 3.0 January 2007 MAN0318-3.0 - MPT-2 Autotitrator.book Page ii Friday, January 12, 2007 2:42 PM © Malvern Instruments Ltd. 1999, 2003, 2004, 2007 Malvern Instruments makes every effort to ensure that this document is correct. However, due to Malvern Instruments policy of continual product development we are unable to guarantee the accuracy of this, or any other document after the date of publication. We therefore disclaim all liability for any changes, errors or omissions after the date of publication. No reproduction or transmission of any part of this publication is allowed without the express written permission of Malvern Instruments Ltd. Head office: Malvern Instruments Ltd. Enigma Business Park, Grovewood Road, Malvern, Worcestershire WR14 1XZ United Kingdom. Tel + [44] (0)1684-892456 Fax + [44] (0)1684-892789 Windows 2000 and XP are registered trademarks of the Microsoft Corporation. Printed in England Addendum 0075a.fm Page 1 Tuesday, February 24, 2009 4:07 PM Addendum to manual Addendum number ADD0075-1.0 Date 04/02/2009 Manual number MAN0318-3.0 Manual name MPT-2 Autotitrator User Manual This addendum presents new information on inserting sample tubes into the pinch valve channel on the Zetasizer Nano instrument when connecting to the MPT-2 accessory. This information replaces previous content in the section Connecting the cell tubing on pages 4.5 and 4.6 of the Manual. Connecting the cell tubing Follow the guidelines on inserting the cell in the Zetasizer Nano manual. The tubing has to be attached correctly between the cell used and the titrator unit itself. How the tubing is connected to the cell is dependent upon the cell and the measurement being performed. Connecting the tubing to the cell Follow the instructions below for connecting the cell. For each cell, minimise the tubing within the cell area before inserting into the pinch valve channel. Zeta potential measurements The tubing is attached to the folded capillary cell (DTS1060) using 'Luer lock' connectors. With a half-turn these secure to the Luer fittings on the top of the cell — do not overtighten. The tubing is then inserted into the pinch valve channel; push both tubes down into the pinch valve on the side of the cell area. If a flowcell is used, insert the sample tubes into the threaded inserts and screw into the top of the flowcell, and then push both tubes down into the pinch valve on the side of the cell area. Addendum 0075-1.0 Page 1 Addendum 0075a.fm Page 2 Tuesday, February 24, 2009 4:07 PM ill 8420 Note The pinch valve manufacturer recommends that a vegetable-based oil (e.g. Castor oil) is used to lubricate the section of tube that is inserted into the pinch valve. This is done to help minimise friction, though testing by Malvern Instruments has not shown this to be essential. Size measurements The tubing is attached to the sizing flowcell (ZEN0023) using threaded inserts. As with the folded capillary cell above, push both tubes down into the pinch valve on the side of the cell area. Ensure the join between the PTFE and silicone tubing is within the cell area. Sample in Sample out Tubing join within cell area ill 8419 Page 2 Addendum 0075-1.0 MAN0318-3.0 - MPT-2 Autotitrator.book Page i Friday, January 12, 2007 2:42 PM Table of Contents Part 1 - Operator’s Guide Introduction to this manual Access to the Titrator . . . . . . . . . . . . . . . . . . . . . . . . . . . . . . . . . . . . . . . 1-2 Assumed information . . . . . . . . . . . . . . . . . . . . . . . . . . . . . . . . . . . . . . . 1-3 Where to get help . . . . . . . . . . . . . . . . . . . . . . . . . . . . . . . . . . . . . . . . . . 1-3 Overview What does the Titrator do? . . . . . . . . . . . . . . . . . . . . . . . . . . . . . . . . . . . 2-1 How does it do it? . . . . . . . . . . . . . . . . . . . . . . . . . . . . . . . . . . . . . . . . . 2-1 Controlling the Titrator . . . . . . . . . . . . . . . . . . . . . . . . . . . . . . . . . . . . . . 2-2 Identifying the features of the Titrator Features of the Dispenser . . . . . . . . . . . . . . . . . . . . . . . . . . . . . . . . . . . . 3-1 Manual functions of the software . . . . . . . . . . . . . . . . . . . . . . . . . . . . . . 3-11 Making Measurements - using the Titrator Introduction . . . . . . . . . . . . . . . . . . . . . . . . . . . . . . . . . . . . . . . . . . . . . . 4-1 Setup . . . . . . . . . . . . . . . . . . . . . . . . . . . . . . . . . . . . . . . . . . . . . . . . . . 4-2 Making a measurement . . . . . . . . . . . . . . . . . . . . . . . . . . . . . . . . . . . . . 4-4 Preparing the sample in the container . . . . . . . . . . . . . . . . . . . . . . . . . . . 4-5 Connecting the cell tubing . . . . . . . . . . . . . . . . . . . . . . . . . . . . . . . . . . . 4-5 Filling the cell . . . . . . . . . . . . . . . . . . . . . . . . . . . . . . . . . . . . . . . . . . . . . 4-7 Creating the Titration SOP . . . . . . . . . . . . . . . . . . . . . . . . . . . . . . . . . . . 4-8 Starting a Titration SOP measurement . . . . . . . . . . . . . . . . . . . . . . . . . . 4-16 The 'Titration' measurement display . . . . . . . . . . . . . . . . . . . . . . . . . . . 4-17 Displaying the 'Titration' measurement results . . . . . . . . . . . . . . . . . . . . 4-19 MPT-2 Autotitrator Page i MAN0318-3.0 - MPT-2 Autotitrator.book Page ii Friday, January 12, 2007 2:42 PM Table of Contents MPT-2 Autotitrator Maintenance Introduction . . . . . . . . . . . . . . . . . . . . . . . . . . . . . . . . . . . . . . . . . . . . . . 5-1 Cleaning the accessory. . . . . . . . . . . . . . . . . . . . . . . . . . . . . . . . . . . . . . 5-1 Maintaining the pH probe . . . . . . . . . . . . . . . . . . . . . . . . . . . . . . . . . . . . 5-2 Replacing the dispensing syringes and o-ring . . . . . . . . . . . . . . . . . . . . . . 5-7 Changing the filter and tubing . . . . . . . . . . . . . . . . . . . . . . . . . . . . . . . . . 5-8 Maintenance schedule . . . . . . . . . . . . . . . . . . . . . . . . . . . . . . . . . . . . . . 5-9 User consumables and spares . . . . . . . . . . . . . . . . . . . . . . . . . . . . . . . 5-10 Part 2 - Appendices Specification and Site Requirements Specification . . . . . . . . . . . . . . . . . . . . . . . . . . . . . . . . . . . . . . . . . . . . . A-1 Site requirements . . . . . . . . . . . . . . . . . . . . . . . . . . . . . . . . . . . . . . . . . . A-2 Chemical compatibility Materials list . . . . . . . . . . . . . . . . . . . . . . . . . . . . . . . . . . . . . . . . . . . . . B-1 Installation Installation . . . . . . . . . . . . . . . . . . . . . . . . . . . . . . . . . . . . . . . . . . . . . . . C-1 Regulatory statements CE Declaration of Conformity . . . . . . . . . . . . . . . . . . . . . . . . . . . . . . . . .D-1 FCC Notice (US only) . . . . . . . . . . . . . . . . . . . . . . . . . . . . . . . . . . . . . . .D-2 Canadian Regulatory Information (Canada Only) . . . . . . . . . . . . . . . . . . . .D-3 VCCI acceptance (Japan only). . . . . . . . . . . . . . . . . . . . . . . . . . . . . . . . .D-3 Page ii MAN 0318 MAN0318-3.0 - MPT-2 Autotitrator.book Page 1 Friday, January 12, 2007 2:42 PM Part 1 Operator’s Guide MAN0318-3.0 - MPT-2 Autotitrator.book Page 2 Friday, January 12, 2007 2:42 PM MAN0318-3.0 - MPT-2 Autotitrator.book Page 1 Friday, January 12, 2007 2:42 PM 1 Introduction to this manual i Note This manual must be read in conjunction with the main Zetasizer Nano manual. This manual covers the operation and maintenance of the MPT-2 multi purpose titrator. Instrument Part number MPT-2 multi purpose titrator ZEN1001 This manual can be thought of as a stand-alone manual that covers the operation and maintenance of the MPT-2. The aim of this manual is to: Identify what the accessory is. Explain, in simple terms, how it works. Identify the physical features of the accessory. Explain how the accessory should be used to make a measurement. Identify the user maintenance procedures. It is important that the main Zetasizer Nano manual is read before starting the first measurement. Topics covered in this manual include: Health and safety information. Information is given on laser safety, electrical, temperature and sample handling warnings. The information detailed here is also applicable for the MPT-2 Autotitrator. i MPT-2 Autotitrator Note Further health and safety information is given on the Titrator back panel and underneath the accessory. Page 1-1 MAN0318-3.0 - MPT-2 Autotitrator.book Page 2 Friday, January 12, 2007 2:42 PM 1 Chapter 1 Introduction to this manual Site requirements. This details what services are necessary for connection of the Zetasizer Nano system. Again, the information detailed here also applies to the MPT-2 Autotitrator. What are the Zetasizer Nano instruments, what are the components of the Zetasizer Nano and what do they do, instructions on using the instrument and the software, basic measurement and maintenance procedures. Sample preparation for each measurement type. Use of Standard Operating Procedures (SOPs), organising the measurement files, and discussion on each of the analysis theories used. Customising reports and exporting results. Warning! Use of the system in a manner not specified by Malvern Instruments Ltd may impair the protection provided by the system. Access to the Titrator Within this manual, reference is made to the various people who will have access to the accessory. Below is a list of these people and their responsibilities: Malvern personnel Malvern personnel (service engineers, representatives, etc.) have full access to the accessory and are authorised to perform all service procedures that may require the removal of the covers. Supervisor The supervisor is the person responsible for the management/safety of the system and of its operation. The supervisor is responsible for the training of the operators. The supervisor can perform all user maintenance routines identified in Chapter 5. The supervisor must under no circumstances remove the covers of the instrument or accessory. Operator An operator is a person trained in the use of the system. The operator can perform all user maintenance routines identified in Chapter 5. The operator must under no circumstances remove the covers of the instrument or accessory. Page 1-2 MAN 0318 MAN0318-3.0 - MPT-2 Autotitrator.book Page 3 Friday, January 12, 2007 2:42 PM Introduction to this manual Chapter 1 Warning! Removal of the covers by unauthorised personnel will invalidate the warranty of the accessory. Assumed information Naming convention Within this manual, the Zetasizer Nano series instruments will be referred to as the “Optical Unit” or the “instrument”. The MPT-2 Autotitrator will be referred to in full or as the “Titrator”. The combination of the Optical Unit, one or more accessories and the computer will be referred to as the “System”. Menu commands Menu commands in the software are referred to in the form main menu-menu item. As an example, the command File-New SOP refers to selecting the New SOP item in the File menu. Menu commands are always shown in bold text. Where to get help Other manuals Several manuals may be supplied with the system, with each one giving information on a different aspect of the system. Below is a list of the typical manuals supplied with the system, detailing the information that each manual will contain. MPT-2 Autotitrator user manual (this manual) This manual can be thought of as a basic tutorial. It will act as a guide for all operations of the titrator. Zetasizer Nano series user manual Covers all aspects of the main optical unit. i.e. health and safety issues, unpacking instructions, system checkouts, identification of features and maintenance, and Zetasizer Nano application software. This manual also covers all aspects of making Size, Zeta and Molecular weight measurements, from sample preparation to interpreting the results. MPT-2 Autotitrator Page 1-3 MAN0318-3.0 - MPT-2 Autotitrator.book Page 4 Friday, January 12, 2007 2:42 PM Chapter 1 Introduction to this manual The health and safety section in this manual also applies to the Autotitrator. On-line help The primary function of the on-line help is used to give detailed information on the software. Each dialogue of the titrator software has Help buttons that, when pressed, will give help specific to that dialogue. All information can be accessed from any Help button by then pressing the Contents button. Help desk All queries regarding the system should initially be directed to the local Malvern representative. Please quote the following information: Model and serial number of the optical unit and accessories. Version of the Malvern software. The serial number of the optical unit and the accessories can be found on the rear panel of each module, and on the cuvette holder for the Zetasizer. The version number of the Malvern software can be found by starting the software and selecting Help-About. Contact the United Kingdom help desk if the local Malvern representative is not available. The direct line to the United Kingdom Helpdesk is +44 (0)1684 891800. It should be noted that this help line is primarily English speaking. Remote support Malvern Instruments offers a remote support service, delivered by an Internet connection. Benefits include fast and efficient fault diagnosis, reducing downtime and costs. On-line user training is also available, plus software updates. A direct Internet connection LAN must be available to make use of this facility. Malvern Website - www.Malvern.com The Malvern website offers a comprehensive range of particle characterisation resources for use by customers twenty four hours a day, seven days a week. Resources include software downloads, frequently asked questions, a knowledge base and application notes, plus information on other particle characterisation solutions that Malvern can provide. Page 1-4 MAN 0318 MAN0318-3.0 - MPT-2 Autotitrator.book Page 1 Friday, January 12, 2007 2:42 PM 2 Overview What does the Titrator do? The principal function of the Titrator is to allow zeta potential, size or intensity measurements to be made, while adding quantities of additives (titrants) to the sample when performing a particular titration type, i.e. pH, Dilution or Additive. This allows the effect of adding these titrants on the measurement to be investigated. How does it do it? A schematic of the Titrator system is shown below 6 1 5 2 4 3 ill 6826 MPT-2 Autotitrator Page 2-1 MAN0318-3.0 - MPT-2 Autotitrator.book Page 2 Friday, January 12, 2007 2:42 PM 2 Chapter 2 Overview The heart of the Titrator is the dispenser unit . The sample to be measured is placed in a disposable sample container . The dispenser unit has an internal pump that circulates the sample through the cell in the optical unit. (A size flow cell will be required if size measurements are to be made). The dispenser unit has three titrant containers that can be filled with either an acid, base or some other additive. The titrants used can be different concentrations of the same acid or base. This will improve the accuracy of obtaining a target pH or concentration and limit the quantity of titrant used. The syringe system can deliver a precise quantity of titrant from one of the titrant containers into the sample container. The software can be set up so that measurements are made under a number of sample conditions. The sample is stirred, using the stirrer attachment , pumped through the flow cell and then measured at each of these conditions. In this way the effects of adding various amounts of these titrants on the zeta potential, size or intensity can be investigated. This method is known as a titration measurement. A pH probe continually monitors the pH of the sample, while a temperature controller in the optical unit maintains the sample at a selected temperature. A pinch valve integrated into the Zetasizer Nano basin moulding pinches the tubing and ensures that fluid is stationary during measurements. Once the measurement sequence is complete, the sample and titrants can be flushed from the system. The sample and titrant containers, if required, are replaced with ones containing flush fluid. The fluid is then circulated through the system to a waste container. Controlling the Titrator The Zetasizer system will automatically detect that the titrator has been connected to the instrument. Once connected, titration measurements can be performed either by performing a manual measurement or automatically by running a Standard Operating Procedure (SOP). For checking the operation of the pH probe and for performing maintenance operations such as pH calibration, a further manual control dialogue is available. This dialogue is described in more detail in Chapter 3 when performing pre and post measurement procedures such as priming and cleaning, and in Chapter 5. Controlling the Titrator from an SOP A Standard Operating Procedure (SOP) is like a template that pre-defines all the measurement settings. This ensures that measurements made on the same type of sample are made in a consistent way. SOPs are ideal if the same type of sample is Page 2-2 MAN 0318 MAN0318-3.0 - MPT-2 Autotitrator.book Page 3 Friday, January 12, 2007 2:42 PM Overview Chapter 2 regularly measured, inputting the same parameters each time a measurement is made is tedious and runs the risk of making errors. SOPs can be created or modified as required. Titration SOP measurements use basically the same dialogues as the standard SOP measurements; except for the addition of titrator specific dialogues. Typically the extra information required for a titration SOP is: The type of measurement to be made (zeta potential, size, etc.). Which titrant is to be added and its concentration The type of titration measurement to perform. Number of titration points, etc. Manually controlling the Titrator A manual measurement is where all the measurement parameters are set immediately before the measurement is performed. This is ideal if measuring many different types of sample, or experimenting with the measurement parameters and different levels of titrant addition. To perform a manual measurement, select Measure-Manual from the menu bar. A manual measurement dialogue will appear where the measurement settings can be chosen and, if required, saved as an SOP. Once chosen, the measurement can begin by simply pressing the Start button on the Measurement display. The features of the measurement display are described in Chapter 4. MPT-2 Autotitrator Page 2-3 MAN0318-3.0 - MPT-2 Autotitrator.book Page 4 Friday, January 12, 2007 2:42 PM Chapter 2 Overview Page 2-4 MAN 0318 MAN0318-3.0 - MPT-2 Autotitrator.book Page 1 Friday, January 12, 2007 2:42 PM 3 Identifying the features of the Titrator This chapter’s aim is to help identify both the physical and software features of the Titrator. Use it as a reference guide where an explanation of all the features will be found, whether it is an LED indicator or a check box within the software. This chapter is divided into two sections. The first section will examine the features of the dispenser unit in more detail, while the second section will look at the features of the software in detail. Features of the Dispenser The illustration below identifies the main features of the dispenser (note that some of the tubing and cables are not shown in their final positions for clarity). 3 4 5 1 2 ill 6830 MPT-2 Autotitrator Page 3-1 MAN0318-3.0 - MPT-2 Autotitrator.book Page 2 Friday, January 12, 2007 2:42 PM 3 Chapter 3 Identifying the features of the Titrator Dispersion head The Dispersion head can be thought of as a mixing bowl. The sample to be measured is placed in a container that is screwed to the underside of the Dispersion head. Titrants are added and the sample stirred. The dispersion head also houses the pH probe. This area is explained in more detail later in this chapter. Dispensing area Warning! For safety reasons the dispensing area cover must always be in place during a measurement sequence. The dispensing area houses the dispensing syringes, titrant bottles, valves and the pump head. This area is explained in more detail later in this chapter. Dispensing area cover The dispensing area has a removable cover that allows access to both the titrant and sample tubing, and the sample filter. The cover simply pulls up and off the unit. Rear panel The rear panel contains all electrical connections to the computer and optical unit. This area is explained in more detail later in this chapter. pH probe The pH probe connects to the back panel of the titrator. Page 3-2 MAN 0318 MAN0318-3.0 - MPT-2 Autotitrator.book Page 3 Friday, January 12, 2007 2:42 PM Identifying the features of the Titrator Chapter 3 Dispersion head The sample to be measured is placed in a sample container that is attached to the dispersion head. Titrants are added and the sample stirred. The dispersion head also houses the pH probe. The illustration below identifies the main features of the dispersion head. 2 4 1 6 5 Magnetic Flea 3 ill 6831 Sample container The sample container is the mixing and reaction vessel for the measurement. Attaching the sample container ill 6832 MPT-2 Autotitrator Page 3-3 MAN0318-3.0 - MPT-2 Autotitrator.book Page 4 Friday, January 12, 2007 2:42 PM Chapter 3 Identifying the features of the Titrator The sample container initially just contains the sample to be measured. Titrants are added to the sample through the titrant tubes and the dispersion is stirred. Two sizes of containers can be used; the 'standard' container as shown above, and a 'large volume' container, which will generally be used for dilution titrations. To Attach and remove the 'standard' sample container, simply screw the container into, or unscrew the container from, the dispersion unit; as shown above. Instructions on fitting the large volume container are described in the Titrants SOP dialogue section in the next chapter. Be careful not to splash any sample when inserting and removing the sample container. The sample containers are disposable - replacement containers can be obtained directly from Malvern instruments. i Note This manual will assume that a standard sample container will always be used, unless otherwise stated. pH probe The pH probe measures the pH of the sample. The performance of the pH probe will deteriorate over time, though correct maintenance will extend its life and ensure rapid and accurate titrations. It is recommended that the probe is replaced at least once a year. Caution! The probe must never be allowed to dry out. If it does it may need replacing. See Chapter 5 for details on maintaining the probe. Magnetic Stirrer The stirrer agitates the sample and aids titrant dispersion. The stirrer motor is pulled forward from the front of the titrator to sit directly below the sample container. A magnetic stirrer 'flea' placed in the sample container will agitate the sample once the stirrer is turned on during a titration or pH calibration. The speed of the stirrer is set through the Titrants SOP dialogue. The optimum speed will depend upon the type of sample being titrated. Care should be taken when adjusting the stirrer speed as air may be introduced into the sample. If in doubt, set the stir speed check box to Automatic. Page 3-4 MAN 0318 MAN0318-3.0 - MPT-2 Autotitrator.book Page 5 Friday, January 12, 2007 2:42 PM Identifying the features of the Titrator Chapter 3 Sample exit and return tubes The sample is pumped to and from the cell through these tubes. The ends of the sample exit and return tubes must always be below the surface of the sample, for two reasons: 1. If the sample exit tube is above the level of the sample, no sample can be pumped and circulated. 2. Bubbles may be generated from the dropping of sample back into the sample container. Titrant tubes The measured dose of titrant from the titrant containers enters the sample container through these tubes. The ends of the titrant tubes must always be below the surface of the sample, for two reasons: 1. If small amounts of titrant are dispensed these may stay attached to the end of the titrant tube. Immersing the tubes in the sample will break the surface tension. 2. Bubbles may be generated from the dropping of titrant into the sample. The titrant tubes are the same as those used for the sample. If required the titrant tubes can be extended to use a larger volume titrant container. A cut-out is provided at the top of the dispersion area cover for the exit of the tubes. i Note For protein measurements where only a minimum sample volume is desired, loosen the tubing clamp and carefully pull both sample and titrant tubing down towards the bottom of the container - see the Tubing connection bracket section later in this chapter. Ideally the stirrer is not used. It is not required with protein measurements when the minimum volume is required. Status indicator This indicator shows the status of the titrator. The indicator will show: Red if the titrator has encountered an error condition. Green if the titrator is in operation. Amber if the titrator is in standby mode. MPT-2 Autotitrator Page 3-5 MAN0318-3.0 - MPT-2 Autotitrator.book Page 6 Friday, January 12, 2007 2:42 PM Chapter 3 Identifying the features of the Titrator Dispersing area The illustration below identifies the main features of the dispersing area. 5 2 1 3 4 3 4 3 4 ill 6829 Dispensing syringes and syringe drive The syringes are the mechanism for dispensing precise amounts of titrants from the titrant containers to the sample container. When a titrant is requested the syringe drive will descend to first obtain the titrant from the container, and then ascend to deliver the titrant to the sample container; this is done in conjunction with the manifold assembly and solenoid valves described below. Manifold assembly and solenoid valves The manifold assembly and solenoid valves control the flow of sample through the cell. These valves are either opened or closed depending on the requirements of the prime and titration sequences. The solenoid valves open and close to control the flow of the titrant from the container, through the manifold assembly, to the sample container. If only one titrant is requested to dispense, its respective solenoid valve will open to allow the titrant to be delivered when the syringe ascends. The other two solenoid valves will stay closed so any titrant dispensed will return to the correct titrant container. Page 3-6 MAN 0318 MAN0318-3.0 - MPT-2 Autotitrator.book Page 7 Friday, January 12, 2007 2:42 PM Identifying the features of the Titrator Chapter 3 To sample container From titrant containers Syringes ill 6833 Titrant containers The titrant containers contain the solutions that will be added to the sample during a titration measurement sequence. Each container can hold either acid, base, salt, or an additive. The tubing connectors from the top of the titrant containers are colour coded at the manifold to match LED indicators (below) and the colours in the Titrants SOP dialogue. How to fill, change and insert the titrant containers is described in Chapter 4. Titrant indicators Each titrant container has an LED indicator alongside that illuminates whenever that titrant is being dispensed. The three LEDs are colour coded (red, yellow and green) to reflect the colour coding in the Titrants SOP dialogue. Pump head The pump head is used to pump the sample (or cleaning fluid) through the cell. The speed of the pump is set through the Titrants dialogue. MPT-2 Autotitrator Page 3-7 MAN0318-3.0 - MPT-2 Autotitrator.book Page 8 Friday, January 12, 2007 2:42 PM Chapter 3 Identifying the features of the Titrator Tubing connection bracket All the titrator tubing is routed around the bracket underneath the dispenser lid. The illustration below shows details the various connections. How to connect or disconnect the tubing is described in the Chapter 5. To access the bracket simply pull the dispersing area cover off. 3 4 6 To Zetasizer 5 2 Titrant tubes Pump Clamping screw 1 2 ill 6936 Tubing entry and tubing clamping ring All tubing enters the sample container through entry holes in the container holder. The tubing includes three titrant tubes, purge tube, sample in and sample out tubing. These are described in the following paragraphs. Adjusting the tubing length Depending upon the titration sample volume used and the type of titration being performed, the length of the tubes can be altered to be either higher or lower within the sample container. This is done as follows: Page 3-8 Loosen the clamping screw, to loosen the tubing clamping ring. Carefully pull the tubing either up or down to the required height. Tighten the clamping screw to secure the tubing to be clamped in position. MAN 0318 MAN0318-3.0 - MPT-2 Autotitrator.book Page 9 Friday, January 12, 2007 2:42 PM Identifying the features of the Titrator i Chapter 3 Note The clamping ring can be used for securing both thin and thick tubing diameters in place. Thick tubing (1/8”) is supplied as standard for connecting the sample flow in and out of the sample container. Titrant tubes The titrant tubes are fed directly from the manifold to the sample container. Sample in connector (from Zetasizer) The sample that has been measured is re-circulated to the sample container via this connector. Sample out connector (to Zetasizer) The sample to be measured is recirculated through this connector to the cell in the optical unit. For biological samples, a syringe filter of minimum size 0.22µm can be placed on the exit of this connection to filter oversized particles. This filter should be replaced regularly to maintain optimum filtration. Sample to pump This connection feeds the sample from the sample container to the pump before passing to the sample out connector. Purge connector Warning! If a Nitrogen supply is used the system must be located in a well ventilated environment. Turn off the supply when not in use. See Appendix B for a requirement specification for the Nitrogen supply. The purge connection is provided to enable connection of a Nitrogen purge supply. This is used to prevent any absorption of oxygen that may change the pH characteristics of the sample, i.e. cause a pH drift. Though the amount of pH drift is dependent upon the alkalinity of the sample, even for a sample with a low alkalinity this drift will be noticeable. The need to eliminate this drift is therefore of particular importance when performing protein charge titrations; pH drift during this operation will lead to extended titration times. The amount of Nitrogen needed to prevent oxygen absorption should be just enough to cover the immediate space above the sample. The Nitrogen can be introduced into the container by blanketing the area directly above the sample or by bubbling the nitrogen through the sample. If too much nitrogen is introduced, or the flow rate is too high, there is a risk of bubbles being generated in the sample. MPT-2 Autotitrator Page 3-9 MAN0318-3.0 - MPT-2 Autotitrator.book Page 10 Friday, January 12, 2007 2:42 PM Chapter 3 Identifying the features of the Titrator Rear panel The illustration below identifies the main features of the rear panel. 5 1 2 3 4 ill 6828 pH probe connection The pH probe is connected to the pH probe connection on the rear of the titrator. The pH probe connectors must be clean and dry at all times. Contaminated connectors may affect the performance of the probe. On/off switch The power on/off switch for the titrator. Power input Power input socket for the titrator. The external power supply is plugged here. Communications connector Connects to the RS232 port on the Zetasizer Nano series instruments to allow the software to control the titrator. Stirrer connector Connection for the magnetic stirrer. Page 3-10 MAN 0318 MAN0318-3.0 - MPT-2 Autotitrator.book Page 11 Friday, January 12, 2007 2:42 PM Identifying the features of the Titrator Chapter 3 Manual functions of the software The software can be separated into two distinct areas. Sample measurement controls used when performing Manual and SOP measurements, Pre- or post-measurement functions using the Manual control and pH calibration dialogues. The remaining sections in this chapter explain the features of the Manual control dialogue, and how they relate to the operation of the titrator. The next chapter Making measurements - using the titrator details how to make an SOP measurement including identification of the SOP selections. The Manual control dialogue and its operation The Manual control dialogue is used to clean and prepare the unit prior to a measurement. This includes setup instructions such as priming, cleaning and calibrating the pH probe. The Manual control dialogue is displayed by selecting Tools-InstrumentMPT-2 Titrator- Manual control within the Zetasizer Nano software, or by selecting the Manual control icon. The different tabs, Clean, Fill, Prime and pH monitor, and their functions are described below. MPT-2 Autotitrator Page 3-11 MAN0318-3.0 - MPT-2 Autotitrator.book Page 12 Friday, January 12, 2007 2:42 PM Chapter 3 Identifying the features of the Titrator It should be noted that all prime, fill and clean quantities are determined by the number of cycles performed, each cycle performs either one complete fill, prime or clean operation. Clean tab This tab enables the sample tubing and cell to be flushed and cleaned. i Note Choose an appropriate cleaning fluid for the sample or titrants being used (e.g. deionised water). Ensure that it will reliably clean the sample or titrants used from the tubing. To clean the sample tubing: 1. Remove the sample container and replace with one full of cleaning fluid. 2. Press the Clean button to begin the operation. 3. The pump will circulate the cleaning fluid through the sample tubing until the Clean button is pressed a second time. Use the pump and stirrer controls (below) to adjust the pump and stirrer speeds during the cleaning. 4. Perform the clean a few times to ensure the sample tubing is properly cleaned, i.e. stop the clean operation, refresh the cleaning fluid and repeat. It is recommended the clean procedure is performed three times to ensure adequate cleanliness has been achieved. 5. Once started, pressing Clean a second time will stop the operation. i Note The larger the cleaning fluid container the more effective the cleaning operation will be. Settings - Pump and Stirrer Allows setting of the stirrer and of the pump to circulate the cleaning fluid through the flow cell. The slider bar or value box can be used to select the speed and direction; each control will alter to reflect the other's setting. Enable stirrer will turn the stirrer on or off. i Page 3-12 Note Pumping air into the tubing prior to the cleaning fluid will aid the cleaning. This will act as a buffer, first driving the sample through the tubing before the cleaning fluid cleans the tubes. This is simply done by removing the cleaning fluid while leaving the pump running. MAN 0318 MAN0318-3.0 - MPT-2 Autotitrator.book Page 13 Friday, January 12, 2007 2:42 PM Identifying the features of the Titrator Chapter 3 Fill tab The Fill tab is used to fill the sample tubing and cell prior to beginning a measurement. This primes the cell in the same way as the titrant tubes below. The pump and stirrer controls work in the same way as described above. To fill the cell: 1. Insert the full sample container into the dispersion head. 2. Select the cycles required and press the Fill button(s) to begin the operation. Each cycle will pump the volume of the sample tubing and cell. 3. The pump will circulate the sample through the sample tubing and cell until the number of cycles has been completed or the Fill button is pressed a second time. Use the pump and stirrer controls (below) to adjust the pump and stirrer speeds during the filling. i Note Filling the cell should be performed at a lower speed, i.e. 40%, than during a normal titration. This prevents the introduction of bubbles into the tubing which will affect the measurement result, especially when performing a zeta measurement. If bubbles appear, invert the cell while still pumping and tap it lightly to dislodge them. Prime tab Priming is the process of ensuring that all the titrant delivery tubes are free of air and full of liquid. Generally this is done after changing titrants or after the system has not been used for a time, e.g. overnight. Each titrant delivery tube can be individually primed, or all tubes can be primed simultaneously. The coloured indicators on the dialogue match the LED indicators next to the titrant container, and also the titrant tubing connectors. To prime the titrant tubes: 1. Place the filled titrant containers under the container cover, and under the titrant tubes that are to be primed. 2. Insert an empty waste sample container into the dispersion head to catch the titrants. 3. Select the radio button for the titrant tube that is to be primed, or All to prime all three titrant delivery tubes at once. 4. Select the cycles required and press the Prime button to begin the operation. Each cycle will pump the volume of the titrant tubes from the container. 5. Priming will stop once the number of cycles has been completed. MPT-2 Autotitrator Page 3-13 MAN0318-3.0 - MPT-2 Autotitrator.book Page 14 Friday, January 12, 2007 2:42 PM Chapter 3 Identifying the features of the Titrator 6. Once started, pressing Prime a second time will stop the operation. 7. When the prime operation has finished, titrant should be visible in the bottom of the beaker. If none is dispensed, the Prime button should be pressed again to repeat the process. The titrant tubes can also be cleaned using the same tab. Simply insert containers of cleaning fluid in place of the titrant containers. pH monitor tab This tab continually reads and displays the current pH of a sample; either in the sample container fitted to the titrator or a separate container that the probe is inserted into. The reading will update every second. If using a separate container, place the probe in the sample, then wait for the reading to stabilise before reading the value. i Note It is good practice to stir a sample during a pH measurement. pH calibration dialogue With this dialogue the pH calibration points can be set and the calibration performed. Page 3-14 MAN 0318 MAN0318-3.0 - MPT-2 Autotitrator.book Page 15 Friday, January 12, 2007 2:42 PM Identifying the features of the Titrator Chapter 3 It is important that the pH probe is correctly calibrated on a regular basis. If the probe is not calibrated then the points of the measurement may be incorrect. It is recommended that the calibration should be performed at the beginning of each titration session. The pH calibration dialogue is displayed by selecting Tools-InstrumentMPT-2 Titrator- pH calibration within the Zetasizer Nano software, or by selecting the pH calibration bration appear on the dialogue. icon. Brief instructions on performing the cali- Calibration points can added or removed using the respective buttons. Adding a pH point will display the Calibration point dialogue; input a pH point and press Ok to add it to the calibration points list. Calibration is then simply selecting the pH buffer points to use and pressing the Measure button. Guidance instructions on performing the calibration will appear on the dialogue. A progress bar shows how far the calibration routine has proceeded. A tick displayed once a pH point has calibrated. is Also displayed in the dialogue is the pH probe output from calibration (mV) value. This is a direct voltage reading generated by the pH calibration circuitry and corresponds directly to the pH point from calibration value alongside. During the calibration routine this value should constantly change. If it does not then the probe is either not immersed sufficiently in the pH solution, or the probe is broken or disconnected. While a pH calibration is being performed pH probe output from calibration (mV) will change to pH probe output (mV), and pH point from calibration will change to Estimated pH. The complete calibration routine is described in Chapter 5. MPT-2 Autotitrator Page 3-15 MAN0318-3.0 - MPT-2 Autotitrator.book Page 16 Friday, January 12, 2007 2:42 PM Chapter 3 Page 3-16 Identifying the features of the Titrator MAN 0318 MAN0318-3.0 - MPT-2 Autotitrator.book Page 1 Friday, January 12, 2007 2:42 PM 4 Making measurements - using the Titrator Introduction This chapter covers the basic operations of the titrator that enable measurements to be made. There are three basic steps involved: Setup. This includes system setup procedures such as filling the titrant containers. Additionally, setup may include priming the system or specifying a new SOP (see Creating/modifying an SOP in the Zetasizer Nano user manual), and calibrating the pH probe. Measurement. This involves connecting the cell, preparing the sample container, selecting the SOP to be used, entering sample details and then starting the measurement. Typically (dependent on how the SOP is set up), the system will make the measurement, save the results, print a report and display the results on the computer. Cleaning. This is the process whereby the sample, and titrants if necessary, within the system are flushed out, leaving the tubing clean and ready for the next measurement. As can be seen, if a routine measurement is being made then the setup stage can be omitted. In this case, making a measurement is a very quick and easy procedure. i MPT-2 Autotitrator Note This chapter will assume that a standard sample container will always be used, unless otherwise stated. Page 4-1 MAN0318-3.0 - MPT-2 Autotitrator.book Page 2 Friday, January 12, 2007 2:42 PM 4 Chapter 4 Making measurements - using the Titrator Setup Some setup procedures will have to be performed daily, while others will only have to be performed at much longer intervals. Typically, setup involves one or more of the following: Filling the titrant containers. Only required when the containers are nearly empty. Priming the titrant syringe pumps and tubes. Usually done at the beginning of the day or at the start of a new session. Calibrating the pH probe. Usually performed before each titration session. Caution! The pH probe will require special care. Never allow the pH probe to dry out. It is important to read the section on the care of the pH probe in Chapter 5. Filling and changing the titrant containers The three titrant containers are typically filled with acid, base, salt, or other additives. For most applications all that is required is to check that there is enough titrant in the containers and re-fill if necessary. Alternatively, if different titrants are continually being used, one of the titrant containers may need to be changed prior to the measurement. Always consult the Materials Safety Data Sheets for any titrant being used for information on safe handling. Changing and Re-filling the containers The titrant containers will hold up to 25ml of titrant. When the level reaches approximately 5ml, it is recommended to re-fill the container. To refill: Page 4-2 Remove the titrant container by lifting the container cover up and sliding out the container. Dispose of the remainder of the titrant and rinse the container. Prepare 25ml of titrant to the correct concentration (see A note on titrant concentration later in this section). Add the titrant to the container. MAN 0318 MAN0318-3.0 - MPT-2 Autotitrator.book Page 3 Friday, January 12, 2007 2:42 PM Making measurements - using the Titrator Chapter 4 Re-fit the container. Lift the container cover up and slide the container in to the empty holder position. Close the cover ensuring all containers are fitted correctly into the cover. Prime the titrant tubing using the Manual control dialogue. i Note If changing the titrant type used, it is important to clean the tubing and containers if re-using. Refer to Chapter 3 - the Manual control dialogue and its operation for details. Also change the titrant settings in the SOP as appropriate for the new titrant, i.e. name, type, concentration. A note on titrant concentration Preparing and specifying the concentration of the titrants is critical to achieving accurate results. The concentration specified within the Titrants SOP dialogue must be accurate to within 10%. A concentration of 0.25M is satisfactory for most measurements. In some situations it may be wise to vary this. For example, if a large number of points is to be used in a titration measurement, or if performing pH measurements close to pH 7, a lower concentration may be needed. The titrator can accurately dispense small volumes so concentrations of titrant up to 1M can be used. It is recommended that pre-diluted titrants are purchased. Either use titrants that are diluted to the exact concentration required, or purchase titrants of a known Molar concentration that can be easily diluted further. For titrations that cover a wide pH range it is useful to use two concentrations of titrant, e.g. 0.25M of acid and 0.01M of the same acid. This will ensure that the pH values achieved are closer to the requested values. Priming Priming is the act of ensuring that the titrant tubes are completely full of the titrant. Over time, the titrant may evaporate from the end of the titrant tube and therefore it will not deliver the correct volume when first used. It is recommended that the dispenser unit is primed every morning or at the beginning of a new session. Select one prime cycle when performing a daily prime. The dispenser unit should also be primed when a titrant container is changed in order to remove any traces of the original titrant that may be left in the titrant tubes. Three prime cycles will be sufficient to remove previous titrant. MPT-2 Autotitrator Page 4-3 MAN0318-3.0 - MPT-2 Autotitrator.book Page 4 Friday, January 12, 2007 2:42 PM Chapter 4 Making measurements - using the Titrator To prime the titrant tubes: 1. Attach a sample container containing clean water to the dispersion head. Water in the container is not essential, but will eliminate the effect of surface tension at the end of the titrant tube. 2. Open the titrator application by selecting the Manual control 3. Select the cycles required and press the Prime button. 4. Priming will be finished once the number of cycles has completed. icon. Making a measurement As explained in the Zetasizer Nano manual a measurement can be made in two ways; either as a Manual measurement or by using an SOP. The sections that follow will concentrate on making measurements using SOPs. It should be noted that when performing either a manual or SOP titration, the same dialogue structure that is detailed in the Zetasizer Nano manual will be used, though certain dialogues will change slightly to accommodate the Titrator selections; where necessary these changes will be explained in the text. Page 4-4 MAN 0318 MAN0318-3.0 - MPT-2 Autotitrator.book Page 5 Friday, January 12, 2007 2:42 PM Making measurements - using the Titrator Chapter 4 Preparing the sample in the container Before starting the measurement, it is necessary to prepare the sample and attach the container to the dispersion head 1. First prepare the sample to be measured and place a known volume into a sample container. An initial sample volume of 10ml is recommended (5ml minimum to 25ml maximum). The preparation of the sample is of prime importance. Read the sections on sample preparation in the Zetasizer Nano manual. i 2. Note The sample used should be of a suitable concentration that gives an intensity of scattering within recommended values. This is checked at the beginning of each titration. If the concentration is too high the titration may proceed slowly due to the sample buffering the pH. If a message occurs indicating the sample concentration is higher than recommended, dilute the sample and restart the titration. Attach the sample container to the dispersion head as described in Chapter 3. Connecting the cell tubing Follow the guidelines on inserting the cell in the Zetasizer Nano manual. The tubing has to be attached correctly between the cell used and the titrator unit itself. How the tubing is connected to the cell is dependent upon the cell and the measurement being performed. Connecting the tubing to the cell Follow the instructions below for connecting the cell. For each cell, minimise the tubing within the cell area before inserting into the pinch valve channel. Zeta potential measurements The tubing is attached to the folded capillary cell (DTS1060) using 'Luer lock' connectors. With a half-turn these secure to the Luer fittings on the top of the cell - do not overtighten. The tubing is then inserted into the pinch valve channel: Insert one tube until held by the pinch valve. Insert the second tube and rest it above the pinch valve. MPT-2 Autotitrator Page 4-5 MAN0318-3.0 - MPT-2 Autotitrator.book Page 6 Friday, January 12, 2007 2:42 PM Chapter 4 Making measurements - using the Titrator Push 1st tube into pinch valve. Rest the 2nd tube above pinch valve. ill 6841 i Note The pinch valve manufacturer recommends that a vegetable-based oil (e.g. Castor oil) is used to lubricate the section of tube that is inserted into the pinch valve. This is done to help minimise friction, though testing by Malvern instruments has not shown this to be essential. Size measurements The tubing is attached to the sizing flowcell (ZEN0023) using threaded inserts. As with the folded capillary cell above, insert one tube into the channel until held by the pinch valve, then insert the second tube into the channel to rest above the valve. Ensure the join between the PTFE and silicone tubing is within the cell area. Sample in Sample out Tubing join within cell area Push 1st tube into pinch valve. Rest the 2nd tube above pinch valve. ill 6842 Page 4-6 MAN 0318 MAN0318-3.0 - MPT-2 Autotitrator.book Page 7 Friday, January 12, 2007 2:42 PM Making measurements - using the Titrator Chapter 4 Connecting the tubing to the Titrator The connections used on the Autotitrator are of the "Luer lock" variety. The diagram below shows how to connect the tubing, from the cells mentioned above, to the tubing connection bracket. Similar connections are used throughout the unit; the connections may differ slightly, but the connection principle is the same. Sample out (to Zetasizer) Sample in (from Zetasizer) If a filter is used, attach this to the sample out (To Zetasizer) connection in the same manner as the direct tubing is done, then connect the tubing to it. ill 6869 Filling the cell With the cell tubing connected, and the sample container prepared and mounted onto the dispersion head, all that is left to do before configuring the SOP and starting the measurement is to fill the cell. The cell must be filled so that no bubbles are left within the sample path; this is especially important for Zeta potential measurements. To fill the cell: 1. Open the Manual control dialogue by selecting Tools-Instrument- MPT-2 Titrator- Manual control within the Zetasizer Nano software, or by selecting the Manual control icon. 2. Select the Fill tab. 3. Select the cycles required and press the Fill button(s) to begin the operation. Each cycle will pump the volume of the sample tubing and cell. 4. The pump will circulate the sample through the sample tubing and cell until the number of cycles has been completed or the Fill button is pressed a second time. Use the pump and stirrer controls to adjust the pump and stirrer speeds during the filling - see the note below. MPT-2 Autotitrator Page 4-7 MAN0318-3.0 - MPT-2 Autotitrator.book Page 8 Friday, January 12, 2007 2:42 PM Chapter 4 Making measurements - using the Titrator 5. Before starting the titration check that this procedure has eliminated all bubbles from the cell. i Note Filling the cell should be performed at a lower speed than during a normal titration i.e. 40% of normal speed. This to prevent the introduction of bubbles into the tubing which will affect the measurement result, especially when performing a Zeta measurement. If bubbles are present, invert the cell while still pumping and tap it lightly to dislodge them. Creating the Titration SOP A titration measurement follows the same SOP format as performed when doing a normal Size or Zeta measurement, with a few exceptions. When a titration measurement is chosen two extra dialogues - Titrants and Titration sequence - will be included in the SOP selections. Also note that some of the other dialogue pages will alter slightly to accommodate extra parameters necessary to perform the titration measurement. For information on the standard SOP dialogues please refer to the Zetasizer Nano manual where necessary. This section focuses on how to create a new SOP and details all the measurement settings that are available. Almost all the options for creating a titration SOP are the same as those available for making a manual titration measurement, so this chapter will also be of benefit to those who require an explanation of the options available for a manual measurement. To create a new SOP, select File-New SOP. This will open up the SOP Editor. The SOP Editor consists of several dialogues that can be stepped through by using the Next button. Once the SOP has been created, press Finish and save the new SOP. The various SOP dialogues are described below. Measurement type Select an Autotitration measurement and then choose whether a pH, Dilution or Additive titration is required. Lastly select the type of measurement, i.e. Size, Zeta potential or Intensity, that is to be performed - two measurement types can be chosen. Page 4-8 MAN 0318 MAN0318-3.0 - MPT-2 Autotitrator.book Page 9 Friday, January 12, 2007 2:42 PM Making measurements - using the Titrator Chapter 4 The pH Titration SOP Editor menu is: The menu shown indicates a pH Titration done against Size and Zeta potential. The menu list will change dependent upon the Titration and measurement options chosen. Titration types There are four types of titration available. For each type, Size, Zeta potential or Intensity measurements can be performed. The types of titration available are: Dilution The Dilution titration is used to monitor either sample Size or Zeta potential parameters as a function of sample concentration. Additive log titration (Conductivity) This titration is used to monitor the conductivity of a sample by adding salts. Results are shown as a function of conductivity MPT-2 Autotitrator Page 4-9 MAN0318-3.0 - MPT-2 Autotitrator.book Page 10 Friday, January 12, 2007 2:42 PM Chapter 4 Making measurements - using the Titrator Additive linear titration (Concentration) This titration is used monitor the effects of formulation additives on the Size and Zeta potential of the sample. Results are shown as a function of concentration. pH This is a standard pH titration used to monitor solution properties, or sample size, as a function of sample pH. During a Zeta potential pH titration the Isoelectric point can be determined. Sample See the description in the Zetasizer Nano manual. Sample - Material See the description in the Zetasizer Nano manual. Sample - Dispersant See the description in the Zetasizer Nano manual. Sample - General options This dialogue includes information from both the Size or Zeta Sample - General options dialogues. See description in the Zetasizer Nano manual for details. Only the Sample viscosity option will be shown if an Intensity only measurement option is chosen. Sample - Temperature See the description in the Zetasizer Nano manual. i Note As the temperature probe is not temperature compensated, it is recommend that titrations are performed with ambient temperature conditions. Adjust the temperature in the SOP to the ambient value. Sample - Cell See description in the Zetasizer Nano manual. Size measurement See the description in the Zetasizer Nano manual. Page 4-10 MAN 0318 MAN0318-3.0 - MPT-2 Autotitrator.book Page 11 Friday, January 12, 2007 2:42 PM Making measurements - using the Titrator Chapter 4 Size measurement - Advanced See the description in the Zetasizer Nano manual. Size measurement - Data processing See the description in the Zetasizer Nano manual. Zeta measurement See the description in the Zetasizer Nano manual. Zeta measurement - Advanced See the description in the Zetasizer Nano manual. Zeta measurement - Data processing See the description in the Zetasizer Nano manual. Titration - Titrants This dialogue enables the titrants used to be specified, and the pump and stirrer speed to be set. MPT-2 Autotitrator Page 4-11 MAN0318-3.0 - MPT-2 Autotitrator.book Page 12 Friday, January 12, 2007 2:42 PM Chapter 4 Making measurements - using the Titrator Titrants The Titrants Configuration area is used to set up the features of the titrants used, such as their type, name and concentration. Type of titrant Specifies the type of titrant in each of the containers. Use the drop down list to select the type of titrant used, i.e. either acid, base, salt, solvent, additive or disabled, depending upon the titration type being performed. The colour coding to the left of the list corresponds to the colour LED indicators alongside the titrant containers in the dispersion area. Titrant name This is a title for the titrant container. Either type the titrant name or select from the scroll down list. The name entered here will be printed on the titrant report. Concentration Specifies the concentration of the titrant in the titrant container. For pH titrations the concentration units will always be for Molarity (M), whilst for other titration types different units can be chosen. The concentration chosen will affect the precision of titration measurement. i Note When titrating over certain pH ranges, the program may prompt for a second, more dilute, titrant to be used. Dispenser Automatic/Manual Select Automatic to let the software control the pump and stirrer speeds, or specify an appropriate speed for the sample using Manual. Pump speed Sets the speed of the pump that recirculates the sample through the flow cell. For normal operation this will generally be between 30% and 80%. Stirrer speed Sets the stirrer speed. Care should be taken not to introduce bubbles into the measurements by setting the stirrer speed too high. Recirculate between repeat measurements If more than one measurement is being made at one titration point then this check box gives the option of either making all measurements on the sample within the cell or recirculating the sample between measurements. This option is selectable for Size measurements, but is always on when performing pH vs Zeta potential measurements. This is to prevent the pH reading from being affected when the Zeta voltage field is applied. Page 4-12 MAN 0318 MAN0318-3.0 - MPT-2 Autotitrator.book Page 13 Friday, January 12, 2007 2:42 PM Making measurements - using the Titrator Chapter 4 Sample volume This is used to inform the software how much sample is initially added to the sample container. The more accurately this volume is specified, the more precise the titration will be. The initial start volume will vary according to the titration type being performed; generally this will be between 3ml minimum and 25ml maximum. When the magnetic stirrer is used a minimum of 8ml is necessary for pH titrations, and 5ml for all others. Filter This option should be enabled when running the Titrator with a filter fitted. This is to ensure correct operation of the pump. With the Filter is fitted checkbox enabled, the pump reverse action is disabled to avoid dislodging particles from the filter. Extra pressure from reverse pumping when the filter is attached may create leaks within the system. Predicted volume On the left of the Titrants dialogue a display is shown indicating how full the sample container will get. This display estimates the predicted total volume that will eventually end up in the sample container (initial sample volume plus all the titrant additions), to ensure that the container does not overflow and is full enough to cover the dispense tubes. The display indicates by colour the volume and risk level of any overflow. Unless a dilution titration is being performed (see below) the display will always show the 'standard' sample container. The maximum volume of the 'standard' sample containers supplied by Malvern is 25ml. No risk: The display will show green if the predicted volume is within the range 5 to 15ml. Low risk: The display will show amber if the predicted volume is greater than 15ml. High risk: The display will show red if the predicted volume is greater than 20ml. i Note The predicted volume is only an estimate. It is least accurate for pH titrations as buffering is difficult to estimate. Performing dilution titrations: For dilution titration ratios greater than 4:1, the Predicted volume container graphic in the dialogue will change to show that the large-volume containers MPT-2 Autotitrator Page 4-13 MAN0318-3.0 - MPT-2 Autotitrator.book Page 14 Friday, January 12, 2007 2:42 PM Chapter 4 Making measurements - using the Titrator should be used. This is due to the larger amounts of titrant that will be required to perform the dilution. When using the large-volume containers the displacement ring should be placed at the bottom. The displacement ring will displace the small initial sample upwards, within the centre of the container, and towards the titrant and sample tubes. This minimises the amount of sample necessary to start the dilution, and ensures the magnetic stirrer is positioned correctly. The sloping top of the ring guides the tubes into the centre of the container, whilst also preventing any sample from resting on the top of the ring. Larger container Displacement ring The displacement ring will also as act as a weight to keep the container in place when resting on the magnetic stirrer. ill 6940 A message will appear to indicate that both the sample and titrant containers used must be the large volume type. Titration - Sequence This dialogue enables the titration measurement details to be selected, such as the number of points, the range of the titration and the equilibration time. Depending upon the titration type selected - pH, dilution or additive - the dialogue will alter accordingly. The same format will be used, with generally just the text and titration units altered to reflect the titration chosen. The dialogue shown is for a pH titration. Page 4-14 MAN 0318 MAN0318-3.0 - MPT-2 Autotitrator.book Page 15 Friday, January 12, 2007 2:42 PM Making measurements - using the Titrator Chapter 4 Sequence The sequence area enables the Start and End pH or concentration values to be set. The display will change depending on the type of titration set in the measurement type dialogue. With a titration selected, enter the Start and the End values in the respective boxes. At the start of the titration the titrator will change the pH or concentration of the sample to match that requested for the start point. Change the Increment value to determine how many titration points will be measured. The number of points to be measured will be shown alongside. Increment (points) is used for defining the number of different sample conditions. A maximum of 30 points can be measured in a single titration. Increment is not available for Additive log or Dilution titrations. Start at current - pH or sample concentration. Selecting this check box will override the Start value. The titrator will then use the current value and equally space the titration points between this value and the end setting. The Start value box now will be greyed out but will indicate the current pH or concentration value. Initial concentration (For additive and dilution titrations only). During a pH titration the pH probe measures the current pH value of the sample; but, as there is no facility to read the current concentration of the sample on the MPT-2, a value must be specified here stating the concentration of the sample before any titrants are added. MPT-2 Autotitrator Page 4-15 MAN0318-3.0 - MPT-2 Autotitrator.book Page 16 Friday, January 12, 2007 2:42 PM Chapter 4 Making measurements - using the Titrator With the dilution titration the concentration specified will be that of the sample container. The End concentration will be the desired concentration level required after dilution has finished, the dilution being performed in the number of points (steps) specified. Precision This area is only displayed for pH titrations. The sample may have a buffering effect that will cause the pH to drift during measurement. The sample must therefore be allowed to equilibrate to a stable value before measurement. This is achieved by selecting a Precision tolerance value. This value will allow a balance to be made between performing a slow titration and obtaining points close to the requested value (low tolerance values), or a faster titration where the points are slightly different to those selected (higher tolerance values). Predicted volume Please see description under Titrants SOP dialogue. Titration - Instructions See the description in the Zetasizer Nano manual. Titration - Reports See the description in the Zetasizer Nano manual. Titration - Export See the description in the Zetasizer Nano manual. Starting a Titration SOP measurement The system is now ready to start the actual measurement. To start an SOP measurement, select Measure-Start SOP. The Open SOP dialogue will appear. Select the SOP that will be used and select Open. If an SOP has not been specified for the sample, create one as described in the previous section. The titration measurement will then follow the measurement sequence as detailed in the Zetasizer Nano manual. Page 4-16 Any necessary pre-measurement instructions will appear. MAN 0318 MAN0318-3.0 - MPT-2 Autotitrator.book Page 17 Friday, January 12, 2007 2:42 PM Making measurements - using the Titrator Chapter 4 This may be followed by a Labels dialogue, allowing the measurement to be named and any other information about the measurement to be entered. Select the OK button when ready. The Measurement display, discussed below, will now appear. Follow the instructions on the status line of the measurement display and press the Start button to start the measurement. The measurement sequence will complete and the results can be viewed - see Displaying the results. The 'Titration' measurement display The Titration measurement displays are virtually identical to those shown when performing a standard Zeta or Size measurement. The only difference being the inclusion of a “measurement type versus titration” tab, i.e. Zeta/Intensity vs pH. The standard tabs are explained in the Zetasizer Nano manual. Titration/measurement type (i.e. pH/Zeta) This tab details the titration measurement against the measurement type that is simultaneously produced. The graph shown will only appear after the measurement sequence has finished, and show a plot of titration v measurement type, i.e. pH v Zeta potential. MPT-2 Autotitrator Page 4-17 MAN0318-3.0 - MPT-2 Autotitrator.book Page 18 Friday, January 12, 2007 2:42 PM Chapter 4 Making measurements - using the Titrator The graph above shows a plot of the titration performed, with each titration measurement point indicated on the graph. A weighted average line joins the mean measurement result obtained from each group of measurement points. Measurement sequence i Note The status bar will prompt for certain actions during the course of the measurement. A titration measurement performs exactly the same processes that are done when performing a standard measurement, plus the inclusion of titration specific steps. For details of the standard measurement sequence refer to the Zetasizer Nano manual for details. The actual measurement sequence will depend upon the measurement being performed, though in general an autotitration measurement sequence will be as follows: 1. With the sample container and the cell inserted, Start is pressed. The cell is first checked to identify the cell type fitted, and that it agrees with that selected in the SOP. Once identified the measurement sequence continues automatically. The pump and stirrer will be set to the values requested in the SOP and the pH value will be read. 2. The titration will now start at the value specified with in the SOP. This will either be the "Start" value or "..at current value". 3. If Start at current value was selected the system will immediately go into performing a measurement. If this was not selected the unit will add titrants to the sample to bring it to the start value specified. 4. Once the start value has been obtained a measurement will be performed. The sample will recirculate if specified. 5. With the first measurement complete more titrants will be added to the sample to bring it to the second measurement point, where another measurement will be performed. 6. The measurement sequence continues until all points have been measured. 7. The measurement sequence will now complete and add a result to the current open file. The progress meter indicates the measurement progress during each stage. Page 4-18 MAN 0318 MAN0318-3.0 - MPT-2 Autotitrator.book Page 19 Friday, January 12, 2007 2:42 PM Making measurements - using the Titrator i Chapter 4 Note If Close is pressed while a measurement is in progress the screen will close, but only the data for the currently performed titration measurement will be lost. The data from all completed titration measurements will be preserved; i.e. if 15 individual measurements are to be performed for one complete titration, and the titration is closed on measurement 10; the first nine measurements data will be preserved, but the 10th measurement data will be lost. For Zeta potential measurements, when the titration measurement is closed before all individual measurements are completed, no isolelectric point will be generated. Displaying the 'Titration' measurement results To display a titration report, select a 'Titration' type measurement record and then select the appropriate report tab. The report will show all appropriate measurement information for that record. When a Titration result is selected in the Records view, all individual associated measurements will be selected too. These correspond to the number of titration points measured during the complete titration. For example, if a Zeta titration measurement used 16 titration points, then 16 Zeta measurements records will be shown directly underneath the prime titration record. The standard report for titration measurements is shown below. The particular graph displayed is a pH v Zeta potential plot. MPT-2 Autotitrator Page 4-19 MAN0318-3.0 - MPT-2 Autotitrator.book Page 20 Friday, January 12, 2007 2:42 PM Chapter 4 Making measurements - using the Titrator 1 2 3 4 ill 7925 The report is divided into four areas; these are described below. For different titration measurements the details shown will change. Sample The Sample section gives details of the sample parameters. This includes the sample name, record number, measurement date and time, dispersant name, the SOP used and the measurement file name. The information shown is generally that which was inputted into the SOP measurement dialogues. Cell The Cell section gives details on the Cell type used during the measurement. Titrants The Titrants section displays the same information specified in the Titrants SOP dialogue: The Titrants Configuration area is used to set up the features of the titrants used, such as its type, name and concentration. Page 4-20 Type. Displays the type of titrant in each of the containers; either acid, base, or disabled. Name. This is a title for the titrant. MAN 0318 MAN0318-3.0 - MPT-2 Autotitrator.book Page 21 Friday, January 12, 2007 2:42 PM Making measurements - using the Titrator Chapter 4 Concentration. Specifies the concentration of the titrant, this is usually between 1.0M and 0.01M. The concentration chosen will affect the precision of titration measurement. Results The results are shown in graphical form. The graph shows a plot of the titration performed, with each titration measurement point indicated on the graph. The Total injected Volume (ml) is indicated at the top of the graph. This is the amount of titrant injected into the sample during the course of the measurement. For Zeta potential measurements the Isoelectric point is also indicated at the top of the graph. This is the pH point at which the Zeta potential is zero. Please see the Size description in the Zetasizer Nano manual for details on altering the graph. MPT-2 Autotitrator Page 4-21 MAN0318-3.0 - MPT-2 Autotitrator.book Page 22 Friday, January 12, 2007 2:42 PM Chapter 4 Making measurements - using the Titrator Page 4-22 MAN 0318 MAN0318-3.0 - MPT-2 Autotitrator.book Page 1 Friday, January 12, 2007 2:42 PM 5 Maintenance Introduction Caution! Only a qualified Malvern representative, is allowed access to the inside of the titrator. There are no user serviceable parts inside the titrator. The titrator has been designed so that supervisor/operator maintenance is kept to a minimum. This section explains the routine maintenance procedures that the supervisor/operator can perform. These procedures are: Cleaning the titrator. Maintaining the pH probe. Replacing the Dispensing syringes and o-ring. Changing the filter and tubing A summary of how often these procedures should be carried out is detailed in the maintenance schedule later in this chapter. Additionally, this section contains a list of parts and part numbers of consumables and items that can be replaced by the user in the event of failure. Cleaning the accessory Caution! The surfaces of the system may be permanently damaged if samples or titrants are spilt onto them. If spillages should occur, then the system should be disconnected from the power supply before scrupulously cleaning any spillage. MPT-2 Autotitrator Page 5-1 MAN0318-3.0 - MPT-2 Autotitrator.book Page 2 Friday, January 12, 2007 2:42 PM 5 Chapter 5 Maintenance Cleaning the Titrator surfaces Periodically, the covers should be thoroughly cleaned using a mild soap solution on a damp cloth. Always ensure that the accessory is disconnected from the power supply before cleaning. Never use excess liquid to clean the accessory and always avoid the electrical components on the rear panel. Always ensure that the accessory is completely dry before applying power. Never use a solvent-based solution to clean the accessory as damage to the painted surface may result. Cleaning the sample path To avoid cross-contamination of samples, the sample flow path should always be kept scrupulously clean. Always flush the sample after each measurement session; refer to The Manual control dialogue and it’s operations section in Chapter 3. Maintaining the pH probe The pH probe is essential to ensure good performance of the Titrator, and its maintenance is of paramount importance. As with any pH probe, its performance will degrade over time and will eventually have to be replaced. The frequency of replacement will be determined by; the maintenance of the probe, how frequently it is used and the types of sample being measured. In this respect a pH probe can be thought of as a "Consumable" item. Malvern recommends that the probe is replaced every year, but this frequency may vary. Note three important points when using a pH probe: 1. The performance of the pH probe will be severely affected if it is allowed to dry out (even for short periods). 2. The pH probe should be calibrated at regular intervals. 3. The probe should be cleaned regularly - If the probe responds slowly a message to clean the electrode will be given. This electrode operates over a range of pH 1 to pH 14, and temperature range of 0 to 70°C, though it is recommended that the titrations are performed at ambient temperature conditions, i.e. by setting the measurement temperature to equal the ambient temperature. Page 5-2 MAN 0318 MAN0318-3.0 - MPT-2 Autotitrator.book Page 3 Friday, January 12, 2007 2:42 PM Maintenance Chapter 5 This is for two reasons: 1. The pH Probe is not temperature compensated, so the sample in the container must be the same temperature as the cell. 2. At higher temperatures the operating life of the pH probe will be greatly reduced. Preparation before first use 1. Remove the screw end-cap and connect to the cable supplied. 2. Remove the membrane protection teat. This teat contains a small amount of saturated KCl solution (3.8M). 3. To allow air pressure equalization in the reference junction part of the probe, remove the rubber cover, or sleeve that covers the reference junction vent. 4. Check that the reference electrolyte is about 1cm below the level of the opening. Top up with the electrolyte supplied if necessary. 5. Check that there are no air bubbles within the inner glass membrane. Bubbles may be removed by shaking the electrode using a similar action used with a clinical thermometer. Keeping the pH probe wet If the pH probe is allowed to dry out, even for short periods, the performance of the probe can be severely affected. It may not be possible to recover a degraded pH probe. Typically, when the probe is immersed in a buffer solution, the pH should be attained (to within 0.1 of the pH) within 10 seconds. If this time exceeds 30 seconds, and the probe cannot be recovered, then the probe should be replaced. When changing the sample container, do not allow the probe to be exposed to air for more than 20 seconds. Make sure that the next sample container is ready to attach, or alternatively have a spare container of storage solution available. What is a soaking solution? A soaking solution is a liquid that the probe can be immersed in to prevent it from drying out. The following guidelines should be followed when using a pH probe: The probe can be immersed in the sample solution for short periods (a few hours). The probe can be immersed in tap water for the up to a day. (Do not use deionised water as it will destroy the charge equilibrium of the glass electrode). MPT-2 Autotitrator Page 5-3 MAN0318-3.0 - MPT-2 Autotitrator.book Page 4 Friday, January 12, 2007 2:42 PM Chapter 5 Maintenance For long periods (more than a day) the probe should be immersed in either a dilute acid solution (pH 2 to pH 4) or an acidic buffer such as pH 4. If the electrode is not being used for a period of, say, more than a week, then it is advisable to protect the glass membrane by replacing the protective rubber teat containing a small quantity of the electrolyte solution. It is best to squeeze the end of the teat first to make it easier to slide on and also to prevent electrolyte being forced back into the probe. If the probe has become dry, then it may be possible to recover the performance by soaking the probe overnight in a solution of 0.1M hydrochloric acid. However, the performance may never fully recover and there may be no alternative except to replace the pH probe. Cleaning the pH probe The probe should be periodically cleaned. The calibration procedure detailed below will indicate whether the probe requires cleaning. Chemical cleaning is usually sufficient. To chemically clean, soak the probe overnight in a solution of 0.1M hydrochloric acid, then use a soft tissue soaked in isopropanol and wipe over the end of the probe. Once cleaned, re-calibrate the probe to see if its performance has recovered. Some probes have a PTFE 'wick' which is fibrous. This is more easily wetted than the ceramic junction but can become clogged by very fine particles in the dispersion. When this happens, the pH probe will not respond to pH changes in the sample. Carefully brushing this wick can recover performance. This effect is reduced by using more dilute samples. Calibrating the pH probe The performance of the titrator relies on the pH probe being correctly calibrated. If the pH probe has not been calibrated then the pH values will be incorrect. It is recommended that the pH probe is calibrated before each titration session. To calibrate the pH probe the following is needed: Page 5-4 At least two pH buffers. The default buffers are pH 4 and pH 9 (these are supplied with the probe). See Choosing the buffers when calibrating later in this section for advice on selecting buffers. A maximum of four buffers can be used for the calibration. A container of clean deionised water to rinse the probe between measurements. MAN 0318 MAN0318-3.0 - MPT-2 Autotitrator.book Page 5 Friday, January 12, 2007 2:42 PM Maintenance Chapter 5 Ideally, the pH probe should be calibrated while fitted to the system and using the standard sample containers. i Note The pH probe should be recalibrated if the room temperature changes by more than 5°C. To calibrate the probe: Calibration is performed by selecting a calibration point that will match the pH buffer to be used, and pressing the Measure button. Instructions are present on the calibration dialogue to give guidance through the process. 1. Rinse the electrode in deionised water and dab dry with a good quality lens tissue (one that does not shed fibres/lint free). 2. Open the pH calibration dialogue by selecting Tools-Instrument- MPT-2 Titrator- pH calibration within the Zetasizer Nano software, or by selecting the pH calibration 3. MPT-2 Autotitrator icon. Select the first calibration point: press the Add button and enter the calibration pH required. Press OK. This point will now be added to the calibration point list. Page 5-5 MAN0318-3.0 - MPT-2 Autotitrator.book Page 6 Friday, January 12, 2007 2:42 PM Chapter 5 Maintenance 4. Repeat the above for all the required calibration points, i.e. pH 4, 7 and 9. The chosen pH points will show an alongside. Default pH points will be pH 4 and pH 9 as these are the buffers originally supplied with the pH probe. See Choosing the buffers when calibrating later in this section for advice on adding and selecting buffers. 5. Select the first pH point and place the pH probe into the matching pH buffer, wait for the pH probe output (mV) value to stabilise and press the Measure button. The software will then check that the pH reading is stable before continuing. (After a pH calibration has finished, pH probe output (mV) will change to pH probe output from calibration (mV). 6. When the calibration of the first pH point is complete, the pH point will show a alongside. 7. Remove the probe from the first pH buffer, rinse with deionised water and dab dry. 8. Continue the calibration until all required pH points have been calibrated. During the calibration a progress bar at the bottom of the dialogue indicates how far the calibration routine has proceeded. The ticks or crosses alongside the pH probe indicate the following: A pH point has been chosen but not yet calibrated. A pH point has been chosen and been calibrated. Calibration points selected during a previous calibration, which have not been calibrated during the current session. If required select these points and perform the calibration process as described. A tick will appear once it is complete. Points can be deleted by selecting the point and pressing Remove. Choosing the buffers when calibrating The default buffers for calibrating are pH 4 and pH 9. Other values may be used but ensure that the lowest and highest values are at least 3 pH values apart. Also if all titration measurements tend to be in the lower end of the pH table it is advisable to use pH 2 and pH 5 buffers to calibrate the probe. Adding a pH buffer point To use a different pH value, a new pH buffer point must be added to the selection list. Press Add to display the Calibration point dialogue, then perform either of the below actions: 1. Page 5-6 Select a defined pH point from the Calibration pH list and press OK to add it to the Calibration points list in the main dialogue. MAN 0318 MAN0318-3.0 - MPT-2 Autotitrator.book Page 7 Friday, January 12, 2007 2:42 PM Maintenance Chapter 5 2. Or if using a pH buffer not available in the list, select Custom, type the value in the Custom buffer entry box, then press OK to add it to the Calibration points list in the main dialogue. If the maximum accuracy of calibration is required over a wide pH range, then 3 or 4 buffers should be used The pH probe for the Titrator is supplied with sachets of pH4 and pH9 buffers. Follow the instructions supplied with the sachets for the best methods of making the buffer solutions. As buffers are typically low cost items, it will be more economical to source from a local supplier. If finding a convenient source proves difficult, contact the local Malvern representative who will be able to give advice. Common Problems pH electrodes are versatile but their performance is dependent on the sample being tested. For example, pH measurement of high purity water or liquids containing sulphur ions will require special electrodes. Slow response can often be caused by the build-up of deposits on the glass membrane or frit. Initially, try cleaning the probe by dipping into concentrated Nitric Acid for 10 seconds. If this is unsuccessful, repeat for one minute. If still unsuccessful then regeneration may be possible by dipping the membrane for one minute into a solution of 2% HF and 5% HCl whilst stirring. Should the frit be blocked by proteins then try soaking the electrode in an appropriate organic solvent, or a solution of 10% pepsin in 1M HCl. As such actions usually dehydrate the glass membrane, it will be necessary to soak overnight in 3M KCl solution. If these actions are unsuccessful then the electrode will need to be replaced. Always ensure that the level of the electrode's electrolyte is above that of the liquid under test. This will prevent electrolyte contamination, and ensure a good electrical contact. With the blue rubber cover removed, the electrode uses a small amount of electrolyte per day. When in continuous use, weekly top-ups are recommended. Replacing the dispensing syringes and o-ring It is recommended that all three dispensing syringes and o-rings are replaced at least every 12 months or sooner if leaks develop. Replacement syringes and o-rings are available through the Malvern representative (see User consumable and spares at the end of this section). MPT-2 Autotitrator Page 5-7 MAN0318-3.0 - MPT-2 Autotitrator.book Page 8 Friday, January 12, 2007 2:42 PM Chapter 5 Maintenance To remove a syringe and o-ring: 1. Turn off the accessory and remove the side cover. 2. Manually push down the syringe mount. 3. Pull the base of the syringe out of the syringe mount, and then out from the o-ring. 4. Using a small screwdriver push the o-ring out of the manifold assembly . The o-ring will fall out the back of the manifold onto the base of the dispensing area. 3 2 1 ill 6835 Replacement is the reverse of the above procedure. 1. Push the o-ring into the recess on the manifold . 2. Slide the syringe mount up, checking that the syringes smoothly enter the manifold assembly - ensure the syringe does not bend severely. 3. Prime the system once all the syringes have been replaced. Changing the filter and tubing The filter removes all particles above the grading size of the filter fitted. To maintain optimum filtration it is recommended it should be replaced regularly. Replacement of the filter and any tubing on the titrator is performed using very similar techniques. Generally, all internal tubing is connected with the screw-fit connections and all external tubing and filters use a 'Luer' style. The diagram below shows how the Page 5-8 MAN 0318 MAN0318-3.0 - MPT-2 Autotitrator.book Page 9 Friday, January 12, 2007 2:42 PM Maintenance Chapter 5 connections are made. Some connections differ slightly but the principle is the same. To replace the tubing on the Sizing flowcell, simply pull the used silicone tubing off the harder PTFE tube and replace with new tubing. Connect the tubing at the tubing connection bracket as shown below. Screw-fit connection “Luer” connection ill 6836 Maintenance schedule The following maintenance schedule should be followed to ensure the accessory continues to correctly function. MPT-2 Autotitrator Procedure Period Priming the system. Every morning or at the beginning of a new measurement session. pH probe calibration. Preferably before each titration session. pH probe cleaning. Once a week or according to in-house QC procedures. Cleaning the covers. Once a month. Dispensing syringe and o-ring replacement. The three dispensing syringes should be replaced every 12 months. pH probe replacement. The pH probe should be replaced at least every 12 months. Page 5-9 MAN0318-3.0 - MPT-2 Autotitrator.book Page 10 Friday, January 12, 2007 2:42 PM Chapter 5 Maintenance User consumables and spares This section lists all available user consumables and spares. Contact the Malvern Instruments representative, quoting the part number listed below. Part Page 5-10 Part number 500 'Standard' sample and titrant containers plus caps. Maximum fill : 25ml BEK0008 10 'Large-volume' sample and titrant containers plus lids. Maximum fill : 125ml BEK0009 pH probe Inc: pH4 and 9 buffer sachets) SEN0106 Dispensing syringe pack Inc: 3 syringes and 3 o-rings) ZEN4030 Magnetic Stirrer bar (Flea). ZEN4034 Peristaltic pump head. Inc: Pump head and tubing ZEN4036 Connectors pack for all internal and external connections on the Autotitrator except pump (mostly1/16” fittings). Inc: 4 x manifold (red) 2 x push on barb connections 4 x manifold (green) 4 x black tubing grips 4 x manifold (cream) 1 x Luer filter fittings 4 x plastic nuts 1 x Luer caps ZEN4037 Internal tubing pack 1 for all internal connections on the Autotitrator. Inc: 20 x tubing cones (ferrules) and 8m tubing ZEN4038 External connections pack (to Zetasizer Nano) Inc: 15 x Male Luer lock fittings (sample in connection) 5 x Female Luer push fittings (sample out connection) ZEN4039 External tubing (to Zetasizer Nano) Inc: 1 box (25ft) silicone tubing ZEN4040 Displacement ring (for use with large-volume beaker) ZEN4041 Internal tubing pack 2 Includes tubing and fittings for larger bore tubing (1/8") sizes to Dispersion head ZEN4043 RS232 cable. CAB0020 MAN 0318 MAN0318-3.0 - MPT-2 Autotitrator.book Page 1 Friday, January 12, 2007 2:42 PM Part 2 Appendices MAN0318-3.0 - MPT-2 Autotitrator.book Page 2 Friday, January 12, 2007 2:42 PM MAN0318-3.0 - MPT-2 Autotitrator.book Page 1 Friday, January 12, 2007 2:42 PM A Specification and Site Requirements Specification Parameter Specification Dimensions (excluding pH probe). Width: 170mm Height: 260mm Depth: 390mm Weight (dispenser unit only). 5.3Kg. Power requirements. Power supply : ~ 100-240V, 50-60Hz 24Vdc via external 'universal' power supply Power rating. 30VA Recommended maximum fill capacity of 'standard' sample container. When filled with titrant : When filled with sample : 25ml 20ml Modes of operation. Automatic via Malvern software. The accessory has been designed to be stored and operated in the following environmental conditions. MPT-2 Autotitrator Operating temperature +10 to 35°C (+50 to +95°F) Storage temperature -20 to +50°C (-104 to +122°F) Humidity 10 to 90% (non-condensing) Altitude Up to 2000m Pollution degree 2 Mains supply voltage fluctuations ±10% of nominal voltage Page A-1 MAN0318-3.0 - MPT-2 Autotitrator.book Page 2 Friday, January 12, 2007 2:42 PM A Appendix A Specification and Site Requirements Site requirements Note These requirements should be read in conjunction with the system requirements as stated in the Zetasizer Nano user manual. Nitrogen purge specification Warning! A Nitrogen supply must be used in a well ventilated environment. Turn off the supply when not in use. If a nitrogen supply is required then it must conform to the following specifications and flow rate conditions: Page A-2 It is important that the nitrogen supply is dry, free from oil and filtered to remove any contaminants that could affect the sample being measured. The flow rate should be adjustable between 2 and 20ml/min. MAN 0318 MAN0318-3.0 - MPT-2 Autotitrator.book Page 1 Friday, January 12, 2007 2:42 PM B Chemical compatibility The sample flow path in the titrator has been manufactured from materials that are considered to give the widest protection from chemical attack. However, it is important to check that any sample or titrant used is chemically compatible with the materials that they will come into contact with within the accessory. This appendix lists all materials that comes into contact with the sample and titrants in the normal operation of the accessory. Materials list MPT-2 Autotitrator Component Materials Sample/titrant containers (25ml) Polypropylene Sample/titrant containers (125ml) Polypropylene Sample container mount (i.e. dispersion head) Polypropylene Titrant container mount Polypropylene Magnetic stirrer 'flea 'Teflon’ Manifold PEEK (Polyetheretherketone) Manifold valves PEEK and FFKM (seal) Dispensing syringes PTFE Peristaltic pump tubing Silicone rubber Internal Tubing PTFE Tubing to optical unit and cell Silicone rubber Tubing connectors Polypropylene / PVDF pH probe Glass Displacement ring PEEK (Polyetheretherketone) Page B-1 MAN0318-3.0 - MPT-2 Autotitrator.book Page 2 Friday, January 12, 2007 2:42 PM B Appendix B Page B-2 Chemical compatibility MAN 0318 MAN0318-3.0 - MPT-2 Autotitrator.book Page 1 Friday, January 12, 2007 2:42 PM C Installation This section gives instructions on how to reconnect the accessory should it be necessary to move it once it has been commissioned. The accessory must be initially commissioned by a Malvern Instruments representative. Ensure that the new location of the system has enough space before attempting to move the accessory. If the accessory is to be moved short distances, then a sample container containing water should be attached to the dispersion head to prevent the pH probe from drying out. If the accessory is to be moved greater distances then the pH probe should be removed and its protective cover attached to prevent the probe from drying out. Follow the installation instructions for the Zetasizer Nano as detailed in the User manual, then connect the Titrator as shown below. Stirrer pH probe On /off 24V PSU Mains Supply RS232 (I0I0I) Comms USB comms ill 6929 MPT-2 Autotitrator Page C-1 MAN0318-3.0 - MPT-2 Autotitrator.book Page 2 Friday, January 12, 2007 2:42 PM C Appendix C Page C-2 Installation MAN 0318 MAN0318-3.0 - MPT-2 Autotitrator.book Page 1 Friday, January 12, 2007 2:42 PM D Regulatory statements CE Declaration of Conformity The CE badge on this product signifies conformance to European Commission Directives. ill 6939 MPT-2 Autotitrator Page D-1 MAN0318-3.0 - MPT-2 Autotitrator.book Page 2 Friday, January 12, 2007 2:42 PM D Appendix D Regulatory statements FCC Notice (US only) The Federal Communications Commission (FCC) mark on this product signifies conformance to FCC regulations relating to Radio Frequency Devices. These have been satisfied by testing the product against, and being found to be compliant with: FCC CFR 47 Part 15:March 2003.Class A digital device. The device complies with part 15 of the FCC Rules. Operation is subject to the following two conditions: 1) This device may not cause harmful interference, and 2) this device must accept any interference received, including interference that may cause undesired operation. Note This equipment has been tested and found to comply with the limits for a Class A digital device, pursuant to part 15 of the FCC rules. These limits are designed to provide reasonable protection against harmful interference when the equipment is operated in a commercial environment. This equipment generates, uses, and can radiate radio frequency energy and, if not installed and used in accordance with the instruction manual, may cause harmful interference to radio communications. Operation of this equipment in a residential area is likely to cause harmful interference in which case the user will be required to correct the interference at his own expense. Note Changes or modifications not expressly approved by Malvern Instruments Limited could void the user’s authority to operate the equipment. Page D-2 MAN 0318 MAN0318-3.0 - MPT-2 Autotitrator.book Page 3 Friday, January 12, 2007 2:42 PM Regulatory statements Appendix D Canadian Regulatory Information (Canada Only) This digital apparatus does not exceed the Class A limits for radio noise emissions from digital apparatus set out in the Radio Interference Regulations of the Canadian Department of Communications. Note that Canadian Department of Communications (DOC) regulations provide, that changes or modifications not expressly approved by Malvern Instruments Limited could void your authority to operate this equipment. This Class A digital apparatus complies with Canadian ICES-003. Cet appareil numérique de la classe A est conforme à la norme NMB-003 du Canada. VCCI acceptance (Japan only) The Voluntary Control Council for Interference (VCCI) mark on this product signifies compliance to Japanese EMC regulations as specified by VCCI. ill 6793 Translation: This is a Class A product based on the standard of the Voluntary Control Council for Interference by Information Technology Equipment (VCCI). If this equipment is used in a domestic environment, radio disturbance may occur, in which case the user may be required to take corrective actions. MPT-2 Autotitrator Page D-3 MAN0318-3.0 - MPT-2 Autotitrator.book Page 4 Friday, January 12, 2007 2:42 PM Appendix D Page D-4 Regulatory statements MAN 0318 MAN0318-3.0 - MPT-2 Autotitrator.book Page i Friday, January 12, 2007 2:42 PM Index A D Access to the titrator 1-2 Adding a pH point 3-15 Additive linear titration 4-10 Additive log titration 4-9 Additive titration 4-8 Adjusting the tubing length 3-8 Altitude A-1 Attaching the sample container 3-4 Back panel 1-1, 1-4, 3-2, 3-10 Bubbles 3-5 Buffers 5-4, 5-6, 5-10 Depth A-1 Dilution titration 4-8, 4-9, 4,13 Dimensions A-1 Dispenser 4-12 Dispenser unit 2-2, 3-1 Dispensing area 3-2 Dispensing area cover 3-2 Dispensing syringe 3-6, 5-7 Dispersing area 3-6 Dispersion head 3-2, 3-3 Displacement ring 4-14 Disposable sample container 2-2 DOC D-3 C E Calibration points 3-15 Canadian Regulatory Information D-3 CE badge D-1 CE Declaration D-1 Changing the filter 5-8 Changing the tubing 5-8 Chemical compatibility B-1 Clamping ring 3-8 Clamping screw 3-8 Clean 3-11 Clean tab 3-12 Cleaning 4-1, 5-2, 5-4, 5-9 Cleaning fluid 3-7, 3-12 Cleaning the accessory 5-1 Communications connector 3-10 Concentration 4-10, 4-12 Conductivity 4-9 Connecting the cell tubing 4-5 Connecting the tubing to the titrator 4-7 Connectors 3-9, 3-10 Connectors pack 5-10 Consumables 5-10 Controlling the titrator 2-2 Covers 5-9 Creating an SOP 4-1 Enable stirrer 3-12 Error condition 3-5 Estimated pH 3-15 European Commission Directives D-1 B MPT-2 Autotitrator F FCC D-2 FCC Notice D-2 Federal Communications Commission D-2 File menu 1-3 Fill 3-11 Fill tab 3-13 Filling the cell 3-13, 4-7 Filling the titrant containers 4-2 Filter 4-13, 5-1, 5-8 Flea 3-4, 5-10 Flush fluid 2-2 Folded capillary cell 4-5 H Health and safety 1-1, 1-4 Height A-1 Help desk 1-4 Help file 1-4 Help-About 1-4 Page i MAN0318-3.0 - MPT-2 Autotitrator.book Page ii Friday, January 12, 2007 2:42 PM Index How does it do it 2-1 Humidity A-1 I Increment value 4-15 Installation C-1 Isoelectric point 4-10, 4-21 K Keeping the pH probe wet 5-3 L Large volume container 3-4 LED indicators 3-7 M Magnetic stirrer 3-4 Mains supply voltage A-1 Maintaining the pH probe 5-1 Maintenance 5-1 Maintenance schedule 5-9 Making a measurement 4-4 Making measurements 4-1 Malvern personnel 1-2 Malvern Website 1-4 Manifold assembly 3-6 Manual control dialogue 2-2, 3-11, 4-3, 4-7 Manual functions of the software 3-11 Manual measurement 2-3 Materials list B-1 Materials Safety Data Sheets 4-2 Measure-Manual 2-3 Measurement 4-1 Measurement display 2-3, 4-17 Measurement sequence 4-18 Measurement type (SOP) 4-8 Menu commands 1-3 Model number 1-4 Modifying an SOP 4-1 N Naming convention 1-3 Nitrogen purge 3-9, A-2 Note on titrant concentration 4-3 Page ii MPT-2 Autotitrator O On/off switch 3-10 On-line help 1-4 Operating temperature A-1 Operator 1-2 O-ring 5-7 Oxygen absorption 3-9 P Part number 1-1 pH buffers 5-4, 5-6, 5-10 pH calibration 3-4, 3-11, 3-14, 5-2, 5-4, 5-5, 5-9 pH concentration 4-15 pH monitor 3-11 pH monitor tab 3-14 pH point from calibration 3-15 pH probe 2-2, 3-2, 3-4, 3-10, 5-2, 5-4, 5-9 pH probe - maintenance 5-2 pH probe output from calibration (mV) 3-15 pH titration 4-8, 4-10 Pinch valve 2-2, 4-5 Pollution degree A-1 Power input 3-10 Power rating A-1 Power supply A-1 Precision 4-16 Predicted 4-13 Predicted volume 4-13, 4-16 Preparation before first use 5-3 Preparing the sample 4-5 Prime 3-11 Prime tab 3-13 Priming 4-2, 4-3, 5-9 Priming the titrant tubes 3-13 Problems 5-7 Progress bar 3-15 Pump 2-2, 3-2, 3-7, 4-7 Pump head 3-7, 5-10 Pump settings 3-12 Pump speed 4-12 Purge connector 3-9 Purge tube 3-8 MAN 0318 MAN0318-3.0 - MPT-2 Autotitrator.book Page iii Friday, January 12, 2007 2:42 PM MPT-2 Autotitrator R Rear panel 1-4, 3-2, 3-10 Recirculate between repeat measurements 4-12 Record view 4-19 Remote support 1-4 Reports 4-19 S Sample - Cell (SOP) 4-10 Sample - Dispersant (SOP) 4-10 Sample - General options (SOP) 4-10 Sample - Material (SOP) 4-10 Sample - Temperature (SOP) 4-10 Sample (SOP) 4-10 Sample buffering 4-5 Sample concentration 4-15 Sample container 2-2, 3-3 Sample exit tubes 3-5 Sample in connector 3-9 Sample out connector 3-9 Sample preparation 4-5 Sample return tubes 3-5 Sample to pump 3-9 Sample tubing 3-8 Sample tubing - cleaning 3-12 Sample volume 4-13 Sequence 4-15 Serial number 1-4 Service engineer 1-2 Settings - Pump and Stirrer 3-12 Setup 4-1, 4-2 Site requirements 1-2, A-2 Size flow cell 2-2 Size measurement - Advanced (SOP) 4-11 Size measurement - Data processing (SOP) 4-11 Size measurement (SOP) 4-10 Size measurements - connecting the cell 4-6 Sizing flowcell 4-6 Soaking solution 5-3 Solenoid valves 3-6 SOP 1-2, 2-2 SOP dialogues Measurement type 4-8 Sample 4-10 Sample - Cell 4-10 Sample - Dispersant 4-10 Sample - General options 4-10 MPT-2 Autotitrator Index Sample - Material 4-10 Sample - Temperature 4-10 Size measurement 4-10 Size measurement - Advanced 4-11 Size measurement - Data processing 4-11 Titrants 4-8, 4-11 Titration - Export 4-16 Titration - Instructions 4-16 Titration - Reports 4-16 Titration sequence 4-8, 4-14 Zeta measurement 4-11 Zeta measurement - Advanced 4-11 Zeta measurement - Data processing 4-11 Spares 5-10 Specification A-1 Standard Operating Procedure 1-2, 2-2 Standard sample container 3-4 Standby mode 3-5 Start button 2-3 Status indicator 3-5 Stirrer 2-2, 3-4, 3-10, 4-7 Stirrer flea 3-4 Stirrer settings 3-12 Stirrer speed 4-12 Storage temperature A-1 Supervisor 1-2 Syringe 2-2, 3-2, 3-6, 5-7 Syringe drive 3-6 T Temperature A-1 Titrant concentration 4-3 Titrant containers 2-2, 3-7, 4-2 Titrant indicators 3-7 Titrant name 4-12 Titrant tubes 3-5, 3-8, 3-9 Titrants 4-12 Titrants SOP 3-4 Titration - Export (SOP) 4-16 Titration - Instructions (SOP) 4-16 Titration - Reports (SOP) 4-16 Titration - Sequence (SOP) 4-14 Titration - Titrants (SOP) 4-11 Titration SOPs 4-8 Titration types 4-9 Total injected Volume 4-21 Tubing clamping ring 3-8 Tubing connection bracket 3-5, 3-8 Page iii MAN0318-3.0 - MPT-2 Autotitrator.book Page iv Friday, January 12, 2007 2:42 PM Index Tubing length - adjustment 3-8 Type of titrant 4-12 U User consumables 5-10 Using the Titrator 4-1 V Valve 3-6 VCCI acceptance D-3 Volume 4-13 Page iv MPT-2 Autotitrator W Website 1-4 What does the Titrator do 2-1 Width A-1 www.Malvern.com 1-4 Z Zeta measurement - Advanced (SOP) 4-11 Zeta measurement - Data processing (SOP) 4-11 Zeta measurement (SOP) 4-11 Zeta measurements - connecting the cell 4-5 Zetasizer Nano manual 1-1 MAN 0318