1
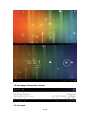
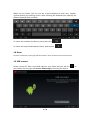
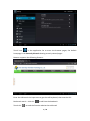
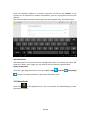
USER MANUAL
TABTRONICS QUANTUM 7
This user manual has been specially designed to guide you through the functions
and features of your device.
• Please read this manual carefully before using your device to ensure safe and
correct use.
• The descriptions in this manual are based on the default settings of your
device.
• Please keep this manual for future reference.
MENU
1.1
1.2
Chapter One (overview)
Appearance
Buttons
1.3
1.4
1.5
1.6
1.7
1.8
1.9
1.10
Open and shut down
Open and shut down standby mode
Lock and unlock the screen
Homepage information column
Text input
Reset
USB Connect
accessories
Chapter Two (Internet)
2.1
Browser
Chapter Three (Applications)
3.1
Camera
3.2
3.3
3.4
3.5
3.6
Gallery
Video
Music
Calendar
Calculator
3.7
Explorer
3.8
3.9
APK Installer
E-mail
3.10
Downloads
3.11
Sound recorder
3.12
4.1
4.2
4.3
4.4
4.5
4.6
Clock
Chapter Four ( System setting)
Wireless networks setting
Sound setting
Display setting
Application setting
Date & Time setting
Language and input setting
Chapter Five ( Attentions)
Chapter Five :Hardware configuration
1 / 22
Chapter One:Overview
1.1 Appearance
The picture above is for illustration purposes only.
1.2 Buttons
Power button
Long press the power button 2-3 seconds to open the screen
When open the tablet, short press this button to enter the off-screen state and short
press again to light up the screen
Volume
Press Volume+/- to adjust the volume
1.3 Open and shut down
Open
Long press the power button (see the appearance) 2-3 seconds, pictures will show
2 / 22
up until to the interface
Shut down
Long press the power button, then the screen shows “POWER OFF” and Click it, then
in power off dialog to select “OK” to shut down
1.4 Open and close standby mode
Open the standby mode
In boot mode, you can tap the power button, the system will into the standby mode
which can save power
Close the standby mode
In the standby mode, light tap of the power button of the device, enter the normal
state
1.5 Lock and unlock the screen
Lock
You can set the sleep time in the system of display
The system will sleep automatically and lock the screen to the standby mode if
without any inactivity when reaches the preset of standby time.
Unlock
Move the sign
Drag this
to unlock, show as below
to unlock the screen and enter the application interface
3 / 22
1.6 Homepage information columns
1.7 text input
4 / 22
When use the tablet, you can use the virtual keyboard to enter text, number,
symbols directly by touching screen. After selecting the Android input method, the
default keyboard show as below:
To switch the numbers and letters, please press this
To switch the capital and lowercase letter, please press
1.8 Reset
Press the reset button on the right side of the device, then you device will restart and reset
1.9 USB connect
Please connect PC with in-box USB cable for your tablet and you will see
your tablet, click this sign and turn on USB storage to connect your device
5 / 22
on
Turn off USB storage to disconnect your device with PC
1.9 Accessories
Item
What you can do with it
Power Adapter
Use power adapter to provide power and
charge the battery
USB Cable
Use USB cable to connect device with USB
device
User manual
Guide your use
Chapter two: Internet
2.1 Browser
Require network support before using a web browser, if there are network
supporting problems, please contact your network operator or the service provider.
Tablet’s web browser can connect to the Internet via WIFI to satisfy your business
and individual network needs
Please touch
picture:
to set up the WIFI so that can use the browser normally. See as
6 / 22
Touch here
in the application list to enter the browser pages; the default
homepage is the Recently Viewed showing recently viewed pages.
Browser supports the following features
Enter the URL-touch the input area to get the soft keyboard, then text the UPL.
Bookmark search—click this
Touch this
to add into the bookmark
to read the favorite website that collected
7 / 22
Touch this
to search the internet
Touch this
to add new browser
Touch this
to close the browser
Chapter three: Application
3.1 Camera
Touch this
in the application list to enter the camera, the views showed on
the screen and you can do the following as picture:
Camera
Click this
to get Snap shot
Click this
to set up
white balance,
scene mode,
Video
Click this
to video and do the relevant operation.
8 / 22
save
Click this
to set up
white balance,
time lapse interval,
save
3.2 Gallery
Click here
Click this
in the application list which including all the pictures
can classify the pictures by time and place. Click this
9 / 22
to enter the
camera.
Click this
to choose the album to edit or delete
Click this
to enter slides show when enter the album
3.3 Video
Touch this
to the video play
There are some control areas at the bottom after you enter the video
10 / 22
3.4 Music
Touch here
to the music player. Music can be played by artists or album
classification.
This page displays the songs alphabetically.
Click the songs you want to listen and get into selected state to play.
Click on the now playing will playing being played album page; there will be lyrics
shows under the page right
Play
Click one song to play
11 / 22
list
random play
repeat
lyrics
3.5 Calendar
Touch this
to calendar, for the first time into the calendar interface will
remind to add the Google account, which facilitates more calendar operation, if do
not need to set, click on the not now, otherwise to set up Google account settings,
set into the calendar interface, the default page shows the months.
Day view: long press to the event to rebuilt, view, edit, and delete; Click on the blank
area can set up new events; long press the blank area, you can built new events or
display/not display the lunar day view.
Week view: Long presses the event to rebuilt, view, edit, and delete events; long
press the blank area you can rebuilt events or display/not display the lunar weeks
view.
Month view: Long press date to build new calendar items or display/not display the
lunar month view
Agenda: list all events click or read the details.
In any views, when you switch to other date, week or month, all can be back to today
or week or month now y touching “today” button
12 / 22
3.6 Calculator
Touch here in the application list to get into the calculator
3.7 Explorer
Touch here
in the application list, it supports the files mutual copy in this two
places SD Card, internal memory and USB
13 / 22
Touch the button
Touch this
to do multi operation and then edit the files
to edit te file including cut/copy/paste/delete
For Copy, in the files list, long press the file when it turn to multi operation option,
click Copy, click
paste
to choose where to put the file, abd then click this
to
3.8 APK Installer
Touch here
in the application list, it will install, unload the APK file
automatically. It searches the APK file from SD Card, Internal Memory
Install
Click Install to install application in storage path from Internal Memory and SD card
Manage
Click Manage in the APK Installer interface, click the application that need to be
managed to do Launch, Export, Uninstall
3.9 E-mail
Require the internet support before using e-mail, if there are problems in network
supporting; please contact your network operator
Add account
14 / 22
If you are the first time to use email, get into a mailbox interface directly or set up an
account according to instruction.
If you want to add more mailboxes, click Settings on the top of the page to add more
mailboxes, and then select Add account.
Draft e-mail
In inbox page, you can click
this on the right page top to draft mail quickly.
In the draft mail page, you can:
Add mail recipients quickly.
15 / 22
Enter the recipient address in recipient input box or click on the contact in the
contact list of recipients to choose mail address; you can copy/close to sent input
address
Write email subject and text content (the text area support copy, share operation)
Add attachment
Add attachments from the document management, when it succeeds, the name will
show one “New e-mail” page; you can click to select to open or remove them
Reply, forward mail
Click the right page preview area of the toolbar reply
, relay all
, forwarding
choices. The base operation is same with the draft e-mail.
3.10 Downloads
Click here
in the application list; you can preview the downloading or done
document contents
16 / 22
Click download file to stop or delete the download contents
3.11 Sound Recorder
Click here
Tap
in the application list to record sound
to start recording
17 / 22
Tap
to stop recording
Tap
to play recording
3.12 Clock
Click here
in the application list to access clock interface
Tap set alarm to set up clock alarm
Chapter Four: System setting
Click here
to enter the system setting interface
18 / 22
4.1 Internet setting
This setting module includes: the wireless and network Settings
The wireless local area network Settings
Open wireless LAN switches, the system will scan available wireless network
automatically and display the wireless local area network in the list
Among them, if the local area networks have the sign
behind it, it represents
the network has been encryption, it needs to enter the password to connection. The
sign
represents the networks do not need a passwordm can be connected
directly.
You can choose the network from the list you want m click it to connect directly, also
you can click the advanced, then click connected to network; you can also select
add wireless local area network to add by hand
Network notice: open the switch, it will notice if there any opne networks
The wireless local area network certificate: the wireless local area network loading
and management.
4.2 Sound setting
In Sound setting, you can choose mute switch which can get more detailed settings if
you need. Click the volume setting can set up the notice, the media and the alarm of
volume and choose the prompt operation sound and the bell and software disk boot
switch voice
19 / 22
4.3 Display setting
Display settings contains: Brightness, Wallpapers Settings, Automatic rotating
Settings, Dormancy time and Font size
Brightness
The user can adjust brightness manually to get the lightness you want.
Wallpaper Settings
In the wallpaper setting, you can set up the wall paper and dynamic wallpaper; the
wallpaper can be chosen from gallery
Dormancy time
When the screens in light state a period of time, it will automatically lock to save the
power if without any operations.
Font size
You can set up the font size according to individual’s favorite, there were
respectively: small, ordinary, big, huge.
4.4 Application setting
In the application setting, you can manage the running services and access rights
management and development but only for developer
Application management
In this setting, it is easy to manage and delete some applications that have been
installed.
First, get into the application list, click the according to name sort buttons to order
the alphabet and number; click the all menu to scan the running program or
programs that provide by a third party software developers.
Click on an application, you can see the application’s relevant information to clear
the cache, unload programs, clear the default value or forced to stop operation, etc
Running services
In this setting, you can end and set up some programs that are running
Access management
In this setting, by using the opening or prohibition to manage the applications to
access content permissions
4.5 Date & Time setting
In this setting interface, you can set up your system time and series options.
Time setting
You can use automatic time from the network, to choose the time zone, to set
specific date and time and display format in time setting
4.6 Language and input Setting
20 / 22
In this setting interface, you can choose the language you want
Input method
In here the input methods can be set by users, you can add the words in the
dictionary or to delete
Android keyboard
You can set up automatic capital function of opening or closing
Chapter Five:
Attentions
5.1 Please do not put your device in high temperature, moisture or dust place; the
tablet is not waterproof
5.2 Avoid falling or violent collision, do not violently shake the touch screen,
otherwise, it could lead to damage or display unnormal.
5.3 If system shutdown automatically, bootable again soon after the shutdown.
5.4 Please charge the tablet regularly if not use it for long time to avoid the damage
caused by the excessive consumption from battery.
5.5 Do not disassemble or use alcohol, thinner or benzene class to swab product
surface
5.6 Please do not use the tablet when driving or walking in the street, otherwise it
may lead an accident
5.7 Please choose the appropriate volume, if had tinnitus, please lower the volume
or stop using
5.8 Memory space available dishonest nominal for the android system itself takes up
part of the memory space and the operation of the program will also take up space if
you open them
5.9 Storage capacity that dishonest nominal for android system occupies about
hundreds of MB storage capacity, also in order to install the software needs, the
system must lay off certain storage capacity, so the actual usable space and nominal
space have deviation
5.10 When CPU in high-speed operation, especially in 3D games or in long time
playback high-definition video, the fuselage will have the phenomenon of fever
21 / 22
Chapter Five :Hardware configuration
Size: (long x width thick) :192x 115 x 11 mm
CPU processor speed: Rockchip 3066 Dual Core 1.5GHz
GPU:Mali-400, with 3D accelerator
This machine capacity: 4 G
Memory: 1GB
Storage card: TF 128M-32 G
Screen: 7’’ capacitive multi-touch screen
Resolution: 800 * 480 pixels
Battery type and capacity: rechargeable polymer battery: 3000 math
USB: high speed USB2.0 micro, OTG connecting peripherals
Gravity sensor: 3D
The tape: built-in microphones head
Software configuration
Operating system: Android 4.1.1
Video: AVI,MPG,MKV,RM,RMVB,MP4,MOV,VOB,DAT,FLV,TS,3GP,WEBM(VP8)etc
Music: MP1,MP2,MP3,WMA,WAV,OGG,OGA,APE,FLAC,AAC,M4A,3GPP
Pictures: JPG,BMP,PNG etc
E-book: TXT, EPUB, PDF,WORD,EXCEL, POWERPOINTS
22 / 22