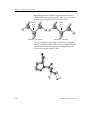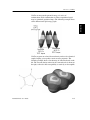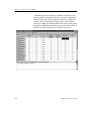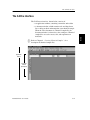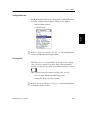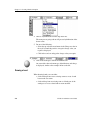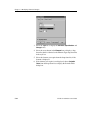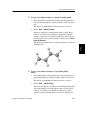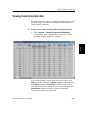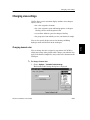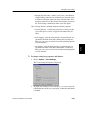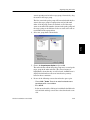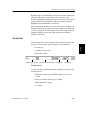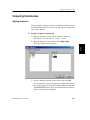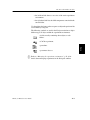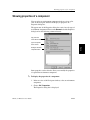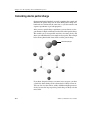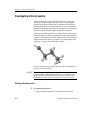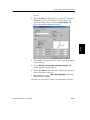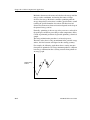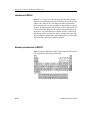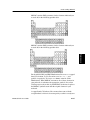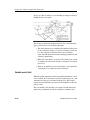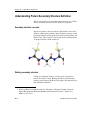
1
BIOMEDCAChe® 6.0 WINDOWS USER GUIDE Copyright statement © 2000-2003 Fujitsu Limited. All rights reserved. © 1989-2000 Oxford Molecular Limited. All rights reserved. This document may not be used, sold, transferred, copied or reproduced, in any manner or form, or in any medium, to any person other than with the prior written consent of Fujitsu Limited. Published by Fujitsu Limited. All possible care has been taken in the preparation of this publication but neither Fujitsu Limited nor Oxford Molecular Limited accepts any liability for any inaccuracies that may be found. Fujitsu Limited reserves the right to make changes without notice both to this publication and to the product it describes. This version of the User Guide was published in January 2003. FJ1290-04 ii BioMedCAChe User Guide Contents Support and further information iv Introduction to the User Guide 1-1 The BioMedCAChe documentation set New users About this user guide Conventions in this user guide Navigation aids 1-2 1-3 1-4 1-6 1-8 Introduction to CAChe 2-1 Overview of CAChe Introduction to computer-aided chemistry The advantages of CAChe Performing experiments with CAChe Computational chemistry and CAChe 2-2 2-7 2-8 2-12 2-20 CAChe Basics 3-1 Starting the CAChe workspace The CAChe interface The application window The workspace Using CAChe Using CAChe Help Quitting CAChe 3-2 3-3 3-4 3-7 3-16 3-42 3-44 Creating Chemical Samples 4-1 Working with chemical sample files Drawing a molecule in the workspace Completing your molecule Perfecting your molecule Saving files Printing files 4-2 4-4 4-9 4-10 4-16 4-21 Modifying Chemical Samples 5-1 Modifying atoms and bonds Selecting workspace objects Changing atom and bond properties 5-2 5-3 5-17 Viewing Chemical Samples 6-1 CAChe display options Using CAChe model types Changing the appearance of atoms BioMedCAChe User Guide 6-2 6-4 6-8 iii Hiding atoms Changing the appearance of bonds Hiding bonds Viewing selection only Coloring by molecules Viewing multiple windows Viewing chemical sample data Changing view settings Saving settings Building crystal structures 6-18 6-21 6-28 6-30 6-31 6-32 6-33 6-37 6-51 6-54 Manipulating Molecules 7-1 Using the manipulation tools Manipulating portions of your molecule Using faster motion mode Duplicating molecules Deleting portions of your molecule Fusing ring structures Grouping atoms 7-2 7-9 7-12 7-13 7-18 7-21 7-24 Investigating Molecular Geometry 8-1 Working with chiral centers Mirroring a molecule Superimposing molecules Specifying angles and distances Working with geometry labels Locking geometry labels Locking atoms Disabling locked geometry Working with search labels 8-2 8-5 8-6 8-12 8-19 8-28 8-31 8-34 8-36 Manipulating Biomolecules 9-1 Viewing biomolecules Working in the Sequence View window Changing biomolecules Comparing biomolecules 9-2 9-10 9-23 9-31 Performing Workspace Experiments 10-1 Introduction to workspace experiments Setting up a workspace experiment Running an experiment Viewing active experiments Viewing server information Size and element limitations Troubleshooting experiments iv 10-2 10-4 10-17 10-26 10-28 10-30 10-31 BioMedCAChe User Guide Viewing experimental results Viewing log files and output files 10-35 10-39 Using the Procedure Editor 11-1 The Procedure Editor Starting the Procedure Editor The Procedure Editor interface Managing the experiment environment Showing properties of a component Modifying a procedure Editing the settings of a compute engine Creating experiments Expert modification Creating a group procedure package Exporting environment components Quitting the Procedure Editor 11-2 11-3 11-4 11-8 11-13 11-17 11-23 11-25 11-30 11-31 11-37 11-38 Using ProjectLeader 12-1 Introduction to ProjectLeader Starting ProjectLeader Using the ProjectLeader workbook Opening a ProjectLeader project Adding chemical samples Viewing sample properties Running a ProjectLeader experiment Using scatter plots Changing workbook display options Viewing cell information Printing files Exporting a ProjectLeader worksheet Saving a ProjectLeader project Quitting ProjectLeader 12-2 12-4 12-6 12-10 12-11 12-15 12-18 12-25 12-31 12-37 12-38 12-41 12-42 12-43 Optimization and Energy Calculations 13-1 Optimizing chemical samples Selective optimization Viewing optimized structures Calculating current energy 13-2 13-5 13-9 13-10 Investigating Low-energy Conformations 14-1 Generating energy maps Viewing map files 14-2 14-11 Investigating Electron Distribution 15-1 Investigating electron density surfaces BioMedCAChe User Guide 15-2 v Generating an electrostatic potential surface Investigating molecular orbital energies Viewing a surface 15-6 15-7 15-9 Investigating Atom and Bond Properties 16-1 Calculating atomic partial charge Calculating bond properties Viewing atom and bond properties 16-2 16-4 16-7 Investigating Reactions 17-1 Investigating transition state structures Investigating reaction path structures 17-2 17-4 Investigating Spectra 18-1 Investigating infrared spectra Investigating UV-visible spectra 18-2 18-6 Investigating Biomolecules 19-1 Investigating peptide conformations Creating a homology model of the MC4R Docking Agouti-Related Protein into the MC4R 19-3 19-14 19-20 CAChe Computational Applications 20-1 Understanding Mechanics Understanding Dynamics Understanding MOPAC Understanding Tabulator Understanding DGauss Understanding CONFLEX 20-2 20-7 20-11 20-22 20-23 20-34 CAChe BioComputations 21-1 Understanding Residue Names Understanding Protein Secondary Structure Definition Understanding Dihedral Angles for Building Peptides Understanding Sequence Property Predictions 21-2 21-4 21-6 21-8 Keyboard and Toolbar Shortcuts A-1 Keyboard shortcuts Toolbar shortcuts A-2 A-6 CAChe File Management B-1 CAChe folders and files B-2 Index vi BioMedCAChe User Guide Support and further information For support and further information about other products available from Fujitsu Limited, please contact your local Fujitsu office: telephone and e-mail information is listed below. Japan contact: Fujitsu Limited Life Science & Material Science Division 9-3, Nakase 1-Chome Tel: +81 43 299 3681 Mihama-ku, Chiba City Fax: +81 43 299 3019 Chiba 261-8588 e-mail: [email protected] Japan http:///www.CACheSoftware.com North America contact: CAChe Group Fujitsu America Inc. Tel: +1 503 531 3600 Fax: +1 503 531 9966 e-mail: [email protected] http://www.CACheSoftware.com Europe contact: FQS Poland Sp. z o.o. Palac Pugetow ul. Starowislna 13-15 31-038 Krakow Poland BioMedCAChe User Guide Tel: +48 12 429 43 45 Fax: +48 12 429 61 24 e-mail: [email protected] http://www.fqspl.com.pl vii viii BioMedCAChe User Guide 1 Tutorials Basics Using Chapter 2, “Introduction to CAChe”, introduces computer-aided chemistry and CAChe, including information about using CAChe to build, view, and analyze chemical samples; running experiments from CAChe using both the workspace and ProjectLeader; and an overview of the computational chemistry applications, including CONFLEX and MOPAC. Customizing Chapter 1, “Introduction to the User Guide”, describes the conventions used in this user guide and outlines the content of each user guide part. Understanding The following chapters introduce you to the structure of this user guide and provide an overview of BioMedCAChe. Appendices Part one Introduction Introduction to CAChe 1 Introduction to the User Guide Introduction 1 Overview This chapter describes: the structure of this user guide Tutorials • • the text styles, icons, and navigation aids used throughout the manual. Contents The BioMedCAChe documentation set 1-2 New users 1-3 About this user guide 1-4 Conventions in this user guide Navigation aids 1-6 1-8 Appendices Understanding Customizing Using Basics Understanding the structure and layout of the user guide, and the conventions used throughout, will aid you in the location of specific information. Chapter 1 - Introduction to the User Guide The BioMedCAChe documentation set The BioMedCAChe documentation set consists of: • • the BioMedCAChe User Guide both on-line and printed • • • the CAChe on-line Help the BioMedCAChe Getting Started booklet both on-line and printed release notes for new software versions installation notes. This User Guide covers the functionality of BioMedCAChe, explaining how to use BioMedCAChe, and some of the underlying concepts. 1-2 BioMedCAChe User Guide New users The tutorials are worked examples that show how to use BioMedCAChe to perform structure-guided drug discovery. In the tutorials, you learn how to clean a protein from the Protein Data Bank, analyze protein and protein-ligand interactions, display proteins as ribbons, visualize active sites, align sequences, and dock novel ligands into active sites. Tutorials If you are using BioMedCAChe for the first time, we recommend that you work through the tutorials. These can be found in the Getting Started booklet or from the CAChe menu Help | Online Books | CAChe Getting Started. Introduction New users Appendices Understanding Customizing Using As you use CAChe, you may find it useful to refer to Part 1, “CAChe Basics”, for general details on how to use CAChe. Basics For a guide to using CAChe on a task by task basis, refer to Part 3, “Using CAChe”. BioMedCAChe User Guide 1-3 Chapter 1 - Introduction to the User Guide About this user guide This user guide describes how to use BioMedCAChe to build molecules and perform experiments on chemical samples. It explains how to use the program and gives information necessary to understand the way the program works. The user guide is divided into parts, which are outlined below. Introduction This Introduction describes how computer-aided chemistry and CAChe can help you perform experiments on molecules. It outlines the properties that you can investigate with CAChe, and the procedures that you can apply to an experiment, as well as an overview of the experimental process. CAChe Basics CAChe Basics introduces the CAChe interface and describes how to use interface components such as menu options, toolbar buttons, and dialog boxes. This part also describes the tools in the CAChe workspace, which you use to build and manipulate a molecule. Using CAChe Using CAChe describes in detail how to use CAChe to draw and manipulate a molecule, display a molecule in different ways, measure molecular geometry, and perform experiments on a sample to investigate low-energy or transition state structures, and to discover various electronic properties. Understanding CAChe Understanding CAChe contains a detailed explanation of the computational applications in CAChe and the difference between these applications in their approach to experiments on chemical samples. 1-4 BioMedCAChe User Guide About this user guide Appendices Index Appendices Understanding Customizing Using Basics Tutorials There is a fully comprehensive index of the BioMedCAChe User Guide at the end of the manual. Introduction The appendices list keyboard shortcuts, toolbar button functions, and the files that are added to your computer when you install your BioMedCAChe product. BioMedCAChe User Guide 1-5 Chapter 1 - Introduction to the User Guide Conventions in this user guide Before using this user guide, you should be familiar with the following: Text styles Different text styles are used throughout this user guide in order to emphasize the following: Items on the interface that you need to select, such as buttons, appear as follows: Select Start Menu items are described as follows: Choose FileOpen. i.e., Choose File from the menu bar, then choose the Open menu option from the File menu. Text that you need to type in, or text that is displayed in a window, appears as follows: cache@localhost Icons The following symbols appear throughout the user guide ª Indicates step by step instructions for a task. NOTE Indicates a note. TIP Indicates a tip, hint, or shortcut. : Indicates a reference to another part of the user guide, or another book. 1-6 BioMedCAChe User Guide Conventions in this user guide Appendices Understanding Customizing Using Basics Tutorials Introduction Refer to Chapter 3, “CAChe Basics”, for a description of the components of the CAChe interface, and an explanation of the conventions used for mouse actions such as choosing menu options, selecting tools, and using dialog boxes. BioMedCAChe User Guide 1-7 Chapter 1 - Introduction to the User Guide Navigation aids There is a full table of contents for this user guide on page iii. As explained earlier, this user guide is divided into parts, where each part contains one or more chapters. Each chapter has a short table of contents and an overview that explains exactly what information is in the chapter. The user guide contains many cross-references that direct you to further relevant information on a topic. However, where possible, information on any particular topic is grouped together, ensuring that you can easily locate the information that you need. There is a comprehensive index at the end of the user guide. 1-8 BioMedCAChe User Guide 2 Introduction to CAChe Introduction 2 Overview using CAChe to build, view, and analyze chemical samples • running experiments from CAChe using both the workspace and ProjectLeader • an overview of the computational chemistry applications, including CONFLEX and MOPAC. Contents Calculated versus measured properties 2-17 Performing experiments with CAChe 2-20 Workspace experiments 2-21 ProjectLeader experiments Using the Procedure Editor 2-25 2-27 Computational chemistry and CAChe 2-28 Introducing the computational applications 2-28 Appendices Overview of CAChe 2-10 Introduction to computer-aided chemistry 2-15 The advantages of CAChe 2-16 Understanding Customizing Using the accuracy of CAChe calculations compared with measured experimental data Basics • • Tutorials This chapter introduces computer-aided chemistry and CAChe, including: Chapter 2 - Introduction to CAChe Overview of CAChe BioMedCAChe is a computer-aided molecular design (CAMD) modeling tool for the Microsoft® Windows® 98, Windows® Me, Windows® XP, or Windows® 2000 operating systems. CAChe can be used to discover molecular properties and energy values. You can also draw and model molecules and perform calculations on a molecule. BioMedCAChe and BioCAChe provide insight into biomolecule structure, properties and reactivity, including: • similarities between potential drug molecules • structure activity relationships (QSAR) • visualization of experimental structures (e.g. PDB and crystal structures) • superimposition of lead molecules and quality of superimposition • drug receptor interactions • bioavailability (e.g. logP) • molecular shape • electrostatic interactions • design of stereo-specific candidates • location of all low energy conformations (CONFLEX) • automatic sequence alignment • Crevice maps suggest binding sites • location of binding sites • reactivity surfaces • design of ligands inside a binding site pocket • accessible surfaces • partial charges • IR spectra • transition states • H-bond analysis • ribbon of proteins • Rule-of-5 screening While many questions posed by biologists and medicinal chemists can be solved by using only one of these capabilities, the availability of all these working together in CAChe is invaluable. 2-2 BioMedCAChe User Guide • • drawing tools to create your molecule’s atoms and bonds • selection tools to modify all or part of a structure after it has been built. manipulation tools to rotate, scale, and move a chemical sample in three dimensions You can rotate, enlarge, and move a chemical sample around the workspace to view a molecule more closely, both before and after experimenting. CAChe shows most experimental results graphically. CAChe can quickly and easily correct the geometry, valency, and hybridization of your chemical sample. BioMedCAChe User Guide 2-3 Understanding Space filling model Appendices Ball & cylinder model Customizing Using You can apply a selection of modeling styles to your sample to view its structure in many different ways. The following example shows two different ways that you can view the same molecule in CAChe. Tutorials CAChe provides the following tools: Basics You can draw the atoms and bonds of a molecule using the CAChe tools, copy a molecular structure from the fragment library of samples supplied with your CAChe product, or you can copy and paste a sample structure from another application, such as ChemDraw or Isis/Draw. You can manipulate this chemical sample on your computer screen, then perform experiments on it. Introduction Overview of CAChe Chapter 2 - Introduction to CAChe The following illustration shows a molecule before and after a CAChe optimization experiment to lower the steric energy of the molecule using calculations from classical mechanics. Strained bond angle Steric energy = 13.3 kcal/mol Relaxed bond angle Steric energy = 1.5 kcal/mol You can use CAChe to superimpose one molecule on another to highlight structural differences. The following example shows the capoten molecular structure (transparent) superimposed on the x-ray-derived capoten structure (solid). . 2-4 BioMedCAChe User Guide Overview of CAChe Customizing Appendices Understanding CAChe can generate colored electron density surfaces for a chemical sample, helping you to predict certain reactive properties. The following example shows a line drawing of a furan molecule on the left. The electron density surface for the same molecule is shown on the right, colored to show susceptibility to attack by an electrophile. Using Basics Tutorials Introduction CAChe can measure the potential energy of a series of conformations. Each conformation is either not optimized (rigid map) or optimized (optimized map). The following example shows a three-dimensional rigid energy graph. BioMedCAChe User Guide 2-5 Chapter 2 - Introduction to CAChe CAChe ProjectLeader can help you automate calculations, track chemical samples, and maintain a history of work accomplished. The following is part of a ProjectLeader table from a quantitative structure activity relationship (QSAR) analysis of the antibiotic activity of a number of nitrofurans.This table can be used to predict the activity of additional nitrofurans. One outcome of this analysis is identification of the atoms that are responsible for activity. 2-6 BioMedCAChe User Guide Introduction to computer-aided chemistry Some experiments produce computer-simulated representations of the calculated properties. For example, you can view an electron density surface that predicts reactivity sites superimposed on your molecule. Other experiments display a three-dimensional energy graph next to a series of conformations for a molecule, so you can view the relationship between energy and molecular geometry. Animate the series of conformations along an axis of the graph to compare lowenergy structures that may be separated from each other by high energy barriers, or rotate the graph along any axis to view its energy values more clearly. Tutorials Basics Appendices The experiments in computer-aided chemistry use mathematical models derived from computational chemistry to calculate molecular properties and geometries. The next section describes how CAChe applies these models during the experimental process. Using You can then perform experiments on the molecule, where experiments consist of calculations using classical and quantum mechanical theories. The calculations explore the characteristics of your chemical sample, predicting properties such as electron distribution, and generating conformations that possess low potential energy or heat of formation values. Customizing You can display the molecule as a simple line drawing, as threedimensional spheres and cylinders, or as a combination of many different modeling styles. Use computer-aided chemistry to measure the geometry of a structure precisely and lock atom distances and bond angles at any value you require. Understanding Computer-aided chemistry enables you to create a model of a molecular structure on a computer screen. You can move the model around the x, y, and z axes of the computer screen, and view the structure from many different angles and perspectives. Introduction Introduction to computer-aided chemistry BioMedCAChe User Guide 2-7 Chapter 2 - Introduction to CAChe The advantages of CAChe CAChe provides you with a three-dimensional modeling tool that helps you to visualize a structure. By simply rotating and examining a model of a molecule, you can gain a new perspective and view your sample from every conceivable angle, with unmatched precision. You can zoom in on a tiny portion of your molecule, or view it from a distance. Three-dimensional ball and stick models, space-filling models, and shaded surfaces are standard CAChe modeling tools. Chemists who use x-ray data for structure analysis want to simulate manipulating the models in space. Superimposing related samples helps compare the structural differences. Docking one sample to another can help you see steric interactions, hydrogen bond possibilities, or molecular orbital overlap. CAChe provides all these modeling tools. Experimental results are often saved in graphical form, either superimposed on the image of the original molecule, or displayed next to the molecule as a threedimensional graph, or series of structures that you can animate. Geometry optimization If you need to analyze a structure of unknown geometry, the best place to start is with an exploration of low-energy conformations of the chemical sample. Reactions usually proceed from the lowest energy conformation, or sometimes from any of several low-energy conformations with low barriers for interconversion. CAChe makes it easy to generate and analyze any number of low energy geometries. Electronic properties Sometimes the characteristics of a molecule can be predicted on the basis of some of its physical properties. Important properties estimated by CAChe include partial charges, bond order, electron density distribution, and molecular orbital shape. Refer to Chapter 10, “Performing Workspace Experiments”, for a complete list of the properties computed by CAChe. 2-8 BioMedCAChe User Guide The advantages of CAChe Modeling reaction pathways While computer-aided chemistry is a tool that can help you in many ways, like all tools, it has some limitations. CAChe was designed to help skilled experimental chemists explore questions that can be addressed by computational chemistry. Your chemical intuition will help you compose the right questions and CAChe will help you interpret the answers. Even though CAChe accurately solves mathematical equations to predict chemical properties, the predicted properties do not always agree with measured properties. The disagreements arise because the mathematical model is a simplification of the real world. You can both gain confidence in the accuracy of CAChe predictions, and improve the accuracy of your predictions, by calibrating predicted results with known data. BioMedCAChe User Guide 2-9 Understanding Calibrating CAChe Appendices Calculated versus measured properties Customizing Using The key to the success of modeling a reaction is locating a low energy pathway from reactants to products. CAChe models transition states to help clarify the choice between alternative pathways. By comparing computed activation energies, the selection of alternative modes of attack becomes apparent. Animation of a molecule following a predicted pathway may reveal unexpected conformational or electronic changes. Tutorials Because molecules are not static, it may be necessary to simulate motion to understand some problems. This approach is most frequently used to model the changes in shape of macromolecules. Basics Simulation of motion–dynamic models Introduction Graphical displays make it easier to interpret the significance of a property, and graphical comparisons are especially useful. By making it relatively easy to obtain graphical displays of a variety of electronic properties, CAChe can help you explore molecular properties and generate new ideas and draw conclusions. Chapter 2 - Introduction to CAChe The difference between calculated or measured values of a property and the “true” or “exact” value are referred to as ‘error’. Errors in calculated results are not the same as experimental errors; there is a fundamental difference. Experimental errors generally fluctuate randomly about the “true” value. The average of a large number of measurements gradually approaches the “true” value. Errors in computational methods arise because the computational method is based on a generalized model of the real world. Errors in a particular computational method are systematic, not random. Exploiting these systematic differences makes it possible to predict properties more accurately for particular classes of chemical samples by using experimental results to calibrate the calculated predictions. The calibration holds true for other samples in the same class. So how do you calibrate CAChe? Simply plot experimental data from similar chemical systems against calculated results and fit the plot. Level of accuracy Computer-aided chemistry matches a mathematical model to your chemical sample. The following table shows the level of accuracy that you can expect when you use models of molecular structures and computational chemistry. Keep in mind that even the most accurate experimental techniques are challenged to measure bond lengths with greater accuracy than 0.002Å. Molecular Semi-empirical a Mechanics (MM2) Quantum Mechanics (PM3)b 2-10 Bond lengths ±0.005Å 0.036Å Bond angles ±1° ±3.9° Dihedral angles ±5° ±14.9° Heats of formation ±0.7 kcal/mol ±7.8 kcal/mol BioMedCAChe User Guide Appendices Understanding Customizing Using Basics Tutorials a. N. L. Allinger, comments made during a lecture at the QCPE Workshop on semi-empirical and ab initio techniques, July 1986, at the University of Oxford, England. b. James J. P. Stewart, J. Comp. Chem., 1989, 10, 209–220. Introduction The advantages of CAChe BioMedCAChe User Guide 2-11 Chapter 2 - Introduction to CAChe Performing experiments with CAChe The following process is a summary of how to run an experiment in CAChe : 1. Build your molecule in a chemical sample file and view it from different perspectives by moving it around the screen, rotating it in three dimensions, and scaling it. CAChe uses chemical sample (.csf) files to display and save molecules and associated data. After you have created a new chemical sample file in the workspace, the menu and workspace will display options to modify and manipulate the molecular structure. You can view your molecular structure from any angle. 2. Review what you know about your chemical sample and what you want to learn. A good problem-solving technique is to write down everything you know about a problem before trying to solve it. Then make a list of the properties you want to discover/uncover. You could ask yourself many questions about your particular project. It isn’t the answers you possess at the moment that are important, but the fact that you have looked at your problem closely enough to know what answers will help you. 3. Based on your chemical sample and the properties you are interested in, run a CAChe experiment to generate the desired data. In choosing experimental settings, remember that in most cases, the standard settings are a good place to start. Refer to “Introducing the computational applications”, p 2-20, for an overview of the computational applications. Refer to Chapter 11, “Using the Procedure Editor”, for details about creating experiments and modifying procedures. Refer to Chapter 20, “CAChe Computational Applications”, for more detailed information about using procedures other than the standard settings. 2-12 BioMedCAChe User Guide Performing experiments with CAChe Other experiments produce a separate file, such as a map file, where you can view and analyze experimental data in the form of three-dimensional graphics which can be manipulated in the same way as a molecule in a chemical sample file. For example, you could animate a series of low-energy conformations while viewing the corresponding value on an energy graph, or rotate the graph around the x, y, and z axes. Tutorials Some experimental results can be viewed from the chemical sample file. For example, properties such as atomic partial charge or bond strain can be viewed by coloring or scaling atoms and bonds. Isosurfaces representing electronic properties can be superimposed on the molecule in the chemical sample file. Basics 4. Once you have finished running experiments, take a look at the results. Introduction You can perform experiments on a chemical sample and its conformation, or on an atom or bond. You can also discover a transition state and reaction path for a chemical reaction between two samples. Using 5. Use what you have learned to plan new experiments or create new chemical samples. Workspace experiments You can use the the CAChe workspace to build and view your molecule and its properties and investigate molecular geometry. When you perform an experiment from the workspace, you can choose to investigate the properties of the following: BioMedCAChe User Guide a chemical sample Appendices • • • Understanding Customizing Refer to Chapter 10, “Performing Workspace Experiments”, Chapter 11, “Using the Procedure Editor”, and Chapter 12, “Using ProjectLeader”, for a detailed description of the experimental process in CAChe . an atom a bond 2-13 Chapter 2 - Introduction to CAChe • • a chemical sample conformation a chemical reaction. Chemical sample experiments CAChe can perform a variety of experiments on a chemical sample from the workspace, including: 2-14 • Optimized geometry — optimizes the geometry of your chemical sample using procedures from either classical molecular mechanics, or semi-empirical quantum mechanics. Procedures that use classical methods are the fastest and usually give good results. • UV-visible transitions — generates a UV-visible spectra for a molecule, created by electron transition between molecular orbitals as electromagnetic radiation in the visible and ultraviolet (UV-visible) region is absorbed by the molecule. • Heat of formation — calculates the energy of a chemical sample at a geometry-optimized energy minimum. • Current energy — calculates the energy of a chemical sample at its current geometry. • Electron density — generates an electron density isosurface for an electron probability density of 0.01 e-/Å3. The surface is colored to reflect the electrostatic potential at every point on the surface. • HOMO and LUMO — calculates the energies and shapes of the HOMO and LUMO of your chemical sample using a quantum mechanical application. • All molecular orbitals — generates the shapes and energies of all of the Molecular Orbitals (MOs) in your chemical sample. • Susceptibility (electrophilic, nucleophilic, and radical) — creates a three-dimensional surface superimposed over your chemical sample that indicates areas that are vulnerable to an attack by electrophiles, nucleophiles, or radicals. BioMedCAChe User Guide Performing experiments with CAChe Refer to Chapter 15, “Investigating Electron Distribution”, for further details about the other chemical sample experiments in the preceding list. Refer to Chapter 18, “Investigating Spectra”, for further details on infrared and UV-visible spectra experiments. Introduction Refer to Chapter 13, “Optimization and Energy Calculations”, for further details about optimized geometry. • Atomic partial charge — calculates atomic partial charges for every atom in your chemical sample whenever you run an experiment that includes a semi-empirical quantum mechanical procedure. Basics CAChe performs the following experiment on an atom from the workspace: Tutorials Atom experiment • Bond order — determines the actual bond order of each bond in your chemical sample using semi-empirical quantum mechanical methods. • Bond strain — a purely classical mechanical quantity, calculated every time a classical mechanical calculation is carried out. Refer to Chapter 16, “Investigating Atom and Bond Properties”, for further details. BioMedCAChe User Guide 2-15 Understanding CAChe performs the following experiments on a bond from the workspace: Appendices Bond experiments Customizing Using Refer to Chapter 16, “Investigating Atom and Bond Properties”, for further details. Chapter 2 - Introduction to CAChe Chemical sample conformation experiments CAChe performs the following experiments on a chemical sample conformation from the workspace: • Rigid map — generates a potential energy map of conformations determined by geometry search labels in the sample for each structural element you want to vary, with structures for each map point not optimized. • Optimized map — generates a potential energy map of conformations determined by geometry search labels in the sample for each structural element you want to vary, with structures for each map point optimized. • Sequence of conformations —generates a collection of low-energy conformations by sequentially searching an unlimited number of geometry labels. The resulting map file contains local energy minima, but does not offer information about the energy barriers between them. • Dynamics trajectory — generates a trajectory of a chemical sample in random thermal motion by randomly adding kinetic energy to each atom. Motion is induced that can overcome small barriers to lower energy structures. Refer to Chapter 14, “Investigating Low-energy Conformations”, for further details. Reaction and transition state experiments CAChe performs the following experiments from the workspace on reaction and transition state structures produced by a chemical reaction: • 2-16 Map reaction — generates a potential energy map of conformations determined by geometry search labels in the sample for each structural element you want to vary, with structures for each map point optimized. BioMedCAChe User Guide • Refine transition state — refines the structure and energy of a transition state structure using a minimize gradient calculation. • Verify transition state — calculates a transition state structure’s vibrational transitions, where a single negative vibration confirms a true transition state. • Find reaction paths — produces a map file containing the structures a chemical sample in a transition state geometry will pass through on the way to the reactant or product structures. Refer to Chapter 17, “Investigating Reactions”, for further details. Tutorials Search for saddle — calculates a saddle point (transition state) structure from a reactant and a product molecule of a chemical reaction. Basics • Introduction Performing experiments with CAChe Refer to Chapter 12, “Using ProjectLeader”, for further details on starting ProjectLeader, and ProjectLeader experiments and capabilities. Use ProjectLeader to: • BioMedCAChe User Guide perform an experiment on several chemical samples at once (you can experiment on only one chemical sample at a time using the workspace) 2-17 Customizing Understanding ProjectLeader is a separate application accessible from either the Windows Explorer, or the Start menu on the Windows taskbar. Appendices ProjectLeader is often the best place for a scientist to start to plan experiments. You can use CAChe ProjectLeader to perform calculations on several chemical samples at one time, or carry out statistical analyses on chemical samples, including calculations based on customizable equations. Using ProjectLeader experiments Chapter 2 - Introduction to CAChe • perform statistical analyses on experimental results, including multiple linear regression, forward and reverse stepwise regressions, and customizable algebraic equations • view the values of experimental calculations for several chemical sample files at the same time • create scatter plots of the results of experiments and analyses to view trends in your data. Viewing and analyzing columns of experimental data for several chemical samples at once enables you to establish mathematical relationships between one set of data and another, thus aiding: • the process of calibration by comparing the results of measurements on specific instruments and the known standard results • the calculation of quantitative structure activity relationships (QSAR) between molecular structure and pharmacological activity, and quantitative structure property relationships (QSPR) between molecular structure and properties such as boiling points, octanol-water partition coefficients, and dipole moments. You can use ProjectLeader to perform a variety of experiments, such as: 2-18 • • • atom and bond count • elemental analysis calculating the percent weight of each element • zero-order, first-order, and second-order molecular connectivity indices • • • dipole moment and dipole vectors x, y, and z net positive and negative charge for a molecule molecular properties such as molecular formula, weight, and refractivity dielectric, steric, and total energy of a structure electron affinity BioMedCAChe User Guide Performing experiments with CAChe shape index order 1, 2, and 3 The Procedure Editor allows you to create your own experiments, and change parameter settings from the default settings supplied with CAChe. The Procedure Editor allows you to display the experiment environment in a tree view. From this view, you can perform a wide range of functions. These functions include: creating new experiments modifying procedures by adding, deleting, or moving steps editing compute engine data Using • • • • • Tutorials Using the Procedure Editor Basics Experiments can be performed on entire chemical samples, or on chemical sample components such as atoms, bonds, and molecular orbitals. Introduction octanol water partition coefficient. editing parameter data creating new packages for use by groups of users. Appendices Understanding Refer to Chapter 11, “Using the Procedure Editor”, for full details about using the Procedure Editor. Customizing • • BioMedCAChe User Guide 2-19 Chapter 2 - Introduction to CAChe Computational chemistry and CAChe CAChe uses computational chemistry as an essential part of computer-aided chemistry. By applying computational molecular models derived from mathematical equations to a chemical sample you create, you can calculate molecular properties such as the position and behavior of electrons, and nuclei in certain conditions. The computational chemistry tools that CAChe uses are derived from classical mechanics and quantum mechanics, and are applied to your chemical sample by a number of computational applications that perform calculations based on specified parameters. Using classical mechanics, CAChe can: • • optimize molecular geometry • simulate the normal motion of atoms according to time, temperature, and the calculated forces of the atoms. determine a series of low-energy conformations between high energy barriers Using quantum mechanics, CAChe can: • • • • • predict electron density and distribution in a molecule investigate molecular orbital energies optimize molecular geometry determine transition state geometry calculate molecular properties such as bond order and atomic partial charge. Introducing the computational applications While mostly invisible to the user, CAChe uses a number of computational applications which use classical and quantum mechanical methods to perform experiments on your chemical sample. This section gives an overview of each computational application. 2-20 BioMedCAChe User Guide Computational chemistry and CAChe Tabulator converts the solved wavefunction from MOPAC into three-dimensional graphical representations of several properties including susceptibility, electron density, molecular orbitals, and electrostatic potential. Information generated by Tabulator can be viewed superimposed on the molecule in the chemical sample file. BioMedCAChe User Guide 2-21 Tutorials Basics Using MOPAC is a semi-empirical quantum mechanical computational tool that provides optimization and wavefunction (electron distribution) data to search for optimized geometry, transition state geometry and molecular properties such as bond order, partial charges, and orbital energies. MOPAC includes several sets of parameters from which you can choose: MINDO/3, MNDO, MNDO-d, PM3 and AM1. MOPAC also implements MOZYME, a linear scaling method for giant molecules. MOPAC generates a log data file and an output file containing experimental details, and alters the structure of the molecule in your chemical sample file to correspond to the calculated optimum geometry. Customizing Dynamics simulates the normal motion of atoms according to time, temperature, and the calculated forces on the atoms. Dynamics generates a trajectory or collection of structures over time, where each structure has an associated potential and kinetic energy as well as temperature. A log data file and an output file containing experimental details are also generated when an experiment is performed with Dynamics. Trajectory information is stored graphically in a separate energy map file. Understanding CONFLEX generates low-energy conformers of a molecule of any shape. It can be used to compute an optimum geometry and potential energy maps. Appendices Mechanics optimizes molecular geometry using classical molecular mechanics. Mechanics finds an optimum geometry by systematically moving all atoms in a chemical sample until the net force acting on each atom approaches zero. Mechanics generates a log data file and an output file containing experimental details, and alters the structure of the molecule in your chemical sample file to correspond to the calculated optimum geometry. Introduction Refer to Chapter 20, “CAChe Computational Applications”, for more detailed information. Chapter 2 - Introduction to CAChe DGauss is a density funtional theory program. It can determine an optimum geometry and compute electronic properties such as bond order, atom partial charges and potential energy maps. NOTE DGauss is available as an optional add-on to CAChe. 2-22 BioMedCAChe User Guide 1 Basics Using Customizing Understanding Chapter 3, “CAChe Basics”, introduces the components of the workspace. Appendices Part two The following chapter describes the basics of CAChe for Windows. Basic Introduction CAChe Basics 3 CAChe Basics Introduction 3 Overview This chapter introduces the basics of using CAChe, including how to: Basics Tutorials start and quit CAChe use the components of the workspace access CAChe on-line Help. 3-2 3-3 3-4 The menu bar The toolbar The status bar 3-4 3-5 3-6 The workspace 3-8 The title bar The style bar The tool palette The scroll bars Stereo 3D cursor Manipulating document windows 3-9 3-9 3-13 3-14 3-15 3-16 Using CAChe Using the mouse Using the menu bar Using the toolbar Using dialog boxes Using the workspace selection tools Using the Select tool Using the workspace style bar Using CAChe Help Viewing context-sensitive Help Viewing the CAChe Help system Quitting CAChe 3-17 3-17 3-20 3-21 3-22 3-29 3-33 3-40 3-43 3-43 3-44 3-45 Understanding Starting the CAChe workspace The CAChe interface The application window Appendices Contents Customizing Using • • • Chapter 3 - CAChe Basics Starting the CAChe workspace CAChe runs in a Windows Me, Windows 98, Windows NT 4.0 and Windows 2000 environment. ª To start the CAChe workspace 1. Choose Start Programs CAChe Workspace from the Windows taskbar. An initializing CAChe splash screen containing CAChe version details is displayed. After a few seconds, the CAChe application window opens, containing an empty document window, referred to as the workspace. 3-2 BioMedCAChe User Guide The CAChe interface The CAChe interface The CAChe user interface, shown below, consists of: a document window, which contains tools and drop-down lists to help you draw and manipulate your chemical sample. When the active document is a chemical sample file, the document window is referred to as the workspace. Chemical sample files are used to create, edit, and experiment on molecules. Refer to Chapter 4, “Creating Chemical Samples”, for a description of chemical sample files. Using Application window Introduction an application window, containing a menu bar and toolbar Basics Tutorials • • Appendices Understanding Customizing Document window (workspace) BioMedCAChe User Guide 3-3 Chapter 3 - CAChe Basics The application window The CAChe application window contains standard Windows features, such as: • • a menu bar with a selection of menu options • a status bar at the bottom of the window. a toolbar containing buttons that provide a shortcut to some of the menu options The menu bar The menu bar displays options that give access to drop-down lists of menu options. The menu that is visible when you first start CAChe is as follows: Refer to “Using the menu bar”, p 3-20, for details on how to use the CAChe menu. 3-4 BioMedCAChe User Guide The application window The toolbar Hiding the toolbar Customizing Refer to “Using the toolbar”, p 3-21, for details on how to use the CAChe toolbar, and a list of toolbar buttons and their equivalent menu options. Using Basics Tutorials View | Ball & Cylinder View Space Filling View Lines View | Lines Only Edit Position View Fit in Window Beautify Comprehensive Edit Connect Atoms Adjust Define Geometry Label Experiment Show Server Information Experiment New Experiment Show Submitted Experiments Help Index Context-sensitive Help File Print Edit Paste Edit Cut Edit Copy File Save File New File Open The following diagram shows the toolbar and the corresponding menu options that each button performs. Introduction The toolbar contains a collection of buttons that provide a shortcut to some of the menu options. To hide the CAChe toolbar 1. When the toolbar is visible, choose Options Show Toolbar. The toolbar is no longer displayed in the CAChe application window. The check mark next to the Show Toolbar drop-down list option is no longer displayed, indicating that the toolbar is currently hidden. BioMedCAChe User Guide 3-5 Appendices ª Understanding You can choose to hide the CAChe toolbar. Chapter 3 - CAChe Basics ª To redisplay the CAChe toolbar 1. When the toolbar is hidden, choose Options Show Toolbar. The toolbar is displayed in the CAChe application window. A check mark is displayed next to the Show Toolbar drop-down list option, indicating that the toolbar is currently visible. The status bar The status bar is displayed at the bottom of the CAChe application window, and describes the action performed by a selected command in a menu drop-down list, or a selected button in the toolbar. In addition, the status bar displays the net charge on the molecule, the number of atoms and the empirical formula. When there is no drop-down list option or toolbar button selected, the status bar displays the following message: Hiding the status bar You can choose to hide the CAChe status bar. ª To hide the CAChe status bar 1. When the status bar is visible, choose Options Show Status Line. The status bar is no longer displayed. The check mark next to the Show Status Line drop-down list option is no longer displayed, indicating that the status bar is currently hidden. ª To redisplay the CAChe status bar 1. When the status bar is hidden, choose Options Show Status Line. The status bar is displayed at the bottom of the CAChe window. 3-6 BioMedCAChe User Guide The application window Appendices Understanding Customizing Using Basics Tutorials Introduction A check mark is displayed next to the Show Status Line dropdown list option, indicating that the status bar is currently visible. BioMedCAChe User Guide 3-7 Chapter 3 - CAChe Basics The workspace The active document window is referred to in CAChe as the workspace. While you can have many document windows open at any one time, there can only be one active document window. Any menu bar or toolbar commands you choose affect the active document window. To activate a window, click on it. The main components of the workspace are: • • a title bar that displays the name of the document • a tool palette that provides selection tools, a drawing tool, and manipulation tools. a style bar with drop-down lists that enable you to change the element type, bond type, charge, and hybridization of selected parts of your molecule Title bar Style bar Tool palette Scroll bars A blank workspace 3-8 BioMedCAChe User Guide The workspace The title bar The main document file type for CAChe is the chemical sample file, indicated by the suffix .csf. Use chemical sample files to: • • • draw your molecule view your molecule in different ways Basics Tutorials The workspace that appears when you start CAChe has the default name ChemicalSample1. To change this name, save the file. Once you save a file, a three-letter suffix appears in the document name, which describes the file type of the document. Introduction The workspace title bar displays the name of the document. launch experiments. Refer to Chapter 4, “Creating Chemical Samples”, for more information on chemical sample files. Using The workspace title bar also contains the default Windows minimize, maximize, and close buttons. Customizing The style bar • • • element type • bond type. Understanding The workspace style bar provides four items that enable you to change or create features of selected parts of your molecule, as follows: hybridization Appendices charge BioMedCAChe User Guide 3-9 Chapter 3 - CAChe Basics Element Type box Hybridization box Charge box Bond Type box Example style bar Use the style bar in conjunction with the workspace selection and drawing tools to: • • • • • • draw atoms of a specific element draw bonds of a specific bond type draw atoms with a specific hybridization and charge change the element type of selected atoms change the bond type of selected bonds change the hybridization and charge of selected atoms. The Element Type box The Element Type box lists the last seven elements for atoms you have drawn or selected, and provides access to the Periodic Table dialog box, from which you select any element in the Periodic Table. Once you choose an element from the Element Type drop-down list, you can: • • draw an atom of that element change a selected atom to that element. Refer to “Using the workspace style bar”, p 3-40, for information on using the Element Type drop-down list. 3-10 BioMedCAChe User Guide The workspace The Hybridization box The Hybridization box provides a drop-down list of hybridization or electronic configuration alternatives which you can apply to: Introduction the next atom you draw a selected atom. Basics Tutorials • • The Charge box The Charge box is a text box which you can use to enter a charge value, or select a negative or positive charge value provided by CAChe, by using the up or down arrow button next to the text box. Customizing Using Refer to “Using the workspace style bar”, p 3-40, for information on using the Hybridization drop-down list. draw an atom with the specified charge value change the charge of a selected atom. Refer to“Using the workspace style bar”, p 3-40, for information on using the Charge text box. BioMedCAChe User Guide 3-11 Appendices • • Understanding Once you have selected or entered a charge value, you can: Chapter 3 - CAChe Basics The Bond Type box The Bond Type box lists up to six bond types. Once you choose a bond type from the drop-down list, you can: • • draw a bond of the specified bond type change a selected bond to the specified bond type. Refer to “Using the workspace style bar”, p 3-40, for information on using the Bond Type drop-down list. Hiding the style bar You can choose to hide the workspace style bar. ª To hide the workspace style bar 1. When the style bar is visible, choose Options Show Ribbon. The style bar boxes are no longer displayed at the top of the workspace. The check mark next to the Show Ribbon drop-down list option is no longer displayed, indicating that the style bar is currently hidden. ª To redisplay the workspace style bar 1. When the style bar is hidden, choose Options Show Ribbon. The style bar is displayed at the top of the workspace. A check mark is displayed next to the Show Ribbon drop-down list option, indicating that the style bar is currently visible. 3-12 BioMedCAChe User Guide The workspace The tool palette The workspace tool palette provides three types of tools: selection tools a drawing tool Introduction • • • manipulation tools. Select Molecule Basics Tutorials Select Selection tools Select Similar Group Select Atom/Bond tool Rotate Manipulation tools The tool palette contains the following selection tools: BioMedCAChe User Guide • the Select tool, which is the default workspace tool. Use it to select individual objects • • the Select Molecule tool, which selects an entire molecule • the Select Group tool, which selects an atom and all the atoms with which it shares a group. the Select Similar tool, which selects all objects of a similar type 3-13 Understanding The selection tools Customizing Using Scale Appendices Translate Chapter 3 - CAChe Basics The Atom/Bond tool Use the Atom/Bond tool to draw atoms and bonds in the workspace. Specify element type, bond type, charge, and hybridization first by using the style bar drop-down lists. The manipulation tools The tool palette contains the following manipulation tools: • • the Translate tool, which moves objects in the workspace • the Scale tool, which zooms in and out on objects in the workspace. the Rotate tool, which rotates workspace objects in three dimensions Refer to “Using the workspace selection tools”, p 3-29, for further details about the selection tools. Refer to Chapter 4, “Creating Chemical Samples”, for details about the Atom/Bond tool. Refer to Chapter 7, “Manipulating Molecules”, for details about the manipulation tools. The scroll bars Use the scroll bars, to the right and at the bottom of a CAChe document window, to view objects located at the outer edges of the document window or workspace. Move the scroll bars to the right of a document window by: • clicking and dragging up and down to view objects above and below the currently displayed objects. Move the scroll bars at the bottom of a document window by: • 3-14 clicking and dragging to the left and right to view objects to the left or right of currently displayed objects. BioMedCAChe User Guide The workspace Refer to “Using CAChe”, p 3-17, for a description of how to click and drag using the cursor. You can choose to hide the scroll bars at the right and at the bottom of a CAChe document window. To hide the scroll bars 1. When the scroll bars are visible, choose Options Show Scroll Bars. The scroll bars are no longer displayed at the right and at the bottom of the document window. Basics Tutorials ª Introduction Hiding the scroll bars The check mark next to the Show Scroll Bars drop-down list option is no longer displayed, indicating that the scroll bars of the workspace are currently hidden. Scroll bars are displayed at the right and bottom of the active workspace. A check mark is displayed next to the Show Scroll Bars dropdown list option, indicating that the scroll bars of the workspace are currently visible. Stereo 3D cursor If you have a stereo license, the cursor may be drawn in 3D in the workspace. To display the 3D cursor in the workspace Appendices ª 1. When the cursor exists in 2D in the workspace, choose Options | 3D Cursor. The cursor is displayed in the workspace in 3D, and a check BioMedCAChe User Guide Customizing 1. When the scroll bars are hidden, choose Options Show Scroll Bars. Using To redisplay the scroll bars Understanding ª 3-15 Chapter 3 - CAChe Basics mark is displayed next to the 3D Cursor drop-down list option. ª To hide the 3D cursor in the workspace 1. When the cursor exists in 3D in the workspace, choose Options | 3D Cursor. The cursor is displayed in 2D in the workspace, and the check mark next to the 3D Cursor drop-down list option is no longer displayed. Manipulating document windows View all open CAChe document windows at the same time using the Windows Tile and Cascade options. You can also arrange minimized windows using the Windows Arrange Icons option. ª To arrange windows to overlap in a cascading pattern 1. Choose Window Cascade. All open CAChe document windows are opened in a cascading pattern, so that you can view the title bar of each window. ª To arrange windows side by side 1. Choose Window Tile. All open CAChe document windows are arranged side by side, so that you can view the title bar and a portion of the contents of each window. ª To arrange minimized windows 1. Choose Window Arrange Icons. All minimized CAChe windows (those made into an icon) are arranged along the bottom of the main CAChe application window. 3-16 BioMedCAChe User Guide Using CAChe Using the mouse The following terms are used in this User Guide to describe mouse actions. Select Basics Tutorials The following section explains terms used throughout this User Guide and provides instructions on using the components of the CAChe interface. Introduction Using CAChe Select the following items in CAChe: dialog box buttons check boxes radio buttons Using arrow buttons directory buttons tabs workspace tools Customizing • • • • • • • • toolbar buttons. Understanding Choose Choose the following items in CAChe: menu options drop-down list options. Appendices • • BioMedCAChe User Guide 3-17 Chapter 3 - CAChe Basics Click Click on the following objects: • • • • ª document windows to make them active in the workspace using the selection tools in the workspace using the Atom/Bond tool hypertext links in the CAChe Help system. To click on an object using the selection tools 1. Position the cursor over the workspace object you want to select. 2. Press the left mouse button and release. The selected object is highlighted and other workspace objects are grayed out. 3. To select more objects, hold down the Shift key. 4. Position the cursor over the next object you want to select, still holding down the Shift key. 5. Press the left mouse button and release. The second object you selected is highlighted along with the first, while other workspace objects are grayed out. 6. Continue to click on any further objects you want to select, still holding down the Shift key. ª To click on the workspace using the Atom/Bond tool 1. Position the cursor anywhere over the workspace. 2. Press the left mouse button and release. An atom is displayed in the workspace. 3-18 BioMedCAChe User Guide Using CAChe Click and drag Click and drag on the following objects: scroll bars in dialog boxes Introduction sliders in dialog boxes in the workspace using the selection tools in the workspace using the Atom/Bond tool in the workspace using the manipulation tools. Selection tools Click and drag in the workspace using the selection tools to draw a selection box around the objects you want to select. ª Basics Tutorials • • • • • To click and drag using the selection tools 1. Select the selection tool you want to use. The selected objects encompassed by the selection box are highlighted, while other workspace objects are grayed out. Atom/Bond tool To click and drag using the Atom/Bond tool 1. Select the selection tool you want to use. 2. Position the cursor over an atom or bond. 3. Hold down the left mouse button and drag the cursor a short distance across the workspace. 4. A bond and connecting atom are displayed in the workspace, attached to the atom or bond where you started drawing. BioMedCAChe User Guide 3-19 Appendices ª Understanding Click and drag in the workspace using the Atom/Bond tool to draw a bond and connecting atom. Customizing 3. Hold down the left mouse button and drag the cursor to form a selection box around the objects you want to select. Using 2. Position the cursor to one side of the object or group of objects you want to select. Chapter 3 - CAChe Basics Manipulation tools Click and drag in the workspace using the manipulation tools to move, rotate, and scale objects. ª To click and drag using the manipulation tools 1. Select the selection tool you want to use. 2. Position the cursor in the workspace. 3. Hold down the left mouse button and drag the cursor across the workspace. The selected object is moved, scaled, or rotated. Double-click Double-click on the following items to open them in the Open and Save As dialog box scrolling lists. • • folders files. Using the menu bar This user guide uses the following convention for choosing options from a menu’s drop-down list: Menu Drop-down list option. For example, File Save. Menu options You can also perform some menu drop-down list options using either keyboard shortcuts or toolbar buttons. Refer to “Toolbar shortcuts”, p 3-21, for details about toolbar buttons and their equivalent menu options. Refer to Appendix A, “Keyboard and Toolbar Shortcuts”, for a list of keyboard shortcuts that are equivalent to menu options. 3-20 BioMedCAChe User Guide Using CAChe Using the toolbar The following section describes how to use the toolbar buttons. 1. Position the cursor over the required button. 2. Press the left mouse button. The name of the button appears in the a yellow tool tip box near the cursor and a short description of the function of the button status bar at the bottom of the screen. 3. Release the left mouse button. Introduction To select a toolbar button Basics Tutorials ª The command to which the toolbar button provides a shortcut is performed. Toolbar shortcuts Customizing Appendices Understanding View Space Filling View Ball & Cylinder View Lines View | Lines Only Edit Position View Fit in Window Beautify Comprehensive Adjust Define Geometry Label Edit Connect Atoms Experiment Show Server Information Experiment Show Submitted Experiments Experiment New Help Index Context-sensitive Help File Print Edit Copy Edit Paste Edit Cut File Save File Open File New Using The following diagram shows the menu options that are equivalent to each toolbar button. BioMedCAChe User Guide 3-21 Chapter 3 - CAChe Basics Using dialog boxes The following section describes how to use the scrolling lists, buttons, and text boxes in a sample CAChe dialog box. Dialog boxes in CAChe are used to: 3-22 • • • • • • • • • create, open, save, or print files • scrolling or non-scrolling lists from which you can select an item • scrolling or non-scrolling windows that display information. change display attributes of objects add and define geometry labels and search labels change settings for menu options and workspace tools initiate experiments choose chemical properties on which to base an experiment choose procedures used in an experiment display experimental results display more detailed information about an experimental output file. BioMedCAChe User Guide Using CAChe The following diagram shows examples of the components of a dialog box. Directory buttons Help Close button button Details buttons Introduction Arrow button Basics Tutorials Scrolling list Scroll bars Text box Buttons Drop-down list To enter text into a text box 1. Position the cursor in the required text box and press the left mouse button. This activates the text box and fixes the position of the cursor. 2. Type the text you want to add to the text box. Appendices The text is added at the position of the cursor. Customizing ª Understanding Text boxes allow you to enter information using the keyboard. For example, in the example dialog shown earlier, you can use the File name text box to select the existing text, delete it, and type in a new file name. Using Text boxes BioMedCAChe User Guide 3-23 Chapter 3 - CAChe Basics Arrow buttons Arrow buttons indicate the presence of a drop-down list. Select an arrow button to display a drop-down list. ª To select an arrow button 1. Position the cursor over the arrow button. 2. Press the left mouse button. A drop-down list is displayed. Arrow buttons also indicate a text box in which you can enter a value, or choose a value supplied by selecting either an up or down arrow button at the side of a text box. ª To enter a value into a text box using arrow buttons 1. Move the cursor over the up arrow button, if you want to choose a value of 1 or more, or over the down arrow button, if you want to choose a value of -1 or less. 2. Press the left mouse button. The value of 1 or -1 is displayed in the text box. 3. Increase or decrease the value further by selecting the arrow until the value you require is displayed. Check boxes Check boxes can be toggled on and off to enable or disable an option in the dialog box. ª To enable a check box 1. Position the cursor over the blank check box. 2. Press the left mouse button. A check mark is displayed in the check box to show that the option is enabled. 3-24 BioMedCAChe User Guide Using CAChe Radio buttons To enable a radio button 1. Position the cursor over the blank radio button. 2. Press the left mouse button. A small black circle is displayed in the radio button to show that the option is enabled. Basics Tutorials ª Introduction Radio buttons can also be toggled on and off to enable or disable an option in the dialog box. Directory buttons • the new folder button, shown to the left, which creates a new folder within the folder whose contents the dialog box is currently displaying. To select a directory button 1. Position the cursor over the button you want to select. 2. Press the left mouse button. Appendices The scrolling list in the dialog box either displays the contents of the next directory up, or a new folder is created in the current directory. Customizing the directory level button, shown to the left, takes you up one directory level to display the contents of the next folder up in your directory structure. Understanding ª • Using Directory buttons appear on dialog boxes such as the Open and Save As dialog boxes. The two directory buttons perform the following functions: BioMedCAChe User Guide 3-25 Chapter 3 - CAChe Basics Details buttons Details buttons appear on some dialog boxes such as the Open and Save As dialog boxes. Toggle between the two details buttons, shown to the left, to view: • • ª file names only displayed in the dialog box scrolling list. file details such as type and size in the dialog box scrolling list. To select a details button 1. Position the cursor over the button you want to select. 2. Press the left mouse button. Files in the scrolling list are either displayed with file name and icon only, or with file name, icon, file type and size, and the date that the file was last modified. Buttons Buttons perform an action or display another dialog box containing further options. Examples of buttons are shown below. ª To select a button 1. Position the cursor over the button you want to select. 2. Press the left mouse button. An action is performed, or another dialog box is displayed. 3-26 BioMedCAChe User Guide Using CAChe Tabs Tabs display a list of options, radio buttons, or check boxes specific to the object on the tab. A dialog box can contain two or more tabs. Introduction Bond tab Basics Tutorials Atom tab ª To select a tab 1. Move the cursor over the tab you want to select. 2. Press the left mouse button. The selected tab is displayed. Drop-down lists display a number of options. When you choose one, the option you choose is displayed in the relevant text box. ª To choose an option from a drop-down list 1. Position the cursor over the drop-down list option you require. Understanding 2. Press the left mouse button. Customizing Using Drop-down lists Appendices The drop-down list disappears and the option you chose is displayed in the relevant text box. BioMedCAChe User Guide 3-27 Chapter 3 - CAChe Basics Scrolling and non-scrolling lists Lists can be scrolling or non-scrolling, depending on the number of items being displayed. Lists are used to display items that you: • • select by clicking on the item open by double-clicking on the item. For example, the scrolling list shown below displays a list of files. Select a file by clicking on it. ª To select an item in a scrolling or non-scrolling list 1. Position the cursor over the item you want to select. 2. Press the left mouse button to select the item. The item is highlighted. The scrolling list shown below displays folders in the cache folder on a computer’s C drive. Open a folder to view the files inside by double-clicking on the folder icon or name. ª To open an item in a scrolling or non-scrolling list 1. Position the cursor over the item you want to select. 2. Press the left mouse button twice in quick succession to select and open the item at the same time. If the item is a folder, the files within that folder are displayed in the dialog box. If the item is a file, the file opens. 3-28 BioMedCAChe User Guide Using CAChe Scrolling and non-scrolling windows If a window does not display scroll bars, all the information present in that window is currently displayed on screen. ª Basics Tutorials Scroll bar Introduction Windows display information. Many windows have scroll bars that allow you to view text that has scrolled off the screen. The following window is a scrolling window. To scroll a window 1. Move the cursor over the square in the scroll bar. This section introduces the palette of workspace tools, which is displayed at the left of the workspace window and consists of: • four selection tools - the Select (default), Select Molecule, Select Similar, and Select Group tool • • a drawing tool - the Atom/Bond tool three manipulation tools - the Rotate, Translate, and Scale tool. BioMedCAChe User Guide • select or deselect individual atoms and bonds in the workspace • • select or deselect several atoms and bonds Appendices This section also describes in detail how to use the default Select tool to do the following: Understanding Using the workspace selection tools Customizing Using 2. Hold down the left mouse button and drag the cursor upwards or downwards to view the window contents above and below the currently displayed information or objects. select every object in the workspace. 3-29 Chapter 3 - CAChe Basics Selecting a tool To select a tool from the tool palette, click on it. When you select a tool, the cursor changes to represent the selected tool, as shown in the following table. Workspace tool name Tool palette icon Cursor Select tool (default) Select Molecule tool Select Similar tool Select Group tool Atom/Bond tool Rotate tool Translate tool Scale tool 3-30 BioMedCAChe User Guide Using CAChe Introducing the selection tools Basics Tutorials The select tools operate on visible objects. Usually, hidden objects are not selected. A hidden object is selected only if the Select Molecule tool or Select Group tool is used to choose a visible atom or bond and the hidden object is a part of the selected molecule or group. Introduction Use the selection tools to select workspace objects individually, in groups of similar objects, or molecule by molecule. CAChe allows you to hide atoms, bonds and other objects. The Select tool The Select tool is the default workspace tool. Use it to: • select one or more visible objects, such as individual atoms or bonds • deselect one or more objects. • select all visible objects by clicking on the background Using The Select tool and Select cursor are shown to the left. Refer to “Using the Select tool”, p 3-33, for further details. Use the Select Molecule tool to: • • select one or more visible molecules deselect one or more molecules. The Select Molecule tool and cursor are shown to the left. Appendices Refer to Chapter 5, “Modifying Chemical Samples”, for details about using the Select Molecule tool. The Select Similar tool. Use the Select Similar tool to: BioMedCAChe User Guide Understanding Customizing The Select Molecule tool 3-31 Chapter 3 - CAChe Basics • select visible objects of a similar type, for example, all atoms of the same element type, or all bonds of the same bond type • deselect objects of a similar type. The Select Similar tool and Select Similar cursor are shown to the left. Refer to Chapter 5, “Modifying Chemical Samples”, for details about using the Select Similar tool, and how to define criteria for similarity. The Select Group tool Use the Select Group tool to: • select a visible atom, and all the atoms with which it shares a group. The Select Group tool and Select Group cursor are shown to the left. Refer to Chapter 5, “Modifying Chemical Samples”, for details about using the Select Group tool. The Atom/Bond tool Use the Atom/Bond tool to: • draw atoms and bonds. The Atom/Bond tool and Atom/Bond cursor are shown to the left. Refer to Chapter 4, “Creating Chemical Samples”, for details about using the Atom/Bond tool to draw the constituent atoms and bonds of your molecule. The Rotate tool: Use the Rotate tool to: • 3-32 rotate objects in two or three dimensions. BioMedCAChe User Guide Using CAChe The Rotate tool and Rotate cursor are shown to the left. The Translate tool Use the Translate tool to: • move objects in the workspace in two dimensions. The Translate tool and Translate cursor are shown to the left. Refer to Chapter 7, “Manipulating Molecules”, for details about using the Translate tool, and how to define the center of rotation for the tool. Basics Tutorials Introduction Refer to Chapter 7, “Manipulating Molecules”, for information on how to use the Rotate tool, and how to define the center of rotation for the tool. The Scale tool. Use the Scale tool to: zoom in on objects Refer to Chapter 7, “Manipulating Molecules”, for information on how to use the Scale tool. Using the Select tool The Select tool is the default workspace tool. Use the Select tool to: BioMedCAChe User Guide • • select one or more workspace objects by clicking on them • select a group of workspace objects by clicking on them while holding down the Shift key • deselect a selected workspace object by clicking on it select a group of workspace objects by clicking and dragging around them 3-33 Understanding The Scale tool and Scale cursor are shown to the left. Customizing Using zoom out from objects. Appendices • • Chapter 3 - CAChe Basics ª • deselect a group of selected workspace objects by clicking and dragging around them while holding down the Shift key • deselect a group of selected workspace objects by clicking on them while holding down the Shift key • select every visible object in the workspace • invert the selection by clicking on empty space while holding down the Shift key. This has the same effect as Edit | Invert Selection. To select the Select tool 1. Select the Select tool by clicking on it in the tool palette. The cursor is displayed as the default arrow cursor or Select tool, shown to the left. Using the Select tool to select objects Use the Select tool to select objects by: • • clicking on objects in the workspace clicking and dragging around objects in the workspace. Selecting more than one object Clicking and dragging is a useful way of selecting more than one object when the objects are close to each other. You can also select more than one object by using the Shift key. ª To select a group of objects near to each other 1. Position the Select tool to one side of the group of objects you want to select. 2. Press and hold down the left mouse button and drag the Select tool to form a selection box around the objects you want to select. The objects are highlighted to show that they are selected. 3-34 BioMedCAChe User Guide Using CAChe If the objects you want to select are not close to each other, you can select more than one object by holding down the Shift key while you click on subsequent objects. 1. Position the Select tool over the first object you want to select. 2. Press the left mouse button to select the object. The object is highlighted to show that it is selected. 3. Position the Select tool over the second object you want to select. 4. Hold down the Shift key and select the second object by clicking on it. Introduction To select more than one object using the Shift key Basics Tutorials ª The second object you selected is highlighted to show that it is selected. 5. Position the Select tool over the third object you want to select. 6. Hold down the Shift key and select the third object by clicking on it. 7. Continue to hold down the Shift key and click on objects until you have selected everything you want. Using The third object you selected is highlighted to show it is selected. • clicking on objects in the workspace while holding down the Shift key • clicking and dragging around objects in the workspace while holding down the Shift key. The object is grayed out to show that it is deselected. Understanding Use the Select tool to deselect objects that are currently selected by: Customizing Using the Select tool to deselect objects Clicking and dragging around a group of selected objects while holding down the Shift key is also a useful way of deselecting more than one object when the objects are close to each other. You can BioMedCAChe User Guide 3-35 Appendices Deselecting more than one object Chapter 3 - CAChe Basics also deselect more than one object by clicking on each object and holding down the Shift key. ª To deselect a group of selected objects near to each other 1. Position the Select tool to one side of the group of objects you want to deselect. 2. Hold down the Shift key, and click and drag the Select tool to form a selection box around the group of objects you want to deselect. The objects are grayed out to show that they are deselected. If the objects you want to deselect are not close to each other, you can also deselect more than one object by holding down the Shift key while you click on subsequent objects. ª To deselect more than one object by clicking 1. Position the Select tool over the object you want to deselect. 2. Hold down the Shift key and deselect the object by clicking on it. 3. Position the Select tool over the second object you want to deselect. 4. Hold down the Shift key and deselect the second object by clicking on it. The second object you deselected is grayed out to show that it is deselected. 5. Position the Select tool over the third object you want to deselect. 6. Hold down the Shift key and deselect the third object by clicking on it. The third object you deselected is grayed out to show that it is deselected. 7. Continue to hold down the Shift key and click on objects until you have deselected everything you want. 3-36 BioMedCAChe User Guide Using CAChe Using the Select tool to select every visible object in the workspace To select every visible object in the workspace 1. Select a selection tool by clicking on it. 2. Click in a blank area of the workspace. Every visible object in the workspace is highlighted to show that it is selected. Hidden objects are not selected. Although you can select every object in the workspace, you cannot deselect every object in the workspace. CAChe requires that there is at least one selected object in a workspace or active window. Basics Tutorials ª Introduction Select everything displayed in the workspace using any of the three selection tools. NOTE The menu command Edit | Select All selects all visible and hidden objects. Invert the current selection in the workspace using any of the three selection tools. Customizing To invert the visible selection in the workspace 1. Select a selection tool by clicking on it. 2. Do one of the following: ❏ Click in a blank area of the workspace. ❏ Choose Edit Invert Selection. Newly selected objects in the workspace are highlighted to show that they are selected. Appendices NOTE The menu command Edit | Invert Selection inverts the selection of both visible and hidden objects. Understanding ª Using Using the Select tool to invert the selection in the workspace BioMedCAChe User Guide 3-37 Chapter 3 - CAChe Basics The Rotate tool Use the Rotate tool to rotate workspace objects in two and three dimensions around the x, y, and z axes. ª To select the Rotate tool 1. Select the Rotate tool by clicking on it in the tool palette. The cursor is displayed as the Rotate tool, shown to the left. Using the Rotate tool ª To rotate objects around the z axis 1. Position the Rotate tool outside of the circle that indicates the center of the workspace. 2. Click and drag the Rotate tool. All objects in the workspace are rotated around the z axis of the workspace coordinates. ª To rotate objects around the x and y axes 1. Position the Rotate tool inside the circle that indicates the center of the workspace. 2. Click and drag the Rotate tool. All objects in the workspace are rotated around the y axis if you drag the Rotate tool to the left and right, and around the x axis if you drag the Rotate tool up and down. Dragging the tool diagonally moves objects around the x and y axis. The Translate tool Use the Translate tool to move workspace objects in two dimensions. ª To select the Translate tool 1. Select the Translate tool by clicking on it in the tool palette. 3-38 BioMedCAChe User Guide Using CAChe The cursor is displayed as the Translate tool, shown to the left. ª Introduction Using the Translate tool To move objects in two dimensions 1. Position the Translate tool anywhere in the workspace. All objects in the workspace move in the direction that you dragged the tool. Basics Tutorials 2. Click and drag across the workspace. The Scale tool Use the Scale tool to: • • zoom out from workspace objects. To select the Scale tool Using ª zoom in on workspace objects 1. Select the Scale tool by clicking on it in the tool palette. Customizing The cursor is displayed as the Scale tool, shown to the left. Using the Scale tool To zoom in on objects Understanding ª 1. Position the Scale tool anywhere in the workspace. 2. Click and drag toward the right-hand side or top of the workspace. ª Appendices All objects in the workspace are scaled to a larger size. To zoom out from objects 1. Position the Scale tool anywhere in the workspace. 2. Click and drag toward the left-hand side or bottom of the BioMedCAChe User Guide 3-39 Chapter 3 - CAChe Basics workspace. All objects in the workspace are scaled to a smaller size. Using the workspace style bar The workspace style bar consists of four drop-down lists which display settings for: • • • • element type for an atom charge of an atom hybridization of an atom bond type. Use the style bar boxes in conjunction with: • • the Atom/Bond tool the selection tools. Using the style bar with the Atom/Bond tool Choose atom and bond properties from the style bar’s drop-down lists before you draw atoms and bonds using the Atom/Bond tool. ª To use the style bar with the Atom/Bond tool 1. Select the arrow button in the Element Type box and choose the element type for the atom that you want to draw from the dropdown list. . 2. Select the arrow button in the Hybridization box and choose the hybridization value for the atom that you want to draw from the 3-40 BioMedCAChe User Guide Using CAChe 3. Click in the Charge text box and type the charge for the atom that you want to draw in the Charge text box, or select the up arrow button or down arrow button to display charge values in increasing or decreasing order, respectively. Basics Tutorials Introduction drop-down list. Refer to Chapter 4, “Creating Chemical Samples”, for information on using the Atom/Bond tool. Using the style bar with the selection tools Select atoms and bonds with the selection tools to: • BioMedCAChe User Guide view current atom and bond properties using the style bar boxes 3-41 Appendices 5. Use the Atom/Bond tool to draw the atoms and bonds you require. Understanding Customizing Using 4. Select the arrow button in the Bond Type box and choose the bond type for the bond that you want to draw from the dropdown list. Chapter 3 - CAChe Basics • ª change atom and bond properties using the style bar boxes. To view current atom and bond properties 1. Use the Select tool to select the atom or bond whose properties you want to view. The current atom or bond properties are displayed in the relevant style bar boxes. If you select more than one object and the objects you select possess different properties, the style bar boxes do not display any values. ª To change atom or bond properties 1. Use one of the selection tools to select the objects whose values you want to change. For example, if you want to change a bond from double to single, select the bond with the Select tool. If you want to change all the atoms in a molecule to another element type, select the molecule with the Select Molecule tool. The current value of the object you selected is displayed in the relevant style bar box, if you selected one object, or objects of a similar type. No value is displayed in the style bar boxes if you selected more than one object with different properties. 2. Choose the value or property you require from the drop-down list of the relevant style bar box to change the value or property of the selected object. For example, choose single from the Bond Type drop-down list if you want to change a double bond to a single bond. Choose the new element type from the Element Type drop-down list if you want to change the atoms of a selected molecule to another element type. The value or property of the selected object changes to the value or property you chose from the list. 3-42 BioMedCAChe User Guide Using CAChe Help Using CAChe Help context-sensitive Help, which displays information on any part of the interface, such as a portion of a dialog box, a workspace tool, or a menu option • the CAChe Help system, accessible from the Contents and Index tabs. Use the tabs to navigate through the Help system to view overview or procedural information on CAChe. Basics Tutorials • Introduction CAChe offers two forms of on-line Help: Viewing context-sensitive Help You can view context-sensitive Help in two ways: • • from the toolbar context-sensitive Help button from a dialog box context-sensitive Help button. ª Using Accessing context-sensitive Help from the toolbar To access context-sensitive Help from the toolbar 2. Click on an item in the workspace, or select a menu option or toolbar button. A pop-up window is displayed, containing information about the object that you clicked on or the menu option or toolbar button that you selected. Appendices For example, if you clicked on a tool in the tool palette, the pop-up window contains the tool name and describes the tool’s function. Understanding The cursor changes to display a question mark, indicating that you are in context-sensitive Help mode. Customizing 1. Select the toolbar button shown to the left. BioMedCAChe User Guide 3-43 Chapter 3 - CAChe Basics Accessing context-sensitive Help from a dialog box ª To access context-sensitive Help from a dialog box 1. Select the Windows query button, shown to the left, located in the top left corner of the dialog box. The cursor changes to display a question mark, indicating that you are in context-sensitive Help mode. 2. Click on a radio button, check box, text box, scrolling list, or button in the dialog box. A pop-up window is displayed, containing information about the dialog box component that you clicked on. For example, if you click on a text box in the dialog box, the pop-up window describes the function of the text box, and the type of information that you type into the text box. Viewing the CAChe Help system You can view the CAChe Help system in two ways: • • from the workspace Help menu from the toolbar Help button. Accessing the Help system from the Help menu ª To access the Help system from the Help menu 1. Choose Help CAChe Help Topics to display the Contents tab. Accessing the Help system from the toolbar ª To access the Help system from the toolbar 1. Select the toolbar button shown to the left to display the Contents tab. 3-44 BioMedCAChe User Guide Quitting CAChe Quitting CAChe To quit CAChe 1. Choose File Exit. If you have any unsaved changes in open windows, an alert box asks you if you would like to save changes. Introduction ª Select Yes to save the changes and quit CAChe. ❏ Select No to quit CAChe without saving the changes. ❏ Select Cancel to keep CAChe running. Appendices Understanding Customizing Using ❏ Basics Tutorials 2. Do one of the following: BioMedCAChe User Guide 3-45 Chapter 3 - CAChe Basics 3-46 BioMedCAChe User Guide 3 Chapter 4, “Creating Chemical Samples”. Tutorials The following chapters describe how to use CAChe: Chapter 6, “Viewing Chemical Samples”. Chapter 7, “Manipulating Molecules”. Using Chapter 5, “Modifying Chemical Samples”. Chapter 11, “Using the Procedure Editor” Chapter 12, “Using ProjectLeader”. The following chapters describe details of the different experiments in CAChe: Chapter 13, “Optimization and Energy Calculations”. Chapter 14, “Investigating Low-energy Conformations”. Chapter 15, “Investigating Electron Distribution”. Chapter 16, “Investigating Atom and Bond Properties”. Chapter 17, “Investigating Reactions”. Chapter 18, “Investigating Spectra”. Chapter 19, “Investigating Biomolecules” Customizing Chapter 10, “Performing Workspace Experiments”. Understanding Chapter 9, “Manipulating Biomolecules” Using Chapter 8, “Investigating Molecular Geometry”. Appendices Part three Introduction Using CAChe 4 Creating Chemical Samples Overview This chapter explains how to create a molecule using the tools and menu options of the CAChe workspace. This chapter describes how to: • • draw the atoms and bonds of your molecule in the workspace • • save all CAChe files Opening a new chemical sample file Opening an existing chemical sample file Drawing a molecule in the workspace Completing your molecule Perfecting your molecule Correcting valence Defining valence rules Correcting hybridization Correcting ring geometry 4-2 4-2 4-3 4-4 4-4 4-5 4-6 4-9 4-10 4-10 4-10 4-13 4-13 Correcting geometry Correcting hydrogen bond geometry The Comprehensive command Deleting hydrogens Saving files Saving a new file Saving an existing file Opening a saved file Printing files Previewing a printout Choosing print options Printing a CAChe window 4-14 4-14 4-15 4-15 4-17 4-17 4-19 4-20 4-22 4-22 4-23 4-25 Appendices Working with chemical sample files Understanding print CAChe files and set up print options for CAChe. Customizing Using correct the geometry, valence, and hybridization of the resulting structure Contents Using the Atom/Bond tool Drawing an atom Drawing a bond Tutorials Introduction 4 Chapter 4 - Creating Chemical Samples Working with chemical sample files You create a molecular structure by drawing atoms and bonds in a document window. The document in which you draw, edit, and save your molecular model is called a chemical sample file, and this is the default file type in CAChe. You use chemical sample files to: • • • draw and perfect your molecule view your molecule in different ways perform experiments on your molecule. This chapter describes how to draw, edit, view, and save your chemical sample. Refer to Chapter 10, “Performing Workspace Experiments”, for details about launching experiments from a chemical sample file. Opening a new chemical sample file When you first start CAChe, a document window entitled ChemicalSample1 is opened. ChemicalSample1 is a blank chemical sample file. When you create a molecule in the document window and save the data, the chemical sample file suffix *.csf appears in the title bar of the document window. If you already have a blank ChemicalSample1 window open, you do not need to open a new chemical sample file. If you do not have a blank document window currently open, you need to open a new chemical sample file. ª To open a new chemical sample file 1. Choose File New. A blank chemical sample file document window opens. 4-2 CAChe for Windows User Guide Working with chemical sample files Opening an existing chemical sample file ª Introduction Alternatively, you may want to open a chemical sample file that you have already worked on and saved. To open a saved chemical sample file Using Tutorials 1. Choose File Open to display the Open dialog box. 2. Select the arrow button in the Files of type box to display a drop-down list of file types. 6. Click and drag the scroll bar in the scrolling list to display the folder that contains the file that you want to open. 7. Double-click on the folder to open it. A list of files is displayed in the scrolling list. 8. Do one of the following: ❏ Click in the File name text box and type the file name of the file that you want to open. ❏ Click and drag the scroll bar in the scrolling list to locate the file you wish to open, then click on it to select it. 9. Select Open to open the chemical sample file. CAChe for Windows User Guide 4-3 Understanding 5. Choose the drive where the file that you want to open is located. Appendices 4. Select the arrow button in the Look in box to display a dropdown list of drives that you can access. Customizing 3. Choose Chemical Sample (*.csf) from the drop-down list. Chapter 4 - Creating Chemical Samples Drawing a molecule in the workspace In CAChe, the active chemical sample file window is referred to as the workspace. Each workspace contains a palette of tools which you can use to draw and manipulate your molecule. Use the Atom/Bond tool to draw the atoms and bonds of your molecule, and use the style bar boxes at the top of the workspace to choose the properties of the atoms and bonds you draw. You can choose these properties either: • • before you draw the atom or bond using the Atom/Bond tool after you draw the atom or bond using the selection tools. Refer to Chapter 5, “Modifying Chemical Samples”, for details about using the selection tools to change the atom and bond type on a molecule you have already drawn. The following section describes how to draw a molecule by: • • choosing atom and bond properties from the style bar drawing the atoms and bonds in the workspace using the Atom/Bond tool. Refer to Chapter 3, “CAChe Basics”, for details about using the style bar boxes. Using the Atom/Bond tool This section describes how to use the Atom/Bond tool to draw atoms and bonds. Use the Atom/Bond tool to: 4-4 • draw an atom by clicking the Atom/Bond tool in the workspace • draw further bonds and atoms by clicking and dragging the Atom/Bond tool in the workspace • continue to draw atoms and bonds until your molecule is complete. CAChe for Windows User Guide Drawing a molecule in the workspace ª To select the Atom/Bond tool The mouse cursor changes to the Atom/Bond tool, shown to the left. Once you have selected the Atom/Bond tool, you are ready to start drawing the atoms and bonds of your molecule. Introduction 1. Select the Atom/Bond tool by clicking on it in the tool palette. Drawing an atom involves: 1. Choosing atom properties from the style bar drop-down lists. Tutorials Drawing an atom NOTE When the Atom/Bond tool is the active tool, clicking anywhere in the workspace draws an atom. The type of atom is determined by the current selections in the style bar’s element type, hybridization, and charge drop-down lists. ª Using 2. Clicking in the workspace with the Atom/Bond tool. To draw an atom 1. Select the arrow button in the Element Type box at the left of the style bar. 2. Choose an element type from the drop-down list. The atom you draw will be of the chosen element type. 3. Select the arrow button in the Hybridization box in the style bar. A drop-down list of hybridization options is displayed. CAChe for Windows User Guide 4-5 Appendices Understanding Customizing A drop-down list of elements is displayed. Chapter 4 - Creating Chemical Samples 4. Choose a hybridization from the drop-down list. The atom you are going to draw will possess hybridization of the chosen value. 5. Do one of the following: ❏ Select the up or down arrow button in the Charge text box in the style bar until the positive or negative charge value you require is displayed. ❏ Click in the text box and type the charge value you require. 6. Click in the workspace with the Atom/Bond tool. An atom of the chosen element type, hybridization, and charge, is displayed, similar to the example shown to the left. Drawing a bond When drawing bonds you can either: 4-6 • click and drag between two existing atoms to create a bond between the two atoms • click and drag from an existing atom to a blank part of the workspace to create a bond with an atom attached. CAChe for Windows User Guide Drawing a molecule in the workspace Drawing a bond between two existing atoms 2. Positioning the Atom/Bond tool over an existing atom in the workspace. 3. Clicking and dragging to another atom. The type of bond you draw is determined by the current selection in the style bar’s Bond Type drop-down list. ª To draw a bond between two existing atoms Tutorials 1. Choosing a bond type from the style bar Bond Type drop-down list. Introduction Drawing a bond between existing atoms involves: Using 1. Select the arrow button in the Bond Type box at the left of the style bar, as shown below: 3. Position the Atom/Bond tool over an atom you have already drawn. 4. Click and drag the Atom/Bond tool across the workspace to another atom you have already drawn. A bond of the chosen bond type is displayed between the two atoms. The example to the left shows a single bond between two atoms of the same element. If a bond already exists between the two atoms, the next higher order bond type is formed. Bond order cycles through single, double, triple, weak, and back to single bonds when you repeat bond formation. CAChe for Windows User Guide 4-7 Understanding The bond you are going to draw will be of the chosen bond type. Appendices 2. Choose a bond type from the drop-down list. Customizing A drop-down list of bond types is displayed. Chapter 4 - Creating Chemical Samples Drawing a bond with an atom Drawing a bond with an atom involves: 1. Choosing a bond type from the Bond Type drop-down list in the style bar. 2. Positioning the Atom/Bond tool over an existing atom in the workspace. 3. Clicking and dragging to a blank part of the workspace. The type of bond you draw is determined by the current selection in the Bond Type drop-down list in the style bar. ª To draw a bond between two existing atoms 1. Select the arrow button in the Bond Type box at the left of the style bar, as shown below. A drop-down list of bond types is displayed. 2. Choose a bond type from the drop-down list. The bond you draw will be of the chosen bond type. 3. Position the Atom/Bond tool over an atom you have already drawn. Click and drag the Atom/Bond tool across the workspace to a blank part of the workspace. A bond of the chosen bond type is displayed between the existing atom and a new atom of the currently selected element type. The example to the left shows a single bond between two atoms of different element type. 4-8 CAChe for Windows User Guide Completing your molecule Completing your molecule • continue to draw individual atoms, then join them by drawing bonds between each atom • continue to draw bonds with an attached atom. Tutorials Finish ring structures by completing the last bond you draw over the first atom that was drawn. When your molecule is complete, you can: • • clean up its structure, geometry, and chemistry • change selected bonds to another bond type. Introduction Complete your molecule in one of the following ways: Using change selected atoms to another element type, hybridization, and atomic charge Refer to the next section for details about correcting the structure, geometry, and chemistry of your chemical sample. Appendices Understanding Customizing Refer to Chapter 5, “Modifying Chemical Samples”, for details about using the selection tools to change atom and bond properties on a molecule you have already drawn. CAChe for Windows User Guide 4-9 Chapter 4 - Creating Chemical Samples Perfecting your molecule Once you have drawn all the constituent atoms and bonds of your molecule, you can correct its valence, hybridization, and geometry by choosing drop-down list items from the Beautify menu. NOTE Do not use the Beautify menu options on any portion of a molecule that has been optimized previously by running an Optimize Geometry experiment. This is because the geometry achieved by running an optimization experiment is superior to the geometry resulting from the Beautify menu options. Refer to Chapter 13, “Optimization and Energy Calculations”, for information on performing optimization experiments. Correcting valence ª To correct valence 1. Select a workspace selection tool by clicking on it in the tool palette. 2. Using the selection tool, select the portion of your molecule, or the entire molecule, for which you want to correct valence. The objects you have selected are highlighted in the workspace. 3. Choose Beautify Valence. CAChe adds or removes hydrogen atoms and electrons to or from the selected atoms to satisfy the valence rules for each atom. Defining valence rules You can change the valence rules that you apply to a chemical sample using the Beautify menu options (i.e., Beautify Valence and Beautify Comprehensive) by changing valence options for each element in the periodic table. 4-10 CAChe for Windows User Guide Perfecting your molecule ª To change the valence rules for an element Using Tutorials Introduction 1. Choose Options Periodic Table Settings to display the Periodic Table Settings dialog box. 2. Do one of the following: Select an element from the element list by clicking on it. ❏ If the element you want is not shown, double-click on Periodic Table to display the Periodic Table dialog box. Appendices Understanding Customizing ❏ CAChe for Windows User Guide 4-11 Chapter 4 - Creating Chemical Samples Select the element whose valence rules you want to change by clicking on it. Select OK to close the Periodic Table dialog box. 3. Select the Beautify tab in the Periodic Table Settings dialog box to display a list of valence options. 4. Select the Beautify Valence check box so that it is enabled. You can now apply valence rules by using the menu options Beautify Valence and Beautify Comprehensive. 5. Do one of the following: ❏ Select the Complete Shell radio button so that it is enabled. You can now fill the valence shell to satisfy atom hybridization by using the menu options Beautify Valence and Beautify Comprehensive. ❏ Select the Satisfy Configuration radio button so that it is enabled. You can now fill the orbitals of the element’s atoms to satisfy atom hybridization by using the menu options Beautify Valence and Beautify Comprehensive. 6. Select the Add Electrons check box so that it is enabled. You can now add orbitals to represent non-bonded electrons by using Beautify Valence and Beautify Comprehensive. 7. Select OK to close the Periodic Table Settings dialog box and to save the new valence rules applied by using Beautify Valence and Beautify Comprehensive. NOTE Select Factory Settings to restore default settings for the application of valence rules for the element currently chosen in the Periodic Table Settings dialog box. Factory Settings is displayed when you select the Beautify tab. Select Factory Settings for All to restore default settings to all elements for all options selected in the Periodic Table Settings dialog box. 4-12 CAChe for Windows User Guide Perfecting your molecule Correcting hybridization To correct hybridization 1. Select a workspace selection tool by clicking on it in the tool palette. 2. Using the selection tool, select the portion of your molecule, or the entire molecule, for which you want to correct hybridization. Introduction ª CAChe examines the hybridization (electronic configuration) of each selected atom and bond, and forces the atomic configurations to match the bond types and atom charges, so that electronic configuration is consistent with the number of bonded and non-bonded valence electrons. You can label atoms with their hybridization using the Atom Attributes dialog box, accessed by choosing View Atom Attributes. Using 3. Choose Beautify Hybridization. Tutorials The objects you have selected are highlighted in the workspace. Refer to Chapter 6, “Viewing Chemical Samples”, for information about the Atom Attributes dialog box. 1. Select a workspace selection tool by clicking on it in the tool palette. 2. Using the selection tool, select the portion of your molecule, or the entire molecule, for which you want to correct ring geometry. The objects you have selected are highlighted in the workspace. 3. Choose Beautify Rings. CAChe forces selected cyclic structures into either a planar or puckered conformation, adjusting bond lengths to their proper values. CAChe for Windows User Guide 4-13 Understanding To correct ring geometry Appendices ª Customizing Correcting ring geometry Chapter 4 - Creating Chemical Samples If the selected structure contains two or more sp2 atoms, the ring is flattened. If the selected structure contains fused rings, all rings except the first one are flattened. Correcting geometry ª To correct geometry 1. Select a workspace selection tool by clicking on it in the tool palette. 2. Using the selection tool, select the portion of your molecule, or the entire molecule, for which you want to correct geometry. The objects you have selected are highlighted in the workspace. 3. Choose Beautify Geometry. CAChe changes the bond angles and bond lengths in the selected objects to chemically sound values, based on existing atom valence and hybridization. NOTE This menu option does not clean up ring geometry. Correcting hydrogen bond geometry ª To correct hydrogen bond geometry 1. Select a workspace selection tool by clicking on it in the tool palette. 2. Using the selection tool, select the portion of your molecule, or the entire molecule, for which you want to correct H-bond geometry. 3. The objects you have selected are highlighted in the workspace.Choose Beautify H-Bonds. CAChe sequentially orients each -OH or -SH hydrogen atom to 4-14 CAChe for Windows User Guide Perfecting your molecule maximize hydrogen bonding. ª To correct valence, hybridization, ring structure, and geometry in one step 1. Select a workspace selection tool by clicking on it in the tool palette. 2. Using the selection tool, select the portion of your molecule, or the entire molecule, for which you want to correct valence, hybridization, ring structure, and geometry. Tutorials The Beautify Comprehensive menu option corrects valence, hybridization, geometry, and ring structure in one step. This option is equivalent to choosing Valence, Hybridization, Rings, and Geometry, in order, from the Beautify menu. Using The Comprehensive command Introduction NOTE This menu option moves only hydrogen atoms by rotations and applies to water, hydroxyl or thiol groups only. The objects you have selected are highlighted in the workspace. Deleting hydrogens The Beautify Delete Hydrogens menu option deletes all hydrogen atoms from your structure so you can view or experiment on just the backbone of your chemical sample. Appendices Use the Beautify Valence menu option to replace the hydrogen atoms. You can also hide or display hydrogen atoms using the View Suppress Hydrogens menu option. Refer to Chapter 6, “Viewing Chemical Samples”, for more information about hiding and displaying hydrogen atoms. CAChe for Windows User Guide Understanding CAChe satisfies the valence and hybridization rules of the selected objects, and corrects the ring structure and geometry. Customizing 3. Choose Beautify Comprehensive. 4-15 Chapter 4 - Creating Chemical Samples ª To delete hydrogen atoms 1. Select a workspace selection tool by clicking on it in the tool palette. 2. Using the selection tool, select the portion of your molecule, or the entire molecule, for which you want to correct valence, hybridization, ring structure, and geometry. The objects you have selected are highlighted in the workspace. 3. Choose Beautify Delete Hydrogens. CAChe deletes all hydrogen atoms in the selected workspace objects. 4-16 CAChe for Windows User Guide Saving files Refer to Chapter 6, “Viewing Chemical Samples”, for information on the Atom Attributes and Bond Attributes dialog boxes. You can save all files, of all file types in CAChe, using the menu options described in the next sections, “Saving a new file” and “Saving an existing file”. NOTE When you change a new or existing file in CAChe, an asterisk is displayed next to the file name in the workspace title bar to indicate that the file is changed and you need to save it. Once you save the file, the asterisk disappears. Tutorials The chemical sample is displayed in the same orientation and display style in which you saved the file when you next open it. Using When you save your chemical sample file in CAChe, you save the current orientation of the chemical sample in the workspace and its display style for atoms and bonds chosen from the Atom Attributes and Bond Attributes dialog box options. Introduction Saving files ª To save a previously unsaved file 1. Choose File Save. Appendices Understanding If this is the first time you are saving the file, the Save As dialog box is displayed. Customizing Saving a new file CAChe for Windows User Guide 4-17 Chapter 4 - Creating Chemical Samples 2. Select the arrow button in the Save in box to display a dropdown list of: ❏ folders in the directory structure above the currently open folder ❏ available drives on which you can save the file. 3. Choose the folder or drive in which you want to save the file from the drop-down list. 4. Do one of the following: ❏ To create a new folder in which to save the file, select the dialog box button shown to the left. ❏ To move up a level of folders to locate the folder in which you want to save the file, select the dialog box button shown to the left. ❏ To save the file in a subfolder, click and drag the scroll bar in the scrolling list to locate the folder in which you want to save the file, and double-click on the folder to open it. 5. Do one of the following: 4-18 ❏ Click in the File name text box and type the file name that you want to use to save the file. ❏ Click and drag the scroll bar in the scrolling list to display a file that you want to replace, and click on it to select it. That file name is now displayed in the File name text box. CAChe for Windows User Guide Saving files 6. Select the arrow button in the Save as type box and choose the file type you require from the drop-down list. 7. Select Save to close the Save As dialog box and to save the file. ª Introduction Saving an existing file To save an existing file without changing the name, type, or location ❏ Choose File Save. ❏ Press Ctrl S. ❏ Select the toolbar button shown to the left. Tutorials 1. Do one of the following: ª Using The file is saved. To save an existing file with a new file name, as a different file type, or in a new location 1. Choose File Save As to display the Save As dialog box. ❏ Select the arrow button in the Save as type box and choose the new file type from the drop-down list. ❏ Select the arrow button in the Save in box and choose from the drop-down list the new drive or folder where you want to save the file. ❏ Click and drag the scroll bar in the scrolling list to locate the folder in which you want to save the file, and double-click on the folder to open it. 3. Select Save to close the Save As dialog box and to save the file with the new file name, as the different file type, in another folder, or on another drive. CAChe for Windows User Guide 4-19 Understanding Click in the File name text box and type the new file name. Appendices ❏ Customizing 2. Do one of the following, as required: Chapter 4 - Creating Chemical Samples Opening a saved file ª To open a saved file 1. Choose File Open to display the Open dialog box. 2. Select the arrow button in the Look in box to display a dropdown list of: ❏ folders in the directory structure above the currently open folder ❏ available drives on which you can save the file. 3. Choose the folder or drive where the file is located from the drop-down list. 4. Do one of the following: ❏ To move up a level of folders to locate the folder in which you want to save the file, select the dialog box button shown to the left. ❏ To save the file in a subfolder, click and drag the scroll bar in the scrolling list to display the folder where the file is located, and double-click on the folder to open it. 5. Select the arrow button in the Files of type box and choose the file type of the file that you want to open from the drop-down list. 4-20 CAChe for Windows User Guide Saving files ❏ Click and drag the scroll bar in the scrolling list to locate the file that you want to open, and select the file by clicking on it. ❏ Click in the File name text box and type the file name of the file that you want to open. Appendices Understanding Customizing Using Tutorials 7. Select Open to close the Open dialog box and to open the file. Introduction 6. Do one of the following: CAChe for Windows User Guide 4-21 Chapter 4 - Creating Chemical Samples Printing files CAChe allows you to print a copy of the contents of a workspace. When printing, window contents are scaled so that all currently visible workspace objects are printed. Prints are made as a bitmap at the resolution of your printer. You can preview and print the contents of all windows in CAChe, regardless of file type. The following sections describe how to: • • • preview a printout change print settings print a CAChe window. Previewing a printout CAChe allows you to view the appearance of a printout before you print. ª To preview a printout 1. Activate the document window whose contents you want to preview by clicking on the window. 2. Choose File Print Preview to enter print preview mode. The contents of the workspace are displayed framed in a page as they would appear in a printout. 3. To zoom into the printout, choose Zoom In. CAChe zooms into the displayed printout. The cursor changes to the print preview magnifying glass. Click to continue to zoom into the printout in increments. 4. To zoom out from the printout, do one of the following: Choose Zoom Out. CAChe zooms out from the displayed printout in increments. Continue to click the print preview cursor until the printout display reverts to its original size. 4-22 CAChe for Windows User Guide Printing files 5. To exit print preview mode, choose Close. CAChe returns you to the document window. Introduction Choosing print options You can change the following print options in CAChe: ª which printer to use and its properties page orientation of a printout paper size and source. Tutorials • • • To specify a printer and its properties 2. To use a different printer from the one displayed in the Printer panel, select the arrow button in the Name box and choose a printer from the drop-down list. Appendices The printer’s status, type, and location are displayed in the Printer panel of the dialog box. Understanding Customizing Using 1. Choose File Print Setup to display the Print Setup dialog box. CAChe for Windows User Guide 4-23 Chapter 4 - Creating Chemical Samples 3. To change the properties of the printer, select Properties to display a dialog box containing specific options for your printer type. 4. Select the Paper, Graphics, Device Options, or Postscript tab to display and select the options relevant to your printer. NOTE The bitmap created depends on the resolution set for your printer. Therefore, high printer resolution will create a smoother print, but will take longer to print. Lower printer resolution will be faster to print, and can be useful for very large shaded spheres, e.g., large atoms. 5. Select OK to close the dialog box of printer properties and to return to the Print Setup dialog box. 6. Select OK in the Print Setup dialog box to save the selected printer and its properties and to close the Print Setup dialog box. ª To change page orientation of a printout 1. Choose File Print Setup to display the Print Setup dialog box. 2. Select the Portrait radio button in the Orientation panel to print portrait images, where the paper is longer than it is wider. 4-24 CAChe for Windows User Guide Printing files ª To change paper size and source 1. Choose File Print Setup to display the Print Setup dialog box. 2. Select the arrow button in the Size box, located in the Paper panel, and choose a paper size from the drop-down list. 3. Select the arrow button in the Source box, located in the Paper panel, and choose a paper source from the drop-down list. Tutorials 4. Select OK to save the page orientation and to close the Print Setup dialog box. Introduction 3. Select the Landscape radio button in the Orientation panel to print landscape images, where the paper is wider than it is longer. Using 4. Select OK to save the paper size and source settings, and to close the Print Setup dialog box. Printing a CAChe window ª To print a CAChe document window to a printer 1. Activate the document window whose contents you want to print by clicking on the window. ❏ Choose File Print ❏ Press Ctrl P ❏ Select the toolbar button shown to the left. Appendices 2. Do one of the following: The Print dialog box is displayed. CAChe for Windows User Guide Understanding CAChe also gives you the option of printing the contents of a document window to a file, as well as to a printer. Customizing You can print the contents of all CAChe document windows, regardless of file type. When printing, the contents of a document window are scaled so that all currently visible objects are printed. Prints are made as a bitmap at the resolution of your printer. 4-25 Chapter 4 - Creating Chemical Samples 3. To use a different printer from the one displayed in the Printer panel, select the arrow button in the Name box and choose a printer from the drop-down list. The printer’s status, type, and location are displayed in the Printer panel of the dialog box. 4. To change the properties of the printer, select Properties to display a dialog box containing specific options for your printer type. 4-26 CAChe for Windows User Guide Printing files 6. Select OK to close the dialog box of printer properties and to return to the Print dialog box. 7. In the Copies panel of the Print dialog box, do one of the following: ❏ Select the up arrow button in the Number of Copies text box to increase the number of copies you require of the printout. Select the down arrow button to decrease the number of copies you require. ❏ Click in the Number of Copies text box and enter the number of printouts you require. Tutorials The bitmap created depends on the resolution set for your printer. Therefore, high printer resolution will create a smoother print, but will take longer to print. Lower printer resolution will be faster to print, and can be useful for very large shaded spheres, e.g., large atoms. Using NOTE Introduction 5. Select the Paper, Graphics, Device Options, or Postscript tab to display and select the options relevant to your printer. 8. Select OK to print the contents of the active document window to a printer and to close the Print dialog box. ª To print a CAChe document window to a file 1. Activate the document window whose contents you want to print to a file by clicking on the window. ❏ Choose File Print. ❏ Press Ctrl P. ❏ Select the toolbar button shown to the left. Understanding 2. Do one of the following to display the Print dialog box: Appendices 3. Select the Print to file check box so that it is enabled. 4. Select OK. The Print to File dialog box is displayed. CAChe for Windows User Guide Customizing TIP If printing is slow, try changing the resolution of your printer, as described in step 5. 4-27 Chapter 4 - Creating Chemical Samples 5. Select the arrow button in the Save in box and choose a folder or drive in which to save the file from the drop-down list. 6. Do one of the following: ❏ To create a new folder in which to save the file, select the dialog box button shown to the left. ❏ To move up a level of folders to locate the folder in which you want to save the file, select the dialog box button shown to the left. ❏ To save the file in a subfolder, click and drag the scroll bar in the scrolling list to locate the folder in which you want to save the file, and double-click on the folder to open it. 7. Click in the File name text box and enter a name for the file that you are saving. 8. Select the arrow button in the Save as type box and choose a file type from the drop-down list for the file that you are saving. 9. Select Save to print the contents of the selected document window to a file and to close the Print to File dialog box. The image is saved using the file name and file type that you specified, and in the folder you selected. TIP If printing is slow, try changing the resolution of your printer. Refer to “Choosing print options”, p 4-23, for details. 4-28 CAChe for Windows User Guide 5 Modifying Chemical Samples 5 This chapter describes how to: use the CAChe workspace selection tools to select portions of your molecule, the entire molecule, or similar workspace objects • use the CAChe Find command to select portions of your molecule by name or property • change the atom and bond properties of those selected objects using the workspace style bar • change the atom and bond properties of those selected objects using the menu options. Modifying atoms and bonds Selecting workspace objects 5-2 5-3 The selection tools The Select Molecule tool The Select Similar tool The Select Group tool 5-3 5-6 5-9 5-12 Finding workspace objects Selecting neighbors Selecting water Changing atom and bond properties CAChe bond types 5-14 5-16 5-18 5-19 5-32 Appendices Contents Understanding Customizing • Using Once you have drawn your molecule, you can change its atom and bond characteristics by selecting atoms and bonds and applying new attributes. Tutorials Overview Chapter 5 - Modifying Chemical Samples Modifying atoms and bonds You can change the components of your molecule and their properties by selecting the objects you want to modify, and choosing the new values or properties from either: • • the style bar boxes at the top of the workspace dialog boxes, accessed from the menu, that provide further options for modifying your molecule’s atoms and bonds. Before you can modify the properties of any workspace object, you have to select it with one of the selection tools provided in the tool palette to the left of the workspace. TIP A quick way to create your molecule is to sketch a chain of atoms and bonds with just one element and bond type. You then select individual atoms and bonds and change their properties using the drop-down lists in the workspace style bar. 5-2 CAChe for Windows User Guide Selecting workspace objects Selecting workspace objects Select workspace objects individually, in groups, or molecule by molecule. Use one of the four selections tools to select what you require in the workspace. TIP Objects such as atoms, bonds and labels, can be hidden in one or more views and possibly visible in other views. Hidden objects in one view can be selected using the selection tools in a different view where they are visible. Since commands operate on any selected objects whether hidden or visible, it is important to remember which hidden objects are selected. If you forget which objects are selected, use the command View | Hide Unselected to hide all unselected objects and to display any hidden selected objects. • • • the Select tool • the Select Group tool. the Select Molecule tool the Select Similar tool Select a tool by clicking on it in the tool palette. As you point at a tool icon with the cursor, the name of the tool appears in a yellow ToolTip and a line of help appears in the lower left border of the window. CAChe for Windows User Guide 5-3 Appendices The workspace palette contains four selection tools: Understanding Customizing The selection tools Using You can also select workspace objects from the Sample Property Window described in “Selecting chemical sample data”, p 6-34 and you can select objects by searching for specific properties using the Edit | Find command Edit | Select Neighbors, Select Locked atoms. Tutorials When you select a workspace object, it becomes highlighted in the workspace to show that it is selected, while other objects appear grayed out to show that these objects are deselected. Chapter 5 - Modifying Chemical Samples When you select a tool, the mouse cursor in the workspace changes shape to indicate which tool is currently selected. Alternatively, you may choose the tool from the popup menu that appears when you press right mouse button in the 3D Structure Window. Clicking the right mouse button in the Workspace pops up this menu. The table below displays the selection tools as they appear in the tool palette, and their corresponding cursors: Selection tool • the Select tool (default) • the Select Molecule tool • the Select Similar tool • the Select Group tool Tool palette icon Mouse cursor General rules for the selection tools The following methods of selecting and deselecting workspace objects apply to all four selection tools. 5-4 CAChe for Windows User Guide Selecting workspace objects Selecting one object • clicking on an object selects it. For example, click and drag around a group of atoms with the Select tool to select all the atoms in the group. • clicking on one object, then holding down the Shift key or holding down the Ctrl key while clicking on other objects, selects all those objects. Using Selecting more than one object • clicking and dragging a selection box around objects with the tool selects those objects. Tutorials For example, click on an atom with the Select tool to select the atom, or click on a molecule with the Select Molecule tool to select the molecule. Selecting an atom with the Select Molecule tool will select all the atoms in the molecule, including any hidden atoms. Moving one or more objects in the workspace • hold the Alt key, click and drag on one or more selected objects to move the selected object or objects across the workspace. Deselecting one object • clicking on a selected object while holding down either the Shift or Ctrl key deselects the object. NOTE You cannot deselect an object if it is the only selected item in the workspace, because CAChe requires that at least one object in the workspace must be selected. CAChe for Windows User Guide 5-5 Understanding select every visible object in the workspace by clicking anywhere in the workspace with any selection tool. Hidden objects are not selected. Appendices • Customizing For example, to select adjacent atoms, click on one atom, then hold down the Shift key and click on the adjacent atom. Continue to hold down the Shift key until you have selected everything you want. Chapter 5 - Modifying Chemical Samples Deselecting more than one object • clicking on a selected object while holding down either the Shift or Ctrl key, then clicking on additional selected objects while continuing to hold down the Shift or Ctrl key, deselects those selected objects. NOTE You cannot deselect everything in the workspace, because CAChe requires that at least one object must be selected. If you attempt to do this, all objects become selected. Using the Select tool Use the Select tool to: • • select one or more objects, such as individual atoms or bonds deselect one or more objects. Refer to Chapter 3, “CAChe Basics”, for further details about how to use the Select tool. The Select Molecule tool Use the Select Molecule tool to: 5-6 • • select one or more molecules by clicking on them • select a group of molecules by clicking on them while holding down either the Shift or Ctrl key • • deselect a selected molecule by clicking on it select one or more molecules by clicking and dragging around them deselect a group of selected molecules by clicking and dragging around them while holding down either the Shift or Ctrl key CAChe for Windows User Guide Selecting workspace objects • ª deselect a group of selected molecules by clicking on them while holding down either the Shift or Ctrl key. To select the Select Molecule tool 1. Select the Select Molecule tool by clicking on it in the tool palette. Tutorials The mouse cursor changes to the Select Molecule tool, shown to the left. Using the Select Molecule tool to select a molecule Use the Select Molecule tool to select a molecule by: ª clicking on a molecule in the workspace. Using • To select a molecule 1. Position the Select Molecule tool over the molecule you want to select. 2. Press the left mouse button to select the molecule. ª • clicking on the molecules in the workspace while holding down either the Shift or Ctrl key • clicking and dragging around the molecules in the workspace. To select more than one molecule by clicking 1. Position the Select Molecule tool over the molecule you want to select. 2. Press the left mouse button to select the molecule. CAChe for Windows User Guide 5-7 Understanding Use the Select Molecule tool to select more than one molecule by: Appendices Using the Select Molecule tool to select more than one molecule Customizing The molecule is highlighted to show that it is selected. Hidden atoms in the molecule are selected. To display selected hidden atoms, choose View | Hide Unselected. Chapter 5 - Modifying Chemical Samples The molecule is highlighted to show that it is selected. 3. Position the Select Molecule tool over the second molecule you want to select. 4. Hold down the either Shift or Ctrl key and press the left mouse button to select the second molecule. The second molecule is highlighted in the workspace to show that it is selected. 5. Continue to hold down either the Shift or Ctrl key while clicking on molecules until you select all the molecules you require. ª To select more than one molecule by clicking and dragging 1. Position the Select Molecule tool to one side of a molecule you want to select. 2. Click and drag the Select Molecule tool to form a selection box around the molecules you want to select. The molecules you encompassed in the selection box are highlighted to show that they are selected. Using the Select Molecule tool to deselect a molecule ª To deselect a selected molecule 1. Position the Select Molecule tool over the selected molecule you want to deselect. 2. Press the left mouse button to deselect the molecule. The molecule is grayed out to show that it is deselected. Using the Select Molecule tool to deselect more than one molecule Use the Select Molecule tool to deselect more than one molecule by: 5-8 • holding down either the Shift or Ctrl key while clicking on the selected molecules • holding down either the Shift or Ctrl key and clicking and dragging around the selected molecules in the workspace. CAChe for Windows User Guide Selecting workspace objects ª To deselect more than one molecule by clicking 1. Position the Select Molecule tool over the selected molecule you want to deselect and hold down either the Shift or Ctrl key. 2. Press the left mouse button to deselect the molecule while holding down either the Shift or Ctrl key. The molecule is grayed out to show that it is deselected. 4. Continue to hold down either the Shift or Ctrl key and press the left mouse button to select the second molecule. Tutorials 3. Position the Select Molecule tool over the second molecule you want to select. 5. Continue to hold down either the Shift or Ctrl key while clicking on selected molecules until you deselect all the molecules you require. ª Using The second molecule is grayed out to show that it is deselected. To deselect more than one molecule by clicking and dragging 2. Hold down either the Shift or Ctrl key and click and drag the Select Molecule tool to form a selection box around the selected molecules you want to deselect. The molecules you encompassed in the selection box are grayed out to show that they are deselected. Understanding The Select Similar tool Use the Select Similar tool to: CAChe for Windows User Guide select all atoms or bonds of a similar type deselect all atoms or bonds of a similar type. Appendices • • Customizing 1. Position the Select Molecule tool to one side of a selected molecule you want to deselect. 5-9 Chapter 5 - Modifying Chemical Samples You can define the criteria for similarity when selecting similar objects with the Select Similar tool by choosing Options Select Similar Settings. Refer to “Defining Similarity”, p 5-11, for details about how to define similarity criteria. ª To select the Select Similar tool 1. Select the Select Similar tool by clicking on it in the tool palette. The mouse cursor changes to the Select Similar tool, shown to the left. Using the Select Similar tool to select similar atoms or bonds ª To select similar atoms 1. Position the Select Similar tool over an atom of the type that you want to select. 2. Press the left mouse button to select the atom and all other atoms of the same type. All similar atoms are highlighted in the workspace to show that they are selected. ª To select similar bonds 1. Position the Select Similar tool over a bond of the type that you want to select. 2. Press the left mouse button to select the bond and all other bonds of the same type. All similar bonds are highlighted in the workspace to show that they are selected. 5-10 CAChe for Windows User Guide Selecting workspace objects Using the Select Similar tools to deselect similar atoms or bonds ª To deselect similar atoms 1. Position the Select Similar tool over a selected atom of the type that you want to deselect. All similar atoms are grayed out in the workspace to show that they are deselected. ª To deselect similar bonds Tutorials 2. Hold down either the Shift or Ctrl key and press the left mouse button to deselect the atom and all other atoms of the same type. 2. Hold down either the Shift or Ctrl key and press the left mouse button to select the bond and all other bonds of the same type. Using 1. Position the Select Similar tool over a selected bond of the type that you want to deselect. All similar bonds are highlighted in the workspace to show that they are selected. Defining Similarity You can define the following criteria for selecting similar atoms: Customizing element type hybridization charge number of bonded atoms number and type of bonds. You can define the following criteria for selecting similar bonds: CAChe for Windows User Guide bond type Appendices • • Understanding • • • • • element of bonded atoms. 5-11 Chapter 5 - Modifying Chemical Samples To do this, you use the Select Similar Settings dialog box. ª To define similarity criteria for the Select Similar tool 1. Choose Options Select Similar Settings. The Select Similar Settings dialog box is displayed. 2. Select the Atoms tab to display a list of atom property check boxes. 3. Select the required check boxes so that they are enabled. 4. Select the Bonds tab to display a list of bond property check boxes. 5. Select the required check boxes so that they are enabled. 6. Select OK to close the Select Similar Settings dialog box. The Select Group tool Use the workspace’s Select Group tool to: • • • • ª 5-12 select an atom and all the atoms with which it shares a group deselect an atom and all atoms in the group select an RMS label. select bonds in a group To select the Select Group tool CAChe for Windows User Guide Selecting workspace objects 1. Select the Select Group tool by clicking on it in the tool palette. The mouse cursor changes to the Select Group tool, shown to the left. Using the Select Group tool to select a group ª To select a group o position the cursor to one side of the group you want to select, hold down the left mouse button and drag the cursor to form a selection box around the group. select an atom, and hold down either the Shift or Ctrl key while you select each of the remaining atoms in the group by clicking on it. The atoms are highlighted to show they are selected. Using o Tutorials 1. In the workspace, select the Select tool, and do one of the following: 2. Choose Edit | Group Atoms to display the Group Atoms dialog box. 5. Select OK to close the Group Atoms dialog box. 6. Select the Select Group tool, and select an atom in the defined group. All the atoms that share a group with this atom are selected, even hidden atoms. ª To deselect a group Appendices 1. In the workspace, position the Select Group tool over the selected group you want to deselect. 2. Press the left mouse button to deselect the group. The group is grayed out to show that it is deselected. CAChe for Windows User Guide Understanding 4. Select >>Group>> to display the new group in the Defined Groups list. Customizing 3. Enter a name for the group of selected atoms in the Group Name text box. 5-13 Chapter 5 - Modifying Chemical Samples Using the Select Group tool to select an RMS error label l ª To select an RMS error label 1. From two molecules in the workspace, select a corresponding atom from each, both of which are defined within a group. 2. Choose Analyze | Calculate RMS Error to display an RMS error label. 3. Use the Select Group tool to select the RMS error label. The atoms in the groups, used for the calculation, are selected. Finding workspace objects Select chemical sample atoms, bonds and groups by property using the Find menu item. ª To find objects with specific properties 1. From either the workspace or the Sample Properties view choose Edit | Find to display the Find dialog box. 2. Choose the atoms, bonds or groups from the Search for dropdown menu. 3. Choose the property from the Where drop-down menu. The properties listed are those available in the chemical sample for the chosen object. They are listed in alphabetic order. Different molecules may have different properties available for searching. 5-14 CAChe for Windows User Guide Selecting workspace objects 4. Choose the search criteria. The criteria in the list depend upon the type of property. Criteria available for strings, names, integers and real numbers are different. 5. Type the criteria values in the text box. Range criteria (e.g. “Is in Range or Equals +-) display two text boxes to specify the range. When entering a range, enter the lower and upper values. Tutorials Strings: Is, Is not, Contains, Does not contain Names: Is, Is not Integers: Equals, Not equals, Is less than, Is more than, Is in range, Is not in range Real numbers: Equals (+-), Is less than, Is more than, Is in range, Is not in range 6. (optional) Check Look in selection only to restrict the search to the currently selected objects. Using When comparing real numbers equality, enter the value you are searching for and the interval that defines equality. 8. Check Show selection only to hide all objects that are not selected. 9. Check Zoom to selection to fit the selected objects in the workspace once they are found. This option is grayed unless the Find command was invoked from a workspace. 10. Click Cancel to exit without changing the current selection. The selected objects are highlighted. CAChe for Windows User Guide 5-15 Understanding TIP To find objects that match search criteria for one property OR a different property, use the Find command twice. On the second use check Add to selection to find objects that match the search criteria for the first property or the second property. Appendices 7. (optional) Check Add to selection if you want to extend the current selection with the newly selected items. Customizing TIP To find objects that match search criteria for one property AND a different property, use the Find command twice. On the second use check Look in selection only to find objects that match the search criteria for the first property and the second property. Chapter 5 - Modifying Chemical Samples Selecting neighbors Using the Select tool in the workspace to select atoms or bonds adjacent to selected atoms in large molecules is tedious and error prone. CAChe provides a single command that selects atoms and bonds that neighbor selected atoms. ª To select neighboring atoms 1. From the workspace choose Edit | Select Neighbors. The following dialog appears: 2. Choose the method to Select Nearest by • • • Selection Radius Number of Atoms Number of Bonds 3. Type the radius, number of atoms or number of bonds in the box adjacent to the chosen method. 4. Click OK to select the all neighboring atoms and add them to the current selection. When selecting neighboring atoms by number of atoms, CAChe creates a list of the atoms closest to the currently selected atoms and orders that list by distance from the selection. CAChe then adds the nearest specified number of atoms to the current selection. 5-16 CAChe for Windows User Guide Selecting workspace objects When selecting by number of neighboring bonds, CAChe selects all atoms that are closer than the specified number of bonds from the currently selected atoms. ª To select neighboring residues, waters and HET groups 1. From the workspace choose Edit | Select Neighbors. The Select Neighbors dialog appears. Using Tutorials 2. Choose Residues, waters, HETs from the Select Nearest pull down menu. 3. Choose the method to Select Nearest by Number of Atoms Number of Bonds 4. Type the radius, number of atoms or number of bonds in the box adjacent to the chosen method. 5. Click OK to select the all neighboring residues, waters and HETs and add them to the current selection. When selecting neighboring residues, waters and HETs by number of atoms, CAChe creates a list of the atoms closest to the currently selected atoms and orders that list by distance from the selection. CAChe then adds the nearest specified number of atoms to the current selection. When selecting by number of neighboring bonds, CAChe selects CAChe for Windows User Guide 5-17 Understanding Customizing Selection Radius Appendices • • • Chapter 5 - Modifying Chemical Samples all residues, waters and HETs that are closer than the specified number of bonds from the currently selected atoms. Selecting water Using the Select tool in the workspace to select all water molecules in a protein crystal or solvated chemical sample is tedious and error prone. CAChe provides a single command that selects all water molecules. To select all water molecules 1. Choose Edit | Select Water. All hidden or visible water molecules are selected. 5-18 CAChe for Windows User Guide Changing atom and bond properties Changing atom and bond properties Once you have selected the atom, bond, or molecule that you want to change, you choose its new values or properties from: • • the style bar boxes at the top of the workspace • • Beautify menu options that correct an atom’s hybridization an Edit menu option that changes bond type while connecting two atoms participating in the bond. Tutorials dialog boxes, accessed from the menu, that provide further options for modifying your molecule’s atoms and bonds The quickest way to change the element type, hybridization, or charge of an atom involves using the Element Type, Hybridization, and Charge style bar boxes at the top of the workspace. Element Type box Charge box Bond Type box The atom or group of atoms are highlighted to show that they are selected. 2. Select the arrow button in the Element Type box. A drop-down list is displayed, listing the last seven element types you have used. 3. If the element you require is displayed, choose it from the dropdown list. The element is displayed in the Element Type box and the selected atom, or group of atoms, changes to the chosen element type. CAChe for Windows User Guide 5-19 Understanding 1. Select the atom or group of atoms whose element type you want to change by clicking on the atoms with a selection tool. Customizing To change an atom’s element type using the style bar boxes Appendices ª Hybridization box Using Changing an atom using the style bar Chapter 5 - Modifying Chemical Samples 4. If the element you require is not displayed, choose Periodic Table from the drop-down list to display the Periodic Table dialog box. 5. Select an element by double-clicking on it, or clicking on it and selecting OK. The Periodic Table dialog box closes. The element you have chosen is displayed in the Element Type box and the selected atom changes to the chosen element type. ª To change hybridization of an atom using the style bar 1. Select the atom or group of atoms whose hybridization you want to change by clicking on the atoms with a selection tool. The atom or group of atoms are highlighted to show that they are selected. 2. Select the arrow button in the Hybridization box. A drop-down list is displayed, listing a number of hybridization options. 3. Choose the hybridization you require from the drop-down list. The hybridization is displayed in the Hybridization box and the selected atom changes to the chosen hybridization value. 5-20 CAChe for Windows User Guide Changing atom and bond properties ª To change the charge of an atom using the style bar 1. Select the atom or group of atoms whose charge you want to change by clicking on the atoms with a selection tool. The atom or group of atoms are highlighted to show that they are selected. The charge of the selected atom changes to the positive or negative value that you selected or entered into the Charge text box. Tutorials 2. Select the up or down arrow button in the Charge text box to display the positive or negative value you require, or enter the value you require by clicking in the text box. You can also change the element type, hybridization, and charge of an atom using the Atom Attributes dialog box. The dialog box also provides access to display options that you can apply to one or more selected atoms. Using Changing an atom using the Atom Attributes dialog box To change an atom’s element type, hybridization, and charge using the Atom Attributes dialog box 1. Select the atom or group of atoms whose element type, hybridization, or charge you want to change by clicking on the atoms with a selection tool. The atom or group of atoms are highlighted to show that they are selected. Appendices 2. Choose View Atom Attributes to display the Atom Attributes dialog box. Understanding ª Customizing Refer to Chapter 6, “Viewing Chemical Samples”, for details about changing the appearance of an atom. CAChe for Windows User Guide 5-21 Chapter 5 - Modifying Chemical Samples 3. Select the Type tab to display the Element, Hybridization and Charge boxes. 4. Select the arrow button in the Element box to display a dropdown list which is identical to the Element Type drop-down list in the style bar. 5. Select the element you require from the drop-down list, if the element is displayed. 6. If the element you require is not displayed, choose Periodic Table from the drop-down list to display the Periodic Table dialog box. 5-22 CAChe for Windows User Guide 7. Select an element by double-clicking on it, or clicking on it and selecting OK. Using Tutorials Changing atom and bond properties The Periodic Table dialog box closes and the element you have chosen is displayed in the Element box in the Atom Attributes dialog box. o o Select the up or down arrow button in the Charge text box to display the positive or negative atomic charge you require. Click in the text box and enter the atomic charge you require. 10. Select OK to close the Atom Attributes dialog box. Appendices The selected atom or group of atoms changes to the element type, hybridization, and positive or negative atomic charge that you have chosen in the Atom Attributes dialog box. Understanding 9. Do one of the following: Customizing 8. Select the arrow button in the Hybridization box and choose the hybridization you require from the drop-down list. CAChe for Windows User Guide 5-23 Chapter 5 - Modifying Chemical Samples Changing an atom’s hybridization using the Beautify menu Another way to change an atom’s hybridization is to select the atom and choose Beautify Hybridization, or Beautify Comprehensive. Both these menu options employ valence rules to change atomic hybridization to match the existing bond type and atomic charge. However, because the valence of the atoms must be satisfied before you change hybridization, Beautify Comprehensive is the best menu option to use if there is unsatisfied valence in your sample. Beautify Comprehensive corrects the valence, hybridization, ring structure, and geometry of your sample in one step. Refer to Chapter 4, “Creating Chemical Samples”, for more information on the Beautify menu. ª To change an atom’s hybridization using the Beautify menu 1. Select the atom or group of atoms whose hybridization you want to change by clicking on the atoms with a selection tool. The atom or group of atoms are highlighted to show that they are selected. 2. Do one of the following: o o Choose Beautify Comprehensive if there is unsatisfied valence in your sample. Choose Beautify Hybridization if you have already satisfied the valence rules for your sample. CAChe changes the atomic hybridization of the selected atom or group of atoms to match bond type and atomic charge. 5-24 CAChe for Windows User Guide Changing atom and bond properties Checking an atom’s hybridization using the Beautify menu A way to check atom hybridizations is to select the atoms and choose Beautify | Check Hybridization. This menu option employs valence rules to check atomic hybridization to match the existing bond type and atomic charge. 1. Select the atom or group of atoms whose hybridization you want to change by clicking on the atoms with a selection tool. The atom or group of atoms are highlighted to show that they are selected. 2. Choose Beautify Check Hybridization. Appendices Understanding CAChe checks the atomic hybridization of the selected atom or group of atoms to match bond type and atomic charge. If the hybridization is correct, CAChe displays a dialog with the message “Hybridization OK”. Otherwise, CAChe highlights the atoms which do not satisfy the hybridization rules. Choose Beautify | Hybridization to correct the hybridization of the selected atoms. Using To check an atom’s hybridization using the Beautify menu Customizing ª Tutorials Refer to Chapter 4, “Creating Chemical Samples”, for more information on the Beautify menu. CAChe for Windows User Guide 5-25 Chapter 5 - Modifying Chemical Samples Checking an atom’s valence using the Beautify menu A way to check atom valences is to select the atoms and choose Beautify | Check Valence. This menu option employs valence rules to check atomic valence to match the existing bond type and atomic charge. Refer to Chapter 4, “Creating Chemical Samples”, for more information on the Beautify menu. ª To check an atom’s valence using the Beautify menu 1. Select the atom or group of atoms whose valence you want to change by clicking on the atoms with a selection tool. The atom or group of atoms are highlighted to show that they are selected. 2. Choose Beautify Check Valence. 3. CAChe checks the atomic valence of the selected atom or group of atoms to match bond type and atomic charge. If the valence is correct, CAChe displays a dialog with the message “Valence OK”. Otherwise, CAChe highlights the atoms which do not satisfy the valence rules. Choose Beautify | Valence to correct the valence of the selected atoms. Changing an atom’s radius for a particular atomic charge You can specify atomic radius for a particular atomic charge for any element in the periodic table. ª To specify atomic radius for a particular atomic charge 1. Choose Options Periodic Table Settings to display the 5-26 CAChe for Windows User Guide Changing atom and bond properties Tutorials Periodic Table Settings dialog box. o o Choose the element for which you want to specify a radius associated with atomic charge from the element list by clicking on it. Using 2. Do one of the following: If the element you require is not shown in the list, double-click on Periodic Table to display the Periodic Table dialog box. 6. Click in the Van der Waals Radius text box and type a value for atomic radius. 7. Select OK to close the Define Charge dialog box. The charge and van der Waals radius values are displayed in the Charge/VDW Radius list in the Periodic Table Settings dialog CAChe for Windows User Guide 5-27 Understanding 5. Click in the Charge text box and type a value for atomic charge. Appendices 4. To add a new list item, select Add to display the Define Charge dialog box. Customizing 3. Select the Charge tab to display the Charge/VDW Radius list. Chapter 5 - Modifying Chemical Samples box. 8. To change an existing list item, select the list item containing the atomic charge and radius values you want to change, and select Change to display the Define Charge dialog box. 9. Click in the Charge or Van der Waals Radius text box and type a new value for atomic charge or radius. 10. Select OK to close the Define Charge dialog box. The new charge and van der Waals radius values are displayed in the Charge/VDW Radius list in the Periodic Table Settings dialog box. 11. To remove an existing list item, select the list item containing the atomic charge and radius values you want to remove, and select Remove. The list item disappears from the list. 12. To apply a radius value to a specific atomic charge for the currently selected element, select the list item containing the charge and corresponding radius values that you require. 13. Select OK to close the Periodic Table Settings dialog box. All atoms of the element you chose, with the atomic charge you specified, are displayed in the workspace with the radius you specified. The radius value applies to all new atoms of that element that you draw which possess the atomic charge you specified, and all atoms in saved chemical sample files with the atomic charge you specified. Changing a bond using the style bar Change the bond type of a selected bond using the Bond Type box in the style bar at the top of the workspace. Bond Type box ª To change bond type using the Bond Type style bar box 1. Select the bond or group of bonds whose bond type you want to change by clicking on the bonds with a selection tool. 5-28 CAChe for Windows User Guide Changing atom and bond properties The bond, or group of bonds, are highlighted to show that they are selected. 2. Select the arrow button in the Bond Type box to the right of the style bar. A drop-down list of bond types is displayed. 3. Choose the bond type you require from the drop-down list. Tutorials The bond type you have chosen is displayed in the Bond Type box, and the selected bond changes to the bond type you have chosen. Changing a bond using the Bond Attributes dialog box Refer to Chapter 6, “Viewing Chemical Samples”, for details about changing the appearance of a bond. ª Using You can also change a bond’s type using the Bond Attributes dialog box. The dialog box also provides access to display options that you can apply to one or more selected bonds. To change bond type using the Bond Attributes dialog box The bond, or group of bonds, are highlighted to show that they are selected. Appendices Understanding 2. Choose View Bond Attributes to display the Bond Attributes dialog box. Customizing 1. Select the bond, or group of bonds, whose type you want to change by clicking on the bonds with a selection tool. CAChe for Windows User Guide 5-29 Chapter 5 - Modifying Chemical Samples 3. Select the Type tab to display the Type box. 4. Select the arrow button in the Type box to display a drop-down list which is identical to the Bond Type drop-down list in the style bar. 5. Select the bond type you require from the drop-down list. 6. Select OK to close the Bond Attributes dialog box. The selected bond or group of bonds changes to the bond type that you have chosen in the Bond Attributes dialog box. Changing bond type while connecting atoms Another way to change bond type is to select the two atoms participating in the bond, and connect the atoms using the Edit Connect Atoms menu option. The connecting bond cycles through the following bond types every time you choose this menu option: • • • • 5-30 single double triple weak. CAChe for Windows User Guide Changing atom and bond properties ª To change bond type while connecting atoms 1. Select the two atoms participating in the bond by clicking on the first atom with the Select tool, then holding down the Shift key and clicking on the second atom with the Select tool. The atoms are highlighted to show that they are selected. o Choose Edit Connect Atoms. o Press Ctrl K. o Select the Connect Atoms toolbar button, shown to the left. The selected bond changes to one of the following bond types: single, double, triple, or weak. Tutorials 2. Do one of the following: o Continue to choose Edit Connect Atoms. o Continue to press Ctrl K. o Using 3. Do one of the following: Continue to select the Connect Atoms toolbar button, until the selected bond changes to the bond type you require. Reversing a coordinate bond ª To reverse a coordinate bond Understanding 1. Select the molecule that contains the coordinate bond(s) by clicking on the molecule with the Select Molecule tool. Customizing CAChe enables you to reverse the direction of a coordinate bond. The molecule is highlighted to show that it is selected. 2. Choose Edit | Reverse Coordinate Bonds. Appendices The coordinate bond(s) are reversed. CAChe for Windows User Guide 5-31 Chapter 5 - Modifying Chemical Samples CAChe bond types CAChe recognizes the following seven types of bonds: • • • • • • • single covalent bonds double covalent bonds triple covalent bonds weak bonds ionic bonds coordinate covalent bonds (dative bonds) π coordination bonds. Single covalent bonds Single covalent bonds share two electrons between two atoms, in a single bond created by the overlap of one orbital from each bonded atom. Each atom contributes one of its valence electrons to the bond. The following example shows a single covalent bond displayed as a cylinder. Double covalent bonds Double covalent bonds share four electrons between two atoms, in two bonds created by the overlap of two orbitals on each atom. Each atom contributes two of its valence electrons to the bond. The following example shows a double covalent bond displayed as multiple cylinders. 5-32 CAChe for Windows User Guide Changing atom and bond properties Triple covalent bonds Tutorials Triple covalent bonds share six electrons between two atoms, in three bonds created by the overlap of three orbitals on each atom. Each atom contributes three of its valence electrons to the bond. The following example shows a triple covalent bond displayed as multiple cylinders. Weak bonds Using Weak bonds allow you to explicitly represent the weak interactions between two atoms. A common example is the hydrogen bond, shown below in the multiple cylinders display style. Coordinate covalent bonds or dative bonds are formed when a lone pair from one atom combines with an empty orbital of another atom. The following example shows a coordinate bond in the multiple cylinders display style. CAChe for Windows User Guide 5-33 Understanding Coordinate covalent bonds Appendices Ionic bonds represent strong attractions between centers of opposite charge. The electrons that participate in ionic bonds are localized at the negatively-charged atom. The following example shows an ionic bond in the multiple cylinders display style. Customizing Ionic bonds Chapter 5 - Modifying Chemical Samples π coordination bonds These bonds involve donation of electrons from a π bond to an empty orbital of a metal. The only way to create π coordination bonds is to click and drag with the Atom/Bond tool away from the center of a bond to an empty location in the workspace, or from one existing atom to another. The following example shows a π coordination bond in the multiple cylinders display style. 5-34 CAChe for Windows User Guide 6 Viewing Chemical Samples Introduction 6 Overview change the appearance of chemical samples, by viewing atoms and bonds in a number of different display options, without changing molecular structure • customize display attributes for workspace objects, such as the color assigned to elements, the appearance of atom and bond properties, the appearance of workspace text and lines, and the perspective from which you view your chemical sample • • save customized workspace settings Using • Tutorials This chapter describes how to use the CAChe workspace to: build crystal structures. Contents Hiding atoms Hiding and displaying selected atoms Hiding and displaying hydrogen atoms Changing the appearance of bonds Changing bond shape Changing bond color Hiding bonds Hiding and displaying selected bonds 6-18 6-18 6-19 6-21 6-21 6-25 6-28 6-28 Viewing selection only Coloring by molecules Viewing multiple windows Viewing chemical sample data 6-30 6-31 6-32 6-33 Selecting chemical sample data 6-34 6-35 6-37 Changing element color 6-37 Editing the color palette 6-38 Changing drawing settings 6-43 Changing workspace perspective and distance 6-44 Changing workspace stereo display 6-46 Changing view settings for valence 6-48 Saving settings Building crystal structures Selecting a space group Defining cell parameters Defining fractional coordinates Building asymmetric atoms Building a molecular crystal Building an infinite lattice Displaying and hiding crystal boundaries Creating CrystalStructure files ShelX files 6-51 6-54 6-55 6-57 6-58 6-60 6-60 6-62 6-63 6-63 6-65 Customizing 6-8 6-11 6-14 6-16 Editing chemical sample data Changing view settings Understanding Changing atom labeling Changing atom shape Changing atom color Hiding and displaying electrons 6-2 6-4 6-8 Appendices CAChe display options Using CAChe model types Changing the appearance of atoms Chapter 6 - Viewing Chemical Samples CAChe display options CAChe offers many different options for displaying atoms and bonds so that you can easily change the appearance of your entire chemical sample, or selected portions only, without changing the molecular structure. This allows you to view different representations of your chemical sample at varying stages of your work. Choosing a new display style can help you visualize certain aspects or properties of your molecule more clearly. CAChe offers the following display options for your chemical sample: • • • • • • shape, size, and shading options for atoms and bonds ability to show or hide atoms and bonds of a certain type ability to display electrons customizable color palette for workspace objects labeling options for atoms and bonds drawing settings for the display of text and lines in the workspace or in files containing graphs. Refer to Chapter 19, “Investigating Biomolecules”, for additional information on viewing and displaying biomolecules. While you can customize the display of your molecule by combining many different combinations of viewing options for atom and bond properties, CAChe also offers the following five built-in model styles available from the View menu: • Lines - displays atoms as their atomic symbol, and bonds as multiple lines. Colors are not changed. The lines are not zbuffered, improving speed of rotation. • Lines Only - displays atoms as small circles, and bonds as multiple small cylinders scaled to 0.04Å. Colors are not changed. The cylinders are z-buffered, improving depth perception for large molecules. 6-2 CAChe for Windows User Guide CAChe display options • Cylinders - displays atoms as small shaded spheres with a van der Waals radius of 1Å scaled to 0.05Å, and bonds as multiple cylinders scaled to 0.1Å. Colors are not changed. • Space Filling (Corey-Pauling-Kolton model) - displays atoms as shaded spheres with a van der Waals radius of 1Å scaled to 1.0Å, and colored by element • Partial Charge and Calculated Bond Order - displays atoms as shaded spheres with a partial charge of 1 a.u. scaled to 1.0Å, and colored by partial charge polarity (+/-), and bonds as single cylinders scaled to 0.1Å for a calculated bond order of 1, colored by calculated bond order. The Partial Charge and Calculated Bond Order model style is enabled only if you have first run a partial charge or calculated bond order experiment on your chemical sample. Tutorials van der Waals radius of 1Å scaled to 0.2Å, and colored by element, and bonds as multiple cylinders scaled to 0.1Å, colored by atom color Introduction Ball and Cylinder - displays atoms as shaded spheres with a Using • Appendices Understanding Customizing Refer to Chapter 16, “Investigating Atom and Bond Properties”, for information on running both a partial charge experiment and a calculated bond order experiment. CAChe for Windows User Guide 6-3 Chapter 6 - Viewing Chemical Samples Using CAChe model types ª To view your chemical sample as a line drawing 1. Select the portion of your molecule that you want displayed as a line drawing by clicking on objects with a selection tool. The objects are highlighted to show that they are selected. 2. Choose View Lines. Atoms are displayed as their atomic symbol label, and bonds as multiple lines, colored by atom color. Atom colors are not changed. To color selected atoms by element, choose View | Color by Element. The following example shows a molecule displayed as a line drawing. ª To view your chemical sample as a line only drawing 1. Select the portion of your molecule that you want displayed as a line only drawing by clicking on objects with a selection tool. The objects are highlighted to show that they are selected. 2. Choose View Lines Only. Atoms are displayed as small circles, and bonds as multiple small z-buffered cylinders, colored by atom color. Atom colors are not changed. To color selected atoms by element, choose View | Color by Element. 6-4 CAChe for Windows User Guide Using CAChe model types 1. Select the portion of your molecule that you want displayed as a ball and cylinder model by clicking on objects with a selection tool. The objects are highlighted to show that they are selected. 2. Choose View Ball & Cylinder. Atoms are displayed as shaded spheres with a van der Waals radius of 1Å scaled to 0.2Å.Bonds are displayed as multiple cylinders scaled to 0.1Å, colored by atom color. Atom colors are not changed. To color selected atoms by element, choose View | Color by Element. Introduction To view your chemical sample as a ball and cylinder model Tutorials ª 1. Select the portion of your molecule that you want displayed as a space filling model by clicking on objects with a selection tool. The objects are highlighted to show that they are selected. 2. Choose View Space Filling. Your molecule appears as a CPK (Corey-Pauling-Kolton) model with atoms displayed as shaded spheres with a van der Waals radius of 1Å scaled to 1.0Å. Bonds are displayed as single cylinders scaled to 0.000Å. Atom colors are not changed. To CAChe for Windows User Guide 6-5 Understanding To view your chemical sample as a space filling (CPK) model Appendices ª Customizing Using The following example shows a molecule displayed as a ball and cylinder model. Chapter 6 - Viewing Chemical Samples color selected atoms by element, choose View | Color by Element. The following example shows a molecule displayed as a space filling model. ª To view your chemical sample by partial charge and calculated bond order 1. Run a partial charge experiment or a calculated bond order experiment on your chemical sample. 2. Select the portion of your molecule that you want displayed as by partial charge and calculated bond order by clicking on objects with a selection tool. The objects are highlighted to show that they are selected. 3. Choose View Partial Chg and Calc. Bond Order. Atoms are displayed as shaded spheres with a partial charge of 1 a.u. scaled to 1.0Å, and colored by partial charge polarity (+/-). Bonds are displayed as single cylinders scaled to 0.1Å for a calculated bond order of 1, colored by calculated bond order. Refer to Chapter 16, “Investigating Atom and Bond Properties”, for information on running both a partial charge experiment and a calculated bond order experiment. 6-6 CAChe for Windows User Guide Using CAChe model types Appendices Understanding Customizing Using Tutorials Introduction The following example shows a molecule displaying partial charge and calculated bond order. CAChe for Windows User Guide 6-7 Chapter 6 - Viewing Chemical Samples Changing the appearance of atoms Atoms can be represented by a variety of symbols that depict different kinds of information, such as spheres and space-filling spheres, or as combinations of symbols and spheres. NOTE The display style you choose to represent your chemical sample has no impact on its structure, or on any experiments you run using that chemical sample. CAChe allows you to change the following aspects of an atom’s appearance: • • • • atom labeling atom shape atom color the electrons of an atom. Changing atom labeling Choose from the following selection of atom labels: • • • • atomic symbol - displays the atom symbol; e.g., C for carbon • atom number - displays the CAChe atom number. hybridization - displays the atom hybridization; e.g., sp3 charge - displays the atomic charge; e.g., +1 partial charge - displays the calculated partial charge (as long as you have run a partial charge experiment on your chemical sample first) CAChe assigns a unique number to each atom, and numbering is in the same order that you added the atoms to the workspace. 6-8 CAChe for Windows User Guide Changing the appearance of atoms chirality for asym. carbons - indicates which asymmetric carbon atoms are chiral centers; e.g., R or S • locked state - indicates whether the atom is locked (L), and whether the lock is broken (LB). Appendices Understanding Customizing Using The following example shows a molecule’s atoms displaying atom symbol, hybridization, and atom number labels. Tutorials • Introduction If you delete an atom from your chemical sample, the associated atom number is also deleted, creating a gap in the sequential order of atom numbers. The deleted atom’s number is assigned to the next atom you add to the workspace. CAChe for Windows User Guide 6-9 Chapter 6 - Viewing Chemical Samples ª To change atom labeling 1. Select the atoms for which you want to display labels by clicking on the atoms with a selection tool. 2. Choose View Atom Attributes to display the Atom Attributes dialog box. 3. Select the Label tab to display the following list of labeling options for atoms: o atomic symbol o hybridization o charge o partial charge o atom number o chirality for asymmetric carbons o presence of locks on the atom o the alphanumeric label o name. If the chemical sample is from a PDB file, the Name is the PDB atom name. 4. Select the check box next to the display features you require for 6-10 CAChe for Windows User Guide Changing the appearance of atoms each selected atom. 5. Select OK to close the Atom Attributes dialog box. Changing atom shape View atoms as three types of spheres: shaded spheres - atoms are displayed as a shaded space-filling representation. Appendices Understanding Customizing Using • Tutorials Introduction The labels you chose are displayed against the atoms you selected. CAChe for Windows User Guide 6-11 Chapter 6 - Viewing Chemical Samples • wireframe spheres - atoms are displayed as a wireframe space-filling representation. • dotted spheres - atoms are displayed as a dotted space-filling representation. Change the radius of a sphere to represent: • • • 6-12 the van der Waal’s radius the covalent radius a radius proportional to the calculated atomic partial charge property - only available if you have run a partial charge or calculated bond order experiment on your chemical sample. CAChe for Windows User Guide Changing the appearance of atoms Scale a sphere by specifying a radius size relative to 1Å. To change atom shape 1. Select the atoms that you want to change shape by clicking on the atoms with a selection tool. Using Tutorials 2. Choose View Atom Attributes to display the Atom Attributes dialog box. Introduction ª o Spheres radio button, proceed to step 5 o Coordination Polyhedra radio button, proceed to step 8 o Thermal Ellipsoid radio button, proceed to step 9 o None radio button, to hide the selected atoms. Proceed to step 10. CAChe for Windows User Guide o Shaded Spheres radio button o Wireframe Spheres radio button o Dotted Spheres radio button. Appendices 5. From the following list in the Shape Options panel, select the shape option you want to apply to each selected atom: Understanding 4. Choose one of the following options as the representation for the selected atoms: Customizing 3. Select the Shape tab. 6-13 Chapter 6 - Viewing Chemical Samples 6. Select the arrow button in the Scale Spheres such that box and choose a scaling option from the drop-down list. 7. Enter the factor by which you want to scale the radius in the is displayed as text box. Proceed to step 10. 8. Enter a value in the Polyhedra Scale Factor text box in the Shape Options panel. Proceed to step 10. The coordination polyhedra will be scaled by the factor you have entered. 9. Enter a value in the Probability text box in the Shape Options panel to determine the probability at which the ellipsoid is represented. 10. Select OK to apply the changes and to close the Atom Attributes dialog box. The selected atoms are displayed as the spheres you specified, with a radius representing the scaling options you chose. Changing atom color Color atoms by: • element - colors the selected atoms with the element color from the periodic table settings. • partial charge polarity - colors the selected atoms by the calculated partial charge polarity. Atoms with a positive partial charge are colored with color index 2 (usually red). Atoms with a negative partial charge are colored with color index 3 (usually yellow). An experiment which produces partial charge must have been run on your chemical sample before this choice produces useful results. • specific color - colors the selected atoms with a specific color that you choose from a drop-down list displaying 12 colors. Refer to “Changing view settings”, p 6-37, for information on how to edit element color settings for the periodic table. Use the following options to change the color of atom labels: 6-14 CAChe for Windows User Guide atom color - colors labels on the selected atoms with the same color selected in the Color atoms by panel of the Color tab options. • standard text color - colors labels on the selected atoms with the standard text color. Refer to “Editing the color palette”, p 6-38, for information on changing the standard text color by editing the CAChe color palette. ª To change atom color and atom label color 1. Select the atoms that you want to change color by clicking on the atoms with a selection tool. Tutorials • Introduction Changing the appearance of atoms o o o color atoms by element color atoms by partial charge polarity by last residue, molecule or backbone color o color atoms by specific color. 4. In the Color Atoms By panel, select the radio button next to the color option you want to apply to each selected atom, ensuring CAChe for Windows User Guide 6-15 Appendices 3. Select the Color tab to display the following list of color options for atoms: Understanding Customizing Using 2. Choose View Atom Attributes to display the Atom Attributes dialog box. Chapter 6 - Viewing Chemical Samples that the relevant radio button is enabled. 5. If you select the Specific Color radio button, also select the arrow button in the box and choose a color from the drop-down list. 6. In the Color Label With panel, select the radio button next to the color option you want to apply to the label of each selected atom, ensuring that the relevant radio button is enabled. 7. Select OK to close the Atom Attributes dialog box. The selected atoms and their atom labels are displayed in the colors you chose. Hiding and displaying electrons CAChe can add representations of non-bonded valence electrons to your chemical sample. You can display or hide electrons in the chemical sample. When you hide electrons, they remain part of the chemical sample. Hiding electrons has no effect on calculations run on the chemical sample during an experiment. The following example shows electrons displayed in the workspace. Electrons ª To display electrons 1. When electrons are hidden, choose View Show Electrons. A check mark is displayed next to the drop-down list option to indicate that electrons are visible. All of the electrons in the 6-16 CAChe for Windows User Guide Changing the appearance of atoms workspace are displayed. ª To hide electrons Appendices Understanding Customizing Using Tutorials The check mark next to the drop-down list option disappears to indicate that electrons are hidden. All of the electrons in the workspace are hidden. Introduction 1. When electrons are visible, choose View Show Electrons. CAChe for Windows User Guide 6-17 Chapter 6 - Viewing Chemical Samples Hiding atoms You may want to view part or all of your chemical sample, without displaying its atoms, so that you can view other aspects of your molecule more clearly. Hiding atoms simplifies the appearance of your chemical sample, and increases the speed of manipulating the molecule around the workspace. CAChe allows you to: • • hide and display selected atoms in your sample hide and display all of the hydrogen atoms in your sample. Hiding and displaying selected atoms When you hide selected atoms, the atoms are hidden in the workspace but remain part of your chemical sample. Hiding atoms does not affect any experiments you subsequently run on the chemical sample. ª To hide selected atoms 1. Select the atoms that you want to hide by clicking on them with a selection tool. 2. Do one of the following: o Choose View | Hide Selected. o or, o Choose View Atom Attributes to display the Atom Attributes dialog box. Select the Display Atoms check box so that it is not checked. (The Display Atoms check box is displayed no matter which tab is currently selected in the Atom Attributes dialog box.) Select OK to close the Atom Attributes dialog box. The selected atoms are hidden and then the visible objects are selected. ª 6-18 To hide unselected atoms CAChe for Windows User Guide Hiding atoms 1. Select the atoms that you want to remain visible by clicking on them with a selection tool. 2. Choose View | Hide Unselected. You will find this command very useful when working with complex molecules because it allows you to see clearly selected objects by quickly hiding all those that are not selected. To display hidden selected atoms Tutorials ª Introduction The atoms that are not selected are hidden. Do one of the following: 1. Choose View | Show All, or o Choose Edit Select All. o Press Ctrl A. Using 1. Do one of the following to select all atoms: 2. Choose View Atom Attributes to display the Atom Attributes dialog box. 3. Select the Display Atoms check box so that it is enabled. A check mark appears in the Display Atoms check box. Customizing 4. Select OK to close the Atom Attributes dialog box. All of the atoms in the workspace are now visible. Understanding ª You can show or hide all the hydrogen atoms in your chemical sample, without deleting the atoms. As with hiding atoms, hiding hydrogen atoms does not affect any calculations you run on the chemical sample while hydrogens are hidden. To hide hydrogen atoms Appendices Hiding and displaying hydrogen atoms 1. When hydrogens are visible, choose View Suppress Hydrogens. CAChe for Windows User Guide 6-19 Chapter 6 - Viewing Chemical Samples A check mark is displayed next to the drop-down list option to indicate that hydrogens are hidden. Depending upon the setting in Options | Valence Settings, either all the hydrogen atoms in the workspace are hidden or only the hydrogen atoms connected to carbon are hidden. ª To display hydrogen atoms 1. When hydrogens are hidden, choose View Suppress Hydrogens. The check mark that is displayed next to the drop-down list option disappears to indicate that hydrogens are visible. All the hydrogen atoms in the workspace are visible. Exceptions to hiding hydrogen atoms You cannot hide hydrogen atoms that are attached to a locked atom, or hide locked hydrogen atoms. Refer to Chapter 8, “Investigating Molecular Geometry”, for details about locked atoms. You also cannot hide hydrogen atoms that are attached to an atom that has not had its valence checked by choosing Beautify Valence or Beautify Comprehensive. Refer to Chapter 5, “Modifying Chemical Samples”, for details about the Beautify menu options. You can also choose to keep hydrogens displayed if they are attached to atoms with valence exceptions by choosing Options Valence Settings. You can also choose to keep hydrogens displayed if they are attached to atoms other than carbon by choosing Options Valence Settings. Refer to “Changing view settings for valence”, p 6-48, for details about the Options Valence Settings menu option. 6-20 CAChe for Windows User Guide Changing the appearance of bonds CAChe allows you to change the shape and color of a bond’s appearance. As with changing the appearance of atoms, choosing another display style for bonds has no impact on a chemical sample’s structure, or on any experiments you run using that chemical sample. Changing bond shape single lines multiple lines single cylinders Using multiple cylinders. Scale the radius of a cylinder by: • • specifying a relative size in angstroms for each cylinder • specifying a relative size in angstroms for a calculated bond order of 1. This option is only useful after a calculated bond order experiment has been run on your chemical sample. specifying a relative size in angstroms for a formal bond order of 1 Appendices Understanding Customizing • • • • Tutorials Bonds can be represented as: Introduction Changing the appearance of bonds CAChe for Windows User Guide 6-21 Chapter 6 - Viewing Chemical Samples Single lines All bond types are displayed as a single line with one line connecting the two atoms, as shown in the following example. Multiple lines Bonds are displayed as lines, with the number of lines connecting the two atoms corresponding to the bond type. For example, a double bond is displayed as two lines, as shown in the following example. 6-22 CAChe for Windows User Guide Changing the appearance of bonds Single cylinders Tutorials Introduction All bond types are displayed as a single cylinder with one cylinder connecting the two atoms, as shown in the following example. Using Multiple cylinders ª To change bond shape 1. Select the bonds that you want to change shape by clicking on the bonds with a selection tool. CAChe for Windows User Guide 6-23 Appendices Understanding Customizing Bonds are displayed as cylinders, with the number of cylinders connecting the two atoms corresponding to the bond type. For example, a double bond is displayed as two cylinders, as shown in the following example. Chapter 6 - Viewing Chemical Samples 2. Choose View Bond Attributes to display the Bond Attributes dialog box. 3. Select the Shape tab to display the following list of shape options for bonds: o single lines o multiple lines o single cylinders o multiple cylinders. 4. In the Draw bonds as panel, select the radio button next to the shape option you want to apply to each selected bond, so that the relevant radio button is enabled. 5. Select the arrow button in the Scale cylinders such that box and choose a scaling option from the drop-down list. 6. Click in the is displayed as text box and enter the factor by which you want to scale the radius of each selected bond. 7. Select OK to close the Bond Attributes dialog box. The selected bonds are displayed in the shape you specified, with a radius representing the scaling options you chose. 6-24 CAChe for Windows User Guide Changing the appearance of bonds Changing bond color Refer to “Changing the appearance of atoms”, p 6-8, for more information on specifying atom color. For example, if a bond is drawn between an atom colored by a specific color blue and a carbon atom colored by element type, the bond will be half blue and half black. Refer to “Changing view settings”, p 6-37, for information on how to edit element color settings for the periodic table. • bond type - colors the selected bonds by the type of bond. Single bonds are colored with color index 3, double bonds are colored with color index 4, triple bonds are colored with color index 8, weak bonds are colored with color index 5, coordinate bonds are colored with color index 7, and ionic bonds are colored with color index 1. Refer to “Editing the color palette”, p 6-38, for information on changing the assigned bond type colors by editing the CAChe color palette. calculated bond strain - colors the selected bonds by the calculated bond strain. The calculated bond strain is mapped onto the bond order values, and the color indexes used are the same as for bond type. Appendices • This option is only useful after a calculated bond strain experiment has been run on your chemical sample. CAChe for Windows User Guide Using atom element color - colors the selected bonds with the element color from the periodic table settings. Customizing • Tutorials atom color - colors the selected bonds with the same color specified for the atom attached at each end of the bond. Atom color is specified using the Atom Attributes dialog box. Understanding • Introduction Bonds can be colored by: 6-25 Chapter 6 - Viewing Chemical Samples • calculated bond order - colors the selected bonds by the calculated bond order. Bond order values are rounded to the nearest integer, and the color indexes used are the same as for bond type. This option is only useful after a calculated bond order experiment has been run on your chemical sample. • specific color - colors the selected bonds with a specific color that you choose from a drop-down list displaying 12 colors. Refer to “Editing the color palette”, p 6-38, for information on changing the colors displayed in the drop-down list by editing the CAChe color palette. ª To change bond color 1. Select the bonds that you want to change color by clicking on them with a selection tool. 2. Choose View Bond Attributes to display the Bond Attributes dialog box. 6-26 CAChe for Windows User Guide Changing the appearance of bonds o color bonds by atom element colors o color bonds by bond type o color bonds by calculated bond strain o color bonds by calculated bond order o color bonds by specific color. 4. Select the radio button next to the coloring option you want to apply to each selected bond, so that the relevant radio button is enabled. 5. To assign a specific color to selected bonds, select the arrow button in the Specific Color box and choose a color from the drop-down list. 6. Select OK to close the Bond Attributes dialog box. Tutorials color bonds by atom colors Using o Introduction 3. Select the Color tab to display the following list of color options for bonds: Appendices Understanding Customizing The selected bonds are displayed in the colors you chose. CAChe for Windows User Guide 6-27 Chapter 6 - Viewing Chemical Samples Hiding bonds CAChe allows you to: • hide and display selected bonds in your sample. You can hide the bonds in your chemical sample in exactly the same way that you can hide atoms. The bonds are hidden from view in the workspace, but are still present in your molecule. Hiding bonds does not affect any experiments you run on your chemical sample while bonds are hidden. Hiding and displaying selected bonds ª To hide selected bonds 1. Select the bonds that you want to hide by clicking on them with a selection tool. Then do one of the following: 2. Choose View | Hide Selected The selected bonds are not visible in the workspace. Alternatively, 1. Select the bonds that you want to hide by clicking on them with a selection tool. 2. Choose View Bond Attributes to display the Bond Attributes dialog box. 3. Select the Display Bonds check box so that it is disabled. The Display Bonds check box is displayed no matter which tab is currently selected in the Bond Attributes dialog box. 4. Select OK to close the Bond Attributes dialog box. The selected bonds are not visible in the workspace. ª To display hidden bonds Do one of the following: 6-28 CAChe for Windows User Guide Hiding bonds 1. Choose View | Show All, All of the bonds in the workspace are now visible. Alternatively, Click on an empty area of the workspace with a selection tool. o Choose Edit Select All o Press Ctrl A. 2. Choose View Bond Attributes to display the Bond Attributes dialog box. 3. Select the Display Bonds check box so that it is enabled. Tutorials o Introduction 1. Do one of the following to select all the objects in the workspace: A check mark appears in the Display Bonds check box. 4. Select OK to close the Bond Attributes dialog box. Appendices Understanding Customizing Using All of the bonds in the workspace are now visible. CAChe for Windows User Guide 6-29 Chapter 6 - Viewing Chemical Samples Viewing selection only Simplifying the view of giant molecules, crystal lattices and complex chemical samples often aids understanding and analysis. You can simplify a view by displaying only selected objects like backbone atoms. ª To show only the selection 1. From the 3D Structure window or Sample Property View, choose View Show Selection Only. All displayable objects such as atoms, bonds, and labels which are selected are displayed and all other objects are hidden. The menu item View Show Selection Only is checked indicating that objects are hidden. ª To display hidden objects 1. From the 3D Structure window or the Sample Property View, choose to View Show Selection Only uncheck it and restore the display of all objects. TIP When you are viewing selections only, the visible objects change when you change selection. Viewing selection only is often used with either a Sample Property view or the Sequence View Window and selections are made in one of those windows. Often a better way to simplify the view, is to hide atoms and bonds with the View | Hide Unselected and View | Hide Selected commands. 6-30 CAChe for Windows User Guide Coloring by molecules To color molecule 1. From the workspace, choose View Color by Molecule. Appendices Understanding Customizing All molecules that contain more than three atoms and have at least one atom selected are identified and each is colored in turn with a color from the twelve CAChe atom colors. Unless the colors have been changed with View | Color Palette, the colors used are cyan, dark red, gold, green, blue, white, grey, red yellow, bright green, dark blue, purple. If there are more than twelve molecules present, the colors are reused. Tutorials ª Using Giant molecules, crystal lattices and complex chemical samples often contain many separate molecules or chains. You can visually separate molecules by coloring each with a different color. Introduction Coloring by molecules CAChe for Windows User Guide 6-31 Chapter 6 - Viewing Chemical Samples Viewing multiple windows You can open many 3D structure windows and one sample properties window for each chemical sample. When you open a new 3D structure window of the same chemical sample file, CAChe displays the molecular structure at a different orientation. Opening multiple document windows allows you to look at your chemical sample from a number of different perspectives, or in different ways, simultaneously. If you change the chemical structure in one window, all other windows containing the same chemical sample reflect those changes. ª To open a new 3D structure window of a chemical sample 1. Choose Window New 3D Structure Window. A new window opens, displaying the contents of the active document window at a different perspective. ª To open a new sample properties window of a chemical sample 1. Choose Analyze Chemical Properties Spreadsheet. A new window opens, displaying the contents of the active document window as a spreadsheet workbook. 6-32 CAChe for Windows User Guide Viewing chemical sample data The CAChe chemical sample is a database of information about your chemical sample. You can view and modify the information in a sample property workbook. ª To open a new window showing chemical sample properties 1. Choose Analyze Chemical Properties Spreadsheet. nonbonded electron pairs so that the valence can be checked. The Calculations worksheet tracks the sequence of modeling calculations that have been performed. CAChe for Windows User Guide 6-33 Appendices In the chemical sample, atoms and their properties appear in the Atoms worksheet, bonds in the Bonds worksheet, and residues in the Groups worksheet. The Orbitals worksheet keeps track of Understanding Customizing Using Tutorials A new window opens, displaying the contents of the active document chemical sample in a workbook. Introduction Viewing chemical sample data Chapter 6 - Viewing Chemical Samples The sample properties window is a workbook view of your chemical sample. As you work with the chemical sample using either the 3D Structure workspace or the Chemical Properties workbook, you add or change chemical sample information. The changes are immediately updated in the 3D Structure windows and Chemical Properties workbook (sample properties window). Save the workspace as a chemical sample file (.csf) to preserve all of the information you have added. If you save chemical samples in other formats, information such as rendering style, and computed atom properties will be lost. Selecting chemical sample data You can select objects in the chemical sample file such as atoms, bonds, labels, and groups directly from a spreadsheet in the workbook. Selection from a worksheet is often the easiest way to choose specific atoms, bonds, groups, labels or other objects. ª To select all chemical sample objects 1. In the Chemical Properties Spreadsheet, choose Edit Select All. All objects in the chemical sample on all worksheets are selected and displayed as greyed. Objects displayed in any workspaces of the same chemical sample are highlighted. ª To select a chemical sample object 1. In the Chemical Properties workbook, choose the tab for the kind of object, e.g. Atoms or Bonds. 2. Click on the row number. The row number is contained in the first column of the spreadsheet. The row background is greyed, all other objects are deselected and the object is selected. The same object displayed in any workspaces of the same chemical sample are highlighted. ª To toggle the selection of a chemical sample object 1. In the Chemical Properties workbook, choose the tab for the kind 6-34 CAChe for Windows User Guide Viewing chemical sample data of object, e.g. Atoms or Bonds. To extend the selection of chemical sample objects 1. In the Chemical Properties workbook, choose the tab for the kind of object that is currently selected, e.g. Atoms or Bonds. 2. While holding the Shift key, click on the row number. The row background is greyed from the first selected object to the current row, all other objects are deselected and the greyed objects are selected. Selected objects displayed in any workspaces of the same chemical sample are highlighted. Tutorials ª Using The selection state of the object is inverted and its display in any workspaces of the same chemical sample are updated. The selection of other objects is unchanged. Introduction 2. While holding the Ctrl key, click on the row number. The row number is contained in the first column of the spreadsheet. Editing chemical sample data You can enter specific data into the chemical sample file such as precise atom coordinates or experimental UV/visible absorption spectra. Customizing To enter chemical sample properties 1. In the Chemical Properties workbook, choose Edit Edit Property Values. Editing of cells is enabled. 2. Click in a cell and type the new value. When you click out of the cell, the value is updated and all open workspace and sequence views are also immediately updated. NOTE Editing the value of geometry labels does not alter the geometry. CAChe for Windows User Guide 6-35 Understanding ª Editing the value of atom IDs renumbers atoms in a molecule. Appendices TIP Chapter 6 - Viewing Chemical Samples ª To copy, cut, paste, and delete chemical sample properties 1. In the Chemical Properties workbook, choose Edit Edit Property Values. Editing of cells is enabled. 2. Select a cell or information in a cell. 3. Choose one o Edit Copy o Edit Cut o Edit Paste o Edit Delete. The chosen operation is performed on the selection. Entire rows are selected by clicking on the row number. Note that you can copy and paste between sample property worksheets, between chemical samples and to and from external applications like word processors and spreadsheets. 6-36 CAChe for Windows User Guide Changing view settings Changing view settings • • text and line width for general workspace labeling the color assigned to atom and bond properties, workspace labeling, and text and background color the perspective from which you view your chemical sample. You can also specify display criteria for showing and hiding hydrogen atoms and electrons in the workspace. Changing element color You can change the color assigned to any element in CAChe by editing the settings of the periodic table. Changes you make this way apply to all chemical sample files, not just the active document in the workspace. ª Tutorials the color assigned to elements Using • • Introduction CAChe allows you to customize display attributes for workspace objects, such as: To change element color Customizing 1. Choose Options Periodic Table Settings. Appendices Understanding The Periodic Table Settings dialog box is displayed. CAChe for Windows User Guide 6-37 Chapter 6 - Viewing Chemical Samples 2. Do one of the following to select an element whose color you want to change: o o Select an element in the Periodic Table Settings element list. Double-click on Periodic Table to display the Periodic Table dialog box, and select an element by clicking on it and selecting OK to close the Periodic Table dialog box. 3. Select the Color tab to display the Color box. 4. Select the arrow button in the Color box and choose a color from the drop-down list of 12 colors. 5. Select OK to close the Periodic Table Settings dialog box. The new element color is applied to objects of the element type you chose from the drop-down list. Color changes apply to all saved chemical sample files, and all new objects of that element type drawn in the workspace. NOTE Select Factory Settings to restore default settings for element color for the element currently chosen in the Periodic Table Settings dialog box. Factory Settings is displayed when you select the Color tab. Select Factory Settings for All to restore default settings to all elements for all options selected in the Periodic Table Settings dialog box. You can also use the Periodic Table Settings dialog box to specify how an atom of a particular element type is corrected using the Beautify menu, and how the atom’s radius is displayed for a particular atomic charge. Refer to “Defining valence rules”, p 4-10 for more information on the Periodic Table Settings dialog box. Editing the color palette Change the color assigned to workspace objects, and atom and bond properties, by editing the CAChe color palette. The color palette matches one of 14 colors to a property or an object. 6-38 CAChe for Windows User Guide Changing view settings You can change any one of the fourteen colors by: choosing another pre-defined color The remaining two colors in the color palette are not numbered, and allow you to change the workspace text color and background color. You can change the color for the following atom and bond properties using the color palette: single bonds Using double bonds triple bonds ionic bonds weak bonds surface labels atom distance geometry labels Customizing bond angle geometry labels dihedral angle geometry labels improper torsion geometry labels. You can change the color of the following workspace properties using the color palette: • • standard text color workspace background color. When you edit the color palette, all the objects represented by that color will change to the new color. For example, the color assigned to the index number 8 represents triple bonds and improper torsion geometry labels, and may CAChe for Windows User Guide 6-39 Understanding • • • • • • • • • • Tutorials Out of the 14 colors in the palette, the first 12 colors are assigned an index number. These twelve colors appear in dialog boxes that allow you to choose a color for selected bonds and atoms, or for elements. Introduction creating a new custom color by specifying red, green, and blue color values, and hue, saturation, and luminosity values. Appendices • • Chapter 6 - Viewing Chemical Samples represent some elements, and parts of a calculated 3D surface generated by experiments. When you edit this color, all objects represented by this color will change in the active workspace. Refer to “Changing the appearance of atoms”, p 6-8, and “Changing the appearance of bonds”, p 6-21, for details about changing the color of selected atoms or bonds. Refer to “Changing element color”, p 6-37, for details about changing the color of particular elements without affecting other objects that share the same color. Viewing the color palette ª To view the color palette 1. Choose View Color Palette. The Define Colors dialog box is displayed. A scrolling list displays a color index number and associated properties and objects which are represented by the corresponding color. 2. Click and drag the scroll bar to view all 14 colors in the color palette. 6-40 CAChe for Windows User Guide Changing view settings Changing the color palette choose a pre-defined color from a selection of basic Windows colors or custom colors • create a new color from any of 16.8 million colors by adjusting red, green, and blue values, and hue, saturation, and luminosity values. To change a color to a pre-defined color Tutorials ª • Introduction When you change a color in the color palette, you can either: 1. Select the color you want to change by clicking on it in the Define Color dialog box scrolling list. Using A box is displayed around the list option to show that it is selected. 3. Do one of the following: o o CAChe for Windows User Guide Select one of the 48 basic Windows colors by clicking on a color box in the Basic colors panel. Select a custom color by clicking on a color box in the Custom colors panel. 6-41 Appendices Understanding Customizing 2. Select Set to display the Color dialog box. Chapter 6 - Viewing Chemical Samples 4. Select OK to close the Color dialog box. The new color replaces the color you selected in the Define Colors dialog box scrolling list. 5. Select OK to close the Define Colors dialog box. All workspace objects represented by that color index number are displayed in the new color. ª To change a color to a new custom color 1. Select the color you want to change by clicking on it in the Define Color dialog box scrolling list. A box is displayed around the list option to show that it is selected. 2. Select Set to display the Color dialog box. 3. Select Define Custom Colors to display a color picker square in an extended Color dialog box. 4. Do one of the following: Click and drag the crosshairs around the color picker square to choose a new color. Click and drag the slider at the right of the color picker square to adjust the luminosity value. The values in the Red, Green, and Blue text boxes, and the Hue and Sat text boxes, change as you drag the crosshairs around the square. The 6-42 CAChe for Windows User Guide Changing view settings o Click in the Red, Green, and Blue text box and enter the values you require for the new color. The values in the Hue, Sat, and Lum text boxes change accordingly. Click in the Hue, Sat, and Lum text boxes to change these values. The values in the Red, Green, and Blue text boxes change accordingly. Introduction value in the Lum text box changes as you drag the slider up or down. 5. Click on Add to Custom Colors when the color displayed in the Color|Solid box is the color you require. Tutorials A sample of the color you are creating is displayed in the Color|Solid box. 6. Select OK to close the Color dialog box. The new custom color replaces the color you selected in the Define Colors dialog box scrolling list. Using The new color appears in the Custom colors panel of the Color dialog box. 7. Select OK to close the Define Colors dialog box. CAChe allows you to change the width of lines or text in the workspace. Workspace objects affected by changing drawing settings include geometry and search labels, atom labels, graph labels and axes. ª Appendices The thinnest line width will give the fastest screen rendering, but prints as hair lines on high-resolution hard copy. Choose one of the other three line widths for lines that scale proportionately on the printer. To change drawing settings 1. Choose Options Drawing Settings. The Drawing Settings dialog box is displayed. CAChe for Windows User Guide Understanding Changing drawing settings Customizing All workspace objects represented by that color index number are displayed in the new custom color. 6-43 Chapter 6 - Viewing Chemical Samples 2. Select a text width by clicking on the button that displays the width you require. The currently active text width button is depressed to show that it is enabled. 3. Select a line width by clicking on the button that displays the width you require. The currently active line width button is depressed to show that it is enabled. 4. Select OK to close the Drawing Settings dialog box. Text and lines in the active workspace are displayed in the width you chose. Changing workspace perspective and distance You can change the perspective in which you view your chemical sample by aligning the view with an axis or plane in your molecular structure. You can also edit the viewing distance, and front and back clipping depths. Align your workspace view with the following: 6-44 • x axis - enables you to view your chemical sample looking down the chemical sample’s x axis • y axis - enables you to view your chemical sample looking down the chemical sample’s y axis • z axis - enables you to view your chemical sample looking down the chemical sample’s z axis. CAChe for Windows User Guide Changing view settings ª • viewing distance - controls the perspective of images on the screen. Perspective can be exaggerated to enhance the 3D effect. • near clipping - clips the front portions of your molecule as it encounters the front of the three-dimensional viewing box. This gives you a cross sectional view of the remaining portion of your molecule. • far clipping - clips the back portions of your molecule as it encounters the back of the three-dimensional viewing box. This gives you a cross sectional view of the remaining portion of your molecule. Tutorials Alter viewing distance and depth using the following options: Introduction through selected atoms - enables you to view your chemical sample looking down the axis formed by two selected atoms or normal to the plane formed by three selected atoms. You must have either two or three atoms selected when you choose the View Settings command in order to use this option. Using • To change workspace perspective and distance 1. Choose Options View Settings. 2. To align your workspace view with the x, y, or z axis, select the radio button next to the axis you require, so that the radio button is enabled. CAChe for Windows User Guide 6-45 Appendices Understanding Customizing The View Settings dialog box is displayed. Chapter 6 - Viewing Chemical Samples 3. To align your workspace view through selected atoms, select two or three atoms by clicking on them with a selection tool cursor. The Through Selected Atoms radio button is no longer grayed out. 4. Select the Through Selected Atoms radio button so that it is enabled. 5. To decrease the viewing distance of your molecule, click and drag the Viewing Distance slider to the left. 6. To increase the viewing distance of your molecule, click and drag the Viewing Distance slider to the right. 7. To shrink the front of the three-dimensional viewing box to clip your molecule, click and drag the Near Clipping slider to the left. 8. To expand the front of the three-dimensional viewing box to clip your molecule, click and drag the Near Clipping slider to the right. 9. To shrink the back of the three-dimensional viewing box to clip your molecule, click and drag the Far Clipping slider to the left. 10. To expand the back of the three-dimensional viewing box to clip your molecule, click and drag the Far Clipping slider to the right. Changing workspace stereo display If you have a Stereo license, you can improve the way in which your chemical sample is displayed in the workspace by using the following options: 6-46 • texture mapping - enables you to improve the texture quality of your sample • specular highlights - enables you to add specular highlights to the atoms in your sample • high quality spheres - enables you to improve the precision of the atoms in your sample. CAChe for Windows User Guide Changing view settings You can alter the eye settings, while wearing the stereo glasses, using the following option: ª eye separation - controls the stereo disparity, so that as you rotate the trackball, objects seem not to stretch as they rotate. To change stereo display in the workspace 1. Choose Options View Settings. Using Tutorials 2. Select the OpenGL tab to display the following dialog box. Introduction • o Spectral Highlights o High Quality Spheres. Texture Mapping and Spectral Highlights cannot be chosen together. High Quality Spheres can be chosen with either option. 4. In the Eye Settings panel, select Swap Left/Right Eyes to correctly view the workspace while wearing the stereo glasses. 5. To adjust the stereoscopic view for your eyes, do one of the following: o o CAChe for Windows User Guide click and drag the Eye Separation slider to the right to make objects appear deeper click and drag the Eye Separation slider to the left to make objects appear flatter. 6-47 Understanding Texture Mapping Appendices o Customizing 3. Select the required features from the following list of options in the View Quality panel: Chapter 6 - Viewing Chemical Samples The stereo view in the workspace changes when you release the mouse button so that you can find the best separation for your eyes. 6. Select OK to close the View Settings dialog box. Changing view settings for valence You can choose to keep hydrogens and electrons displayed if they are attached to atoms with valence exceptions. You can also choose to keep locked hydrogen atoms displayed. When you hide hydrogens using the View menu, both locked hydrogen atoms, and atoms with unsatisfied valence, will remain displayed. You can also choose to display a warning message if you attempt to save a chemical sample file that contains non-standard hybridization or unsatisfied valence. Changing view settings for hydrogens and electrons ª To display locked hydrogen atoms and hydrogens attached to atoms with unsatisfied valence 1. Choose Options Valence Settings to display the Valence Settings dialog box. 2. Select the Show locked hydrogen atoms and those attached to atoms with unsatisfied valence check box so that it is enabled. 3. Select OK to close the Valence Settings dialog box and to save the view setting for hydrogens. 6-48 CAChe for Windows User Guide Changing view settings ª To display hydrogens not bonded to carbon atoms This setting applies only when View | Suppress Hydrogens is checked. In that case, all hydrogen atoms bonded to carbon are hidden and only those atoms attached to other elements are displayed. If View | Suppress Hydrogens is not checked, all hydrogen atoms are displayed. ª To display electrons attached to atoms with unsatisfied valence 1. Choose Options Valence Settings to display the Valence Settings dialog box. Tutorials 3. Select OK to close the Valence Settings dialog box and to save the view setting for hydrogen atoms. Using 2. Select the Suppress hydrogens not bonded to carbon atoms check box so that it is not checked. Introduction 1. Choose Options Valence Settings to display the Valence Settings dialog box. 2. Select the Show electrons attached to atoms with unsatisfied valence check box so that it is enabled. 1. Choose Options Valence Settings to display the Valence Settings dialog box. 2. Select the When saving files, display warning for any atoms with non-standard hybridization or unsatisfied valence check box so that it is enabled. 3. Select OK to close the Valence Settings dialog box. When you attempt to save a chemical sample file containing atoms with non-standard hybridization or unsatisfied valence, an CAChe for Windows User Guide 6-49 Understanding To display a warning when saving files containing nonstandard hybridization or unsatisfied valence Appendices ª Customizing 3. Select OK to close the Valence Settings dialog box and to save the view setting for electrons. Chapter 6 - Viewing Chemical Samples alert box is displayed. 4. Do one of the following: o o o 6-50 Select Yes to highlight atoms with non-standard hybridization or unsatisfied valence. Select No to save the chemical sample file without highlighting atoms with non-standard hybridization or unsatisfied valence. Select Cancel to close the alert box. CAChe for Windows User Guide Saving settings Once you have made a display style the default, any new atoms or bonds added to an existing chemical sample file or to a new chemical sample file will be displayed in the new default style. NOTE When you change default settings, those default settings will not apply to display styles for atoms and bonds in chemical sample files that you have already saved. Default settings only apply to atoms and bonds you draw after changing the default settings. Using Changing settings using menu options Tutorials When you change the display styles for atoms and bonds, the changes only apply to selected objects in the active workspace, unless you specify that you want to make that display style a default setting. Introduction Saving settings The following settings become default settings as soon as you change them: View Suppress Hydrogens • Options Use Faster Motion Refer to Chapter 7, “Manipulating Molecules”, for information on this Options menu option. • Adjust Enable Locks Refer to Chapter 7, “Manipulating Molecules”, for information on this Adjust menu option. CAChe for Windows User Guide 6-51 Understanding Refer to “Hiding atoms”, p 6-18, and “Changing the appearance of atoms”, p 6-8, for information on these View menu options. Customizing View Show Electrons Appendices • • Chapter 6 - Viewing Chemical Samples • all settings in the Periodic Table Settings dialog box, displayed by choosing Options Periodic Table Settings Refer to the following for information on this Options menu option: “Changing view settings”, p 6-37. Chapter 4, “Creating Chemical Samples”. Chapter 5, “Modifying Chemical Samples”. Changing settings using a dialog box The following settings become default settings by selecting Make Default in the relevant dialog box: • all colors in the Define Colors dialog box color palette, displayed by choosing View Color Palette Refer to “Changing view settings”, p 6-37, for information on this View menu option. • all settings in the Atom Attributes dialog box, displayed by choosing View Atom Attributes Refer to “Changing the appearance of atoms”, p 6-8, for information on this View menu option. • all settings in the Bond Attributes dialog box, displayed by choosing View Bond Attributes Refer to “Changing the appearance of bonds”, p 6-21, for information on this View menu option. • all settings in the Geometry Label Attributes dialog box, displayed by choosing View Geometry Label Attributes Refer to Chapter 8, “Investigating Molecular Geometry”, for information on this View menu option. 6-52 CAChe for Windows User Guide Saving settings • all settings in the Surface Attributes dialog box, displayed by choosing Analyze Surface Attributes Refer to Chapter 5, “Modifying Chemical Samples”, for information on this Options menu option. • all settings in the Drawing Settings dialog box, displayed by choosing Options Drawing Settings Refer to “Changing view settings”, p 6-37, for information on this Options menu option. • all settings in the Rotation Settings dialog box, displayed by choosing Options Rotation Settings Tutorials all settings in the Select Similar Settings dialog box, displayed by choosing Options Select Similar Settings Using • Introduction Refer to “Viewing a surface”, p 15-9, for information on this View menu option. all settings in the View Settings dialog box, displayed by choosing Options View Settings Refer to “Changing view settings” earlier in this chapter for information on this Options menu option. • all settings in the Valence Settings dialog box, displayed by choosing Options Valence Settings Appendices Refer to “Changing view settings”, p 6-37, for information on this Options menu option. Understanding • Customizing Refer to Chapter 7, “Manipulating Molecules”, for information on this Options menu option. CAChe for Windows User Guide 6-53 Chapter 6 - Viewing Chemical Samples Building crystal structures CAChe enables you to build models of infinite lattice and molecular crystal structures within the workspace. CAChe enables you to: • • • • select a space group • build the molecular structure from asymmetric atoms, which can then be used to build a molecular crystal • • • • build an infinite lattice define cell parameters define fractional coordinates of the asymmetric atoms build a structure containing only the asymmetric atoms and bonds display and hide crystal boundaries open CrystalStructure and ShelX file types import data from a text file into the Crystal Shape dialog box. There are five ways that you can add asymmetric atoms, from which the crystal structure is built: • add atoms to a workspace using the Atom tool Refer to “Using the Atom/Bond tool”, p 4-4 for further details. • add atoms to a workspace by opening a chemical sample file Refer to “Working with chemical sample files”, p 4-2 for further details. 6-54 • use the Crystal Shape dialog box to enter the atomic symbols and their fractional coordinates • create an ASCII text file of data using a specified file format; when you open this file, the asymmetric atoms and bonds are added to the workspace CAChe for Windows User Guide Building crystal structures From the asymmetric atoms, space group, and unit cell parameters, the necessary transformations are performed to create the unit cell. You specify the number of times the unit cell is repeated in three dimensions to build the crystal structure. Selecting a space group When you select a space group, you are choosing the transform used to build the crystal from asymmetric atoms. The choice of space group includes: short International (Hermann-Mauguin) space group symbols common abbreviated names (specific names) Using • • for the alternate symbols of monoclinic space groups. ª Introduction copy data from a text file and paste it into a fractional coordinates table. Tutorials • To select a space group 1. Select the crystal structure that you want to change by clicking on it with the Select Molecule Tool. Appendices Understanding Customizing 2. Choose Edit | Crystal Shape to display the Crystal Shape dialog box. CAChe for Windows User Guide 6-55 Chapter 6 - Viewing Chemical Samples 3. In the Space Groups panel, select the arrow button in the Space Group box and choose a group from the drop-down list. The complete identification for that space group is displayed in the Identification panel of the dialog box. The space group name and number, the crystal system to which it belongs, and the specific name are shown. The associated Descriptor is displayed. 4. If the space group has more than one descriptor, select the arrow button in the Descriptor box and choose the one that you require. The Descriptor drop-down list is grayed out if there are no choices available for the space group you selected. 5. Select Apply to view the crystal structure in the workspace. 6. Select OK to accept the changes and to close the Crystal Shape dialog box. Space group symbols found elsewhere have equivalent space group nomenclature in CAChe. The following table identifies the short International space groups used by CAChe that are equivalent to other published symbols. Find the alternative space group nomenclature used in the literature in the column on the right to identify the CAChe equivalent nomenclature on the left. CAChe Pmm2 Pmc21 Pcc2 Pma2 Pca21 Pnc2 Pmn21 Pba2 Pna21 Pnn2 Cmm2 Cmc21 Ccc2 Amm2 Abm2 Ama2 Aba2 Fmm2 6-56 Alternative Pmm Pmc Pcc Pma Pca Pnc Pmn Pba Pna Pnn Cmm Cmc Ccc Amm Abm Ama Aba Fmm CAChe Imm2 Iba2 Ima2 P42cm P42nm P42mc P42bc I41md I41cd P42mmc P42mcm P42nbc P42nnm P42mbc P42mnm P42nmc I41/amb I41/acd Alternative Imm Iba Ima P4cm P4nm P4mc P4bc I4md I4cd P4/mmc P4/mcm P4/nbc P4/nnm P4/mbc P4/mnm P4/nmc I4/amd I4/acd CAChe for Windows User Guide Defining cell parameters Appendices Cell parameters define the unit cell for the space group. The cell parameters a, b, and c specify the lengths of the edges of the unit cell, and the cell parameters α, β, and γ specify the angles between the edges of the unit cell. Tutorials Alternative C62 C612 C652 C622 C642 C632 C6mm C6cc C63cm C63mc C-6m C-6c C-62m C-62c C6/mmm C6/mcc C6/mcm C6/mmc P43 P423 F43 F413 I43 P433 P413 I413 Using CAChe P622 P6122 P6522 P6222 P6422 P6322 P6mm P6cc P63cm P63mc P-6m2 P-6c2 P-62m P-62c P6/mmm P6/mcc P63/mcm P63/mmc P432 P4232 F432 F4132 I432 P4332 P4132 I4132 Customizing Alternative Fdd C3 C31 C32 C-3 C312 C32 C3112 C312 C3212 C322 C3m C31m C3c C31c C-31m C-31c C-3m C-3c C6 C61 C65 C62 C64 C63 C-6 C6/m C63/m Understanding CAChe Fdd2 P3 P31 P32 P-3 P312 P321 P3112 P3121 P3212 P3221 P3m1 P31m P3c1 P31c P-31m P-31c P-3m1 P-3c1 P6 P61 P65 P62 P64 P63 P-6 P6/m P63/m Introduction Building crystal structures CAChe for Windows User Guide 6-57 Chapter 6 - Viewing Chemical Samples ª To define cell parameters 1. Select the crystal structure using the Select Molecule Tool. 2. Choose Edit | Crystal Shape to display the Crystal Shape dialog box. 3. In the Angles panel, enter values by editing the a=, b=, c=, and α=, β=, γ= text boxes. If the crystal system to which the space group belongs places restraints on unit cell parameters, values for the cell parameters will be automatically entered. 4. Select Apply to view the crystal structure in the workspace. 5. Select OK to accept the changes and to close the Crystal Shape dialog box. Defining fractional coordinates You can use the Fractional Coordinates tab of the Crystal Shape dialog box to: 6-58 • enter asymmetric atoms and their fractional coordinates before you build a crystal • enter and edit atoms and their fractional coordinates after you build a crystal. CAChe for Windows User Guide Building crystal structures ª To define the fractional coordinates 1. Choose Edit | Crystal Shape to display the Crystal Shape dialog box. 2. Select the Fractional Coordinates tab. Introduction NOTE If you are entering asymmetric atoms before you build the crystal, enter the space group and cell parameters first. Tutorials 3. Select the arrow button in the Multiplier box, and choose a value from the drop-down list. The multiplier divides the entered coordinates to give the fractional coordinates. 4. In the Symbol column, do one of the following: o enter the atomic symbol for each atom enter an alphanumeric label, containing an atomic symbol and any numeric tag, to uniquely identify each asymmetric atom. Using o Each atom in the crystal is assigned a unique number that is displayed in the Atom column. 8. Select OK to accept the structure and to close the Crystal Shape dialog box. The fractional coordinates are altered when you use CAChe computational methods, or use commands in the workspace Beautify menu, on the crystal structure. You can transfer data between tables on the Fractional Coordinates tab using Edit | Copy and Edit | Paste. CAChe for Windows User Guide 6-59 Understanding 7. Select Apply to view the crystal structure in the workspace. Appendices 6. Select Redefine All Atoms as Asymmetric to identify additional atoms as asymmetric. Customizing 5. Enter the coordinates in the X, Y, and Z columns by clicking the left uppermost cell using the left mouse button, and use the Tab key to move between cells. Chapter 6 - Viewing Chemical Samples Building asymmetric atoms You may want to build only the asymmetric atoms. This option can be used after building a molecular crystal or infinite lattice as a way to start again. This option deletes all bonds and all atoms except asymmetric atoms from the molecule file. ª To build asymmetric atoms 1. Select the crystal structure using the Select Molecule Tool. 2. Choose Edit | Crystal Shape to display the Crystal Shape dialog box. 3. In the Build panel, select Asymmetric atoms only. 4. Select Apply to view the crystal structure in the workspace. The asymmetric atoms are displayed, and you can edit their positions. 5. Select OK to accept the changes and to close the Crystal Shape dialog box. Building a molecular crystal You can build a molecular crystal by first building one molecule from asymmetric atoms. This enables you to adjust bond types in the molecule before you build the molecular crystal. ª To build a molecule 1. Choose Edit | Crystal Shape to display the Crystal Shape dialog box. 2. Define the space group and cell parameters in the Space Group panel and Angles panel, respectively. 3. In the Build panel, select Molecule. 4. Select the Fractional Coordinates tab. 5. In the Symbol column, do one of the following: 6-60 o enter the atomic symbol for each atom o enter an alphanumeric label, containing an atomic symbol and CAChe for Windows User Guide Building crystal structures any numeric tag, to uniquely identify each asymmetric atom. The bond types and atom configuration can be corrected if necessary. You can also add structures, such as water molecules, before building the molecular crystal. 8. Select OK to accept the changes and to close the Crystal Shape dialog box. ª To build a molecular crystal Tutorials 7. Select Apply to view the crystal structure in the workspace. Introduction 6. Enter the coordinates in the X, Y, and Z columns by clicking the left uppermost cell using the left mouse button, and use the Tab key to move between cells. 2. Choose Edit | Crystal Shape to display the Crystal Shape dialog box. 3. In the Build panel, select Molecular Crystals. Using 1. Select the crystal structure using the Select Molecule Tool. 4. Select Apply to view the structure in the workspace. Appendices According to this formula, when the distance between two atoms is less than the estimated bond length, they are considered bonded. Bond types are then assigned depending on the types of atoms and the distance between them. If atoms are closer than one-half the normal bond length, they are considered too close and no bond is formed. After the molecule is built from asymmetric atoms using this bond formation formula, the molecular crystal is built. Understanding The molecular crystal is built using the bonds present in the workspace and the asymmetric atoms. If no bonds are present, the crystal is built using a formula that estimates bond lengths according to covalent radii and electronegativity. Customizing 5. Select OK to accept the changes and to close the Crystal Shape dialog box. CAChe for Windows User Guide 6-61 Chapter 6 - Viewing Chemical Samples Building an infinite lattice You can build an infinite lattice crystal by entering the fractional coordinates of the asymmetric atoms. ª To build an infinite lattice 1. Choose Edit | Crystal Shape to display the Crystal Shape dialog box. 2. Select the Fractional Coordinates tab, and enter the fractional coordinates of asymmetric atoms. 3. Select the Main tab. 4. Choose the appropriate Space Group from the drop-down list. 5. Enter the cell parameters using the Angles panel. 6. In the Build panel, select Infinite Lattice. 7. Select Apply to view the infinite lattice in the workspace. Bonds are based on the distance criteria as molecular crystals. Infinite lattices are trimmed to lattice boundaries. 8. Select OK to accept the changes and to close the Crystal Shape dialog box. ª To change the lattice boundaries 1. Select the infinite lattice using the Select Molecule Tool. 2. Choose Edit | Crystal Shape to display the Crystal Shape dialog box. 3. In the Lattice Boundaries panel, enter the lattice boundaries in both positive and negative a, b, and c directions. 4. Select Apply to view the changes in the workspace. The size of the crystal is changed accordingly. 5. Select OK to accept the changes and to close the Crystal Shape dialog box. 6-62 CAChe for Windows User Guide Building crystal structures Displaying and hiding crystal boundaries NOTE To enable the display of crystal boundaries, the structure requires crystal information first: display the Crystal Shape dialog box, and select either OK or Apply. To display the asymmetric cell 1. Select the asymmetric atom using the Select Tool. 2. Choose Edit | Crystal Boundaries | Draw Asymmetric Cell. Tutorials ª Introduction You can display or hide outlines of the asymmetric cell, unit cell, and crystal lattice. An outline of the asymmetric cell is displayed. To display the unit cell Using ª 1. Select the asymmetric atom using the Select Tool. 2. Choose Edit | Crystal Boundaries | Draw Unit Cell. An outline of the unit cell is displayed. ª To display the lattice boundaries An outline of the crystal lattice is displayed. Creating CrystalStructure files Appendices You can build crystal structures by opening a CrystalStructure file. A CrystalStructure file is an ASCII text file that you create with a word processing application. This file enables you to enter fractional coordinates and thermal tensor parameters for atoms derived from theoretical or experimental data. Understanding 2. Choose Edit | Crystal Boundaries | Draw Lattice Boundaries. Customizing 1. Select the asymmetric atom using the Select Tool. CAChe for Windows User Guide 6-63 Chapter 6 - Viewing Chemical Samples CrystalStructure files have the following format and information: Line # 1 2 3 4 5 6 7 8 9 10 11 12 13 14 15 16 format CrystalStructure (spelled exactly as shown) Comments (must be present) Comments (must be present) Comments (must be present) a = {length of a axis in angstroms} b = {length of b axis in angstroms} c = {length of c axis in angstroms} alpha = {angle in degrees} beta = {angle in degrees} gamma = {angle in degrees} scale = {multiplier converting x, y, z coordinates to range (0,1) Repeat cell = {number of times to repeat the unit cell along a, b and c axes} Space Group = {international space group symbol} Descriptor = none {or enter the descriptor as found on the third line of the International Tables for Crystallography} Temperature Factor = (must be UIJ, BIJ, or BETA) {This line is optional} Z x y z T11 T22 T33 T12 T13 T23 {Z=the atomic symbol or atom label; x, y, z = fractional coordinates, separated by tabs or white space; T## = optional thermal tensor data separated by tabs or white space. Parentheses () can be used to include additional comments; data enclosed in parentheses are ignored.} Note the following: ª • The CrystalStructure file can have any name, but the first line in the file must include the word CrystalStructure spelled exactly as shown. • Three comment lines must follow. The keywords are case sensitive and should be spelled exactly as shown. • Thermal tensor data is optional. If only the first element of the tensor is entered, then the atom is considered isotropic. To build a crystal structure using a CrystalStructure file 1. Choose File | Open to display the Open dialog box. 2. From the Files of type drop-down list select Crystal Structure (*.xsf). 3. Select the file. 4. From the scrolling list, locate the file and click on it to select it. 5. Select Open to open the CrystalStructure file. The crystal structure is displayed in the workspace. 6-64 CAChe for Windows User Guide Building crystal structures ShelX files You can build crystal structures by opening a ShelX Instruction file. ª To open a ShelX Instruction file Tutorials Refer to “Changing atom shape”, p 6-11, for further information. Introduction If you entered thermal tensor data into the CrystalStructure file, you can build a crystal and represent atoms as thermal ellipsoids using the Thermal Ellipsoid command in the Shape tab of the Atom Attributes dialog box. 2. From the Files of type drop-down list select ShelX Instruction (*.ins). 3. Select the file. Using 1. Choose File | Open to display the Open dialog box. 4. From the scrolling list, locate the file and click on it to select it. If you entered thermal tensor data into the ShelX file, you can build a crystal and represent atoms as thermal ellipsoids using the Thermal Ellipsoid command in the Shape tab of the Atom Attributes dialog box. Refer to “Changing atom shape”, p 6-11, for further information. Appendices Importing data from a text file Data may be copied from text files, via the clipboard, into the fractional coordinates table of the Crystal Shape dialog box. CAChe for Windows User Guide Understanding The structure displays asymmetric atoms lacking bonds. Information about fractional coordinates, the space group, and descriptors are included in the file. This enables you to easily reconstruct the original crystal using the Crystal Shape dialog box. Customizing 5. Select Open to open the ShelX file. 6-65 Chapter 6 - Viewing Chemical Samples ª To import data from a text file 1. Open the file using a text editor. 2. Select the rows you want to copy, and copy the data to your clipboard by pressing Ctrl C. 3. Choose Edit | Crystal Shape to open the Crystal Shape dialog box. 4. Select the Fractional Coordinates tab. 5. Select one or more rows by clicking on a row in the Atom column and holding down the Shift key. 6. Press Ctrl V to paste the data from your clipboard to the table. 7. Select Apply to view the structure in the workspace. 8. Select OK to accept the changes and to close the Crystal Shape dialog box. 6-66 CAChe for Windows User Guide 7 Manipulating Molecules This chapter describes how to manipulate molecules in the CAChe workspace, including how to: • use the manipulation tools to rotate, translate, and scale workspace objects • • rotate, translate, and scale only selected portions of your molecule • superimpose one molecule over another to visualize geometrical differences • fuse atoms and bonds from one cyclic structure with atoms and bonds from another cyclic structure • • name and define groups of atoms duplicate, copy, cut, delete, and paste selected portions of your molecule 7-3 7-5 7-8 Manipulating portions of your molecule 7-9 Using faster motion mode 7-12 Duplicating molecules 7-13 Duplicating workspace objects 7-13 Copying workspace objects 7-14 Copying objects from ChemDraw or ISIS Draw 7-17 Deleting portions of your molecule Cutting workspace objects Deleting workspace objects The undo command Fusing ring structures Grouping atoms 7-18 7-18 7-19 7-19 7-21 7-24 Defining a group 7-24 Selecting groups and portions of groups 7-25 Changing atom order in groups 7-28 Showing residues in Group Atoms dialog box 7-29 Understanding 7-2 Appendices Using the manipulation tools Customizing select atom groups and portions of atom groups. Contents Using the Rotate tool Using the Translate tool Using the Scale tool Using Overview Tutorials Introduction 7 Chapter 7 - Manipulating Molecules Using the manipulation tools The CAChe workspace tools allow you to move your chemical sample around the workspace in a variety of ways, enabling you to view its properties and spatial geometry more clearly. The workspace tool palette provides you with the following three manipulation tools: • the Rotate tool, which rotates objects in two or three dimensions around the workspace x, y, and z axes • the Translate tool, which moves objects around the workspace in two dimensions • the Scale tool, which zooms into and out from a workspace object. Select a tool by clicking on it in the tool palette. When you select a tool, the mouse cursor in the workspace changes shape to indicate which tool is currently selected. The table below shows the three manipulation tools and their corresponding mouse cursors: Manipulation tool • the Rotate tool • the Translate tool • the Scale tool Tool palette icon Mouse cursor NOTE When you use the manipulation tools, all objects in the workspace are rotated, translated, or scaled. To rotate, translate, and scale selected objects only, choose Edit Move Selected to enter position mode. Refer to “Manipulating portions of your molecule”, p 7-9, for more information. 7-2 BioMedCAChe User Guide Using the manipulation tools Rotating a chemical sample with the Rotate tool mimics the movement of the chemical sample in the x, y, and z directions. When you first draw a molecule and rotate it, the rotation is centered around the center of the workspace; i.e., around the origin of the workspace’s three-dimensional coordinate system. You can alter the center of rotation to the center of a currently selected object. This is described in the section “Defining the center of rotation”, p 7-4. Introduction Using the Rotate tool • • rotate workspace objects around the x and y axes rotate workspace objects around the z axis. To select the Rotate tool 1. Select the Rotate tool by clicking on it in the tool palette. 2. The mouse cursor changes to the Rotate tool, shown to the left. Using ª Tutorials Use the Rotate tool to: Appendices Understanding Customizing A black circle is displayed in the center of the workspace, as shown in the following example. BioMedCAChe User Guide 7-3 Chapter 7 - Manipulating Molecules Rotating objects around the x and y axes ª To rotate workspace objects around the x and y axes 1. Position the Rotate tool inside the black circle in the workspace. 2. Click and drag in the workspace to the left and right with the Rotate tool. Workspace objects are rotated around the y axis. 3. Click and drag up and down in the workspace with the Rotate tool. Workspace objects are rotated around the x axis. 4. Click and drag up and down diagonally in the workspace with the Rotate tool. Workspace objects are rotated around the x and y axes. Rotating objects around the z axis ª To rotate workspace objects around the z axis 1. Position the Rotate tool outside of the black circle in the workspace. 2. Click and drag in the workspace to the left or down with the Rotate tool. Workspace objects are rotated around the z axis in a clockwise direction. 3. Click and drag in the workspace to the right or up with the Rotate tool. Workspace objects are rotated around the z axis in an anticlockwise direction. Defining the center of rotation You can control the operation of the Rotate tool by changing the center of rotation about which the tool operates. 7-4 BioMedCAChe User Guide Using the manipulation tools Center rotation around: ª the center of the workspace the center of currently selected objects. To define the center of rotation for the Rotate tool 2. To rotate workspace objects around the center of the workspace, select the Window Center radio button so that it is enabled. Using Tutorials 1. Choose Options Rotation Settings to display the Rotation Settings dialog box. Introduction • • Using the Translate tool The Translate tool allows you to move the chemical sample sideways and up and down in the workspace relative to the x and y coordinates of the workspace. Use the Translate tool to: move workspace objects around the workspace. Appendices • Refer to “Other ways to move workspace objects”, p 7-7, for further details about moving your molecule and its components around the workspace. BioMedCAChe User Guide Understanding 4. Select OK to close the Rotation Settings dialog box and to save the rotation settings for the Rotate tool. Customizing 3. To rotate workspace objects around the center of any currently selected object, select the Current Selection Center radio button so that it is enabled. 7-5 Chapter 7 - Manipulating Molecules ª To select the Translate tool 1. Select the Translate tool by clicking on it in the tool palette. 2. The mouse cursor changes to the Translate tool, shown to the left. Moving objects around the workspace ª To move workspace objects relative to the x and y axes 1. Position the Translate tool anywhere in the workspace. 2. Click and drag with the Translate tool in the direction that you want to move workspace objects. For example, to move your chemical sample to the bottom of the workspace, click and drag downwards. Workspace objects are moved in the direction that you drag the Translate tool. Recentering workspace objects When you use the Translate tool, workspace objects move away from the center of the workspace. This means that the next time you rotate your chemical sample using the Rotate tool, your chemical sample rotates in an arc around the x, y, or z axes, instead of rotating around its center. It is possible to translate a molecule so far from the center of the workspace that when you rotate it, the molecule’s motion takes it off the edge of the screen. You can return your molecule to the center of the workspace or resize it to fit the workspace window to recover workspace objects that have disappeared from view. Centering workspace objects You can center selected portions of your chemical sample in the workspace window. The size of the selected objects is not changed. 7-6 BioMedCAChe User Guide Using the manipulation tools ª To center objects in the workspace 1. Select the workspace object that you want to center by clicking on it with a selection tool. The selected workspace object is moved to the center of the workspace. Scaling and centering workspace objects You can center selected portions of your chemical sample in the workspace and scale the selected portion so that it fits into the currently sized workspace. ª To scale and center objects in the workspace 1. Select the workspace object that you want to center and scale relative to the size of the workspace window by clicking on the object with a selection tool. Using 2. Choose View Center in Window. Tutorials Introduction The object is highlighted to show that it is selected. The object is highlighted to show that it is selected. Choose View Fit in Window o Select the toolbar button shown to the left. o Press Ctrl F The selected workspace object is rescaled and moved to the center of the workspace. Other ways to move workspace objects Apart from using the Translate tool, you can also move workspace objects by: selecting one or more objects with a selection tool, and dragging across the workspace Appendices • The selected objects move to the location to which you dragged the selection tool. BioMedCAChe User Guide Understanding o Customizing 2. Do one of the following: 7-7 Chapter 7 - Manipulating Molecules • using geometry labels to accurately adjust the geometrical relationship between atoms in the workspace. Refer to Chapter 8, “Investigating Molecular Geometry”, for more information on geometry labels and how to adjust them. Using the Scale tool Scaling lets you zoom into and out from workspace objects along the z axis of the workspace. ª To select the Scale tool 1. Select the Scale tool by clicking on it in the tool palette. The mouse cursor changes to the Scale tool, shown to the left. Zooming in and out on workspace objects ª To zoom in and out on workspace objects 1. Position the Scale tool anywhere in the workspace. 2. Click and drag with the Scale tool to the right or upwards in the workspace to zoom in on workspace objects. Workspace objects increase in size as you drag the Scale tool. 3. Click and drag with the Scale tool to the left or downwards in the workspace to zoom out from workspace objects. Workspace objects decrease in size as you drag the Scale tool. 7-8 BioMedCAChe User Guide Manipulating portions of your molecule The changes you make to atom positions while in position mode actually change the x, y, and z coordinates of molecular components. Because of this, use caution when scaling objects in position mode. Scaling selected portions of a chemical sample can result in: • • abnormally strained bond distances Tutorials Using position mode, you can rotate, translate, or scale selected portions of your chemical sample. This enables you to carry out tasks such as positioning selected fragments for bonding, or rotating selected functional groups to visualize individual properties more clearly. Using When you use the manipulation tools in the way described in the previous section, “Using the manipulation tools”, all objects present in the workspace are rotated, translated, or scaled. CAChe also allows you to manipulate selected portions of your molecule, while the remainder of the workspace objects remain stationary. Introduction Manipulating portions of your molecule an unreasonable molecular geometry that produces meaningless energy values in CAChe experiments. 1. Select the atoms and bonds that you want to rotate, translate, or scale by clicking on them with a selection tool. The selected atoms and bonds are highlighted to show that they are selected. 2. Do one of the following to enter position mode: o Choose Edit Move Selected o Select the toolbar button shown to the left. A check mark is displayed next to the Move Selected dropdown list option to indicate that you are in position mode. The Rotate tool is automatically enabled and the cursor changes to the Rotate tool. A black circle is displayed in the center of the BioMedCAChe User Guide 7-9 Understanding To manipulate selected workspace objects Appendices ª Customizing CAChe displays a warning message if you attempt to scale selected portions of your chemical sample while in position mode. Chapter 7 - Manipulating Molecules workspace. The selected atoms and bonds are displayed as a separate group from the rest of the molecule, with all connecting bonds temporarily hidden. An example is shown below. 3. To rotate the selected object, click and drag the Rotate tool inside the black circle to rotate the object along the x and y axes, or outside of the black circle to rotate the object along the z axis. 4. To translate the selected object, use the Translate tool to click and drag the cursor to the workspace location where you want to put the selected object. 5. To scale the selected object, use the Scale tool to zoom into or out from the selected object. When you select the Scale tool by clicking on it in the tool palette, a warning message is displayed, informing you that scaling a portion of your chemical sample will affect atom distances. Do one of the following: o Select OK to proceed and select the Scale tool. o Select Cancel to return to using the Rotate or Translate tool. If you select OK, click and drag the Scale tool to zoom into and out from the selected object. 6. Do one of the following to exit position mode: o 7-10 Select a selection tool or the Atom/bond tool by clicking on BioMedCAChe User Guide Manipulating portions of your molecule the tool in the tool palette. o Choose any menu option. Appendices Understanding Customizing Using Tutorials Introduction The check mark next to the Move Selected drop-down list option disappears. BioMedCAChe User Guide 7-11 Chapter 7 - Manipulating Molecules Using faster motion mode Faster motion mode is helpful when viewing or manipulating large structures in the workspace. When you make a change to your chemical sample or manipulate it in some way, the chemical sample appears in a simplified form such as a line drawing. This increases the speed at which CAChe can redraw the moving or changing molecule. As soon as the simplified display of the molecule is complete, CAChe reverts to the current display mode. For example, if you have chosen to view your chemical sample in ball and cylinder mode, the molecule reverts back from a line drawing into a ball and cylinder model. If you further manipulate or change a molecule before CAChe can reapply the current display style, the chemical sample remains in its simplified line drawing mode, so speeding up the rate of screen display for the molecule. ª To use faster motion mode 1. Choose Options Use Faster Motion. A check mark is displayed next to the drop-down list option to indicate that faster motion mode is enabled. Objects in the workspace are temporarily displayed as a line drawing when you next perform a manipulation or editing action on your chemical sample. When you complete the manipulation or editing of your chemical sample, the display style reverts to the currently chosen mode. 7-12 BioMedCAChe User Guide Duplicating molecules Duplicating workspace objects When you duplicate an object, the new copy of the object is offset from the original object slightly and becomes the only object selected. You can then manipulate the newly duplicated structure into a new location by using position mode. Tutorials If your molecule includes fragments that are repeated, you can build the fragment once and copy it. In CAChe, you can either duplicate an object, or copy and paste it. Introduction Duplicating molecules ª Using The contents of the Windows Clipboard is not affected by duplicating an object. To duplicate an object 1. Select the object that you want to duplicate by clicking on it with a selection tool. The object is highlighted to show that it is selected. o Press Ctrl D. A copy of the selected object is displayed in the workspace, above and to one side of the original object. The copy is highlighted in the workspace to show that it is selected, while all other workspace objects are grayed out. 3. Do one of the following: o o Click and drag in the workspace with a selection tool to move the selected copy to the location you want. Click and drag the Translate tool across the workspace to the location where you want to place the duplicated object. The duplicate moves to the location where you dragged it. BioMedCAChe User Guide 7-13 Understanding Choose Edit Duplicate Appendices o Customizing 2. Do one of the following: Chapter 7 - Manipulating Molecules Copying workspace objects You can copy any selected object to the Windows Clipboard and paste it into the active workspace or into a different workspace. When you paste an object, it appears as a selected object in the center of the workspace. You can paste the same object repeatedly. You can also copy and paste a workspace object into another Windows application, for example ChemDraw/ISIS Draw. The image is pasted as a Windows bitmap. ª To copy and paste an object in the active workspace 1. Select the object that you want to copy by clicking on it with a selection tool. The object is highlighted to show that it is selected. 2. Do one of the following: o Choose Edit Copy. o Press Ctrl C. o Select the toolbar button shown to the left. 3. Do one of the following: o Choose Edit Paste. o Press Ctrl V. o Select the toolbar button shown to the left. A copy of the selected object is pasted in the center of the active workspace. The copy is highlighted in the workspace to show that it is selected, while all other workspace objects are grayed out. 4. Do one of the following: o o Click and drag in the workspace with a selection tool to move the selected copy to the location you want. Use the Translate tool to click and drag across the workspace to the location where you want to place the copied object. The pasted copy moves to the location where you dragged it. 7-14 BioMedCAChe User Guide Duplicating molecules ª To copy and paste an object to another workspace 1. Select the object that you want to copy by clicking on it with a selection tool. Introduction The copied object remains on the Windows Clipboard until you copy or cut another object, or quit CAChe, so you can continue to paste copies of the object until you have the required number of copies. The object is highlighted to show that it is selected. Choose Edit Copy. o Press Ctrl C. o Select the toolbar button shown to the left. 3. Do one of the following: o o Choose File Open to open the chemical sample file in which you want to paste the copied object. Using o Tutorials 2. Do one of the following: If the chemical sample file in which you want to paste the copied object is already open, click on its workspace to make it active. o Press Ctrl V. o Select the toolbar button shown to the left. A copy of the selected object is pasted in the center of the active workspace. The copy is highlighted in the workspace to show that it is selected, while all other workspace objects are grayed out. 5. Do one of the following: o o Click and drag in the workspace with a selection tool to move the selected copy to the location you want. Use the Translate tool to click and drag across the workspace to the location where you want to place the copied object. The pasted copy moves to the location where you dragged it. BioMedCAChe User Guide 7-15 Understanding Choose Edit Paste. Appendices o Customizing 4. Do one of the following: Chapter 7 - Manipulating Molecules The copied object remains on the Windows Clipboard until you copy or cut another object, or quit CAChe, so you can continue to paste copies of the object until you have the required number of copies. ª To copy and paste an object to another Windows application 1. Select the object that you want to copy by clicking on it with a selection tool. The object is highlighted to show that it is selected. 2. Do one of the following: o Choose Edit Copy. o Press Ctrl C. o Select the toolbar button shown to the left. 3. Open or maximize the application in which you want to paste the copied object. 4. Open or select the document into which you want to paste the copied object. 5. Do one of the following: o Choose Edit Paste. o Press Ctrl V. An image of the selected object is pasted into the document in the format of a Windows bitmap. The copied object remains on the Windows Clipboard until you copy or cut another object, or quit CAChe, so you can continue to paste copies of the object until you have the required number of copies. 7-16 BioMedCAChe User Guide Duplicating molecules Copying objects from ChemDraw or ISIS Draw ª To copy and paste an object from ChemDraw or ISIS Draw 1. Select the object that you want to copy by clicking on it with a selection tool. Introduction You can copy any selected object to the Windows Clipboard from ChemDraw or ISIS Draw, and paste it into the workspace. o Choose Edit | Copy o Press Ctrl C Tutorials 2. Do one of the following: CAChe only transfers chemical samples smaller than 400 atoms to ChemDraw and IsisDraw. To transfer information to ChemDraw or IsisDraw, CAChe places an SD file on the clipboard. The largest chemical sample that can be placed on the clipboard in SD format is 400 atoms. 4. Do one of the following: o Choose Edit Paste. o Press Ctrl V. Customizing NOTE If the chemical sample file in which you want to paste the copied object is already open, click on its workspace to make it active. A copy of the selected object is pasted in the center of the active workspace. The copy is highlighted in the workspace to show that it is selected, while all other workspace objects are grayed out. The copied object remains on the Windows Clipboard until you copy or cut another object, so you can continue to paste copies of the object until you have the required number of copies. BioMedCAChe User Guide 7-17 Understanding o Choose File Open to open the chemical sample file in which you want to paste the copied object. Appendices o Using 3. Do one of the following: Chapter 7 - Manipulating Molecules Deleting portions of your molecule CAChe provides two ways to delete selected workspace objects: • cutting an object, placing it in the Windows Clipboard to paste into another file or Windows application • deleting an object without placing a copy in the Windows Clipboard. Cutting workspace objects ª To cut a workspace object 1. Select the object that you want to cut by clicking on it with a selection tool. The object is highlighted to show that it is selected. 2. Do one of the following: o Choose Edit Cut. o Press Ctrl X. o Select the toolbar button shown to the left. The selected object is copied to the Windows Clipboard and disappears from the workspace. The object remains in the Windows Clipboard until another selected object is copied or cut, or until you quit CAChe. 3. Do one of the following: o o 7-18 Choose File Open to open a CAChe file if you want to paste the object from the Windows Clipboard into another CAChe file, or if the file is already open, activate it by clicking on its workspace. If you want to paste the object into another Windows application, open or maximize the application, and open or activate the file into which you want to paste the cut object. BioMedCAChe User Guide Deleting portions of your molecule o Choose Edit Paste. o Press Ctrl V. o Select the toolbar button shown to the left (if you are pasting into a CAChe file). The cut object is pasted into the new document. Tutorials 5. Continue to paste copies of the object until you have the required number of copies. Deleting workspace objects To delete workspace objects 1. Select the object that you want to delete by clicking on it with a selection tool. The object is highlighted to show that it is selected. Using ª Introduction 4. Do one of the following: Choose Edit Delete. o Press Delete. The selected object disappears from the workspace and is not copied to the Windows Clipboard. The undo command You can undo most editing actions performed on CAChe files. For example, if you delete part of your molecule by mistake, you can undo the delete action to retrieve the deleted object. Appendices You can also reapply an editing action that you have undone by choosing the Redo menu option, as long as you have not performed another editing action since choosing Undo. Understanding o Customizing 2. Do one of the following: BioMedCAChe User Guide 7-19 Chapter 7 - Manipulating Molecules ª To undo an editing action 1. Choose Edit Undo. Workspace objects resume their position or state prior to the last editing action that you performed on the workspace. ª To redo an editing action after choosing undo 1. Choose Edit Redo. Workspace objects resume their position or state after the last undo action you performed. NOTE The Undo option from the Edit menu does not apply to the option Edit Save, which you cannot undo. 7-20 BioMedCAChe User Guide Fusing ring structures fuse two atoms, where the first atom you select is replaced by the second atom you select. The second atom inherits all the connections of the first atom in addition to its own, and its valence is automatically adjusted. • fuse two bonds, by fusing two sets of atoms. The first atom you select in the first set is replaced by the second atom in that set, and the first atom in the second set is replaced by the second atom in that set. Once you fuse ring structures, use the Beautify menu to correct the bond lengths, geometry, and hybridization of the resulting structure. ª Tutorials • Using CAChe allows you to bond two ring structures together by fusing selected atoms from one ring onto selected atoms from the other ring. When fusing cyclic structures, you can either: Introduction Fusing ring structures To fuse two atoms 1. Select an atom in the first ring structure by clicking on it with the Select tool. The atom is highlighted to show that it is selected. The following example shows the order of atom selection in the two rings, and the resulting structure when the second selected atom replaces the first. When you fuse atoms, the second atom you selected will replace the first atom you selected in the first ring structure. 2 2 Appendices 1 Fuse Atoms BioMedCAChe User Guide Understanding 2. Hold down the Shift key and select the corresponding atom in the second ring structure by clicking on it with the Select tool. Customizing The atom is highlighted to show that it is selected. 7-21 Chapter 7 - Manipulating Molecules 3. Choose Edit Fuse Atoms. The first atom you selected is replaced by the second atom you selected. The second atom becomes attached to all connecting bonds and atoms from the first atom. 4. Choose Beautify Comprehensive to correct the valence, hybridization, ring structure, and molecular geometry of the resulting structure. ª To fuse two bonds 1. Select an atom in the first ring structure by clicking on it with the Select tool. The atom is highlighted to show that it is selected. 2. Hold down the Shift key and select the corresponding atom in the second ring structure by clicking on it with the Select tool. The atom is highlighted to show that it is selected. 3. Choose Edit Fuse Atoms. The first atom you selected is superimposed over the second atom you selected. 4. In the first ring structure, select the other atom connected to the bond you want to be superimposed by clicking on the atom with the Select tool. The atom is highlighted to show that it is selected. 5. Hold down the Shift key and select the corresponding atom in the second ring structure (i.e., the other atom connected to the bond you want to fuse) by clicking on it. The atom is highlighted to show that it is selected. The following example shows the order of atom selection in the two rings, and the resulting structure when the bond in the second ring structure replaces the first. When you fuse bonds, the bond in the second ring structure will replace the bond in the first ring structure. 7-22 BioMedCAChe User Guide Fusing ring structures 1 2 2 Fuse Bonds 4 Introduction 4 6. Choose Edit Fuse Atoms. The bond whose connecting atoms you selected in the first ring structure is replaced by the bond whose connecting atoms you selected in the second ring structure. The second bond inherits all the connecting bonds and atoms from the first bond. Appendices Understanding Customizing Using 7. Choose Beautify Comprehensive to correct the valence, hybridization, ring structure, and molecular geometry of the resulting structure. Tutorials 3 BioMedCAChe User Guide 7-23 Chapter 7 - Manipulating Molecules Grouping atoms CAChe allows you to define and name a group of atoms, select a named atom group in the workspace, and then work with the group as a unit. You can also ungroup previously grouped atoms. Defining a group ª To form an atom group 1. Select the atoms that you want to participate in a group by clicking on them with a selection tool. If you are using the Select tool, hold down the Shift key when selecting more than one atom. The atoms are highlighted to show that they are selected. 2. Choose Edit Group Atoms to display the Group Atoms dialog box. 3. Choose the Group Type from the pulldown. A group can be an active site, ligand, water, amino acid, nucleic acid, hetero type or none of these. 4. Click in the Group Name text box and type a name for the group of selected atoms. 5. Select >>Group>> to display the new group name in the Defined Groups list. 7-24 BioMedCAChe User Guide Grouping atoms Selecting groups and portions of groups form new groups of atoms select portions of an existing group select portions of a current workspace selection. Set diagrams in the Group Atoms dialog box illustrate the set operations, with the left circle representing the set S (selected atoms in the workspace), and the right circle representing the set G (a named atom group). The shaded region in each set diagram represents the workspace atoms that will be selected by the set operator. Using • • • Tutorials The Group Atoms dialog box refers to the atoms you selected in the workspace as S, and previously defined groups of atoms as G. Using set operator buttons in the dialog box, you can combine atoms from both S and G to: Introduction When you select a new or existing group in the Defined Groups list, the buttons in the section Combine the current selection (S) with group (G) to form a new selection are enabled. To select an existing group of atoms 1. Choose Edit Group Atoms to display the Group Atoms dialog box. Understanding 2. Click on the group that you want to select in the Defined Groups list. 3. Select G only. 4. Select OK to close the Group Atoms dialog box. The atoms belonging to the chosen group are highlighted in the workspace to show that they are selected. BioMedCAChe User Guide 7-25 Appendices ª Customizing The example set diagrams to the left represent the selection of all items belonging to a named atom group (far left) and the selection of everything but the atoms in a named group (left). Chapter 7 - Manipulating Molecules ª To select all workspace objects apart from an atom group 1. Choose Edit Group Atoms to display the Group Atoms dialog box. 2. Select the group whose atoms you do not want to be selected in the workspace by clicking on the group in the Defined Groups list. 3. Select All but G. 4. Select OK to close the Group Atoms dialog box. Every workspace object is selected, apart from the atoms belonging to the group you chose in the Group Atoms dialog box. The atoms belonging to the chosen group are highlighted in the workspace to show that they are selected. ª To select an existing group of atoms plus additional atoms 1. Select the additional atoms that you want to select by clicking on them with a selection tool. The atoms are highlighted to show that they are selected. 2. Choose Edit Group Atoms to display the Group Atoms dialog box. 3. Select the group whose atoms you also want to select in the workspace by clicking on the group in the Defined Groups list. 4. Select S or G. 5. Select OK to close the Group Atoms dialog box. The atoms that you selected before opening the Group Atoms dialog box are still selected, and the atoms belonging to the chosen group in the Group Atoms dialog box are also selected in the workspace. ª To select an existing group of atoms minus additional atoms 1. Select the grouped atoms that you do not want selected by clicking on them with a selection tool. The atoms are highlighted to show that they are selected. 7-26 BioMedCAChe User Guide Grouping atoms 2. Choose Edit Group Atoms to display the Group Atoms dialog box. The atoms that you selected before opening the Group Atoms dialog box are no longer selected, while all other atoms belonging to the group chosen in the Group Atoms dialog box are selected in the workspace. ª To select grouped atoms among selected workspace atoms 1. Select a number of atoms, or everything, in the workspace by clicking on the atoms or the workspace background with a selection tool. The selected atoms are highlighted. Tutorials 5. Select OK to close the Group Atoms dialog box. Using 4. Select G but not S. Introduction 3. Select the group that contains the atoms you selected in the workspace by clicking on the group in the Defined Groups list. 2. Choose Edit Group Atoms to display the Group Atoms dialog box. Any atoms that were previously selected before opening the Group Atoms dialog box, and which belong to the group chosen in the Group Atoms dialog box, remain selected in the workspace. ª To select non-grouped atoms among selected workspace atoms 1. Select a number of atoms, or everything, in the workspace by clicking on the atoms or the workspace background with a selection tool. The selected atoms are highlighted. BioMedCAChe User Guide 7-27 Understanding 5. Select OK to close the Group Atoms dialog box. Appendices 4. Select S and G. Customizing 3. Select the group that contains the atoms you want to remain selected in the workspace by clicking on the group in the Defined Groups list. Chapter 7 - Manipulating Molecules 2. Choose Edit Group Atoms to display the Group Atoms dialog box. 3. Select the group that contains the atoms you do not want selected in the workspace by clicking on the group in the Defined Groups list. 4. Select S but not G. 5. Select OK to close the Group Atoms dialog box. Any atoms that were previously selected before opening the Group Atoms dialog box, and which don’t belong to the group chosen in the Group Atoms dialog box, remain selected in the workspace. ª To ungroup a previously named group 1. Choose Edit Group Atoms to display the Group Atoms dialog box. 2. Select the group that you want to ungroup by clicking on the group in the Defined Groups list. 3. Select <<Ungroup<<. 4. The group is no longer displayed in the Defined Groups list. 5. Select OK to close the Group Atoms dialog box. Any atoms belonging to that group still remain in your molecule, but the association between them is broken. Changing atom order in groups Atoms in atom groups have an order. Atom order is important when superimposing atom groups as explained in “Superimposing with ordered atom groups”, p 8-7. ª To change atom order in an existing group of atoms 1. Choose Edit Group Atoms to display the Group Atoms dialog box. 2. In the Defined Groups list, click on the plus symbol (+) next to the group that you want to reorder. The group expands to display 7-28 BioMedCAChe User Guide Grouping atoms Tutorials Introduction the name of each atom in the group. Atoms are placed after the atom they are dropped on. To move an atom to the top position in the list, drag it on top of the group name. Using 3. Drag the atom names to place them in the required order. 4. Select OK to close the Group Atoms dialog box. Residues are special atom groups that are added automatically when biomolecules are imported from PDB files or built with the Sequence View window. ª To view atom groups that are residues Appendices 1. Choose Edit | Group Atoms to display the Group Atoms dialog box. Check Show Residues in the Group Atoms dialog box. Understanding Showing residues in Group Atoms dialog box Customizing The atoms belonging to the chosen group are highlighted in the workspace to show that they are selected and the order of the atoms in the group has been changed. BioMedCAChe User Guide 7-29 Chapter 7 - Manipulating Molecules The list of residues appears in the Defined Groups list. The order of atoms in a residue is important. You should not change the order of atoms in residues. If you need to create an ordered group using all the atoms in a residue, select that residue and then create a new group with a different name (see “Defining a group”, p 7-24). The new group will not be classified as a residue and you can reorder the atoms in the new group. 7-30 BioMedCAChe User Guide 8 Investigating Molecular Geometry Overview This chapter describes how to measure and adjust aspects of the geometry of your chemical sample, including how to: identify and invert any chiral centers in your chemical sample generate a mirror image of your molecule measure atom distance and bond angle values using geometry labels lock geometry labels Using compare the molecular geometry of two structures lock atoms disable locked geometry and repair broken locked geometry labels Working with chiral centers 8-2 Viewing chiral centers Inverting chiral centers 8-2 8-3 Mirroring a molecule Superimposing molecules 8-5 8-6 Superimposing by atoms 8-6 Superimposing with ordered atom groups 8-7 Calculating the RMS error 8-10 Specifying angles and distances Specifying atom distance Specifying bond angle Specifying dihedral angle Specifying improper torsion angles Working with geometry labels 8-12 8-13 8-14 8-15 8-17 8-19 Defining geometry labels while viewing atom distance and bond length 8-19 Defining geometry labels from the Adjust menu 8-21 Changing geometry label appearance Deleting geometry labels Labeling H-Bonds Labeling Bumps Locking geometry labels Broken geometry locks Locking atoms 8-21 8-26 8-27 8-28 8-29 8-31 8-32 Hiding locked atom labels Selecting locked atoms 8-33 8-34 Disabling locked geometry Working with search labels 8-35 8-37 Specifying a new geometry label as a search label 8-37 Changing a geometry label to a search label 8-40 Defining search labels automatically 8-41 Manipulating search labels 8-43 Animating search labels 8-44 Understanding Contents Customizing add search labels to create varying conformations of the structure. Appendices • • • • • • • • Tutorials Introduction 8 Chapter 8 - Investigating Molecular Geometry Working with chiral centers CAChe includes helpful functions to make working with the chiral centers in your chemical sample easier. CAChe allows you to: • identify chiral centers by labeling selected asymmetric carbons • invert the bonded neighbors of a chiral carbon. Viewing chiral centers Label asymmetric tetrahedral carbons in the workspace with an R or an S to indicate the chirality. You can hide or display the labels you add to chiral carbons. ª To label chiral centers 1. Select the carbon atoms or molecule for which you want to label chirality by clicking on the atoms or molecule with a selection tool. The atoms are highlighted in the workspace to show that they are selected. 2. Choose View Atom Attributes to display the Atom Attributes dialog box. 8-2 CAChe for Windows User Guide Working with chiral centers 3. Select the Label tab to display a list of atom labeling options. 4. Select the Chirality for Asymmetric Carbons check box so that it is enabled. To invert the bonded neighbors of a chiral carbon, select a chiral center and swap two connecting bonds. The R and S labels that indicate chirality are also exchanged after you invert chirality. Tutorials Inverting chiral centers Using All selected asymmetric tetrahedral carbon atoms are labeled with an R or an S to indicate the chiral center and the chirality. When drawing and modifying a structure, it is not uncommon that the four substituents and the central atom will be situated in, or close to, the plane. In this instance, CAChe may display an incorrect chiral assignment. The correct chiral assignment is displayed after the structure has been beautified, or optimized. Introduction 5. Select OK to close the Atom Attributes dialog box. • if the chiral center has three or more bonds in fused ring structures, you cannot invert chirality. To invert chirality 1. Use a selection tool to select the carbon atom at the chiral center for which you want to invert chirality. The atoms are highlighted in the workspace. 2. Do one of the following: o Choose Edit Invert Chirality. o Press Ctrl I. The two connecting bonds in the selected chiral center are swapped and the labels R and S are exchanged in the workspace. CAChe for Windows User Guide 8-3 Understanding if two bonds of the central atom are in a ring structure and two are not, the two that are not part of a ring become inverted. Appendices ª • Customizing There are two exceptions to the way CAChe swaps bonds while inverting chirality: Chapter 8 - Investigating Molecular Geometry NOTE When you invert a chiral center with four neighboring atoms that are equally free to move, you can control which atoms are swapped by first locking the geometry of the two atoms you want to remain unchanged. Refer to “Locking atoms”, p 8-32, for details. 8-4 CAChe for Windows User Guide Mirroring a molecule ª To mirror a molecule 1. Select the atoms or molecule that you want to mirror by clicking on the atoms or molecule with a selection tool. The atoms are highlighted in the workspace to show that they are selected. Tutorials CAChe allows you to mirror the x, y, and z coordinates of selected atoms about the y and z plane through the center of the workspace. Mirroring a molecule is most useful for generating the enantiomer (mirror image) of a chemical sample. Introduction Mirroring a molecule The selected atoms or molecule are mirrored about the y, z plane of the workspace. Using 2. Choose Edit Mirror. Appendices Understanding Refer to “Locking geometry labels”, p 8-29, and “Locking atoms”, p 8-32, for details about disabling locks. Customizing NOTE CAChe cannot mirror a structure with locked atoms, or atoms that participate in locked geometry, if the mirroring involves breaking the locks. If you want to mirror such a molecule, disable the locks first. CAChe for Windows User Guide 8-5 Chapter 8 - Investigating Molecular Geometry Superimposing molecules Superimposing by atoms You can compare the molecular geometry of two structures by superimposing one or more atoms in one structure on corresponding atoms in the other structure. You can select up to twenty-five pairs of atoms, one set of twenty-five atoms from each structure. CAChe superimposes the selected atoms from both molecules to coincide with each other as much as possible. You can then compare any differences in structural geometry, indicated by the RMS value. When selecting atoms from two different structures to superimpose on each other, you must select the atoms in a precise order. Use one of the following two selection methods: • select the same number of atoms from both molecules in the same order. For example, if you want two atoms from each molecule to coincide, select two atoms from the first molecule and then select the corresponding two atoms from the second molecule. • select one atom in the first molecule, and then select the corresponding atom in the second molecule, then select another atom in the first structure, and the corresponding atom in the second structure, until you have selected the number of atoms that you want to coincide. NOTE The structure that moves to accomplish the superimposition is the one that contains the first atom you select. ª To superimpose two molecules 1. Select the atoms that you want to be superimposed on another structure’s atoms by clicking on the atoms with the Select tool. 2. Do one of the following: o 8-6 Select the same number of corresponding atoms in the second structure in exactly the same order that you selected the atoms in the first structure. CAChe for Windows User Guide Superimposing molecules The molecule that contains the first atom that you selected moves to overlap the other molecule. The selected atoms are highlighted to show that they are still selected. An RMS error is displayed which indicates the error in molecular geometry between the two structures. 4. Do one of the following to move the molecules apart again: o Choose Edit Undo o Press Ctrl Z. o Select one molecule by clicking on it with the Select Molecule tool and click and drag to move the selected molecule to one side. Tutorials 3. Choose Analyze Superimpose. Introduction Select one atom in the first molecule, and then select the corresponding atom in the second molecule, then select another atom in the first structure, and the corresponding atom in the second structure, until you select the required number of atoms. Using o When superimposing atoms, the atoms are superimposed in the order that they are defined in the group. Before you can superimpose groups, you must define the groups as described in “Defining a group”, p 7-24. ª To superimpose two molecules by atom group CAChe for Windows User Guide 8-7 Understanding CAChe superimposes the atoms in the selected groups from both molecules so that they coincide with each other as much as possible. You can then compare any differences in structural geometry, indicated by the RMS value. Appendices You can compare the molecular geometry of two structures by superimposing an ordered group in one structure on the corresponding ordered group in the other structure. The selected groups should be in different molecules, but the molecules can be in the same workspace or in different workspaces. Customizing Superimposing with ordered atom groups Chapter 8 - Investigating Molecular Geometry 1. Choose Analyze | Superimpose Groups. The Superimpose dialog appears. 2. Click the plus symbol (+) next to the groups name. The ordered list of atoms appears. Atoms in the probe are superimposed on atoms in the target in order. 3. If the order needs to be changed, drag the atoms so that each atom in the probe group corresponds in order to the atom you 8-8 CAChe for Windows User Guide Superimposing molecules The first atom in the probe group will be matched with the first atom in the target group for superposition and so forth until either all of the probe atoms are matched or all of the target atoms are matched. The number of atoms in the probe group and the target group can be different. Left over atoms at the end are not included in the superposition. Introduction want it superimposed on in the target group. Alternatively, drag the atoms in the target group. 6. Do one of the following to move the molecules apart again: o o o CAChe for Windows User Guide Choose Edit Undo. There is no undo if molecules were superimposed in a new window. Press Ctrl Z. Select one molecule by clicking on it with the Select Molecule tool and click and drag to move the selected molecule to one side. 8-9 Understanding The molecule that contains the probe group moves to overlap the target group in the other molecule. The selected atoms are highlighted to show that they are still selected. An RMS error is displayed which indicates the error in molecular geometry between the two structures. Appendices 5. Choose the Superimpose Option and press OK. Customizing Using Tutorials 4. Select one group from each molecule. Chapter 8 - Investigating Molecular Geometry TIP To superimpose multiple molecules in a single window, repeatedly superimpose new probes against the target in the window where the first superposition takes place. Calculating the RMS error The RMS indicates the error in molecular geometry between two structures. ª To calculate the RMS error 1. Select the atom(s) in the structure for which you want the RMS to be calculated. 2. Select the same number of corresponding atom(s) in the second structure in exactly the same order that you selected the atoms in the first structure. 3. Choose Analyze | Calculate RMS Error. The RMS error is displayed in the workspace. 4. To move the position of the RMS value, click in the centre of the value with the left mouse button, and drag to another part of the workspace. ª To select the atoms involved in the RMS calculation 1. Position the Select Group tool over the RMS label, and select it using the left mouse button. The atoms involved in the calculation are selected. 2. Choose Analyze | Superimpose. The two molecules are superimposed. ª To select the two molecules involved in the RMS calculation 1. Position the Select Group tool over the RMS label, and select it using the left mouse button. The two molecules that are involved in the calculation are 8-10 CAChe for Windows User Guide Superimposing molecules selected. Appendices Understanding Customizing Using Tutorials Introduction This enables you to distinguish the molecules involved in the RMS calculation from other molecules in the workspace. CAChe for Windows User Guide 8-11 Chapter 8 - Investigating Molecular Geometry Specifying angles and distances CAChe allows you to measure and adjust distances and angles in a molecule, so that you can view and change the exact internal coordinates of a structure. You can also measure and adjust angle and distance values between atoms belonging to different molecules. You can measure and change the following angles and distances: • • • • atom distance bond angle dihedral angle improper torsion. When measuring angles and distances, the order in which you select the participating atoms is crucial to the resulting geometry adjustment. In all cases, the atom you select first is the atom that moves to achieve the new value of the angle or distance. The values you can measure and adjust depend on the number of selected atoms: • if two atoms are selected, you can measure and adjust atom distance • if three atoms are selected, you can measure and adjust bond angles • if four atoms are selected, you can measure and adjust dihedral angles and improper torsion. You can also choose to label bond angles and atom distances in the workspace by applying geometry labels. Refer to “Working with geometry labels”, p 8-19, for information on applying geometry labels. 8-12 CAChe for Windows User Guide Specifying angles and distances Specifying atom distance To measure and adjust atom distance 1. Select the two atoms between which you want to measure atom distance by clicking on an atom with the Select tool, then holding down the Shift key and clicking on the second atom. If you are adjusting atom distance, ensure that the first atom you select is the atom that you want to move. o o Click in the Distance text box and type the new atom distance value that you require. Select the Distance text box arrow buttons to increase or decrease the current atom distance value to the value that you require. 4. Select Apply to view the results of the new atom distance value in the workspace. CAChe for Windows User Guide 8-13 Understanding 3. Do one of the following: Appendices The current atom distance value in angstroms is displayed in the Distance text box. Customizing Using 2. Choose Adjust Atom Distance to display the Set Atom Distance dialog box. Tutorials ª Introduction You can view and adjust the distance between two atoms in the same workspace. Chapter 8 - Investigating Molecular Geometry The first atom that you selected moves to increase or decrease the atom distance to the value that you specified in the Distance text box. 5. Select OK to accept the new atom distance value and to close the Set Atom Distance dialog box. Specifying bond angle Measure and adjust the angle between two bonds by selecting the three participating atoms in the order in which the atoms span the angle, with the second atom positioned at the fulcrum of the angle. The following example shows a labeled bond angle, with the atoms labeled in the order of selection. ª To measure and adjust bond angle 1. Select the three atoms between which you want to measure bond angle by clicking on the first atom with the Select tool, then holding down the Shift key and clicking on the second and third atom. If you are adjusting the bond angle, ensure that the first atom you select is the atom that you want to move. 2. Choose Adjust Bond Angle to display the Set Bond Angle dialog box. The current bond angle value in degrees is displayed in the Angle text box. 8-14 CAChe for Windows User Guide o o Click in the Angle text box and type the new bond angle value that you require. Select the Angle text box arrow buttons to increase or decrease the current bond angle value to the value that you require. Using 3. Do one of the following: Tutorials Introduction Specifying angles and distances 4. Select Apply to view the results of the new bond angle value in the workspace. Specifying dihedral angle Appendices View a dihedral angle value by selecting four atoms and then measuring the rotational angle between the bond connecting the first and second atoms, and the bond connecting the third and fourth atoms. The following three examples show a dihedral angle, with the atoms labeled in the order of selection in each example. Understanding 5. Select OK to accept the new bond angle value and close the Set Bond Angle dialog box. Customizing The first atom that you selected moves to increase or decrease the bond angle to the value that you specified in the Angle text box. CAChe for Windows User Guide 8-15 Chapter 8 - Investigating Molecular Geometry ª To measure and adjust dihedral angles 1. Select the four atoms that encompass the two bonds between which you want to measure the dihedral angle, by clicking on the first atom with the Select tool, then holding down the Shift key and clicking on the second, third and fourth atom. If you are adjusting the dihedral angle, ensure that the first atom you select is the atom that you want to move. 2. Choose Adjust Dihedral Angle to display the Set Dihedral Angle dialog box. The current dihedral angle value in degrees is displayed in the Angle text box. 8-16 CAChe for Windows User Guide Specifying angles and distances 3. Do one of the following: Select the Angle text box arrow buttons to increase or decrease the current dihedral angle value to the value that you require. 4. Select Apply to view the results of the new dihedral angle value in the workspace. The first atom that you selected moves to increase or decrease the dihedral angle to the value that you specified in the Angle text box. 5. Select OK to accept the new atom distance value and close the Set Dihedral Angle dialog box. Using Specifying improper torsion angles Introduction o Click in the Angle text box and type the new dihedral angle value that you require. Tutorials o To measure and adjust improper torsion 1. Select the four atoms that form the improper torsion angle by clicking on the first atom with the Select tool, then holding down the Shift key and clicking on the second, third and fourth atom. CAChe for Windows User Guide 8-17 Appendices ª Understanding Customizing View an improper torsion angle by selecting four atoms and then measuring the angle between the bond connecting the first and second atoms, and the projection of that same bond on to the plane formed by the first, third and fourth atoms. The following two examples show improper torsion angles, with the atoms labeled in the order of selection in each example. Chapter 8 - Investigating Molecular Geometry If you are adjusting the improper torsion angle, ensure that the first atom you select is the atom that you want to move. 2. Choose Adjust Improper Torsion to display the Set Improper Torsion dialog box. The current improper torsion value in degrees is displayed in the Angle text box. 3. Do one of the following: o o Click in the Angle text box and type the new improper torsion value that you require. Select the Angle text box arrow buttons to increase or decrease the current improper torsion value to the value that you require. 4. Select Apply to view the results of the new improper torsion angle value in the workspace. The first atom that you selected moves to increase or decrease the improper torsion angle to the value that you specified in the Angle text box. 5. Select OK to accept the new improper torsion value and close the Set Improper Torsion dialog box. 8-18 CAChe for Windows User Guide Working with geometry labels Working with geometry labels identify specific geometry attributes of your chemical sample • lock atom distances and bond angles at their current values. display existing values of your chemical sample’s internal coordinates Refer to “Locking geometry labels”, p 8-29, for further details. Tutorials • • Introduction Geometry labels identify the participating atoms and the current value of a specific angle or distance. Use geometry labels to: • when viewing and adjusting values for atom distance, bond angle, improper torsion, and dihedral angles • • directly from the Adjust menu To add a geometry label to a distance or angle 1. Select the required number of atoms for the distance or angle you want to label by clicking on the first atom with the Select tool, then holding down the Shift key and clicking on the remaining atoms. CAChe for Windows User Guide 8-19 Understanding Add a geometry label while viewing or adjusting an atom distance or bond length value. Appendices Defining geometry labels while viewing atom distance and bond length Customizing automatically by generating dihedral angle search labels, a type of geometry label, using the CAChe Geometry Label Wizard. Refer to “Working with search labels”, p 8-37, for information on creating and using search labels. ª Using You can define geometry labels in three ways: Chapter 8 - Investigating Molecular Geometry For example, select two atoms if you want to label atom distance, three atoms if you want to label a bond angle, or four atoms if you want to label an improper torsion or dihedral angle. 2. Choose one of the following menu options: o Adjust Atom Distance o Adjust Bond Angle o Adjust Improper Torsion o Adjust Dihedral Angle. The Set Atom Distance, Set Bond Angle, Set Dihedral Angle, or Set Improper Torsion dialog box is displayed. 3. Select the Define Geometry Label check box so that it is enabled. 4. Select Apply to view the geometry label in the workspace. A geometry label identifies the participating atoms and displays the value of the distance or angle in the workspace. The following example shows a geometry label. 5. Select OK to accept the geometry label and close the Set Atom Distance, Set Bond Angle, Set Dihedral Angle, or Set Improper Torsion dialog box. 8-20 CAChe for Windows User Guide Working with geometry labels ª To define a geometry label directly from the Adjust menu 1. Select the required number of atoms for the distance or angle you want to label by clicking on the first atom with the Select tool, then holding down the Shift key and clicking on the remaining atoms. For example, select two atoms if you want to label atom distance, three atoms if you want to label a bond angle, or four atoms if you want to label a dihedral angle. 2. Do one of the following: o Choose Adjust Define Geometry Label. o Press Ctrl L. Tutorials You cannot define an improper torsion geometry label in this way. Using If you do not need to adjust atom distance or bond angle values, you can also add geometry labels to your chemical sample directly from the Adjust menu, without displaying the Set Atom Distance, Set Bond Angle, or Set Dihedral Angle dialog box. Introduction Defining geometry labels from the Adjust menu Once you have added geometry labels to your chemical sample, you can also choose to: hide or display geometry labels hide or display the value and locked state of a geometry label color geometry labels by label type or by the standard text color defined in the CAChe color palette. Appendices • • • Understanding Changing geometry label appearance Customizing A geometry label identifies the participating atoms and displays the value of the distance or angle in the workspace. CAChe for Windows User Guide 8-21 Chapter 8 - Investigating Molecular Geometry Hiding geometry labels Hide or display selected geometry labels in the workspace. ª To hide geometry labels 1. Select the geometry label that you want to hide by clicking on the numeral portion of the label with the Select tool. 2. Choose View Geometry Label Attributes to display the Geometry Label Attributes dialog box. 3. Select the Display Geometry Labels check box so that it is disabled. 4. Select OK to close the Geometry Label Attributes dialog box. The geometry label that you selected is no longer displayed in the workspace. ª To redisplay geometry labels 1. Do one of the following to select everything in the workspace: o Click on an empty area of the workspace with a selection tool. o Choose Edit Select All. o Press Ctrl A. 2. Choose View Geometry Label Attributes to display the Geometry Label Attributes dialog box. 8-22 CAChe for Windows User Guide Working with geometry labels 3. Select the Display Geometry Labels check box so that it is enabled. 4. Select OK to close the Geometry Label Attributes dialog box. Hiding text in geometry labels Hide and display the following text in a geometry label: • the value of the distance or angle that the geometry label represents • the locked state of the geometry label. Tutorials Introduction All geometry labels in the workspace are displayed. ª Using Refer to “Locking geometry labels”, p 8-29, for further details. To hide the geometry label value 1. Select the geometry label whose value you want to hide by clicking on the numeral portion of the label with the Select tool. 2. Choose View Geometry Label Attributes to display the Geometry Label Attributes dialog box. The geometry label you selected no longer displays the value it represents. ª To redisplay the geometry label value 1. Select the geometry label whose value you want to display by clicking on the label with the Select tool. 2. Choose View Geometry Label Attributes to display the Geometry Label Attributes dialog box. 3. Select the Label tab to display the Label geometry labels with panel. CAChe for Windows User Guide 8-23 Understanding 5. Select OK to close the Geometry Label Attributes dialog box. Appendices 4. Select the Value check box so that it is disabled. Customizing 3. Select the Label tab to display the Label geometry labels with panel. Chapter 8 - Investigating Molecular Geometry 4. Select the Value check box so that it is enabled. 5. Select OK to close the Geometry Label Attributes dialog box. The geometry label you selected displays the value it represents. ª To hide the locked state of a geometry label 1. Select the geometry label whose locked state you want to hide by clicking on the numeral portion of the label with the Select tool. 2. Choose View Geometry Label Attributes to display the Geometry Label Attributes dialog box. 3. Select the Label tab to display the Label geometry labels with panel. 4. Select the Lock State check box so that it is disabled. 5. Select OK to close the Geometry Label Attributes dialog box. The geometry label you selected no longer displays an L if the geometry label is locked, or an LB if the geometry label is locked and the lock has been broken, or an LD if the geometry label lock is disabled. ª To redisplay the locked state of a geometry label 1. Select the geometry label whose locked state you want to redisplay by clicking on the numeral portion of the label with the Select tool. 2. Choose View Geometry Label Attributes to display the Geometry Label Attributes dialog box. 3. Select the Label tab to display the Label geometry labels with panel. 4. Select the Lock State check box so that it is enabled. 5. Select OK to close the Geometry Label Attributes dialog box. The geometry label you selected displays an L if the geometry label is locked, or an LB if the geometry label is locked and the lock has been broken, or an LD if the geometry label lock is disabled. 8-24 CAChe for Windows User Guide Working with geometry labels Refer to “Locking geometry labels”, p 8-29, for information on locked geometry labels and broken geometry label locks. Introduction Refer to “Disabling locked geometry”, p 8-35, for information on disabling locks. Changing geometry label color Color geometry labels in one of two ways: by the standard text color defined in the color palette. To color geometry labels by label type 1. Select the geometry label whose color you want to change by clicking on the label with the Select tool. 4. Select the Geometry Label Type Color radio button, in the Color Geometry Labels with section, to enable it. 5. Select OK to close the Geometry Label Attributes dialog box. The geometry label you selected is displayed in the color assigned to its geometry label type. CAChe for Windows User Guide 8-25 Appendices 3. Select the Color tab. Understanding Customizing 2. Choose View Geometry Label Attributes to display the Geometry Label Attributes dialog box. Using ª by label type Tutorials • • Chapter 8 - Investigating Molecular Geometry ª To color geometry labels by standard text color 1. Select the geometry label whose color you want to change by clicking on the numeral portion of the label with the Select tool. 2. Choose View Geometry Label Attributes to display the Geometry Label Attributes dialog box. 3. Select the Color tab. 4. Select the Standard Text Color radio button, in the Color Geometry Labels with section, to enable it. 5. Select OK to close the Geometry Label Attributes dialog box. The geometry label you selected is displayed in the color assigned to standard text in the CAChe color palette. Refer to “Editing the color palette”, p 6-38, for information on editing the CAChe color palette. Deleting geometry labels Delete a geometry label in one of two ways: • • ª using the Delete key using the Adjust menu options. To delete a geometry label using the Delete key 1. Select the geometry label you want to delete by clicking on the label with the Select tool. 2. Press Delete. ª To delete a geometry label using the Adjust menu 1. Select the geometry label you want to delete by clicking on the label with the Select tool. 2. Choose one of the following, depending on the distance or angle that the label is representing: o 8-26 Adjust Atom Distance to display the Set Atom Distance CAChe for Windows User Guide Working with geometry labels dialog box. o Adjust Bond Angle to display the Set Bond Angle dialog o Adjust Improper Torsion to display the Set Improper Torsion dialog box. Adjust Dihedral Angle to display the Set Dihedral Angle dialog box. 3. Select the Define Geometry Label check box so that it is disabled. 4. Select OK to close the Set Atom Distance, Set Bond Angle, Set Dihedral Angle, or Set Improper Torsion dialog box. Tutorials o Introduction box. The geometry label you selected is no longer displayed in the workspace. Using Labeling H-Bonds To label hydrogen bonds within a selection and between the selected atoms and the set of visible and unselected atoms do the following. 2. Choose Analyze | Label H-Bonds. Blue hydrogen bond labels are created between any selected hydrogen-bonded atom and any visible atom it is hydrogen bonded to. In this analysis, hydrogen bonds are formed between any hydrogen atom attached to O, N, S or F and all O, N or S hydrogen acceptors that are within 2.2 Å. Because H-bond labeling is based on a distance criterion, Hbond labels may appear in unexpected locations if your structure is poorly refined. CAChe for Windows User Guide 8-27 Understanding 1. Select the atoms whose hydrogen bonds you wish to label with the Selection tool, the Select molecule tool or the Select Group tool. Customizing To label all hydrogen bonds Appendices ª Chapter 8 - Investigating Molecular Geometry Labeling Bumps To label unselected atoms that are too close to the selected atoms do the following. ª To label all bumps 1. Select the atoms that you wish to analyze for bumps with the Selection tool, the Select molecule tool or the Select Group tool. 2. Choose Analyze | Label Bumps. Orange bump labels are created between any selected atom and any visible, unselected atom that is within 0.87 times the sum of their van der Waals radii and that is not bonded or in the same bond angle. Because bump labeling is based on a distance criterion, labels may appear in unexpected locations if your structure is poorly refined. A large number of bump labels can indicate a structure requiring further refinement. 8-28 CAChe for Windows User Guide Locking geometry labels lock an existing geometry label directly from the Adjust menu. To lock a geometry label while defining it 1. Select the required number of atoms for the distance or angle you want to label by clicking on the first atom with the Select tool, then holding down the Shift key and clicking on the remaining atoms. For example, select two atoms if you want to create and lock a label for an atom distance, three atoms if you want to create and lock a label for a bond angle, or four atoms if you want to create and lock a label for an improper torsion or dihedral angle. 2. Choose one of the following menu options: o Adjust Atom Distance o Adjust Bond Angle o Adjust Improper Torsion o Adjust Dihedral Angle. The Set Atom Distance, Set Bond Angle, Set Dihedral Angle, or Set Improper Torsion dialog box is displayed. 3. Select the Define Geometry Label check box so that it is enabled. 4. Select the Lock Geometry radio button so that it is enabled. CAChe for Windows User Guide 8-29 Tutorials • Using lock a label while defining the geometry label using the Set Atom Distance, Set Bond Angle, or Set Improper Torsion dialog box Customizing ª • Understanding Lock geometry labels in one of two ways: Appendices Locking geometry labels allows you to freeze an atom distance, bond angle, dihedral angle, or improper torsion angle at a specified value, ensuring that the locked portions of your chemical sample do not change during an experiment. Introduction Locking geometry labels Chapter 8 - Investigating Molecular Geometry 5. Select OK to close the Set Atom Distance, Set Bond Angle, Set Dihedral Angle, or Set Improper Torsion dialog box. A geometry label displays the value of the distance or angle in the workspace and an L to indicate that the label is locked. The following example shows a locked geometry label. ª To lock an existing geometry label 1. Select the geometry label you want to lock by clicking on the numeral portion of the label with the Select tool. 2. Choose Adjust Lock. The geometry label displays the value of the distance or angle in the workspace and an L to indicate that the label is locked. ª To unlock a geometry label 1. Select the locked geometry label by clicking on the numeral portion of the label with the Select tool. 2. Choose Adjust Unlock. The geometry label no longer displays an L. 8-30 CAChe for Windows User Guide Locking geometry labels Locks change to broken locks if the geometry of the locked structure changes. Changes can occur while you are editing your chemical sample with locks disabled. Running some experiments using the computational applications Mechanics, ZINDO, or MOPAC can also result in slightly altered values for locked coordinates. If the coordinates of a locked geometry label change, you can return the value of a broken geometry label lock to its locked value. ª To repair a broken geometry label lock 1. Select the geometry label with a broken lock by clicking on the numeral portion of the label with the Select tool. 2. Choose Adjust Repair Locked Geometry Labels. CAChe for Windows User Guide Appendices The spatial relationship that the geometry label represents returns to the locked value. Understanding Repairing broken locks Customizing Using Tutorials Broken locks are labeled with LB in the workspace to indicate that a broken lock is present. The following example shows a broken geometry label lock. Introduction Broken geometry locks 8-31 Chapter 8 - Investigating Molecular Geometry Locking atoms You can freeze the location of an atom by locking its x, y, and z coordinates in the workspace. When you perform an experiment on a chemical sample with locked atoms, locks are enforced even if the lock is currently disabled. Locking atoms is useful to: • perform calculations that require some atoms to remain at a fixed position, while others are free to move. For example, you could lock the structural bulk of an enzyme to optimize the surface of an enzyme and its substrate. To study the effect of a zeolite cage on the deformation of a molecule that passes through it, you could lock the atoms in the zeolite and optimize the molecule in various positions in the zeolite. • fix the location of an atom that might move out of the workspace area when you scale and rotate several structures at once. You can also unlock atoms at any time. ª To lock an atom 1. Select the atoms you want to lock using a selection tool. 2. Choose Adjust Lock. The atoms are locked at their current x, y, z workspace coordinates and are labeled with an L. The following example shows labeled locked atoms. 8-32 CAChe for Windows User Guide Locking atoms ª To unlock atoms 2. Choose Adjust Unlock. The selected atoms are unlocked and the L label is no longer displayed. Introduction 1. Select the atoms you want to lock by clicking on the atoms with a selection tool. You can show or hide the L label which indicates a locked atom. To hide locked atom labels 1. Select the locked atoms whose label you want to hide by clicking on the atoms with a selection tool. Understanding Customizing 2. Choose View Atom Attributes to display the Atom Attributes dialog box. Using ª Tutorials Hiding locked atom labels Appendices 3. Select the Label tab to display a list of options for labeling atoms. 4. Select the Locked State check box so that it is disabled. 5. Select OK to close the Atom Attributes dialog box. The selected locked atoms no longer display the L label. CAChe for Windows User Guide 8-33 Chapter 8 - Investigating Molecular Geometry ª To redisplay locked atom labels 1. Select the locked atoms whose label you want to redisplay by clicking on the atoms with a selection tool. 2. Choose View Atom Attributes to display the Atom Attributes dialog box. 3. Select the Label tab to display a list of options for labeling atoms. 4. Select the Locked State check box so that it is enabled. 5. Select OK to close the Atom Attributes dialog box. The selected locked atoms display an L label to indicate that they are locked. Selecting locked atoms You can select all the locked atoms in the workspace, whether or not the atoms are labeled as locked. ª To select all locked atoms 1. Choose Edit Select Locked Atoms. All locked atoms in the workspace are highlighted to show that they are selected. 8-34 CAChe for Windows User Guide Disabling locked geometry • • locked geometry labels locked atoms. Disabling the locks on geometry labels and atoms allows you to move the participating atoms around the workspace. However, if you do not return the participating atoms of a locked geometry label to their locked values, you create a broken lock which is displayed when you enable locked geometry again. Using Refer to “Broken geometry locks”, p 8-31, for information on repairing broken geometry label locks. Tutorials You can enable or disable locked geometry at any time. Locks are enabled by default until you disable them. CAChe allows you to disable: Introduction Disabling locked geometry ª To disable locked geometry 1. Choose Adjust Enable Locks. Appendices The check mark next to the Enable Locks drop-down list option is no longer displayed, indicating that this option is disabled. Locked geometry labels and atoms display an LD label to indicate that there are disabled locks present. Understanding When you begin a CAChe experiment, disabled geometry label locks and atom locks are automatically enabled and used by the computational applications to freeze the locked coordinates of the participating atoms. Customizing Moving a locked atom while locks are disabled just moves the locked atom to a new location. When locks are enabled again, the atom is displayed as locked in the new location. CAChe for Windows User Guide 8-35 Chapter 8 - Investigating Molecular Geometry ª To enable locked geometry 1. Choose Adjust Enable Locks. A check mark is displayed next to the Enable Locks drop-down list option, indicating that this option is enabled. Locked geometry labels which have not been broken and locked atoms display an L to indicate that they are locked. Broken locked geometry labels display an LB to indicate that a broken lock is present. 8-36 CAChe for Windows User Guide Working with search labels For example, you can vary a dihedral angle through 360 degrees, stopping every 15 degrees to compute the energy of the molecule at those conformations. Tutorials When creating a search label, you specify a range of values for an atom distance, bond angle, improper torsion, or dihedral angle. During the CAChe experiment, the labeled distance or angle is moved through the range of search label values to create a number of conformations for the molecule, so that the energy of each conformation can be measured. Using Search labels are a form of geometry label that vary the value of the atom distance or bond angle represented by the geometry label. Search labels are used in CAChe experiments to define a range of conformations for a molecule while computing the energy of each conformation. Introduction Working with search labels Refer to Chapter 13, “Optimization and Energy Calculations”, and Chapter 14, “Investigating Low-energy Conformations”, for information on how CAChe experiments use search labels. specify a new geometry label as a search label while creating the geometry label • • modify an existing geometry label to become a search label use the Geometry Label Wizard to create one or more search labels automatically. Specifying a new geometry label as a search label Appendices You can define a search label for an atom distance, bond angle, dihedral angle, or improper torsion angle while creating a new geometry label. Understanding • Customizing You can define search labels in three ways: CAChe for Windows User Guide 8-37 Chapter 8 - Investigating Molecular Geometry ª To create a search label while defining a geometry label 1. Select the required number of atoms for the distance or angle you want to label by clicking on the first atom with the Select tool, then holding down the Shift key and clicking on the remaining atoms. For example, select two atoms if you want to create a search label for an atom distance, three atoms if you want to create a search label for a bond angle, or four atoms if you want to create a search label for an improper torsion or dihedral angle. 2. Choose one of the following menu options: o Adjust Atom Distance o Adjust Bond Angle o Adjust Improper Torsion o Adjust Dihedral Angle. The Set Atom Distance, Set Bond Angle, Set Dihedral Angle, or Set Improper Torsion dialog box is displayed. 3. Select the Define Geometry Label check box so that it is enabled. 4. Select the Search radio button so that it is enabled. A range of default values and steps between those values are displayed in the text boxes beneath the Search radio button. 8-38 CAChe for Windows User Guide Working with search labels 5. If you want to change the default values, do one or all of the following: Click in the using text box and enter a new value for the number of steps throughout which you want the range of values to be varied. 6. Select OK to close the Set Atom Distance, Set Bond Angle, Set Dihedral Angle, or Set Improper Torsion dialog box, and to define the search label with the specified value range and number of steps. Appendices Understanding Customizing A search label displays the value of the distance or angle in the workspace and an S to indicate that the label is a search label. The following example shows a search label. Introduction o Click in the and text box and enter a new value for the completion of the value range. Tutorials o Click in the between text box and enter a new value for the start of the value range. Using o CAChe for Windows User Guide 8-39 Chapter 8 - Investigating Molecular Geometry Changing a geometry label to a search label You can modify an existing geometry label to change it into a search label. ª To change a geometry label into a search label 1. Select the geometry label by clicking on the numeral portion of the label with the Select tool. The geometry label is highlighted to show that it is selected. 2. Choose the relevant menu option for the selected geometry label type from one of the following: o AdjustAtom Distance o AdjustBond Angle o AdjustImproper Torsion o AdjustDihedral Angle The Set Atom Distance, Set Bond Angle, Set Dihedral Angle, or Set Improper Torsion dialog box is displayed. 3. Select the Search radio button so that it is enabled. A range of default values and steps between those values are displayed in the text boxes beneath the Search radio button. 4. If you want to change the default values, do one or all of the following: o o o Click in the between text box and enter a new value for the start of the value range. Click in the and text box and enter a new value for the completion of the value range. Click in the using text box and enter a new value for the number of steps throughout which you want the range of values to be varied. 5. Select OK to close the relevant dialog box, and to define the search label with the specified value range and number of steps. A search label displays the value of the distance or angle in the workspace and an S to indicate that the label is a search label. 8-40 CAChe for Windows User Guide Working with search labels Defining search labels automatically When defining labels, the Geometry Label Wizard excludes the following: ring structures locations that conflict with locked geometry labels Tutorials • • • • Introduction You can use the CAChe Geometry Label Wizard to automatically generate dihedral angle search labels for selected bonds in your molecule. locked atom coordinates any other search labels already present in your sample. • • Using In addition, you can specify the following to be excluded from the automatic generation of dihedral angle search labels: one or more bond types terminal groups such as CH3, CCl3, NH2, or OH. To define dihedral search labels using the Geometry Label Wizard 1. Do one of the following: o o CAChe for Windows User Guide Select the whole molecule by clicking on it with the Select Molecule tool. Select the bonds for which you want to generate search labels by clicking on one bond with the Select tool, holding down the Shift key, and clicking on the rest of the bonds. 8-41 Understanding ª Appendices Refer to “Locking atoms”, p 8-32, for details about locking the workspace coordinates of atoms. Customizing NOTE Before you generate automatic search labels, you might want to lock the coordinates of an atom near the center of the molecule, to prevent the sample from moving to the far edges of the workspace during the generation of the varying conformations. Chapter 8 - Investigating Molecular Geometry 2. Choose AdjustGeometry Label Wizard to display the Geometry Label Wizard dialog box. 3. To include single, ionic, and coordinate bonds in the search label generation, select the Single, Ionic and Coordinate bonds searching between check box so that the radio button is enabled. A range of default values and steps between those values are displayed in the text boxes beneath the Single, Ionic and Coordinate bonds searching between check box. 4. If you want to change the default values, click in the relevant text box and type a new value for the start or end of the value range, or for the number of steps throughout the range. 5. To include double bonds in the search label generation, select the Double bonds searching between check box so that the radio button is enabled. A range of default values and steps between those values are displayed in the text boxes beneath the Double bonds searching between check box. 6. If you want to change the default values, click in the relevant text box and type a new value for the start or end of the value range, or for the number of steps throughout the range. 7. To include weak bonds in the search label generation, select the Weak bonds searching between check box so that it is enabled. 8-42 CAChe for Windows User Guide Working with search labels 9. To include terminal groups, select the Include terminal groups check box so that it is enabled. 10. Select OK to generate dihedral angle search labels automatically, and to close the Geometry Label Wizard dialog box. Search labels display the value of the selected dihedral angles in the workspace and an S to indicate that the labels are search labels. selecting search labels by clicking on the numeral portion of the search label in the workspace • changing the appearance of search labels by choosing View Geometry Label Attributes to display labeling and coloring options • modifying search labels and their values by choosing Atom Distance, Bond Angle, Improper Torsion or Dihedral Angle from the Adjust menu and editing search label values in the Set Atom Distance, Set Bond Angle, Set Dihedral Angle, or Set Improper Torsion dialog box. • deleting search labels using the Delete key. Refer to “Working with geometry labels”, p 8-19, for more information on performing the above actions on geometry labels. CAChe for Windows User Guide 8-43 Understanding • Appendices You can manipulate search labels in exactly the same way as geometry labels using the following actions: Customizing Using Manipulating search labels Tutorials 8. If you want to change the default values, click in the relevant text box and type a new value for the start or end of the value range, or for the number of steps throughout the range. Introduction A range of default values and steps between those values are displayed in the text boxes beneath the Weak bonds searching between check box. Chapter 8 - Investigating Molecular Geometry Animating search labels You can animate your molecule so that it steps through every conformation created by the search labels you added to it. You can: ª • animate the molecule from the first to the last conformation in the range • animate the molecule from the last to the first conformation in the range • • stop at any individual conformation view the conformations step by step, or in a range of steps. To animate search labels 1. Select the search labels that you want to animate in one of the following ways: o o Select a molecule and its search label by clicking in the workspace background using a selection tool. Select individual search labels by clicking on one label with the Select tool, holding down the Shift key, and clicking on the other search labels that you want to animate. 2. Choose Adjust Animate Geometry Labels to display the Animate Geometry Labels dialog box. 3. Select the forward button, shown to the left, to animate your molecule from the first to the last conformation. The molecule in the workspace moves through each search label value in turn to create a range of conformations. The Conformation text box displays the position of the current 8-44 CAChe for Windows User Guide Working with search labels The molecule stops moving, and the Conformation text box displays the position of the current conformation in the range of conformations. 5. To animate your molecule from the last to the first conformation, select the reverse button, shown to the left. 6. To display a particular conformation in the range, do one of the following: o Select the up or down arrow buttons in the Conformation text box to increase or decrease the value displayed. Click in the Conformation text box and enter the step number of the conformation you want to view. Using o Tutorials 4. To stop the animation at a particular conformation, select the stop button, shown to the left. Introduction conformation in the range of conformations. The box to the right of the Conformation text box displays the total number of conformations in the range. 7. To view the first conformation in the range, select the rewind button, shown to the left. The molecule moves to the first conformation in the range. o o Select the up or down arrow buttons in the Step by text box to increase or decrease the value displayed. Click in the Step by text box and type the number of steps by which you want to animate the molecule. 10. To finish the animation, do one of the following: o o CAChe for Windows User Guide Select Done to close the Animate Geometry Labels dialog box and to display the conformation at which you finished the animation in the workspace. Select Cancel to close the Animate Geometry Labels dialog box and to display the conformation before the animation. 8-45 Understanding 9. To modify the range of steps by which you are animating the molecule, do one of the following: Appendices The molecule moves to the last conformation in the range. Customizing 8. To view the last conformation in the range, select the forward button, shown to the left. Chapter 8 - Investigating Molecular Geometry 8-46 CAChe for Windows User Guide 9 Manipulating Biomolecules Overview This chapter describes how to open Protein Data Bank (PDB) files, view protein structures and sequences and build proteins and peptides from their sequence. You’ll learn how to: open and view PDB molecules build peptides and proteins by sequence; mutate residues Using display secondary structure color sequences and structure by property compare and align sequences in separate proteins superimpose structures from sequences map protein and active site surfaces 9-2 9-6 9-6 9-7 9-8 9-8 9-9 9-10 9-10 9-11 Working in the Sequence View window9-18 Viewing sequence residues 9-18 The toolbar 9-19 The Sequence View window 9-20 The style bar 9-21 The tool palette 9-23 Changing the sequence style 9-25 Computing and viewing secondary structure 9-26 Numbering sequences 9-27 Coloring sequences by properties 9-28 Wrapping and hiding sequences Changing biomolecules Mutating residues Inserting residues Deleting residues Joining chains Copying and pasting sequences Building peptides and proteins Building by homology Changing secondary structure Comparing biomolecules Aligning sequences Matching selections Select conserved Superimposing biomolecules Removing superposition Extending the amino acid repository 9-29 9-31 9-31 9-32 9-33 9-33 9-34 9-34 9-35 9-37 9-39 9-39 9-40 9-41 9-42 9-44 9-45 Nonstandard amino acid in a PDB file 9-45 Creating and adding a nonstandard amino acid with the Workspace 9-47 Customizing Saving a PDB molecule Displaying proteins Viewing PDB atom names Highlighting residues Coloring residues Highlighting and displaying the backbone Displaying the backbone N-C-C trace Displaying ribbons Displaying surfaces Understanding Viewing biomolecules Appendices Contents • • • • • • • Tutorials Introduction 9 Chapter 9 - Manipulating Biomolecules Viewing biomolecules To view biomolecules contained in CAChe chemical sample files, simply open them as you would any other molecule. In addition to viewing biomolecules that are contained in chemical sample files, CAChe can view biomolecules from structural databases like the Protein Data Bank maintained by the Research Collaboratory for Structural Bioinformatics (RCSB). The structures of proteins and other biomolecules can be downloaded from http://www.rcsb.org/pdb/ as PDB files. PDB files have an extension of .pdb or .ent. To view the 3D structure contained in a PDB file, you simply open it in the CAChe workspace. ª To open a PDB file 1. Choose File Open to display the Open dialog box. 2. Select the arrow button in the Look in drop down box to display a drop-down list of: o o folders in the directory structure above the currently open folder available drives from which you can open the file. 3. Choose the folder or drive where the file is located from the drop-down list. 9-2 BioMedCAChe User Guide Viewing biomolecules Do one of the following: o To move up a level of folders to locate the folder containing the file, select the dialog box button shown to the left. To locate the file in a subfolder, click and drag the scroll bar in the scrolling list to display the folder where the file is located, and double-click on the folder to open it. 4. Select the arrow button in the Files of type box and choose PDB (*.pdb, *.ent) from the drop-down list. Introduction o o o Click and drag the scroll bar in the scrolling list to locate the file that you want to open, and select the file by clicking on it. Click in the File name text box and type the file name of the file that you want to open. Tutorials 5. Do one of the following: If the PDB file contains HETATM records, you should use the Sequence View to select the HET residues and you should check them to see that the bond types and atom valencies are as expected for that structure. BioMedCAChe User Guide 9-3 Customizing CAChe uses a het_dictionaryCIF.txt file that resides in the CAChe directory to assign bonding and charges in HET groups. This file changes with each new update to the PDB. You should download the new version of this file from the PDB with each new release of the PDB to ensure that your HET group definitions are up-to-date. Understanding If you need to load the alternative coordinates, you must modify the PDB file using a text editor to make the alternative first before loading the file into CAChe. Appendices NOTE If the PDB file contains alternative coordinates for atoms, you will see the dialog below and the first coordinates will be used. Using 6. Select Open to open the file and to close the Open dialog box. Chapter 9 - Manipulating Biomolecules A new workspace opens and the structure displays. NOTE It may take a few seconds to load the PDB file, depending on its size or the number of atoms it contains. At this point you should save the file as chemical sample with the appropriate name. All of the information in the PDB file has been stored in the CAChe chemical sample format. For example, residues have been stored as Groups and you can use the Select Group tool to select residues. To view this information, choose Analyze | Chemical Properties Spreadsheet. The chemical sample properties window appears. 9-4 BioMedCAChe User Guide Using Tutorials Introduction Viewing biomolecules Note that the sample properties for a PDB molecule contain several worksheets: Atoms contains atoms and their properties Electrons worksheet keeps track of nonbonded electron pairs so that the valence can be checked. Electrons are added when you beautify a structure and do not appear when the PDB file is first opened. • Notes contains PDB REMARK, NOTE, SOURCE, COMPND and HEADER records information. When a PDB file is opened in CAChe, some new information is automatically calculated and added. However, the information required for molecular modeling must still be added for example hydrogen atoms and atom hybridization. ª BioMedCAChe User Guide To prepare a PDB molecule for molecular modeling 9-5 Understanding Groups contains residues and their properties Customizing Bonds contains bonds and their properties Appendices • • • • Chapter 9 - Manipulating Biomolecules 1. Choose Edit | Select All. 2. Choose Beautify | Valence Hydrogen atoms and electrons are added. If atoms do not have hybridization or electrons, then hybridization and electrons are added. Only the geometry of hydrogen atoms and the hybridization and electrons around atoms that do not have hybridization already assigned are changed with these commands. Saving a PDB molecule As you work with this chemical sample, you may add additional information that you want to save. ª To save a PDB molecule 1. Select File | Save. When you save this workspace, you can chose to save it as a chemical sample file (*.csf), a PDB file, or other file type. Save the workspace as a chemical sample file (*.csf) to preserve all of the information you have added. Otherwise, information such as rendering style and computed atom properties will be lost. Displaying proteins You can display 3D structures from PDB files using the display options described in Chapter 6. Refer to Chapter 6, “Viewing Chemical Samples” for details about display options for chemical samples. In addition, you can: • • • • 9-6 view PDB atom names highlight residues color the protein by residue property display the protein backbone BioMedCAChe User Guide Viewing biomolecules • view the protein as a ribbon. ª To view the PDB atom names 1. Select the atoms or molecule for which you want to view the PDB names by clicking on the atoms, groups or molecule with the appropriate selection tool. The atoms are highlighted in the workspace to show that they are selected. Tutorials You can view atom names in the workspace. Introduction Viewing PDB atom names 4. Select the Name check box so that it is enabled. 5. Select OK to display the PDB labels and close the Atom Attributes dialog box. Appendices Selected atoms are displayed with atom names. In large structures, atom names may be so small that they are not visible. Magnify the protein to see the atom names. Understanding 3. Select the Label tab to display a list of atom labeling options. Customizing Using 2. Choose View Atom Attributes to display the Atom Attributes dialog box. BioMedCAChe User Guide 9-7 Chapter 9 - Manipulating Biomolecules Highlighting residues ª To highlight a residue 1. Choose the Select Group tool. Residues are special types of atom groups. 2. Select an atom in a residue. All the atoms that share a group with this atom are selected. Residues are identified by their PDB names. ª To deselect a group 1. Position the Select Group tool over the selected group you want to deselect. 2. Press the shift key and the left mouse button to deselect the group. The group is grayed out to show that it is deselected. You can also use the Sequence View window to quickly select residues. See “The selection tools”, p 9-24 for details. Coloring residues ª 9-8 To color all residues by the same scheme BioMedCAChe User Guide Viewing biomolecules Using Tutorials Introduction 1. Choose View | Color by Residue The Residue Colors dialog opens. 2. Select the Scheme and Method. The colors of all atoms in an amino acid residue are assigned based on the Scheme and Method selected. The change in color applies to selected, unselected, visible and hidden atoms. Highlighting and displaying the backbone ª To highlight a backbone 1. Choose Edit | Select Backbone. All atoms that are marked as backbone atoms are selected and highlighted. All other atoms connected to the backbone are deselected. BioMedCAChe User Guide 9-9 Appendices Understanding To learn about the coloring schemes and methods, see “Coloring sequences by properties”, p 9-28 for details. Customizing 3. Choose OK. Chapter 9 - Manipulating Biomolecules ª To display a backbone only 1. Choose Edit | Select Backbone. All atoms that are marked as backbone atoms are selected and highlighted. All other atoms connected to the backbone are deselected. 2. Choose View | Hide Unselected. Atoms not in the backbone are hidden, and only the backbone is displayed. Displaying the backbone N-C-C trace ª To display the N-C-C protein backbone 1. Choose View | Backbone N-C-C Trace. The N-C-C atoms in each residue are selected and all other atoms connected to the backbone are deselected and hidden. ª To redisplay all atoms 1. Choose View | Show All. All objects are displayed. Displaying ribbons ª To display the protein backbone as a ribbon 1. Choose View | Backbone Ribbon. 2. Choose the style: Single Thread, Threads, Flat Ribbon, Solid 9-10 BioMedCAChe User Guide Viewing biomolecules Using Tutorials A splined ribbon in the chosen style and using the color set with View | Residue Colors is drawn.1 The cubic B-spline follows the N-C-C atoms in each residue. All amino acid residues connected to the backbone are deselected and hidden. Nucleic acids, HET groups and waters remain visible. Introduction Ribbon, Threaded Spools, Threaded Pods. Solid ribbon backbone of 1A9T colored by secondary structure 1. Choose View | Backbone Ribbon | None. All objects are displayed. Displaying surfaces With CAChe, you can display the accessible surface of 1. a protein accessible to a probe sphere of 1.4Å radius colored by hydrophobicity and hydrophilicity; 2. an active site adjacent pocket colored by the hydrophobic and hydrophilic properties required in a ligand for good binding; 3. a protein colored by the depth of the crevices in the surface. 1. Carson, M., J. of Mol. Graphics, 1985, 5, 103-106. BioMedCAChe User Guide 9-11 Understanding Customizing To redisplay all atoms Appendices ª Chapter 9 - Manipulating Biomolecules ª To display the protein accessible surface 1. With the Select Molecule Tool in the 3D Structure Window, select the protein. NOTE The protein must have hydrogen atoms added first. The protein highlights and all other objects dim. 2. Choose View | Hide Unselected. The protein remains visible, all other objects disappear. 3. Choose Analyze | Accessible surface. After a few seconds, a progress dialog appears and then the surface is drawn on the protein. The surface that is drawn is one that would be accessible to, or touched by, a 1.4Å sphere rolling over the protein. Since water is approximately 1.4Å in size, this surface is sometimes called the solvent accessible surface. The mauve (red) areas indicate regions of the protein surface where there are hydrogen bond acceptors (e.g. >C=O) within 3.0Å. The blue areas map regions of the protein where there are hydrogen bond donors (e.g. -OH or -NH2) more than 3.0Å from a carbonyl oxygen and less than 2.6Å from a hetero hydrogen (-XH). The rest of the surface is colored cream and that indicates hydrophobic regions of the protein. 9-12 BioMedCAChe User Guide Viewing biomolecules ª To hide the protein accessible surface 1. Choose Analyze | Show Surfaces. Tutorials Introduction The Show Surfaces dialog appears. 2. Uncheck the .asf surface and choose OK. ª Using The dialog closes and the surface disappears. To delete the protein accessible surface 1. With the protein accessible surface displayed, click on the asf surface label. The surface and its label disappear from the screen and are removed from the chemical sample file. However, the surface .asf files remain in the .iso folder. You delete .asf files with the Windows Explorer after they have been deleted from the chemical sample. ª To display the crevice surface NOTE Appendices 1. With the Select Molecule Tool in the 3D Structure Window, select the protein. The protein must have hydrogen atoms added first. The protein highlights and all other objects dim. BioMedCAChe User Guide Understanding 2. Choose Edit | Delete. Customizing Both the surface label and the surface highlight, all other objects dim. 9-13 Chapter 9 - Manipulating Biomolecules 2. Choose View | Hide Unselected. The protein remains visible, all other objects disappear. 3. Choose Analyze | Crevice surface. After a few seconds, a progress dialog appears and then the surface is drawn on the protein. The surface that is drawn is one that would be accessible to, or touched by, a 1.4Å sphere rolling over the protein. Since water is approximately 1.4Å in size, this surface is sometimes called the solvent accessible surface. The blue areas map deep crevices in the protein surface. The depth is measured from an outer, smoother surface accessible to a 2.9Å sphere. Blue areas are points farther than 3.0Å from the outer surface. The cream areas map areas that are within 3.0Å of the outer surface. Relatively large, deep and complex-shaped canyons are potential binding sites for ligands. ª To hide the crevice surface 1. Choose Analyze | Show Surfaces. 9-14 BioMedCAChe User Guide Viewing biomolecules Tutorials Introduction The Show Surfaces dialog appears. 2. Uncheck the .acs surface and choose OK. The dialog closes and the surface disappears. To delete the protein crevice surface 1. With the protein crevice surface displayed, click on the acs surface label. Using ª Both the surface label and the surface highlight, all other objects dim. To display the ligand adjacent surface 1. With the Select Molecule Tool in the 3D Structure Window containing a ligand bound in a protein active site, select the ligand. NOTE The protein and ligand must have hydrogen atoms added first. The ligand highlights and all other objects dim. 2. Choose Analyze | Adjacent Surface - Pocket. After a few seconds, a progress dialog appears and then the BioMedCAChe User Guide 9-15 Understanding ª Appendices The surface and its label disappear from the screen and are removed from the chemical sample file. However, the surface .acs files remain in the .iso folder. You delete .acs files with the Windows Explorer after they have been deleted from the chemical sample. Customizing 2. Choose Edit | Delete. Chapter 9 - Manipulating Biomolecules surface of the protein adjacent to the ligand. 3. Choose View | Hide Unselected. The ligand and the surface remain visible. All other objects disappear. The surface1 that is drawn is one that is accessible to, or touched by, a 1.4Å sphere rolling over that portion of the protein adjacent to the ligand. This is the surface of the protein that interacts with the ligand and forms the pocket in which the ligand is docked. The colors of the pocket indicate properties of an ideal ligand. The mauve (red) areas indicate regions of the protein surface where hydrogen bond acceptors (e.g. >C=O) are needed in the ligand for optimal binding. The blue areas map regions of the protein where nearby hydrogen bond donors (e.g. -OH or -NH2) are needed for optimal binding in the ligand. The cream areas indicate where the ligand should have hydrophobic groups (e.g. >CH2). You can use this wire pocket to design new ligands with improved binding affinity by (1) filling empty space in the pocket with functional groups that bind to the protein and (2) trimming protruding groups. As a guide, carbonyl oxygens (>C=O) should touch the red mesh, hydrogens that hydrogen bond to the protein should stick through the blue mesh, and hydrophilic groups should be inside and away from the mesh. 1. Bohacek, R. and McMartin, C., J Med Chem 1992, 35, 1671-1684. 9-16 BioMedCAChe User Guide Viewing biomolecules ª To hide the adjacent surface - pocket 1. Choose Analyze | Show Surfaces. Tutorials Introduction The Show Surfaces dialog appears. 2. Uncheck the .aas surface and choose OK. ª Using The dialog closes and the surface disappears. To delete the protein adjacent surface - pocket 1. With the protein adjacent surface displayed, click on the aas surface label. Appendices The surface and its label disappear from the screen and are removed from the chemical sample file. However, the surface .aas files remain in the .iso folder. You delete .aas files with the Windows Explorer after they have been deleted from the chemical sample. Understanding 2. Choose Edit | Delete. Customizing Both the surface label and the surface highlight, all other objects dim. BioMedCAChe User Guide 9-17 Chapter 9 - Manipulating Biomolecules Working in the Sequence View window The sequence data for a protein 3D structure that is open in CAChe is displayed in the Sequence View window. When you open multiple proteins, their sequence data are added to the Sequence View window. Only one Sequence View window can be open at one time. You use the sequence window to: • • • • • • • • • • view the sequence color the sequence by property mutate residues edit the sequence build peptides and proteins from residues analyze secondary structure adjust the conformation or secondary structure of a protein align sequences match selections and select conserved residues superimpose sequences. NOTE The Sequence View is available only with CAChe WorkSystem Pro, BioCAChe or BioMedCAChe. Viewing sequence residues ª To view a sequence 1. From a workspace window, choose Analyze | Sequence to display the sequence window. The Sequence View window displays sequences in rows that begin with the chemical sample 9-18 BioMedCAChe User Guide Working in the Sequence View window name. Title bar Style bar The sequence has a direction, starting from the N terminus of the first residue to the C terminus of the last one. Hetero groups are always displayed, but water molecules (HOH) are never displayed. Tutorials Introduction Tool palette Using When you view a sequence, the Sequence View window comes to the front and the menus and toolbar change. The toolbar The Sequence View toolbar contains a collection of buttons that provide a shortcut to some of the menu options. BioMedCAChe User Guide Customizing Appendices Understanding Experiment Show Server Information Experiment Show Submitted Experiments Experiment New Context-sensitive Help File Print Help Index Edit Paste Edit Cut Edit Copy File Save File Open File New The following diagram shows the toolbar and the corresponding menu options that each button performs when the Sequence View window is at the front. 9-19 Chapter 9 - Manipulating Biomolecules The Sequence View window Although you can have many workspaces open at any time, there can be only one Sequence View window open at a time. Any menu bar or toolbar commands you choose affect the active document window. To activate the Sequence View, click on it. The main components of the Sequence View are: • • a title bar that displays the name of the document • a Tool palette that provides selection tools and a residue editing tool. a Style bar with drop-down lists that enable you to change the residue type, secondary structure type, and Phi and Psi angles of selected parts of your protein Title bar Style bar Tool palette The Sequence View window Residues for each chemical sample are shown using 1-letter or 3letter codes on a line that wraps at the window boundary. An asterisk called the “chain terminal” marks the end of each protein chain. The at symbol ‘@’ marks the terminus of a cyclic peptide. Note that the chain terminal is not part of the structure and you cannot select the chain terminal. Refer to “Changing the sequence style”, p 9-25 for details about changing display options for sequences such as 1- and 3-letter codes. The Sequence View, the workspace and the Sample Property Windows work together. That is, selections or changes you make in one window are immediately reflected in the other two windows. 9-20 BioMedCAChe User Guide Working in the Sequence View window Tutorials Items copied in the Sequence View, the 3D Structure window or a Sample Properties view can be pasted into another view. Thus you can select a sequence in the Sequence View, then switch to the 3D Structure window to paste the residue sequence and adjust its position in 3D space. Introduction Residues shown as half intensity color are not selected. On displays with only 256 colors, residues that are not selected are gray. Residues highlighted in bright full intensity colors have one or more atoms or bonds selected. Residues with every atom selected are highlighted and surrounded by a black box. The style bar The Sequence View style bar provides three items that enable you to change or create features of selected parts of your molecule: Using residue type secondary structure type Phi and Psi angles. Residue Type drop-down Secondary structure drop-down Phi angle box Psi angle box Example style bar BioMedCAChe User Guide • display the residue type and Phi-Psi angles of a selected residue • • • mutate a residue from one type to another Understanding Use the style bar in conjunction with the workspace selection and inserting tools to: Customizing • • • change Phi and Psi angles Appendices set a motif. 9-21 Chapter 9 - Manipulating Biomolecules The Residue Type box The Residue Type drop-down box lists the twenty standard amino acids. Once you choose a residue from the Residue Type drop-down box, you can: • • insert a residue of that type mutate a selected residue to the type you select. The Secondary Structure box The Secondary Structure box provides a drop-down list of secondary structures that you can apply to: • • the next residue you insert a selected residue. . 9-22 BioMedCAChe User Guide Working in the Sequence View window The Phi and Psi boxes Introduction The Phi and Psi boxes are text boxes that you can use to enter values for the attachment angles for the residue. Once you have selected or entered angles, you can: insert a residue with the specified Phi and Psi values change the Phi or Psi values of a selected residue. Tutorials • • Hiding the style bar ª To hide the sequence style bar 1. When the style bar is visible, choose Options Show Ribbon. Using You can display or hide the sequence style bar. The style bar is no longer displayed at the top of the workspace. To redisplay the sequence style bar 1. When the style bar is hidden, choose Options Show Ribbon. The style bar is displayed at the top of the workspace. A check mark appears next to the Show Ribbon drop-down item on the Options menu, indicating that the style bar is currently visible. The tool palette • BioMedCAChe User Guide Appendices The sequence tool palette provides two types of tools: Understanding ª Customizing The check mark next to the Show Ribbon drop-down item on the Options menu no longer appears, indicating that the style bar is currently hidden. selection tools 9-23 Chapter 9 - Manipulating Biomolecules • a residue tool for inserting residues Select Select Molecule/Chain Selection tools Select Similar Residue Residue tool The selection tools The tool palette contains the following selection tools: • the Select tool (default), which selects individual residues or sequences • the Select Molecule tool, which selects an entire molecule or sequence chain in a protein • the Select Similar tool, which selects all residues of a similar type. Choose a tool by clicking on it in the tool palette. When you choose a tool, the mouse cursor in the workspace changes shape to indicate which tool is currently selected. The table below displays the selection tools as they appear in the tool palette, and their corresponding cursors: Selection tool 9-24 • the Select tool (default) • the Select Molecule/ Chain tool • the Select Similar tool Tool palette icon Mouse cursor BioMedCAChe User Guide Working in the Sequence View window The Residue tool • Tool palette icon Mouse cursor the Residue tool With the residue tool, you may type residues in a sequence. You must specify secondary structure type, and Phi and Psi angles first before typing a residue. Tutorials Editing Tool Introduction Use the residue tool to edit residue sequences in the sequence window. ª Using Changing the sequence style To view 3-letter codes 1. Choose View | 3-letter Code to display 3-letter codes for all sequences. The 3-letter Code menu item is checked. To view 1-letter codes 1. Choose View | 1-letter Code to display 1-letter codes for all sequences. Appendices Understanding The 1-letter Code menu item is checked. Customizing ª BioMedCAChe User Guide 9-25 Chapter 9 - Manipulating Biomolecules The codes for the residues are listed in the table. Residue 1-letter 3-letter code Alanine A ALA Arginine R ARG Asparagine N ASN Aspartic acid D ASP Cysteine C CYS Glutamine Q GLN Glutamic acid E GLU Glycine G GLY Histidine H HIS Isoleucine I ILE Leucine L LEU Lysine K LYS Methionine M MET Phenylalanine F PHE Proline P PRO Serine S SER Threonine T THR Tryptophan W TRP Tyrosine Y TYR Valine V VAL Computing and viewing secondary structure ª To view secondary structure 1. Choose View | Secondary Structure to display icons below each residue that show the secondary structure that is contained 9-26 BioMedCAChe User Guide Working in the Sequence View window To compute secondary structure 1. Choose Edit | Analyze Secondary Structure to compute the secondary structure and display icons below each residue that show the secondary structure. The secondary structure is computed by the PDB standard Kabsch and Sander algorithm (see “Defining secondary structure”, p 21-4). Numbering sequences You can number sequences by the number assigned to residues within the original PDB file or from one to n using a ruler. ª Tutorials ª Using The secondary structure is displayed in 1-letter codes defined in “Defining secondary structure”, p 21-4. If you delete, replace or insert residues, you change the secondary structure, and you must update the secondary structure information. Introduction in the PDB file. To number sequences 1. Do one of the following The number displayed is the number obtained from the PDB file. Sequences do not necessarily start numbering from one and residues may have the same PDB number, but differ in PDB insertion code. The PDB numbers always define the order in the sequence. o View | Residue numbers | Ruler to display the sequence ruler above each residue. Sequence rulers always start from 1 and end with the number of the chain termini in the sequence. The ruler counts residues, gaps and chain termini. During editing, the PDB number assigned to a residue may no longer reflect its position in the sequence. For example, editing the residue with PDB number 10 might appear after the residue with PDB BioMedCAChe User Guide 9-27 Understanding above each residue. Customizing View | Residue numbers | PDB to display the PDB number Appendices o Chapter 9 - Manipulating Biomolecules number 24. Or there can be many residues with the same PDB number but different insertion codes. ª To renumber sequences 1. Choose Edit | Resequence PDB numbers to display the PDB number above each residue. Renumbering replaces all PDB numbers in the sequence with the current numbers in the sequence ruler. Coloring sequences by properties ª To color a sequence 1. Choose View | Residue Colors... The Residue Colors dialog appears. 2. Choose the color Scheme: • • Residue Type Sequence Protocol 3. Choose the Method. Method details are explained in Chapter , “Understanding Sequence Property Predictions” The method window specifies the number of adjacent residues that are grouped together for analysis. For example, a window of 17 will result in the sequence being analyzed in blocks of 17 9-28 BioMedCAChe User Guide Working in the Sequence View window residues to determine properties such as the antigenicity or hydropathy. Using Tutorials For example, if you color by sequence protocol, you see this dialog. Introduction A coloring legend showing the resulting color scheme displays in the bottom half of the dialog box. To display the property legend 1. In the Sequence View window, choose View | Property Legend. The Property Legend is available when residues are colored by sequence protocol and the residues have different colors. Wrapping and hiding sequences ª To wrap sequences 1. Check Format | Wrap Lines to display all sequences folded at the window boundary. BioMedCAChe User Guide 9-29 Understanding ª Appendices For some residues and some types of properties, the property value cannot be determined because the sequence may be too short. Residues for which the property cannot be determined are colored white. Customizing 4. Click Apply to color all residues in the sequence view without closing the dialog. Click OK to color all residues and close the dialog. Chapter 9 - Manipulating Biomolecules ª To unwrap sequences ª 1. Uncheck Format | Wrap Lines to display all sequences on a single line that can be scrolled. . To hide a sequence 1. In the Sequence View window, select the name of the sequence you want to hide. 2. Choose View | Hide Sequence to hide the sequence. Alternatively, close all 3D structure and sample property windows for the biomolecule. The sequence for the structure is removed from the sequence view. ª . To display the sequence again 1. Choose Analyze | Sequence in the 3D structure window. 9-30 BioMedCAChe User Guide Changing biomolecules • Commands from the Edit menu work on the active sequence only. The name of the active sequence is highlighted in yellow. • • Editing operations immediately change the 3D structure. • Deleting residues deletes the residue group, its atoms, its bonds and other dependent objects. Inserting residues adds the residue group and all atoms and bonds belonging to that residue. • Inserting residues in the middle of a sequence will shift the right most portion of the chain, changing the 3D coordinates of all atoms in the right subchain. • Changing the Phi or Psi value of a residue may change the global 3D structure. Replacing residues causes a point mutation. ª To mutate residues 1. Use the select tool to select the residues you want to mutate to a particular residue. The residues are highlighted. If the workspace is open on this structure, the atoms belonging to the selected residues are highlighted in the workspace. BioMedCAChe User Guide 9-31 Appendices Mutating residues Understanding Customizing You should tile your windows so that you can see the structure in a 3D workspace while making editing changes. Tutorials As you modify your molecules, keep the following tips in mind: Using You use the CAChe sequence window to edit, modify, delete, mutate, build and analyze biomolecules at the secondary structure level. Introduction Changing biomolecules Chapter 9 - Manipulating Biomolecules 2. Choose the new residue from the Residue Type drop-down. The selected residues are replaced with the newly chosen residue. NOTE When you mutate a residue, the backbone atoms of both residues are superimposed and then the original residue is removed. The residue in the workspace and the residue in the repository must contain the three crucial backbone atoms given by the PDB names (C, CA, N). If the backbone atoms are not present, a dialog appears that explains which residue was missing the backbone PDB names. Inserting residues ª To insert a residue 1. Select the name of a protein to activate it for modification. The name is highlighted in yellow. 2. In the Sequence View window, use the residue tool to select the position where the insertion is to take place. The insertion position is shown with an I-beam cursor between residues. If the workspace is open on this structure, the workspace display remains unchanged. 3. Do one of the following: o o Type the 1-letter code for new residue Choose Edit | Insert to insert the residue shown in the Residue Type box in the style bar. The new residue is inserted at the insertion position and the Ibeam moves to the right. 9-32 BioMedCAChe User Guide Changing biomolecules Introduction NOTE When you insert a residue the Psi and Phi angles used are the same as specified in the style bar. In addition, the next residue in the sequence is moved to make room for the insertion only if the peptide bond is shorter than 2 A. Deleting residues Do one of the following 1. Use the Select tool to select the residues you want to delete. The selected residues are highlighted. If the workspace is open on this structure, the atoms belonging to the selected residues are highlighted in the workspace. 2. Type the Delete key. Tutorials To delete residues Using ª The selected residues are deleted and a single asterisk appears in place of the deleted residues. The chain is broken unless the deleted residues were at the end of a chain. Or Joining chains Chains are broken when you delete residues. ª To join two chains 1. With the Select tool choose the two residues you want to join. One residue must be at the start of a chain and the other at the BioMedCAChe User Guide 9-33 Understanding The residue to the left of the I-beam is deleted, the I-beam is moved to the left and a single asterisk appears in the place of the deleted residue. The chain is broken unless the deleted residues were at the end of a chain. Appendices 2. Type the backspace key. Customizing 1. Use the Residue tool to place the I-beam to the right of the residue you want to delete. Chapter 9 - Manipulating Biomolecules end of a chain. The residues can be in the same chain. The selected residues are highlighted. If the workspace is open on this structure, the atoms belonging to the selected residues are highlighted in the workspace. 2. Choose Edit | Connect Chains. The selected residues are joined and the original chains are connected into one chain. No atoms are moved and, since the geometry is unchanged, unusually long bonds may be created. To clean up the structure after all modifications are made, run an experiment that optimizes the geometry. ª To join adjacent chains 1. With the Residue tool place the I-beam to the right of the asterisk separating the chains you intend to join. 2. Type the Backspace key. The asterisk disappears and two chains are joined forming one chain. No atoms are moved and, since the geometry is unchanged, unusually long bonds may be created. To clean up the structure after all modifications are made, run an experiment that optimizes the geometry. Copying and pasting sequences You can copy and paste selected residues within or between sequences. Pasted residues are inserted as new chains. Building peptides and proteins ª To build a peptide 1. In the Sequence View window, click the name of the chemical sample to activate it for modification. The sequence name is highlighted in yellow. 2. Choose the Residue tool. A flashing I-beam cursor appears at the beginning of the sequence. 9-34 BioMedCAChe User Guide Changing biomolecules 3. Type the 1-letter code for each residue in the peptide or protein. Building by homology Since genes have changed through evolution, proteins are usually members of families of related proteins that have similar sequences and 3D structures. As a result, it is possible to predict an unknown structure from its sequence by using the X-ray structure of a homologous protein. Tutorials NOTE When you add a residue, the Psi and Phi angles used are the same as specified in the ribbon. Using The 3D structure displayed in the workspace is updated to contain the new residue. The new chain is added to the workspace away from any other structures. Introduction The new residue is inserted at the cursor creating a new chain. The box moves to the right and contains an asterisk that indicates the end of the chain. 1. Open the known protein in the workspace. 2. Choose Analyze | Sequence to display the sequence in the Sequence View window. 3. In the Sequence View window, replace, delete or add residues with ones from the new sequence. When you replace a residue, backbone atoms of both residues are superimposed and then the original residue is removed conserving the secondary structure. NOTE When the unknown sequence has extra residues that are not in the known structure, you will want to add them as loops. BioMedCAChe User Guide 9-35 Understanding To build by homology Appendices ª Customizing If you have the sequence for a protein with an unknown 3D structure and you have a homologous protein with a 3D structure, you can build the unknown 3D structure from the known one. You do this by editing the sequence of the homologous 3D structure so that it matches the sequence of the unknown. Chapter 9 - Manipulating Biomolecules To add loops without moving the other atoms in a chain, you break the chain at the point of loop insertion, then insert the residues forming the loop and finally rejoin the chain. ª To insert a loop 1. In the Sequence View window, click the name of the chemical sample to activate it for modification. The sequence name is highlighted in yellow. 2. Use the Select tool to select the two residues where you want to insert the loop. 3. Select Edit | Break Chain. The chain is broken and an asterisk appears between the selected residues. 4. Use the Residue tool to add new residues to each chain in a loop. As you add residues, adjust the Psi and Phi angles so that new loop residues are added in the appropriate empty space and do not overlap existing residues. To view the sequence and 3D structure simultaneously, select Window | Tile to display the Sequence View window and the workspace side by side. 5. After all residues are added, place the Residue tool to the right of the asterisk and press the backspace key. The chains are rejoined and the asterisk disappears. forming the loop and finally rejoin the chain. ª To create a turn 1. In the Sequence View window, click the name of the chemical sample to activate it for modification. The sequence name is highlighted in yellow. 2. Use the Select tool to select the two residues where you want to place the turn. 3. Select Edit | Make turn and choose one of the following 9-36 o Type I o Type I’ o Type II o Type II’ BioMedCAChe User Guide Changing biomolecules The selected turn is created using angles in the selected residues Type Psi Right Residue Phi Psi Phi -60 -30 -90 0 I’ 60 30 90 0 II -60 120 80 0 II’ 60 -120 -80 0 Tutorials I Introduction Left Residue Changing secondary structure ª Using You can change the secondary structure or protein conformation from the style bar in the Sequence View window. To change secondary structure 1. Use the Select tool to select the residues you want to adjust. ª To adjust Phi and Psi angles 1. Use the Select tool to select the residue you want to adjust. The selected residue is highlighted. If the workspace is open on this structure, the atoms belonging to the selected residue are highlighted in the workspace. 2. Type the new angles into the Phi or Psi boxes in the style bar at the top of the Sequence View window. The residue geometry is changed. BioMedCAChe User Guide 9-37 Understanding The Phi and Psi angles are set to the values for the secondary structure and the residue geometry is changed to the new values. Appendices 2. Choose a secondary structure option from the secondary structure drop down in the style bar at the top of the Sequence View window. Customizing Selected residues are highlighted. If the workspace is open on this structure, the atoms belonging to the selected residues are highlighted in the workspace. Secondary structure patterns are created by more than one adjacent residue. Chapter 9 - Manipulating Biomolecules NOTE When you change the Psi and Phi angles of a residue, there can be large global effects on the protein. 9-38 BioMedCAChe User Guide Comparing biomolecules Comparing biomolecules You can compare sequences to discover similarities in their structure and thus their function. To do so you can align sequences by placing gaps in the sequences. ª Introduction Aligning sequences To align a sequence automatically Tutorials 1. Open the sequences of two or more chemical samples as described in “Viewing sequence residues”, p 9-18. 2. From the Sequence View window, choose Edit | Align. An exact pairwise sequence alignment is performed between the two selected sequences using the Needleman-Wunsch algorithm with BLOSUM50 matrix. Gaps are inserted between residues to bring the sequences into alignment. BioMedCAChe User Guide 9-39 Appendices 3. Choose a different sequence from each list and select OK. Understanding Customizing Using The Align Sequence dialog appears. Chapter 9 - Manipulating Biomolecules You may adjust the alignment manually by inserting gaps as appropriate. ª To align a residue manually 1. Open the sequences of two or more chemical samples as described in “Viewing sequence residues”, p 9-18. 2. With the Residue tool, place the flashing I-beam where you want to insert the gap. 3. Type either the space bar or the minus symbol (-) for each new gap you want to insert. New gaps are inserted to the left of the I-beam cursor. No changes are made to the 3D structure in the workspace. ª To delete a gap 1. With the Residue tool, place the I-beam cursor to the right of gaps you want to delete. 2. Type the backspace key to delete the gap. No changes are made to the 3D structure in the workspace. Matching selections The active sites in homologous proteins are often conserved. When you have two aligned homologous proteins and the active site in one is selected, you can identify the active site in the second protein by selecting the matching residues. ª To match a sequence selection 1. From the Sequence View, choose Edit | Match Selection. 9-40 BioMedCAChe User Guide Comparing biomolecules Using Tutorials Introduction The Match Sequence Selection dialog appears. 2. Chose one sequence from each list. The Master Sequence contains the selection you wish to match in the New Selection. The OK button highlights. The dialog closes and residues in the New Selection sequence adjacent to selected residues in the Master Sequence highlight and all other residues dim. Understanding ª The active sites in homologous proteins are often conserved. When you have many aligned homologous proteins, you may be able to identify the active site residues in them protein by selecting the conserved residues. To select conserved residues Appendices Select conserved 1. From the Sequence View, choose Edit | Select Conserved. BioMedCAChe User Guide Customizing 3. Select OK. 9-41 Chapter 9 - Manipulating Biomolecules The Select Conserved Residues dialog appears. 2. Chose one or more sequences from each list. Choose the sequences whose residues are to be matched from the Master Sequence and choose the sequences that will have the conserved residues highlighted from the New Selection list. You may choose the same sequences in each list. The OK button highlights. 3. Select OK. The dialog closes and residues in the New Selection sequence that are conserved in all the sequences from the Master list and the New Selection list highlight. All other residues dim. Superimposing biomolecules You can compare the molecular geometry of two biomolecules by superimposing one or more residues from one onto the corresponding residues in the other. CAChe superimposes the Cα atoms of the selected residues from both biomolecules to coincide with each other as much as possible. 9-42 BioMedCAChe User Guide Comparing biomolecules You can then compare any differences in structural geometry, indicated by the RMS label displayed in the workspace. 1. Select the residues that you want to be superimposed on another structure’s residues by clicking on the residues in the sequence window with the Select tool. Tutorials NOTE Only sequences from two different chemical samples can be superimposed. The order in which residues are selected is not important. Introduction To superimpose two molecules by residue 2. Choose Edit Superimpose Sequences. The probe chemical sample overlaps the target chemical sample in a workspace. The selected atoms are highlighted to show that they are selected. An RMS error is displayed in the workspace that indicates the error in molecular geometry between the Cα BioMedCAChe User Guide 9-43 Appendices Choose the Superposition option to specify where the result appears. If you choose to Superimpose Target and Probe in a New Window, the new window is titled “Superposition Results”. Understanding Customizing The Superimpose dialog box appears, which allows you to choose which chemical sample is the target, which is the probe, and where the superposition takes place. Using ª Chapter 9 - Manipulating Biomolecules atoms in the selected residues. Removing superposition In the workspace, do one of the following to remove the superposition: o Choose Edit Undo Superimpose. o Press Ctrl Z. o Select one molecule by clicking on it with the Select Molecule tool and dragging to move the selected molecule to one side. No undo is available if the superposition is done in a new window. Simply close the window without saving it to remove the superposition. 9-44 BioMedCAChe User Guide Extending the amino acid repository You may extend the repository by adding nonstandard amino acids and assigning shortcuts to them. After adding the nonstandard amino acid to the repository, you can used it for building peptide sequences in the same way as the standard amino acids. You add nonstandard amino acids to the repository in one of two different ways: Tutorials By default the amino acid (AA) repository consists of the templates for the 20 standard amino acids. Each of the standard amino acids has the 1-letter code of the amino acid assigned as a keyboard shortcut. The shortcut allows you to build a sequence by typing 1letter codes on the keyboard. Introduction Extending the amino acid repository - from the Sequence View of a nonstandard amino acid you have drawn in the CAChe Workspace Using - directly from the Sequence View of a PDB file Nonstandard amino acid in a PDB file ª To add a nonstandard residue from a PDB file 1. From the 3D Structure window, choose File | Open and select the PDB file containing nonstandard amino acids. Customizing With CAChe, you can easily add nonstandard residues that appear in PDB files. If you need a trial case, 4hvp.ent contains the following hetero groups: ABA - ALPHA-AMINO-N-BUTYRIC ACID NLE - NORLEUCINE 2. Choose Analyze Sequence. The Sequence View window comes to the front and the sequence from the PDB file appears. BioMedCAChe User Guide 9-45 Appendices TIP Understanding The PDB file opens in a new 3D Structure window. Chapter 9 - Manipulating Biomolecules 3. Choose Options | Amino Acids Repository. The Amino Acids Repository dialog appears. 4. In the Amino Acids Repository dialog, press the New button The New Amino Acids dialog appears: 5. Select one amino acid, e.g. ABA67, from the New Amino Acid list and choose Add. The selected residue is added to the repository, displayed in the Amino Acid list and available in the Residue Combo Box. 9-46 BioMedCAChe User Guide Extending the amino acid repository Creating and adding a nonstandard amino acid with the Workspace TIP Amino acids in the repository are building blocks that appear in repeat units in the sequence. For example, the repository contains the glycyl fragment, not glycine. Amino acids also must contain the N-C-C- backbone. Introduction 1. In the CAChe 3D Structure window, build a nonstandard amino acid. Tutorials 2. Choose Beautify | Valence. Hydrogen atoms are added. 3. Choose Edit | Group Atoms. The group appears in the Defined Groups list. 5. Click OK. The Group Atoms dialog box closes. 6. Choose Analyze | Chemical Properties Spreadsheet and click the Groups tab. The chemical properties workbook opens and the Groups page is at the front. Check that: BioMedCAChe User Guide 9-47 Appendices Understanding Customizing 4. Choose amino acid from the Group Type pull down and type In the group name into the Group Name text box, and press the >>Group>> button. Using The Group Atoms dialog box appears. Chapter 9 - Manipulating Biomolecules o The group type is AA_GROUP, o the group name is as you typed it, o and the group PDB Name is the first 3 letters of the group name. 7. Close the Sample Properties Window. 8. In the 3D Structure window, select Analyze | Sequence. The Sequence View comes to the front with the sequence of the chemical sample. 9. Choose Options | Amino Acids Repository. The Amino Acids Repository dialog appears. 10. In the Amino Acids Repository dialog, press the New button. The New Amino Acids dialog appears. 11. Select the available item that contains the name of the new amino acid group that you created and click Add. The selected residue is added to the repository and the dialog closes. The new amino acid is displayed in the Amino Acid list and available in the Residue Combo Box. 9-48 BioMedCAChe User Guide 10 Performing Workspace Experiments Introduction 10 Overview an overview of the experimental properties and procedures available in CAChe, and the computational applications involved in each experiment • a detailed description of how to perform a CAChe experiment in the workspace • an overview of all experiment files that CAChe creates, their file names, and file locations. Using • Tutorials This chapter describes experiments in the CAChe workspace, including: Choosing a property class Choosing a property Choosing a procedure Choosing a server Running an experiment Saving an experiment file Stopping an experiment Running experiments simultaneously Viewing active experiments 10-5 10-5 10-9 10-17 10-18 10-23 10-24 10-26 10-27 Reattempting output file generation Displaying servers on which to run an experiment Displaying experimental details Viewing experimental results Sample.io folder Sample.iso folder Sample.map folder Viewing log files and output files 10-29 10-31 10-32 10-32 10-33 10-35 10-36 10-37 10-37 10-39 10-40 Appendices Introduction to workspace experiments 10-2 Viewing server information Setting up a workspace experiment 10-4 Size and element limitations Preparing a chemical sample file 10-4 Troubleshooting experiments Understanding Contents Customizing Refer to Chapter 11, “Using the Procedure Editor”, for details about creating new experiments, Chapter 12, “Using ProjectLeader”for an overview of performing experiments using ProjectLeader, and “Workspace versus ProjectLeader”, p 2-21, for a comparison of the two. Chapter 10 - Performing Workspace Experiments Introduction to workspace experiments CAChe runs experiments by performing calculations based on the geometry or molecular properties of a chemical sample in the workspace. Workspace experiments allow you to visualize experimental results in a variety of ways such as: • viewing low-energy conformations alongside a threedimensional energy graph • • animating a series of low-energy structures superimposing surfaces on a molecule, representing electronic properties such as electron density or susceptibility to attack. The calculations are performed by a range of computational applications, which apply mathematical models from classical mechanics, quantum mechanics, and dynamics to the chemical sample in the workspace. Workspace experiments generate the following types of information: 10-2 • • low-energy conformations of your molecule • distribution of electronic properties of your chemical sample, calculated as a shaded surface superimposed on the molecule • atom and bond properties, including partial charge, bond order, and bond strain • transition state and reaction path conformations of your molecule • infrared (vibrational) and UV-visible (electronic) spectra, with motion vectors or molecular orbitals superimposed on a molecule in the workspace for any transition in the spectra. the geometry of a series of low-energy conformations, mapped against energy in a two- or three-dimensional graph CAChe for Windows User Guide Introduction to workspace experiments Refer to “Setting up a workspace experiment”, p 10-4, for a full list of the properties and procedures that you can use in experiments, and which procedures to use for a certain type of experiment. Refer to “Viewing experimental results”, p 10-36, for details on file types generated by different experiments, and the content of a file type. Appendices Understanding Customizing Refer to Chapter 20, “CAChe Computational Applications”, for detailed information on the computational applications that CAChe uses. Tutorials Refer to Chapter 11, “Using the Procedure Editor”, for details about creating new experiments, modifying procedures, and editing parameter data sets. Using CAChe performs experiments locally on your computer, unless you have access to a Unix-based CAChe GroupServer. Introduction Some CAChe experiments produce complicated three-dimensional output, or a large amount of textual information, which is saved in a new output file based on the name of the original chemical sample file. CAChe for Windows User Guide 10-3 Chapter 10 - Performing Workspace Experiments Setting up a workspace experiment The following steps outline the process of performing a workspace experiment, and the properties and procedures available. 1. Prepare a chemical sample file. 2. Choose a property class to investigate. 3. Choose a property to investigate. 4. Choose a procedure to use. 5. If you have access to CAChe GroupServer, choose a server to run the experiment on. Refer to Chapter 11, “Using the Procedure Editor”, for details about creating a new experiment. After these steps just listed, you are ready to start the experiment. Refer to “Running an experiment”, p 10-18, for details about performing an experiment in CAChe. Preparing a chemical sample file Before you can perform an experiment, you need to build and investigate the geometry of your molecule in a chemical sample file. Perfect the geometry of the molecule as much as possible by using the tools and menu options in the workspace before running an experiment. Some CAChe experiments, such as generating an energy map, also require the addition of search labels. Refer to Chapter 4, “Creating Chemical Samples”, and Chapter 5, “Modifying Chemical Samples”, for details about building and perfecting your molecule. Refer to Chapter 8, “Investigating Molecular Geometry”, for details about adding geometry search labels to your molecule. 10-4 CAChe for Windows User Guide Setting up a workspace experiment Choosing a property class Choose from the following five classes of properties on which to experiment and investigate further for your chemical sample: Introduction chemical sample properties atom properties bond properties Tutorials sample conformation properties reaction and transition state properties. Choosing a property The workspace provides a range of properties on which you can experiment for each class of property. Properties for each property class are described in the following sections. Using • • • • • Chemical sample properties Choose from the following properties for a chemical sample. low energy structures transition state structures, which can also be determined by investigating reaction properties. Heat of formation Calculates the energy of a chemical sample at a geometry-optimized energy minimum. CAChe for Windows User Guide 10-5 Understanding • • Appendices Optimizes the geometry of your chemical sample using procedures from either classical molecular mechanics, or semi-empirical quantum mechanics. Procedures that use classical methods are the fastest and usually give good results. You can optimize a molecule to discover: Customizing Optimized geometry Chapter 10 - Performing Workspace Experiments IR transitions Generates an infrared (IR) spectra for a molecule, created by coordinated motions of the atoms as electromagnetic radiation in the infrared region is absorbed by the molecule. UV-visible transitions Generates a UV-visible spectrum for a molecule, created by electron transition between molecular orbitals as electromagnetic radiation in the visible and ultraviolet (UV-visible) region is absorbed by the molecule. NOTE UV-visible spectra can be generated only if you have the optional VAMP add-on. Current energy Calculates the energy of the chemical sample at its existing geometry. The geometry of the sample is not changed by this experiment. Electron density Generates an electron density isosurface for an electron probability density of 0.01 e-/Å3. The surface is colored to reflect the electrostatic potential at every point on the surface. HOMO and LUMO Calculates the energies and shapes of the HOMO and LUMO of your chemical sample using a quantum mechanical application. HOMO-5 to LUMO+4 Generates the energies and shapes of a total of 11 molecular orbitals ranging from HOMO -5 to LUMO +4. All molecular orbitals Generates the shapes and energies of all of the molecular orbitals (MOs) in your chemical sample. 10-6 CAChe for Windows User Guide Setting up a workspace experiment Electrostatic isopotential Creates a three-dimensional surface superimposed over your chemical sample which indicates areas that are vulnerable to an attack by either electrophiles, nucleophiles, or radicals. Superdelocalizability (electrophilic, nucleophilic, or radical) Creates a three-dimensional electron density isosurface with colors reflecting the relative differences in reactivity of the different parts of your sample. Using Atom properties Tutorials Susceptibility (electrophilic, nucleophilic, or radical) Introduction Generates an electrostatic potential isosurface that shows both the polarity of the potential and where in space the potential equals ±0.03 a.u. (±18 kcal/mol, ±75 kJ/mol). Choose the following property for an atom. Atomic partial charge Calculates atomic partial charges for every atom in your chemical sample. Choose from the following properties for a bond. Calculated bond order Determines the computed bond order of every bond in your chemical sample using semi-empirical quantum mechanical methods. Calculated bond strain CAChe for Windows User Guide Appendices Determines the computed bond strain of every bond in your chemical sample using classical mechanical methods. Understanding Customizing Bond properties 10-7 Chapter 10 - Performing Workspace Experiments Chemical sample conformation properties Choose from the following properties for a chemical sample conformation. Rigid map Generates a potential energy map of conformations determined by geometry search labels in the sample for each structural element you want to vary, with structures for each map point not optimized. Optimized map Generates a potential energy map of conformations determined by geometry search labels in the sample for each structural element you want to vary, with structures for each map point optimized. Sequence of conformations Generates a collection of low-energy conformations by sequentially searching an unlimited number of geometry labels. The resulting map file contains local energy minima, but does not offer information about the energy barriers between them. Dynamics trajectory Generates a trajectory of a chemical sample in random thermal motion by randomly adding kinetic energy to each atom. Motion is induced that can overcome small barriers to lower energy structures. Reaction and transition state properties Map reaction Creates a transition state structure from a reactant and a product molecule of a chemical reaction. Search for saddle Locates a stationary point between the reactant and product that corresponds to the transition state for the reaction. 10-8 CAChe for Windows User Guide Setting up a workspace experiment Refine transition state Refines a transition state structure using a minimize gradient calculation. Introduction Verify transition state Verifies the current transition state geometry, where a single negative vibration confirms a true transition state. Produces an assemblage file containing the structures a chemical sample in a transition state geometry will pass through on the way to the reactant or product structures. Tutorials Find reaction paths The workspace offers a wide range of procedures that you can use to investigate a property. Procedures are applied by one or more of the computational applications, which apply theories from classical mechanics, quantum mechanics and dynamics to your chemical sample. Using Choosing a procedure Appendices Understanding Each procedures you can use to run CAChe experiments applications involved in each procedure. Each procedure is identified with a number. This procedure number can be viewed in CAChe from the Experiment dialog box, displayed by choosing Experiment New. Customizing Identifying the procedure number CAChe for Windows User Guide 10-9 Chapter 10 - Performing Workspace Experiments Example of an Experiment dialog box The currently selected procedure is displayed in the Using box and a description of the procedure is displayed in the box underneath. Select the down arrow to scroll to the bottom of the description, where a number is displayed. The last two digits of the four-digit number display the procedure number for the selected procedure. For example, the procedure number of the example shown in the example dialog box earlier is 12. Refer to “Running an experiment”, p 10-18, for details about how to use the Experiment dialog box. Using the table of procedures The following table lists the different procedures and the computational applications involved in each procedure. The fastest quantum mechanical procedure for chemical sample, atom, and bond properties is usually procedure 3. 10-10 CAChe for Windows User Guide Setting up a workspace experiment To model transition state geometries, choose procedures 16, 17, 18, or 19. To generate additional surfaces for a chemical sample, when an experiment that uses one of the procedures numbered 1-19 has already been run on it, choose procedure 20. Procedure 20 takes advantage of geometry and wavefunction data generated already during the first experiment. Procedure Name Computational Applications 0 MM geometry Mechanics 1 MM geometry with AM1 wavefunction Mechanics, MOPAC, Tabulator 2 MM geometry with PM3 wavefunction Mechanics, MOPAC, Tabulator 3 MM geometry with EHT wavefunction Mechanics, ExtHückel, Tabulator 4 MM geometry with AM1 wavefunction in water Mechanics, MOPAC, Tabulator 5 MM geometry with PM3 wavefunction in water Mechanics, MOPAC, Tabulator 6 MM geometry with INDO/1 wavefunction Mechanics, ZINDO, Tabulator CAChe for Windows User Guide Appendices Understanding Customizing Using Procedure Number Tutorials To model your sample in water, choose procedures 4, 5, 10, 11, 14, 15, 18, or 19. Introduction The most accurate quantum mechanical procedure for chemical sample, atom, and bond properties is usually procedure 8, although depending on your sample, 7 or 9 may yield better results. 10-11 Chapter 10 - Performing Workspace Experiments 10-12 Procedure Number Procedure Name Computational Applications 7 MM/AM1 geometry with AM1 wavefunction Mechanics, MOPAC, Tabulator 8 MM/PM3 geometry with PM3 wavefunction Mechanics, MOPAC, Tabulator 9 MM/INDO/1 geometry with INDO/1 wavefunction Mechanics, ZINDO, Tabulator 10 MM/AM1 geometry with AM1 wavefunction in water Mechanics, MOPAC, Tabulator 11 MM/PM3 geometry with PM3 wavefunction in water Mechanics, MOPAC, Tabulator 12 AM1 geometry with AM1 wavefunction MOPAC, Tabulator 13 PM3 geometry with PM3 wavefunction MOPAC, Tabulator 14 AM1 geometry with AM1 wavefunction in water MOPAC, Tabulator 15 PM3 geometry with PM3 wavefunction in water MOPAC, Tabulator 16 AM1 transition state geometry with AM1 wavefunction MOPAC, Tabulator 17 PM3 transition state geometry with PM3 wavefunction MOPAC, Tabulator CAChe for Windows User Guide Setting up a workspace experiment Procedure Name Computational Applications 18 AM1 transition state geometry with AM1 wavefunction in water MOPAC, Tabulator 19 PM3 transition state geometry MOPAC, with PM3 wavefunction in water Tabulator 20 existing geometry and wavefunction Tabulator 25 rigid or optimized map, unlimited search labels Mechanics 26 AM1 rigid or optimized map, 1 search label MOPAC 27 PM3 rigid or optimized map, 1 search label MOPAC 28 AM1 rigid or optimized map, 2 search labels MOPAC 29 PM3 rigid or optimized map, 2 search labels MOPAC 30 AM1 rigid or optimized map, 1 search label, in water MOPAC 31 PM3 rigid or optimized map, 1 search label, in water MOPAC 32 AM1 rigid or optimized map, 2 search labels, in water MOPAC 33 PM3 rigid or optimized map, 2 search labels, in water MOPAC 36 single pass sequence of conformations, unlimited search labels Mechanics CAChe for Windows User Guide Appendices Understanding Customizing Using Tutorials Introduction Procedure Number 10-13 Chapter 10 - Performing Workspace Experiments 10-14 Procedure Number Procedure Name Computational Applications 37 multiple pass sequence of conformations, unlimited search labels Mechanics 38 random motion at 300K, uses MM2 parameters Dynamics 39 AM1 transition state, requires reactant and product as input MOPAC 40 PM3 transition state, requires reactant and product as input MOPAC 41 AM1 transition state in water, requires reactant and product as input MOPAC 42 PM3 transition state in water, requires reactant and product as input MOPAC 45 AM1 intrinsic reaction coordinate MOPAC 46 AM1 intrinsic reaction coordinate, reverse direction MOPAC 47 PM3 intrinsic reaction coordinate MOPAC 48 PM3 intrinsic reaction coordinate, reverse direction MOPAC 49 AM1 dynamic reaction coordinate MOPAC 50 AM1 dynamic reaction coordinate, reverse direction MOPAC 51 PM3 dynamic reaction coordinate MOPAC CAChe for Windows User Guide Setting up a workspace experiment Procedure Name Computational Applications 52 PM3 dynamic reaction coordinate, reverse direction MOPAC 55 MM/PM3 geometry with INDO/1 wavefunction Mechanics, MOPAC, ZINDO, Tabulator 57 AM1 geometry with AM1 wavefunction MOPAC, Tabulator 58 PM3 geometry with PM3 wavefunction MOPAC, Tabulator 59 Current geometry with INDO/1 wavefunction ZINDO, Tabulator Using Tutorials Introduction Procedure Number NOTE Dynamics, MOPAC, and ZINDO are not available with Personal CAChe. MOPAC, ZINDO, and Extend Huckel are not available with BioCAChe. The following table lists the five classes of properties, described earlier in “Choosing a property”, and the procedures you can use to run an experiment to calculate each property. Properties Available procedures CAChe for Windows User Guide 0, 7-19 Heat of Formation 12-15 UV-visible transitions 55, 59 IR transitions 57, 58 Current Energy 0, 12-15 Appendices Optimized Geometry Understanding Chemical Sample Properties Customizing Matching properties to procedures 10-15 Chapter 10 - Performing Workspace Experiments Properties Available procedures Electron Density 1-20 HOMO and LUMO 1-20 HOMO-5 to LUMO+4 1-20 All Molecular Orbitals 1-20 Electrostatic Isopotential 1-20 Susceptibility (Electrophilic) 1-20 Susceptibility (Nucleophilic) 1-20 Susceptibility (Radical) 1-20 Superdelocalizability (Electrophilic) 1-20 Superdelocalizability (Nucleophilic) 1-20 Superdelocalizability (Radical) 1-20 Atom Properties Partial Charge 1-19 Bond Properties Bond Order 1-19 Bond Strain 0 Chemical Sample Conformation Properties 10-16 Rigid Map 25-33 Optimized Map 25-33 Sequence of Conformations 36-37 Dynamics Trajectory (not Personal CAChe) 38 CAChe for Windows User Guide Setting up a workspace experiment Properties Available procedures Search for Saddle (not Personal or Bio-CAChe) 39-42 Refine Transition State (not Personal or Bio-CAChe) 16-19 Verify Transition State (not Personal or Bio-CAChe) 57, 58 Find Reaction Paths (not Personal or Bio-CAChe) 45-52 Tutorials 26-33 Using Map Reaction (not Personal or Bio-CAChe) Introduction Reaction and Transition State Properties Choosing a server Appendices Understanding However, if you are using CAChe in conjunction with CAChe GroupServer, you may have access to multiple Unix servers on which you can run experiments. If this is the case, you need to choose a server before you run an experiment. Customizing If you are using your CAChe product as a standalone program, experiments are performed locally on your computer. CAChe for Windows User Guide 10-17 Chapter 10 - Performing Workspace Experiments Running an experiment This section describes how to run a CAChe experiment from the workspace, and how to use the menu options and dialog boxes involved in performing an experiment. You do not need to open the chemical sample file that you want to experiment on before running an experiment. ª To perform an experiment 1. Do one of the following: ❏ Choose Experiment New. ❏ Select the toolbar button shown to the left. The Experiment dialog box is displayed. The Input List box displays the name of the currently active chemical sample file. 2. If the file displayed in the Input List box is not the chemical sample file on which you want to perform the experiment, select the currently displayed file in the Input List file name, and select Set Inputs to display the Open dialog box. 10-18 CAChe for Windows User Guide 4. Select the arrow button in the Files of type box and choose Chemical Sample (*.csf) from the drop-down list to display all chemical sample files in the Cache folder. Using 3. Select the arrow button in the Look in box and choose Cache from the drop-down list to open the Cache folder. Tutorials Introduction Running an experiment ❏ Click in the File name text box and type the name of the chemical sample file on which you want to experiment. 6. Select Open to close the Open dialog box. The selected chemical sample file is now displayed in the Input List box in the Experiment dialog box. 7. Select the arrow button in the Property of box and choose the class of property on which you want to experiment from the drop-down list. For example, if you want to investigate the property of a chemical sample, choose chemical sample from the drop-down list. 8. Select the arrow button in the Property box and choose the property on which you want to experiment from the drop-down list. CAChe for Windows User Guide 10-19 Understanding Click and drag on the scroll bar at the bottom of the scrolling list to locate the chemical sample file on which you want to experiment and select it by clicking on it. Appendices ❏ Customizing 5. Do one of the following: Chapter 10 - Performing Workspace Experiments For example, if you want to investigate the electron density of a chemical sample, choose electron density from the drop-down list. The display box underneath the Property box describes the selected property. 9. Select the arrow button in the Using box and choose a procedure from the drop-down list. For example, if you want to use a procedure that applies MM geometry with a PM3 wavefunction, choose MM geometry with PM3 wavefunction from the drop-down list. The display box underneath the Using box describes the selected procedure, and the computational application that will perform the experiment. Refer to “Choosing a property class”, p 10-5, for a more detailed description of the selected property, and “Choosing a procedure”, p 10-9, for a more detailed description of the selected procedure. 10. Select the arrow button in the Server box and do one of the following: Choose cache@localhost from the drop-down list if you are using CAChe as a standalone CAChe product. Choose the remote server on which to run the experiment from the drop-down list if you are using CAChe in conjunction with CAChe GroupServer, and want to run the experiment on a remote CAChe server. 11. Select Start to begin the experiment. The Experiment Status dialog box is displayed, informing you of the following: 10-20 ❏ the name of the chemical sample file ❏ the time and date when the experiment was submitted ❏ when the experiment began executing ❏ the server on which the experiment is running ❏ the property being calculated ❏ the experiment’s progress as the calculations are performed CAChe for Windows User Guide Running an experiment the current computational application executing and the step it is performing. Using Tutorials Introduction ❏ ❏ Executing: The experimental property is currently being computed. ❏ Returning Output Files: The experimental results are being transferred into automatically generated files on your PC, or are being transferred from a remote server to your PC (if you are using CAChe with GroupServer). The Experiment Status dialog box also displays information generated by the computational applications, such as steric energies, and heats of formation. The relevant computational applications involved in the CAChe for Windows User Guide 10-21 Understanding Pending: The experiment has been submitted to your PC or to a remote server (if you are using CAChe with GroupServer), and the experiment is waiting to start because the server is busy with another experiment. Appendices ❏ Customizing The scrolling text window at the bottom of the Experiment Status window displays textual output received from the computational applications, and information on the progress of the experiment. Some common experimental states that you see during the course of an experiment are: Chapter 10 - Performing Workspace Experiments experiment also appear minimized at the bottom of the CAChe application window in the Windows taskbar. When the experiment is finished, the scrolling window in the Experiment Status dialog box displays the final results of the experiment and the time taken to complete the experiment. Stop, Extract, and Retry are disabled. The relevant computational applications involved in the experiment no longer appear minimized at the bottom of the CAChe application window in the Windows taskbar. 12. Click and drag on the scroll bar of the scrolling window to view all the details of the experiment. Save this information by clicking and dragging with the cursor to select all the text in the window and choosing Edit Copy. You can now paste the text into any text editor or word processor document. CAChe has also automatically saved this information in one or more log and output files located in an automatically generated input/output (.io) folder. Refer to “Viewing log files and output files”, p 10-40, for information on viewing log files. 13. When you have finished viewing the experimental details, select the Windows Close button in the upper right corner of the Experiment Status dialog box to close the dialog box. You return to the Experiment dialog box. 14. Do one of the following: 10-22 ❏ Save the settings in the Experiment dialog box, as described in the next section, “Saving an experiment file”. ❏ Select the Windows Close button in the upper right corner of the Experiment dialog box to close the dialog box without saving its contents. CAChe for Windows User Guide Running an experiment You can save the settings in an Experiment dialog box as an experiment file (*.exp), so that you can reuse the same property and procedure settings without having to reselect any of the drop-down list options. ª Tutorials The next time you want to run an experiment with the same settings, open the .exp file to display the Experiment dialog box with the settings you saved. Introduction Saving an experiment file To save an experiment file 1. Select the Experiment dialog box by clicking on it. 4. Click in the File name text box and type a name for the experiment file you are saving. 5. Select the arrow button in the Save as type box and choose Experiments (*.exp) from the drop-down list. 6. Select Save to save the experiment file and to close the Save As dialog box. The file is saved with the extension *.exp. CAChe for Windows User Guide 10-23 Appendices 3. Select a folder in which to save the experiment file from the Save in drop-down list or from the scrolling list. Understanding Customizing Using 2. Choose File Save to display the Save As dialog box. Chapter 10 - Performing Workspace Experiments Stopping an experiment You can stop an experiment while it is still running before calculations are complete, and choose how to deal with any data already produced by the experiment. You can stop an experiment from the following dialog boxes: ª • the Experiment Status dialog box, displayed automatically while an experiment is running • the Experiments Submitted dialog box, displayed by choosing one of the following: ❏ ExperimentShow Submitted Experiments ❏ Experiment Show Server Information. To stop an experiment from the Experiment Status dialog box 1. Select Stop to display the Stop an Experiment dialog box. 2. Select one of the following: Select the Stop immediately and discard output files radio button to stop the experiment immediately without returning any computational results. Your chemical sample input file is not altered. Any files that would have been overwritten by the calculation, such as map documents, tabulated orbital information, or computational output files, are untouched. Select the Stop immediately and return output files radio button to return whatever results the experiment has generated up to that point. This option is not recommended because it does not allow the experiment time to “clean up” before returning results. Consequently, the data returned may not be valid. 10-24 CAChe for Windows User Guide Running an experiment 3. Select OK to close the Stop an Experiment dialog box. The experiment is aborted and output data already generated is either discarded or saved, depending on the option you selected. ª Tutorials If you chose to save output files, data already generated is also displayed in the Experiment Status dialog box. Introduction Select the Stop when convenient and return output files radio button to stop the experiment at a logical point in the calculations and save the output files. This returns files just as if the experiment had completed. To stop an experiment from the Experiments Submitted dialog box 1. Choose one of the following: Experiment Show Submitted Experiments The Experiments Submitted dialog box is displayed, which shows experiments submitted by a user. ❏ Using ❏ Experiment Show Server Information The Select a Server dialog box is displayed, which shows a list of servers. 3. Select Stop to display the Stop an Experiment dialog box. 4. Select the required radio button, as described in the previous procedure, “To stop an experiment from the Experiment Status dialog box”. 5. Select OK to close the Stop an Experiment dialog box and to close the Experiments Submitted dialog box. The experiment is aborted and output data already generated is either discarded or saved, depending on the option you selected. CAChe for Windows User Guide 10-25 Understanding 2. Select the experiment you want to stop in the Experiments Submitted dialog box. Appendices The Experiments Submitted dialog box is displayed, which shows experiments running on that server. Customizing Select the server on which the experiment you want to stop is running, and select OK. Chapter 10 - Performing Workspace Experiments Running experiments simultaneously You can perform more than one CAChe experiment at a time. ª To start a new experiment while another experiment is running 1. Do one of the following to display another Experiment dialog box from which you can start the next experiment: ❏ Select Extract in the Experiment Status dialog box of the current experiment. ❏ Choose Experiment New. ❏ Select the toolbar button shown to the left. ❏ Choose File Open to open an Experiment dialog box or experiment file (*.exp) which you have previously saved. 2. Select a chemical sample file, property class, property and procedure from the Experiment dialog box and select Start as described in the previous section “Running an Experiment.” The second experiment begins. 10-26 CAChe for Windows User Guide Viewing active experiments ª To view submitted experiments Using 1. Choose Experiments Show Submitted Experiments to display the Experiments Submitted dialog box. Tutorials You can view a list of experiments that have been submitted and are either currently being performed, or (if you are using CAChe in conjunction with GroupServer) experiments that are waiting for a free server. Introduction Viewing active experiments 3. To stop an experiment, select the experiment in the Experiments Submitted dialog box and select Stop. The Stop an Experiment dialog box is displayed. 4. Select the required radio button, as described in the previous section, “Stopping an experiment”. 5. Select OK to close the Stop an Experiment dialog box and to stop the experiment. 6. To reattempt to generate output files if the experiment halts because of lack of storage space on your computer, select Retry. CAChe for Windows User Guide 10-27 Understanding The Experiment Status dialog box is displayed, which shows details of the calculations as they are performed, and the status of the experiment. Appendices 2. To view more detailed information on an experiment, select the experiment in the list and choose Details. Customizing The Experiments Submitted dialog box displays experiments submitted by a user. Chapter 10 - Performing Workspace Experiments Output file generation continues and output files are saved as normal. 7. Select Close to close the Experiments Submitted dialog box. 10-28 CAChe for Windows User Guide Viewing server information ª To view server information Using 1. Choose Experiment Show Server Information to display the Select a Server dialog box. Tutorials You can view a list of experiments being performed on a particular server. This is useful if you are using CAChe GroupServer with CAChe, so that you can see on which server active experiments are currently being processed. Introduction Viewing server information 2. Select the server for which you want to view submitted experiments from the list, and select OK. Appendices Understanding The Experiments Submitted dialog box is displayed, listing experiments running on that server. Customizing The Select a Server dialog box lists available servers. If you are using CAChe as a standalone program, the list displays just cache@localhost. CAChe for Windows User Guide 10-29 Chapter 10 - Performing Workspace Experiments 3. To stop an experiment, select the experiment in the list and choose Stop. The Stop an Experiment dialog box is displayed. 4. Select the required radio button, as described in the section “Stopping an experiment”, p 10-24. 5. Select OK to close the Stop an Experiment dialog box and stop the experiment. 6. Select Close to close the Experiments Submitted dialog box. 10-30 CAChe for Windows User Guide Size and element limitations Size and element limitations Procedures that include INDO/1 calculations are limited to 200 atoms and 700 basis functions, where a basis function is equivalent to a valence atomic orbital. For example, carbon has four basis functions (one 2s and three 2p). Tutorials Procedures that use MOPAC (for example, those that include AM1, PM3 or PM5 calculations) are limited by the amount of memory on your system. In practice, this means that MOPAC calculations are limited to molecules with 20,000 - 30,000 atoms or less. Introduction The size of your molecule might limit the experimental procedures that you can successfully execute. The elements contained within your chemical sample file may limit your choice of procedures. Procedures that use the computational applications ExtHückel or Mechanics accept all elements. Using All other procedures are simply limited by the availability of memory. Appendices Understanding Customizing NOTE Procedures that use AM1, PM3, PM5 or INDO/1 parameters are not available with Personal CAChe or BioCAChe. CAChe for Windows User Guide 10-31 Chapter 10 - Performing Workspace Experiments Troubleshooting experiments This section outlines problems that you may encounter while trying to run CAChe experiments. Reattempting output file generation Occasionally, when an experiment is returning output files, your disk may fill up and the experiment will report an error because the output files cannot be saved. CAChe enables you to make more disk space available and then continue to generate and save the output files. You can reattempt to generate output files from the following dialog boxes: ª • the Experiment Status dialog box, displayed automatically while an experiment is running • the Experiments Submitted dialog box, displayed by choosing Experiment Show Submitted Experiments To reattempt output file generation from the Experiment Status dialog box 1. When you receive an error message that your disk is full, make more storage space available on your local computer. 2. Select Retry. Output file generation continues and output files are saved as normal. ª To reattempt output file generation from the Experiments Submitted dialog box 1. When you receive an error message that your disk is full, make more storage space available on your local computer. 2. Choose Experiment Show Submitted Experiments. The Experiments Submitted dialog box displays experiments submitted by a user. 10-32 CAChe for Windows User Guide Troubleshooting experiments 3. Select the experiment you want to retry in the Experiments Submitted dialog box. When you choose Experiment New to display the Experiment dialog box, you may find that the server you require is not listed in the Server drop-down list. For example, if you are using CAChe as a standalone program, you need to select cache@localhost as the server on which to perform your experiment locally. If you are using CAChe with CAChe GroupServer, you need to select a GroupServer on which to perform your experiment. If the server you require is not shown in the Server drop-down list of the Experiment dialog box, you need to edit your tcpconf.txt file, which is located in your cache folder. Tutorials Displaying servers on which to run an experiment Using Output file generation continues and output files are saved as normal. Introduction 4. Select Retry. If you are using CAChe as a standalone program and cache@localhost does not appear in the Experiment dialog box Server drop-down list, edit your tcpconf.txt file in the following way. To edit the tcpconf.txt file to include a new server 1. Using a text editor, open your tcpconf.txt file, located in the CAChe directory. CAChe for Windows User Guide ❏ the keyword server ❏ the server name of localhost ❏ the login name of cache Appendices 2. Add the following to your tcpconf.txt file to include the localhost server on which to run CAChe experiments locally: Understanding ª Customizing For standalone users 10-33 Chapter 10 - Performing Workspace Experiments ❏ the keyword CACH ❏ the keyword CalcManager The following shows an example tcpconf.txt file, with the server name localhost and login name cache added to the domain name server line. # tcpconf.txt (TCP configuration file) # # Use these if the domain name server is available. # keyword server_name login_name pc_ident unix_process_name server srvr1 jillj CACH CalcManager server localhost cache CACH CalcManager # # 3. Save and close the tcpconf.txt file. 4. Quit and restart the CAChe application. For users with access to GroupServer For users who have access to CAChe GroupServer, and the servers on which you wish to run experiments do not appear in the Experiment dialog box Server drop-down list, you need to add the following to your tcpconf.txt file: ❏ the keyword server ❏ the name of the server or its IP address ❏ your login name on the server ❏ the keyword CACH ❏ the keyword CalcManager The following shows an example tcpconf.txt file, with the servers srvr1 and srvr2 added to the domain name server line. 10-34 CAChe for Windows User Guide Troubleshooting experiments # tcpconf.txt (TCP configuration file) # # Use these if the domain name server is available. server localhost cache CACH CalcManager server srvr1 jillj CACH CalcManager server srvr2 markp CACH CalcManager Introduction # keyword server_name login_name pc_ident unix_process_name Tutorials # # 5. Save and close the tcpconf.txt file. Displaying experimental details If you exit CAChe by mistake while an experiment is running, or if you accidentally close the Experiment Status dialog box while an experiment is in progress, you can redisplay experimental details. 1. Choose Experiment Show Submitted Experiments to display a list of experiments in progress. 2. Select the experiment in progress whose details you want to view by clicking on it in the list. 3. Select Details. Appendices The Experiment Status dialog box is displayed, informing you of the experiment’s progress. Customizing To redisplay experimental details Understanding ª Using 6. Quit and restart the CAChe application. CAChe for Windows User Guide 10-35 Chapter 10 - Performing Workspace Experiments Viewing experimental results When you run an experiment in CAChe, a number of files containing experimental details are created and stored in automatically generated folders. The folders are prefixed with the same name as your chemical sample file. For example, if your chemical sample file is named sample.csf, the automatically generated folders are named as follows: • • • sample.io (contains input/output files) sample.iso (contains isosurface files) sample.map (contains energy map files). The following tables list all the files created by CAChe experiments, for a chemical sample file named sample.csf, and the location of the experimental files. 10-36 CAChe for Windows User Guide Viewing experimental results Sample.io folder Location Creator Type, Description DYNAMICS.LOG SAMPLE.IO Dynamics text, log file DYNAMICS.OUT SAMPLE.IO Dynamics text, output file HUCKEL.LOG SAMPLE.IO ExtHückel text, log file HUCKEL.OUT SAMPLE.IO ExtHückel text, output file MECHANCS.OUT SAMPLE.IO Mechanics text, output file MECHANCS.LOG SAMPLE.IO Mechanics text, log file MOPAC.LOG SAMPLE.IO MOPAC text, log file MOPAC.OUT SAMPLE.IO MOPAC text, output file TABULATE.OUT SAMPLE.IO Tabulator text, output file ZINDO.LOG SAMPLE.IO ZINDO text, log file ZINDO.OUT SAMPLE.IO ZINDO text, output file File name Location Creator Type, Description EP-DENS.ISO SAMPLE.ISO Tabulator binary, electron density surface colored by electrostatic potential NF-DENS.ISO SAMPLE.ISO Tabulator binary, electron density surface colored by nucleophilic susceptibility (frontier density) Using Tutorials Introduction File name CAChe for Windows User Guide 10-37 Appendices Understanding Customizing Sample.iso folder Chapter 10 - Performing Workspace Experiments 10-38 File name Location Creator Type, Description EF-DENS.ISO SAMPLE.ISO Tabulator binary, electron density surface colored by electrophilic susceptibility (frontier density) RF-DENS.ISO SAMPLE.ISO Tabulator binary, electron density surface colored by radical susceptibility (frontier density) NS-DENS.ISO SAMPLE.ISO Tabulator binary, electron density surface colored by nucleophilic superdelocalizability ES-DENS.ISO SAMPLE.ISO Tabulator binary, electron density surface colored by electrophilic superdelocalizability RS-DENS.ISO SAMPLE.ISO Tabulator binary, electron density surface colored by radical superdelocalizability ELEC.ISO SAMPLE.ISO Tabulator binary, electrostatic potential isosurface MO123.ISO SAMPLE.ISO Tabulator binary, molecular orbital isosurface (orbital # 123) CAChe for Windows User Guide Viewing experimental results Location Creator Type, Description ENERGY.MAP SAMPLE.MAP Mechanics MOPAC binary, rigid or optimized map DYNAMICS.MAP SAMPLE.MAP Dynamics binary, Dynamics trajectory SEQSRCH.MAP SAMPLE.MAP Mechanics binary, sequence of conformations IRC1.MAP SAMPLE.MAP MOPAC binary, reaction path IRC-1.MAP SAMPLE.MAP MOPAC binary, reaction path DRC1.MAP SAMPLE.MAP MOPAC binary, reaction path DRC-1.MAP SAMPLE.MAP MOPAC binary, reaction path Appendices Understanding Customizing Using Tutorials File name Introduction Sample.map folder CAChe for Windows User Guide 10-39 Chapter 10 - Performing Workspace Experiments Viewing log files and output files Each CAChe computational application produces both a log file and output file when you use an experimental procedure that involves that computational application. The exception is Tabulator, which only produces an output file. Log files (*.log) contain details such as the date and time of the experiment, computation time, and final result of the experiment. Output files (*.out) contain details of the calculations carried out on the chemical sample step by step, and the resulting values. You can view both log files and output files in any text editor or word processor. Log files and output files are overwritten each time you perform another experiment on the chemical sample file using the same computational application. If you want to keep a particular experimental log or output file, save it under another name in your text editor or word processor. 10-40 CAChe for Windows User Guide 11 11 Introduction Using the Procedure Editor Overview create a new experiment modify the settings of an experiment clone an existing experiment share experiments with other CAChe users. Refer to Chapter 10, “Performing Workspace Experiments”, for an overview of performing experiments in the CAChe workspace. Using • • • • Tutorials This chapter describes the Procedure Editor, and how to use it to: Understanding Calling a procedure 11-20 Running a procedure 11-21 Editing the settings of a compute engine 11-23 Creating experiments 11-25 Creating a new experiment 11-25 Cloning an existing experiment 11-27 Importing a CAChe experiment 11-28 Expert modification 11-30 Creating a group procedure package 11-31 Loading new packages 11-33 Refreshing the experiment environment 11-35 Returning to original settings 11-36 Exporting environment components 1137 Quitting the Procedure Editor 11-38 Appendices The Procedure Editor 11-2 Starting the Procedure Editor 11-3 The Procedure Editor interface 11-4 The Navigator window 11-4 The Procedure window 11-6 The Parameter Data window 11-7 Managing the experiment environment 11-8 Using the tree view 11-8 Using the list view 11-11 Showing properties of a component 11-13 Available properties 11-14 Modifying a procedure 11-17 Adding a step 11-19 Deleting a step 11-19 Moving a step 11-19 Viewing the settings of a step 11-20 Customizing Contents Chapter 11 - Using the Procedure Editor The Procedure Editor The Procedure Editor allows you to customize the procedure environment of the Workspace and ProjectLeader. The Procedure Editor allows you to: 11-2 • edit procedures and other components of the experiment environment • create new procedures and components of the experiment environment • • • clone existing procedures • create a new package of experiments, procedures, and parameter data for use by other users. share procedures with other CAChe users perform expert modification to individual property parameters CAChe for Windows User Guide Starting the Procedure Editor Starting the Procedure Editor You can start the Procedure Editor in any of the following ways: from the Experiment Definition dialog box in the Workspace from the Property Wizard in the ProjectLeader. 1. Perform one of the following: ❏ From Windows, choose StartCACheProcedure Editor ❏ From the Workspace, select the Edit button in the Experiment Definition dialog box ❏ From the ProjectLeader, select the Edit button in the Property Wizard. Tutorials To start the Procedure Editor Using ª manually from the Start menu Introduction • • • The Navigator window of the Procedure Editor is displayed. Customizing If you started the Procedure Editor from either the Workspace or the ProjectLeader, the Procedure Editor opens with the currently active experiment visible in the Navigator window, and the referenced procedure visible in a Procedure window. Appendices Understanding For experiments that are unique to the ProjectLeader, the Property dialog box is displayed instead. CAChe for Windows User Guide 11-3 Chapter 11 - Using the Procedure Editor The Procedure Editor interface The Procedure Editor consists of three types of window: • • • the Navigator window the Procedure window the Parameter Data window. In addition, there is a menu bar and a toolbar. The menu bar changes as you select different types of Procedure Editor window. The Navigator window By default, the Navigator window is displayed when you start the Procedure Editor. The Procedure and Parameter Data windows may be displayed by double-clicking an appropriate object in the Navigator window. The Navigator window is divided into two panes: 11-4 CAChe for Windows User Guide • the left-hand side shows a tree view of the entire experiment environment • the right-hand side lists the child components contained in the current folder. Use the splitter bar between the two panes to adjust the portion of the screen filled by each pane. The following symbols are used in the Navigator window to depict different types of object within the experiment environment: Tutorials a folder, usually containing other objects or subfolders. Introduction The Procedure Editor interface a CAChe experiment. Using a procedure. a parameter data set. Appendices Understanding Customizing Refer to “Managing the experiment environment”, p 11-8, for details about managing experiments in the Navigator window CAChe for Windows User Guide 11-5 Chapter 11 - Using the Procedure Editor The Procedure window The Procedure window dialog box allows you to modify the definition of a procedure. The title bar contains the title of the procedure. The number of chemical samples Buttons to modify the steps Steps involved in the procedure Description of the procedure Use the five buttons in the Procedure Steps section to modify the existing procedure. In addition, you can use the menu options in the Procedure window to modify the procedure. This dialog box is displayed from the Navigator window when you double-click on a procedure object in the tree view. Refer to “Modifying a procedure”, p 11-17, for details about modifying procedures using this dialog box. 11-6 CAChe for Windows User Guide The Procedure Editor interface The Parameter Data window Using Tutorials Introduction The Parameter Data window lets you modify a parameter data set. The title bar contains the name of the data set displayed within the window. Edit the figures in the window to change the parameter data set. If any unsaved changes have been made to the data set, the title bar displays an asterisk symbol (*). Appendices Understanding Refer to “Expert modification”, p 11-30, for details about editing parameter data sets using this window. Customizing This window is displayed from the Navigator window when you double-click on a data set object in the tree view. CAChe for Windows User Guide 11-7 Chapter 11 - Using the Procedure Editor Managing the experiment environment This section outlines the ways in which you can manage the display of the experiment environment. This section details how to use the tree view and the list view of the Navigator window. ª To display a new navigator window ❏ Choose Window | New Navigator Window. A new navigator window is displayed in Procedure Editor. Using the tree view The following actions can be performed in the tree view: • • • • selecting an object in the tree view expanding and collapsing folders renaming objects displaying Procedure and Parameter Data windows. Selecting an object You can select a folder or an object within a folder. ª To select an object in the tree view ❏ Position the cursor over the object and press the left mouse button. NOTE When you have selected an object, press the right mouse button to display a pop-up menu containing a subset of the menu bar options for that object. 11-8 CAChe for Windows User Guide Managing the experiment environment Expanding a folder ª To expand a folder 1. In the tree view, move the cursor over the plus sign of the folder that you wish to expand. 2. Press the left mouse button to expand the selected folder. Tutorials The presence of subfolders is shown by a plus symbol (+) next to the main folder icon. Introduction Expand a folder in the tree view to show all the subfolders nested beneath it. Using NOTE Choosing ViewExpand All Folders expands every object in the tree view. Collapsing a folder You can collapse a folder in the tree view to hide all the subfolders nested beneath it. ª To collapse a folder 1. In the tree view, move the cursor over the minus sign of the folder that you wish to collapse. Customizing A folder that has been expanded is shown by a minus symbol (-) next to the main folder icon. Understanding 2. Press the left mouse button to collapse the selected folder. Appendices NOTE Choosing ViewCollapse All Folders collapses all expanded objects in the tree view. CAChe for Windows User Guide 11-9 Chapter 11 - Using the Procedure Editor Renaming an object You can rename an object in the tree view. ª To rename an object 1. Select the object that you wish to rename. 2. Do one of the following: ❏ Click on the selected object with the left mouse button. ❏ Choose FileRename. The object name is highlighted. 3. Enter a new name. Displaying a Procedure window You can display a Procedure window from the tree view. ª To display a Procedure window 1. Do one of the following: ❏ Double-click on a procedure name in the tree view. ❏ Double-click on an experiment object that uses the procedure. A Procedure window is displayed. Displaying a Parameter Data window You can display a Parameter Data window from the tree view. ª To display a Parameter Data window ❏ Double-click on a parameter data set in the tree view. A Parameter Data window is displayed. 11-10 CAChe for Windows User Guide Managing the experiment environment Using the list view The list view can be used to: edit the name of an entry Introduction edit the description of an entry sort entries. Refer to “Using the tree view”, p 11-8, for details about selecting an object and displaying Procedure and Parameter Data windows from the list view. Expanding the list view Tutorials • • • ª Using You can display the contents of a folder in the list view. To expand a folder in the list view ❏ In the list view, move the cursor over the folder that you wish to expand, and double-click the left mouse button. Editing an entry ª Understanding You can edit the name of an object in the list view, or change its description. Customizing The contents of the selected folder are displayed in the list view, and the tree view is updated to ensure that the selected folder is visible. To edit the name of an object 1. Select the entry in the list view that you wish to change. 2. Choose FileRename. The object name is highlighted. Appendices 3. Enter the new name. CAChe for Windows User Guide 11-11 Chapter 11 - Using the Procedure Editor ª To edit the description of an object 1. Select the entry in the list view that you wish to change. 2. Choose FileProperties to display the Properties dialog box. 3. Enter the new description in the Description text box. 4. Select OK to confirm the changes, and to close the dialog box. Sorting entries You can sort the entries in the list view into ascending or descending alphabetical order. ª To sort the entries in the list view 1. Choose one of the following: ❏ ViewList Icons | by Name ❏ ViewList Icons | by Description. Entries are sorted into ascending alphabetical order. 11-12 CAChe for Windows User Guide Showing properties of a component You can select an environment component in the tree view or list view of the Navigator window and display its properties in a Properties dialog box. Tutorials The appearance of the Properties dialog box varies for each type of environment component. However the General tab of the Properties dialog box has the following common features: Introduction Showing properties of a component Copy of the icon used in the tree view Type of component and its content ª To display the properties of a component 1. In the tree view of the Navigator window, select an environment component. Appendices 2. Choose FileProperties. The Properties dialog box is displayed. CAChe for Windows User Guide Understanding Some properties can be edited to allow you to modify the properties of a particular environment component. Customizing Using Package in which the component resides 11-13 Chapter 11 - Using the Procedure Editor Available properties Different properties are available for each type of environment component.Each different type of property is displayed on a different tab of the Property dialog box. Experiment environment properties You cannot edit the attributes of the General tab for the experiment environment component. You can edit the Packages tab to specify which packages to load when refreshing the experiment environment. Refer to “Refreshing the experiment environment”, p 11-35, for full details of using the Packages tab to define which packages are loaded into the experiment environment. Property component properties For Workspace property components the Property dialog box features a General tab. For ProjectLeader property components the Property dialog box also features a Property tab. 11-14 CAChe for Windows User Guide Showing properties of a component ProjectLeader experiment component properties Introduction The ProjectLeader experiment component Properties dialog box contains an Experiment tab that allows you to select from the four classes of ProjectLeader experiment. Tutorials Experiment name Using Classes of ProjectLeader experiment Appendices Understanding Customizing NOTE The Name text box cannot be edited unless the dialog box is displayed when creating a new experiment. CAChe for Windows User Guide 11-15 Chapter 11 - Using the Procedure Editor The following parameters can be set for different types of internal experiment: Experiment type Atom Count Bond Count Connectivity Index Group Count Ring Count Ring Size Shape Index Parameters Atomic number with available values in the range 0 to 102. Bond order with available values of all, single, double, or triple. Order with available values in the range 0 to 2. Normal or Polymer. Group type with available values of aldehyde or thio. Ring size with available values of all rings, small rings, 5 membered, 6 membered, and large rings. Aromatic or non-aromatic. Ring size with available values of smallest or largest. Order with available values of 0 to 2. Normal or alpha-weighted. Valence Connectivity Order with available values of 0 to 2. Index Normal or Polymer. The experiment types: Elemental analysis, Log P, Molar Refractivity, Molecular Formula, Molecular Weight, Net Charge, and Structure-Property Correlation have no additional controls. Workspace experiment component properties The Workspace experiment component Properties dialog box contains an Experiment tab that allows you to select the procedure associated with the experiment. 11-16 CAChe for Windows User Guide Modifying a procedure A procedure is a named sequence of steps which are applied to one or more chemical samples. The procedure specifies the compute engine or engines used in the experiment. You can modify a procedure by: adding or deleting steps changing the settings of the compute engine used. A Procedure window allows you to modify the selected procedure. The Procedure window has five buttons that you can use: The New button allows you to select new compute engine steps from a popup list. Tutorials rearranging the order in which the steps are performed Using • • • Introduction Modifying a procedure The Open button allows you to view and change the settings for a selected compute engine step. The Down button allows you to move a selected step nearer the end of the procedure. Each time the button is selected, the step is moved one step downwards. Appendices The New button can also be used to insert a new step that calls another procedure. This saves you having to duplicate all the steps of the second procedure within the one that you are modifying. Understanding The Up button allows you to move a selected step nearer the beginning of the procedure. Each time the button is selected, the step is moved one step upwards. Customizing The Delete button allows you to remove the selected step from the procedure. CAChe for Windows User Guide 11-17 Chapter 11 - Using the Procedure Editor ª To modify a procedure 1. In the tree view of the Navigator window, select the procedure that you wish to modify. 2. Perform one of the following actions to display a Procedure window: ❏ Press the right mouse button and choose Open from the popup menu. ❏ Double-click on the selected procedure. The name of the procedure is displayed in the title bar of the Procedure window. 3. If required, you can: ❏ add a step ❏ call another procedure ❏ move a step ❏ view the settings of a step. Refer to the following sections for details about performing each of these actions. 4. If required, change the description of the procedure by typing into the Description text box. 5. When all the modifications have been made, choose FileClose to close the Procedure window. 6. Choose FileSave to save the modifications to the procedure. NOTE You can import a step from a previous version of CAChe by using the FileImport Step option. Alternatively, you can drag setting files into the Procedure window. 11-18 CAChe for Windows User Guide Modifying a procedure Adding a step You can add a step to a procedure. 2. Select the New button to display a popup menu. Alternatively, choose FileNew Step. 3. Choose the name of the compute server that you wish to use. The selected step is added to the procedure, and the Settings dialog box, for the selected compute engine, is displayed. Refer to “Editing the settings of a compute engine”, p 11-23, for details about editing these settings. Tutorials 1. Select the step in the procedure after which you want to insert a new step. Introduction To add a step Using ª Deleting a step You can delete a step from a procedure. To delete a step Customizing 1. Select the step that you wish to remove. 2. Select the Delete button. The selected step is removed from the list of steps. Moving a step You can move a step from a procedure so that it appears nearer the beginning or end of a set of steps. To move a step Appendices ª Understanding ª 1. Select the step that you wish to move. 2. Select the Up button to move the step upwards. CAChe for Windows User Guide 11-19 Chapter 11 - Using the Procedure Editor 3. Select the Down button to move the step downwards. The selected step is moved up or down respectively. Viewing the settings of a step You can view the settings of a selected step. ª To view the settings of a step 1. Select the step that you wish to view. 2. Select the Open button to display the Settings dialog box. Alternatively, choose FileEdit Step. If you wish to change the settings of the compute engine used in an existing step, refer to “Editing the settings of a compute engine”, p 11-23. Calling a procedure You can call a procedure from within the procedure that you are modifying. The instruction to call the second procedure is added as a step within the procedure. The Procedure Call Settings dialog box is used. 11-20 CAChe for Windows User Guide Modifying a procedure 1. From the Procedure window, select the step in the procedure after which you want to insert the call to another procedure. 2. Select the New button to display a popup menu. 3. Choose Procedure Call to display the Procedure Call Settings dialog box. 4. Select the procedure that you wish to call from the Procedure to Call text box. Alternatively, you can select the Browse button and choose from the list of available procedures. Introduction To call a procedure from another procedure Tutorials ª 6. Select OK to confirm the procedure that you wish to call and to close the dialog box. Using 5. If required, change the procedure arguments in the Procedure Arguments drop-down list. A step calling the selected procedure is inserted into the list of steps. After modifying a procedure you can execute the procedure using the Run Procedure dialog box. Appendices Understanding Sample text boxes Customizing Running a procedure CAChe for Windows User Guide 11-21 Chapter 11 - Using the Procedure Editor The dialog box features a Sample n text box, where n is the sample number, for each of the chemical samples used. For example, a procedure with two input arguments has a text box for Sample 1 and a text box for Sample 2. The Start button is disabled until the location of all the samples has been specified. All output from the procedure is sent to the Output window. The dialog box remains open until the procedure has completed or been aborted. ª To run a procedure 1. In the tree view of the Navigator window, select the procedure that you wish to run. 2. Choose RunProcedure to display the Run Procedure dialog box. 3. Specify the location of Sample 1 in the Sample 1 text box. If you are unsure of the location, select the Browse button to display the Browse Procedures dialog box. 4. Repeat step three for any other required samples. 5. Select the Start button to run the procedure using the sample file(s) specified as input. 11-22 CAChe for Windows User Guide Editing the settings of a compute engine a new step is added to a procedure an existing step is viewed. NOTE Editing a compute engine step only changes the settings for the compute engine in the procedure featured in the Procedure window. The inputs for each compute engine fall into three categories: Arguments This information is taken from the argument specified for the procedure in which the compute engine is used. Settings The control data for the compute engine. Parameter data The names of particular classes of parameter data, e.g., MM2 Standard. CAChe for Windows User Guide 11-23 Understanding • • Appendices You can display the Settings dialog box for a compute engine from the Procedure window if: Customizing Using Tutorials You can edit the input arguments and settings for each of the compute engines available in CAChe. Each compute engine has a unique dialog box in which you can edit the settings. The dialog box for Mechanics is shown below as an example. Introduction Editing the settings of a compute engine Chapter 11 - Using the Procedure Editor ª To edit the settings of a new compute engine step 1. From the Procedure window, select the New button to display the Settings dialog box: For details about displaying the Procedure window, refer to “Modifying a procedure”, p 11-17. 2. Modify the settings for the compute engine, as required. Refer to the on-line Help system for CAChe for details of the settings available for each compute engine. 3. Select OK to save the changes to the compute engine. Alternatively, select Original Settings to return to the default machine settings for the compute engine. NOTE You can remove user-defined settings from a compute engine step at any time by selecting the Original Settings button. ª To edit the settings of an existing compute engine step 1. From the Procedure window, select the compute engine step that you wish to modify. For details about displaying the Procedure window, refer to “Modifying a procedure”, p 11-17. 2. Select the View button to display the Settings dialog box: 3. Modify the settings for the compute engine, as required. Refer to the on-line Help system for CAChe for details of the settings available for each compute engine. 4. Select OK to save the changes to the compute engine. Alternatively, select Original Settings to return to the default machine settings for the compute engine. Refer to the CAChe on-line Help system for details about the settings available for each compute engine. 11-24 CAChe for Windows User Guide Creating experiments Creating experiments clone an existing experiment and edit it import an existing CAChe experiment. Creating a new experiment You can create a new experiment in the Procedure Editor, and save it in the experiment environment. You can choose the category of experiment property in which you want the new experiment to belong. Examples of categories of experiment property include partial charge and electrophilic susceptibility. CAChe for Windows User Guide 11-25 Appendices Understanding Customizing Use the Properties dialog box to create a new experiment. This is a two tabbed dialog box which allows you to define a name, description, and procedure for the experiment. Tutorials create a new experiment from scratch Using • • • Introduction There are three ways to create an experiment using the Procedure Editor: Chapter 11 - Using the Procedure Editor ª To create a new experiment 1. In the tree view of the Navigator window, select the class of experiment property in which you wish to include the new experiment. The new experiment will be placed in the folder that you select. 2. Perform one of the following actions to display the Properties dialog box: ❏ ❏ Press the right mouse button and choose New Experiment from the drop-down menu. Choose FileNew Experiment. 3. In the Experiment tab, enter a name for the new experiment in the Name text box. By default the new experiment is called New Experiment. 4. Enter the name of the procedure that you wish the experiment to use in the Procedure text box. You may enter a name which does not currently exist. Alternatively, select the Browse button to select an existing procedure. The Browse Procedure dialog box is displayed. Select a procedure from the list and select OK to add the procedure to the Procedure text box. 5. Select the General tab of the Properties dialog box. 6. Enter a description of the new experiment in the Description text box. 7. Select OK to confirm the details of the new experiment, and to close the dialog box. The new experiment is added to the folder that you selected in step one. 8. If you entered the name of a procedure which does not exist, a Procedure window will be displayed to allow you to define it. Refer to “Modifying a procedure”, p 11-17, for details about defining a procedure. 9. Choose FileSave to save the changes to the experiment environment. 11-26 CAChe for Windows User Guide Creating experiments Cloning an existing experiment To clone an existing experiment 1. In the tree view of the Navigator window, select the experiment that you wish to clone. 2. Choose EditCopy. Using ª Tutorials A copy of the selected experiment is placed at the same level as the original in the tree hierarchy. The procedure referenced within the experiment is also copied. The new experiment is assigned the same name as the original, with the suffix [2]. Similarly, the new procedure is assigned the same name as the original with the suffix [2]. The description text given to the new copy of the procedure is “Copy of <procedure>”, where <procedure> is the name of the original procedure. Introduction You can create a new experiment by cloning an existing experiment and modifying its settings. 3. Choose EditPaste. Appendices Understanding Customizing Refer to steps two to eight of “Creating a new experiment”, p 11-25, for details about changing the settings of an experiment. CAChe for Windows User Guide 11-27 Chapter 11 - Using the Procedure Editor Importing a CAChe experiment You can import an existing CAChe experiment into the experiment environment. The Open dialog box is used to allow you to select an experiment to import. You can import an experiment into the Workspace or ProjectLeader folder of the Navigator window. You can also import procedures into the procedure index folder, and parameter data into the parameter data folder. To do this you should select the procedure index folder, or the parameter data folder respectively before using the FileImport command. ª To import a CAChe experiment 1. In the tree view of the Navigator window, select one of the following folders: ❏ select the Workspace folder if you want the experiment to be available in the Workspace ❏ select the ProjectLeader folder if you want the experiment to be available in the ProjectLeader. 2. Choose FileImport Experiments to display the Open dialog box. Note that if you have not selected the Workspace or ProjectLeader folder this option will not be available. 3. Select the Property Index file that you wish to import and select the Open button to import the file. 11-28 CAChe for Windows User Guide Creating experiments This file contains the experiment. . NOTE The import facility always creates new environment components with unique names. The currently selected components are not overwritten. Appendices Understanding Customizing Using Refer to “Exporting environment components”, p 11-37, for details about exporting experiments, procedures, and parameter data. Tutorials Refer to steps two to eight of “Creating a new experiment”, p 11-25, for details about changing the settings of an experiment Introduction The experiment is added to the tree view. CAChe for Windows User Guide 11-29 Chapter 11 - Using the Procedure Editor Expert modification You can modify the parameter data of a compute engine. The modified parameter data is used for all experiments that use that compute engine with that set of parameter data. A Parameter Data window is used to modify parameter data. ª To modify parameter data 1. In the tree view of the Navigator window, move to the Parameter Data folder. 2. Double-click on the parameter data set that you wish to modify, e.g., the STANDARD set of MM2. A Parameter Data window is displayed. 3. Change any of the data in the window by selecting a value and overwriting with a new value. 4. When the modifications are complete, choose FileSave to save the modified parameter data set. NOTE If you make any changes which are not satisfactory, choose EditOriginal Settings to revert to the system copy of the parameter data. 11-30 CAChe for Windows User Guide Creating a group procedure package System This directory relates to the location of the CAChe executables, and is shared by all users of the installation. Group This directory contains packages that are available to a group of users. This feature is available to both multiple user installations of CAChe, and single user installations. In the case of single users, the group package(s) can be used to share CAChe experiments with other users. User This directory contains packages available to a particular CAChe user. Tutorials In the CAChe experiment environment there are three directories, each of which can contain packages: Using A package is a collection of different types of components that are used in the experiment environment. Examples of these components include the property and the sample used in an experiment. Introduction Creating a group procedure package Appendices Understanding Customizing You can create a new group procedure package for use by other users. Packages can be created from the Organizer dialog box using the Create Package dialog box. This is a three-tabbed dialog box that allows you to copy files between user and group packages. CAChe for Windows User Guide 11-31 Chapter 11 - Using the Procedure Editor ª To create a group procedure package 1. Create experiments, procedure definitions, and parameter data as required in your own user package. Refer to “Creating a new experiment”, p 11-25, for details about creating an experiment. Refer to “Modifying a procedure”, p 11-17, for details about modifying a procedure. Refer to “Expert modification”, p 11-30, for details about modifying a parameter data set. 2. Choose FileOrganizer. The Organizer dialog box is displayed. This dialog box is displayed with an active tab which reflects the currently selected component in the tree view. 3. In the Experiment tab, select the Create Package button. The Create Package dialog box is displayed. 4. Select the Group radio button to specify that the new package should be available to group users. 5. Enter a name for the package in the New Package Name text box. 6. Enter the name of the author in the Package Author text box. 7. Select OK to create the package, and to close the dialog box. 11-32 CAChe for Windows User Guide Creating a group procedure package Select the Experiment tab of the Organizer dialog box. ❏ Select the new group package from the right-hand Experiments Available In drop-down list. The new package is displayed in the To Group box. ❏ From the In User box, select the components that you wish to copy to the new group package. ❏ Select the Copy button to copy the selected components. 9. To copy procedures into the Group package: ❏ Select the Procedures tab of the Organizer dialog box. ❏ Select the new group package from the right-hand Procedures Available In drop-down list. Tutorials ❏ Introduction 8. To copy experiments into the Group package: ❏ From the In User box, select the components that you wish to copy to the new group package. ❏ Select the Copy button to copy the selected components. Using The new package is displayed in the To Group box. ❏ Select the new group package from the right-hand Parameter Data Available In drop-down list. The new package is displayed in the To Group box. ❏ From the In User box, select the components that you wish to copy to the new group package. ❏ Select the Copy button to copy the selected components. 11. When all the required components have been added to the new group package, select the Close button to close the Organizer dialog box. Loading new packages Once the group package has been created, all users who share the group package directory are informed of the availability of the new CAChe for Windows User Guide 11-33 Understanding Select the Parameter Data tab of the Organizer dialog box. Appendices ❏ Customizing 10. To copy parameter data into the Group package: Chapter 11 - Using the Procedure Editor package the next time they start the Procedure Editor, the Workspace, or the ProjectLeader. The New Packages Available dialog box is displayed if the package set contains any new packages that were not present the last time the Procedure Editor, the Workspace, or the ProjectLeader was started. You can select the packages that you wish to load. NOTE The New Packages Available dialog box will inform you in the future if any new packages are added to CAChe as a result of you or a System Administrator installing a new CAChe compute engine. . ª To select packages to be loaded 1. In the New Packages Available dialog box, select the packages that you wish to be loaded. 2. Select OK to confirm your selection and to close the dialog box. NOTE If you accept the default status by selecting the OK button without making any selection, then all packages will be loaded. 11-34 CAChe for Windows User Guide Creating a group procedure package After creating or importing packages, you can refresh the experiment environment to include those new packages. Alternatively, you can specify any packages which you do not wish to include. ª Using Tutorials The Packages tab of the Property dialog box for the Experiment Environment component is used. Introduction Refreshing the experiment environment To refresh the experiment environment 1. In the tree view of the Navigator window, select the folder named Environment. 2. Choose FileProperties to display the Properties dialog box. 4. To include a package, check the check box next to it. 5. To exclude a package, uncheck the check box next to it. 6. When you have made your selection, select the Apply button to refresh the experiment environment. Appendices The specified selection of packages is loaded. Understanding All the available packages are shown with check boxes by each one. Customizing 3. Select the Packages tab. CAChe for Windows User Guide 11-35 Chapter 11 - Using the Procedure Editor Returning to original settings You can select a component and revert it to its original definition. This action discards any overwritten version created by editing the component. The original definitions for each component are stored in the System or Group directories. This action removes the modified definitions that reside in the User directory, exposing the originals in the System or Group directory. ª To return to the original settings 1. In the tree view of the Navigator window, select the component that you wish to use. 2. Choose EditOriginal Settings. The component is reverted to its original settings. NOTE Only definitions in the User directory can be overwritten. 11-36 CAChe for Windows User Guide Exporting environment components Exporting environment components The following components can be exported: Introduction experiments procedures parameter data The type of component which can be exported depends on the current selection in the tree view of the Navigator window. Using The Export command uses the Save As dialog box. Tutorials • • • 2. Choose FileExport to display the Save As dialog box. 3. Enter a name for the exported component in the File Name text box. 4. Select a directory for the component. 5. Select the Save button to export the component, and to close the dialog box. Refer to “Importing a CAChe experiment”, p 11-28, for details about importing environment components. CAChe for Windows User Guide 11-37 Understanding 1. In the tree view of the Navigator window, select the component that you wish to export. Customizing To export an environment component Appendices ª Chapter 11 - Using the Procedure Editor Quitting the Procedure Editor ª To quit the Procedure Editor 1. Choose FileExit. If you have any unsaved changes in the displayed experiment environment, an alert box asks if you would like to save changes. 2. Do one of the following: 11-38 ❏ Select Yes to save the changes and exit the Procedure Editor. ❏ Select No to exit the Procedure Editor without saving the changes. ❏ Select Cancel to keep the Procedure Editor running. CAChe for Windows User Guide 12 Using ProjectLeader Overview ProjectLeader is a component of CAChe that is used to automate the calculation of properties, and to perform analyses on multiple chemical samples. This chapter describes how you can use ProjectLeader to: perform experiments on chemical samples, or on components of chemical samples such as atoms and bonds • • carry out statistical analyses and evaluate equations Refer to Chapter 10, “Performing Workspace Experiments”, for an overview of performing experiments in the CAChe workspace, and “Workspace versus ProjectLeader”, p 2-21, for a comparison. Starting ProjectLeader Using the ProjectLeader workbook Opening a ProjectLeader project Adding chemical samples 12-2 12-3 12-5 12-7 12-11 12-12 Using the CAChe Workspace from a worksheet 12-14 Copying objects from ChemDraw, ISIS Draw, or ChemFrontier 12-15 Viewing sample properties Editing sample properties Copying sample properties 12-17 12-18 12-18 Running a ProjectLeader experiment 12-20 Adding a chemical sample column, property, sample component, analysis, or comment to a worksheet 12-21 Selecting a server 12-24 Selecting cells 12-24 Evaluating the cells 12-25 Editing data 12-26 Using scatter plots 12-27 Changing workbook display options 12-33 Changing the chemical sample display 12-33 Sorting rows 12-34 Changing the grid line display 12-35 Changing the text display 12-36 Changing the numerical display 12-36 Hiding and displaying worksheet features 12-37 Using worksheet footnotes 12-37 Viewing cell information Printing files Previewing a printout Choosing print options Printing a ProjectLeader window 12-39 12-40 12-40 12-40 12-42 Exporting a ProjectLeader worksheet 12-43 Saving a ProjectLeader project 12-44 Quitting ProjectLeader 12-45 Customizing ProjectLeader experiments Understanding Introduction to ProjectLeader Using plot scatter plots of the results of experiments and analyses. Appendices Contents Using • Tutorials Introduction 12 Chapter 12 - Using ProjectLeader Introduction to ProjectLeader ProjectLeader is a separate application from the CAChe Workspace. ProjectLeader simplifies the application of computer-aided chemistry by letting you specify first the chemical property that you want evaluated, then the procedure for evaluating that property. By contrast, CAChe Workspace requires you to choose the procedure, then select the property to be evaluated.. NOTE ProjectLeader is not part of BioCAChe, Personal CAChe, Quantum or Ab Initio CAChe. ProjectLeader offers the ability to perform calculations on several chemical samples at the same time. A wide range of experiments is available, including experiments similar to those you can perform in the Workspace, plus experiments not available in the Workspace such as calculating connectivity indexes, dipole vectors, and the octanol-water partition coefficient. Experiments may be performed on entire chemical samples, or on chemical sample components such as atoms, bonds, and molecular orbitals. Refer to “ProjectLeader experiments”, p 12-3, for a full list of the experiments available in ProjectLeader. Viewing and analyzing columns of experimental data for several chemical samples at once enables you to establish mathematical relationships between one set of data and another, thus aiding: 12-2 • the process of calibration by comparing the results of measurements on specific instruments with the known standard results • the calculation of quantitative structure activity relationships (QSAR) between molecular structure and pharmacological activity, and quantitative structure property relationships (QSPR) between molecular structure and properties such as boiling points, octanol-water partition coefficients, and dipole moments. BioMedCAChe User Guide Introduction to ProjectLeader The following list includes some of the experiments that are available with ProjectLeader. These experiments can be performed on one or more chemical samples simultaneously: • optimization to find a low energy structure for steric energy, heat of formation, or total energy • • • • net positive and negative charge for a molecule • calculation of the dielectric, steric, total energy, and heat of formation of a structure at its current geometry • • investigation of visible and UV-visible spectra data • • • • dipole moment and dipole vectors x, y, and z electron affinity shape index order 1, 2, and 3 octanol-water partition coefficient. ProjectLeader supports the statistical analyses of chemical samples, such as multiple linear regression, forward and reverse stepwise regression, and calculations based on customizable equations. 12-3 Using Customizing zero-order, first-order, and second-order molecular or valence connectivity indices Understanding investigation of molecular orbital energies such as HOMO and LUMO energies Appendices ring count and size Using molecular formula, weight, and refractivity Experiments can also be performed on sample components, such as atoms, bonds, and molecular orbitals. BioMedCAChe User Guide Tutorials ProjectLeader experiments Introduction Once you have performed several experiments and analyses, you may wish to plot a scatter plot of the results. The straight line fitting in ProjectLeader’s scatter plots provides a powerful way of identifying trends in your results. Chapter 12 - Using ProjectLeader ProjectLeader experiments use the same set of computational applications as Workspace experiments. Refer to Chapter 20, “CAChe Computational Applications”, for further details. 12-4 BioMedCAChe User Guide Starting ProjectLeader Starting ProjectLeader 1. Do one of the following: ❏ ❏ Choose Start Programs CAChe ProjectLeader from the Windows taskbar. In Windows Explorer, double-click the plwin.exe icon in the CAChe folder. The splashscreen is displayed. After a few seconds an empty ProjectLeader workbook, Introduction To start ProjectLeader Tutorials ª Untitled1, is opened. Using Worksheet button Column button Using Row button Column, row, and worksheet buttons Each column has a lettered column button, and each row has a numbered row button. Click on these to select a whole column or row respectively. Click on the worksheet button to select the whole worksheet. BioMedCAChe User Guide 12-5 Appendices Footnote display area Understanding Customizing Sheet tab Chapter 12 - Using ProjectLeader Sheet tab Each worksheet in a workbook has a sheet tab. Click on the sheet tab to make the worksheet active. Sheet tabs can be renamed, Refer to “Worksheets”, p 12-9 for further details. Footnotes Footnotes can be defined for each worksheet cell. They are displayed in the footnote display area, underneath the ProjectLeader worksheet. 12-6 BioMedCAChe User Guide Using the ProjectLeader workbook When you start ProjectLeader, an empty workbook is displayed. The following illustration shows a ProjectLeader workbook to which the following have been added: • • • Chemical Sample files (displayed as line drawings here) • worksheets. experiments investigating molecular properties Introduction Using the ProjectLeader workbook Appendices NOTE The modification state of a project is indicated by a * attached to the title of each project window. Understanding Customizing Using Using Tutorials experimental results contained in the relevant worksheet cells BioMedCAChe User Guide 12-7 Chapter 12 - Using ProjectLeader The Chemical Sample column The first column in the worksheet is the Chemical Sample column. When you add chemical samples to ProjectLeader they are displayed in this column. You can also open the CAChe Workspace from the Chemical Sample column, in order to: • • view an existing chemical sample contained in the worksheet create a new chemical sample to add to the worksheet. The column title row The first row in the worksheet is the column title row. The column titles are displayed underneath alphabetically-labeled column buttons. The property or analysis that you want to calculate is added to the column title cells. Worksheet cells Experiments and analyses are performed by evaluating worksheet cells. The experiment or analysis is defined by the chemical sample in the Chemical Sample column, and the experiment or analysis in the column title row. Worksheet cells display the status of calculations as they are performed, then display the results when experiments are complete. Refer to “Running a ProjectLeader experiment”, p 12-20, for more information. Mouse actions in ProjectLeader Most tasks in ProjectLeader can be accomplished by using mouse actions. Double-click on a cell in the Chemical Sample column or the column title row to open a dialog box that lets you define information for that cell. Double-click on a cell in: • 12-8 the Chemical Sample column to open a sample in that cell BioMedCAChe User Guide Using the ProjectLeader workbook • the column title row to define the type of information to be displayed in that column: a property, an analysis, or a comment. A different pop-up menu is displayed if you click the right mouse button on a sheet tab in the ProjectLeader workbook, on a cell in the Sample Properties workbook, and yet another from a right mouse click on a scatter plot. Worksheets Tutorials display a pop-up menu listing actions that can be performed for that cell. Introduction Right mouse click on a cell in the ProjectLeader worksheet to Each workbook can contain many worksheets. Select the sheet tabs to move from one worksheet to another. ª insert a sheet delete a sheet Using rename a sheet move a sheet. To insert a sheet ❏ Choose Edit | Insert Sheet. ª Understanding A new sheet is inserted to the immediate left of the currently selected sheet. To delete a sheet 1. Select the sheet tab that you want to delete. 2. Choose Edit | Delete Sheet. Appendices The sheet is deleted from the workbook. ª To rename a sheet 1. Select the sheet tab that you want to rename. BioMedCAChe User Guide Customizing • • • • Using ProjectLeader enables you to: 12-9 Chapter 12 - Using ProjectLeader 2. Choose Edit | Rename Sheet. 3. Enter a new name in the Rename Sheet dialog box, and select OK. The sheet is renamed. ª To move a sheet 1. Select the sheet that you want to move. 2. Choose Edit | Move Sheet to display the Move Sheets dialog box. 3. As required, select either: ❏ Move Up ❏ Move Down 4. Select OK when the sheet has been reordered to your requirements. TIP Select a sheet tab using the right mouse button to display a pop-up menu listing the commands for managing worksheets. 12-10 BioMedCAChe User Guide Opening a ProjectLeader project ª To open an existing ProjectLeader project 1. Choose File Open to display a dialog box. 2. Move to the directory that contains the project that you want to open. The files are filtered so that only files that have the extension .plp are displayed. Tutorials ProjectLeader projects can be saved as project files so that you can continue working on a project at a later time. ProjectLeader project files are saved with the extension .plp. Introduction Opening a ProjectLeader project 3. Select the project that you want to open. Using 4. Select Open. Appendices Understanding Customizing Using The project is opened in a ProjectLeader workbook. BioMedCAChe User Guide 12-11 Chapter 12 - Using ProjectLeader Adding chemical samples Chemical samples can be added to the ProjectLeader worksheet from: • • • CAChe Chemical Sample files (*.csf files) MDL SD files (*.sd, *.sdf files) MDL MOL files (*.mol files). Multiple files of each format can be added simultaneously. Chemical samples can be added straight to ProjectLeader from file. Alternatively, you can open the Workspace from the worksheet, draw a new Chemical Sample file, save it, then add the new file to the worksheet. ª To add existing files 1. Double-click on a cell in the Chemical Sample column to display the Open dialog box. 2. From the Files of type drop-down list, choose the format of the files that you want to import. 3. Select the files that you want to import. You can add multiple Chemical Sample files, or multiple SD and MOL files, but you cannot import a mixture of Chemical Sample files and SD or MOL files simultaneously. 4. Hold down Shift and select the first and last files in a group to select all of the files in that group. Hold down Ctrl and select more files to add single files to the selection. In order to display multiple chemical samples, ProjectLeader will insert new rows directly below the cell that you have selected. 5. Select Open. 12-12 ❏ If you are importing Chemical Sample files or MOL files, the structures are displayed in the Chemical Sample column, and the process of adding the files is complete. ❏ If you are importing SD files, the Import an MDL SD File BioMedCAChe User Guide Adding chemical samples CAChe reads SD or MOL files and translates them to CAChe Chemical Sample files, one chemical sample per file. Because multiple chemical samples can be contained in one SD file, and only one chemical sample can be saved in each CAChe Chemical Sample file, you are prompted to define the way in which you want to name the new Chemical Sample files. Introduction dialog box is displayed. Continue with steps 6 through 8, below, to complete the process. 7. Select the Load additional data radio button if you want to import any data from the SD file other than the structures. Tutorials 6. In the Import an MDL SD file dialog box, choose a name from the scrolling list of possible names for the chemical samples. Additional data will be loaded in the first unoccupied columns. The structures are displayed in the Chemical Sample column. Using Choose a name from this list Using 8. Select OK. CAChe works primarily with 3D structures. Many corporate databases contain only 2D chemical structures. The 2D structures must be converted to 3D before performing experiments that require 3D coordinates. If your SD file appears to contain 2D coordinates instead of 3D coordinates, you will BioMedCAChe User Guide 12-13 Appendices The name of each sample is saved with the worksheet cell. Understanding Customizing Select this option to import additional data Chapter 12 - Using ProjectLeader receive this informational message: When a Chemical Sample file is added to a worksheet, you have the option to display it either as a line drawing or by name. Line drawings are displayed by default, and have the advantage that you can enlarge them in order to view the details more clearly. Refer to “Changing workbook display options”, p 12-33, for details of changing the chemical sample display. Using the CAChe Workspace from a worksheet ProjectLeader allows you to view a chemical sample in the CAChe Workspace by selecting the sample from a ProjectLeader worksheet. You can also open the Workspace and create a new Chemical Sample file. Displaying the CAChe Workspace ª To open an existing Chemical Sample file in the Workspace 1. Hold down Shift and click on a chemical sample in the ProjectLeader worksheet. The Workspace is opened, displaying the selected Chemical Sample file. The selected worksheet cell in ProjectLeader is colored pink to indicate that the corresponding Chemical Sample file is currently displayed in the Workspace. 2. Edit the chemical sample in the Workspace and save the file. The changes are displayed in the worksheet cell in 12-14 BioMedCAChe User Guide Adding chemical samples ProjectLeader. 1. Hold down Shift and click on an empty cell in the Chemical Sample column. The CAChe Workspace is opened, displaying a new, empty Chemical Sample file. The selected worksheet cell is colored pink to indicate that it is linked to the Chemical Sample file that is currently displayed in the Workspace. 2. Draw a molecule and save the Chemical Sample file. Introduction To add a new Chemical Sample file to a ProjectLeader worksheet Tutorials ª ª To copy and paste an object from ChemDraw, ISIS Draw or ChemFrontier 1. Select the object that you want to copy by clicking on it with a selection tool. 2. Do one of the following: ❏ choose Edit | Copy ❏ press Ctrl C. 3. Select an empty cell in the Chemical Sample column in which to paste the object. BioMedCAChe User Guide 12-15 Using Customizing You can copy any selected object to the Windows Clipboard from ChemDraw, ISIS Draw or ChemFrontier, and paste it into a ProjectLeader worksheet. Likewise, you can copy an object to the Windows Clipboard from a ProjectLeader worksheet, in MDL format, and paste it into one of these programs. Understanding Copying objects from ChemDraw, ISIS Draw, or ChemFrontier Appendices Refer to Chapter 4, “Creating Chemical Samples”, for details about drawing and saving the molecule. Using The chemical sample is displayed in the relevant ProjectLeader worksheet cell. Chapter 12 - Using ProjectLeader 4. Do one of the following: ❏ choose Edit Paste ❏ press Ctrl V. The Save As dialog box is displayed. 5. Enter a name for the file, and select Save. A copy of the selected object is pasted in the cell. The copied object remains on the Windows Clipboard until you copy or cut another object, so you can continue to paste copies of the object until you have the required number of copies. 12-16 BioMedCAChe User Guide Viewing sample properties Viewing sample properties NOTE Sample properties can only be viewed if the information is available in the Chemical Sample file. Experiments can be performed on the sample properties in the Sample Properties workbook in the same way as in the ProjectLeader workbook. Information can also be copied into the ProjectLeader workbook, where further experiments can be performed. ª To view the sample properties 1. Select the chemical sample that you are interested in. 2. To display the Sample Properties workbook, do one of the following: ❏ choose View Sample Properties click the right mouse button to display a popup menu and choose View Sample Properties. 3. Select the tabs at the bottom of the workbook to view information about the different components. BioMedCAChe User Guide Tutorials Appendices ❏ Using Each component is displayed on a different sheet in the workbook. Using bonds molecule groups vibrational spectra crystals dihedral angles molecular orbitals Gaussian-type orbital basis functions Customizing atoms orbitals electronic spectra improper torsion angles bond angles atom distances Slater-type orbital basis functions Understanding In addition to ProjectLeader’s main workbook, you can open the Sample Properties workbook to view information about the following components of the chemical samples: Introduction ProjectLeader’s main workbook is used to display chemical samples and the results of experiments and statistical analyses. 12-17 Chapter 12 - Using ProjectLeader Refer to “Running a ProjectLeader experiment”, p 12-20, for details of performing experiments in the Sample Properties workbook. Editing sample properties By default, the Sample Properties workbook is locked against editing. However, it is possible to unlock it, and to edit the values in the workbook. NOTE Care should be taken when editing sample properties, because ProjectLeader does not check the validity of any changes made to chemical samples. ª To edit a sample property 1. Choose Edit Edit Property Values. The lock icon is removed from the Sample Properties workbook. 2. Edit the cells that you want to change. Cells that have been edited automatically have a footnote added to them, warning you that the cell has been edited. 3. Choose Edit Lock Property Values to lock the sample properties again. This avoids the risk of editing properties accidently. Copying sample properties Sample properties can be copied to the ProjectLeader workbook and displayed in the same row as the chemical sample to which they relate. Experiments can then be performed on the sample properties in the ProjectLeader workbook. ª To copy sample properties to the ProjectLeader workbook 1. In the Sample Properties workbook, select the cells that you want to copy to the ProjectLeader workbook. 2. To display the Select Columns dialog box, do one of the 12-18 BioMedCAChe User Guide Viewing sample properties following: It prompts you to choose the first column in the ProjectLeader workbook to which the sample property data should be copied. 3. In the Select Columns dialog box, choose the first column to which the cells should be copied. You must choose a column in the ProjectLeader workbook for each of the rows in the Sample Properties workbook from which you are copying data. 4. If you are copying data from more than one row in the Sample Properties workbook, select Next, then choose a ProjectLeader workbook column for the next row of data, until you have chosen a column for each of the rows. 5. Select OK. Introduction click the right mouse button to display a popup menu and choose Copy to Main Workbook. Tutorials ❏ choose Edit Copy to Main Workbook Using ❏ Customizing Refer to “Running a ProjectLeader experiment”, p 12-20, for details about performing experiments on sample properties when they are in the main ProjectLeader workbook. Using The cells are copied into the ProjectLeader workbook. Appendices Understanding The available columns are displayed in this list BioMedCAChe User Guide 12-19 Chapter 12 - Using ProjectLeader Running a ProjectLeader experiment A ProjectLeader experiment can be the calculation of a property, or the calculation of an analysis. ProjectLeader experiments can be run on entire chemical samples or on components of chemical samples. Experiments can be run from the ProjectLeader workbook, or from the Sample Properties workbook. Refer to “Viewing sample properties”, p 12-17, for details of viewing sample properties and copying the information into the ProjectLeader workbook. To run a ProjectLeader experiment on one or more chemical samples or sample components, you use the following steps: 1. Add a chemical sample column, property, sample component, analysis, or comment to a worksheet. Refer to “Adding a chemical sample column, property, sample component, analysis, or comment to a worksheet”, p 12-21 2. Select a server on which to run the experiment. Refer to “Selecting a server”, p 12-24 3. Select the cells on which you want to experiment. Refer to “Selecting cells”, p 12-24 4. Evaluate the cells. Refer to “Evaluating the cells”, p 12-25 NOTE Before performing an experiment to calculate polymer properties, you must open the chemical sample in the Workspace, select the terminal carbon and hydrogen atoms of the polymer, and save the Chemical Sample file. 12-20 BioMedCAChe User Guide Running a ProjectLeader experiment ª To add a chemical sample column 1. Double-click on an empty column title cell to display the Enter Property dialog box. 2. Select the Chemical Sample radio button. Tutorials You can add Chemical Sample columns to a ProjectLeader worksheet in addition to the Chemical Sample column that represents the first column in a worksheet. This enables you to compare the results of calculations between different columns of chemical samples. Using If no column is appropriate to provide information for the property of a sample component, a new column containing an appropriate sample component is automatically inserted. Using ProjectLeader experiments are defined by assigning a property, sample component, or analysis to a worksheet column, then evaluating the cells in that column. The chemical sample information for the row provides ProjectLeader with enough information to evaluate the cells. Introduction Adding a chemical sample column, property, sample component, analysis, or comment to a worksheet To add a property to a worksheet 1. Double-click on an empty column title cell to display the Enter Property dialog box. 2. Select the Property of radio button. 3. Select an option from the Property of drop-down list, then select Next. The available properties are displayed in a scrolling list. A brief description of the selected property is displayed underneath the list. Selecting a property displays its description. 4. Select a property to investigate from the Kind of property BioMedCAChe User Guide 12-21 Understanding ª Appendices The column title cell is labeled Chemical Sample, and chemical samples can be added to the column. Customizing 3. Select OK. Chapter 12 - Using ProjectLeader scrolling list, then select Next. 5. Select a procedure from the Kind of procedure scrolling list. 6. If required, choose Edit to edit the procedure. The Procedure Editor is opened. Refer to Chapter 11, “Using the Procedure Editor”, for information on the Procedure Editor. 7. Select OK. If you have more than one Chemical Sample column in a worksheet, you will be prompted to select a column. 8. From the Column Select dialog box, do one of the following: ❏ select a column from the list and choose OK to perform the calculation on that column ❏ select Automatic to perform the calculation on the Chemical Sample column to the nearest left of the new column. The property is displayed in the column title cell at the top of the relevant column. When you evaluate any cell in this column, the chosen property is calculated. TIP To undo a command, choose Edit | Undo. ª To add a sample component to a worksheet 1. Double-click on an empty column title cell to display the Enter Property dialog box. 2. Select the Sample Component radio button, then select Next. 3. Select an option from the Kind of sample component drop-down list, then select Next. 4. Select a procedure from the Kind of procedure scrolling list. 5. Select OK. If you have more than one Chemical Sample column in a worksheet, you will be prompted to select a column. 6. From the Column Select dialog box, do one of the following: 12-22 ❏ select a column from the list and choose OK to perform the calculation on that column ❏ select Automatic to perform the calculation on the Chemical Sample column to the nearest left of the new column. BioMedCAChe User Guide Running a ProjectLeader experiment To add a statistical analysis to a worksheet 1. Double-click on an empty column title cell to display the Enter Property dialog box. 2. Select the Analysis radio button, then select Next. 3. Select one of the types of regression from the Kind of analysis scrolling list, then select Next. 4. Select the column that contains the data you want to predict from the Predict scrolling list. Tutorials ª Introduction The sample component is displayed in the column title cell at the top of the relevant column. When you evaluate any cell in this column, the chosen sample component is calculated. To add an equation to a worksheet 1. Double-click on an empty column title cell to display the Enter Property dialog box. 2. Select the Analysis radio button, then select Next. 3. Select Algebraic Equation, then select Next. 4. Type an algebraic equation into the Equation panel. Start the equation with an equals sign, and use letters to refer to the worksheet columns. 5. Select OK. The equation is displayed in the column title cell at the top of the BioMedCAChe User Guide 12-23 Using Customizing ª Understanding The regression equation, regression coefficient and crossvalidation are given in the column title. When you evaluate any cell in this column, the regression is evaluated. Columns with no predictive power, that is those without any variance, are omitted from the regression. The regression equation for each cross-validation step can be distinctly different for each model, even if the overall regression equation is the same for a given set of data to predict one variable. Appendices 6. Select OK. Using 5. Select one or more columns to include in the regression from the Using scrolling list. Chapter 12 - Using ProjectLeader column.When you evaluate any cell in this column, the chosen equation is evaluated. ª To add a comment to a worksheet 1. Double-click on an empty column title cell to display the Enter Property dialog box. 2. Select the Comment radio button, then select Next. 3. Type the title for the column in the Comment panel, then select OK. The title is displayed in the column title cell at the top of the relevant column. Edit the cells individually to add comments. Selecting a server ª To select a server on which to run the experiment 1. Choose Evaluate Select Server to display the Select Server dialog box. 2. Select a server by clicking on it, then select OK. TIP You can find out which server is currently selected by choosing Evaluate Show Server. Selecting cells ª To select cells 1. Select one or more cells to include in the experiment, where the row of the cell corresponds to the chemical sample on which you want to experiment, and the column of the cell corresponds to the property or analysis that you want to investigate or perform. Use one of the following to select the cells: 12-24 ❏ To select a group of adjacent cells, click and drag the mouse over the cells. ❏ To select one or more non-adjacent cells, hold down the Ctrl key and click on the cells. BioMedCAChe User Guide ❏ To select a whole column, click on the relevant lettered column button. ❏ To select a whole row, click on the relevant numbered row button. ❏ To select the whole worksheet, click on the worksheet button, or choose Edit | Select All. The cells are highlighted in black to show that they are selected. Introduction Running a ProjectLeader experiment ª Tutorials Evaluating the cells To evaluate the selected cells 1. To evaluate selected cells, do one of the following: ❏ choose Evaluate Cell press the right mouse button and choose Evaluate Cell from the popup menu. Using ❏ Appendices Where two or more columns of cells are to be evaluated, ProjectLeader checks to see whether the individual cell evaluations correspond to the same named procedure, running on the same chemical sample. If so, the experiment is run only once so that analyses are calculated on the same chemical state of the chemical sample. Customizing Parallel cell evaluation Understanding TIP You can stop a lengthy evaluation by choosing Evaluate Stop Cell Evaluation. Using Individual cells display the status of the calculations being performed, then the results as calculations are completed. BioMedCAChe User Guide 12-25 Chapter 12 - Using ProjectLeader Editing data You can cut, copy and paste selected data in ProjectLeader, and you can insert or delete selected columns or rows. The following actions can be chosen from the Edit menu: Cut to remove selected cells from the worksheet. Copy to copy selected cells to the Windows Clipboard. Paste to insert copied data into selected cells. Any existing data in the cells is overwritten. Clear to clear the data in selected cells. Delete to delete selected columns or rows from the worksheet. Any adjacent columns or rows in the worksheet move correspondingly. Insert to insert columns or rows before the selected column or row. Any adjacent columns or rows move correspondingly. NOTE If you attempt to delete cells in a ProjectLeader worksheet that provide the source of information for other cells, a warning will be displayed. For example, deleting a sample component column in a worksheet, where a property of sample component column exists, will disallow you from evaluating the cells in the property of sample component column. 12-26 BioMedCAChe User Guide Using scatter plots Using scatter plots 1. Select the data columns that you want to plot as a scatter plot. 2. Choose View Scatter Plot to display a dialog box that prompts you to choose the columns for each axis of the scatter plot. You can have one column of data plotted along the horizontal axis, and multiple columns along the vertical axis. By default, the first column that you chose from a ProjectLeader worksheet is assigned to the horizontal axis, and the other columns are assigned to the vertical axis. If only one column is selected, it is assigned to the vertical axis. 3. Specify the columns that you want to plot on each axis. Tutorials To plot a scatter plot Using ª Introduction Scatter plots enable you to view trends in data columns. The scatter plot is displayed so that it is the same size as the worksheet from which it was plotted. 5. Click and drag a corner of the scatter plot window to resize it. Customizing Title Using 4. Select OK to plot the scatter plot. Selected point Understanding Label Regression line BioMedCAChe User Guide Appendices Legend Selected data set 12-27 Chapter 12 - Using ProjectLeader Changing the display of the plot ª To scale the plot 1. Hold down Ctrl, the left mouse button, and the right mouse button, then do one of the following: ❏ drag the cursor up and to the left to make the plot smaller ❏ drag the cursor down and to the right to make the plot larger. 2. To zoom in on a particular part of the plot, hold down Ctrl and the left mouse button, and drag the cursor over the area that you want to zoom in on. A rectangular box is drawn around the section, then the display is zoomed in on that section. 3. To reset the view, choose View | Reset graph. ª To translate the plot 1. Hold down Shift, the left mouse button, and the right mouse button, then drag the cursor in the direction that you want to translate the graph. 2. To reset the view, choose View | Reset graph. Selecting data points You can select single data points, entire data sets, or combinations of points. Menu actions apply to all selected data points. ª To select data points 1. Use the left mouse button to select a single data point. The label of the selected data point is boxed to indicate that the point is selected. 2. Use the right mouse button to display the popup menu for the selected data point. The menu options are activated, but only relate to the selected point. Regression is still grayed out, because an entire data set must be selected before a regression analysis can be performed. 12-28 BioMedCAChe User Guide Using scatter plots 3. To select an entire data set, select a data set from the legend. 4. Use the right mouse button to display the popup menu for any highlighted data point. The menu options for any highlighted data point now relate to all of the highlighted data points. To toggle the selection of data points ❏ Hold down Ctrl and select the left mouse button to toggle the selection of the selected points. Tutorials ª Introduction All of the data points in the data set are highlighted and the name of the data set is displayed on the vertical axis. All data points that were selected become unselected, and data points that were unselected become selected. select an individual point to label one point only ❏ select a data set to label an entire data set. 2. Click the right mouse button to display the popup menu, and choose one of the following menu options: Number Name X-Value Y-Value Value Pairs None The number of the point. Points are numbered in the order that they appear in the worksheet. The name of the sample and the number of the point. The x-value of the point. The y-value of the point. The x- and y-values of the points. No label. The chosen label is displayed next to the selected points. BioMedCAChe User Guide 12-29 Customizing ❏ Understanding 1. To select the data points that you want to label, do one of the following: Using To label data points Appendices ª Using Changing the labeling of the points Chapter 12 - Using ProjectLeader Changing the title of the plot ª To change the title of the plot 1. Double-click on the title of the plot to display the Graph Title dialog box. 2. Edit the text box as required. 3. Select OK to update the title. NOTE Deleting all of the text of the title is equivalent to removing the title. ª To hide the title of the plot ❏ Choose View | Title to toggle off the display of the title. The title of the plot is hidden. Changing the legend of the plot ª To change the legend of the plot 1. Double-click on the legend of the plot. 2. Edit the legend as required. ª To hide the legend of the plot ❏ Choose View | Legend to toggle off the display of the legend. The legend of the plot is hidden. Changing the axes labels ª To change the axes labels 1. Double-click on an axis label. 2. Edit the axis label as required. 12-30 BioMedCAChe User Guide Using scatter plots Hiding the footer of the plot Choose View | Footer to toggle off the display of the footer. The footer of the plot is hidden. Fitting a straight line Regression analysis gives a best-fit straight line for one of the data sets, and the regression equation between that data set and the data set plotted on the X axis. The r2 value gives the correlation of the data. ª Tutorials ❏ Introduction To hide the Footer of the plot To fit a straight line 1. Select the data set to which you want to fit a line. 2. Place the mouse cursor anywhere in the scatter plot and click the right mouse button. Using ª Exporting the plot ª To copy the plot to another application 1. Select the scatter plot that you want to copy, then choose Edit Copy. Appendices 2. Switch to another application, and choose Edit Paste to paste an image of the plot. Customizing The best-fit line is drawn through the results of the regression analysis, and the regression equation is given underneath the scatter plot. Understanding 3. Choose Regression from the menu. Using A popup menu is displayed. BioMedCAChe User Guide 12-31 Chapter 12 - Using ProjectLeader Printing the plot ª To print the plot ❏ Select the scatter plot that you want to print, then choose File Print. Closing the plot If a ProjectLeader project is closed while scatter plot windows are open, the plots are saved to the project file. When the project is reopened, the scatter plot windows are redisplayed. 12-32 BioMedCAChe User Guide Changing workbook display options Changing workbook display options • • rows can be sorted • font size and type, and alignment of text can be changed, and text can be displayed as a molecular formula (i.e., numbers as subscripts) • numbers can be displayed in scientific or standard notation (the default), with up to nine digits after a decimal point • footnotes, column buttons, and row buttons can be displayed or hidden. grid lines can be hidden, or displayed as dotted, shaded gray, or solid black lines ª To display or hide a chemical sample 1. Select a chemical sample by clicking on it in the Chemical Sample column. The cell is highlighted in black to show that it is selected. 2. Choose Format Structure to enable or disable the structure view. A check mark is displayed next to the menu option if it is enabled. When it is enabled, the chemical samples are displayed as line drawings. When it is disabled, the chemical samples are BioMedCAChe User Guide 12-33 Understanding Individual line drawings can be scaled in the workbook, so that you can view the molecular structure more clearly. Appendices By default, the ProjectLeader workbook displays chemical samples as line drawings. However, you can choose to display the names of the chemical samples instead. Customizing Using Changing the chemical sample display Tutorials chemical samples can be displayed by their file name, or as line drawings that you can enlarge to view more clearly Using • Introduction You can change the display of the following items in a ProjectLeader workbook: Chapter 12 - Using ProjectLeader displayed as names. ª To scale a structure line drawing in a worksheet 1. Position the cursor at the bottom of the row button adjacent to the line drawing that you want to scale. The cursor changes into a crosshair shape. 2. Click and drag downwards to increase the depth of the row. The adjacent molecular line drawing increases in size in proportion to the row button. 3. Position the cursor to the right of the column button A. The cursor changes into a crosshair shape. 4. Click and drag to the right to increase the width of the column. All molecular line drawings in the Chemical Sample column increase in size in proportion to the column button A. Sorting rows You can sort the rows in a ProjectLeader worksheet according to the following properties: ª • in ascending (A to Z, or numeric) or descending (Z to A, or reverse numeric) order • cell type, where data are sorted in the following order: numerics, molecular formula, then textual data • text only, where formulae for the molecula ordering convention is observed: carbon atoms, hydrogen atoms, then remaining atoms in alphabetical order • text handling, where the case of textual data is observed. To sort rows 1. Select the column by which you want to sort the rows. 2. Choose View | Sort to display the Sort dialog box. The column that you selected is displayed from the drop-down list in the Primary Key panel. 12-34 BioMedCAChe User Guide Changing workbook display options 3. Select either Ascending (A to Z, or numeric) or Descending (Z to A, or reverse numeric) order from the Primary Key panel. 5. Select either Ascending or Descending from the Secondary Key panel. 6. Select the Options tab. This enables you to determine the sort mode, and text handling. ❏ select Cell type to sort numerical data first ❏ select Text only to sort only textual data. Tutorials 7. In the Sort Mode panel, do one of the following: Introduction 4. If required, select a column to be used as a secondary key in the Secondary Key panel from the drop-down list. ❏ select Case sensitive to sort textual data so that capitals have a higher priority ❏ select Case insensitive to sort textual data regardless of case. Using 8. If required, do one of the following in the Text Handling panel: TIP Press the right mouse button, and select Sort Ascending to sort rows from A to Z, or in numeric order. Press the right mouse button, and select Sort Descending to sort rows from Z to A, or in reverse numeric order. Changing the grid line display Understanding To change the grid line display Choose one of the following: ❏ View Grid Line None ❏ View Grid Line Dotted ❏ View Grid Line Gray ❏ View Grid Line Solid. The grid lines in the worksheet change to the selected style. BioMedCAChe User Guide 12-35 Appendices ª Customizing The data in the column is sorted according to your preferences. Using 9. Select OK to accept the changes, and to close the Sort dialog box. Chapter 12 - Using ProjectLeader Changing the text display ª To display text in a different font size or type 1. Select the cells containing the text you want to change. 2. Choose Format Font to display the Font dialog box. 3. Select the Font, Font style, and Size from the scrolling lists, or edit the text box directly. 4. Select OK to apply the changes, and to close the Font dialog box. ª To change text alignment 1. Select the cells containing the text you want to change, then choose one of the following: ❏ Format Left ❏ Format Center ❏ Format Right. The alignment of the selected text changes. ª To display text as a molecular formula 1. Select the cells containing the text you want to change. 2. Choose Format Molecular Formula. The selected text is displayed with the numbers as subscripts. 3. Choose Format Normal Text to revert the display to normal text. Changing the numerical display Select the cells containing the numbers you want to change, and choose one of the following from the Format menu: 12-36 Scientific Notation to display numbers in scientific notation Standard Notation to display numbers in standard notation Digits after Decimal to set the number of decimal places to display BioMedCAChe User Guide Changing workbook display options Hiding and displaying worksheet features 1. Choose: ❏ View Column Labels to display or hide column labels ❏ View Row Labels to display or hide row labels. Tutorials The menu option has a check mark next to it when the labels are displayed, and no check mark when the labels are hidden. Introduction To hide or display column or row buttons Using worksheet footnotes ProjectLeader lets you add footnotes to a cell, and choose whether to display them or not. If a worksheet has a footnote, a small icon is displayed in the worksheet cell. Footnote display area ª To add a footnote to a cell 1. Select the cell by clicking on it. 2. Choose View Cell Information to display the Cell Information dialog box. BioMedCAChe User Guide 12-37 Appendices Understanding Customizing Using When a cell is selected, any footnotes associated with it are displayed underneath the ProjectLeader worksheet in the footnote display area, as shown in the following diagram. Using ª Chapter 12 - Using ProjectLeader 3. Click in the Footnote panel then enter the footnote that you want to add. 4. Select OK to close the Cell Information dialog box. The footnote is displayed in a scrolling window at the bottom of the worksheet. ª To display or hide footnotes 1. Choose View Footnote to display or hide footnotes. A check mark next to the menu option indicates whether footnotes are currently displayed. Footnotes are displayed in a scrolling section below the worksheet. 12-38 BioMedCAChe User Guide Viewing cell information Viewing cell information You can view the following information about a cell: the procedure used to calculate the property the date and time the information was last updated. To view or edit cell information 1. Select the cell by clicking on it. 2. Choose View Cell Information to display the Cell Information dialog box. Tutorials ª the property it displays Introduction • • • A scrolling list displays the chemical sample property that the cell contains, the procedure used to calculate the property, and when the information was last updated. Using The Cell text text box displays the contents of the cell. 4. Click in the Footnote section to add or edit a footnote for the cell. Appendices Understanding 5. Select OK to make the changes and to close the Cell Information dialog box. Customizing 3. Double-click in the Cell text text box to edit the cell contents. Using The Footnote section displays any footnotes attached to the cell. BioMedCAChe User Guide 12-39 Chapter 12 - Using ProjectLeader Printing files ProjectLeader enables you to print a copy of a worksheet view, or a scatter plot. The following sections describe how to: • • • preview a printout change print settings print a ProjectLeader worksheet or scatter plot. Previewing a printout ProjectLeader enables you to view the appearance of a printout before you print. ª To preview a printout 1. Activate the document window whose contents you want to preview by clicking on the window. 2. Choose File Print Preview to enter print preview mode. The contents of the window are displayed framed in a page as they would appear in a printout. 3. To exit print preview mode, choose Close. ProjectLeader returns you to the document window. Choosing print options You can change the following print options in ProjectLeader: • • • ª which printer to use and its properties page orientation of a printout paper size and source. To specify a printer and its properties 1. Choose File | Page Setup to display the Page Setup dialog box. 12-40 BioMedCAChe User Guide Printing files 2. Select Printer to display a further Page Setup dialog box. 5. Select the Page Setup or Advanced tab to display and select the options relevant to your printer. 6. Select OK to close the dialog box of document properties and to return to the Page Setup dialog box. 7. Select OK in the Page Setup dialog box to save the selected printer and its properties and to close the Page Setup dialog box. ª Tutorials 4. To change the properties of the printer, select Properties to display a dialog box containing specific options for your printer type. Using The printer’s status, type, and location are displayed in the Printer panel of the dialog box. Introduction 3. To use a different printer from the one displayed in the Printer panel, select the arrow button in the Name box and choose a printer from the drop-down list. To change page orientation of a printout ❏ select the Landscape radio button to print landscape images, where the paper is wider than it is longer. 3. Select OK to save the page orientation and to close the Page Setup dialog box. ª To change paper size and source 1. Choose File Page Setup to display the Page Setup dialog box. 2. Select the arrow button in the Size box, located in the Paper panel, and choose a paper size from the drop-down list. 3. Select the arrow button in the Source box, located in the Paper panel, and choose a paper source from the drop-down list. 4. Select OK to save the paper size and source settings, and to close the Page Setup dialog box. BioMedCAChe User Guide 12-41 Customizing select the Portrait radio button to print portrait images, where the paper is longer than it is wider Understanding ❏ Appendices 2. In the Orientation panel, select one of the following: Using 1. Choose File Page Setup to display the Page Setup dialog box. Chapter 12 - Using ProjectLeader Printing a ProjectLeader window You can print a ProjectLeader worksheet or scatter plot. ª To print a ProjectLeader window to a printer 1. Activate the document window whose contents you want to print by clicking on the window. 2. Do one of the following: ❏ Choose File Print ❏ Press Ctrl P. The Print dialog box is displayed. 3. In the Copies panel of the Print dialog box, do one of the following: ❏ In the Number of Copies text box, select the up arrow to increase the number of copies of the printout you require, or select the down arrow button to decrease the number of copies you require. ❏ Click in the Number of Copies text box and enter the number of printouts you require. 4. Select OK to print the contents of the active document window to a printer and to close the Print dialog box. 12-42 BioMedCAChe User Guide Exporting a ProjectLeader worksheet Exporting a ProjectLeader worksheet To export a worksheet 1. Select the data that you want to export. If you want to export the entire worksheet, select the worksheet button in the top right-hand corner of the worksheet. 2. Choose File Export to display the Save As dialog box. 3. Click in the File name text box and type a name for the new file. Tutorials ª Introduction You can export a ProjectLeader worksheet in .sdf file format for use in other applications, such as chemical database programs. Appendices Understanding Customizing Using 5. Select Save to save the .sdf file, and to close the Save As dialog box. Using 4. Choose Files (*.sdf) from the Save as type drop-down list. BioMedCAChe User Guide 12-43 Chapter 12 - Using ProjectLeader Saving a ProjectLeader project ProjectLeader projects can be saved as project files. This enables you to save a project that you have been working on, then open it again and continue working on it from where you stopped. One ProjectLeader workbook is saved in each project. If you have more than one workbook open when you save a workbook as a project, ProjectLeader will prompt you to supply a different name for each workbook so that each workbook is saved in a different project.| ª To save a ProjectLeader project 1. Choose File | Save. If you have not already defined a name for the project, the Save As dialog box is opened. 2. Move to the directory in which you want to save the project. 3. Enter a name for the project in the File name text box. 4. Select Save to save the project. If you have more than one workbook that has not been saved as a project, the Save as dialog box remains open so that you can save the other projects. 5. Save all of the projects that you want to save. Select Cancel to skip any projects that you do not want to save. 12-44 BioMedCAChe User Guide Quitting ProjectLeader Quitting ProjectLeader To quit ProjectLeader 1. Choose File Exit. If you have any unsaved changes in open windows, you are prompted to save changes. Introduction ª Select Save to save the changes, before quitting ProjectLeader. ❏ Select Discard to quit ProjectLeader without saving the changes. ❏ Select Cancel to keep ProjectLeader running. Appendices Understanding Customizing Using Using ❏ Tutorials 2. Do one of the following: BioMedCAChe User Guide 12-45 Chapter 12 - Using ProjectLeader 12-46 BioMedCAChe User Guide 13 Optimization and Energy Calculations Introduction 13 Overview optimizing with CAChe to discover low energy conformations of your molecule • calculating the current energy of a chemical sample. Optimizing chemical samples Classical or quantum mechanics? Optimizing with classical mechanics Optimizing with quantum mechanics Selective optimization 13-2 13-3 13-3 13-4 13-6 Optimizing substituted portions of a molecule 13-6 Investigating reactive sites at the surface of enzymes 13-8 Maintaining mutual orientations Viewing optimized structures Calculating current energy 13-8 13-10 13-11 Calculating current energy with classical mechanics 13-11 Calculating current energy with quantum mechanics 13-11 Including solvation effects 13-12 Appendices Contents Understanding Customizing Using • Tutorials This chapter describes: Chapter 13 - Optimization and Energy Calculations Optimizing chemical samples Optimization involves finding the most stable geometry, or minimum energy structure, of a chemical sample. The lowest energy, or optimum structure, of a conformation of a molecule displays characteristics and properties that are more likely to reflect the true behavior of a chemical sample. Therefore, using optimization in CAChe enables you to achieve more accurate results when analyzing molecular characteristics. Because of this, most CAChe experimental procedures begin with optimizing your chemical sample. NOTE You might not always want to optimize the sample; for example, if the sample is already in a low-energy geometry from a previous experiment. In this situation, choose the existing geometry and wavefunction procedure for your experiment. This procedure uses existing geometry and wavefunction data from previous experiments on the chemical sample. CAChe uses both classical molecular mechanics and semi-empirical quantum mechanics to find minimum energy conformations of your molecule. You can combine both methods of optimization in a CAChe experiment. For example, you can optimize a molecule using classical mechanics first, and then refine the structure using quantum mechanics. CAChe optimization procedures also enable you to: • include solvation effects of water while optimizing your molecule. Refer to“Modeling solvent effects with COSMO”, p 20-19, for more information on experimental procedures that include solvation effects. 13-2 CAChe for Windows User Guide Optimizing chemical samples However, if your sample is in a state where electronic effects have a significant impact on the structure (e.g., a transition state), its geometry cannot be refined by a classical approach. Similarly, classical mechanical experiments do not yield any molecular orbital information. Using Many CAChe procedures perform an optimization using classical mechanics first, before refining the resulting structure using one of the quantum mechanics techniques. This often reduces computation time, while providing molecular orbital information. Tutorials Classical mechanical methods are much faster than using quantum mechanical calculations. Also, experiments tend to yield similar or more accurate optimized geometries when applying classical mechanics to discover a low-energy structure. Introduction Classical or quantum mechanics? Optimizing with classical mechanics CAChe performs as many optimization iterations as necessary, and stops when the steric energy change between iterations becomes acceptably small. At the end of an optimization, your chemical sample’s geometry corresponds to a steric energy minimum, although it might not be the absolute global minimum. The following example shows how CAChe optimizes a butane molecule with a strained dihedral angle, so that the atoms of the CAChe for Windows User Guide 13-3 Understanding For example, the deviation of a dihedral angle from a staggered conformation adds to the steric energy of butane. Other factors, such as hydrogen bonding, are stabilizing and reduce the total steric energy for your sample. Appendices CAChe calculates these deviations from the ideal, and optimizes a molecule by moving its atoms to lower the sum of the deviations (and thus lower the steric energy) until energy changes are negligible. Customizing CAChe examines bond angles and atom distances in your molecule and compares its geometry to the classical mechanical ideal value. Deviations from the ideal accumulate a relative energy quantity known as steric or potential energy. Chapter 13 - Optimization and Energy Calculations optimized molecule do not deviate from the classical mechanical ideal, and therefore steric energy is minimized. A strained dihedral angle in butane A perfectly staggered dihedral angle Optimizing with quantum mechanics Quantum mechanics uses the presence and positions of electrons between atoms to calculate a minimum energy structure, based on the Schrödinger equation. Quantum mechanical procedures in CAChe calculate an energy related to the heat of formation for different structures of the molecule, until the energy is minimized. Quantum mechanics also allows you to compare heat of formation values for different chemical samples, as well as comparing the energy values of different conformations of the same molecule. Heat of formation energy values produced from quantum mechanical computations can be: • • 13-4 directly compared adjusted, then compared to experimental heats of formation. CAChe for Windows User Guide Optimizing chemical samples Appendices Understanding Customizing Using Tutorials Introduction NOTE Optimization with quantum mechanics is not available with Personal CAChe. CAChe for Windows User Guide 13-5 Chapter 13 - Optimization and Energy Calculations Selective optimization You can optimize only selected portions of your molecule, rather than the whole structure. To do this, you lock atom coordinates and specified geometry labels so that atoms remain in the same position, and atom distances and bond angles remain at a constant value, during an experiment. All computational applications, apart from ZINDO, recognize locked atom coordinates and locked geometry labels. Refer to “Locking geometry labels”, p 8-29, and “Locking atoms”, p 8-32, for information on applying locks. There is no set procedure for selective optimization, but the following sections describe situations where optimization of only one portion only of a chemical sample can be used. Optimizing substituted portions of a molecule If you know the geometry of the structure for a sample closely related to your molecule, you may want to explore the most likely geometry of sites where you made substitutions. You can optimize the substituted portion of the sample, while leaving the section for which data exists untouched, whereas normal optimizing would cause structural adjustments throughout the whole chemical sample. The following example shows a molecular structure where the core atoms of a molecule could be locked while allowing the pendant groups to optimize. 13-6 CAChe for Windows User Guide Using Tutorials Introduction Selective optimization Follow the steps below to perform a selective optimization. 2. Choose Adjust Lock. An L is displayed in the workspace to indicate that the atoms are locked. 3. Use the Atom/Bond tool to draw the atoms and bonds that comprise the substituted portion of the molecule by clicking and dragging in the workspace. This is the portion that you want to optimize. 4. Choose File Save to save the chemical sample file. 5. Run the optimization experiment of your choice. The locked atoms remain fixed at their workspace coordinates, while the rest of the chemical sample is optimized. CAChe for Windows User Guide 13-7 Understanding 1. Select all the atoms you want to remain unchanged by clicking on the first one with the Select tool, holding down the Shift key, and clicking on the rest of the atoms you do not want to optimize. Customizing To optimize selected portions only of a molecule Appendices ª Chapter 13 - Optimization and Energy Calculations Investigating reactive sites at the surface of enzymes Selectively locking geometry attributes can also be helpful when you are investigating reactive sites at the surface of enzymes. The only difference between this example and the previous one is that the chemical sample file you optimize contains two different structures: the substrate, which is completely free to optimize, and the enzyme, whose reactive site is also free to optimize but whose remaining structural mass can be locked. Performing the optimization this way saves a great deal of time since the bulk of the chemical sample is not being adjusted. Maintaining mutual orientations If your chemical sample has a biphenyl structure, you may want to investigate the molecule while the two rings are kept at a 60° dihedral angle. The following example shows a molecular structure where you may want to lock the angle between two rings before performing an optimization. Follow the steps below to perform a selective optimization where the rings are kept at a constant orientation. 13-8 CAChe for Windows User Guide Selective optimization 1. Select all the participating atoms of the dihedral angle by clicking on the first one with the Select tool, holding down the Shift key, and clicking on the second, third, and fourth atoms of the dihedral angle. Ensure that the first atom you select is the atom that you want to move if you are adjusting the dihedral angle. 2. Choose Adjust Dihedral angle to display the Set Dihedral Angle dialog box. 3. Click in the Angle text box and type 60.00. Introduction To optimize a molecule while retaining a fixed dihedral angle Tutorials ª 4. Select the Define Geometry Label check box. 6. Select OK to close the Set Dihedral Angle dialog box. A geometry label identifies the participating atoms and displays the value of the dihedral angle and an L in the workspace to indicate that the angle is locked. Using 5. Select the Lock Geometry radio button. 7. Choose File Save to save the chemical sample file. Appendices Understanding Customizing 8. Run the optimization experiment of your choice. CAChe for Windows User Guide 13-9 Chapter 13 - Optimization and Energy Calculations Viewing optimized structures When you optimize a chemical sample, CAChe automatically saves the optimized structure in the chemical sample file. Sometimes, viewing the optimized structure alone can answer questions about factors that affect a molecule’s geometry, such as steric interactions. However, you often need to view the differences between the original and the optimized structure. If you save the chemical sample file using a different file name before optimizing, the original structure and the optimized one are both available to compare. One way to view differences is to superimpose one structure on the other. You can also compare distances and angles using geometry labels to measure the geometry of both structures precisely. Refer to Chapter 8, “Investigating Molecular Geometry”, for details about superimposing molecules. 13-10 CAChe for Windows User Guide Calculating current energy Calculating current energy • classical mechanics, which calculates the current steric or potential energy of the molecule • quantum mechanics, which calculates the heat of formation of the molecule. CAChe current energy procedures also enable you to: • include solvation effects of water while calculating the current energy of your molecule. Using Calculating current energy with classical mechanics Tutorials CAChe provides procedures that use one of the following: Introduction You can measure the energy of a chemical sample in its existing geometry, without changing or optimizing its current geometry. Calculating current energy with quantum mechanics Appendices Quantum mechanics uses the presence and positions of electrons between atoms to calculate the energy of a structure based on the Schrödinger equation. Quantum mechanical procedures in CAChe calculate an energy related to the heat of formation for a molecule. NOTE Calculating current energy using quantum mechanics is not available in Personal CAChe. CAChe for Windows User Guide Understanding CAChe calculates these deviations from the ideal and computes a steric or potential energy value for the molecule without altering its structure. Customizing CAChe examines bond angles and atom distances in your molecule and compares the geometry to the classical mechanical ideal value. Deviations from the ideal accumulate a relative energy quantity known as steric or potential energy. 13-11 Chapter 13 - Optimization and Energy Calculations Including solvation effects CAChe allows you to include water solvent effects in a current energy experiment by using COSMO. Refer to“Modeling solvent effects with COSMO”, p 20-19, for more information on experimental procedures that include solvation effects. 13-12 CAChe for Windows User Guide 14 14 Overview This chapter describes how to investigate a series of low-energy conformations of your molecule by generating and analyzing the following energy maps: a rigid energy map an optimized energy map Using a sequence of conformations a dynamics trajectory. 14-12 Understanding 14-12 14-15 14-22 14-26 14-30 Appendices Customizing • • • • Tutorials Introduction Investigating Low-energy Conformations Contents Generating energy maps 14-2 Preparing your chemical sample file 14-5 Generating a rigid energy map 14-6 Generating an optimized energy map 14-7 Generating a sequence of conformations 14-9 Generating a dynamics trajectory 14-10 Viewing map files Map file windows Map file display options Analyzing map files Animating map files Saving map files Chapter 14 - Investigating Low-energy Conformations Generating energy maps When you optimize a sample, the resulting low-energy geometry is based on the original geometry that you started with. By varying the geometry of your sample into numerous different conformations and measuring the energy of each, CAChe can investigate the existence of other low-energy conformations for your molecule based on a different geometry. CAChe generates energy map files (*.map) from the following experiments: • • • • • rigid energy map (energy.map) optimized energy map (energy.map) sequence of conformations (seqsrch.map) dynamics trajectory (dynamics.map) reaction path (irc1.map, irc-1.map, drc1.map, drc-1.map). Refer to Chapter 17, “Investigating Reactions”, for details about reaction paths. Map files are also called assemblage files because they are an assemblage of structure/energy pairs. Map files enable you to visualize the relationships between sample conformations and their energy, plotted in a two- or three-dimensional graph. Energy maps are generated by varying specified coordinates of your molecule to create a series of conformations. The energy of each conformation is plotted in a two- or three-dimensional graph so that you can easily locate low energy conformations separated by highenergy barriers. This makes it possible to locate a global rather than a local energy minimum for the molecule. CAChe allows you to: • 14-2 view and manipulate each conformation of your molecule beside the energy graph CAChe for Windows User Guide view the corresponding conformation for any point on the graph, and vice versa • animate the conformations so that you can view each structure generated, while the energy map displays the graph location of each conformation. CAChe generates the following types of energy maps: rigid or optimized energy maps (energy.map), where the potential energy of each conformation is measured, and each conformation is either not optimized (rigid map) or optimized (optimized map). An optimized energy map (energy.map) is also generated when you run a map reaction experiment. a sequence of conformations (seqsrch.map), where lowenergy conformations only are generated by finding a lowenergy value for a coordinate in the molecule, and holding that coordinate at the low energy value while repeating the process for each specified coordinate in the molecule Appendices • Understanding Three-dimensional rigid energy graph Customizing Using • Tutorials • Introduction Generating energy maps CAChe for Windows User Guide 14-3 Chapter 14 - Investigating Low-energy Conformations Sequence of conformations graph • a dynamics trajectory (dynamics.map), where kinetic energy is added to a molecule by randomly assigning velocities to atoms. As the calculation proceeds, kinetic energy is transformed into potential energy. The potential energy of resulting conformations is plotted against time. Dynamics trajectory graph • a reaction path (irc.map, irc-1.map, drc1.map, drc1.map), where two internal coordinates of a chemical sample are varied to form the principal deformations occurring in the 14-4 CAChe for Windows User Guide Generating energy maps Using Tutorials Introduction course of a reaction. A series of reaction path structures are calculated between the transition state structure (deformed structure) to either the product or reactant molecule. Reaction path graph Refer to Chapter 17, “Investigating Reactions”, for more information on map reaction experiments. CAChe steps the search labels (a form of geometry label) through the range of values that you specified when defining the search labels, to form the conformations and measure the energy of each structure. You can define search labels for atom distances, bond angles, improper torsion angles, and dihedral angles. Understanding Refer to Chapter 8, “Investigating Molecular Geometry”, for more information on adding search labels to a chemical sample. Appendices Before generating a rigid or optimized energy map, or sequence of conformations, you must first add search labels to the atom distances and bond angles that you want varied in your molecule to generate the series of conformations. You do not have to add search labels to perform a dynamics trajectory or reaction path experiment. Customizing Preparing your chemical sample file CAChe for Windows User Guide 14-5 Chapter 14 - Investigating Low-energy Conformations Generating a rigid energy map CAChe steps the search labels through their defined range of values and computes the energies of each resulting conformation. For example, if you define two search labels, each with 10 steps, your energy map will contain 121 conformations (112), because 10 steps results in 11 conformations, and each one is tested in combination with all other possibilities. CAChe provides procedures that use one of the following: • classical mechanics, which generates a potential energy rigid map • quantum mechanics, which generates a heat of formation rigid map. NOTE You cannot generate a rigid energy map using quantum mechanics with Personal CAChe or BioCAChe. A rigid energy map calculation keeps the structure rigid at the defined search label values. The unoptimized conformational energy is plotted as a function of the position of any two of the structural elements to create the rigid map. An optimized map optimizes each conformation resulting from the search label values. Both rigid and optimized maps are useful for investigating how energy changes as a function of specific geometry attributes in your molecule. Refer to “Generating an optimized energy map”, p 14-7, for more information. Generating a rigid energy map with classical mechanics Classical mechanical procedures measure the potential energy of each conformation of a molecule formed by varying the search labels. The labeled bond angles and atom distances in your molecule are examined and compared to the classical mechanical ideal geometry. Deviations from the ideal accumulate potential energy, which is measured and plotted in an energy graph for each conformation. 14-6 CAChe for Windows User Guide Generating energy maps Quantum mechanical procedures measure the heat of formation of each conformation of a molecule formed by varying the search labels. The presence and position of electrons between atoms is measured in every conformation formed by the search labels, and heat of formation is calculated, based on the Schrödinger equation. You are limited to a maximum of two search labels in your molecule. Tutorials Generating a rigid energy map with quantum mechanics Introduction You can add up to eight search labels to generate a rigid energy map using classical mechanical procedures. However, because of the time required to complete the calculations, it is more practical to add a maximum of three or four search labels to one molecule. Energy maps generated using quantum mechanics are useful for mapping bond breaking and bond formation in a molecule. Using If you use one search label the result is a reaction coordinate search. If you use two search labels, the result is a grid search. NOTE You cannot generate a rigid energy map using quantum mechanics with Personal CAChe or BioCAChe. CAChe provides procedures that use one of the following: CAChe for Windows User Guide • classical mechanics, which generates a potential energy optimized map • quantum mechanics, which generates a heat of formation optimized map. 14-7 Understanding CAChe steps the search labels through their defined range of values and optimizes each resulting conformation. An optimized map takes much longer to generate than a rigid map, because of the optimization step. Appendices An optimized energy map is similar to a rigid map, except that each conformation formed by the varying search labels is optimized before the energy is calculated. Customizing Generating an optimized energy map Chapter 14 - Investigating Low-energy Conformations NOTE You cannot generate an optimized energy map using quantum mechanics with Personal CAChe or BioCAChe. The optimized conformational energy is plotted as a function of the lowest-energy position of any two of the structural elements to create the optimized map. Generating an optimized energy map with classical mechanics Classical mechanical procedures measure the potential energy of each conformation of a molecule formed by varying the search labels. Each conformation is then optimized by lowering deviations from classical mechanical ideal geometry. The potential energy of each optimized conformation is then plotted in an energy graph. You can add up to eight search labels to generate an optimized energy map using classical mechanical procedures. However, because of the time required to complete the calculations, it is more practical to add a maximum of three or four search labels to one molecule. Generating an optimized energy map with quantum mechanics Quantum mechanical procedures measure the heat of formation of each conformation of a molecule formed by varying the search labels. Each conformation is then optimized by measuring the presence and positions of electrons based on the Schrödinger equation. The heat of formation of each optimized conformation is then plotted in an energy graph. You are limited to a maximum of two search labels in your molecule. If you use one search label, the result is a reaction coordinate search. If you use two search labels, the result is a grid search. Energy maps generated using quantum mechanics are useful for mapping bond breaking and bond formation in a molecule. NOTE You cannot generate an optimized energy map using quantum mechanics in Personal CAChe or BioCAChe. 14-8 CAChe for Windows User Guide Generating energy maps Investigating water solvent effects Generating a sequence of conformations A sequence of conformations, or sequential search, is similar to an optimized map, but offers a faster method to arrive at purely lowenergy conformations, rather than the combination of low- and highenergy structures that an optimized map produces. Instead of evaluating and optimizing the energy of all possible combinations of search label values, the sequence of conformations finds the lowest energy value of each search label in turn, and locks each label at its lowest value, before proceeding to the next one. In this way, only low-energy conformations are generated. Using Refer to“Modeling solvent effects with COSMO”, p 20-19, for more information on experimental procedures that include solvation effects. Tutorials Introduction You can include water solvent effects in rigid or optimized energy map experiments, and map reaction experiments. • multiple pass search, which evaluates up to three low energy values for each search label. Sequential searches are often an efficient way to get closer to the global minimum energy value for a molecule. The resulting map file contains local energy minima without high-energy barriers between them. Sequential searches always generate a two-dimensional graph, regardless of the number of search labels in the chemical sample file. The horizontal axis is simply the sequence in which the conformations were evaluated, and the vertical axis displays the potential energy for the particular conformation. CAChe for Windows User Guide 14-9 Understanding one pass search, which evaluates only one low energy value for each search label Appendices • Customizing The following procedures are available for a sequence of conformations experiment: Chapter 14 - Investigating Low-energy Conformations Sequential searches can only be performed by Mechanics using classical mechanical methods. You can use an unlimited number of search labels in a sequence of conformations experiment. TIP To use a large number of search labels in a sequence of conformations experiment, you can add dihedral angle search labels automatically using the Geometry Label Wizard. Refer to “Defining search labels automatically”, p 8-41, for details about using the Geometry Label Wizard. Generating a dynamics trajectory Dynamics trajectory experiments allow you to visualize the movement of atoms that results from adding thermal energy to the molecule. Initially, the energy is added in the form of kinetic energy by randomly assigning velocities to atoms. As the calculation proceeds, however, some kinetic energy is transformed into potential energy. The total energy in the system is conserved throughout the experiment. You do not need to add search labels to a sample before performing a dynamics trajectory experiment, so your chemical sample file requires no preparation. Therefore, a dynamics trajectory experiment is a faster alternative to a rigid map, optimized map, or sequence of conformations experiment, which can take too much time to prepare and generate for large molecules. The resulting energy map from a dynamics trajectory allows you to view conformations beside a two-dimensional energy graph, which can be used to: • • identify low-energy conformations gain useful information regarding the relative rigidity of a structure. The horizontal axis corresponds to the time frame in which the structures are sampled, and the vertical axis represents the energy of the resulting conformation. 14-10 CAChe for Windows User Guide Generating energy maps Appendices Understanding Customizing Using Tutorials NOTE You cannot generate a dynamics trajectory in Personal CAChe. Introduction Low-energy structures in a trajectory map are not truly energy minima. These structures are good starting points for a geometry optimization, which leads to a more accurate minimum energy geometry. CAChe for Windows User Guide 14-11 Chapter 14 - Investigating Low-energy Conformations Viewing map files When you open a map file, two windows open side by side, as shown in the following example. Graph window Conformation window Tool palette Parameter bar ª To open a map file 1. Choose File Open to display the Open dialog box. 2. Double-click on the Cache folder to open it. 3. Click and drag on the scroll bar of the scrolling list to locate the .map folder belonging to the relevant chemical sample file and double-click on the .map folder to open it. 4. Select the arrow button in the Files of type box and choose Map (*.map) from the drop-down list. 5. Double-click on the required map file to open it. Map file windows The structure displayed in the right window (the conformation window) is the lowest energy conformation of all the structures generated by the experiment. Its energy value is displayed in the parameter bar at the bottom of the window, and a small spherical 14-12 CAChe for Windows User Guide Viewing map files The two windows are interactive. If you click on a graph location in the graph window, the conformation window displays the conformation that corresponds to the selected point on the graph. You can also move the marker step by step along the graph using the up, down, left, and right arrow keys. The conformation window displays the corresponding structure as the marker moves throughout the graph. Tutorials The graph displayed in the graph window can be rotated in two or three dimensions. The colors of the graph in the graph window represent the relative energies of graph locations and their equivalent conformations. Introduction marker indicates the corresponding energy location in the graph in the left window (the graph window). • • a tool palette, similar to the workspace tool palette a parameter bar that displays the x, y, and z parameters of the graph. Using Both windows contain: If you close a graph window and save the map file, the next time the file is opened, only the conformation window is displayed. To display a graph window 1. Choose Window New Graph Window. Appendices Understanding The graph window corresponding to the conformation window is displayed. Customizing ª CAChe for Windows User Guide 14-13 Chapter 14 - Investigating Low-energy Conformations Using the tool palettes The tool palette in both map file windows contain tools that function in exactly the same way as the workspace tools. Select tool Select Molecule tool Select Similar tool Conformation window only Group Select tool Atom/Bond tool Rotate tool Translate tool Scale tool You can rotate, translate, and zoom in to the map and conformation window using the tools, and also select items with the three selection tools in the conformation window. Using the Select tool in the graph window changes the position of the spherical marker in the graph. Refer to Chapter 5, “Modifying Chemical Samples”, for information on using the selection tools. Refer to Chapter 7, “Manipulating Molecules”, for information on using the Rotate, Translate, and Scale tools. Using the parameter bar The parameter at the bottom of both windows contains a drop-down list from which you can choose to view in ascending or descending order: 14-14 • the values plotted along the x and y axes for a twodimensional graph • the values plotted along the x, y, and z axes for a threedimensional graph. CAChe for Windows User Guide Viewing map files 1. Select the arrow button in the left-hand parameter bar box to display a drop-down list of the parameters plotted along the graph axes. An example of left-hand and right-hand parameter bar boxes is shown below. 2. Choose the parameter whose values you want to view from the drop-down list. The right-hand parameter bar box displays the value for the currently selected graph position. Introduction To use the parameter bar Tutorials ª The value jumps incrementally to the next value in the range. Using 3. To increase or decrease the value of the selected parameter, select the up or down arrow buttons in the right-hand parameter bar box. Map file display options CAChe enables you to change the display of components of the two map file windows, including: CAChe for Windows User Guide each window’s parameter bar variables plotted along each graph axis Appendices • • • • • Understanding As you step through the range of values using the parameter bar, the marker in the graph window moves to the graph position that corresponds with the current value, and the conformation window displays the structure corresponding to the current parameter value. Customizing 4. The conformation window displays the conformation with the corresponding increased or decreased value, and the spherical marker moves to the graph location of the increased or decreased value. graph color options axis attributes graph attributes. 14-15 Chapter 14 - Investigating Low-energy Conformations Hiding the parameter bar You can choose to hide the parameter bar on either a conformation or a graph window. ª To hide the parameter bar 1. Activate the window whose parameter bar you want to hide. 2. Choose Options Show Parameter Bar. The check mark next to the drop-down list option disappears to show that this option is disabled. The parameter bar in the active window is no longer displayed. Changing the variables plotted along an axis In a two-dimensional graph, energy is plotted on the y axis. In a three-dimensional graph, energy is plotted on the z axis. You can change the variables plotted along any axis. This is useful for displaying combinations of search label values if you generated a map with more than two search labels. ª To change the variable plotted along any axis 1. Activate the graph window of the map file by clicking on it. 2. Choose View Graph Attributes to display the Graph Attributes dialog box. 14-16 CAChe for Windows User Guide Viewing map files 3. Select the arrow button in the X, Y, or Z boxes to display a dropdown list of variables which you can plot along that axis. 5. Change the constant value for search labels not assigned an axis by selecting the up or down arrow button in the box displaying that label’s current value. Tutorials The drop-down lists include any search labels that are not currently assigned to a graph axis. These search labels are also listed at the left side of the Graph Attributes dialog box. The value shown for search labels not currently displayed in the graph is the value at which those labels are held constant. Introduction 4. Choose the variable that you want to plot along the relevant axis from the X, Y, or Z drop-down lists. 6. Select OK to apply the changes to the graph and close the Graph Attributes dialog box. Using The value jumps incrementally based on the step size you defined for the search label. Changing graph color relative energy, where colors of the graph in the graph window represent the relative energies of graph locations and their equivalent conformations. • constant color, where the graph function is displayed in one color only. In trajectory files produced by Dynamics experiments, you can also choose to color a graph by: CAChe for Windows User Guide total energy kinetic energy potential energy temperature. Appendices • • • • Understanding • Customizing You can choose to color the graph function by: 14-17 Chapter 14 - Investigating Low-energy Conformations ª To change graph color 1. Activate the graph window of the map file by clicking on it. 2. Choose View Graph Attributes to display the Graph Attributes dialog box. 3. Select the arrow button in the Color By box to display a dropdown list of color options. 4. Choose a color option from the drop-down list. 5. Select OK to apply color options to the map file graph and to close the Graph Attributes dialog box. Changing axis attributes You can change the following axis attributes for individual axes: • • • ª edit the range of values along a graph axis change the axis title hide or display axes, axis labels, and the range of values for an axis. To change axis attributes 1. Activate the graph window of the map file by clicking on it. 2. Choose View Graph Attributes to display the Graph Attributes dialog box. 3. Select Attributes under the box of the axis whose display options you want to change. For example, if you want to change display options for the X axis, choose Attributes under the X box. The Axis Attributes dialog box is displayed. 14-18 CAChe for Windows User Guide 4. To change an axis title, select the Title tab to display the Axis Title text box. Tutorials Introduction Viewing map files 6. To change the range of values displayed on the axis, select the Range tab to display the Maximum and Minimum text boxes. 7. Click in the Minimum text box and type a minimum value for axis range. Using 5. Click in the Axis Title text box and type a title for the axis. 8. Click in the Maximum text box and type a maximum value for the axis range. 10. Select the Show Axis check box to hide the graph axis. The check mark is no longer displayed in the check box. 11. Select the Show Axis Title check box to hide the graph axis title. Customizing 9. To change axis labeling, select the Label tab to display a list of check boxes. The check mark is no longer displayed in the check box. 13. Select OK to save the axis display options and to close the Axis Attributes dialog box. 14. Select OK to close the Graph Attributes dialog box. CAChe for Windows User Guide 14-19 Appendices 12. Select the Show Axis Range check box to hide the graph axis range of values. Understanding The check mark is no longer displayed in the check box. Chapter 14 - Investigating Low-energy Conformations Changing graph attributes You can also choose to hide or display the following graph attributes: • • • • ª all graph axes all axis labels the graph function the spherical graph marker. To hide the graph axes of a graph window 1. Activate the graph window of the map file by clicking on it. 2. When the graph axes are visible, choose View Show Axes. The check mark next to the drop-down list option disappears to show that the option is disabled. The axes of the graph are no longer displayed in the graph window. ª To display the graph axes 1. Activate the graph window of the map file by clicking on it. 2. When the graph axes are hidden, choose View Show Axes. A check mark is displayed next to the drop-down list option to show that it is enabled. The axes of the graph are displayed in the graph window. ª To hide axis labels 1. Activate the graph window of the map file by clicking on it. 2. When axis labels are visible, choose View Show Axes Text. A check mark is no longer displayed next to the drop-down list option to show that it is disabled. The axis labels of the graph are no longer displayed in the graph window. ª To display axis labels 1. Activate the graph window of the map file by clicking on it. 14-20 CAChe for Windows User Guide Viewing map files 2. When axis labels are hidden, choose View Show Axes Text. 1. Activate the graph window of the map file by clicking on it. 2. When the graph function is visible, choose View Show Graph Function. A check mark is no longer displayed next to the drop-down list option to show that it is disabled. The graph function is no longer displayed in the graph window. ª Tutorials To hide the graph function To display the graph function 1. Activate the graph window of the map file by clicking on it. 2. When the graph function is hidden, choose View Show Graph Function. Using ª Introduction A check mark is displayed next to the drop-down list option to show that it is enabled. The axis labels of the graph are displayed in the graph window. A check mark is displayed next to the drop-down list option to show that it is enabled. The graph function is displayed in the graph window. 1. Activate the graph window of the map file by clicking on it. 2. When the graph marker is visible, choose View Show Marker. A check mark is no longer displayed next to the drop-down list option to show that it is disabled. The spherical graph marker is no longer displayed in the graph window. ª To display the graph marker Customizing To hide the graph marker Understanding ª 2. When the graph marker is hidden, choose View Show Marker. A check mark is displayed next to the drop-down list option to show that it is enabled. The spherical graph marker is displayed in the graph window. CAChe for Windows User Guide 14-21 Appendices 1. Activate the graph window of the map file by clicking on it. Chapter 14 - Investigating Low-energy Conformations Analyzing map files CAChe uses a conformational analysis window to list all of the conformations in your map file in ascending order of energy values. You can view the energy value of a conformation, plus the value of any other variable for that conformation. ª To open a conformational analysis window 1. Activate a graph window or conformation window by clicking on it. 2. Choose Window New Conformational Analysis Window. A conformational analysis window is displayed. The window lists the energies of the map file’s conformations in order of ascending energy. The first energy value listed corresponds to the lowest energy minimum in the analysis. The conformational analysis window is interactive with the graph and conformation window. 3. Select a conformation in the conformational analysis window by clicking on the conformation in the list. An asterisk appears next to the selected conformation in the list. The conformation in the conformation window displays the conformation you selected in the list. The spherical marker in the graph window moves to the corresponding energy value in the 14-22 CAChe for Windows User Guide Viewing map files graph. 6. Select the up or down arrow button in the left-hand box of the parameter bar to increase or decrease the value of the selected parameter in increments. The conformation window displays the conformation with the selected increased or decreased parameter value. The spherical marker in the graph window moves to the corresponding energy value in the graph. Tutorials 5. Select the arrow button in the right-hand box of the parameter bar to choose another parameter from a drop-down list. Using 4. The parameter bar at the bottom of the conformational analysis window displays a parameter value for the selected conformation. Introduction You may need to move the conformational analysis window to one side by clicking and dragging on its title bar to view the graph window and conformation window of the map file. Choose Window New Conformation Window or Window New Graph Window to display as many map file windows as you want. 8. When you have finished viewing the list of conformations, select the Windows close button at the upper right corner of the conformational analysis window to close the window. 9. When you have finished viewing the graph or a conformation CAChe for Windows User Guide 14-23 Understanding Double-click on a conformation listed in the conformational analysis window to display a larger conformation window. Use this second conformation window to view the same conformation as appears in the first smaller conformation window from a different angle or from a different perspective. Appendices 7. Do one of the following to view a conformation from a different perspective: Customizing The resulting conformation no longer corresponds with the conformation you selected in the conformational analysis window. The asterisk next to the selected conformation in the list disappears, indicating that the graph location and conformation displayed by the map file windows is not one of the conformations listed in the conformational analysis window. Chapter 14 - Investigating Low-energy Conformations from a different perspective, select the Windows close button at the upper right corner of extra copies of the graph or conformation window to close the window. Specifying analysis criteria You can change analysis settings to view selected portions only of the energy and conformational data in a map file. Control display of variable values in the following ways: ª • • display a percentage only of a range of values • display a specified number only of the lowest energy conformations • eliminate low-energy conformations if they belong to shallow energy wells that are separated from adjacent lower minima by low energy barriers. display only those conformations with a specified energy value To specify analysis criteria 1. Activate a conformational analysis window by clicking on it. 2. Choose Options Analysis Settings to display the Analysis Settings dialog box. 3. Select the arrow button in the Variable box to display a dropdown list of variables for which you can change settings. 14-24 CAChe for Windows User Guide Viewing map files Click in the kcal/mole text box and type the energy value for the range of low-energy conformations that you want to view. 6. To display a selected number only of low-energy conformations, do the following: ❏ Select the Show radio button so that it is enabled. ❏ Click in the lowest value minima text box and type the number of conformations with the lowest energy value that you want to view. 7. To eliminate minima occurring in shallow energy wells separated from adjacent lower minima by low energy barriers, do the following: ❏ Select the Coalesce minima which are separated by barriers smaller than radio button so that it is enabled. ❏ Click in the adjacent text box and type a value for the energy barrier. Energy wells separated by barriers smaller than the specified value result in the higher energy minimum being ignored. Appendices 8. Select Analyze to apply the specified analysis criteria to the map file windows, and to close the Analysis Settings dialog box. Tutorials Select the Show all minima with value less than radio button so that it is enabled. Using 5. To display only those low-energy conformations with a specified energy value, do the following: Customizing Click in the % text box and type the percentage value for the range of low-energy conformations that you want to view. Understanding Select the Show minima in the lowest radio button so that it is enabled. Introduction 4. To display a certain percentage only of low-energy conformations in the conformational analysis window, conformation window, and graph window, do the following: CAChe for Windows User Guide 14-25 Chapter 14 - Investigating Low-energy Conformations Animating map files Animating a map file runs through each conformation in the map file, while indicating the corresponding location on the energy graph for each location. You can visualize the following properties in each type of map file: ª • animating a rigid or optimized map shows how the conformation defined by each step in a search label affects energy • animating a sequence file shows a series of optimized structures • animating a reaction path starts at the transition state conformation and proceeds toward either the reactant or the product • animating a dynamics trajectory file shows you how long a sample remains in the same approximate conformation. If a conformation has a long life span, high energy barriers may exist that prevent the structure from changing. Such a conformation might be a good starting structure for further analysis. To animate a map file 1. Activate a graph window, conformation window, or conformational analysis window by clicking on the window. 2. Choose one of the following: ❏ ❏ Edit Animate Along Axis (if you activated a graph window) to display the Animate Along Horizontal Axis dialog box. Edit Animate All Conformations (if you activated a conformation window) to display the Animate All Conformations dialog box ❏ Edit Animate Analyzed Conformations (if you activated a conformational analysis window) to display the Animate Analyzed Conformations dialog box The Animate Along Horizontal Axis dialog box, Animate All Conformations dialog box, and Animate Analyzed 14-26 CAChe for Windows User Guide Viewing map files 3. Select the forward button, shown to the left, to animate your molecule. Tutorials Introduction Conformations dialog box function in an identical way. The Animate All Conformations dialog box is shown below. For a conformation window, the conformation window steps through each conformation in the map file. ❏ For a conformational analysis window, the conformation window steps through each conformation listed in the conformational analysis window. The molecule in the conformation window moves through each variable value in turn to display the range of conformations. At the same time, the spherical marker in the graph window moves to each corresponding graph location. The Conformation text box in the relevant Animate dialog box displays the position of the current conformation in the range of conformations. The box to the right of the Conformation text box displays the total number of conformations in the range. 4. To stop the animation at a particular conformation, select the stop button, shown to the left. The molecule stops moving in the conformation window and the marker remains stationary in the graph window. The CAChe for Windows User Guide 14-27 Customizing ❏ Understanding For a graph window, the conformation window steps through the conformations along the graph axis that is most closely aligned with the horizontal axis based on the graph’s current rotation. (By rotating the graph you can control which axis is animated, and which is held constant.) Appendices ❏ Using Depending on which type of window is active, one of the following occurs: Chapter 14 - Investigating Low-energy Conformations Conformation text box in the relevant Animate dialog box displays the position of the current conformation in the range of conformations. 5. To animate your molecule from the last to the first conformation, select the reverse button, shown to the left. The molecule in the conformation window moves through each variable value to display the range of conformations in reverse order. At the same time, the spherical marker in the graph window moves in reverse order to each corresponding graph location. 6. To display a conformation in a particular location in the range, do one of the following: In the relevant Animate dialog box, select the up or down arrow buttons in the Conformation text box to increase or decrease the value displayed. In the relevant Animate dialog box, click in the Conformation text box and type the step number of the conformation you want to view. The conformation at the specified position in the range is displayed in the conformation window, and the spherical marker in the graph window displays the corresponding graph location. 7. To display a conformation with a particular variable value, do the following: In the graph window, conformation window, or conformational analysis window, select the arrow button in the left-hand parameter bar box and choose a variable from the drop-down list. Select the up or down arrow button in the right-hand parameter bar box to choose a value for the variable. The conformation with the specified variable value is displayed in the conformation window, and the spherical marker in the graph window displays the corresponding graph location. 8. To display a conformation in the conformational analysis list, double-click on the conformation in the list. A second conformation window opens, displaying the selected 14-28 CAChe for Windows User Guide Viewing map files The conformation window displays the first conformation in the range. The marker in the graph window moves to the beginning of the graph. 10. To view the last conformation in the range, select the forward button, shown to the left, in the Animate Along Horizontal Axis, Animate All Conformations, or Animate Analyzed Conformations dialog box. Tutorials 9. To view the first conformation in the map file range of conformations, select the rewind button, shown to the left, in the Animate Along Horizontal Axis, Animate All Conformations, or Animate Analyzed Conformations dialog box. Introduction conformation. Select the up or down arrow buttons in the Step by text box to increase or decrease the value displayed. ❏ Click in the Step by text box in the Animate Along Horizontal Axis, Animate All Conformations, or Animate Analyzed Conformations dialog box, and enter the number of steps by which you want to animate the molecule. 12. To finish the animation, do one of the following: Select Done in the relevant Animate dialog box to close the dialog box and to display the conformation at which you finished the animation in the conformation window. ❏ Select Cancel to close the relevant Animate dialog box and to display the conformation you had prior to animating the map file. Appendices ❏ Customizing ❏ Understanding 11. To modify the range of steps by which you are animating the molecule, do one of the following: Using The conformation window displays the last conformation in the range. The marker in the graph window moves to the end of the graph. CAChe for Windows User Guide 14-29 Chapter 14 - Investigating Low-energy Conformations Saving map files CAChe offers two saving options that are specific to map files. You can save the following: ª • the current conformation in the conformation window as a new chemical sample file • selected conformations in a conformational analysis window as new chemical sample files. You can save one or more conformations from the conformational analysis window. Each conformation is saved into a separate chemical sample file. To save a conformation in the conformation window as a chemical sample file 1. Activate the conformation window which displays the conformation that you want to save as a chemical sample file. 2. Choose FileSave As Chemical Sample to display the Save As dialog box. 3. Click in the File name text box and type the name of the new chemical sample file. 4. Select the arrow button in the Save as type box and choose Chemical Sample (*.csf) from the drop-down list. 5. Select Save to save the conformation in the chemical sample file and to close the Save As dialog box. ª To save conformations in the conformational analysis window as chemical sample files 1. Select one or more conformations in a conformational analysis window by clicking on the conformations. 2. Choose File Save Selected Conformations As to display the Save As dialog box. 3. Click in the File name text box and type the name of the new chemical sample file. The file name you enter will apply to all the files you are saving, with each file name appended with the number that corresponds 14-30 CAChe for Windows User Guide Viewing map files to that structure’s place within the energy list. For example, chem005.csf would be the fifth lowest energy in the list. Appendices Understanding Customizing Using Tutorials 5. Select Save to save the conformations in separate chemical sample files and to close the Save As dialog box. Introduction 4. Select the arrow button in the Save as type box and choose Chemical Sample (*.csf) from the drop-down list. CAChe for Windows User Guide 14-31 Chapter 14 - Investigating Low-energy Conformations 14-32 CAChe for Windows User Guide 15 15 Overview This chapter describes the various types of experiments that CAChe offers to predict electron distribution in your chemical sample, including experiments that generate: electron density surfaces electrostatic potential surfaces molecular orbital surfaces. Generating electron density colored by electrostatic potential 15-3 Generating an electron density surface colored by susceptibility 15-4 Generating an electron density surface colored by superdelocalizability 15-5 Generating an electrostatic potential surface 15-6 Investigating molecular orbital energies 15-7 Calculating HOMO and LUMO energies 15-7 Calculating HOMO -5 to LUMO +4 energies 15-8 Calculating all molecular orbital energies 15-8 Viewing a surface Hiding a surface Interpreting surface color CAChe color tables Interpreting surfaces Changing display options for surfaces 15-9 15-10 15-11 15-13 15-15 15-18 Understanding Investigating electron density surfaces 15-2 Appendices Contents Customizing Using • • • Tutorials Introduction Investigating Electron Distribution Chapter 15 - Investigating Electron Distribution Investigating electron density surfaces CAChe generates surfaces from the following experiments: • • • • • • • • • • • electron density nucleophilic susceptibility electrophilic susceptibility radical susceptibility nucleophilic superdelocalizability electrophilic superdelocalizability radical superdelocalizability electrostatic potential HOMO and LUMO HOMO-5 to LUMO+4 all molecular orbitals. You can also use CAChe procedures for generating electron density surfaces to: • optimize the geometry of the molecule first using classical mechanics, quantum mechanics, or a combination of both. You can combine all optimization procedures with generating electron density for your sample. NOTE You cannot use procedures that involve MOPAC or ZINDO in Personal CAChe. 15-2 CAChe for Windows User Guide Investigating electron density surfaces The following example shows a line drawing of a furan molecule, and an electron density surface for the same molecule, colored to show electrostatic potential, which indicates furan’s charge distribution. Tutorials An electron density isosurface for an electron probability density of 0.01 e-/Å3 is generated. This surface is colored to reflect the electrostatic potential at every point on the surface. Surface color changes to reflect the magnitude and polarity of the electrostatic potential. Using You can generate an electron density surface colored by electrostatic potential to view charge distribution in a molecule. The threedimensional electron density isosurface that is produced gives a more accurate representation of the true shape of your chemical sample. Introduction Generating electron density colored by electrostatic potential Positive electrostatic potential The colors displayed depend on the current colors assigned to each of the color indexes. Appendices Refer to “CAChe color tables”, p 15-13, for details about assigned colors. Understanding Customizing Negative electrostatic potential CAChe for Windows User Guide 15-3 Chapter 15 - Investigating Electron Distribution Generating an electron density surface colored by susceptibility You can generate an electron density surface colored by: • • • nucleophilic susceptibility electrophilic susceptibility radical susceptibility. Susceptibility provides clues about which parts of your chemical sample are vulnerable to an attack by three different type of species: electrophiles, nucleophiles, and radicals. After an optimization step, the electron distribution of orbitals near your sample’s frontier orbitals (molecular orbitals near the highest occupied molecular orbital or HOMO and lowest unoccupied molecular orbital or LUMO) are evaluated. A three-dimensional electron density isosurface is created that can be superimposed over your chemical sample. Shape and color give you clues to the relative reactivity of different sites. Reactive centers can be easily identified as the centers of brightly colored “bullseye” patterns on the isosurface. NOTE Susceptibility and superdelocalizability experiments (described in the next section) give similar results, but susceptibility experiments are recommended because they are widely applicable. The following example shows a line drawing of a furan molecule, and an electron density surface for the same molecule, colored to show susceptibility to attack by an electrophile. Negative electrostatic potential Positive electrostatic potential 15-4 CAChe for Windows User Guide Investigating electron density surfaces Generating an electron density surface colored by superdelocalizability You can generate an electron density surface colored by: radical superdelocalizability. Superdelocalizability is similar to susceptibility, but is more sensitive to the relationship between the frontier orbital energies of your chemical sample versus any specific electrophilic, nucleophilic, or radical species that would be reacting with your sample. In most cases, susceptibility yields similar results without dependencies on reagent energies. Superdelocalizability output is a three-dimensional electron density isosurface with colors reflecting the relative differences in reactivity of the different parts of your sample. Tutorials electrophilic superdelocalizability Introduction nucleophilic superdelocalizability Using • • • • your sample’s LUMO energy is greater than the default energy of -8eV for electrophilic superdelocalizability, -2eV for nucleophilic superdelocalizability, and -5eV for radical superdelocalizability • the energies of the attacking molecule’s frontier orbitals are between the HOMO and LUMO energies of your sample. Refer to “Investigating molecular orbital energies”, p 15-7, for information on how to perform a frontier orbitals experiment to determine HOMO and LUMO energies for your chemical sample, and the attacking reagent molecule. CAChe for Windows User Guide 15-5 Understanding your sample’s HOMO energy is less than the default energy of -8eV for electrophilic superdelocalizability, -2eV for nucleophilic superdelocalizability, and -5eV for radical superdelocalizability Appendices • Customizing Superdelocalizability experiments produce more accurate results in the following conditions: Chapter 15 - Investigating Electron Distribution Generating an electrostatic potential surface CAChe investigates the electrostatic potential of a sample by generating an electronic wavefunction using a quantum mechanics computational application and using the data to create a threedimensional surface. An electrostatic potential isosurface is created that shows both the polarity of the potential and where in space the potential equals ±0.03 a.u. (±18 Kcals/mol, ±75 kJ/mol). An electrostatic potential surface is particularly useful if you are interested in the reactivity of your sample to a charged or polar reactant. CAChe procedures for generating an electrostatic potential surface also enable you to: • optimize the geometry of the molecule first using classical mechanics, quantum mechanics, or a combination of both. You can combine all optimization procedures with generating electron density for your sample. NOTE You cannot use procedures that involve MOPAC or ZINDO in Personal CAChe. 15-6 CAChe for Windows User Guide Investigating molecular orbital energies The following three experiments calculate the energies and shapes of your sample’s molecular orbitals by generating an electronic wavefunction in a quantum mechanical computational application: HOMO and LUMO HOMO -5 to LUMO +4 all molecular orbitals. CAChe procedures for calculating molecular orbital energies also enable you to: • Tutorials • • • Introduction Investigating molecular orbital energies optimize the geometry of the molecule first using classical mechanics, quantum mechanics, or a combination of both. Using You can combine all optimization procedures with generating electron density for your sample. NOTE You cannot use procedures that involve MOPAC or ZINDO in Personal CAChe. Appendices The energy of the HOMO is the energy required to remove an electron from the HOMO (ionization energy), and the energy of the LUMO is the energy added to the sample when an electron is added to the LUMO (electron affinity). Understanding A HOMO and LUMO experiment uses a quantum mechanical application to generate an electronic wavefunction and calculate the energies and shape of the highest occupied molecular orbital (HOMO) and lowest unoccupied molecular orbital (LUMO) of your chemical sample. Customizing Calculating HOMO and LUMO energies CAChe for Windows User Guide 15-7 Chapter 15 - Investigating Electron Distribution The following example shows calculated HOMO and LUMO energies for a furan molecule, colored to show electrostatic potential, which indicates furan’s charge distribution. HOMO energies LUMO energies Calculating HOMO -5 to LUMO +4 energies This experiment is similar to the HOMO and LUMO experiment described in the previous section. The difference is that a total of nine molecular orbitals are generated, ranging from HOMO -5 to LUMO +4. Often, large molecules have several orbitals clustered near the HOMO and LUMO. Viewing the shapes and energies of these orbitals can be useful. Calculating all molecular orbital energies This experiment calculates the shapes and energies of all of the molecular orbitals in your chemical sample. Choose this experiment when the orbitals you are interested in lie outside the HOMO -5 to LUMO +4 range. Do not use this experiment without careful consideration, simply because it requires a significant amount of disk space to store all the orbitals for large molecules. 15-8 CAChe for Windows User Guide Viewing a surface When you run an experiment that generates a surface for your molecule, a surface file (*.iso) is created, which contains information that CAChe uses to build a three-dimensional molecular surface representing electronic properties. You view this shaded surface superimposed on your molecule in the chemical sample file. You do not open the isosurface file to view the surface. To display a surface Tutorials ª Introduction Viewing a surface 1. Choose File Open to display the Open dialog box. 2. Double-click on the Cache folder to open it. 4. Click and drag on the scroll bar of the scrolling list to locate the relevant chemical sample file for which you generated the surface. Using 3. Select the arrow button in the Files of type box and choose Chemical sample (*.csf) from the drop-down list. 5. Double-click on the required chemical sample file to open it. The chemical sample file opens. The Show Surfaces dialog box lists all the surfaces generated for the chemical sample file. CAChe for Windows User Guide 15-9 Appendices Understanding Customizing 6. Choose Analyze Show Surfaces to display the Show Surfaces dialog box. Chapter 15 - Investigating Electron Distribution 7. Select one or more surfaces by clicking on the required surfaces in the Displayed surfaces list. A check mark is displayed next to the selected surfaces. 8. Select OK to close the Show Surfaces dialog box. CAChe processes surface information for the chemical sample and displays the surface superimposed on the molecule in the workspace. The example below shows electrophilic susceptibility for furan superimposed on a furan molecule. Hiding a surface You can hide surfaces individually, or choose to hide all surfaces in a chemical sample file. ª To hide surfaces individually 1. Choose Analyze Show Surfaces to display the Show Surfaces dialog box. All surfaces currently displayed in the chemical sample file are shown in the Displayed surfaces list with a check mark next to the surface name. 15-10 CAChe for Windows User Guide Viewing a surface 2. Select the surface that you want to hide by clicking on it in the Displayed surfaces list. The check mark is no longer displayed next to the surface name. ª To hide all surfaces Using 1. Choose Analyze Surface Attributes to display the Surface Attributes dialog box. Tutorials The selected surface is no longer displayed in the workspace. Introduction 3. Select OK to close the Show Surfaces dialog box. 2. Select the Display Surfaces check box so that it is disabled. Customizing 3. Select OK to hide all surfaces in the chemical sample file and to close the Surface Attributes dialog box. Surfaces are no longer displayed in the workspace. Electron density, susceptibility, and superdelocalizability experiments all generate electron density isosurfaces with colors representing a second chemical property. The transition from one color to another occurs at a threshold value. You can view the actual value associated with each color transition for a surface, as described in the next section, “Viewing color threshold values”. Understanding The use of color in other surface experiments such as investigating electrostatic potential and generating molecular orbitals is explained in the section “CAChe color tables”, p 15-13. Appendices Interpreting surface color CAChe for Windows User Guide 15-11 Chapter 15 - Investigating Electron Distribution Viewing color threshold values ª To view values associated with surface color thresholds 1. Select a surface by clicking on its label with the Select tool. The surface is highlighted in the workspace to show that it is selected. 2. Choose Analyze Surface Legend to display the Surface Legend dialog box. The Surface Legend dialog box displays the threshold value of transition from one surface color to another for the selected surface. The colors displayed depend on the current colors assigned to each of the color indexes listed in the following CAChe color tables. NOTE Any color indexes you selected previously using the View Color Palette option will replace the default colors. 15-12 CAChe for Windows User Guide Viewing a surface The following tables list colors and color index values for properties calculated by CAChe experiments. The colors listed are the default colors present when you install the software. If you have changed colors using the color palette, only the indexes in the table below will be accurate. Tutorials You can reset colors to the default values by deleting the cache.ini file, located in the same folder as cache.exe. Deleting cache.ini returns all CAChe defaults to their original settings. Introduction CAChe color tables Electron density surfaces Relative value of surface property 1 White, 255, 255, 255 Highest 2 Gray, 150, 150, 150 3 Red, 255, 0, 51 4 Yellow, 255, 255, 51 5 Green, 0, 255, 0 6 Blue, 51, 51, 255 7 Purple, 255, 0, 255 8 Cyan, 0, 255, 255 Understanding Customizing Color index Color, RGB values Using The following applies to electron density surfaces colored by electrostatic potential, superdelocalizability, or susceptibility. Appendices Lowest CAChe for Windows User Guide 15-13 Chapter 15 - Investigating Electron Distribution Electrostatic potential polarity Color index Color, RGB values Electrostatic potential and occupied MO polarity 3 Red, 255, 0, 51 Positive 6 Blue, 51, 51, 255 Negative Occupied molecular orbital polarity Color index Color, RGB values Electrostatic potential and occupied MO polarity 6 Blue, 51, 51, 255 Positive 5 Green, 0, 255, 0 Negative Partial charge and unoccupied molecular orbital polarity Color index Color, RGB values Partial charge and unoccupied MO polarity 3 Red, 255, 0, 51 Positive 4 Yellow, 255, 255, 51 Negative Bond strain 15-14 Color index Color, RGB values Bond strain (kJ/mole) 6 Blue, 51, 51, 255 0 - 0.99 5 Green, 0, 255, 0 1 - 9.99 CAChe for Windows User Guide Bond strain (kJ/mole) 4 Yellow, 255, 255, 51 10 - 99.99 3 Red, 255, 0, 51 100 - 999.99 Bond order and bond type Bond order, type 5 Green, 0, 255, 0 0 - 0.60, Weak 3 Red, 255, 0, 51 0.61 - 1.60, Single 4 Yellow, 255, 255, 51 1.61 - 2.60, Double 8 Cyan, 0, 255, 255 >2.60, Triple 1 White, 255, 255, 255 Ionic 7 Purple, 255, 0, 255 Coordination Using Color index Color, RGB values Tutorials Color index Color, RGB values Introduction Viewing a surface Surface files that represent electron density properties are referred to as isosurface files, depicting locations around your sample where the electron probability density is equal. The electron density at the surface is 0.01 e/Å3. Although the electron density surface by itself is useful, CAChe adds another property on top of it. The electrostatic potential of your sample is calculated and added to the electron density surface as color. CAChe for Windows User Guide 15-15 Understanding Electron density surfaces Appendices The following section describes how to interpret the appearance of the three-dimensional surfaces that CAChe produces for different types of experiment. Customizing Interpreting surfaces Chapter 15 - Investigating Electron Distribution Along the electron isodensity surface, different magnitudes of electrostatic potential are represented by different colors. The colors displayed depend on the current colors assigned to each of the color indexes listed in the earlier color tables. Susceptibility and frontier density All three of the frontier density experiments (nucleophilic, electrophilic, and radical) generate an electron density surface similar to the electron density experiment. However, the surface colors represent reactivity based on active orbitals near the frontier orbitals (HOMO and LUMO). In the frontier density surface, locations in your chemical sample that are susceptible to attack (nucleophilic, electrophilic, or free radical) are identified by bright bull’s eye patterns. The remainder of the surface is colored to indicate the relative reactivity towards attack. Use the Surface Legend dialog box, accessed by choosing Analyze | Surface Legend, to determine the reactivity represented by each color. The colors corresponding to larger values in the surface legend represent more reactive sites. Superdelocalizability Each of the three superdelocalizability experiments (electrophilic, nucleophilic, and radical) generates an electron isodensity surface. The surface colors represent reactivity based on active orbitals near the frontier orbitals (HOMO and LUMO). The nucleophilic experiment creates an electron density isosurface with colors reflecting the relative reactivity of your sample to a nucleophilic reagent. Similarly, the electrophilic and radical superdelocalizability routines build surfaces that show where an electrophile or a radical has the highest probability of initiating a reaction. Use the Surface Legend dialog box, accessed by choosing Analyze Surface Legend, to determine the reactivity represented by each color. The colors corresponding to larger values in the surface legend represent more reactive sites. 15-16 CAChe for Windows User Guide Viewing a surface your sample’s HOMO energy is less than the default energy of -8eV for electrophilic superdelocalizability, -2eV for nucleophilic superdelocalizability, and -5eV for radical superdelocalizability • your sample’s LUMO energy is greater than the default energy of -8eV for electrophilic superdelocalizability, -2eV for nucleophilic superdelocalizability, and -5eV for radical superdelocalizability • the energies of the attacking molecule’s frontier orbitals are between the HOMO and LUMO energies of your sample. Tutorials • Using Superdelocalizability experiments produce more accurate results in the following conditions: Introduction Susceptibility (frontier density) and superdelocalizability are similar, and so are the surfaces they generate. However, susceptibility experiments and surfaces yield more accurate results for a wider range of chemical samples. Molecular orbitals There are three different experiments that produce molecular orbital surface files: all molecular orbitals. The HOMO and LUMO experiment creates only two surface files, one for your sample’s highest occupied molecular orbital (HOMO) and one for its lowest unoccupied molecular orbital (LUMO). Since these two orbitals often determine your sample’s reactivity, this experiment can be quite useful. Note that if there are degenerate HOMOs or LUMOs, all will be generated. The HOMO-5 to LUMO+4 experiment generates a total of eleven orbital surfaces, if your sample has that many, including the HOMO and LUMO. The all molecular orbitals experiment calculates isosurfaces for all of your sample’s molecular orbitals. CAChe for Windows User Guide 15-17 Understanding HOMO-5 to LUMO+4 Customizing HOMO and LUMO Appendices • • • Chapter 15 - Investigating Electron Distribution The MO surface files created by all three of these experiments depict surfaces with an electron probability amplitude of 0.07 a.u. The default molecular orbital colors for occupied orbitals are green and blue and the defaults for unoccupied orbitals are red and yellow. Color assignment with respect to positive and negative phase is arbitrary, so identical calculations can result in surfaces with opposite colors. You can switch these colors using the color palette, accessed by choosing View Color Palette. If you change green and blue in the color palette to two different colors, the occupied orbital surfaces are displayed in the nearest colors to green and blue. You can open the surfaces of several molecular orbitals at the same time by choosing Analyze Show Surfaces. Electrostatic potential An electrostatic potential surface represents the distance from your sample at which a proton experiences a set attraction or repulsion. The value of the electrostatic potential on the surface is ±0.03 a.u. (±18 kCals/mol, ±75 kJ/mol). Electrostatic potential is normally represented by red and blue to indicate positive and negative potential, respectively. You can switch these colors using the color palette, accessed by choosing View Color Palette. Changing display options for surfaces You can choose whether to display surfaces as: • • • • 15-18 shaded three-dimensional surfaces dotted three-dimensional surfaces wireframe three-dimensional surfaces labeled or unlabeled. CAChe for Windows User Guide Viewing a surface Viewing shaded surfaces • the front of the surface only, which displays the portion of the surface facing you • the back of the surface only, which displays the back of the surface as a shell in which the molecule is floating. Introduction When viewing surfaces as shaded and solid, you have the option of viewing: ª To display shaded surfaces 1. Select a surface by clicking on its label with the Select tool. Tutorials Displaying surfaces as shaded is the default view option. 4. Do one of the following: ❏ To display the front of the surface, select the Show Front check box so that it is enabled. ❏ To display the back of the surface, select the Show Back check box so that it is enabled. 5. Select OK to view the selected surface as the front or back of a solid shaded surface, and to close the Surface Attributes dialog box. CAChe for Windows User Guide 15-19 Appendices 3. Select the Shaded radio button so that it is enabled. Understanding Customizing Using 2. Choose Analyze Surface Attributes to display the Surface Attributes dialog box. Chapter 15 - Investigating Electron Distribution Viewing dotted surfaces When viewing surfaces as dotted, you can choose the density of the surface rendering. ª To display dotted surfaces 1. Select a surface by clicking on its label with the Select tool. 2. Choose Analyze Surface Attributes to display the Surface Attributes dialog box. 3. Select the Dotted radio button so that it is enabled. 4. Do one of the following: ❏ Select the up or down arrow button in the Dot Intensity text box to increase the dot intensity to a maximum of 9. ❏ Click in the Dot Intensity text box and type an integer between 1 and 9. Viewing wireframe surfaces When viewing surfaces as wireframe, you have the option of viewing only the portion of the wireframe which is parallel to: • • • ª the x, y plane of your chemical sample the y, z plane of your chemical sample the x, z plane of your chemical sample. To display wireframe surfaces 1. Select a surface by clicking on its label with the Select tool. 2. Choose Analyze Surface Attributes to display the Surface Attributes dialog box. 3. Select the Wireframe radio button so that it is enabled. 4. To view the portion of the wireframe which is parallel to the x, y plane, select the X-Y Planes check box so that it is enabled. 5. To view the portion of the wireframe which is parallel to the x, y plane, select the Y-Z Planes check box so that it is enabled. 15-20 CAChe for Windows User Guide Viewing a surface 6. To view the portion of the wireframe which is parallel to the x, y plane, select the X-Z Planes check box so that it is enabled. Displaying surface labels is useful for selecting a surface and for viewing the name of a surface. Displaying surfaces as labeled is the default view option. ª To view a surface label ❏ Choose Edit Select All. ❏ Press Ctrl A. ❏ Click anywhere in the workspace background. Using 1. Do one of the following to select everything in the workspace: Tutorials If you have many surfaces displayed at one time, you may find several labels cluttering up the workspace. Introduction Viewing labeled surfaces Every object in the workspace is highlighted to show that it is selected. 2. Choose Analyze Surface Attributes to display the Surface Attributes dialog box. 3. Select the Show Label check box so that it is enabled. ª To hide a surface label 1. Select a surface by clicking on its label with the Select tool. The surface is highlighted to show that it is selected. 2. Choose Analyze Surface Attributes to display the Surface Attributes dialog box. 3. Select the Show Label check box so that it is disabled. 4. Select OK to hide labels for all currently selected surfaces and to close the Surface Attributes dialog box. All surfaces in the workspace are no longer labeled. CAChe for Windows User Guide 15-21 Appendices All surfaces in the workspace are now labeled. Understanding Customizing 4. Select OK to show labels for all surfaces currently being displayed and to close the Surface Attributes dialog box. Chapter 15 - Investigating Electron Distribution 15-22 CAChe for Windows User Guide 16 16 This chapter describes the following CAChe experiments that calculate atom and bond properties: the atomic partial charge experiment, which displays a chemical sample with atoms sized to reflect their partial charge, and enables you to view possible reactivity sites and the most polar bonds in a sample • the bond order experiment, which displays a chemical sample with bonds scaled or colored to reflect calculated bond order • the bond strain experiment, which displays a chemical sample with bond strain represented by colors that indicate the order of magnitude of the strain energy. Calculating atomic partial charge Calculating bond properties Calculating bond order Calculating bond strain Viewing atom and bond properties 16-2 16-4 16-4 16-5 16-7 Displaying partial charge and bond order 16-7 Displaying partial charge with labeled atoms 16-8 Displaying partial charge with scaled and colored atoms 16-10 Displaying bond order and partial charge 16-11 Displaying bond order with color 16-11 Displaying bond order by scaling bond radius 16-12 Displaying bond strain 16-13 Appendices Contents Understanding Customizing • Using Overview Tutorials Introduction Investigating Atom and Bond Properties Chapter 16 - Investigating Atom and Bond Properties Calculating atomic partial charge Quantum mechanical methods are used to optimize the sample and determine the partial charge for all atoms. Both partial charge and bond order are calculated at the same time, so you do not need to run separate experiments to get both properties. After you run a partial charge experiment, you can choose to view your chemical sample with atoms sized to reflect their partial charge. This enables you to view possible reactivity sites more clearly, and shows you which bonds in your sample are most polar. The example below shows phenol with atoms sized to reflect partial charge. Most acidic hydrogen If you know the partial charges on atoms in two reagents, you have a good idea about which part of each molecule is likely to interact. You can also view the relative acidity of different hydrogens more clearly, because the largest positive partial charge is likely to be the most acidic. 16-2 CAChe for Windows User Guide Calculating atomic partial charge • optimize the geometry of the molecule first using classical mechanics, quantum mechanics, or a combination of both. You can combine all of the optimization procedures with calculating atomic partial charge for your sample. Appendices Understanding Customizing Using NOTE You cannot use procedures that involve MOPAC or ZINDO with Personal CAChe. Tutorials CAChe procedures for calculating atomic partial charge also enable you to: Introduction If you have run an experiment that employed a quantum mechanical procedure previously, this information is already present in the chemical sample file and you do not need to re-compute it unless you have changed the geometry of the molecule. CAChe for Windows User Guide 16-3 Chapter 16 - Investigating Atom and Bond Properties Calculating bond properties CAChe offers the following bond property experiments: • • calculated bond order calculated bond strain. Calculating bond order You can calculate bond order using one of the quantum mechanical applications. CAChe determines the experimental bond order of each bond in your chemical sample. Both bond order and partial charge are calculated at the same time, so you do not need to run separate experiments to get both properties. If you have run an experiment that employed a quantum mechanical procedure previously, this information is already present in the chemical sample file and you do not need to re-compute it unless you have changed the geometry of the molecule. CAChe procedures for calculating bond order also enable you to: • optimize the geometry of the molecule first using classical mechanics, quantum mechanics, or a combination of both. You can combine all of the optimization procedures with calculating bond order for your sample. NOTE You cannot use procedures that involve MOPAC or ZINDO with Personal CAChe. After you run a calculated bond order experiment, you can view bonds that are scaled to reflect calculated bond order. You can change the display ratio of a bond order of one to your choice of measurement in Angstroms. Many models use alternating single and double bonds (resonance structures) to represent delocalized π electrons in rings. For example, in benzene, all of the C-C bonds are the same length. This could not be the case if half the bonds are double, and half are single. Calculating bond order using a CAChe experiment and displaying the results by scaling bond cylinders by calculated bond order shows 16-4 CAChe for Windows User Guide Calculating bond properties CAChe examines bond angles and atom distances in your molecule and compares the geometry to the classical mechanical ideal value. Deviations from the ideal accumulate a relative energy quantity known as steric or potential energy. CAChe calculates these deviations from the ideal to discover bond strain. After you run a bond strain experiment, you can display bond strain represented by colors that indicate the order of magnitude of the CAChe for Windows User Guide 16-5 Understanding Bond strain is a purely classical mechanical quantity, calculated every time a classical mechanical calculation is performed. As a result, this property is often a subset of the results when you experiment with other properties. Appendices Calculating bond strain Customizing Using Tutorials The following example shows a benzene molecule with bonds sized to reflect calculated bond orders. Introduction that all the C-C bond orders are equal and greater than the C-H bond orders. The cylinders between carbons are roughly one and a half times thicker than those between carbons and hydrogens, illustrating the bond order of 1.5. Chapter 16 - Investigating Atom and Bond Properties strain energy. Tension and compression can both lead to strain and are indistinguishable. For example, red indicates a high bond strain value and is indicative of a structure that has high potential (or steric) energy. Refer to “CAChe color tables”, p 15-13, for details of the bond strain colors and energy values they represent. 16-6 CAChe for Windows User Guide Viewing atom and bond properties atoms labeled with partial charge atoms sized and colored to reflect partial charge. Similarly, you can view bond order in your chemical sample file by choosing a CAChe modeling style, or customizing display of bond order, by choosing one of the following two view options: bonds colored by bond order When bonds are colored by bond order, CAChe determines which of the standard bond types is closest to the bond order of each bond in your sample. A calculated bond order of 1.5 is rounded to 1.0, and is colored red, the default color of a single bond. Because there are no colors for fractional bond orders, it is often useful to display bond order by both color and by scaling bond radius. ª Customizing Displaying partial charge and bond order To view atomic partial charge and calculated bond order 1. Run an atomic partial charge or calculated bond order experiment on your chemical sample file. 2. Choose View Partial Chg and Calc. Bond Order. CAChe colors atoms by partial charge polarity where positively charged atoms are red and negatively charged atoms are yellow. Atoms are also labeled with partial charge and scaled to reflect partial charge. Bonds are colored by calculated bond order, according to the CAChe color tables. The following example shows a furan molecule viewed by CAChe for Windows User Guide Using scale the radius of bonds by bond order. 16-7 Understanding • • Appendices • • Tutorials After you run a partial charge or bond order experiment, you can view atomic partial charge in your chemical sample file by choosing a CAChe modeling style, or customizing the display of partial charge, using one of the following two view options: Introduction Viewing atom and bond properties Chapter 16 - Investigating Atom and Bond Properties partial charge and calculated bond order. Refer to “CAChe color tables”, p 15-13, for further details about bond colors. Displaying partial charge with labeled atoms ª To view atoms labeled with partial charge 1. Run an atomic partial charge or calculated bond order experiment on your chemical sample file. 2. Choose View Atom Attributes to display the Atom Attributes dialog box. 16-8 CAChe for Windows User Guide Tutorials Introduction Viewing atom and bond properties Using 3. Select the Label tab to display a list of labeling options for atoms. 4. Select the Partial Charge check box so that it is enabled. 5. Select OK to close the Atom Attributes dialog box. Appendices Understanding Customizing Atoms in the workspace are labeled with partial charge, as shown in the following example. CAChe for Windows User Guide 16-9 Chapter 16 - Investigating Atom and Bond Properties Displaying partial charge with scaled and colored atoms ª To view partial charge with scaled and colored atoms 1. Run an atomic partial charge or calculated bond order experiment on your chemical sample file. 2. Choose View Atom Attributes to display the Atom Attributes dialog box. 3. Select the Color tab to display a list of labeling options for atoms. 4. Select the Partial Charge Polarity (+/-) check box so that it is enabled. 5. Select OK to close the Atom Attributes dialog box. Atoms in the workspace are colored by partial charge polarity, where positively charged atoms are displayed on screen in red and negatively charged atoms are displayed on screen in yellow, as shown in the following example. 16-10 CAChe for Windows User Guide Viewing atom and bond properties Displaying bond order and partial charge 2. Choose View Partial Chg and Calc. Bond Order. CAChe colors atoms by partial charge polarity where positively charged atoms are red and negatively charged atoms are yellow. Atoms are also labeled with partial charge and scaled to reflect partial charge. Bonds are colored by calculated bond order, according to the CAChe color tables. Refer to “CAChe color tables”, p 15-13, for further details about bond colors. Tutorials 1. Run an atomic partial charge or calculated bond order experiment on your chemical sample file. Introduction To view atomic partial charge and calculated bond order Using ª Displaying bond order with color To view bond order with colored bonds 1. Run an atomic partial charge or calculated bond order experiment on your chemical sample file. Appendices Understanding 2. Choose View Bond Attributes to display the Bond Attributes dialog box. Customizing ª CAChe for Windows User Guide 16-11 Chapter 16 - Investigating Atom and Bond Properties 3. Select the Color tab to display a list of color options for bonds. 4. Select the Calculated Bond Order radio button so that it is enabled. 5. Select OK to close the Bond Attributes dialog box. Bonds are colored to reflect bond order, according to the CAChe color tables. Refer to “CAChe color tables”, p 15-13, for further details about bond colors. Displaying bond order by scaling bond radius ª To view bond order by scaled bond radius 1. Run an atomic partial charge or calculated bond order experiment on your chemical sample file. 2. Choose View Bond Attributes to display the Bond Attributes dialog box. 3. Select the Shape tab to display a list of shape options for bonds. 16-12 CAChe for Windows User Guide Viewing atom and bond properties 5. Click in the is displayed as text box and type a value for the radius to which bonds with a formal bond order of 1 will be scaled. The value must be between 0.001 and 0.999. 6. Select OK to close the Bond Attributes dialog box. Bonds are scaled to the specified radius. Introduction 4. Select the arrow button in the Scale cylinders such that box and choose Formal Bond Order of 1 from the drop-down list. ª Tutorials Displaying bond strain To view bond strain 2. Choose View Bond Attributes to display the Bond Attributes dialog box. 3. Select the Color tab to display a list of color options for bonds. Using 1. Run a bond strain experiment on your chemical sample file. 4. Select the Calculated Bond Strain radio button so that it is enabled. 5. Select OK to close the Bond Attributes dialog box. Appendices Understanding Refer to “CAChe color tables”, p 15-13, for further details about bond colors. Customizing Bonds are colored to reflect bond strain, according to the CAChe color tables. CAChe for Windows User Guide 16-13 Chapter 16 - Investigating Atom and Bond Properties 16-14 CAChe for Windows User Guide 17 17 Overview This chapter describes the CAChe experiments that investigate the conformations of your molecule during a chemical reaction, including the following transition state experiments: • • search for saddle, which generates a transition state structure • verify transition, which calculates the molecule’s vibrational transitions to verify the transition state geometry. Tutorials Introduction Investigating Reactions Using refine transition, which refines a transition state structure using a minimize gradient calculation map reaction, which produces an optimized energy map by varying one or two search labels and measuring the energy of each resulting conformation using quantum mechanics • find reaction paths, which generates structures in a reaction that your chemical sample will pass through as it proceeds from a transition state geometry to either the product or reactant side of the reaction pathway. Contents Investigating transition state structures 17-2 Viewing transition state structures 17-3 Investigating reaction path structures 17-4 Viewing reaction path structures 17-5 Appendices Understanding • Customizing The following reaction path experiment is also described: Chapter 17 - Investigating Reactions Investigating transition state structures CAChe uses quantum mechanics to investigate transition state structures in a reaction path from a reactant molecule to a product molecule. The following types of experiment are available: • • • search for saddle experiment refine transition state experiment verify transition state experiment. The search for saddle experiment locates a stationary point between the reactant and product that corresponds to the transition state for the reaction. A stationary point is a structure where small geometry changes do not affect overall molecular energy. Before generating a transition state structure, you must specify a reactant molecule and a product molecule (two chemical sample files) for input. The product molecule must have all the atoms of the reactant molecule, and each atom must have the same atom number. The only differences between reactant and product that are allowed are positions of atoms and bonds. Once you have generated a transition state structure, you can refine it using a minimize gradient calculation in the refine transition state experiment. You can then calculate the molecule’s vibrational transitions to verify the current transition state geometry using the verify transition state experiment. A single negative vibration confirms a true transition state. CAChe also allows you to include water solvent effects in a transition state experiment. Refer to“Modeling solvent effects with COSMO”, p 20-19, for more information on experimental procedures that include solvation effects. NOTE Transition state experiments are not available with Personal CAChe and BioCAChe. 17-2 CAChe for Windows User Guide Investigating transition state structures Before running a search for saddle experiment Introduction Because the reactant and product molecules must have all the same atoms and each atom must have the same atom number, the best way to prepare the two chemical sample files is to: 1. Save a copy of the reactant molecule. 2. Change the atom and bond positions to create the product molecule. It is sometimes useful to specify a molecule structure for the product that is very close to the expected transition state structure. Tutorials 3. Save the file and use it as the product molecule. The transition state structure resulting from a search for saddle experiment is saved in the chemical sample file of the reactant product. For this reason it is important to save a copy of the reactant chemical sample file before proceeding with a search for saddle experiment. Using Viewing transition state structures The resulting transition state structure from a verify transition state experiment is also saved automatically in the chemical sample file. It is important to use the same parameter set and solvent effects when generating, refining, and verifying a transition state structure. For example, if you originally used AM1 parameters including the effect of water in your transition state experiment, use the same procedure when refining and verifying your transition state structure. Appendices TIP Understanding The resulting transition state structure from a refine transition state experiment is saved automatically in the chemical sample file on which the experiment was performed. Customizing The contents of the product input file are untouched. CAChe for Windows User Guide 17-3 Chapter 17 - Investigating Reactions Investigating reaction path structures CAChe calculates structures in a reaction that a chemical sample will pass through as it proceeds from a transition state geometry to either the product or reactant side of the reaction pathway. The reaction pathway is the minimum energy path from reactant to transition state structure to product. The following types of experiment are available: • • find reaction paths experiment map reaction experiment. In a find reaction paths experiment, CAChe varies two internal coordinates of your chemical sample to form the principal deformations that occur in the course of a reaction. A series of reaction path structures are then calculated between the transition state structure to either the product or the reactant. You can specify the direction for the reaction path calculation by choosing a vibrational mode for the initial motion of 1 or -1. The direction is purely arbitrary, except for the fact that the 1 and -1 modes are in opposite directions. When generating reaction path conformations, you can: • annihilate the kinetic energy of the molecule at every step using an IRC (Intrinsic Reaction Coordinate) calculation. Potential energy changes from conformation to conformation, and the resulting kinetic energy is annihilated so that the potential and total energies are the same. • conserve the kinetic energy of the molecule at every step using a DRC (Dynamic Reaction Coordinate) calculation. Kinetic energy increases as potential energy is lost from conformation to conformation, so that total energy is constant. The energy of each conformation is plotted in a separate map file where you can view the energy graph alongside each reaction path structure. 17-4 CAChe for Windows User Guide Investigating reaction path structures Start a find reaction paths experiment with a transition state structure generated by a search for saddle experiment. You can also perform a map reaction experiment, which produces an optimized energy map by varying one or two search labels and measuring the energy of each resulting conformation using quantum mechanics. Introduction Refer to “Investigating transition state structures”, p 17-2, for further details about generating a transition state structure. Tutorials . NOTE Reaction path experiments are not available with Personal CAChe and BioCAChe. Both a find reaction paths experiment and a map reaction experiment produce an energy map file, which you can view in the same way as any other map file. Using Viewing reaction path structures Appendices Understanding Customizing Refer to “Viewing map files”, p 14-12, for further details about viewing map files. CAChe for Windows User Guide 17-5 Chapter 17 - Investigating Reactions 17-6 CAChe for Windows User Guide 18 18 Overview This chapter explains how to perform CAChe experiments to generate and view: infrared (vibrational) spectra UV-visible (electronic) spectra. Contents Investigating infrared spectra Viewing infrared spectra Investigating UV-visible spectra Viewing UV-visible spectra 18-2 18-2 18-6 18-7 Appendices Understanding Customizing Using • • Tutorials Introduction Investigating Spectra Chapter 18 - Investigating Spectra Investigating infrared spectra CAChe enables you to view vibrational spectra for a molecule, created by coordinated motions of the atoms as electromagnetic radiation in the infrared (IR) region is absorbed by the molecule. Absorption bands observed in the infrared are associated with the bending and stretching of particular types of bonds, so viewing these infrared transitions aids the analysis of molecular structure. CAChe uses quantum mechanics to compute the force necessary to distort the molecule from its equilibrium geometry and predict the frequency of vibrational transitions. When you select a point on the vibrational spectrum, motion vectors for every atom appear in the workspace, as shown in the following example. You can edit the spectra to adjust the peak width, wavelength, and area of a selected transition. NOTE UV-visible and vibrational spectra generation are not available in Personal CAChe and BioCAChe. However, it is possible to view the UV-visible and vibrational spectra in Personal CAChe and BioCAChe that have been created in other versions of CAChe. Viewing infrared spectra ª To view infrared spectra 1. Open a chemical sample file for which you have infrared 18-2 CAChe for Windows User Guide Investigating infrared spectra (vibrational) spectra data. If you have more than one chemical sample file open with infrared spectra data, choose Analyze | IR Transitions for each file to display the associated spectrum in the IR Transitions window. Additional spectra are indicated by a legend, which is automatically displayed. Introduction 2. Choose Analyze | IR Transitions to display the IR Transitions window. 1. Using the Select tool, click a transition in the graph function, which is indicated by a triangle. The selected transition is highlighted in red to show that it is selected. Motion vectors indicating the direction of movement for each atom in motion appear in the workspace. 2. Hold down Shift and click repeatedly on triangles in the graph function to select several transitions. The selected transitions are highlighted in red and motion vectors belonging to all the selected transitions are displayed for each atom in the workspace. CAChe for Windows User Guide 18-3 Understanding To view motion vectors Appendices ª Customizing Using Tutorials The following shows an example of an IR Transitions window. Chapter 18 - Investigating Spectra The following example shows a display of motion vectors from several selected transitions. ª To edit transition properties 1. For a single transition, double-click the transition. For more than one transition, select the transitions for which you want to edit properties, then choose View | Transition Attributes. The View Transition Attributes dialog box is displayed. 2. Click in the Wavenumber, Width, or Area text box to edit the peak width, wavelength, or area of the selected transitions. 3. Select OK to close the View Transition Attributes dialog box. 18-4 CAChe for Windows User Guide Investigating infrared spectra ª To change axis attributes 2. Click in the Wavelength Range or Intensity Range text boxes to edit the range of each axis. Tutorials Introduction 1. Double-click either spectral axis to display the View Axis Attributes dialog box. Appendices Understanding Customizing Using 3. Select OK to close the View Axis Attributes dialog box. CAChe for Windows User Guide 18-5 Chapter 18 - Investigating Spectra Investigating UV-visible spectra NOTE UV-visible spectra can be generated only if you have ZINDO. CAChe enables you to view electronic spectra for a molecule, created by electron transition between molecular orbitals as electromagnetic radiation in the visible and ultraviolet (UV-visible) region is absorbed by the molecule. Absorption bands observed in the UV-visible region are associated with changes of orbital occupations, so viewing electronic transitions helps identify excited states available for both kinetic and photochemical reactions. The relationship between structure and absorption aids the engineering of molecules with specific electronic absorption properties. CAChe uses quantum mechanics to compute the energies of excited electronic states. When you select a particular spectral transition point on the electronic spectra, the molecule is displayed in the workspace with molecular orbital surfaces superimposed on it, as shown in the following example. You can edit the spectra to adjust the peak width, wavelength, and area of a selected transition. 18-6 CAChe for Windows User Guide Investigating UV-visible spectra Viewing UV-visible spectra 1. Open one or more chemical sample files for which you have UVvisible (electronic) spectra data. 2. Choose Analyze | UV-visible Transitions to display the UVvisible Transitions window. If you have more than one chemical sample file open with UVvisible spectra data, each individual spectrum is displayed in the UV-visible Transitions window, indicated by a legend which is automatically displayed. Introduction To view UV-visible spectra Tutorials ª To view molecular orbital transitions 1. Using the Select tool, click a transition in the graph function, which is indicated by a triangle. The selected transition is highlighted in red to show that it is selected. Molecular orbital surfaces for the transition are displayed superimposed on the relevant atoms in the workspace. HOMO and LUMO energy values are also displayed. CAChe for Windows User Guide 18-7 Appendices ª Understanding Customizing Using The following shows an example of a UV-visible Transitions window. Chapter 18 - Investigating Spectra 2. Hold down Shift and click repeatedly on the graph function to select several transitions. The selected transitions are highlighted in red and molecular orbital surfaces belonging to all the selected transitions are displayed for each atom in the workspace. The following example shows a display of molecular orbital surfaces from several selected transitions. ª To edit transition properties 1. For a single transition, double-click the transition. For more than one transition, select the transitions for which you want to edit properties, then choose View | Transition Attributes. The View Transition Attributes dialog box is displayed. 2. Click in the Wavelength, Width, or Area text box to edit the peak width, wavelength, or area of the selected transitions. 3. Select OK to close the View Transition Attributes dialog box. ª To change axis attributes 1. Double-click either spectral axis to display the View Axis Attributes dialog box. 2. Click in the Wavelength Range or Intensity Range text boxes to edit the range of each axis. 3. Select OK to close the View Axis Attributes dialog box. 18-8 CAChe for Windows User Guide 19 19 Introduction Investigating Biomolecules Overview This chapter explains how to use CAChe with biomolecules to: explore conformations with CONFLEX Using analyze conformations in the workspace solvate the peptide with water molecules. build a GPCR 3D structure using homology modeling • • read in the x-ray crystal structure of a homolog • use the Sequence View window to insert, delete and modify loops • • • solvate the GPCR model with a water shell use the Sequence View window to modify the seven transmembrane (TM) helical domains use mechanics and dynamics to refine the structure Customizing • build a peptide using the Sequence View validate the model Contents Investigating peptide conformations 19-3 Building a peptide Generating peptide conformations Analyzing peptide conformations Including water 19-3 19-6 19-8 19-10 Creating a homology model of the MC4R 19-15 Viewing bovine rhodopsin Building a model of MC4R 19-16 19-17 Docking Agouti-Related Protein into the MC4R 19-22 Understanding • • • • Tutorials investigate peptide conformations Appendices • Chapter 19 - Investigating Biomolecules • dock a ligand into a protein. • • • locate the receptor • model additional small molecule ligands using CONFLEX and property calculations with MOPAC • dock favorable candidates into ligand binding site by superposition on the original ligand dock the ligand into the receptor using distance adjustments refine the ligand-protein complex using mechanics and dynamics NOTE The Sequence View is available only in CAChe WorkSystem Pro, BioCAChe and BioMedCAChe. Since this chapter uses the Sequence View, it is applicable only to WorkSystem Pro, BioCAChe or BioMedCAChe. 19-2 CAChe for Windows User Guide Investigating peptide conformations Investigating peptide conformations Conformational analysis in the workspace allows you to locate the lowest energy conformations. Selected conformations can be refined further using quantum mechanics in MOPAC. Tutorials CAChe can use either molecular mechanics or quantum mechanics to compute the energies of the peptide structures. Most often, you will use molecular mechanics to determine the stable conformations of peptides because it is the fastest and most accurate method for organic structures. Introduction CAChe enables you to build peptides from their sequence and search for their lowest energy conformations. To build a peptide efficiently from the Sequence View window first set the secondary structure type and then enter the sequence. After you have entered the sequence, set the turns, create any disulfide linkages and add terminal atoms. ª Using Building a peptide To enter a peptide from its sequence 3. Choose Window | Tile to show both the Sequence View window and the workspace simultaneously. 4. Choose the insert Residue tool. Appendices 5. From the style bar, set the secondary style to beta anti-parallel. Understanding 2. Choose Analyze | Sequence to display the Sequence View window. Refer to “Working in the Sequence View window”, p 9-18 for information on using the Sequence View. Customizing 1. Open a new chemical sample file. CAChe for Windows User Guide 19-3 Chapter 19 - Investigating Biomolecules TIP Oxytocin is a small 9-residue cyclic peptide with the sequence Cys-Tyr-Ile-Gln-Asn-Cys-Pro-Leu-Gly-NH2 (C-Y-I-Q-N-C-PL-G-NH2) with a disulfide bond between the cystine residues. Oxytocin is a hormone secreted by the posterior pituitary that stimulates uterine contractions. Note that it has an unusual amino group on the C-terminal glycine. 6. Do one of the following ❏ ❏ Type the 1-letter code for each residue. From the style bar, choose the first residue. Then choose Edit | Insert. Continue typing or inserting until the sequence is entered. The residues appear connected in the workspace as the peptide is built. TIP You can choose Edit | Select All and View | Fit in Window from the workspace to show the peptide as you build it. Finally, you add the terminal groups so that the peptide ends with NH3+ and CO2- as expected in water solution. ª To add terminal atoms 1. In the workspace, choose the Select tool. 2. Select the N-terminal atom. 3. Change the charge on the style bar to 1. The charge on N changes to +1. 4. Choose Beautify | Valence. The group is now NH3+. 5. Select the C-terminal atom. 6. Choose Beautify | Valence. The group should now be CH=O. 19-4 CAChe for Windows User Guide Investigating peptide conformations 7. Select the newly created H atom. 8. Using the style bar, change the atom type to O and the charge to -1. The H atom is replaced by O-. 9. Select the CO2- group. Tutorials 10. Choose Beautify | Hybridization. Introduction NOTE If you are building oxytocin which has an unusual amino group on its C-terminal glycine, change the H to N and Beautify | Valence. Then skip to “To create a turn”. Otherwise, for standard Cterminal CO2- groups follow the following steps. The hybridization changes to sp2. 11. With only the CO2- group selected, choose Beautify | Geometry. Only the CO2- group changes. The peptide now terminates in NH3+ and CO2- terminal groups, the structure expected in aqeuous solution. Using 12. Choose File | Save and save the peptide as a chemical sample. As you build a peptide you may need to enter turns, for example if the peptide is cyclic. ª To create a turn 4. In the workspace, connect the sulfur atoms to make the cyclic peptide. 5. Choose Beautify | Valence. 6. Fix the ends to NH3+ and CO2-. When the peptide is cyclic, you close the cycle by creating bonds in the workspace. ª To create a cyclic peptide CAChe for Windows User Guide 19-5 Understanding 3. Choose Edit | Make Turn | Type I. Appendices 2. Select the two residues in the middle of the sequence where the turn is to be located. If you are building oxytocin, select residues 3 and 4 (Ile and Gln). Customizing 1. In the Sequence View window, choose the Select tool. Chapter 19 - Investigating Biomolecules 1. In the workspace, choose the Select tool. 2. Select the two sulfur atoms for the disulfide bond. 3. Choose Edit | Connect. 4. With the two sulfur atoms selected, choose Beautify | Valence. 5. Choose Beautify | Hybridization. A bond appears between the two sulfur atoms and the hydrogen atoms are removed. You have finished building the peptide using standard templates for residues and standard bond angles and distances. At this point, your peptide may contain atoms that are too close together or bonds and angles that require refinement. You clean up the geometry by optimizing the structure with molecular mechanics. ª To refine the peptide 3D structure 1. To optimize the structure, choose Experiment | New 2. Select these options in the experiment window: ❏ Property of | chemical sample, ❏ Property | optimized geometry, and ❏ Using | MM geometry (MM3). 3. Choose Start. The geometry is optimized using MM3. Generating peptide conformations After you have built the peptide, you locate the lowest energy conformations. ª To generate peptide conformations 1. Using the Select tool in the workspace, click on a rotatable C-C single bond joining the C atoms outside any rings in the peptide. 2. Press Shift and click repeatedly on each remaining rotatable C-C bond outside any rings to select several rotations. The selected bonds are highlighted. 19-6 CAChe for Windows User Guide Investigating peptide conformations After making the changes so that the dialog appears as above, choose OK. Using Tutorials Introduction 3. Choose Adjust | Geometry Label Wizard and change the settings in the Geometry Label Wizard dialog so that rotations around single bonds are explored in two steps from -179 to 61 degrees The peptide structure appears with dihedral labels displayed for each of the previously selected C-C bonds. 4. Choose Experiment | New. The Experiment dialog appears. Property of | chemical sample conformations, ❏ Property | sequence of conformations, and ❏ Using | Global Min Search with MM3. Appendices Understanding ❏ Customizing 5. Choose CAChe for Windows User Guide 19-7 Chapter 19 - Investigating Biomolecules The Experiment dialog should look similar to this: 6. Choose Start. CONFLEX runs and automatically searches for low energy structures in rings and around the rotatable bonds that have search labels. For peptides, this is a lengthy process requiring many hours. When CONFLEX completes, it creates a sequence file in the .map directory and opens it automatically in the CAChe workspace if CAChe is running. You use the workspace to analyze the results from CONFLEX. Analyzing peptide conformations ª To analyze the peptide conformations 1. Choose File | Open, set the Files of Type to Map (*.map) and 19-8 CAChe for Windows User Guide Investigating peptide conformations Tutorials Introduction navigate to the .map directory for your chemical sample. 2. Choose seqsrch.map and Open. 4. Choose File | Save As Chemical Sample to save low energy conformations. As you save each conformation, you may find it useful later if you include the sequence number or the conformation number in the new file name. CAChe for Windows User Guide 19-9 Appendices 3. Click on the graph to move the ball to a new conformation. The 3D structure in the workspace changes to that of the newly chosen conformation. Understanding Customizing Using Two windows appear side-by-side. Chapter 19 - Investigating Biomolecules Including water The conformations you found in the previous section are those for the isolated peptide. Without solvents, the ionic ends of the peptide will attract and the conformations with the NH3+ and CO2- groups near one another will be more stable. A polar solvent, like water, will stabilize extended structures. You can model the effect of solvation by adding water molecules to the peptide chemical sample. To add water, it is useful to have a chemical sample containing water molecules. ª To create a water droplet 1. From the workspace menu, choose File | New. A new workspace opens. 2. Choose Edit | Crystal Shape. The Crystal Shape dialog opens. 3. Choose the Fractional Coordinates tab in the Crystal Shape dialog. 4. Enter ‘O’ for oxygen and set the fractional coordinates at 0., 0., 0. so that the dialog looks like this After typing the last coordinate, press the Enter key to complete 19-10 CAChe for Windows User Guide Investigating peptide conformations Using Tutorials 5. Choose the Main tab and set the space group to P1, the Lattice Boundaries to -5.0 to 5.0, and the a, b and c lengths to 2.8 angstroms. Finally, choose to build an Infinite lattice. The Crystal Shape dialog should look like this. Introduction the row. 8. Choose the Atom tab and select row 1. The oxygen atom at the center of the cube is selected. 9. In the workspace, choose Edit | Select Neighbors. The Select Neighbors dialog appears. Appendices 10. Choose to select nearest atoms by selection radius and set the Understanding 7. Choose Window | New Sample Properties Window. The sample properties window appears. Customizing 6. Choose OK. A 28 angstrom cube of 1326 oxygen atoms appears in the workspace. CAChe for Windows User Guide 19-11 Chapter 19 - Investigating Biomolecules selection radius to 14 angstroms. 11. Choose OK. All atoms within a sphere of 14 angstroms from the central oxygen atom are selected. 12. Using the Select tool, invert the selection by holding down the shift key while clicking on empty space. All atoms outside the sphere are selected and those inside the sphere are unselected. 13. Choose Edit | Delete to remove the atoms outside the droplet. A sphere of 515 oxygen atoms remains. To retain the spherical shape during optimization, lock the outer shell of oxygen atoms. 14. In the Sample Properties Window, select atom 1 by clicking on the row number. 15. In the workspace, choose Edit | Select Neighbors and select neighbors within 11.5 angstroms of the selected oxygen atom. 16. Using the Select tool, invert the selection by holding down the shift key while clicking on empty space. The outer shell of oxygen atoms is selected. 17. Choose Adjust | Lock to lock the outer shell of oxygen atoms. The outer most atoms are locked. To display the locked state, choose View | Atom Attributes and check Locked State on the Label tab. 18. In the workspace, choose Edit | Select All and then choose Beautify | Comprehensive to add hydrogen atoms and set the hybridization. You now have a sphere of 515 water molecules (1545 atoms) all oriented in the same direction. 19. Choose Beautify | H-Bonds. 19-12 CAChe for Windows User Guide Investigating peptide conformations 20. Choose Edit | Select All and then Edit | Group Atoms. Type a name for the group such as ‘11A water drop’ and choose Group and then OK. All water molecules are now part of the same group named ‘11A water drop’. ❏ Property of | chemical sample, ❏ Property | optimized geometry, and ❏ Using | MM geometry (MM3). Using 21. To optimize the structure, choose Experiment | New, save the file and then choose Tutorials To further optimize the hydrogen bonding, you use Mechanics. Since you will be using this droplet to solvate molecules, it will be convenient to have the atoms grouped into a single group. Introduction The hydrogen atoms are rotated so that the local hydrogen bonding is maximized. This is a partial optimization of the hydrogen bonding. Choose Start. 1. With both the water droplet and peptide open, choose Edit | Copy from the peptide workspace. 2. In the water droplet workspace, choose Edit | Paste. The peptide appears in the center of the water droplet. To reorient the peptide to a different position, choose Edit | Move Selected and rotate or drag to peptide to the position you prefer. Notice that some water molecules overlap the structure. You need to remove them. 3. To remove overlapping water molecules, use the Select Molecule tool to select the peptide. 4. Then choose Edit | Select Neighbors and Select Nearest | Residues, waters, HETs within 2 angstroms. CAChe for Windows User Guide 19-13 Understanding To solvate the peptide Appendices ª Customizing The water droplet is optimized within the sphere of frozen oxygen atoms. You can use this droplet to add water molecules to your peptide. Chapter 19 - Investigating Biomolecules All waters, residues and HET groups within 2 angstroms of the selected peptide atoms are selected. 5. Using the Select Molecule tool, hold down the shift key while clicking on the peptide to deselect the peptide. The peptide dims and all water atoms near the peptide remain highlighted. 6. Choose Edit | Delete. Water molecules that overlap the peptide are deleted. 7. Choose File | Save As to save the model using a different name. 8. To complete the model, you optimize the solvated peptide. Choose Experiment | New. The Experiment dialog appears. 9. Choose ❏ Property of | chemical sample, ❏ Property | optimized geometry, and ❏ Using | MM Geometry (MM3). 10. Choose Start. A calculation that optimizes the geometry of the peptide within the water sphere of 11 angstrom radius using MM3 is performed. 19-14 CAChe for Windows User Guide Creating a homology model of the MC4R Since all GPCRs likely share a common ancestor, you can use the recent crystal structure of rhodopsin as the basis for building a highquality model of other GPCRs using well-established homology modeling methods. In this GPCR have very similar “core” TM helical structures, even though there may be considerable variation in their amino acid sequences due to their different biological functions.On the other hand, since the mechanisms of GPCR activation are identical, a small number of amino acids in each TM helix are conserved and can be used to align the sequence with rhodopsin using algorithms such as CLUSTAL W. Starting with an aligned sequence, you can use the Sequence View Window to modify the rhodopsin sequences to match the GPCR you want to model and then refine it with mechanics and dynamics following the protocols described in the following discussion. 1. Palczewski, K., Kumasaka, T., Hori, T., Behnke, C.A., Motoshima, H., Fox, B.A., Le Trong, I., Teller, D.C., Okada, T., Stenkamp, R.E., Yamamoto, M., and Miyano, M. Crystal structure of rhodopsin: A G protein-coupled receptor. Science 2000, 289, 739-745. CAChe for Windows User Guide 19-15 Tutorials Using Customizing GPCRs are membrane-bound proteins that are characterized by seven helical regions that traverse the lipid bilayer of the cell membrane. These transmembrane (TM) helices not only define the binding sites for ligands that can interact with the GPCR, such as hormones and neuropeptides, but also undergo conformational rearrangements that are an essential element of signal transduction and intercellular communication. Understanding Design of more active, selective and safe drugs that target GPCRs requires knowledge of other GPCR 3D structures. Unfortunately, because there are often relatively few molecules of a specific GPCR in each cell and because of the difficulty in growing the crystals, it is unlikely that the x-ray structure of other GPCRs will be determined. Appendices During 2000, the first high resolution x-ray crystal structure of a G protein-coupled receptor (GPCR) - bovine rhodopsin - was determined1. GPCRs form a superfamily of homologous membranebound proteins important in cellular signaling and are targets for 60% of drugs in use or development. Introduction Creating a homology model of the MC4R Chapter 19 - Investigating Biomolecules Viewing bovine rhodopsin ª To view bovine rhodopsin 1. Open the bovine rhodopsin crystal structure 1F88.pdb from the Protein Data Bank (http://www.rcsb.org/pdb). 2. Choose Analyze| Sequence. 3. In the Sequence View, choose the Select Molecule tool. NOTE 1F88 contains two copies of bovine rhodopsin in the asymmetric unit. They are called chain A and chain B. 4. Select chain A. Copy it. Close the Sequence View Window. Note that you have selected only the sequence chain. The covalently modified sugars and retinal are in different chains and are not copied. 5. Open a new workspace. Paste the copied sequence into the new workspace. Note that there are two long bonds because some residues are not resolved in the crystal structure. They will be removed when the final homology model is constructed. 6. Close the 1F88 file. 7. Choose File | Save and save the structure as bovinerhodopsin.csf. You will be warned about the large charge on the protein. Press OK and continue to save. 19-16 CAChe for Windows User Guide Creating a homology model of the MC4R Here you build a model structure of MC4R from the structure of bovine rhodopsin and a sequence alignment of MC4R and bovine rhodopsin (OPSD_BOVIN). Tutorials The melanocortin-4 receptor (MC4R), a GPCR which is expressed only in the brain, is involved in the control of human feeding behavior. The agouti-related protein (AGRP) functions as an antagonist of the MC4R. Over expression of AGRP in mice gives rise to increased food intake, making them obese. A 3D structure for the AGRP/MC4R complex could lead to structure-based design of drugs that treat eating disorders. Introduction Building a model of MC4R CLUSTAL W (1.81) multiple sequence alignment Using Begin here OPSD_BOVIN -------------------------------------MNGTEG-------PNFYVPFSNK 016 MC4R_MOUSE -------------------------------------MNSTHHHGMYTSLHLWNRSSHGL 023 OPSD_BOVIN TGVVRSPFEAPQYYLAEPWQFSMLAAYMFLLIMLGFPINFLTLYVTVQHKKLRTPLNYIL 076 MC4R_MOUSE HGNASESLGKGHSDGGCYEQLFVSPEVFVTLGVISLLENILVIVAAIKNKNLHSPMYFFI 083 OPSD_BOVIN EKEVTRMVIIMVIAFLICWLPYAGVAFYIFTHQGSDFGPIFMTIP---AFFAKTSAVYNP 303 MC4R_MOUSE NMKGAITLTILIGVFVVCWAPFFLHLLFYISCPQNPYCVCFMSHFNLYLILIMCNAVIDP 299 OPSD_BOVIN VIYIMMNKQFRNCMVTTLCCGKNPLG-DDEA-STTVSKTET-----SQVAPA-------- 348 MC4R_MOUSE LIYALRSQELRKTFKEIICFYPLGGICELSGRY--------------------------- 332 ª To change the helices 1. Chose File | Open and open the bovine-rhodopsin.csf file CAChe for Windows User Guide 19-17 Understanding OPSD_BOVIN E-----TNNESFVIYMFVVHFIIPLIVIFFCYG-----QLVFTVKEAAAQQQESATTQKA 246 MC4R_MOUSE A-----VIICLISMFFTMLVLMASLYVHMFLMA-----RLHIKRIAVLPGTG--TIRQGT 239 Appendices OPSD_BOVIN VVVCKPMSNFRFGENHAIMGVAFTWVMALACAAPPLVGWSRYIPEGMQCSCGIDYYTPHE 196 MC4R_MOUSE IAVDRYFTIFYALQYHNIMTVRRVGIIISCIWAACTV-----------SGVLFIIYSDSS 191 Customizing OPSD_BOVIN LNLAVADLFMVFGGFTTTLYTSLHGYFVFGPTGCNLEGFFATLGGEIALWSLVVLAIERY 136 MC4R_MOUSE CSLAVADMLVSVSNGSETIVITLLN-STDTDAQSFTVNIDNVIDSVICSSLLASICSLLS 142 Chapter 19 - Investigating Biomolecules that you created in “Viewing bovine rhodopsin”, p 19-16. 2. Choose File | Save As and rename this file MC4R.csf. 3. Choose Analyze | Sequence. Refer to “Working in the Sequence View window”, p 9-18 for information on using the Sequence View. 4. Check View | Residue Numbers | PDB. A Sequence No. line appears in the Sequence View window containing the residue numbers from the PDB file. 5. Delete residues from M1 to A32. This deletes the first extra cellular segment of rhodopsin. This segment is not needed for the model of MC4R. Choose the Select tool. Using the CLUSTAL W (1.81) multiple sequence alignment shown in the table above select each residue in bovine rhodopsin and use the Residue Type drop-down on the Style ribbon to change the rhodopsin Residue Type drop-down Secondary structure drop-down Phi angle box Psi angle box residue one at a time into the residues that are in MC4R. The residue changes, but the backbone Phi and Psi angles remain unchanged from rhodopsin. ª To change the loops Insert loop residues present in MC4R but not in rhodopsin and delete loop residues present in rhodopsin but not in MC4R. After all of the loops are constructed. Delete everything past the last long bond (R(~214)NCMV). Note that the first long bond has been fixed by adding residues in MC4R. ª To refine the initial MC4R model 1. In the Sequence view, choose View | Secondary Structure. The line SS appears below the sequence. Letters in this line denote the secondary structure. H denotes a residue in a helix. 2. Select the residues in the first helix. 19-18 CAChe for Windows User Guide Creating a homology model of the MC4R 6. Choose Edit | Group Atoms. Type the Group Name backbone. Choose >>Group>>. The group named backbone is added to the list of groups. 7. With the Group Atoms dialog still open, choose group TM1 and then choose S or G. The selection (S) now contains the atoms in both the backbone and TM1. Continue the choosing TM groups and choosing S or G until the selection contains the backbone atoms and all seven transmembrane helices. Tutorials 5. In the workspace, choose Edit | Select Backbone to select the backbone atoms. Using 4. Switch back to the Sequence View and continue selecting helices and creating groups until all seven groups TM1-TM7 are defined. Introduction 3. From the workspace, Choose Edit | Group Atoms. Type the Group Name TM1 and choose >>Group>>. The group named TM1 is added to the list of groups. Choose OK. 8. Type locked backbone into the Group Name field. choose >>Group>>. The group named locked backbone is added to the list of groups. Choose OK. 9. Choose Adjust | Lock. The backbone atoms in all the helices are locked. Property of | chemical sample, ❏ Property | optimized geometry, and ❏ Using | MM geometry (MM3) Choose Edit and change the procedure to use steepest descent.for geometry optimization. Refer to “Modifying a procedure”, p 11-17. Choose the Choose Start. The energy is minimized using steepest descent. 12. When the experiment completes, start a new experiment Using | MM geometry (MM3). Choose Edit and change the procedure to use conjugate gradient.for geometry optimization. Refer to CAChe for Windows User Guide 19-19 Understanding ❏ Appendices 11. Choose Experiment | New. The Experiment dialog appears. Choose Customizing 10. Choose Beautify | Valence and then Beautify | Hybridization. Chapter 19 - Investigating Biomolecules “Modifying a procedure”, p 11-17. The energy is minimized for 300 cycles with the locked atoms using the conjugate gradient method. 13. After the experiment completes, choose File | Save As and rename the file MC4R-1.csf. 14. Next, choose Experiment | New. Choose ❏ Property of | chemical sample conformations, ❏ Property | dynamics trajectory, and ❏ Using | MD simulation (MM3). Choose Start to do dynamics at 1000 K with the locked atoms for 50 ps. 15. After the experiment completes, choose File | Save As Chemical Sample and name the file MC4R-2.csf. 16. Choose Experiment | New. The Experiment dialog appears. Choose ❏ Property of | chemical sample, ❏ Property | optimized geometry, and ❏ Using | MM geometry (MM3). Choose Edit and change the procedure to use steepest descent.for geometry optimization. Refer to “Modifying a procedure”, p 11-17. Choose Start. The energy is minimized using conjugate gradient. 17. After the experiment completes, select one turn (4 residues) at each end of each helix and then choose Adjust | Unlock. Then start a dynamics experiment at 600K for 50 ps. Save the last structure from the trajectory and energy minimize. 18. Repeat the unlocking and the dynamics and optimization experiments at 600 Kelvin until all helices have been unlocked and optimized. 19. After the last experiment completes, choose File | Save As and name the file MC4R-final.csf. You have refined the homology model of the structure of MC4R. 19-20 CAChe for Windows User Guide Creating a homology model of the MC4R 1. Gether, U., and Kobilka, B.K. G protein-coupled receptors. II. Mechanism of agonist activation. J. Biol. Chem. 1998, 273, 17979-17982. Ballesteros, J., Kitanovic, S., Guarnieri, F., Davies, P., Fromme, B.J., Konvicka, K., Chi, L., Millar, R.P., Davidson, J.S., Weinstein, H., and Sealfon, S.C. Functional microdomains in G protein-coupled receptors. J. Biol. Chem. 1998, 273, 10445-10453. CAChe for Windows User Guide 19-21 Appendices Understanding Customizing Using Tutorials Introduction Once the structure is created, you examine it to verify that the interhelix interactions that participate in GPCR activation mechanisms are present1 Chapter 19 - Investigating Biomolecules Docking Agouti-Related Protein into the MC4R Agouti-related protein (AGRP) functions as an antagonist of the MC4R and binds to the MC4R. Site-directed mutagenesis experiments suggest that a conserved Arg-Phe-Phe motif mediates key interactions of this protein ligand with the MC4R residues GlyCys-Val. NOTE Docking requires some experimental information on which residues on the receptor bind to which residues on the ligand. ª To view AGRP 1. Get AGRP (1HYK) from the Protein Data Bank: 1HYK.pdb. 2. Open 1HYK.pdb in the workspace. 3. Examine the structure and check that the structure is correct. Are double bonds where they are expected? Is the valence correct? Are charges correct? 4. Choose File | Save and name the file AGRP.csf. ª To dock AGRP into MC4R 1. Open MC4R-final.csf and AGRP.csf. 2. Choose Analyze | Sequence from each workspace. 3. Select R24-F25-F26 in the AGRP sequence. 4. Select G92-C189-V186 in the MC4R sequence. 5. Choose Edit | Superimpose Sequence. Choose Superimpose Target and Probe in New Window. Choose OK. A new workspace opens with AGRP superimposed on top of the receptor in MC4R. 6. Choose File | Save and name the file ACRP-MC4R.csf. 7. Define distance labels between the 19-22 ❏ C-alpha atoms in R24 and G92 ❏ C-alpha atoms in F25 and C189 ❏ C-alpha atoms in F26 and V186 CAChe for Windows User Guide Docking Agouti-Related Protein into the MC4R 10. Place a sphere of explicit water molecules about the extracellular regions as described in “Including water”, p 19-10. 11. Start an experiment to optimize the geometry using MM3. 12. Continue the refinement with dynamics experiments at 300 K for 200 ps. Appendices Understanding Customizing Using You have created a 3D structural model for the complex between Agouti-Related Protein and MC4R. Tutorials 9. With the Rotate and the Drag tools, adjust the position of AGRP until the distance labels each are approximately 2 angstroms and atoms in AGRP are clear of the MC4R atoms. Introduction 8. With the Select Molecule tool, select AGRP and choose Edit | Move Selected. CAChe for Windows User Guide 19-23 Chapter 19 - Investigating Biomolecules 19-24 CAChe for Windows User Guide 1 Tutorials Basics Customizing Understanding Understanding The following chapter explains the theories behind the CAChe computational applications and the way each application functions. Appendices Part four Introduction Understanding CAChe 20 CAChe Computational Applications Overview This chapter explains in detail the theories and methods behind the following CAChe computational applications: • • • Mechanics, which uses augmented MM2/MM3 parameters. • Tabulator, which converts CAChe computational results into threedimensional surfaces. • DGauss, which determines optimum geometry and the electronic properties of molecules by solving the Kohn-Sham equations in a self-consistent-field molecular orbital approximation. • CONFLEX, which computes optimum geometry and potential energy maps. Tutorials Introduction 20 Understanding Customizing MOPAC, which determines optimum geometry and electronic properties by solving the Schrödinger equation using MINDO/3, MNDO, MNDO-d, AM, PM3, or PM5 semi-empirical parameters. MOPAC also implements MOZYME, a linear scaling method for giant molecules. Basics Dynamics, which approximates the movement of atoms. Understanding Mechanics Understanding Dynamics Understanding MOPAC Understanding Tabulator 20-2 20-7 20-11 20-22 Understanding CONFLEX 20-23 Appendices Contents Chapter 20 - CAChe Computational Applications Understanding Mechanics This section provides reference information about the kinds of computations possible using molecular mechanics methods and specific information about the CAChe computational application Mechanics. Mechanics concepts The term molecular mechanics refers to methods of determining molecular geometries using equations from classical Newtonian physics. These methods describe the forces acting on atoms in molecules using empirically derived equations. Currently, several different molecular mechanics force fields are widely used. You may also hear molecular mechanics methods called force-field methods, or Westheimer methods. Most molecular mechanics force fields include terms describing bond stretching, angle bending, torsional, and nonbonded interactions such as van der Waals and hydrogen bond interactions. The sum of all these terms constitutes the steric energy of the molecule. Steric energy is a type of potential energy, and here the terms steric energy and potential energy are used interchangeably. Mechanics computes the net force acting on each atom in your molecule as the sum of the following energy terms: 20-2 • • • • • • • bond stretch • • torsion stretch (MM3 only) bond angle dihedral angle improper torsion van der Waals electrostatics (MM2/MM3 dipoles or partial charges) hydrogen bond bend-bend interactions (MM3 only). BioMedCAChe User Guide Understanding Mechanics The Mechanics computational application consists of the MechanicsComputeEngine and the MechanicsManager, both of which are located in the Mechanics folder in cache/bin. Optimizing with Mechanics Tutorials Basics The CAChe Mechanics application implements Allinger’s standard 1 MM2 force field and MM3 force fields. CAChe significantly augments these force fields by providing rules that estimate the force field parameters for cases not addressed by the standard force fields. Augmentations enable minimization calculations for square planar, trigonal bipyramidal, and octahedral atoms. Understanding The goal of molecular mechanics optimization is to adjust the positions of the atoms until finding an optimum molecular geometry. This optimum geometry corresponds to a minimum, or valley, in the potential energy surface. Molecular mechanics optimization techniques find an optimum geometry by systematically moving all atoms until the net force acting on each atom approaches zero. Customizing The potential energy of the molecule varies as the nuclear positions of the atoms change, and can be thought of as a multidimensional potential energy surface. The potential energy surface has hills corresponding to strained high energy conformations, and valleys corresponding to low energy conformations. Introduction The electrostatic term is calculated from dipole-dipole interactions for the standard non-augmented force fields. For the augmented force fields, the dipoles are decomposed in to atomic charges before evaluation. Partial charges can only be added to a structure if they already exist in the structure file. 1. Allinger, N. L. and others, J. Am. Chem. Soc. 1977, 99, 8127; Allinger, N. L., Yuh, Y. H., Lii, J-H., J. Am. Chem. Soc., 1989, 111, 8551-8566; Bowen, J. P., and Shim, J-Y., J. Comp. Chem., 1998, 19, 1370-1386. BioMedCAChe User Guide 20-3 Appendices Mechanics can be used in a variety of ways to help you find low energy conformations of your structure. When you use the fastest procedure or MM geometry procedures, Mechanics starts with the molecular structure in your chemical sample file. After calculating the structure’s potential energy, Mechanics adjusts the atomic positions and calculates the potential energy of the new structure. Chapter 20 - CAChe Computational Applications Mechanics then moves the atoms and calculates the energy until the energy reaches a minimum, and moving the atoms no longer decreases the energy. Mechanics continues optimizing until the energy change between iterations is within a specified limit, or until reaching the specified number of iterations. The direction and distance that atoms move between iterations depends on the slope of the potential energy surface. Normally, optimizing is the next step after you create a molecule in the workspace and before proceeding to other computations. Most CAChe experimental procedures begin with optimizing a chemical sample. The energy minimization procedure is an iterative process. Therefore, unless there is only one minimum in the potential energy surface, the final structure will depend on the starting geometry. For example, the following graph shows how a starting structure from point A optimized to an energy minimum produces a different low-energy conformation than a starting structure from point B on an energy graph. Potential energy Kcal/mol A B Sequence of conformations 20-4 BioMedCAChe User Guide Understanding Mechanics Generating energy maps with Mechanics Each combination of search labels and steps is computed when you generate an exhaustive map. That is, if you define two search labels, each with ten steps, your potential energy map will contain 121 conformations (112) because ten steps result in eleven conformations, and each one is tested in combination with all other possibilities. You can examine an energy map for up to eight search labels at one time, but it is impractical to employ this computation for more than three or four search labels in one molecule file, because of the time required to perform the calculations. Tutorials Basics Mechanics computes the energies of each conformation resulting from stepping the search labels through the defined range of values. The rigid map experiment keeps the structure rigid at the points where search label steps are defined. The optimized map experiment optimizes the conformation at each step. This computation restricts the relaxation of the molecular structure where search labels are defined (that is, the more search labels defined, the less relaxation that is possible during optimization). Understanding When you run the rigid map or optimized map experiment, a new assemblage file called energy.map is created and saved in an automatically generated folder named with the suffix .map. Customizing Refer to Chapter 8, “Investigating Molecular Geometry”, for more information on search labels. Introduction Mechanics uses search labels that you add to your molecule before beginning an experiment to generate an energy map. Generating a sequential search with Mechanics When you compute the potential energy of multiple conformations of your molecule using the sequence of conformations experiment, the conformations defined by search labels are examined in sequence. A new assemblage file called seqsrch.map is created and saved in the automatically generated .map folder. BioMedCAChe User Guide 20-5 Appendices Search labels you define in the workspace also serve as the basis for performing sequential searches with Mechanics. Chapter 20 - CAChe Computational Applications Mechanics begins this computation by performing a rigid energy search to find the best starting structure among those defined by the search label steps and ranges. To do so, it traverses each search label one step at a time. Beginning with the first search label, it determines the lowest energy position and holds it there while the lowest energy position of the second label is determined and held, and continues down the line of search labels. That first pass through all the search labels provides a starting structure for the sequential search. In the fastest procedure and MM one pass procedures, the computation returns to the first search label, and for each step, optimizes the structure, while holding the internal coordinates defined for that step of that search label constant. The optimized structure that results from each step in each search label is saved in the seqsrch.map file. To examine, view the map file. The seqsrch.map file is an assemblage file that contains a number of conformations equal to the number of steps (plus one) multiplied by the number of search labels. For example, if your structure contains eight search labels, each with five steps, the seqsrch.map file includes 6x8=48 conformations (five steps results in six conformations). As a result, the sequential search is a more economical computation than the optimized map, when your goal is to look for low energy structures. If you choose the MM multiple passes option, you can reduce the bias caused by the sequential search traversing the structure once in a single direction. The multiple pass option examines the multiple minima that occurred in traversing the search labels. The multiple pass option takes more time, performs more computations, and captures more low energy structures. In contrast to the optimized energy map, the sequential search focuses computational power and time on the low energy regions of the potential energy surface. When you perform a multiple pass sequential search, you are likely to obtain the same low-energy conformers that are found by an optimized map. However, these conformations will be closer to the true minima, because this computation allows the relaxation of the entire structure apart from the searched label. The sequential search is also a more economical computation, so you can compute more search labels in less time than the exhaustive map. 20-6 BioMedCAChe User Guide Understanding Dynamics By integrating Newton’s equation of motion, atomic velocities can be obtained from the forces on each atom. For any given temperature, an initial set of velocities can be selected from the Maxwell-Boltzmann distribution and a trajectory through time can be generated for any molecular system. The CAChe Dynamics program uses the same force fields as the CAChe Mechanics program, and it utilizes the Verlet algorithm to update the velocities. The Verlet algorithm is a second order numerical integration of Newton’s equation of motion. This dynamics simulation conserves the total (potential plus kinetic) energy, and the volume of the entire system. This type of simulation is also known as a microcanonical ensemble at temperature T. Dynamics is intended to provide a window into the types of internal motion molecules undergo. While it attempts to duplicate real BioMedCAChe User Guide 20-7 Tutorials Basics While Mechanics methods can produce low-energy conformations for molecular systems, they offer no information about the motions of the atoms. A molecular dynamics trajectory approximates the real motions in a molecular system by using the same force field equations that describe the potential energy of a molecule in terms of molecular geometries to evaluate the forces on each atom. Understanding Dynamics methods approximate the movements of atoms. The potential energy of a molecular system is governed by the empirical force field. The CAChe computational application Dynamics uses the same force fields as the Mechanics application. The kinetic energy of a molecular system is derived from the atomic velocities, which in turn are chosen to reflect the temperature of the simulation. By executing Dynamics simulations, you can observe the molecular systems that you are studying in motion. Customizing Dynamics concepts Appendices This section provides reference information about the kinds of computations possible using dynamics methods and specific information about the CAChe computational application Dynamics. Introduction Understanding Dynamics Chapter 20 - CAChe Computational Applications molecular motions, there are some practical considerations that you should be aware of. Temperature For simple particles, the temperature of a system is related to the average kinetic energy (as translational energy) for the molecules present KE = 3--- kT . For polyatomic molecules, additional energy is 2 found as rotational motion of the molecule and vibrational motion of the atoms, KE = KE t + KE r + KE v . For anything but a linear molecule, KE = 3--- kT + 3--- kT + 1--- NkT , where N 2 2 2 is the number of degrees of vibrational freedom. For nonlinear molecules, N = 3 x number of atoms - 6. Thus the total kinetic energy of a large molecule is larger than that of a small molecule at the same temperature. In the CAChe Dynamics simulation, the molecule remains centered with no rotation, that is, with no net translational or rotational momenta. The motions you observe are only vibrational (stretching, bending, and internal rotation) motions of the atoms where their average velocities are determined from the relationships: i=N KE = 1 ∑ --2- mi vi i 2 = NkT and v = kT -----m The velocity of each atom is determined using random selection from a Gaussian distribution of velocities around its average velocity. The amplitude of motion varies with the square root of the temperature. This relationship is true for molecules of all sizes although the collective motions possible in large molecules may create an illusion of more vigorous motion. Relating temperatures and the motions of molecules in dynamics to our theoretical understanding requires some care. In CAChe Dynamics simulations, the molecule is alone in a vacuum. Thus, it never collides with another molecule, and, as a result, never changes energy or the pattern of motion. Once the initial random velocities have been selected, the fate of the simulation is established. In simple molecules, this may be easily noticeable as a somewhat limited range of motions. For larger 20-8 BioMedCAChe User Guide Understanding Dynamics Generating a Dynamics trajectory CAChe Dynamics generates a trajectory according to the settings that you specify. A trajectory is a collection of structures arranged sequentially in time. Each structure has a potential and a kinetic energy associated with it, as well as a temperature. You can examine the energies and the related structures simultaneously in two sideby-side windows by opening the map file dynamics.map, which is created when you perform an experiment in Dynamics. Generating trajectories can give you information about: BioMedCAChe User Guide the various conformations that occur as a result of normal molecular motion • the structure-energy relationships of the molecule Tutorials Appendices • Basics A simple approach to obtaining greater rotational motion is to start the simulation with the group rotated somewhat away from the minimum conformation. This does have the effect of increasing the average temperature slightly but if the rest of the molecule is minimized, no problems should arise. Use this approach with caution, and only with small portions of the molecule. Understanding Normally, you should start with a minimized structure for a simulation. Sometimes the random velocities given to the individual atoms partially cancel each other and do not lead to the rotational motion expected. This is especially a problem with symmetrical groups like methyl, and in small molecules. Customizing One application of Dynamics simulations is to search for nearby energy conformations. We may know that in real molecules a particular rotational barrier is easily crossed at a given temperature. However, the probability of catching a molecule in the process of crossing the barrier may not be very high. CAChe Dynamics simulations should behave similarly, but as in real life, will require some repeated simulations. Introduction molecules, the larger number of degrees of freedom will lead to more complex motions but will still not cover every configuration. 20-9 Chapter 20 - CAChe Computational Applications • 20-10 regions of the conformational space occupied by the system when applying a high temperature, and therefore a large amount of kinetic energy, to give the molecule enough energy to escape a local energy minimum. BioMedCAChe User Guide Understanding MOPAC MOPAC, the Molecular Orbital Package, developed by James J. P. Stewart, provides a choice of methods for computing electronic properties of molecules. CAChe provides access to MOPAC methods through a Windows environment. This section provides reference information about the kinds of computations possible using MOPAC theory and specific information about the CAChe computational application MOPAC. • • • • • • • • • • • • bond orders • structure and properties in solution Tutorials Use MOPAC to compute: Introduction Understanding MOPAC dipole moments Basics dynamics maps ionization potentials molecular orbital energies Understanding optimum geometry partial charges potential energy maps Customizing intersystem crossings reaction pathways transition states vibrational frequencies and spectra The CAChe MOPAC (Molecular Orbital Package) application determines both an optimum geometry and the electronic properties of molecules by solving the Schrödinger equation using the semiempirical Hamiltonians AM1, PM3 and PM5, developed by M. J. S. Dewar and J. J. P. Stewart respectively. CAChe also supports the BioMedCAChe User Guide 20-11 Appendices MOPAC concepts Chapter 20 - CAChe Computational Applications older parameter sets MNDO and MINDO/3 and the newer parameter set MNDO-d. In addition, CAChe extends AM1 to AM1/d. The molecular orbitals, heat of formation, and molecular geometry derivatives obtained are used to calculate vibrational spectra, molecular geometries, force constants, and other properties of molecules, radicals, and ions. These quantities are used to calculate reaction trajectories and to investigate chemical reactions by locating transition states. MOPAC can calculate the geometry, energetics and reaction profiles of molecules in their excited states. It can include solvent effects in these calculations. Excited state calculations are important in simulation of photochemical processes. MOPAC calculates heats of formation, rather than the energy required to separate the molecule into isolated nuclei and electrons as in quantum-chemical methods such as Extended Hückel Theory and ZINDO. In this section, energy and heat of formation are used interchangeably. Although MOPAC uses many concepts from quantum theory, thermodynamics, and advanced mathematics, a detailed understanding of these areas is not necessary. MOPAC was written and designed with non-theoretical chemists in mind. In CAChe, one version of the MOPAC application is available (MOPAC2KComputeEngine) MOPAC is also available on CAChe GroupServers. How MOPAC differs from Mechanics MOPAC is a quantum-mechanical method. Molecular Mechanics is a classical description using equations from Newtonian physics based on the atom hybridizations and bond types you draw when you build a molecule. Quantum mechanical methods use the Schrödinger equation to determine bond strengths, atomic hybridizations, partial charges, and orbitals from the positions of the atoms and the net charge. Because quantum mechanical methods describe bonds, they can describe chemical reactions in which bonds are formed and broken. 20-12 BioMedCAChe User Guide Understanding MOPAC MOPAC uses search labels in the same way as Mechanics. When you generate energy maps using MOPAC, it is best for the geometry of the molecule to be at an extreme in the range of values used for the steps. A map file (*.map) is produced, just as in Mechanics. Mechanics puts the molecule strain energy into map files, whereas MOPAC adds heat of formation when you execute grid searches and reaction coordinate searches. Mechanics calculations are simpler than quantum mechanical calculations. Consequently, Mechanics is much faster than MOPAC. The time required for molecular mechanics increases as the square of the number of atoms, whereas the time required for a MOPAC calculation increases as the cube of the number of atoms unless the linear scaling method for large molecules (MOZYME) is used. BioMedCAChe User Guide 20-13 Tutorials Basics You can generate four different kinds of potential energy maps when using MOPAC. If you use one search label, you can choose to compute the heat of formation at each geometry defined by the search label, without optimizing other internal coordinates, or you can choose to optimize the internal coordinates for each geometry. Similarly, if you use two search labels, you can compute the heat of formation at each geometry defined by the search labels, with or without optimizing other internal coordinates. Understanding MOPAC maps are preferred for mapping bond breaking and bond formation. Maps generated by Mechanics for bond breaking and bond formation are meaningless. Customizing Both MOPAC and Mechanics can use search labels to create energy maps. You can use several search labels in Mechanics, but MOPAC is limited to one or two search labels. If you use one search label, the result is a reaction coordinate search. If you use two search labels, the result is a grid search. If you define more than two search labels, MOPAC ignores the additional ones. Appendices Both MOPAC and Mechanics recognize locked geometry labels, and atoms with locked workspace coordinates, that you define in your chemical sample file. Introduction MOPAC calculates the heat of formation, whereas the energy calculated in molecular mechanics is the steric energy. Chapter 20 - CAChe Computational Applications Limitations of MOPAC MOPAC is a valence-electron-only program and cannot calculate properties that depend upon changes in the inner-shell electrons. The valence-only nature of any semi-empirical method can manifest itself in unexpected ways. For example, electron isodensity surfaces can have an unusual appearance. Because valence-only theories do not treat inner-shell electrons, the calculated electron density near the nuclei is very small. Electron isodensity surfaces calculated at high density values may show no density around some atoms. The absence of density around some atoms emphasizes the valence-only approximation used in semi-empirical methods. Elements parameterized in MOPAC MOPAC contains AM1/d parameters for the elements indicated (not crossed off) in the following periodic table: 20-14 BioMedCAChe User Guide Understanding MOPAC For the AM1/d, PM3 and PM5 Hamiltonians, Rn serves as a capped bond (Cb) element. Cs, Ba, Po and At serve as +, ++, --, and sparkles, respectively. Xe serves as a dummy atom for all the Hamiltonians. When MOPAC encounters one of these elements in your molecule, it substitutes the appropriate symbol. Also, when CAChe processes the results of your MOPAC calculation, it replaces the MOPAC symbolic atom with the original element in your molecule. A capped bond (Cb) behaves like a monovalent atom, with the exception that it can alter its electronegativity to achieve exactly zero BioMedCAChe User Guide 20-15 Appendices Customizing Understanding MOPAC contains PM5 parameters for the elements indicated (not crossed off) in the following periodic table: Basics Tutorials Introduction MOPAC contains PM3 parameters for the elements indicated (not crossed off) in the following periodic table: Chapter 20 - CAChe Computational Applications charge in whatever chemical environment it finds itself. It can thus mimic an exactly covalent bond with any atom. For example, on bonding to a hydrogen, it is similar to a hydrogen, but if it is bonded to a fluorine atom, it behaves like a very electronegative atom. If several capped bond atoms are used, they behave independently. Capped bonds can be used to mimic additional atoms that have been truncated from a crystal structure. NOTE It is essential that capped bond atoms be placed at a distance of 1.7 Å from the atom they are bonded to and that this bond distance be locked so that spuriously large gradients are not calculated. Electronic property surfaces cannot be tabulated for molecules that contain capped bond atoms. Sparkles behave like 100% ionizable elements. For example, a ++ sparkle appears much like a barium atom. Sparkles represent the neutral atom. For example, if you wanted to represent the alkaline metal salt of formic acid, the formula would be HCOO+ (HCOOCs in the workspace). The positive sparkle will donate its electron to the formate ion, and the molecule will be neutral. Na and K also act as + sparkles, but they appear as Na and K in the input file. Sparkles have no orbitals, no heat of atomization, and no ionization potentials. They have ionic radii of 0.7 Å, so that two sparkles of opposite sign will form an ion pair with a separation of 1.4 Å. The ++, +, -, and -- sparkles are assigned very large masses (108 a.u.) so that they behave as fixed points in vibrational spectrum calculations. NOTE Electronic property surfaces cannot be tabulated for molecules that contain sparkles atoms. 20-16 BioMedCAChe User Guide Understanding MOPAC Optimizing with MOPAC MOPAC can use search labels to generate maps for optimized geometry. A reaction coordinate search uses one search label, and a grid search uses two. The first label listed in the molecule file will be used. All optimize map calculations are done in internal coordinates, MOPAC will override any attempt to use cartesian coordinates. Transition states in MOPAC Saddle points are stationary geometries for which the energy increases when atoms are displaced in all directions except one. This means that only one of the force constants of a molecule at a transition state geometry is negative, and all the rest are positive or zero. The vibrational frequency of the normal mode with the negative force constant is negative. On an energy map, a saddle point is at the top of the pass that connects two minimum-energy geometries with each other. Chemically, this geometry is a transition state. The reaction coordinate is the direction of greatest energy decrease from the saddle point. The reaction pathway is the minimum-energy path from reactants to transition state to products. BioMedCAChe User Guide 20-17 Tutorials Basics Understanding Other molecular geometries besides minimum-energy geometries are stationary. These include saddle points, inflection points, and hilltops. Of these, the saddle point is of greatest interest to chemists. Saddle points are also called transition states. See the next section for more information about saddle points. Customizing The expression optimization refers to finding a minimum-energy geometry of the molecule. The minimum-energy geometry found is usually close to the starting geometry. Appendices Minimum-energy geometries are stationary geometries for which the energy increases when the atoms are displaced in any direction. This means that the force constants of a molecule at a minimumenergy geometry are all positive. Because the force constants are all positive, the vibrational frequencies are all real. Introduction Stationary geometries are those for which the energy does not change when the atoms are displaced by infinitesimal amounts. This means that the net force on each atom is zero. Chapter 20 - CAChe Computational Applications MOPAC has a method designed for locating transition states, called a SADDLE calculation. Both the reactant and product molecules are specified, and MOPAC attempts to locate a stationary point that corresponds to the transition state for the reaction. The geometry generated from a saddle calculation can be some distance away from the transition state. However, refining this structure through a minimize gradient calculation, usually leads to a structure closer to the transition state. Another method for locating transition states is to perform a grid search calculation in which the two internal coordinates varied are the principal deformations that occur in the course of the reaction. The map that is produced may contain a pass on the energy surface that is a saddle point. The molecular geometry at this point can be used as an estimate of the transition state geometry. The geometry of the transition state is refined with an optimization method that can minimize the energy gradient without searching for a minimum-energy geometry. Once the stationary geometry has been found, the transition state is characterized by calculating the vibrational frequencies for the molecule and verifying that there is one (and only one) frequency that corresponds to a negative force constant. These frequencies are negative (strictly speaking, they are imaginary, but they are reported as negative numbers as a matter of convenience). Vibrational frequencies reported in the MOPAC output file contain six (or five, for linear molecules) vibrational modes, which correspond to translation and rotation of the molecule as a whole. These vibrations have frequencies that are close to zero if the molecule is at a stationary point. However, they will not be identically zero, because of the numerical approximations made in determining the stationary-point geometry and in calculating the force matrix. Dynamics calculations in MOPAC Two types of dynamics calculations are possible with MOPAC. The results are saved as an assemblage file (drc1.map, drc-1.map, irc1.map, irc-1.map). 20-18 BioMedCAChe User Guide If the initial geometry is a transition state, an initial displacement along a particular vibrational mode is necessary. You choose the initial displacement by specifying a vibrational mode and a positive or negative direction for the initial motion. A DRC with no damping simulates the motion of the atoms of the single molecule in the gas phase, where none of the kinetic energy gained from losing potential energy would be lost, and would thus be converted into kinetic energy. For DRC calculations, you may specify that only geometry information is output and included in the map file when atom coordinates, the heat of formation, or time has changed by a certain amount. This is useful when you want to run the trajectory for a long time, but do not want to generate very large output files. Modeling solvent effects with COSMO MOPAC contains a method for modeling the effect of highly polar solvents. COSMO (Conductor-like Screening Model), developed by Klamt and Schüürmann, approximates the dielectric screening BioMedCAChe User Guide 20-19 Tutorials Basics Understanding With a Dynamic Reaction Coordinate (DRC), you calculate the dynamics trajectory that conserves energy. As potential energy is lost, the kinetic energy increases, so that the total energy is constant. DRC calculations may be run from any geometry. An internal coordinate can be specified for the initial displacement. Customizing The IRC is intended to be used with a transition-state geometry as the starting point. You choose a vibrational mode for the initial motion. This vibration is usually the reaction coordinate. You also choose whether the initial geometry is displaced in the positive or negative direction along this vibrational mode. Appendices With an Intrinsic Reaction Coordinate (IRC), you calculate the path in which all kinetic energy is lost at every step. As the potential energy changes, the kinetic energy generated is annihilated so that the potential and total energies are the same. An IRC follows the reaction path from the transition-state geometry to either the reactants, or products of the reaction. It simulates one effect of a reaction in a solution, in which all excess kinetic energy would be lost at every step of the trajectory. Other effects, such as the solvent dielectric, are not simulated by the IRC. Introduction Understanding MOPAC Chapter 20 - CAChe Computational Applications energy of a solvent by the method of image charges. It assumes that the medium is a conductor. For water, this is a very good approximation. The method is generalized by constructing a conducting polygonal surface based on the van der Waal’s atom radii and an effective solvent radius. A good example of the method is modeling the solvent effect of water on the geometry of alanine. In the gas phase, MOPAC predicts that neutral alanine (H2N-CH2-CH2-COOH) is more stable than the zwitterionic form (+H3N-CH2-CH2-COO-). When COSMO is used to model the solvent effects, the zwitterion is correctly predicted to be more stable. Because COSMO includes solvent effects for energy gradients as well as energy, it is applicable to all types of MOPAC calculations. However, because COSMO requires a considerable amount of computation, it should not be used unless solvent effects are important. Because of extra memory usage, calculations that use COSMO cannot handle as many atoms as those that do not use it. The practical limit depends upon computer speed and memory but for most computers the practical limit is approximately 200 atoms. Large molecules MOPAC contains a patented method called MOZYME that alters the way in which the electronic structure is calculated. As a result, calculations on large chemical systems require on a small fraction of the memory needed for a conventional calculation and run very much faster. MOZYME can be used for simple geometric calculations, such as geometry optimization and transition state location, and for the calculation of polarizability. There are limitations when this option is used. • • 20-20 Only closed shell RHF calculations are allowed. Thus large molecule calculations are limited to chemical samples in their ground state. Radicals electronic excited states cannot be run. The results are not so precise. For calculations that need high precision MOZYME should not be used. BioMedCAChe User Guide Tutorials Although the SCF uses only a small fraction of the memory needed by an equivalent MOPAC calculation, there is no way to reduce the memory needed for geometry optimization. The EF method uses a large amount of memory, and should therefore not be used in optimizing the geometry of very large systems. A better choice is LBFGS, although it, too, uses a lot of memory. When the geometry of a large system is optimized, the run should be broken into a series of short calculations, of 50-200 cycles. This is necessary because the geometry might change considerably during the optimization, and atoms that were not interacting at the start of the calculation might interact strongly at the end of the run. By stopping and restarting the optimization, any new interactions are taken into account. Failure to break up an optimization in this way can lead to a ruined calculation. Appendices Customizing Understanding Basics • Introduction Understanding MOPAC BioMedCAChe User Guide 20-21 Chapter 20 - CAChe Computational Applications Understanding Tabulator The Tabulator application converts the results of CAChe computational methods into three-dimensional surfaces and properties that you can view from the chemical sample file. This operation is needed to visualize electron density, molecular orbital, electrostatic potential, superdelocalizability, and amplitudes of UVvisible absorption surfaces. The Tabulator uses the molecule file as input, and produces new output isosurface files. Tabulator concepts To convert the results of some CAChe computations into threedimensional graphics data, the Tabulator computes the value of wavefunctions at all points in a three-dimensional grid. To derive an isosurface, the Tabulator connects points of the same value throughout the grid. The Tabulator uses as input the wavefunction data generated by the computational applications. Recall that ExtHückel, MOPAC, ZINDO and DGauss compute wavefunction data for all molecular orbitals, but you can save a subset of the data in your molecule file. You can tabulate data and visualize properties for any subset of the data that you saved in your chemical sample file. The Tabulator carefully orders the molecular orbitals according to increasing energy. This may not be consistent with the numbering order in ExtHückel, MOPAC, ZINDO and DGauss. Therefore, molecular orbital numbers reported by the Tabulator may not exactly correspond with the molecular orbital numbers reported by the other applications, especially MOPAC and ZINDO. Tabulator computes coordinates for an electronic property of your molecule once the computational applications have finished calculating the property. Tabulator creates separate isosurface files for each property you tabulate. You do not open the isosurface file to view the electronic property. Open the chemical sample file and choose the relevant menu options to view the data stored in isosurface files. 20-22 BioMedCAChe User Guide Understanding CONFLEX down-stream/reservoir-filling • pre-check. a variable search limit three modes of perturbation (unique corner flap, edge flip, and stepwise rotation) This section provides reference information about the kinds of computations possible using CONFLEX theory and specific information about the CAChe computational application CONFLEX. Use CONFLEX to compute: Understanding optimum geometry conformations potential energy maps. Appendices Customizing • • • Tutorials • • • Basics CONFLEX generates low-energy conformers of a molecule of any shape. CONFLEX incorporates several unique strategies to complete a conformational space search: Introduction Understanding CONFLEX BioMedCAChe User Guide 20-23 Chapter 20 - CAChe Computational Applications CONFLEX concepts For convenience, the structures being processed are given different names, as follows: • • input structure is the input at the beginning of a search • starting (trial) structure is the perturbed structure before geometry-optimization • optimized structure is the structure after geometryoptimization • stored structure is the optimized structure that survived the redundancy test, and it is saved in the conformer storage. initial structure is called in from the conformer storage at the beginning of each perturbation cycle The algorithms for searching conformational space or a torsional hypersurface involve repeated sampling from the vast conformational space. The process, which is illustrated on the following page (a curved arrow indicates a looping subprocess), has the following steps: (1) generation of an appropriate starting structure (2) geometry-optimization of the starting structure (3) comparison of the optimized structure with the stored conformers. Finally, a structure passing all comparisons is added to the list of stored conformers. In the advanced conformational-space search-algorithms, the first step consists of two subprocesses: (1-1) selection of an initial structure from among the stored conformers (1-2) assignment of appropriate structural perturbation to the initial structure to produce the coordinates of a starting structure. Whereas the overall scheme is similar to most of the known conformation-generators, new strategies have been implemented for each step. In the following sections, these strategies are described. 20-24 BioMedCAChe User Guide Input and Output Structures Process (1) (1-1) (1-2) (1-3) (2) (3) (3-1) Input Nonea None or Stored Initial None Starting Optimized Optimized Output Starting Initial Starting Stored Optimized None/Optimized Stored a At the beginning, no input structure exists in the conformation storage. Customizing The structures used in each process are: Understanding Basics Tutorials Introduction Understanding CONFLEX The lowest-energy structure of the unused, stored conformers is chosen as the initial structure (a structure is considered to be unused if it has never been perturbed to generate a starting structure). This strategy is important to search through the region in the conformational space, in the most efficient way towards a lower BioMedCAChe User Guide 20-25 Appendices Generation of starting structure Chapter 20 - CAChe Computational Applications energy area. This is similar to a stream filling an empty reservoir by finding the the lowest point. The strategy is illustrated schematically here for a conformational space search by the reservoir-filling algorithm. • The initial structures are sampled in the numbered order given to the conformers (ellipses). A pair of conformers connected by a line comprise an initial structure and a conformer generated from that initial structure through perturbation and geometry-optimization. • When the search limit is set to the level of Limit 1, the search is complete after the initial structures 1 through 17 have been processed. • Then the search limit is increased to Limit 2, and conformers 18 through 25 are subjected to initial structures. Variable search limit When the global minimum or the instant global minimum in a local area is reached, the search moves towards a higher-energy area, and sometime local dips are overlooked in the process. The gradual expansion can be utilized to guarantee the thoroughness of the lowenergy search. The search limit is first decided, for example 5 kcal/mol from the global energy minimum, and all the conformers within this first 20-26 BioMedCAChe User Guide Understanding CONFLEX Tutorials The limit is increased to Limit 2 and all the conformers in the new window (between Limit 1 and 2) are subjected to initial structures in order of increasing energy. If local networks of conformers (LAN-a and LAN-b) are not connected within the first window, LAN-b is searched after LAN-c in the second window. A window width of 7 to 10 kcal/mol from the global minimum is generally sufficient to achieve an exhaustive search of the first, chemically meaningful window. Therefore, the variable limitation technique is a useful strategy for keeping the search region under control in the universal search. Introduction window (Limit 1) are used as the initial structures. During this search, all the conformers are saved, even those with energies higher than Limit 1. To ensure exhaustive generation of all possible starting structures, local perturbation is applied to every flexible part in the initial structure. The following three modes of perturbation are designed to mimic the elementary process in the thermal movements of a molecule undergoing conformational change: corner flap and edge flip for endocyclic parts, and stepwise rotation for acyclic parts. Understanding Customizing If the perturbation cannot move the starting structure from the territory to which it initially belonged, subsequent geometryoptimization will return it to the same structure. The territories of similar conformers may be located in close vicinity in the conformational space, constituting a local network of local territories, and less similar conformers may be considered to belong to different localities. Therefore, the method of perturbing an initial structure to produce a candidate new conformer is also responsible for the efficiency of search. Basics Local perturbation Corner flap exploits the puckered feature of a ring structure, and involves the movement of a corner ring-atom to the other side of the local average plane. Two to four contiguous dihedral angles are simultaneously changed along the ring. The advantages of corner BioMedCAChe User Guide 20-27 Appendices Corner flap Chapter 20 - CAChe Computational Applications flap are: • • it is highly efficient in producing a new energy-minimum • it generally does not propagate itself, and can therefore be applied to every ring-atom. In many cases, as many starting structures as the number of ring-atoms can be obtained. it can be considered to mimic a barrier-crossing step in the elementary process of thermal conformational interconversion Edge flip Whilst corner flap is efficient for small to medium ring structures, it is sometimes an unsuccessful technique for larger rings. For example, a ring-atom that is lying on the average local ring plane and flanked by a pair of gauche bonds of the same sign cannot be flapped. Corner flap alone cannot produce all the nearby energy minima for larger rings where mechanisms of conformational interconversion involving more than four contiguous bonds exist. Edge flip is where two adjacent ring-atoms are simultaneously given the corner flap in opposite directions, where a ring bond is flipped. Edge flip is best illustrated by the chair-to-twist boat conversion of cyclohexane. An edge flip perturbation mode, which proved to be effective for large rings, consists of simultaneous small flapping of two adjacent ring-atoms towards the inside of the ring. In contrast to the other two perturbation methods, both directed towards the outside of the ring, this mode is a local inflection occuring for ring structures with a large cavity space. The edge flip involves rotation of two to five contiguous ring bonds, and are called when certain combinations of three contiguous dihedral angles patterns (A, G, G') appear along the ring. Careful structural adjustments are given in 20-28 BioMedCAChe User Guide Understanding CONFLEX The acyclic part of a molecule is perturbed by stepwise rotation. Typically, a Csp3 -Csp3 bond is given 120 and -120 rotations to produce a pair of new rotamers. This method, combined with the reservoir-filling strategy for guiding the search direction, searches low-energy conformers for short side chains and linear molecules with up to six to ten rotatable acyclic bonds. However, it is not as effective for large molecules with multiple branching, where unexpectedly high-energy starting structures are produced. The time required to perform systematic perturbations on the initial structure comprises only a few percent of the total computing time, while by far the most time-consuming step is the geometryoptimization. Therefore, the pre-check is an effective way to increase the efficiency of the conformational space search. In CONFLEX, a structure that is being geometry-optimized is frequently compared with all the stored conformers during the optimization, and that calculation is stopped as soon as the candidate structure is identified as superimposable with one of the stored structures. However, if comparison is made too often, the comparison time will take up a significant part of the total time when the number of stored structures increases. Therefore, with this option, CONFLEX will perform the comparison at 0, 10, 20, and every 10 iterations until 200 iteration, and every 50 iterations thereafter. This strategy reduces the total computing time by 30 to 60 %. BioMedCAChe User Guide 20-29 Appendices Pre-check during optimization Customizing Understanding Optimization Basics Stepwise rotation Tutorials Introduction order to ensure smooth transformation of local structure by edge flip, which is actually a much larger perturbation. Chapter 20 - CAChe Computational Applications Comparison Comparison using conformational distance The similarity between two conformers can be quickly identified by comparing the root mean square of differences in the corresponding pair of dihedral angles, f A and f B. This method is fast and accurate. To save time, the dihedral angles of a stored conformer are retrieved for comparison rather than re-calculating those dihedral angles each time. N dihedral d conf = 20-30 A B 2 ( fi – fi ) ⁄ N i=1 ∑ BioMedCAChe User Guide 21 CAChe BioComputations Introduction 21 Overview Residue names Protein secondary structure Dihedral angles used for building peptides • • • • antigenicity hydrophobicity hydrophilicity flexibility Sequence alignment algorithm Customizing • Basics Sequence property predictions for Understanding • • • • Tutorials This chapter explains the theories and methods behind the following CAChe biocomputations: Contents Secondary structure concepts Defining secondary structure 21-4 21-4 Sequence property concepts Sequence property parameters 21-6 21-8 21-8 21-9 Understanding Dihedral Angles for Building Understanding Sequence Alignment 21-12 Alignment concepts 21-12 Peptides 21-6 3D structure concepts Predefined dihedral angles for regular 21-6 Appendices polypeptide conformations Understanding Residue Names 21-2 Understanding Protein Secondary Structure Understanding Sequence Property Predictions Definition 21-4 Chapter 21 - CAChe BioComputations Understanding Residue Names Residue names used in CAChe are those defined in the Protein Data Bank Contents Guide: Atomic Coordinate Entry Format Description Version 2.1 (draft), October 25, 1996 ". Amino acids are defined in the following table 3 Letter code 1 Letter code Alanine ALA A C3 H7 N1 O2 89.09 Arginine ARG R C6 H14 N4 O2 174.2 Asparagine ASN N C4 H8 N2 O3 132.12 Aspartic acid ASP D C4 H7 N1 O4 133.1 ASP/ASN ambiguous ASX B C4 H71/2 N11/2 O31/2 132.61 Cysteine CYS C C3 H7 N1 O2 S1 121.15 Glutamine GLN Q C5 H10 N2 O3 146.15 Glutamic acid GLU E C5 H9 N1 O4 147.13 GLU/GLN ambiguous GLX Z C5H91/2 N11/2 O31/2 146.64 Glycine GLY G C2 H5 N1 O2 75.07 Histidine HIS H C6 H9 N3 O2 155.16 Isoleucine ILE I C6 H13 N1 O2 131.17 Leucine LEU L C6 H13 N1 O2 131.17 Lysine LYS K C6 H14 N2 O2 146.19 Methionine MET M C5 H11 N1 O2 S1 149.21 Phenylalanine PHE F C9 H11 N1 O2 165.19 Proline PRO P C5 H9 N1 O2 115.13 Serine SER S C3 H7 N1 O3 105.09 Threonine THR T C4 H9 N1 O3 119.12 Tryptophan TRP W C11 H12 N2 O2 204.23 Tyrosine TYR Y C9 H11 N1 O3 181.19 Valine VAL V C5 H11 N1 O2 117.15 Name 21-2 Formula Mol. wt. BioMedCAChe User Guide Understanding Residue Names The nucleotides are defined in this table. 3 Letter codea 1 Letter code Adenosine A A C10 H14 N5 O7 P1 347.22 Cytidine C C C9 H14 N3 O8 P1 323.20 Guanosine G G C10 H14 N5 O8 P1 363.22 Inosine I I C10 H13 N4 08 P1 348.21 Thymidine T T C10 H15 N2 08 P1 322.21 Uridine U U C9 H13 N2 09 P1 324.18 Mol. wt. Introduction Formula Tutorials Name Appendices Customizing Understanding Basics a. When 3-letter codes are displayed in the Sequence View, nucleotides are displayed as single letters. BioMedCAChe User Guide 21-3 Chapter 21 - CAChe BioComputations Understanding Protein Secondary Structure Definition This section provides reference information about the way CAChe defines secondary structure from the geometry of a protein. Secondary structure concepts Regions of proteins can be described as alpha helicies, beta sheets and turns. Alpha helicies and beta sheets are stable structures created by hydrogen bonds and first predicted in 1951 by Linus Pauling and Robert Corey. These regions can be readily observed when proteins are displayed in the CAChe workspace. Defining secondary structure CAChe uses hydrogen bonds to classify regions of proteins as helical, beta sheets or turns. Hydrogen bonds are determined by distance criteria between N-H and C=O groups. The method used is that of Kabsch and Sander.1 1. Wolfgang Kabsch and Christian Sander, “Dictionary of Protein Secondary Structure: Pattern Recognition of Hydrogen-Bonded and Geometrical Features”, Biopolymers, 1983, 22, 2577-2637. 21-4 BioMedCAChe User Guide Understanding Protein Secondary Structure Definition Secondary Structrue Codes Description Residue is in 4-helix B Residue is in isolated beta bridge E Residue is in extended strand or participates in beta ladder G Residue is in 3-helix I Residue is in 5-helix T H-bonded turn Appendices Customizing Understanding Basics H Tutorials Secondary structure is displayed with 1-letter codes shown in the following table. Introduction This method is the standard method used by the Protein Data Bank for automatic verification and validation of HELIX and SHEET records. BioMedCAChe User Guide 21-5 Chapter 21 - CAChe BioComputations Understanding Dihedral Angles for Building Peptides This section provides reference information about the way CAChe builds peptides. 3D structure concepts The shape of proteins and peptides is determined largely by the dihedral angles of the backbone. The backbone is defined by PDB atom names. For proteins, the backbone consists of atoms named N, CA and C. Predefined dihedral angles for regular polypeptide conformations CAChe uses predefined dihedral angles for protein conformations. The angles are from G. N. Ramachandran and V. Sasisekharan, Adv. Protein Chem., 1968, 23, 283 and IUPAC-IUB Commission on Biochemical Nomenclature, Biochemistry, 1970, 9, 3471. Structure Fully extended 21-6 Phi Psi 180 180 Antiparallel beta sheet -139 +135 Parallel beta sheet -119 +113 BioMedCAChe User Guide Understanding Dihedral Angles for Building Peptides Psi Right-handed alpha helix -57 -47 Left-handed alpha helix +60 +60 310 helix -49 -26 pi helix -57 -70 Introduction Phi Predefined values for turns are from C. M. Wilmot and J. M. Thornton, “Analysis and Prediction of the Different Types of β-Turn in Proteins,” J. Mol. Biol., 1968, 203(1), 221-32. Psi1 Phi2 Psi2 -60 -30 -90 0 Type 1’ +60 +30 +90 0 Type 2 -60 +120 +80 0 Type 2’ +60 -120 -80 0 Appendices Customizing Type 1 Basics Phi1 Understanding Turn Tutorials Structure BioMedCAChe User Guide 21-7 Chapter 21 - CAChe BioComputations Understanding Sequence Property Predictions CAChe predicts sequence properties for • • • • antigenicity hydrophobicity hydrophilicity flexibility. This section provides reference information about the way CAChe predicts sequence properties from the residue sequence using average parameters. Sequence property concepts Regions of proteins can be described as antigenetic, hydrophobic, hydrophilic and/or flexible. CAChe uses established, simple algorithms for predicting these properties. The property for each residue depends on its type and the types of neighbor residues in the sequence. The following formula is used w i + ---2 1 P i = ---w ∑ Pj w j = i – ---2 Pi is the average property for residue i; pj is the property published and shown in the reference tables and w is the window size. The window size is the number of residues included in the average. 21-8 BioMedCAChe User Guide Understanding Sequence Property Predictions Sequence property parameters Default Window size (w) 7 19 19 19 a. Hopp, T.P. and Woods, K.R., Proc. Natl. Acad. Sci. USA, 1981, 78, 3824-3828 b. Parker, J. M., Guo, D., Hodges, R. S., Biochemistry, 1986, 25, 5425-5432 BioMedCAChe User Guide Tutorials 7 -0.400 -1.115 0.170 -1.310 -1.220 1.920 -0.670 -0.640 1.250 -0.670 1.220 1.020 -0.920 -0.490 -0.910 -0.590 -0.550 -0.280 0.910 0.500 0.000 1.670 -1.065 Basics 0.115 0.000 -0.120 0.065 -0.071 -0.141 -0.184 0.312 -0.292 0.206 0.075 -0.385 -0.077 -0.053 -0.011 0.058 -0.026 -0.045 -0.013 -0.114 0.000 0.013 0.000 Hydrophobicity Sweet, Eisenberge Understanding 2.100 8.500 1.400 10.000 7.800 -9.200 5.700 2.100 -8.000 5.700 -9.200 -4.200 7.000 2.100 6.000 4.200 6.500 5.200 -3.700 -10.000 0.000 -1.900 6.900 Antigenicity Wellingc Customizing A B C D E F G H I K L M N P Q R S T V W X Y Z Hydropathy Kyte and Doolittle (Hydrophobicity Index)d 1.800 -3.500 2.500 -3.500 -3.500 2.800 -0.400 -3.200 4.500 -3.900 3.800 1.900 -3.500 -1.600 -3.500 -4.500 -0.800 -0.700 4.200 -0.900 -0.490 -1.300 -3.500 Antigenicity Parker (Hydrophilicity Index)b Appendices 1 letter code Antigenicity Hopp and Woods (Hydrophilicity Index)a -0.500 1.600 -1.000 3.000 3.000 -2.500 0.000 -0.500 -1.800 3.000 -1.800 -1.300 0.200 0.000 0.200 3.000 0.300 -0.400 -1.500 -3.400 -0.200 -2.300 1.600 Introduction Sequence property parameters are defined according to this table. 21-9 Chapter 21 - CAChe BioComputations c. Welling, G.W., Weijer W.J., van der Zee, R., Welling-Wester, S., FEBS Lett., 1985, 188, 215218 d. Kyte, J. and Doolittle, R. F., J. Mol. Biol., 1982, 157, 105-132 e. Sweet, R. M. and Eisenberg, D., J. Mol. Biol., 1983, 171, 479-488 . 1 letter code A B C D E F G H I K L M N P Q R S T V W X Y Z Default Window size (w) 21-10 Hydrophobicity Janina Hydrophobicity Fauchere and Pliskab 0.300 -0.550 0.900 -0.600 -0.700 0.500 0.300 -0.100 0.700 -1.800 0.500 0.400 -0.500 -0.300 -0.700 -1.400 -0.100 -0.200 0.600 0.300 0.000 -0.400 -0.700 0.31 -0.68 1.54 -0.77 -0.64 1.79 0 0.13 1.8 -0.99 1.7 1.23 -0.6 0.72 -0.22 -1.01 -0.04 0.26 1.22 2.25 0.000 0.96 -0.43 19 19 12.97 11.13 14.63 10.85 11.89 14 12.43 12.16 15.67 11.36 14.9 14.39 11.42 11.37 11.76 11.72 11.23 11.69 15.71 13.93 0 13.42 11.82 Hydrophilicity Goldman, Engelman, Steitzd -1.600 7.000 -2.000 9.200 8.200 -3.700 -1.000 3.000 -3.100 8.800 -2.800 -3.400 4.800 0.200 4.100 12.300 -0.600 -1.200 -2.600 -1.900 0.000 0.700 6.150 19 19 Hydrophobicity Manvalanc BioMedCAChe User Guide Understanding Sequence Property Predictions Janin, J., Nature, 1979, 277, 491 Fauchere, J. L. and Pliska, V., Eur. J. Med. Chem. - Chim. Ther., 1983, 18, No. 4, 369-375 Manvalan, P. and Ponnuswamy, P. K., Nature, 1978, 275, 673 Karplus, P.A. and Schulz, G. E., Naturwissenschaften, 1978, 72, 212-213 Appendices Customizing Understanding Basics Tutorials Introduction a. b. c. d. BioMedCAChe User Guide 21-11 Chapter 21 - CAChe BioComputations Understanding Sequence Alignment CAChe aligns two sequences by performing a pairwise global alignment using the Needleman-Wunsch algorithm1 with a BLOSUM50 substitution matrix. Alignment concepts When sequences from two proteins are placed in adjacent rows, it is Sequences before alignment likely that some residues in one sequence will be identical to the residues at the same position in the other sequence. In some cases the adjacent residues will be similar in properties and function and frequently substituted during evolution. In other cases, the number 1. Needleman, S. B., and Wunsch, C. D., J. of Mol. Bio., 1970, 48, 443-453, “A general method applicable to the search for similarities in the amino acid sequence of two proteins”. 21-12 BioMedCAChe User Guide Understanding Sequence Alignment Sequences after alignment Appendices Customizing Understanding Alignment is the process of inserting gaps so that the score of adjacent residues is maximized. The scoring used in CAChe is the BLOSUM50 substitution matrix augmented with a single column of Basics Tutorials Introduction of matching residues can be increased by inserting “gaps” in the sequence that account for evolutionary insertions and deletions. BioMedCAChe User Guide 21-13 Chapter 21 - CAChe BioComputations weights for any group that is not a standard amino acid.. The BLOSUM50 Substitution Matrix Used in CAChe A R N D C Q E G H I L K M F P S T W Y V ? A 5 -2 -1 -2 -1 -1 -1 0 -2 -1 -2 -1 -1 -3 -1 1 0 -3 -2 0 -1 R -2 7 -1 -2 -4 1 0 -3 0 -4 -3 3 -2 -3 -3 -1 -1 -3 -1 -3 -1 N -1 -1 7 2 -2 0 0 0 1 -3 -4 0 -2 -4 -2 1 0 -4 -2 -3 -1 D -2 -2 2 8 -4 0 2 -1 -1 -4 -4 -1 -4 -5 -1 0 -1 -5 -3 -4 -1 C -1 -4 -2 -4 13 -3 -3 -3 -3 -2 -2 -3 -2 -2 -4 -1 -1 -5 -3 -1 -1 Q -1 1 0 0 -3 7 2 -2 1 -3 -2 2 0 -4 -1 0 -1 -1 -1 -3 -1 E -1 0 0 2 -3 2 6 -3 0 -4 -3 1 -2 -3 -1 -1 -1 -3 -2 -3 -1 G 0 -3 0 -1 -3 -2 -3 8 -2 -4 -4 -2 -3 -4 -2 0 -2 -3 -3 -4 -1 H -2 0 1 -1 -3 1 0 -2 10 -4 -3 0 -1 -1 -2 -1 -2 -3 2 -4 -1 I -1 -4 -3 -4 -2 -3 -4 -4 -4 5 2 -3 2 0 -3 -3 -1 -3 -1 4 -1 L -2 -3 -4 -4 -2 -2 -3 -4 -3 2 5 -3 3 1 -4 -3 -1 -2 -1 1 -1 K -1 3 0 -1 -3 2 1 -2 0 -3 -3 6 -2 -4 -1 0 -1 -3 -2 -3 -1 M -1 -2 -2 -4 -2 0 -2 -3 -1 2 3 -2 7 0 -3 -2 -1 -1 0 1 -1 F -3 -3 -4 -5 -2 -4 -3 -4 -1 0 1 -4 0 8 -4 -3 -2 1 4 -1 -1 P -1 -3 -2 -1 -4 -1 -1 -2 -2 -3 -4 -1 -3 -4 10 -1 -1 -4 -3 -3 -1 S 1 -1 1 0 -1 0 -1 0 -1 -3 -3 0 -2 -3 -1 5 2 -4 -2 -2 -1 T 0 -1 0 -1 -1 -1 -1 -2 -2 -1 -1 -1 -1 -2 -1 2 5 -2 -2 0 -1 W -3 -3 -4 -5 -5 -1 -3 -3 -3 -3 -2 -3 -1 1 -4 -4 -3 15 2 -3 -1 Y -2 -1 -2 -3 -3 -1 -2 -3 2 -1 -1 -2 0 4 -3 -2 -2 2 8 -1 -1 V 0 -3 -3 -4 -1 -3 -3 -4 -4 4 1 -3 1 -1 -3 -2 0 -3 -1 5 -1 ? -1 -1 -1 -1 -1 -1 -1 -1 -1 -1 -1 -1 -1 -1 -1 -1 -1 -1 -1 -1 1 implementation of the Needleman-Wunsch algorithm follows that of Gotoh1 as described by Durbin, et al.2 The Needleman-Wunsch global alignment gives the highest scoring alignment. However, it may not be unique. There may be other alignments with the same score. If the two sequences are of length n and m respectively, then the time and memory required for the alignment are proportional to nm. For protein sequences that are typically less than 1,000 residues long, alignment is quick. 1. Gotoh, O., J. of Mol. Bio., 1996, 264, 823-838, “An improved algorithm for matching biological sequences”. 2. Durbin, R., Eddy, S. R., Krough, A., Mitchison, G., “Biological sequence analysis: Probabilistic models of proteins and nucleic acids”, Cambridge University Press, 1998, 19-22. 21-14 BioMedCAChe User Guide 1 Tutorials Basics Using Appendix B, “CAChe File Management”, lists the directory structure and file content of your Cache folder. Appendices Appendix A, “Keyboard and Toolbar Shortcuts”, describes the keyboard shortcuts and commands you can use in CAChe, and describes each button in the toolbar. Understanding The following appendices describe the shortcuts you can use in CAChe, and the files that are added to your computer when you install your CAChe product: Appendices Part five Introduction Appendices A A Introduction Keyboard and Toolbar Shortcuts Overview keyboard shortcuts and the corresponding toolbar buttons that replace menu options • keyboard commands that provide operations for which there are no menu options • toolbar buttons and the menu options that each button performs. Contents Keyboard shortcuts Menu option shortcuts Miscellaneous keyboard commands Toolbar shortcuts A-2 A-3 A-4 A-6 Appendices Understanding Appendices Using Basics • Tutorials This appendix contains details of: Appendix A - Keyboard and Toolbar Shortcuts Keyboard shortcuts Keyboard commands and toolbar buttons are available as shortcuts for some menu options. Some keyboard shortcuts provide operations not available through menus or dialog boxes. Keyboard shortcuts and their corresponding toolbar buttons are shown on the following pages, alongside the menu options that the shortcut or toolbar button performs. Also, miscellaneous other keyboard commands are summarized. A-2 CAChe for Windows User Guide Keyboard shortcuts Menu option shortcuts Open an existing file. File Open Ctrl Z Undo (or redo) last operation. Edit Undo Ctrl S Save active file. File Save Alt F4 Quit application. File Exit Ctrl P Print active window. File Print Ctrl F Scale and center a chemical sample. View Fit in Window Ctrl C Copy selected items to clipboard. Edit Copy Ctrl X Cut selected items to clipboard. Edit Cut Ctrl V Paste selected items into active workspace. Edit Paste Del Delete selected items. Edit Delete Ctrl D Duplicate selected items. Edit Duplicate Ctrl L Add a label to selected items. Adjust Define Geometry Label Ctrl K Connect two selected atoms with a bond. Edit Connect Atoms CAChe for Windows User Guide Introduction Ctrl O Tutorials File New Basics Create new (blank) file. Using Ctrl N Toolbar button Appendices Menu option Understanding Action Appendices Keys A-3 Appendix A - Keyboard and Toolbar Shortcuts Keys Action Menu option Ctrl A Select all. Edit Select All Ctrl I Invert chiral carbon. Edit Invert Chirality Toolbar button Miscellaneous keyboard commands The following keyboard commands are available for miscellaneous functions. A-4 Keys Action n or N Exit all keyboard modes, keys no longer manipulate your chemical sample or. + Increase the rate of change for keyboard view adjustments like rotating, translating, and scaling. - Decrease the rate of change for keyboard view adjustments like rotating, translating, and scaling. space Toggle the autorepeat flag. When on, autorepeat continues a viewing adjustment such as rotate until another viewing command is received. i or I Return view of molecular structure to initial conditions, including no rotation or translation, scale factor of 0.1, and x, y, and z axes aligned with origin. a or A Enter the keyboard view rotation mode and set the rate of change to 90° per rotation. No adjustments occur until you choose a direction of rotation (x, X, y, Y, z, Z). CAChe for Windows User Guide s or S Enter the keyboard view scale mode. No adjustments occur until you choose a direction of scaling (x, X, y, Y, z, Z). x Assign a negative x direction to the current view adjustment mode. Rotate about minus x axis. Translate in the negative x direction. Decrease scale. X Assign a positive x direction to the current view adjustment mode. Rotate about positive x axis. Translate in the positive x direction. Increase scale. y Assign a negative y direction to the current view adjustment mode. Rotate about minus y axis. Translate in the negative y direction. Decrease scale. Y Assign a positive y direction to the current view adjustment mode. Rotate about positive y axis. Translate in the positive y direction. Increase scale. z Assign a negative z direction to the current view adjustment mode. Rotate about minus z axis. Translate in the negative z direction. Decrease scale. Z Assign a positive z direction to the current view adjustment mode. Rotate about positive z axis. Translate in the positive z direction. Increase scale. CAChe for Windows User Guide Tutorials Enter the keyboard view translation mode. No adjustments occur until you choose a direction of translation (x, X, y, Y, z, Z). Basics t or T Using Enter the keyboard view rotation mode. No adjustments occur until you choose a direction of rotation (x, X, y, Y, z, Z). Appendices r or R Understanding Action Appendices Keys Introduction Keyboard shortcuts A-5 A-6 View Space Filling View Ball & Cylinder View Lines View Lines Only Edit Position View Fit in Window Beautify Comprehensive Adjust Define Geometry Label Edit Connect Atoms Experiment Show Server Information Experiment Show Submitted Experiments Experiment New Context-sensitive Help File Print Help Index Edit Paste Edit Copy Edit Cut File Save File Open File New Appendix A - Keyboard and Toolbar Shortcuts Toolbar shortcuts The following diagram shows the menu commands that each toolbar button performs. CAChe for Windows User Guide B B Introduction CAChe File Management Overview the files and folders added to your hard disk when you install CAChe from the installation CD-ROM. Contents CAChe folders and files B-2 Appendices Understanding Appendices Using Basics • Tutorials This appendix contains details of: Appendix B - CAChe File Management CAChe folders and files The table below lists the files and folders that are added to your computer when you install your CAChe product. The files and folders that are installed depend on the particular CAChe product that you have purchased. Folder File name Description cache.exe GenID.exe MessageDirector.exe PLWin.exe ProcedureEditor.exe • CAChe applications Analysis.idx SamplePart.idx Space-Groups het_dictionaryCIF.txt Datadict • Property and procedure index cache.chm cache2.chm cache.cnt cache2.cnt cache.hlp cache2.hlp cache_pe.cnt • CAChe Help files ReleaseNotes.pdf Tutorials.pdf UserGuide.pdf • CAChe documentation c:\CACHE • Space group transformations • HET group definitions from PDB • Data dictionary • Various resource files and libraries used by cache.exe, PLWin.exe, and ProcedureEditor.exe c:\CACHE\APP errdll.dll Crystal.dll B-2 • Error code resource • Crystal code resource BioMedCAChe User Guide CAChe folders and files Folder File name Description c:\CACHE\BIN • Contains Conflex compute engine and Conflex manager c:\CACHE\BIN\DYNAMICS • Contains Dynamics compute engine and Dynamics manager c:\CACHE\BIN\MECHANICS • Contains Mechanics compute engine and Mechanics manager c:\CACHE\BIN\MOPAC • Contains MOPAC compute engines and MOPAC manager c:\CACHE\BIN\TABULATOR • Contains Tabulator compute engine and Tabulator manager Tutorials c:\CACHE\BIN\CONFLEX Introduction CAChe Calculation Manager c:\CACHE\ExpEnvironment\Data Basics CalcMgr.exe c:\CACHE\ExpEnvironment\Modules • Chemical sample files c:\CACHE\InstallationNotes • CAChe installation documents c:\CACheUser\cachetmp • Calculation queue and files while calculations are running c:\CACheUser\ExpEnvironment • User procedure packs c:\CACHE\XLATORS BioMedCAChe User Guide • Translation libraries used during file input and output Appendices cachemap.dll cachetrn.dll crystalstructure.dll fio.dll gaussian.dll pdbio.dll ShelX.dll Understanding c:\CACHE\FragmentLibrary Appendices Using c:\CACHE\ExpEnvironment\Packages B-3 Appendix B - CAChe File Management B-4 BioMedCAChe User Guide 1 Introduction Index Overview Index Customizing Using Basics Tutorials This is a full index for the BioMedCAChe User Guide. Index I Index Symbols .csf files 4-3 .ins files 6-65 .seq files generating 20-5 .xsf files 6-64 Numerics 310 helix 21-7 3D cursor 3-15 A Adding chemical samples in ProjectLeader 12-12 Adjusting atom distance 8-13 Agouti-related protein 19-22 All conformations dialog box 14-27 Allinger, N. L. 20-3 Alpha helix 21-7 Amino acid creating nonstandard 9-47 nonstandard 9-45 Amino acid repository 9-45 Analysis criteria 14-24 Analyzing map files 14-22 Angle bond 8-14 dihedral 8-15 improper torsion 8-17 Animate geometry labels dialog box 8-44 Animating map files 14-26 search labels 8-44 Application window 3-4 Arrow buttons 3-24 Assemblage file 20-6 Atom attributes dialog box 5-21, 6-13, 8-2, 8-33, 9-7, 16-8 I-2 Atom properties 10-7 changing 5-19 Atom/bond tool 3-14, 3-19, 3-32, 4-4 Atomic partial charge 2-15, 10-7 Atoms calculating partial charge 16-2 change the charge of 5-21 changing the appearance of 6-8 changing the color of 6-14 changing the radius 5-26 changing the shape of 6-11, 6-13 color 16-10 displaying 6-18 drawing 4-5 fusing 7-21 grouping 7-24 hiding 6-18 hiding locked labels 8-33 interpreting properties 16-7 labeling 6-8 labels 16-8 lock 8-32 measuring distance 8-13 modifying 5-2 properties 16-1 selecting locked atoms 8-34 specifying distance 8-13 ungroup 7-28 unlock 8-33 Axis attributes changing 14-18 Axis attributes dialog box 14-18 B Beautify menu 5-24, 5-25, 5-26 Beta sheet 21-6 BioComputations 21-1 Biomolecules 9-1 investigating 19-1 Bond attributes dialog box 6-24, 16-11 Bond order 2-15, 10-7 BioMedCAChe User Guide BioMedCAChe User Guide C Index Customizing Using Basics Tutorials Introduction CAChe overview 2-2 quitting 3-45 sequence view 9-20 user interface 3-3 workspace 3-8 Calculating atomic partial charge 16-2 bond order 16-4 bond properties 16-4 connectivity indexes 12-2 current energy 13-11 dipole vectors 12-2 RMS error 8-10 using classical mechanics 13-11 using quantum mechanics 13-11 Calibrating CAChe 2-9 Calibrations establishing 2-18, 12-2 Calling a procedure 11-20 Center of rotation (rotate tool) 7-4 Centering objects 7-6 Changing atom or bond properties 3-42 Changing a bond 5-28 Changing atom and bond properties 5-19 Charge 16-7 changing 5-21 Charge box 3-9, 3-11 Check boxes 3-24 Chemical sample files 4-2 opening existing 4-3 opening in ProjectLeader 12-12 opening new 4-2 preparing 10-4 Chemical samples creating 4-1 modifying 5-1 optimizing 13-1 properties 10-5 viewing 6-1 Index Bond orders 20-11 Bond properties 10-7 changing 5-19 Bond strain 2-15, 10-7, 15-14 bond type 3-9 Bond Type box 3-12 Bond types 5-32 Bonds calculating order 16-4 calculating properties 16-4 calculating strain 16-5 changing 5-28 changing the appearance of 6-21 changing the color of 6-25, 6-26 changing the shape of 6-21 changing type 5-30 color 15-14 coordinate covalent 5-33 displaying 6-28 double covalent 5-32 drawing 4-6 drawing between two exisiting atoms 4-7 drawing with an atom 4-8 fusing 7-22 hiding 6-28 interpreting properties 16-7 ionic 5-33 modifying 5-2 order 15-14, 15-15, 16-7, 16-11 π coordination bond 5-34 properties 16-1 radius 16-11 single covalent 5-32 specifying angle 8-14 strain 15-14, 16-12, 16-13 triple covalent 5-33 type 15-14, 15-15 weak 5-33 Broken geometry locks 8-31 Bumps labeling 8-28 Buttons toolbar A-1, A-3 I-3 Index Chiral centers 8-1, 8-2 inverting 8-3 labeling 8-2 viewing 8-2 Choosing options and items 3-17 Classical mechanics 2-4, 13-3 rigid energy map 14-6 Clicking and dragging on objects 3-19 Clicking on objects 3-18 Cloning an experiment 11-27 Closing ProjectLeader 12-45 Color 15-14, 15-15, 16-11 atom 6-14, 16-10 bond 15-14 changing bonds 6-25 default 15-13 define custom palette 6-42 elements 6-37 geometry labels 8-25 partial charge and MO polarity 15-13 surfaces 15-13 tables 15-13 threshold values 15-12 Color dialog box 6-41 Color index 15-14 Color palette changing 6-41 editing 6-38 view 6-40 Comments, adding 12-21 Completing molecules 4-9 Comprehensive command (Beautify menu) 4-15 Computational applications 20-1 Computational chemistry 2-8 Compute engine data editing 11-23 Computer-aided chemistry accuracy 2-10 an overview 2-7 CONFLEX 2-21, 20-23 Conformation properties 10-8 Conformation text box 8-45 Conformational analysis window 14-22 I-4 Conformations 14-9 low-energy 14-1 Connectivity indexes 12-2 Coordinate covalent bonds 5-33 Copy objects to other Windows applications 7-16 Copying objects 7-14 Copying objects from ChemDraw/ISIS Draw 717 Copying sample properties 12-18 COSMO 20-19 Creating a group package 11-31 chemical samples 4-1 experiments 11-25 Crystal Shape dialog box 6-55 Crystal structures building a molecular crystal 6-60 building an infinite lattice 6-62 building asymmetric atoms 6-60 creating CrystalStructure files 6-63 defining cell parameters 6-57 defining fractional coordinates 6-58 displaying and hiding crystal boundaries 6-63 importing data from a text file 6-65 selecting a space group 6-55 ShelX files 6-65 Current energy 2-14, 10-6 calculating 13-11 Cutting objects 7-18 D Define charge dialog box 5-27 Define custom colors 6-42 Defining atom groups 7-24 search labels 8-41 Delete geometry labels 8-26 hydrogens 4-15 molecule portions 7-18 objects 7-19 BioMedCAChe User Guide BioMedCAChe User Guide Basics Tutorials Introduction Draw atom/bond tool 3-30 Drawing a bond with an atom 4-8 atoms 4-5 bonds 4-6 bonds between two existing atoms 4-7 molecules 4-4 Drawing settings 6-43 Drawing settings dialog box 6-43 Drawing tools 2-3 Drop-down lists 3-27 Duplicating molecules 7-13 objects 7-13 Dynamic reaction coordinate 17-4, 20-19 Dynamics 20-7 generating trajectories 20-9 trajectory 2-16, 10-8, 14-10 Dynamics application 2-21 Using E Edit Index Customizing color palette 6-38 parameter data 11-30 procedures 11-17 sample properties 12-18 settings of a compute engine 11-23 Electron affinity 12-3, 15-7 Electron density 2-14, 10-6, 15-13, 15-15 colored by electrostatic potential 15-3 Electron density surface 15-2 colored by superdelocalizability 15-5 colored by susceptibility 15-4 Electron distribution 15-1 Electronic properties 2-8 spectra 18-6 Electrons displaying 6-16 hiding 6-16 view settings 6-48 Index Density 15-16 Deselecting more than one object 5-6 one object 5-5 similar atoms 5-11 Details buttons 3-26 DGauss 2-22 Dialog boxes using 3-22 Dielectric energy 12-3 Dihedral angle specifying 8-15 Dihedral search labels 8-41 Dipole moments 12-3, 20-11 Dipole vectors calculating 12-2 x, y, and z 12-3 Directory buttons 3-25 Display options 6-2 ball and cylinder 6-3 lines 6-2 lines only 6-2 partial charge and calculated bond order 6-3 space filling 6-3 surfaces 15-18 Displaying bonds 6-28 electrons 6-16 experimental details 10-35 sample properties 12-17 servers 10-33 Workspace from ProjectLeader 12-14 Distance changing the workspace distance 6-44 specifying within molecules 8-12 Distribution of electrons 15-1 Docking ligands into proteins 19-22 Document windows arranging 3-16 Documentation set 1-2 Double covalent bonds 5-32 Double-clicking items 3-20 I-5 Index Electrostatic potential 10-7, 15-3, 15-18 Electrostatic potential surface 15-6 Element and size limitations 10-31 Element color changing 6-37 Element type box 3-9, 3-10, 4-5 Energy 10-6 calculating 13-11 molecular mechanics 20-2 Energy maps creating with mechanics 20-5 generating 14-2 optimizing 14-7 rigid 14-6 Enzymes 13-8 Exit. See Quitting Experiment dialog box 10-23 Experiment environment managing the 11-8 refreshing the 11-35 Experiment status dialog box 10-27 Experiments 10-2 atom 2-15 bond 2-15 chemical sample 2-14 chemical sample conformation 2-15 cloning 11-27 creating 11-25 displaying details 10-35 displaying servers 10-33 importing 11-28 performing 2-12, 10-1 reaction 2-16 running 10-18 running a ProjectLeader experiment 12-20 running simultaneously 10-26 saving files 10-23 setting up 10-4 stopping 10-24 troubleshooting 10-32 viewing 10-27 workspace 2-13 Experiments submitted dialog box 10-25, 10-29 I-6 Exporting experiment components 11-37 ProjectLeader worksheet 12-43 scatter plots 12-31 F Faster motion mode 7-12 File management B-1 Files B-1, B-2 experimental 10-36 generation of output files 10-32 log 10-40 opening saved files 4-20 output 10-40 printing 4-22 saving 4-17 saving experiments 10-23 Find reaction paths 2-17 experiment 17-1 Folders B-1, B-2 sample.io 10-37 sample.iso 10-37 Footnotes 12-37 Forward stepwise regression 12-3 Frontier density 2-14, 15-16 orbitals 10-6 Fuse atoms 7-21 bonds 7-22 ring structures 7-21 G Generating energy maps 14-2 rigid 14-6 Geometry broken locks 8-31 correcting 4-14 BioMedCAChe User Guide BioMedCAChe User Guide Introduction Tutorials Basics Using Identifying procedure numbers 10-9 Import MDL SD files dialog box 12-13 Importing an experiment 11-28 Improper torsion angles specifying 8-17 Infra-red spectra 18-2 Insert residue tool 9-25 Installation B-1 Interpreting surface color 15-11 Intrinsic reaction coordinate 17-4, 20-19 Inverting chiral centers 8-3 Investigating atom and bond properties 16-1 electron density surfaces 15-2 electron distribution 15-1 low-energy conformations 14-1 molecular geometry 8-1 molecular orbital energies 15-7 peptide conformations 19-3 reaction path structures 18-2 reactions 17-1 transition state structures 17-2 Customizing H-bond labeling 8-27 Heat of formation 2-14, 10-5, 12-3, 20-13 HELIX 21-5 het_dictionaryCIF.txt 9-3 Hiding atoms 6-18 bonds 6-28 electrons 6-16 surfaces 15-10 text in geometry label 8-23 HOMO 10-6, 12-3, 18-7 HOMO -5 to LUMO +4 energies calculating 15-8 I Index H HOMO and LUMO 2-14 HOMO and LUMO energies calculating 15-7 Homolog creating 19-15 GPCR 19-15 Hybridization changing 5-20 changing an atoms 5-24, 5-25 correcting 4-13 Hybridization box 3-9, 3-11, 4-5 Hydrogen atoms hiding 6-19 Hydrogens deleting 4-15 hiding 6-19 view settings 6-48 Index disabling locks 8-35 investigating molecular 8-1 label wizard 8-41 labels 8-40 optimization 2-8 repairing broken locks 8-31 Geometry label attributes dialog box 8-22, 8-25 Geometry label wizard dialog box 8-42 Geometry labels 8-19, 8-24 changing 8-21 changing color 8-25 deleting 8-26 hiding 8-22 hiding text 8-23 locking 8-29 Graph attributes 14-20 changing color 14-17 Graph attributes dialog box 14-16 Group packages 11-31 Grouping atoms 7-24 Groups defining 7-24 selecting 7-25, 7-28, 7-29 GroupServer 10-34 I-7 Index Ionic bonds 5-33 Ionization energy 15-7 IR transitions 10-6 IR Transitions window 18-3 Isosurfaces 15-17 K Keyboard commands A-4 shortcuts A-1, A-2 Kinetic energy 17-4 L Label chiral centers 8-2 Label Wizard geometry 8-41 Labels 15-21 atom 8-33, 16-8 atoms 6-8 geometry 8-19, 8-24, 8-29 in scatter plots 12-29 search 8-37, 8-43 Legends 15-16 Ligand docking 19-22 Limitations size and element 10-31 Locked geometry disabling 8-35 Locking atoms 8-32 geometry labels 8-29 Locks geometry 8-31 Low-energy structures 10-5 LUMO 10-6, 12-3, 18-7 I-8 M Manipulating molecules 7-1, 7-9 search labels 8-43 Manipulation tools 7-2 Map file windows 14-12 Map files analyzing 14-22 animating 14-26 display options 14-15 open 14-12 saving 14-30 Map reaction 2-16, 17-1 Maps energy 14-2 Matching properties to procedures 10-15 Matching selections 9-40 MC4R 19-15, 19-22 Mechanics 20-5 classical 13-3 concepts 20-2 optimizing with 20-3 quantum 13-3, 13-4 Mechanics application 2-21 Melanocortin-4 receptor (MC4R) 19-17 Melanocortin-4 recptor (MC4R) 19-15 Menu bar 3-4 using 3-20 Menu option 3-20 shortcuts A-3 Minimum-energy geometries 20-17 Mirroring molecules 8-5 MM multiple passes 20-6 one pass 20-6 MM2 20-3 MO polarity 15-14 Model types 6-4 Modeling solvent effects 20-19 styles 2-3 Modifying BioMedCAChe User Guide BioMedCAChe User Guide N Tutorials Introduction Navigator window 11-4 New geometry labels 8-37 New users, important information 1-2 Non-scrolling lists 3-28 windows 3-29 Notes icon 1-6 O Index Customizing Using Basics Objects copying 7-14 cutting 7-18 deleting 7-19 duplicating 7-13 moving 7-6 rotating 7-4 scaling 7-7 zooming in and out 7-8 Octanol-water partitition coefficient 12-3 One pass search 14-9 Online Help 3-43 context-sensitive Help 3-43 the Help system 3-44 Open dialog box 4-3 Opening a ProjectLeader project 12-11 chemical samples in ProjectLeader 12-12 saved files 4-20 Optimization selective 13-6 Optimized geometry 2-14, 12-3 Optimized map 2-16, 10-8 Optimized structures viewing 13-10 Optimizing chemical samples 13-1, 13-2 energy maps 14-7 geometry 10-5 Index atoms and bonds 5-2 chemical samples 5-1 Molecular connectivity index 12-3 Molecular formula 12-3 Molecular geometry investigating 8-1 Molecular orbital energies 15-7 calculating 15-8 Molecular orbitals 2-14, 10-6, 15-17, 20-11 color 15-13 surfaces 18-6 Molecular refractivity 12-3 Molecular weight 12-3 Molecules comparing biomolecules 9-39 completing 4-9 deleting portions 7-18 deselecting 5-8 drawing 4-4 duplicating 7-13 manipulating 7-1, 7-9 mirroring 8-5 optimizing portions 13-6 perfecting 4-10 selecting 5-7 specifying angles and distances 8-12 superimposing 8-6 MOPAC 2-21, 20-11, 20-12 limitations 20-14 Motion Dynamic Models Simulation 2-9 Motion vectors, displaying 18-2 Mouse actions 3-17 choose 3-17 click 3-18 click and drag 3-19 double-click 3-20 select 3-17 Moving objects 7-6, 7-7 in the workspace 5-5 Multiple pass search 14-9, 20-6 Multiple windows 6-32 Mutual orientations 13-8 I-9 Index molecule portions 13-6 quantum mechanics 13-4 using classical mechanics 13-3 Optimum geometry 20-3, 20-11 Orbital energies 15-7 Orbital surfaces, displaying 18-6 Orbitals 15-17 Original Settings command 11-36 Output files 10-21 generation 10-32 P π coordination bond 5-34 Packages loading new packages 11-33 Page orientation 4-24 Paper size 4-25 source 4-25 Parameter bar 14-14 hiding 14-16 Parameter data editing 11-30 Parameter Data window 11-7 Partial charge 15-14, 16-7, 16-10, 16-11, 20-11 color 15-13 Path reaction 10-9 Peptide building 19-3 conformations 19-3 generating 19-6, 19-8 Perfecting molecules 4-10 Performing experiments 10-1, 12-1 Periodic table dialog box 4-11 Periodic table settings dialog box 4-11, 5-27, 637 Perspective changing 6-44 Phi and Psi angle box 9-21 Phi and Psi boxes 9-23 I-10 Pi helix 21-7 Plotting a scatter plot 12-27 variables along an axis 14-16 Polarity 15-14 Polyatomic molecules 20-8 Potential energy maps exhaustive versus sequential 20-6 Potential energy surface 20-3 Potential polarity 15-14 Previewing printouts 4-22, 12-43 Print preview (File menu) 4-22 Print dialog box 4-25 Print Setup dialog box 4-23 Print to File dialog box 4-27 Printing a CAChe window 4-25 files 4-22 options 4-23 orientation 4-24 print to a file 4-27 scatter plots 12-32 Procedure Editor 2-19, 11-1 overview 11-2 quitting 11-38 starting 11-3 Procedure window 11-6 Procedures adding a step 11-19 calling a procedure 11-20 deleting a step 11-19 identifying numbers 10-9 matching properties 10-15 modifying procedures 11-17 moving a step 11-19 property investigation 10-9 running a procedure 11-21 table 10-10 viewing a step 11-20 ProjectLeader overview 12-2 printing 12-40 BioMedCAChe User Guide BioMedCAChe User Guide docking ligandsDocking ligands into proteins 19-22 Introduction Q Basics Tutorials QSAR relationships establishing 2-18, 12-2 QSPR relationships establishing 2-18, 12-2 Quantum mechanics 13-3 optimized energy map 14-8 optimizing molecules 13-4 rigid energy map 14-7 Quitting CAChe 3-45 Procedure Editor 11-38 ProjectLeader 12-45 I-11 Customizing Index Radio buttons 3-25 Radius bond 16-12 Ramachandran 21-6 Reaction path 10-9 structures 17-4 structures that conserve kinetic energy 17-4 structures without kinetic energy 17-4 Reaction pathways 2-9, 20-11 Reaction properties 10-5, 10-8 Reactions investigating 17-1 Reactive sites investigating on enzyme surface 13-8 Refine transition experiment 17-1 Refine transition state 2-17, 10-9 Regression forward stepwise regression 12-3 multiple linear regression 12-3 reverse stepwise regression 12-3 Using R Index projects 12-11 quitting 12-45 Sample Properties table 12-17 scatter plots 12-27 starting 12-5 ProjectLeader workbook 12-7 adding a chemical sample 12-12 adding a property, sample component, analysis, or comment 12-21 adding footnotes 12-37 components of 12-7 copying objects from ChemDraw, ISIS Draw, or Kekule 12-15 displaying chemical samples as line drawings 12-33 exporting as an .sdf file 12-43 hiding column or row buttons 12-37 selecting a server 12-24 selecting cells 12-24 sorting rows 12-34 viewing cell details 12-39 Properties atom 10-7 available properties 11-14 bond 10-7 conformation 10-8 matching to procedures 10-15 Sample properties 12-17 showing properties 11-13 Property class choosing 10-5 Protein accessible surface 9-13 adjacent surface - pocket 9-15 backbone N-C-C trace 9-10 selecting 9-9 coloring residues 9-8 crevice surface 9-13 docking 19-22 ribbons 9-10 Protein Data Bank 21-5 Proteins Index Repairing broken geometry locks 8-31 Residue tool 9-25 Residue type box 9-21, 9-22 Reverse stepwise regression 12-3 Reversing a coordinate bond 5-31 RGB values 15-14 Rigid energy map 14-6 Rigid map 10-8 Ring count 12-3 size 12-3 Ring geometry correcting 4-13 Ring structures fusing 7-21 Rotate tool 3-14, 3-30, 3-32, 3-38, 7-2, 7-3 Rotating objects 7-4 Rotation defining center for rotate tool 7-4 Rotation settings dialog box 7-5 Rules for the selection tools 5-4 Running a procedure 11-21 experiments simultaneously 10-26 ProjectLeader experiments 12-20 S Saddle points 20-17 Sample properties copying 12-18 editing 12-18 Sample Properties table 12-17 viewing 12-17 Sample Properties table 12-17 Sample.io folder 10-37 Sample.iso folder 10-37 Save as dialog box 4-17 Saving experiment files 10-23 files 4-17, 4-19 I-12 map files 14-30 settings 6-51 Scale tool 3-14, 3-30, 3-33, 3-39, 7-2, 7-8 Scaling a scatter plot 12-28 bond radius 16-12 objects 7-7 Scatter plots exporting 12-31 labeling points 12-29 plotting 12-27 printing 12-32 scaling 12-28 selecting data points 12-28 straight line fitting 12-31 title 12-30 translating 12-28 viewing 12-27 Scroll bars 3-14 Scrolling lists 3-28 windows 3-29 Search for saddle 2-17, 10-8 experiment 17-1 Search labels 8-37, 8-40 animating 8-44 for potential energy maps 20-5 Secondary structure 21-4 Secondary Structure box 9-22 Secondary structure box 9-21 Select 3-17 groups 7-25 groups of atoms 7-26 more than one object 5-5 non-grouped atoms 7-27 one object 5-5 Select a server dialog box 10-29 Select all visible 3-31 Select Columns dialog box 12-18 Select conserved 9-41 Select Group tool 3-30, 3-32, 5-4, 5-12 Select Molecule tool 3-30, 3-31, 5-4 Select molecule tool 5-6 BioMedCAChe User Guide BioMedCAChe User Guide I-13 Introduction Tutorials Basics Using Customizing Index Single covalent bonds 5-32 Size and element limitations 10-31 Solvation effects 13-2 Solvent effects modeling 20-19 Sparkles 20-16 Specifying analysis criteria 14-24 angles and distances within molecules 8-12 Spectra 20-11 infra-red 18-2 UV-visible 12-3, 18-6 visible 12-3 Starting CAChe 3-2 Stationary geometries 20-17 Statistical analysis 12-23 Status bar 3-6 hiding 3-6 Steric energy 12-3 lowering 2-4 Stop an experiment dialog box 10-24, 10-27, 1030 Stopping experiments 10-24 Strain bond 16-12 Structures 7-21 Style bar 3-9, 3-40, 5-19 hiding 3-12, 9-23 sequence view 9-21 Superdelocalizability 10-7, 15-5, 15-16 Superimposing molecules 8-6 Superposition removing 9-44 Surface attributes dialog box 15-11, 15-19 Surface legend dialog box 15-12 Surfaces 15-13, 15-15, 15-18, 15-20 3D 20-22 color 15-13 dotted 15-20 hiding 15-10 interpreting color 15-11 labels 15-21 viewing 15-9 Index Select Molecule/chain tool 9-24 Select Similar residue tool 9-24 Select similar settings dialog box 5-12 Select Similar tool 3-30, 3-31, 5-4 Select similar tool 5-9 Select tool 3-30, 3-31, 5-4, 9-24 how to use 3-33 using 5-6 Selecting cells in ProjectLeader 12-24 defining similarity 5-11 items and options 3-17 similar atoms 5-10 Selection tools 3-13, 9-24 Selective optimization 13-6 Sequence of conformations 2-16, 10-8, 14-9 Sequence view style bar 9-21 Tool palette 9-23 sequence view 9-20 Sequence view window 19-3 Sequential search generating with mechanics 20-5 in mechanics 20-6 Servers 10-17 displaying 10-33 in ProjectLeader 12-24 viewing information 10-29 Set atom distance dialog box 8-13 Set bond angle dialog box 8-14 Set dihedral angle dialog box 8-16, 8-27 Set improper torsion dialog box 8-18 Setting up experiments 10-4 Shaded spheres 6-11 surfaces 15-18 Shape index order 12-3 SHEET 21-5 Shortcuts keyboard A-1, A-2 menu options A-3 toolbar 3-21, A-1, A-6 Show surfaces dialog box 15-9 Index Susceptibility 2-14, 10-7, 15-4, 15-16 T Table of procedures 10-10 Tabs 3-27 Tabulator 2-21, 20-22 Temperature 20-8 Text boxes 3-23 Tips icon 1-6, 6-30, 8-10 Title bar 3-9 Title of scatter plots 12-30 Tool palette 3-13, 14-14 Toolbar 3-5 buttons 3-21, A-3 hiding 3-5 sequence view 9-19 shortcuts 3-21, A-1, A-6 using 3-21 Tools atom/bond 3-14, 3-19, 3-30, 4-4 manipulation 3-14, 3-20 manipulation tools 7-2 residue 9-25 residue tool 9-25 rotate 3-14, 3-30, 3-32, 3-38, 7-2, 7-3 scale 3-14, 3-30, 3-33, 3-39, 7-2 scaling 7-8 select 3-30, 3-31, 3-33 select group 5-4, 5-12 select molecule 3-30, 3-31, 5-4, 5-6 select molecule/chain 9-24 select similar 3-30, 3-31, 5-4, 5-9 select similar residue 9-24 selecting 3-30 selection tools general rules 5-4 translate 3-14, 3-30, 3-33, 3-38, 7-2, 7-5 using workspace selection tools 3-29 workspace selection 5-3 Torsion angles improper 8-17 Total energy 12-3 I-14 Trajectory 20-9 dynamics 10-8 Transition state 10-8 structures, investigating 17-2 Transition state geometry, optimizing 13-6 Transition state structures 10-5 Transition states generating 17-1 MOPAC 20-17 refining 17-1 verifying 17-1 Transitions electronic 18-6 vibrational 18-2 Translate tool 3-14, 3-30, 3-33, 3-38, 7-2, 7-5 Translating a scatter plot 12-28 Triple covalent bonds 5-33 Troubleshooting experiments 10-32 Turn type 1 21-7 type 1’ 21-7 type 2 21-7 type 2’ 21-7 U Undo command 7-19 Ungroup atoms 7-28 Unlock atoms 8-33 User guide about 1-4 conventions 1-6 navigation aids 1-8 User interface 3-3 UV-visible spectra 18-6 transitions 2-14, 10-6 UV-visible Transitions window 18-7 V BioMedCAChe User Guide BioMedCAChe User Guide Appendices Understanding Customizing Using Basics Tutorials Introduction Valence correcting 4-10 defining rules 4-10 view settings 6-48 Valence command (Beautify menu) 4-10 Valence settings dialog box 6-48 Van der Waals 20-2 radius 5-27 Variables plotting 14-16 Verify transition experiment 17-1 Verify transition state 2-17, 10-9 Vibrational frequencies 20-11 spectra 18-2 View active experiments 10-27 bond order 16-11 change settings 6-37 change valence settings 6-48 chemical sample by partial charge and calculated bond order 6-6 chemical samples 6-1 chemical samples as a line only drawings 6-4 chemical samples as ball and cylinder models 6-5 chemical samples as line drawings 6-4 chemical samples as space filling models 6-5 chiral centers 8-2 color palette 6-40 color threshold values 15-12 Cory, Pauling, and Koltun model 6-3 electrons settings 6-48 experimental results 18-1 hydrogens settings 6-48 log and output files 10-40 multiple windows 6-32 PDB atom names 9-7 sample properties 12-17 server information 10-29 surfaces 15-9 View atom and bond properties 3-42 View settings dialog box 6-45 Viewing energy maps 14-2 15 W Water solvent effects 14-9 Wavefunction 20-22 Weak bonds 5-33 Window menu 3-16 Windows viewing multiple 6-32 Wireframe 15-20 Wireframe spheres 6-12 Wizard, geometry label 8-41 Workspace 3-8 changing perspective and distance 6-44 style bar 3-9 title bar 3-9 Workspace selection tools 3-29, 5-3, 5-14 Z Zooming in and out on objects 7-8 16 BioMedCAChe User Guide