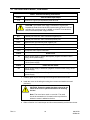
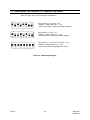
1
Outdoor Brackets and Mounts
Orbiter Microsphere Series
Installation Manual
900.0733 - March 2006 – Rev. 1.0
ISSUE
DATE
REVISIONS
HMDI-001-00-00
1
March 2005
2
May 2005
Initial Release
Revised RS485 to RS422
900.0733
1.0
Rev 1.0
March 2006
Assign Agile part #
ii
900.0733
30-Mar-06
EXPLANATION OF GRAPHICAL SYMBOLS
The lightning flash with arrowhead symbol within an equilateral triangle is intended to
alert the user to the presence of uninsulated "dangerous voltage" within the product's
enclosure that may be of sufficient magnitude to constitute a risk of electric shock to
persons.
The exclamation point within an equilateral triangle is intended to alert the user to the
presence of important operating and maintenance (servicing) instruction in the literature
accompanying the product.
FCC COMPLIANCE STATEMENT
INFORMATION TO THE USER: This equipment has been tested and found to comply
with the limits for a Class A digital device, pursuant to part 15 of the FCC rules. These
limits are designed to provide reasonable protection against harmful interference when
the equipment is operated in a commercial environment. This equipment generates,
uses, and can radiate radio frequency energy and, if not installed and used in
accordance with the instruction manual, may cause harmful interference to radio
communications. Operation of this equipment in a residential area is likely to cause
harmful interference in which case the user will be required to correct the interference at
his expense.
CAUTION : Changes or modifications not expressly
approved by the party responsible for compliance could
void the user’s authority to operate the equipment.
CANADIAN COMPLIANCE
This Class A digital apparatus complies with Canadian ICES-003.
Cet appareil numérique de la Classe A est conforme à la norme NMB-003 du Canada.
EUROPEAN COMPLIANCE STATEMENT
This is a Class A product. In a domestic environment this product may cause radio
interference in which case the user may be required to take adequate measures.
WARNING: Users of the product are responsible for checking and
complying with all federal, state and local laws and statutes
concerning the monitoring and recording of video and audio signals.
Honeywell Video Systems shall not be held responsible for the use
of this product in violation of current laws and statutes..
Rev 1.0
iii
900.0733
30-Mar-06
WARNINGS AND CAUTIONS
WARNING: To reduce the risk of fire or electric shock,
do not expose the pan and tilt assembly to rain or
moisture.
WARNING: The power supply must be connected by a
technically competent person and in accordance with IEE
wiring regulations.
WARNING: To avoid the risk of electric shock, you must
totally isolate the main power supply before making a
connection to it.
WARNING: The PSU must be wired to a double pole
fuse spur with 3mm separation. The 3A fuse spur must
be located close to the PSU.
CAUTION: The pan and tilt assembly must be housed in
an outdoor dome on an external environmental mount
that prevents moisture and rain from entering the
housing. Inadequate sealing could cause failure of the
unit.
Rev 1.0
iv
900.0733
30-Mar-06
IMPORTANT SAFEGUARDS
1.
READ INSTRUCTIONS – All of the safety and operating instructions should be read before the
unit is operated.
2.
RETAIN INSTRUCTIONS – The safety and operating instructions should be retained for future
reference.
3.
HEED WARNINGS – All warnings on the unit and in the operating instructions should be adhered
to.
4.
FOLLOW INSTRUCTIONS – All operating and use instructions should be followed. Installation
should only be carried out by qualified personnel.
5.
STATIC SENSITIVE – These devices are static-sensitive. Anti-static precautions should be
observed at all times. A grounded wrist strap is recommended when handling the pan and tilt
camera assemblies.
6.
POWER SOURCES – This product should be operated only from the type of power source
indicated on the marking label. If you are not sure of the type of power supplied to your facility,
consult your product dealer or local power company. For products designed to operate from
battery power or other sources, refer to the operating instructions.
7.
GROUNDING – This unit must be connected to a good earth ground.
8.
OVERLOADING – Do not overload outlets and extension cords as this can result in a risk of fire or
electric shock.
9.
POWER-CORD PROTECTION – Power supply cords should be routed so that they are not likely
to be walked on or pinched by items placed upon or against them, paying particular attention to
cords and plugs, convenience receptacles, and the point where they exit from the monitor.
10.
SERVICING – Do not attempt to service this unit yourself as opening or removing covers may
expose you to dangerous voltage or other hazards. Refer all servicing to qualified service
personnel.
11.
DAMAGE REQUIRING SERVICE – Unplug the unit from the outlet and refer servicing to qualified
service personnel under the following conditions:
a. When the power-supply cord or plug is damaged.
b. If objects have fallen into the unit.
c. If the electronics in the unit have been exposed to rain or water.
d. If the unit does not operate normally by following the operating instructions. Adjust only those
controls that are covered by the installation and operation instructions as an improper
adjustment of any controls may result in damage and will often require extensive work by a
qualified technician to restore the unit to its normal operation.
e. If the unit has been dropped or the enclosure has been damaged.
Rev 1.0
v
900.0733
30-Mar-06
IMPORTANT SAFEGUARDS, CONTINUED
f.
When the unit exhibits a distinct change in performance - this indicates a need for service.
12.
REPLACEMENT PARTS – When replacement parts are required, be sure the service technician
has used replacement parts specified by the manufacturer or have the same characteristics as the
original part. Unauthorized substitutions may result in fire, electric shock or other hazards.
13.
SAFETY CHECK – Upon completion of any service or repairs to this unit, ask the service
technician to perform safety checks to determine that the unit is in proper operating condition.
14.
LIGHTNING AND POWER LINE SURGES – For added protection of this unit when it is left
unattended and unused for long periods of time, remove power and disconnect the data and video
lines to prevent damage to the unit due to lightning and power-line surges.
15.
HEAT – The product should be situated away from heat sources such as radiators, heat registers,
stoves, or other products (including amplifiers) that produce heat.
16.
WALL OR CEILING MOUNTING – The product should be mounted to a wall or ceiling only as
recommended by the manufacturer.
17.
EXPOSURE TO DIRECT BRIGHT LIGHT – Never point the camera directly towards a bright light
source such as the sun. Never expose the camera to light intensive situations. Permanent and
irreparable damage to the camera’s pick up device may result.
18.
CONTINUOUS AUTO-FOCUS OPERATION – Do not use the camera continuously for a period of
over twenty-four hours with the auto-focus on. Doing so may damage the lens.
IMPORTANT NOTICE
All companies make changes and improvements in their products. Because this product can be set up
to interface with equipment not manufactured by Honeywell Video Systems, there is a possibility that the
interface protocols may have changed since Honeywell Video Systems tested this product with the
interfacing equipment. Therefore, this unit may not be currently compatible with equipment produced by
other manufacturers. The existence of past successful installations proves our intent to provide
equipment compatible with other manufacturers, but does not guarantee success.
Honeywell Video Systems recommends purchasing a single unit for bench testing prior to purchasing
and installing this product in quantity. Should any problems occur, Honeywell Video Systems will
provide technical support (at the user’s expense) to analyze the interface protocols of your system. The
end user must agree to give Honeywell Video Systems reasonable access to the system in order to
study and correct the protocol incompatibility.
In the event that Honeywell Video Systems is unable to make the units work together in the system, we
will accept the return of any Honeywell Video Systems products associated with the installation and
refund the amounts paid for these products. Because Honeywell Video Systems recommends bench
testing the equipment prior to installation, we will not be liable for any installation cost, lost revenues, or
other cost resulting from the incompatibility.
Rev 1.0
vi
900.0733
30-Mar-06
TABLE OF CONTENTS
SECTION 1: INTRODUCTION .................................................................................................................. 1
1.1
PRODUCT DESCRIPTION ............................................................................................................ 1
1.2
KEY INSTALLATION FEATURES .................................................................................................. 2
1.3
UNPACKING AND PREASSEMBLY.............................................................................................. 2
1.3.1 Lower Dome Cleaning ..................................................................................................... 3
1.4
SYSTEM REQUIREMENTS........................................................................................................... 3
1.5
SYSTEM PLANNING..................................................................................................................... 4
SECTION 2: BASIC WIRING..................................................................................................................... 5
2.1
RECOMMENDED CABLING ......................................................................................................... 5
2.1.1 Power............................................................................................................................... 5
2.1.2 Video, Coaxial Cable ....................................................................................................... 6
2.1.3 Video, CAT5 Cable (NVT Transmission).......................................................................... 7
2.1.4 Video, Non-CAT5 Cable (NVT Transmission).................................................................. 8
2.1.5 RS422 Twisted-Pair Telemetry......................................................................................... 9
2.1.6 Coax Control.................................................................................................................. 12
2.1.7 Alarm Inputs/Alarm Relay Outputs ................................................................................ 13
SECTION 3: MOUNT INSTALLATION .................................................................................................... 15
3.1
OUTDOOR WALL MOUNT.......................................................................................................... 15
3.1.1 Corner Mounting Bracket .............................................................................................. 20
3.1.2 Corner Mounting Bracket with Cable Gland Fittings..................................................... 24
3.2
OUTDOOR SOFFIT MOUNT AND POLE/FLAT ROOF MOUNT ................................................. 27
3.3
REGENT WALL AND POLE/FLAT ROOF MOUNT...................................................................... 31
3.3.1 Regent Corner Mounting Bracket.................................................................................. 36
SECTION 4: CONFIGURING AND INSTALLING THE PAN AND TILT CAMERA ASSEMBLY AND
LOWER DOME ................................................................................................................... 39
4.1
ADDRESSING THE PAN AND TILT CAMERA ............................................................................ 39
4.2
ALARM SETTINGS...................................................................................................................... 42
4.3
SETTING THE RS422 TERMINATION ........................................................................................ 42
4.3.1 RS422 Twisted Pair Telemetry Termination .................................................................. 42
4.3.2 RS422 Termination Selection ........................................................................................ 43
4.4
SETTING THE PROTOCOL ........................................................................................................ 44
4.5
COLOUR INTEGRATION SELECTION ....................................................................................... 44
4.6
VIDEO LIFT/GAIN ADJUSTMENTS............................................................................................. 45
4.7
INSTALLING THE PAN AND TILT CAMERA ASSEMBLY ........................................................... 46
4.8
INSTALLING THE LOWER DOME .............................................................................................. 50
Rev 1.0
vii
900.0733
30-Mar-06
TABLE OF CONTENTS, CONTINUED
SECTION 5: OPERATION....................................................................................................................... 53
5.1
INTRODUCTION ......................................................................................................................... 53
5.2
SYSTEM INITIALIZATION ........................................................................................................... 53
5.3
CAMERA SELECTION ................................................................................................................ 54
5.3.1 Camera Button............................................................................................................... 54
5.4
BASIC OPERATION .................................................................................................................... 54
5.5
ACCESSING ON-SCREEN MENUS ........................................................................................... 55
SECTION 6: TECHNICAL SPECIFICATIONS ........................................................................................ 57
6.1
EXTERNAL ORBITER MICROSPHERE....................................................................................... 57
LIST OF FIGURES
Figure 1. Basic Orbiter Microsphere System Example................................................................................ 3
Figure 2. Basic System Plan ........................................................................................................................ 4
Figure 3. RS422 Data LED ........................................................................................................................... 9
Figure 4. RS422 Wiring .............................................................................................................................. 11
Figure 5. Location of SYS.OK LED (PCB VC472V5).................................................................................. 12
Figure 6. Wall Mount Dimensions and Hole Patterns (DWG776) .............................................................. 16
Figure 7. Wire Terminations ....................................................................................................................... 18
Figure 8. Corner Mounting Bracket ........................................................................................................... 21
Figure 9. Corner Mounting Bracket Dimensional Drawing (DWG684) ...................................................... 22
Figure 10. Corner Mounting Bracket with Cable Gland Fittings Drawing (DWG1943).............................. 25
Figure 11. Soffit Mount Dimensions and Hole Patterns (DWG772)........................................................... 28
Figure 12. Pole/Flat Roof Mount Dimensions and Hole Patterns (DWG777) ............................................ 29
Figure 13. Regent Wall Mount Dimensions and Hole Patterns ................................................................. 32
Figure 14. Pole/Flat Roof Mount Dimensions and Hole Patterns .............................................................. 33
Figure 15. Corner Mounting Bracket ......................................................................................................... 37
Figure 16. Addressing Examples............................................................................................................... 40
Figure 17. RS422 Twisted Pair Telemetry Termination.............................................................................. 43
Rev 1.0
viii
900.0733
30-Mar-06
LIST OF FIGURES, CONTINUED
Figure 18. Location of RS422 Termination Jumpers (PCB VC472V5)....................................................... 43
Figure 19. Installing the Black Mounting Arrangement ............................................................................. 46
Figure 20. Installing Inner Liner on Pan and Tilt Assembly ....................................................................... 47
Figure 21. Alarm I/O Connector Locations on Pan and Tilt Assembly ...................................................... 48
Figure 22. Installing The Pan And Tilt Assembly Into The Top Dome ....................................................... 49
Figure 23. Installing Lanyard Between Top And Lower Dome .................................................................. 50
LIST OF TABLES
Table 1. Power Distances for 24V ac at 1A.................................................................................................. 5
Table 2. Typical 75Ω Coaxial Cable Specifications ..................................................................................... 6
Table 3. CAT5 Cabling and NVT Options .................................................................................................... 7
Table 4. Non-CAT5 Cabling and NVT Options ............................................................................................ 8
Table 5. RS422 Recommended Cabling and Distances ............................................................................ 10
Table 6. Alarm/Relay Wiring....................................................................................................................... 13
Table 7. External PCB Wiring Connections ............................................................................................... 19
Table 8. Addresses 1 – 32 (DILSW2) ......................................................................................................... 41
Table 9. Alarm Settings .............................................................................................................................. 42
Table 10. Protocol Selection DILSW1 ........................................................................................................ 44
Table 11. Menu Setup Tree........................................................................................................................ 56
Rev 1.0
ix
900.0733
30-Mar-06
Notes:
Rev 1.0
x
900.0733
30-Mar-06
SECTION 1:
INTRODUCTION
1.1
PRODUCT DESCRIPTION
The Orbiter Microsphere units are high-resolution, low-light sensitive colour cameras in a
high-speed pan/tilt/zoom dome assembly. The pan and tilt camera assembly features a
“plug and play” design that makes installation and servicing quick and convenient.
Some of the features for the Orbiter Microsphere are shown in the table below.
Feature
Camera/Lens
Gold
18X colour
Gold X
Platinum
18x colour/mono
27x colour/mono
Alarm Inputs
8
8
8
Relay Outputs
2
2
2
Five of the environmental mounting versions for the Orbiter Microsphere are
documented in this manual.
•
Wall Mount
•
Soffit Mount
•
Pole/Flat Roof Mount
•
Regent Pole Mount
•
Regent Wall Mount
There are corner-mounting brackets available for the wall mount and regent wall mount.
Rev 1.0
1
900.0733
30-Mar-06
1.2
KEY INSTALLATION FEATURES
All the variations of the Orbiter Microsphere include features that make installation quick
and easy.
1.3
•
Auto sensing dual control; either coaxial video or RS422 twisted pair.
•
Minimum assembly required.
•
Plug and play mounting.
•
Integral video launch amplifier to allow cable runs up to 700 meters (2300 feet).
•
Alarm devices can be connected directly to the Orbiter Microsphere head.
•
Relay outputs available.
•
24V ac Input power
•
NVT Inside
UNPACKING AND PREASSEMBLY
Note: Before installing the pan and tilt camera assembly, the mount must be installed
including terminating all cabling.
WARNING: Always ensure the mounting surface and
installation hardware are capable of holding the
combined weight of the complete Orbiter Microsphere
and the mount.
CAUTION: Ensure all sealing gaskets are fitted properly
and that all cable entries are properly sealed.
CAUTION: The lower dome is fragile when not installed
and is susceptible to irreparable damage if dropped or
scratched on either the inside or outside surface of the
dome.
Rev 1.0
2
900.0733
30-Mar-06
1.3.1
Lower Dome Cleaning
Periodic cleaning of lower domes is required. A soft cloth and methylated spirits or
proprietary foam cleaner will suffice for most applications.
CAUTION: External units located in dirty areas should
be washed down with tepid water and a cloth. Any
particles such as sand or grit must be carefully removed
prior to wiping with a soft cloth.
1.4
SYSTEM REQUIREMENTS
Orbiter Microsphere units receive commands from a system controller. This can be a
Honeywell matrix or a third party controller.
Note: If a third party controller is used, the controller must support the Orbiter
Microsphere protocol, or the Orbiter Microsphere must support the third party
controller’s protocol. Refer to Table 10 for available protocols.
Figure 1 illustrates an example of a basic system.
RS422 Telemetry Data Connection via twisted-pair cabling
Video Connections via coaxial or CAT5 cabling
Figure 1. Basic Orbiter Microsphere System Example
A Honeywell matrix with two monitor outputs is used as the centre of the control system.
The matrix sends and receives all telemetry information to and from the domes. The
system operator can select control of any of the domes with proportional speed pan and
tilt control using the keyboard joystick. The domes can also be programmed to tour
selected presets and be left unattended by the operator.
Rev 1.0
3
900.0733
30-Mar-06
1.5
SYSTEM PLANNING
Proper planning is an important step in the installation of a CCTV system. A system plan
provides the installers with a “blueprint” to work to and also acts as an invaluable
document for personnel who service and maintain the system after installation.
Important aspects of system planning include:
•
The RS422 addresses of the domes shown with location of the domes.
•
The RS422 data cable route. This should clearly show where the daisy chain begins
and where it ends. This is particularly important on large installations where multiple
daisy chains are connected to one or more RS422 distribution units.
•
The location of all control equipment should be marked, particularly where
equipment is hidden from view (e.g. if a matrix is installed in a roof space for
instance). This can save service time so personnel do not have to find equipment by
tracing cabling.
•
Cable junctions and mains supplies should also be included.
Figure 2 shows a very basic system plan.
Figure 2. Basic System Plan
Rev 1.0
4
900.0733
30-Mar-06
SECTION 2:
BASIC WIRING
2.1
RECOMMENDED CABLING
2.1.1
Power
Each dome requires 24V ac at 1A. If the heater/blower is wired, an additional 24V ac at
500mA is required. The power supply should be located as close to the dome as
possible for service and electrical isolation purposes.
In situations where the power supply has to be installed remotely, refer to Table 1 for
cable gauges and distances.
Table 1. Power Distances for 24V ac at 1A
Wire Gauge (AWG)
mm2
Meters
Feet
14
2.5
100
320
16
1.5
50
160
CAUTION: Installation of cable gauges and distances that
are outside the scope of Table 1 above are undertaken
solely at the installers’ risk and responsibility
CAUTION: If several domes are powered from a single
power source (multiple tap) and noise is experienced on
the TP Video output, an isolated power supply should be
used to correct the problem.
Rev 1.0
5
900.0733
30-Mar-06
2.1.2
Video, Coaxial Cable
The dome is capable of delivering crisp, clear video images over coaxial cable runs of
up to 700 meters (2300 feet). A video amplifier is standard on all Orbiter Microsphere
units to allow adjustment for correct video levels and quality over any length of cable run
up to 700 meters (2300 feet). The dome is capable of transmitting video over the
specified coaxial cable run of up to 300 meters (985 feet) without adjustment to the video
launch amplifier. Refer to Figure 18 for location of the two potentiometers for adjusting
the video amplifier. Refer to Section 4.6 for instructions on adjusting the potentiometers.
Table 2. Typical 75Ω Coaxial Cable Specifications
Type
Conductor
Application
RG59
1/0 0.58mm
Main internal cable runs. May also be used
externally in containments or where damage
is unlikely. Not very flexible.
URM70
7/0 0.19mm
Patch cables from main runs to equipment.
Equipment interconnection. Flexible and
useful for tight bends.
CT125
1/0 1.2mm
Duct/containment rated cable for external
main cable runs. Some grades are suited for
direct burial.
Notes:
Rev 1.0
1.
The quality and specification of the cable used has a direct affect on the quality of
the video signal at the control equipment end of the system. Compromising the
cable quality and specification can lead to poor video quality and system
performance.
2.
Always keep coaxial cables away from all other cables and run them in complete
isolation wherever possible. Never run the cables close to potential sources of
electromagnetic interference such as motors, dimmers, and high-speed data trunk
cables.
3.
When other cables cannot be avoided, place cables perpendicular to each other,
not along side, and keep this distance as short as possible.
6
900.0733
30-Mar-06
2.1.3
Video, CAT5 Cable (NVT Transmission)
The Orbiter Microsphere units feature built in NVT transmission modules. This provides
the option of using a single twisted pair of a CAT5 multipair cable for the video signal
rather than coaxial cable. CAT5 cabling for video transmission allows multiple cameras
to be transmitted down the same multicore CAT5 cable without camera video
interference or crosstalk.
Notes:
1.
Observe the same notes stated in the previous section for coaxial cables.
2.
If running a separate CAT5 cable specifically for CCTV, ensure it is clearly
identified to prevent confusion with network and other structured cabling.
3.
Use “Krone” type junction boxes where CAT5 joints are necessary. These boxes
are supplied with labelling for all terminals. A special tool is required to insert
cables into Krone junction terminals. This tool is not supplied.
Table 3 shows the distances and NVT options suitable for Orbiter Microsphere units.
Table 3. CAT5 Cabling and NVT Options
Distance
Receiver model and description
CAT5 Video Telemetry
Up to 150 meters
(500 feet)
NV-212A video transceiver
Cable must be within the same
building as there is no transient
protection.
Yes
Up to 300 meters
(1000 feet)
NV-213A video transceiver
NV-813A 8-port passive hub
NV-1613A 16-port passive hub
Yes
Up to 1 kilometer
(3000 feet)
NV-652R active receiver
NV-862R 8-port active receiver
NV-1662R 16-poirt active receiver
No. Telemetry must be via
RS422 using another pair.
Adhere to the following recommendations when installing CAT5 cable and NVT receiving
equipment.
Rev 1.0
1.
An NVT receiver module must be used at the control end of the system for every
camera that is transmitting video via CAT5. An NVT hub can be used to receive up
to 16 camera using CAT5 cable.
2.
Coaxial video telemetry is possible when a passive NVT receiver module or hub is
used at the control end of the system. If an active receiver is used at the control
end of the system, RS422 telemetry must be used. This requires another single
twisted pair per camera.
3.
When wiring via twisted pair, always ensure that you are actually using a twisted
pair by examining the cable. Failure to use wires from the same pair will lead to
noise introduction and subsequent video and telemetry problems.
7
900.0733
30-Mar-06
2.1.3
Video, CAT5 Cable (NVT Transmission), Continued
4.
2.1.4
The CAT5 Cable used must not be screened in any way, either by foil, braided
screen, or any other means. The use of any cable other than unscreened CAT5
may lead to a reduction in performance and is solely the responsibility of the
installer.
Video, Non-CAT5 Cable (NVT Transmission)
It is possible to run NVT via non-CAT5 cable specifications in existing installations.
Table 4. Non-CAT5 Cabling and NVT Options
Rev 1.0
Cable
Application
Telephone specification CW1128
External
8
900.0733
30-Mar-06
2.1.5
RS422 Twisted-Pair Telemetry
To realize the full feature set of the Orbiter Microsphere units, they must be installed with
a Honeywell telemetry matrix controller. When using RS422 twisted-pair telemetry, the
video signal is transmitted via a coaxial or CAT5 twisted pair cable and the control data
(telemetry) information is a twisted-pair cable.
RS422 twisted-pair telemetry cabling is installed and wired as a network that consists of
one or more daisy chains. When more than one daisy chain is installed an RS422
telemetry distribution unit must be installed to broadcast telemetry data across the entire
RS422 network. Multiple distribution units can be installed on the RS422 network to
allow for complex wiring arrangements.
CAUTION: Star wiring is not permitted as it makes the
correct termination of the RS422 network impossible.
Note: When the unit receives valid RS422 data, the LED labelled DATA on the bottom
board (closest to the camera) flashes. Refer to Figure 3 for location of the DATA LED.
The LED labelled SYS.OK on the top PCB (VC472V5) also flashes when it receives
RS422 telemetry data if the dome is being controlled by RS422 data. Refer to figure 5
for location of the SYS.OK LED.
Figure 3. RS422 Data LED (PCB VC472V4)
Rev 1.0
9
900.0733
30-Mar-06
2.1.5
RS422 Twisted-Pair Telemetry, Continued
The recommended cables and specifications for RS-485 twisted pair telemetry network
cabling are shown in Table 5.
Table 5. RS422 Recommended Cabling and Distances
Type
Description
Maximum Distances
Belden 9841 or equiv.
Single twisted-pair overall
screen
Daisy chain up to 3000
meters (9800 feet)
Belden 9842 or equiv.
Two twisted-pairs overall
screen
Daisy chain up to 3000
meters (9800 feet)
The above cables are available in a series of overall outer sheaths from standard internal
usage finishes to external containment and direct burial types.
CAUTION: Always keep RS422 data cables away from
all other cables and run them in complete isolation
whenever possible. Never run the cables close to
potential sources of electromagnetic interference such as
motors, dimmers, and high-speed data trunk cables.
CAUTION: Couple all data cable screens to data ground
at the control point end only. The cable screens should
not be connected at any other point.
CAUTION: Faulty cable or wiring can cause all domes to
fail or malfunction.
Rev 1.0
10
900.0733
30-Mar-06
2.1.5
RS422 Twisted-Pair Telemetry, Continued
CAUTION: Connect the cable screen at the controller
and connect the cable screen through any junction boxes
installed, but do not connect the cable screen to the
dome.
Figure 4 provides the guidelines for correct RS422 wiring.
Data Connections
at Control Equipment
Data +
Data Ground (Cable Screen)
Start of
daisy chain
Screen connected
through
Main wiring
trunk
All cable nodes from the main
wiring trunk to a dome must
be less than 9.8 feet (3 meters)
long.
Exploded view
of wiring in
junction box
Screen connected
through
Notes: Maximum of 32 domes in daisy-chain.
Junction boxes are provided by installer.
Dome
Data connections
Data+
DataScreen NOT connected
Termination LK2 Fitted
in the OFF position.
(termination off)
LK1 Fitted in the HI position.
Dome
Data connections
Data+
DataScreen NOT connected
End of
daisy chain
Termination LK2
fitted in the ON position
(termination on)
LK1 Fitted in the HI position.
Figure 4. RS422 Wiring
Rev 1.0
11
900.0733
30-Mar-06
2.1.6
Coax Control
The Orbiter Microsphere units support telemetry control over coaxial cable. No set up of
the dome is necessary for coaxial telemetry. The telemetry mode is auto sensing. If no
RS422 connection is sensed, the dome operates via coaxial telemetry.
The LED labelled SYS.OK on the top PCB illuminates when the unit is being controlled
by coax control and the coax control is satisfactory. Refer to Figure 5 for location of the
SYS.OK LED. The LED labelled DATA on the bottom board flashes when a valid
telemetry command is received in the coax. Refer to Figure 3 for location of the DATA
LED.
Figure 5. Location of SYS.OK LED (PCB VC472V5)
Up-the-coax operation of up to 500 meters (1640 feet) is possible with the appropriate
coaxial cable. Refer to Table 2 for recommended coaxial cables.
Rev 1.0
12
900.0733
30-Mar-06
2.1.7
Alarm Inputs/Alarm Relay Outputs
The connections to the alarm inputs/outputs are via two RJ45 sockets located at the top
of the pan and tilt camera assembly.
Note: If alarm devices are connected to the dome, they should not be connected to the
alarm connector until all dome functionality has been fully tested. Alarm device
activations could cause confusion during the initial testing stages.
CAUTION: All alarm input connections MUST be volt
free.
There are two alarm relay outputs that are rated at 24V dc at 1A or 120V ac at 0.5A. The
relays should not be connected to loads that are outside this specification. Refer to
Table 6 for wiring information.
WARNING: If potentially hazardous voltages are fed in
and out of the relays, the installer should affix warning
labels to alert personnel for safety reasons.
Table 6. Alarm/Relay Wiring
CON 1*
Alarm Inputs 1 – 4 /Relay Output 1
AL1
Alarm input 1, normally open only
AL2
Alarm input 2, normally open only
AL3
Alarm input 3, normally open only
AL4
Alarm input 4, normally open only
COM
Common/ground connection for alarm inputs 1 – 4
N/O
Relay 1 normally open pole
COM
Relay 1 common connection
CON 2*
Alarm Inputs 5 – 8/Relay Output 2
AL5
Alarm input 5, normally open only
AL6
Alarm input 6, normally open only
AL7
Alarm input 7, normally open only
AL8
Alarm input 8, normally open only
COM
Common/ground connection for alarm inputs 5 – 8
N/O
Relay 2 normally open pole
COM
Relay 2 common connection
*Do not terminate field alarm wiring until standard operation of the dome is verified.
Rev 1.0
13
900.0733
30-Mar-06
Notes:
Rev 1.0
14
900.0733
30-Mar-06
SECTION 3:
MOUNT INSTALLATION
3.1
OUTDOOR WALL MOUNT
Perform the following steps to install the Orbiter Microsphere Outdoor Wall Mount.
Note: If installing the wall mount on a corner-mounting bracket, perform the procedures
in paragraph 3.1.1.
WARNING: The outdoor wall mount must be attached to
a structure of adequate strength for the purpose.
Appropriate hardware must be used for the type and
state of the surface/structure that provides adequate
support for the working load of the housing and camera
assembly.
1. Use the dimensions and hole patterns in Figure 6 to attach the mount to the wall
surface. The hardware to attach the mount to the wall surface is provided by the
installer. Ensure the cable access holes align with the field wiring.
Rev 1.0
15
900.0733
30-Mar-06
3.1 OUTDOOR WALL MOUNT, CONTINUED
Note : Dimensions in Drawing are shown in millimeters (mm) unless otherwise noted.
Dimension Conversion Chart
mm
inches
mm
inches
5.5
0.216
212
8.346
10
0.393
235
9.25
123
4.84
304
11.968
129
5.078
Figure 6. Wall Mount Dimensions and Hole Patterns (DWG776)
Rev 1.0
16
900.0733
30-Mar-06
3.1 OUTDOOR WALL MOUNT, CONTINUED
2. There are two sealing gaskets provided with the mount. One has 4 holes (one in
each corner) and one is solid. Locate the solid sealing gasket. Remove the paper
to expose the adhesive and press it onto the mount so it is between the wall surface
and the mount. This gasket prevents moisture from entering through the screw
head slots and the cable access holes in the mount.
3. Remove the cover on the wiring box by removing the four (4) screws and washers.
Locate the sealing gasket with the four corner holes. Remove the paper to expose
the adhesive. Align the holes in the gasket with the holes on the inside of the cover
and press it onto the inside of the cover. Set cover and hardware aside.
4. Feed the field wiring through the access holes on the mount. Allow enough wiring
[approx. 1 foot (0.3m)] to extend through the box to terminate the wiring on the
terminal blocks.
NOTE: You will have to poke holes in the sealing
gasket for cable entry. The holes should be no bigger
than needed for cables to fit.
CAUTION: The gasket prevents moisture from
entering the wiring box so the gasket should fit snugly
around the wiring entering the box.
5. Install the mount on the hardware installed on the wall surface. Align the wall
hardware with the screw-head holes on the mount and slide the screw heads into
the slots.
CAUTION: You will have to poke holes in the sealing
gasket for the screw heads. The holes should be no
bigger than needed to allow for the screw heads.
CAUTION: The gasket prevents moisture from
entering the wiring box so the gasket should fit snugly
around the screw heads.
CAUTION: If the unit is mounted on a surface which
is not smooth, care must be taken by the installer to
ensure an alternative and appropriate method is used
to attach the unit and that the sealing is adequate for
the purpose intended. If needed, use a silicon sealer
to prevent moisture from entering the wiring boxes.
Inadequate sealing could cause failure of the unit.
Rev 1.0
17
900.0733
30-Mar-06
3.1 OUTDOOR WALL MOUNT, CONTINUED
6. Terminate the field wiring on each terminal block. Refer to Figure 7 and Table 7 for
terminal block wiring terminations.
a. Label wiring from the mount.
b. Strip the wire back 6mm (¼”).
CAUTION: Ensure the wire is stripped back far enough
to make good contact in the terminal strip, but ensure
that stripped wires do not make contact with each other
or improper operation of the unit may occur.
c. Remove and label each terminal block.
d. Loosen the screw on the terminal block and insert the wire into the terminal
block.
e. Tighten the screw on the terminal block to secure the wire.
f.
Seat the terminal block in the appropriate socket on the PCB in the wiring box.
Note: Connectors 1, 2, 3, 4, and 5 are for field wiring. Connectors 6, 7, 8, 9, and NVT1
are terminated at the factory for the plug-n-play connector in the top dome. There
are no user connections made at connectors 6, 7, 8, 9, and NVT1.
Figure 7. Wire Terminations
Rev 1.0
18
900.0733
30-Mar-06
3.1 OUTDOOR WALL MOUNT, CONTINUED
Table 7. External PCB Wiring Connections
CON 3
ETH
Video and Data Input/Output
Connect to a good (low impedance) Earth Ground
CAUTION: The installer must make a connection to a good (low
impedance) Earth Ground at the ETH terminal using as short a wire as
possible (with a minimum size of 18AWG or 0.75mm2 cross-sectional
area) for maximum power surge protection.
NVT-
Twisted pair CAT5 NVT video connection negative pole
NVT+
Twisted pair CAT5 NVT video connection positive pole
Data -
RS422 twisted pair telemetry data negative pole
Data +
RS422 twisted pair telemetry data positive pole
GND
Composite video ground connection (cable screen)
Video
Composite video output connection
CON 4
Dome Power
-VS
24V ac power supply to Orbiter Microsphere (negative connection when
using 12V dc power supply)
+VS
24V ac power supply to Orbiter Microsphere (positive connection when using
12V dc power supply)
CON 5
Heater and Fan Power
-VH
24V ac power supply to heater/fan (negative connection when using 12V dc
power supply)
+VH
24V ac power supply to heater/fan (positive connection when using 12V dc
power supply)
7. Carefully push any excess wiring back through the cable access holes.
8. Install the cover on the wiring box using the 4 screws and washer removed
previously.
CAUTION: Ensure the gasket has been secured to the
inside of the cover to prevent moisture from entering
the box.
Note: The cover has a notch on one side. The notch
should be mounted so it is located on the top of the box
where the mount is welded to the box.
9. Refer to Section 4 to install the pan and tilt camera assembly and the lower dome.
Rev 1.0
19
900.0733
30-Mar-06
3.1 OUTDOOR WALL MOUNT, CONTINUED
3.1.1
Corner Mounting Bracket
The corner-mounting bracket allows a wall mount to be installed on the corner of a
building. Perform the following steps to install the bracket on a corner and then install
the wall mount on the bracket.
WARNING: The corner mount must be attached to a
structure of adequate strength for the purpose.
Appropriate hardware must be used for the type and
state of the surface/structure that provides adequate
support for the working load of the mount, housing, and
camera assembly.
1. Use the corner mount as a template for the mounting holes to secure the corner
mount to a structure. There are three holes on each side for attaching the mount to
the corner of a structure. Refer to Figures 8 and 9 for installation dimensions.
2. There are two sealing gaskets provided with the wall mount. One has 4 holes (one
in each corner) and one is solid. Locate the solid sealing gasket. Remove the paper
to expose the adhesive and press it onto the corner mount so it is between the
corner mount and the wall mount. This gasket prevents moisture from entering
through the screw head slots and the cable access holes in the corner mount and
wall mount.
Rev 1.0
20
900.0733
30-Mar-06
3.1.1
Corner Mounting Bracket, Continued
3. Run the field wiring through conduit and install the conduit in the conduit hole on the
mount. Refer to Figure 8. The field wiring must extend approx. 0.6m (2 feet) past
the conduit. The field wiring is routed through the corner mount and terminated in
the wall mount wiring box.
CAUTION: The corner mount must be mounted so the
conduit hole is pointed toward the ground to prevent
moisture from entering the mount.
Cable Access Hole
(Cables from mount)
Wall Mount Mounting Holes (4 places)
9.525mm (0.375”) dia.
Corner Mounting Holes (6 places)
10.16mm (0.4”)dia.
Conduit Hole for Field Wiring Access
0.74” dia. (18.796mm)
CAUTION: Ensure this hole is pointing
down towards the ground.
Figure 8. Corner Mounting Bracket
Rev 1.0
21
900.0733
30-Mar-06
3.1.1
Corner Mounting Bracket, Continued
Note: Dimensions shown in drawing are in millimeters (mm).
Dimension Conversion Chart
mm
inches
mm
inches
10
0.39
101.6
3.98
20
0.79
125
4.92
100
3.94
190
7.48
Figure 9. Corner Mounting Bracket Dimensional Drawing (DWG684)
4. Feed the field wiring through the cable access hole on the corner mount. Refer to
Figures 8 and 9.
NOTE: You will have to poke holes in the sealing
gasket for cable entry. The holes should be no bigger
than needed for cables to fit.
CAUTION: The gasket prevents moisture from
entering the wiring box so the gasket should fit snugly
around the wiring entering the box.
Rev 1.0
22
900.0733
30-Mar-06
3.1.1
Corner Mounting Bracket, Continued
5. Remove the cover on the wall mount wiring box by removing the four (4) screws and
washers. Locate the sealing gasket with the four corner holes. Remove the paper to
expose the adhesive. Align the holes in the gasket with the holes on the inside of
the cover and press it onto the inside of the cover. Set cover and hardware aside.
6. Feed the field wiring from the corner mount through the access holes on the mount.
Allow enough wiring [approx. 1 foot (0.3m)] to extend through the wall mount wiring
box to terminate the wiring on the terminal blocks.
7. Secure the wall mount to the corner-mounting bracket using the four M4X16 screws,
washers, and nyloc nuts.
NOTE: You will have to poke holes in the sealing
gasket. The holes should be no bigger than needed
to accommodate the M4X16 screws.
CAUTION: The gasket prevents moisture from
entering the wiring box so the gasket should fit snugly
around the wiring entering the box.
a. Insert a washer on the screw.
b. Insert the screw through the hole in the wall mount wiring box and then through
the hole on the corner-mounting bracket.
c. Insert a washer on the screw and secure the screw with the nyloc nut.
8. Perform steps 6 through 9 in Section 3.1 to complete the installation.
Rev 1.0
23
900.0733
30-Mar-06
3.1.2
Corner Mounting Bracket with Cable Gland Fittings
The corner-mounting bracket allows a wall mount to be installed on the corner of a
building. The cable gland fittings guard against water entering the mount. Perform the
following steps to install the bracket on a corner.
WARNING: The corner mount must be attached to a
structure of adequate strength for the purpose.
Appropriate hardware must be used for the type and
state of the surface/structure that provides adequate
support for the working load of the mount, housing, and
camera assembly.
1. Use the corner mount as a template for the mounting holes to secure the corner
mount to a structure. There are four holes on each side for attaching the mount to
the corner of a structure. Refer to Figure 10.
2. There are two sealing gaskets provided with the wall mount. One has 4 holes (one
in each corner) and one is solid. Locate the solid sealing gasket. Remove the paper
to expose the adhesive and press it onto the corner mount so it is between the
corner mount and the wall mount. This gasket prevents moisture from entering
through the screw head slots and the cable access holes in the corner mount and
wall mount.
Rev 1.0
24
900.0733
30-Mar-06
3.2.1
Corner Mounting Bracket with Cable Gland Fittings, Continued
3. Run the field wiring through the gland fittings on the bracket. Refer to Figure 10.
The field wiring must extend approx. 0.6mm (2 feet) past the bracket. The field
wiring is routed through the corner mount and terminated in the wall mount wiring
box.
Figure 10. Corner Mounting Bracket with Cable Gland Fittings Drawing (DWG1943)
4. Remove the cover on the wall mount wiring box by removing the four (4) screws and
washers. Locate the sealing gasket with the four corner holes. Remove the paper to
expose the adhesive. Align the holes in the gasket with the holes on the inside of
the cover and press it onto the inside of the cover. Set cover and hardware aside.
5. Feed the field wiring from the corner mount through the access holes on the mount.
Allow enough wiring [approx. 0.3m (1 foot)] to extend through the wall mount wiring
box to terminate the wiring on the terminal blocks.
Rev 1.0
25
900.0733
30-Mar-06
3.2.1
Corner Mounting Bracket with Cable Gland Fittings, Continued
6. Secure the wall mount to the corner-mounting bracket using the four M4X16 screws,
washers, and nyloc nuts.
NOTE: You will have to poke holes in the sealing
gasket. The holes should be no bigger than needed
to accommodate the M4X16 screws.
CAUTION: The gasket prevents moisture from
entering the wiring box so the gasket should fit snugly
around the wiring entering the box.
a. Insert a washer on the screw.
b. Insert the screw through the hole in the wall mount wiring box and then through
the hole on the corner-mounting bracket.
c. Insert a washer on the screw and secure the screw with the nyloc nut.
7. Perform steps 6 through 9 in Section 3.1 to complete the installation.
Rev 1.0
26
900.0733
30-Mar-06
3.2
OUTDOOR SOFFIT MOUNT AND POLE/FLAT ROOF MOUNT
WARNING: The soffit mount and pole/flat roof mount
must be attached to a structure of adequate strength for
the purpose. Appropriate hardware must be used for the
type and state of the surface/structure that provides
adequate support for the working load of the housing and
camera assembly.
1. Use the dimensions and hole patterns in Figure 11 to attach the mount to the soffit.
Use the dimensions and hole patterns in Figure 12 to attach the pole or flat roof
mount. Use hardware appropriate for the mounting surface (e.g. wood screws for a
wood structure, metal screws for a metal structure). Ensure the cable access hole
aligns with the field wiring.
Rev 1.0
27
900.0733
30-Mar-06
3.2 OUTDOOR SOFFIT MOUNT AND POLE/FLAT ROOF MOUNT, CONTINUED
Soffit Mount Dimension Conversion Chart
mm
inches
mm
inches
8
0.31
235
9.25
100
3.94
368
14.49
101.6
4
458
18.09
Figure 11. Soffit Mount Dimensions and Hole Patterns (DWG772)
Rev 1.0
28
900.0733
30-Mar-06
3.2 OUTDOOR SOFFIT MOUNT AND POLE/FLAT ROOF MOUNT, CONTINUED
Note: All dimension are shown in mm.
Pole/Flat Roof Mount Dimension Conversion Chart
mm
inches
mm
inches
8
0.31
235
9.25
100
3.94
629
24.76
101.6
4
Figure 12. Pole/Flat Roof Mount Dimensions and Hole Patterns (DWG777)
2. There are two sealing gaskets provided with the mount. One has 4 holes (one in
each corner) and one is solid. Locate the solid sealing gasket. Remove the paper
to expose the adhesive and press it onto the mount so it is between the mounting
surface (soffit, roof, or pole) and the mount. This gasket prevents moisture from
entering through the screw head holes and the cable access hole in the mount.
3. Remove the cover on the wiring box by removing the four (4) screws and washers.
Locate the sealing gasket with the four corner holes. Remove the paper to expose
the adhesive. Align the holes in the gasket with the holes on the inside of the cover
and press it onto the inside of the cover. Set cover and hardware aside.
Rev 1.0
29
900.0733
30-Mar-06
3.2 OUTDOOR SOFFIT MOUNT AND POLE/FLAT ROOF MOUNT, CONTINUED
4. Feed the field wiring through the access hole on the mount. Allow enough wiring
[approx. 0.3m (1 foot)] to extend through the box to terminate the wiring on the
terminal blocks.
NOTE: You will have to poke a hole in the sealing
gasket for cable entry. The hole should be no bigger
than needed for cables to fit.
CAUTION: The gasket prevents moisture from
entering the wiring box so the gasket should fit snugly
around the wiring entering the box.
5. Install the mount on the mounting surface using the appropriate hardware (supplied
by the installer) for the surface.
NOTE: You will have to poke holes in the sealing
gasket for the screw heads. The holes should be no
bigger than needed to allow for the screw heads.
CAUTION: The gasket prevents moisture from
entering the wiring box so the gasket should fit snugly
around the screw heads.
CAUTION: If the unit is mounted on a surface which
is not smooth, care must be taken by the installer to
ensure an alternative and appropriate method is used
to attach the unit and that the sealing is adequate for
the purpose intended. If needed use a silicon sealer
to prevent moisture from entering the wiring boxes.
Inadequate sealing could cause failure of the unit.
6. Remove and label the terminal blocks from the sockets on the PCB inside the wiring
box. Terminate the field wiring on each terminal block. Refer to Figure 7 and Table
7 for terminal block wiring terminations.
a. Loosen the screw on the terminal block.
Rev 1.0
30
900.0733
30-Mar-06
3.2 OUTDOOR SOFFIT MOUNT AND POLE/FLAT ROOF MOUNT, CONTINUED
b. Strip the wire back ¼” (6.35mm).
CAUTION: Ensure the wire is stripped back far enough
to make good contact in the terminal strip, but ensure
that stripped wires do not make contact with each other
or improper operation of the unit may occur.
c. Insert the wire into the terminal block.
d. Tighten the screw on the terminal block to secure the wire.
e. Label each terminal block and then seat the terminal block in the appropriate
socket on the PCB in the wiring box.
7. Carefully push any excess wiring back through the cable access hole.
8. Install the cover on the wiring box using the 4 screws and washer removed
previously.
9. Refer to Section 4 to install the pan and tilt camera assembly and the lower dome.
3.3
REGENT WALL AND POLE/FLAT ROOF MOUNT
WARNING: The regent wall mount and pole/flat roof
mount must be attached to a structure of adequate
strength for the purpose. Appropriate hardware must be
used for the type and state of the surface/structure that
provides adequate support for the working load of the
housing and camera assembly.
Note:
If installing the wall mount on a corner, refer to section 3.3.1 for installation
instructions.
1. Use the dimensions and hole patterns in Figure 13 to attach the wall mount to a wall.
Use the dimensions and hole patterns in Figure 14 to attach the pole or flat roof
mount to a pole or flat roof. Use hardware appropriate for the mounting surface
(e.g. wood screws for a wood structure, metal screws for a metal structure). Ensure
the cable access hole aligns with the field wiring.
Rev 1.0
31
900.0733
30-Mar-06
3.3 REGENT WALL AND POLE/FLAT ROOF MOUNT, CONTINUED
Regent Wall Mount Dimension Conversion Chart
mm
inches
mm
inches
25.0
0.98
172.0
6.77
47.0
1.85
194.0
7.64
59.5
2.34
235.0
9.25
70.0
2.76
335.0
13.19
120.0
4.72
367.0
14.45
125.0
4.92
Figure 13. Regent Wall Mount Dimensions and Hole Patterns
Rev 1.0
32
900.0733
30-Mar-06
3.3 REGENT WALL AND POLE/FLAT ROOF MOUNT, CONTINUED
Regent Pole/Flat Roof Mount Dimension Conversion Chart
mm
inches
mm
inches
6.0
0.24
125.0
4.92
27.25
1.07
194.0
7.64
38.0
1.5
266.0
10.47
71.84
2.83
268.5
10.57
100
3.94
335
13.19
112.5
4.43
367.0
14.45
Figure 14. Pole/Flat Roof Mount Dimensions and Hole Patterns
2. Remove the mount from the mounting box by removing the four (4) screws and
washers. Retain hardware.
Rev 1.0
33
900.0733
30-Mar-06
3.3 REGENT WALL AND POLE/FLAT ROOF MOUNT, CONTINUED
3. Feed the field wiring through the access hole on the mount. Allow enough wiring
[approx. 0.3m (1 foot)] to extend through the box to terminate the wiring on the
terminal blocks.
4. Install the mounting box on the mounting surface using the appropriate hardware
(supplied by the installer) for the surface.
CAUTION: If the unit is mounted on a surface which
is not smooth, care must be taken by the installer to
ensure an alternative and appropriate method is used
to attach the unit and that the sealing is adequate for
the purpose intended. If needed use a silicon sealer
to prevent moisture from entering the wiring boxes.
Inadequate sealing could cause failure of the unit.
5. Remove the terminal blocks from the sockets on the PCB on the mount.
6. Terminate the field wiring on each terminal block. Refer to Figure 7 and Table 7 for
terminal block wiring terminations.
a. Loosen the screw on the terminal block.
b. Strip the wire back ¼” (6.35mm).
CAUTION: Ensure the wire is stripped back far enough
to make good contact in the terminal strip, but ensure
that stripped wires do not make contact with each other
or improper operation of the unit may occur.
c. Insert the wire into the terminal block.
d. Tighten the screw on the terminal block to secure the wire.
e. Label each terminal block and then seat the terminal block in the appropriate
socket on the PCB in the wiring box.
Rev 1.0
34
900.0733
30-Mar-06
3.3 REGENT WALL AND POLE/FLAT ROOF MOUNT, CONTINUED
7. Carefully push any excess wiring back through the cable access hole.
8. Install the mount on the mounting box using the 4 screws and washers removed
previously.
WARNING: Ensure wiring does not get pinched between
mount and mounting box.
9. Refer to Section 4 to install the pan and tilt camera assembly and the lower dome.
Rev 1.0
35
900.0733
30-Mar-06
3.3.1
Regent Corner Mounting Bracket
The corner-mounting bracket allows a wall mount to be installed on the corner of a
building. Perform the following steps to install the bracket on a corner and then install
the wall mount on the bracket.
WARNING: The corner mount must be attached to a
structure of adequate strength for the purpose.
Appropriate hardware must be used for the type and
state of the surface/structure that provides adequate
support for the working load of the mount, housing, and
camera assembly.
1. Use the corner mount as a template for the mounting holes to secure the corner
mount to a structure. Refer to Figure 15 for installation dimensions.
Rev 1.0
36
900.0733
30-Mar-06
3.3.1
Regent Corner Mounting Bracket, Continued
Note: Dimensions shown in drawing are in millimetres (mm).
Corner Mounting Bracket Dimension Conversion Chart
mm
inches
mm
inches
25.0
0.98
194.0
7.64
172.12
6.78
260.0
10.24
176.0
6.93
335.0
13.19
Figure 15. Corner Mounting Bracket
2. Remove the wall mount from the mounting box by removing the four (4) screws and
washers. Retain hardware.
3. Feed the field wiring through the cable gland on the mount.
Allow enough wiring [approx. 1 foot (0.3m)] to extend through the box to terminate
the wiring on the terminal blocks.
Rev 1.0
37
900.0733
30-Mar-06
3.3.1
Regent Corner Mounting Bracket, Continued
4. Install the mounting box on the mounting surface using the appropriate hardware
(supplied by the installer) for the surface.
CAUTION: If the unit is mounted on a surface which
is not smooth, care must be taken by the installer to
ensure an alternative and appropriate method is used
to attach the unit and that the sealing is adequate for
the purpose intended. If needed use a silicon sealer
to prevent moisture from entering the wiring boxes.
Inadequate sealing could cause failure of the unit.
5. Remove the terminal blocks from the sockets on the PCB on the mount.
6. Perform steps 6 through 9 in Section 3.3 to complete the installation.
Rev 1.0
38
900.0733
30-Mar-06
SECTION 4:
CONFIGURING AND INSTALLING
THE PAN AND TILT CAMERA ASSEMBLY
AND LOWER DOME
4.1
ADDRESSING THE PAN AND TILT CAMERA
Each pan and tilt camera assembly must be given a unique address. The address is
defined by setting the switch array on the pan and tilt assembly labelled DILSW2 located
on the top PCB (VC472V5).
Note: Orbiter Microsphere units that are controlled via coaxial cable do not require an
address setting. Therefore, the settings of positions 1-7 on DILSW1 are ignored.
Note: The Orbiter Microsphere must be set with an address that matches the camera
input number on the video control equipment (i.e. Input 12 must have address 12,
Input 8 must have address 8.)
The addressing scheme is binary plus one. The first seven switches of the DILSW2 array
represent a binary value; these values are shown in the figure below.
Note: Switch 8 of DILSW2 is used to define the alarm settings. Refer to paragraph 4.2.
When any of the first seven switches are moved to the “OFF” position, the value of that
switch represents an address value.
All Switches Shown in the ON Position (Address 1)
ON
1
2
3
4
5
6
7
1
2
4
8
16
32
64
8
Switch Binary Value
When using the Orbiter Microsphere protocol, the maximum number of addresses is
128. This is calculated as 64+32+16+8+4+2+1 = 127 which is the setting for DILSW2
with all seven address switches in the “OFF” position. Because the addressing scheme
is binary +1, the actual total is 127 + 1 = 128.
Rev 1.0
39
900.0733
30-Mar-06
4.1 ADDRESSING THE PAN AND TILT CAMERA, CONTINUED
Refer to Figure 16 for pictorial examples of addresses:
ON
1
2
3
4
4
1
5
6
16
32
7
Binary value: 1+4+16+32 = 53
Address = binary value 53+1 = 54
Alarms are enabled – respond per default settings
8
ON
1
2
3
4
5
6
8
1
7
8
32
ON
1
Binary value: 1+8+32 = 41
Address = binary value 41+1 = 42
Alarms enabled – respond per default settings
Binary value = 1+2+4+8+16+32+64 = 127
Address = binary value 127+1=128
Alarms must be set through MaxCom menus
2
4
8
16
32
64
Figure 16. Addressing Examples
Rev 1.0
40
900.0733
30-Mar-06
The following table is a partial listing of the available address settings.
Table 8. Addresses 1 – 32 (DILSW2)
Dome
Address
Rev 1.0
SW1
(1)
SW2
(2)
SW3
(4)
SW4
(8)
SW5
(16)
SW6
(32)
SW7
(64)
1
ON
ON
ON
ON
ON
ON
ON
0
2
OFF
ON
ON
ON
ON
ON
ON
1
3
ON
OFF
ON
ON
ON
ON
ON
2
4
OFF
OFF
ON
ON
ON
ON
ON
3
5
ON
ON
OFF
ON
ON
ON
ON
4
6
OFF
ON
OFF
ON
ON
ON
ON
5
7
ON
OFF
OFF
ON
ON
ON
ON
6
8
OFF
OFF
OFF
ON
ON
ON
ON
7
9
ON
ON
ON
OFF
ON
ON
ON
8
10
OFF
ON
ON
OFF
ON
ON
ON
9
11
ON
OFF
ON
OFF
ON
ON
ON
10
12
OFF
OFF
ON
OFF
ON
ON
ON
11
13
ON
ON
OFF
OFF
ON
ON
ON
12
14
OFF
ON
OFF
OFF
ON
ON
ON
13
15
ON
OFF
OFF
OFF
ON
ON
ON
14
16
OFF
OFF
OFF
OFF
ON
ON
ON
15
17
ON
ON
ON
ON
OFF
ON
ON
16
18
OFF
ON
ON
ON
OFF
ON
ON
17
19
ON
OFF
ON
ON
OFF
ON
ON
18
20
OFF
OFF
ON
ON
OFF
ON
ON
19
21
ON
ON
OFF
ON
OFF
ON
ON
20
22
OFF
ON
OFF
ON
OFF
ON
ON
21
23
ON
OFF
OFF
ON
OFF
ON
ON
22
24
OFF
OFF
OFF
ON
OFF
ON
ON
23
25
ON
ON
ON
OFF
OFF
ON
ON
24
26
OFF
ON
ON
OFF
OFF
ON
ON
25
27
ON
OFF
ON
OFF
OFF
ON
ON
26
28
OFF
OFF
ON
OFF
OFF
ON
ON
27
29
ON
ON
OFF
OFF
OFF
ON
ON
28
30
OFF
ON
OFF
OFF
OFF
ON
ON
29
31
ON
OFF
OFF
OFF
OFF
ON
ON
30
32
OFF
OFF
OFF
OFF
OFF
ON
ON
31
41
Binary
Value
900.0733
30-Mar-06
4.2
ALARM SETTINGS
Switch 8 of the switch array labelled DILSW2 (refer to Figure 16) is used to toggle the
alarm setting. When the switch is ON, the dome alarm inputs are enabled and set to the
default settings as shown in Table 9. If switch 8 is OFF, then the alarms are not
automatically enabled, but can be enabled and adjusted using a MaxCom controller with
local alarm menus. Refer to the MaxCom instructions for details of alarm setting menus.
Table 9. Alarm Settings
Alarm Type
Input-Type
Preset
Time-Out
1
Normally Open
1
10 seconds
2
Normally Open
2
10 seconds
3
Normally Open
3
10 seconds
4
Normally Open
4
10 seconds
5
Normally Open
5
10 seconds
6
Normally Open
6
10 seconds
7
Normally Open
7
10 seconds
8
Normally Open
8
10 seconds
4.3
SETTING THE RS422 TERMINATION
4.3.1
RS422 Twisted Pair Telemetry Termination
The RS422 telemetry network requires termination at the first device in the daisy chain
and also the last device in the daisy chain. The first device is always the telemetry
controller and has RS422 termination as standard. There is no need for this device to be
unterminated. The Orbiter Microsphere units represent other devices on the daisy chain
network and only the last dome on the chain is terminated (termination selected as on).
All domes between the controller and the last dome must have the termination selected
as off. If a single twisted pair RS422 control receiver (dome) is to be connected to an
individual twisted pair output, then the termination should be on at the control receiver.
The jumper should be installed in the ON position on LK2.
Figure 17 illustrates correct RS422 termination on a medium-sized system with three
daisy chains connected to three ports on an RS422 distribution unit.
Rev 1.0
42
900.0733
30-Mar-06
4.3 SETTING THE RS422 TERMINATION, CONTINUED
Figure 17. RS422 Twisted Pair Telemetry Termination
4.3.2
RS422 Termination Selection
The RS422 termination is set using dual jumpers LK1 and LK2 located on the top PCB
(VC472V5) of the pan and tilt camera assembly. Refer to Figure 18 for location of the
jumpers.
The RS422 termination is selected ON/OFF by the position of the jumper LK2. The
factory setting is OFF; termination is disabled. Termination is only ON (enabled) on the
last dome in a daisy-chain wiring configuration.
Termination is selected HI/LO by the position of the jumper LK1. The factory setting is
termination HI. This setting suits almost all installations that are wired and not using any
wire free links. Termination LO is designed for non-cable linked installations such as
fiber, microwave, etc., which sometimes require a higher voltage differential than is
present with the default HI termination setting.
Rev 1.0
Figure 18. Location of RS422 Termination Jumpers (PCB VC472V5)
43
900.0733
30-Mar-06
4.4
SETTING THE PROTOCOL
The protocol is set using switch array marked DILSW1. This switch is located on the top
PCB (VC472V5) on the pan and tilt assembly.
Refer to Table 10 to set the Orbiter Microsphere to the desired protocol.
Table 10. Protocol Selection
DILSW1
Protocol
SW3
SW2
SW1
Honeywell VCL (standard)
OFF
OFF
OFF
Honeywell VCL (disable alarm timers)
ON
OFF
ON
Honeywell Ultrak/Diamond
ON
ON
ON
Ernitec
ON
ON
OFF
Molynx
ON
OFF
OFF
Pelco D
OFF
ON
OFF
Pelco P
OFF
OFF
ON
Vicon
OFF
ON
ON
Note: All third party protocols are supported via RS422 twisted-pair only.
4.5
COLOUR INTEGRATION SELECTION
Switch position 4, SW4, of the switch array labelled DILSW1 (PCB VC472V5) is used to
enable or disable the colour integration.
ON = disabled
OFF = enabled
Rev 1.0
44
900.0733
30-Mar-06
4.6
VIDEO LIFT/GAIN ADJUSTMENTS
There are two potentiometers, VR1 and VR2, located on the top PCB (VC472V5) on the
pan and tilt assembly. Refer to Figure 18 for location of the potentiometers. One is
labelled LIFT (VR1) and the other is labelled GAIN (VR2). These two screwdriveradjustable potentiometers are used to adjust the video lift and gain for coaxial cable runs
that exceed 300m (984 feet). The on-board video amplifier can be adjusted to correct
video levels and quality over any length of cable run up to 700 meters (2300 feet).
VR1 (LIFT) and VR2 (GAIN) are factory set at their minimum setting (which should be
satisfactory for coaxial cable runs up to 300m (985 feet). Before adjusting either the LIFT
or GAIN, ensure that the iris is correctly adjusted.
If the contrast of the image is low (caused by an attenuated video signal), then the GAIN
pot may be adjusted to improve contrast. Slowly turn the GAIN pot clockwise (to
increase the ‘gain’) until the contrast becomes satisfactory as viewed on the monitor.
If the image is ‘smearing’ (due to a cable run of greater than 500 meters (1640 feet), then
the LIFT pot may be adjusted to sharpen the image. Slowly turn the LIFT pot clockwise
(to increase the ‘lift’) until the image becomes satisfactory as viewed on the monitor.
Rev 1.0
45
900.0733
30-Mar-06
4.7
INSTALLING THE PAN AND TILT CAMERA ASSEMBLY
1. Install the black external mounting arrangement on the pan and tilt assembly.
a. Align the arrow on the black mounting arrangement with the lug on the pan and
tilt plug-n-play connector as shown in Figure 19.
Align Lug with
Arrow on Mountng Arrangement
Secure with
3 M3x16 screws
Align Arrow with Lug
on Plug-n-Play Connector
Black Mounting
Arrangement
Figure 19. Installing the Black Mounting Arrangement
b. Secure the mounting arrangement to the pan and tilt camera assembly using the
three (3) m3x16 pan head screws provided with the dome.
2. Install the inner liner on the pan and tilt assembly. Note: Align the slot in the inner
liner with the camera lens throughout the camera’s tilt range. Locate the two
black M4x3/8 screws provided to secure the liner to the mounting bracket on both
sides of the camera. Refer to Figure 20.
Rev 1.0
46
900.0733
30-Mar-06
4.7 INSTALLING THE PAN AND TILT CAMERA ASSEMBLY, CONTINUED
Mounting hole for Inner Liner
(One on each side of camera)
Figure 20. Installing Inner Liner on Pan and Tilt Assembly
CAUTION: It is important the inner liner is installed prior
to installing the pan and tilt assembly. Omission of the
inner liner can cause the pan and tilt assembly to not
initialize properly due to light in the upper assembly. This
causes the dome to appear faulty.
3. Install the pan and tilt camera assembly in the top dome.
a. Plug the RJ45 connectors into the Alarm Connector Socket(s) on the pan and tilt
camera assembly. Refer to Figure 21 for location of the connectors on the pan
and tilt camera assembly. Ensure each cable (as labelled previously) is
connected to the proper alarm connector.
Note: After plugging the RJ45 connectors into the sockets, carefully push the alarm
cabling back up into the top dome.
Rev 1.0
47
900.0733
30-Mar-06
4.7 INSTALLING THE PAN AND TILT CAMERA ASSEMBLY, CONTINUED
Figure 21. Alarm I/O Connector Locations on Pan and Tilt Assembly
b. Align the lug on the plug and play connector on the pan and tilt assembly with
the notch in the top dome. Push the pan and tilt camera assembly up into the
connector, rotate the assembly (in the direction of the arrow shown on the black
mounting arrangement) and allow it to fall into the retaining slot. Refer to Figure
22.
CAUTION: Ensure the alarm cables do not interfere with
the pan and tilt motion.
Rev 1.0
48
900.0733
30-Mar-06
4.7 INSTALLING THE PAN AND TILT CAMERA ASSEMBLY, CONTINUED
Align lug on plug-n-play connector with
notch in dome.
Lug on Plug-n-Play
Connector
Figure 22. Installing The Pan And Tilt Assembly Into The Top Dome
4. Apply power to the unit.
When the unit is first powered up, it goes through an initialization process. During
this process all functions are tested and the pan, tilt, and lens sensors are located.
Rev 1.0
49
900.0733
30-Mar-06
4.8
INSTALLING THE LOWER DOME
Perform the following steps to install the lanyard between the top and lower dome and
attach the lower dome to the top dome.
Note: The lanyard is not installed on the Regent Mounts. Proceed to step 2 if
installing the lower dome on a regent mount.
1. Install the lanyard between the top dome and the lower dome. Refer to Figure 23.
Insert the CSK screw in hole,
place washer on the screw and
secure with M4 hex nut..
Place lanyard over screw and
secure with Nyloc nut.
Place Washer,
then Lanyard
then another Washer,
and secure with Nyloc Nut
Figure 23. Installing Lanyard Between Top And Lower Dome
a. Locate the plastic bag provided with the dome that contains the lanyard and
associated hardware.
b. Place one washer, one end of the lanyard, and then another washer on the post
on the top dome. Secure the washers and lanyard with a Nyloc nut.
c. Insert the CSK Screw into the hole on the lower dome. Note: it will only fit into
one of the four holes in the lower dome; the other three holes are for securing
the lower dome to the top dome. Place one washer and the M4 hex nut on the
screw to secure it to the lower dome.
d. Place the lanyard over the screw and secure it using the remaining Nyloc nut.
Rev 1.0
50
900.0733
30-Mar-06
4.8 INSTALLING THE LOWER DOME, CONTINUED
2. Secure the lower dome to the top dome.
a. Thread the three (3) M4x8 machine screws provided in the three holes on the
lower dome.
b. Align the holes (and screws) on the lower dome with the holes on the top dome
and secure by tightening the three screws. The screws should be tightened
using a torque of 8.41 lbf-in (pound-force inch) or 0.95N-m (Newtonmetres).
3. After verifying standard operation of the Orbiter Microsphere with the matrix
controller, terminate the alarm wiring (if applicable).
Rev 1.0
51
900.0733
30-Mar-06
Notes:
Rev 1.0
52
900.0733
30-Mar-06
SECTION 5:
OPERATION
5.1
INTRODUCTION
The following operation information assumes the system has the Orbiter Microsphere
connected to a MaxCom Matrix and has a MaxCom keyboard connected to the matrix.
For complete operation and programming procedures for the Orbiter Microsphere, refer
to the MaxCom Owner Operation Manual.
If the Orbiter Microsphere is installed in a system with a 3rd party control system, refer to
the user manual for the 3rd party controller to control the PTZ and camera/lens for testing
purposes.
5.2
SYSTEM INITIALIZATION
Upon power-up of the system, the domes connected to the system will initialize by
panning and tilting for several seconds. During the initialization, the domes do not
respond to telemetry commands from the controller.
A start-up screen is displayed on the monitor display for approximately 5 seconds. The
start-up screen shows the MaxCom model (e.g. 8/1, 16/2, etc.), the software compilation
date (e.g. Oct 24 2003), and the software version number (e.g. V01.00).
The keyboard(s) connected to the MaxCom are locked upon power-up. The lock button
on the keyboard is illuminated (lit). A user must log on to the MaxCom to control the
system. Refer to the MaxCom Owner Operation Manual for procedures and user log-on
pass codes.
Rev 1.0
53
900.0733
30-Mar-06
5.3
CAMERA SELECTION
1. Press the number button(s) on the MaxCom keyboard that corresponds to the
camera number. For example, to select camera 15, press the 1 button, then press
the 5 button.
2. Press the camera button.
5.3.1
Camera Button
To sequence between the cameras in the system, repeatedly press the camera button
until the desired camera is displayed.
If a camera is absent from the system, the MaxCom automatically skips (auto-skip) to the
next camera that is present in the system.
5.4
BASIC OPERATION
After selecting the camera at the keyboard, perform the following tests:
1. Verify the video of the camera selected is displayed on the monitor selected at the
keyboard.
2. Move the joystick left, right, up and down to verify the pan and tilt control commands
are functional. The speed of the pan and tilt is relative to the force applied to the
joystick. The further the joystick is moved, the faster the pan or tilt function occurs.
3. Press the Auto 180° button to pan the camera 180°. The camera pans at the
maximum speed (up to 400° per second).
4. Rotate the knob on top of the joystick clockwise to zoom the camera lens in. Rotate
the knob on top of the joystick counter clockwise to zoom the camera lens out.
5. Press the green auto-focus button to toggle the camera in and out of auto-focus
mode. If the auto-focus button is lit, the auto-focus mode is selected. To manually
focus the camera, press the NEAR (+) or FAR (-) buttons. The camera automatically
switches to manual focus mode if one of these two buttons is pressed.
6. Press the green auto iris button to toggle the camera in and out of auto-iris mode. If
the iris button is lit, the auto-iris mode is selected. To manually control the camera
iris, press the OPEN (+) or CLOSE (-) buttons. The camera automatically switches
to manual iris mode if one of these two buttons is pressed.
Rev 1.0
54
900.0733
30-Mar-06
5.5
ACCESSING ON-SCREEN MENUS
The on-screen menus can be accessed by operators to define the parameters of the
cameras, monitors, alarms, and the system.
Note: the security level of the pass code used to log on the system determines the
level of access to the menus. Refer to the MaxCom owner operation manual for
pass codes and security levels.
To access the on-screen menus, perform the following procedures.
1. Press the 9 button,
2. Press the 0 button
3. Press the 9 button
4. Press the 0 button
5. Press the lock button.
If there is no keyboard activity for 60 seconds while the MaxCom is in any of the menus,
the MaxCom automatically returns to normal operation.
Systems with more than one monitor - Only one monitor can display the menus at any
one time. If the menu code is entered after another operator has already accessed the
menus, the MENU IN USE message is displayed. The message is removed as soon as
the other operator exits the menu (or if the operator attempting to access the menus
switches to a different camera).
Rev 1.0
55
900.0733
30-Mar-06
The following setup tree defines the options under each menu in the main setup menu.
Table 11. Menu Setup Tree
1 Cameras
1 Titles
1 Camera
2 Preset
3 Sector
2 Settings (Select Camera
1-16)
• IR Lamps
(Present/Absent)
• Auto 180
(Enabled/Disabled)
• Digital Zoom
(Enabled/Disabled)
• Home Setting (preset
0/tour 1/disabled)
Home Timer (000 to
100) min.
3 Tours (Select Camera 116)
4 Synchronization
5 Privacy Zones
Presets (100–127
(privacy/standard)
6 Sector Zones (1-16)
7 Remote Reset
1 Power-up Reset
2 Camera Reset
3 Factory Reset
(WARNING!)
Main Menu ( 9 0 9 0 lock)
2 Monitors
3 System
4 Alarms
1 Auto1 Time/Date
1 System Alarms
sequence
Setting
1 Settings
2 Actions
3 Contact
Tables
4 Messages
2
2 Time/Date
2 Camera Alarms
Partitioning
Format
(not available at
(not
Clock (12-/24this time)
functioning)
hour)
Date
(Day/Month/Year)
(Month/Day/Year)
(Year/Month/Day)
Month (2
numbers)
(3 letters)
3 Text
Brightness
3 Monitor Control
RS422/RS232
4 Universal
Sequences
(not available
at this time)
5 Language (not
available at this
time)
6 Event Timers (not
available at this
time)
7 Salvo Switching
(not available at
this time)
5 Software
3 Alarm Properties
To select options within the menus, press the corresponding number button (if
applicable), move the joystick stick up or down to move up one line or down one line
respectively, or move the joystick left or right to move between columns.
Press the lock button to exit a menu (Exits the current menu and returns the user to the
previous menu). If the user is at the main menu, pressing the lock button exits the
menus and returns the operator to normal operation.
For detailed information on the menu setup options, refer to the MaxCom Owner
Operation Manual.
Rev 1.0
56
900.0733
30-Mar-06
SECTION 6:
TECHNICAL SPECIFICATIONS
6.1
EXTERNAL ORBITER MICROSPHERE
Function
Gold
Gold X
18x
27x
Digital Zoom
8x
10x
144x
270x
Total Zoom
Colour/Mono
No
Yes
Alarm Inputs
8
Relay Outputs
2
Presets
128
Preset Tours
4
Presets/Tour
128
Mimic Tours
4
Remote Reset
Yes
Home Feature
Yes
Telemetry Options
Coax and Twisted Pair
NVT™ Built-In
Yes
Privacy Zones
28
Line Lock Facility
Yes
Sector Idents
Yes
Wide Dynamic Range
No
Yes
X Wave Technology
No
Scanning System
PAL/NTSC (depends on Model number)
Yes
Resolution PAL (TVL)
460
Resolution NTSC (TVL)
470
>460
752 x 582
Pixels NTSC
768 x 494
4.1 – 73.8
3.25 – 88
Focus
Auto/Manual
Iris
Auto/Manual
Min. Illumination – colour (lux)
Min. Illumination – mono (lux)
0.7
N/A
S/N Ratio (dB)
No
>450
Pixels PAL
Lens size (mm)
1
0.01
50
0.005
48
-20 to +50
Operating Temperature (°C)
0.1 – 400
Variable Pan Speed (°/s)
Continuous 360
Pan Coverage (°)
0.1 – 200
Variable Tilt Speed (°/s)
Rev 1.0
Platinum
Optical Zoom
Tilt Coverage (°)
90
Nominal power supply (VAC)
24
57
900.0733
30-Mar-06
6.1 EXTERNAL ORBITER MICROSPHERE, CONTINUED
Function
Gold
Platinum
Recommended PSU – 230V
HPTV2402DWP or HPTV2402DWPN
Recommended PSU – 110V
HPTV2402WP or HPTV2402WPN
Mounting Options
Wall, Pole, Soffit, Regent, VR, Heavy Duty
Honeywell Protocols
rd
3 Party Protocols
Rev 1.0
Gold X
Standard, Ultrak/Diamond
Pelco P, Pelco D, Vicon, Molynx, Emitek
58
900.0733
30-Mar-06
Notes:
Rev 1.0
59
900.0733
30-Mar-06
Honeywell Video Systems (Head Office)
2700 Blankenbaker Pkwy, Suite 150
Louisville, KY 40299
www.honeywellvideo.com
TEL+1-800-796–2288
Honeywell Security Australia Pty Ltd.
Unit 5, Riverside Centre, 24-28 River Road West
Parramatta, NSW 2150, Australia
www.ademco.com.au
TEL +61-2-8837-9300
Honeywell Video Systems UK Ltd.
Aston Fields Road, Whitehouse Ind Est
Runcorn, Cheshire, WA7 3DL, UK
www.honeywellvideo.com
TEL +44-1928-754-030
Honeywell Security Asia Pacific
Flat A, 16/F, CDW Building, 388 Castle Peak Road
Tsuen Wan, N.T., Hong Kong
www.security.honeywell.com/hk
TEL +852-2405-2323
Honeywell Security South Africa
Unit 6 Galaxy Park, Galaxy Avenue, Linbro
Business Park
P.O. Box 59904, Kengray, 2100, South Africa
www.honeywell.co.za
TEL +27-11-574-2500
Honeywell Security France
Parc Gutenberg, 8, Voie La Cardon
91120, Palaiseau, France
www.honeywell-security.fr
TEL +33-01-64-53-80-40
Honeywell Security Germany
Großenbaumer Weg 8
40472 Düsseldorf, Germany
www.honeywell-security.de
TEL +49-211-41-50-90
Honeywell Security Italia SpA
Via della Resistenza 53/59, 20090 Buccinasco
Milan, Italy
www.security.honeywell.com/it
TEL +39-02-457-1791
Honeywell Security Poland
Chmielewskiego 22a, 70-028
Szczecin, Polska
www.ultrak.pl
TEL +48-91-485-40-60
Honeywell Security Espana
Calle Vivero, 5, 28040
Madrid, Spain
www.security.honeywell.com/es
TEL +34-91-102-5900
Honeywell Security Czech Republic
Havránkova 33, Brno
Dolní Heršpice, 619 00, Czech Republic
www.olympo.cz
TEL +420-543-558-111
Honeywell Video Systems Northern Europe
Netwerk 121
1446 TR Purmerend, Netherlands
www.SecurityHouse.nl
TEL +31-299-410-200
Honeywell Security Slovakia Republic
Vajnorskà 142, 83104 Bratislava
Slovakia
www.olympo.sk
TEL +421-2-444-54-660
Video Systems
www.honeywellvideo.com
1-800-796-CCTV (North America only)
© 2006 Honeywell International Inc.
All rights reserved. No part of this publication may be reproduced by any means without written permission from
Honeywell Video Systems. The information in this publication is believed to be accurate in all respects. However,
Honeywell Video Systems cannot assume responsibility for any consequences resulting from the use thereof. The
information contained herein is subject to change without notice. Revisions or new editions to this publication may
be issued to incorporate such changes.