1
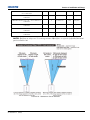
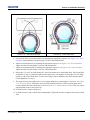
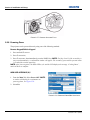
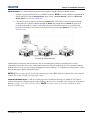
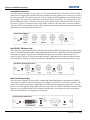
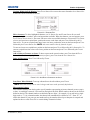
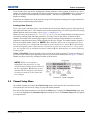
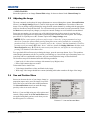
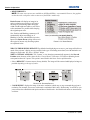
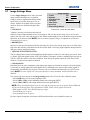
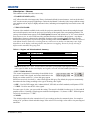
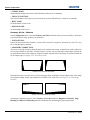
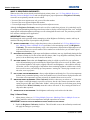
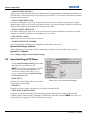
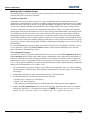
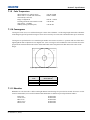
Section 3: Operation
• RESIZE PRESETS:
NOTE: The same resize presets are available to all HD and SXGA+ screen models. However, the graphics
used to describe each preset in this section are of the SXGA+ models only.
Resize Presets will display an image in its
native resolution (no resizing) or will resize
the image by maximizing either the height,
width or both height and width, or will resize
to the maximum size possible while keeping
the original aspect ratio.
Size, Position and Blanking parameters will
automatically adjust accordingly or, if
Blanking is set first, which defines an Active
Input Area; Resize Preset scaling will occur in
this region of interest only. Resizing options
are explained below.
FIGURE 3-18 - RESIZE PRESETS
WHAT IS THE RESIZING DEFAULT? By default when displaying a new source, your image will utilize as
much of the projector’s display area as possible for the type of incoming source data, but with minimal or no
changes to aspect ratio. See Select “Default” below.
WHEN “CUSTOM” APPEARS: The “Custom” re-size descriptor automatically appears in the Size and
Position menu when any of the values for Size, Vertical Stretch, H-Position, V-Position or Blanking do not
correspond to those for a preset. This option is not offered in the Resize Presets pull-down list.
• Select “DEFAULT” for most sources (factory default). The image will be centered and displayed as large as
possible depending on the type of source.
FIGURE 3-19 - RESIZING DEFAULT
• “NO RESIZING” displays the image in its native resolution, which may or may not match the projector’s
resolution. For example, for a source with a native resolution of 800 x 600, “No Resizing” in an SXGA+ projector will use the central 800 x 600 pixels and have a black border—the black border areas are unused areas,
see below.
3-18
M-Series User Manual
020-100009-02 Rev. 1 (04-2009)