1
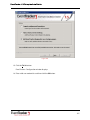
EventTracker Enterprise v7.5 Install Guide EventTracker Publication Date: June 13, 2014 8815 Centre Park Drive Columbia MD 21045 www.eventtracker.com EventTracker v7.5 Enterprise Install Guide Abstract This guide will help the users to install and configure EventTracker Enterprise, and verify the expected functionality of all its components. EventTracker is a reliable, policy driven solution to monitor and manage critical events generated by Windows XP/Vista/7/8/2003/2008/2008 R2/2012/2012 R2 (v7.5 Build 29 and above), Solaris BSM, Unix (SYSLOG), SYSLOG-NG and SNMP devices. EventTracker is an enterprise grade solution that provides real-time alerts, secure warehousing, and flexible reporting. Target Audience EventTracker users or system administrators, who wish to install the EventTracker Enterprise Manager. The information contained in this document represents the current view of Prism Microsystems, Inc. on the issues discussed as of the date of publication. Because Prism Microsystems, Inc. must respond to changing market conditions, it should not be interpreted to be a commitment on the part of Prism Microsystems, Inc. and Prism Microsystems, Inc. cannot guarantee the accuracy of any information presented after the date of publication. This document is for informational purposes only. Prism Microsystems, Inc. MAKES NO WARRANTIES, EXPRESS OR IMPLIED, AS TO THE INFORMATION IN THIS DOCUMENT. Complying with all applicable copyright laws is the responsibility of the user. Without limiting the rights under copyright, this Guide may be freely distributed without permission from Prism, as long as its content is unaltered, nothing is added to the content and credit to Prism is provided. Prism Microsystems, Inc. may have patents, patent applications, trademarks, copyrights, or other intellectual property rights covering subject matter in this document. Except as expressly provided in any written license agreement from Prism Microsystems, Inc. the furnishing of this document does not give you any license to these patents, trademarks, copyrights, or other intellectual property. The example companies, organizations, products, people and events depicted herein are fictitious. No association with any real company, organization, product, person or event is intended or should be inferred. © 2014 Prism Microsystems, Inc. All rights reserved. The names of actual companies and products mentioned herein may be the trademarks of their respective owners. 1 EventTracker v7.5 Enterprise Install Guide Table of Contents Introduction ................................................................................................................................................. 4 Known Issues for v7.5.53 ........................................................................................................................... 5 System Requirements .............................................................................................................................. 16 Hardware Requirements [Min. Configuration] ................................................................................... 16 Software Requirements........................................................................................................................ 16 Pre-install instructions for Local Account and Active Directory authentication v7.5.29 and below versions ...................................................................................................................................................... 18 Create Local User and Group Accounts ............................................................................................... 18 Create EventTracker User Group ...................................................................................................... 20 Create User ........................................................................................................................................ 23 Add User to EventTracker Group...................................................................................................... 25 Create Active Directory User and Group Accounts ............................................................................. 30 Create EventTracker Group............................................................................................................... 31 Create User ........................................................................................................................................ 34 Add User to EventTracker Group...................................................................................................... 37 Add User to Local Administrators group......................................................................................... 41 Add cross-domain users ...................................................................................................................... 42 Add cross-forest users ......................................................................................................................... 43 Install EventTracker Manager .................................................................................................................. 44 Pre-install Checklist for EventTracker Manager ................................................................................ 44 IIS Settings ......................................................................................................................................... 45 Procedure to install EventTracker Manager v7.5.53 - Custom ......................................................... 47 Procedure to install EventTracker Manager v7.5.53 - Standard / Collection Point ........................ 94 Procedure to install EventTracker Manager for v7.5.29 and below versions ................................ 109 User Permission on SQL Server ..................................................................................................... 131 Deploy EventTracker Windows Agent ................................................................................................... 141 Pre-install Instructions for Windows Agent..................................................................................... 141 Pre-install Checklist for Windows Agent .......................................................................................... 141 Different methods to install EventTracker Agents .......................................................................... 142 Deploy EventTracker Windows Agent via System Manager ........................................................... 142 2 EventTracker v7.5 Enterprise Install Guide Configure EventTracker Windows Agent .......................................................................................... 152 Deploy EventTracker Windows Agent – Vista and Above ............................................................... 155 Prerequisites for Windows Agent – Vista and Above .................................................................. 155 Install / Uninstall Vista and above Agent ..................................................................................... 155 Agent Deployment .................................................................................................................................. 155 Secure EventTracker ............................................................................................................................... 155 Uninstall EventTracker Windows Agent ............................................................................................... 156 Uninstall EventTracker Windows Agent via Control Panel.............................................................. 156 Uninstall EventTracker Windows Agent via System Manager ....................................................... 157 Uninstall EventTracker............................................................................................................................ 159 3 EventTracker v7.5 Enterprise Install Guide Introduction EventTracker Enterprise provides a unique combination of capabilities, including: • Enterprise-wide, Distributed Console Event Management • Rapid Integration with Active Directory • USB Device Monitoring • Automatic Remediation • Reporting • Analytics • Real-time Alerting • File Integrity Monitoring • Virtual Infrastructure Monitoring • Status Tracker This is the good time to familiarize you with the various product features as described on the Web site (http://www.eventtracker.com/eventtracker/enterprise/) in the brochure of this package. This installation guide is designed as an easy reference, since we recognize the imperative importance of error free and painless installation experience. ***IMPORTANT: Prism strongly recommends users to refer “How To Install and Customize Web Server (IIS)“ document prior to installing EventTracker 7.5. 4 EventTracker v7.5 Enterprise Install Guide Known Issues for v7.5.53 The mentioned below issues are related to v7.5.53 Pre-Installer only. Q1. I get the error ”Failed to map the path ‘/app_GlobalResources/’.” in the browser interface. The workaround for this issue is to re-install IIS Express manually and later run the EventTracker Configuration once again. This error occurs if user has already installed IIS Express RC. Kindly follow the steps mentioned below. a. Uninstall IIS Express. b. Download IIS Express 8.0 from 64 Bit: http://download.microsoft.com/download/1/6/3/163BBBDE-5523-416D-A293EA0492020E4A/iisexpress_8_0_RTM_x64_en-US.msi 32 bit: http://download.microsoft.com/download/1/6/3/163BBBDE-5523-416D-A293EA0492020E4A/iisexpress_8_0_RTM_x86_en-US.msi c. Install IIS Express 8.0. d. To run EventTracker Configuration, click Start, click Programs, and then click Prism Microsystems. e. Select EventTracker, and then select EventTracker Configuration. f. Enter valid User Credentials, and then select the OK button. Q2. If there are two versions of SQL Express is installed, then what should I do? 5 EventTracker v7.5 Enterprise Install Guide Figure 1 Select either one of those SQL Express installed and proceed further. Q3. What should I do if IIS Express is not working in Win 2003 (64 bit)/2003 R2 machines? IIS Express is not supported on Win 2003 (64 bit)/2003 R2 operating systems. Kindly install IIS for the above mentioned OS. o The installation/setup type will always be Custom, and the link to the guide will redirect the user for detail instruction on how to configure IIS. Figure 2 6 EventTracker v7.5 Enterprise Install Guide o Clicking on No, will exit the installation. o Clicking on Yes, will allow user to proceed only with Custom option. o Users need to get a valid certificate for this type of installation. o User has to select IIS Web Server only. Q4. If user X has installed EventTracker and user Y proceeds to install EventTracker on the same machine, then below message is encountered, what should I do? Figure 3 Figure 4 Please make sure that the user who has started the installation is an administrator, and the same user completes the installation. If two users switch between installing the application this issue arises. The currently logged in user, the System Administrators group, or the System User does not have permissions on respective SQL Instance. Please make sure that the logged in user and the system user are having sysadmin privileges on the SQL instance. For detail instructions to grant sysadmin privilege, please refer User Permission on MS SQL Server. 7 EventTracker v7.5 Enterprise Install Guide Q5. What should I do if I get the following error message ”PkgMgr.exe has been deprecated.” Figure 5 If you are using IIS Express click OK and proceed with the installation. This error message appears if ASP.NET is not installed with IIS. If IIS is already installed, the DISM will enable ASP.NET. Figure 6 8 EventTracker v7.5 Enterprise Install Guide Please make sure that if IIS is installed, then ASP.NET is also installed in the machine. For detail instructions, please refer How To Install and Customize Web Server (IIS). Q6. What should I do if the pre installer prompts to install IIS Express, even though it is installed? (OR) If SQL express is installed via pre-install check, then if you click ‘Back’, the installer shows SQL express is not installed. (OR) What should I do if the message ”A reboot is still pending” occurs? Figure 7 Sometimes installer does not exit properly. This could be because of the pending reboot for Windows installer/.NET Framework/IIS. Quit the Pre-Installer, restart the machine and run the Pre-Installer once again. Q7. What should I do, if some components do not work for UK region settings? Please make sure that the Region settings have been applied to the MS SQL engine, (For Ex: UK region settings). Since EventTracker Setup does not install Microsoft SQL Management Studio, kindly download and install the same. To configure UK Region settings in MS SQL, please refer UK Region Settings Guide. Q8. Setup gives weird errors about not being able to access a folder/file. 9 EventTracker v7.5 Enterprise Install Guide Figure 8 (OR) Figure 9 Please make sure that you give a gap of ten seconds for launching the setup. It takes some time for the Operating system to clean up the temporary files/folders created during installation. Q9. If I get an error message “You need to format the disk in the drive before you use it. Do you want to format it? “, what should I do? 10 EventTracker v7.5 Enterprise Install Guide Figure 10 If the setup ends up using an unformatted drive for archive folder, either format the drive for use, or please use a drive that is formatted and is ready for use. Q10. What should I do, if Microsoft .NET Framework is not installed? 11 EventTracker v7.5 Enterprise Install Guide Figure 11 If Microsoft .NET Framework 3.5 is not installed, EventTracker Pre-Install Check displays an appropriate message. a. Click Download and Install this feature and proceed with the installation. (OR) If the below message displays, 12 EventTracker v7.5 Enterprise Install Guide Figure 12 The instructions to install .NET Framework 3.5 is given in detail in How To - Install Microsoft .NET Framework. Q11. If IIS Express fails to start, then what should I do? Figure 13 1. To launch Services Manager, click the Start button. 2. In Search Programs and Files box, type Services.msc and then press Enter. Services Window displays. 3. Start the service ‘IISExpress’ manually. 13 EventTracker v7.5 Enterprise Install Guide Q12. If IIS Express failed to install, then what should I do? Figure 14 Please run the EventTracker Configuration again. 1. To run EventTracker Configuration, click Start, click Programs, and then click Prism Microsystems. 2. Select EventTracker, and then select EventTracker Configuration. 3. Enter valid User Credentials, and then select the OK button. Q13. How can I use MS SQL Server Enterprise Edition for EventTracker? 14 EventTracker v7.5 Enterprise Install Guide Figure 15 MS SQL Server Enterprise Edition can be used for Custom option only. The user can use either SQL Express or Enterprise Edition for Custom installation. SQL Express Edition will be used for Standard and Collection Point Install/Setup Type. The user will be forced to install SQL Express for Standard and Collection Point even if SQL Enterprise Edition is already present on the machine. 15 EventTracker v7.5 Enterprise Install Guide System Requirements For optimal performance, following are the hardware and software requirements to host EventTracker Enterprise. Hardware Requirements [Min. Configuration] Minimum hardware required to install and smoothly run EventTracker Enterprise. 32-bit Installation: CPU 2GHz, 32-bit (x86) Xeon ® Quad Core or equivalent RAM 3 GB HDD 10 GB Free Hard disk space for the application Table 1 64-bit Installation: CPU 2.80 GHz, 64-bit (x64) Xeon ® Dual Core or equivalent RAM 4 GB HDD 10 GB Free Hard disk space for the application Table 2 Software Requirements EventTracker Manager Windows Platforms 32 bit 64 bit Server 2012 R2 Not Applicable Supported Server 2012 Not Applicable Supported Server 2008 R2 Not Applicable Supported Server 2008 Supported Supported Server 2003 R2 Supported Supported Server 2003 Supported Supported Table 3 Components: • Microsoft .NET Framework 3.5 SP1. 16 EventTracker v7.5 Enterprise Install Guide • • Microsoft SQL SERVER 2005/2008/2008 R2/2012/2012 R2 – Express/Enterprise /Standard Edition. IIS 6.0 and above. Also IIS Express is supported on v7.5 Build 53 and above (except Win 2003 64 bit OS, Vista 64 bit OS). Web Browsers: • • Internet Explorer 8.0 and above Firefox Browser 3.5 and above Note: EventTracker Enterprise installation on Windows 2012/2012 R2/2008/2008 R2 Server Core edition not supported. EventTracker Agent Windows Platforms 32 bit 64 bit Server 2012 R2 Not Applicable Supported Server 2012 Not Applicable Supported Server 2008 R2 Not Applicable Supported Server 2008 Supported Supported Server 2003 R2 Supported Supported Server 2003 Supported Supported Windows 7 Supported Supported 2000 Server Supported Supported Windows XP Supported Supported 2000 Professional Supported Supported Windows 8, 8.1 Supported Supported Vista Supported Supported EventTracker Agent for Solaris: Solaris 9, Solaris 10 Table 4 Components: • Microsoft .NET Framework 2.0 and above. NOTE: Versions other than those specified above are not supported. 17 EventTracker v7.5 Enterprise Install Guide Pre-install instructions for Local Account and Active Directory authentication v7.5.29 and below versions • EventTracker Enterprise users are authenticated locally or against the Windows Active Directory. • If you want ‘Local Account’ authentication, then user accounts and group accounts should preexist on the target computer where EventTracker Enterprise is to be installed. So, create user accounts and group accounts on the target computer before you attempt to install EventTracker Enterprise. • If you want ‘Active Directory’ authentication, then user accounts and group accounts should preexist in the Active Directory. So, create user accounts and group accounts in the Active Directory before you attempt to install EventTracker Enterprise. Create Local User and Group Accounts NOTE: To perform this procedure, you must be a member of the administrators group on the local computer, or you must have been delegated the appropriate authority. If the computer is joined to a domain, then members of the ‘Local Admin’ group might be able to perform this procedure. Summary • • What is the significance of creating ‘EventTracker’ user group? √ To log on to EventTracker Enterprise, the user must be a member of ‘EventTracker’ group. √ EventTracker Enterprise user authentication operates locally, that is confined to a particular computer or within Active Directory context. Create a local user group ‘EventTracker**’ on the computer where EventTracker Enterprise is to be installed. √ Create a local user e.g. ETKaren**. √ Add ETKaren user to EventTracker group. Members of this group can log on to EventTracker Enterprise. 18 EventTracker v7.5 Enterprise Install Guide √ Add ETKaren user to local Administrators group on the computer where EventTracker Enterprise is to be installed. *** You can name user group and user with any name you prefer and need not necessarily be EventTracker and ETKaren. Figure 16 19 EventTracker v7.5 Enterprise Install Guide Create EventTracker User Group 1. Select the Start button, select Control Panel, and then select Administrative Tools. 2. Select Computer Management, and then select Local Users and Groups. Figure 17 3. Expand the Local Users and Groups node. Right – click Groups, and then select New Group. 20 EventTracker v7.5 Enterprise Install Guide Figure 18 4. Type the name of the group in the Group name field. Figure 19 5. Select Create, and then select Close. 21 EventTracker v7.5 Enterprise Install Guide Figure 20 EventTracker group is created. 22 EventTracker v7.5 Enterprise Install Guide Create User 1. In Local Users and Groups node, right-click Users, and then select New User. Figure 21 2. Type appropriate user credentials. For example, you can type ‘ETKaren’ as user name. 3. Provide a strong password and confirm the same. 4. Select the Password never expires check box. Figure 22 23 EventTracker v7.5 Enterprise Install Guide NOTE: It is not mandatory to check Password never expires option. In order to avoid password expiry of EventTracker every now and then, we recommend you to check this option. 5. Select Create, and then select Close. Figure 23 ETKaren user is created. 24 EventTracker v7.5 Enterprise Install Guide Add User to EventTracker Group 1. Right-click the newly created user group, and then select Properties. Figure 24 EventTracker Properties window displays. Figure 25 25 EventTracker v7.5 Enterprise Install Guide 2. Select the Add button. Select Users, Computers, Service Accounts or Groups window displays. Figure 26 3. Select the Locations button. Locations window displays. Figure 27 4. Select the location, typically the name of the computer. In this example, name of the computer is SPIDER-II. Refer Figure 13. 26 EventTracker v7.5 Enterprise Install Guide Figure 28 5. Select the OK button. Figure 29 6. Type the user name in the Enter the object names to select field. 27 EventTracker v7.5 Enterprise Install Guide Figure 30 7. Select the Check Names button. Figure 31 8. Select the OK button. 28 EventTracker v7.5 Enterprise Install Guide Figure 32 9. Select Apply, and then select the OK button. 29 EventTracker v7.5 Enterprise Install Guide Create Active Directory User and Group Accounts NOTE: To perform this procedure, you must be a member of the ‘Account Operators’ group, ‘Local Admin’ group, or the ‘Enterprise Admin’ group in Active Directory, or you must have been delegated the appropriate authority. Summary: a. Create a user group e.g. EventTracker Test** in the domain where EventTracker Enterprise is to be installed. b. Create a domain user e.g. ETKaren**. Add ETKaren user to EventTracker Test group. Members of this group can log on to EventTracker Enterprise. c. Add ETKaren user to local Administrators group on the computer where EventTracker Enterprise is to be installed. ** You can name user group and user with any name you prefer and need not necessarily be EventTracker Test and ETKaren. Figure 33 30 EventTracker v7.5 Enterprise Install Guide Create EventTracker Group 1. Select the Start button, select Settings, and then select Control Panel. 2. Select Administrative Tools, and then select Active Directory Users and Computers. Figure 34 Create a Global Scope Security Group in the domain where EventTracker Enterprise is to be installed. 3. Right-click the domain name, select New, and then select Group. In this example, domain name is ‘pnplvista.test’. Figure 35 New Object – Group displays. 31 EventTracker v7.5 Enterprise Install Guide Figure 36 4. Type the name of the group in the Group name field. In this example group name is ‘EventTracker Test’. 5. Select Group scope as Global, and Group type as Security. Figure 37 32 EventTracker v7.5 Enterprise Install Guide 6. Click OK. ‘EventTracker Test’ group is created. Figure 38 33 EventTracker v7.5 Enterprise Install Guide Create User 1. Right-click Users, point to New, and then User. Figure 39 New Object – User window displays. Figure 40 34 EventTracker v7.5 Enterprise Install Guide 2. Type appropriately in the respective fields. In this example, First name is ‘Karen’, Last name is ‘Smith’ and User logon name is ‘ETKaren’. Figure 41 3. Select the Next > button. 4. Type the password in the Password and Confirm Password fields. 5. Select the Password Never Expires check box. Figure 42 35 EventTracker v7.5 Enterprise Install Guide NOTE: It is not mandatory to check Password never expires option. In order to avoid password expiry of EventTracker every now and then, we recommend you to check this option. 6. Select the Next > button. Figure 43 7. Select the Finish button. Username ‘Karen Smith’ is created. Figure 44 36 EventTracker v7.5 Enterprise Install Guide Add User to EventTracker Group 1. Right-click the EventTracker Test group, and then select Properties. Figure 45 EventTracker Properties window displays. Figure 46 37 EventTracker v7.5 Enterprise Install Guide 2. Select the Members tab. Figure 47 3. Select the Add button. Figure 48 4. Type the user name in the Enter the object names to select field. 38 EventTracker v7.5 Enterprise Install Guide Figure 49 5. Select the Check Names button. Figure 50 6. Select the OK button. ‘Karen Smith’ is a member of ‘EventTracker Test’ group. 39 EventTracker v7.5 Enterprise Install Guide Figure 51 7. Select Apply, and then select the OK button. 40 EventTracker v7.5 Enterprise Install Guide Add User to Local Administrators group To add a user in ‘Administrators’ group on the computer where EventTracker Enterprise is installed please follow the steps given below. 1) Right click My Computer, select Manage. 2) Expand Local Users and Groups, select Groups. 3) Right click EventTracker group, select Add to Group. EventTracker Properties window displays. 4) Select the Add button. Select Users, Contacts, Computers, Service Accounts, or Groups window displays. Figure 52 5) In Enter the object names to select box, enter username (i.e. ‘Karen’ in our example), and select the Check Names button. 6) Select the OK button. 41 EventTracker v7.5 Enterprise Install Guide Add cross-domain users Consider Domain A and Domain B exist in Forest 1 and EventTracker Enterprise server is a member of Domain A. If a user in Domain B needs to access and administer EventTracker Enterprise, add that user to EventTracker user group in Domain A. Since these two domains exist in the same forest, Windows creates automatic trust relationship between these two domains. Figure 53 42 EventTracker v7.5 Enterprise Install Guide Add cross-forest users Consider Domain A and Domain B exist in Forest 1 and Domain C and Domain D exists in Forest 2. EventTracker Enterprise server is a member of Domain A. If a user in Domain C needs to access and administer EventTracker Enterprise, add that user to EventTracker user group in Domain A. Since these two domains exist in different forests, you need to create trust prior to adding users. Figure 54 Windows Server 2003 forests: Create a forest trust. A forest trust lets you create a trust relationship between two separate Active Directory forests. 43 EventTracker v7.5 Enterprise Install Guide Install EventTracker Manager Prism recommends you to refer ”EventTracker Architecture” guide before you begin installation. This guide explains the architecture and sample deployment methods with illustrations. Installation can be initiated by the following methods. 1. Launch the executable program. The installation is geared to be intuitive and friendly. During install you will be asked to provide the path of the digital certificate. Certificate is validated against the latest CRL. Installation proceeds further only if the Certificate found to be valid. The installation procedure is identical for all operating system(s) as mentioned in Table 3. Pre-install Checklist for EventTracker Manager The pre-install checklist describes the specific settings, permissions, and privileges that are required for installing EventTracker Manager. Read the checklist before installation to avoid installation failure. User is a member of ‘Local Administrators’ group ENSURE MSI package installation is allowed User has ‘Logon As Service’ rights User has ‘Logon As Batch job’ rights Network Discovery is enabled System cryptography: Use FIPS 140 compliant cryptographic algorithms, with encryption, hashing and signing algorithms disabled. VERIFY User has permission on ‘Application install directory’ (Folders and sub folders). User must have create service permission on the target system(SCM- service control manager) User has Read/Write permission on windows registry. Table 5 44 EventTracker v7.5 Enterprise Install Guide IIS Settings Please ensure that IIS Settings under Application Pools are as follows in Windows 2008/2008 R2/2012/2012 R2. Figure 55 – 64 bit OS 45 EventTracker v7.5 Enterprise Install Guide Figure 56 – 32 bit OS For details to configure the above settings, please refer Install and Customize IIS Web Server Guide. 46 EventTracker v7.5 Enterprise Install Guide Procedure to install EventTracker Manager v7.5.53 Custom If you are using EventTracker for the first time, launch the executable program and proceed. If you are a second time user, please uninstall the previous version of EventTracker and then proceed. The detail procedure to uninstall EventTracker is mentioned in Uninstall EventTracker. The detail procedure to install EventTracker is given below. 1. Double-click the executable file. EventTracker Pre-Install Check window displays. Figure 57 2. Click the Next > button. Hardware Summary pane displays. 47 EventTracker v7.5 Enterprise Install Guide Figure 58 3. Click the Next > button. Install Type page displays. 4. Select Standard/Collection Point/Custom option, and then select the Next > button. In this section, Custom option is selected. 48 EventTracker v7.5 Enterprise Install Guide Figure 59 Prerequisite page displays. Figure 60 49 EventTracker v7.5 Enterprise Install Guide NOTE: If the prerequisites are not installed, then a message ‘To be installed’ displays against the respective prerequisite. Figure 61 a. Click the Next > button. Install page displays. For some Windows platforms, .NET Framework has to be installed via Server Manager. Figure 62 50 EventTracker v7.5 Enterprise Install Guide Click Configuration Guide link for detail instructions to configure .NET Framework. The instructions to install .NET Framework is given in detail in How To - Install Microsoft .NET Framework. Click OK and proceed to install .NET Framework. After successfully installing .NET Framework, rerun the executable file once again. (OR) If Microsoft .NET Framework is not installed, click Next >, and then click the Install button. Please refer Figure 63. Figure 63 – Installing Microsoft .NET Framework If Windows Installer, Power Shell is not installed, click Next > and then click the Install button. Please refer Figure 64 respectively. 51 EventTracker v7.5 Enterprise Install Guide Figure 64 – Installing Windows Installer and Powershell Once prerequisites are installed, Database page displays. 5. If MSSQL Server – Express Edition 2005/2008/2008 R2/2012 is already installed, then click the Next > button. NOTE: Users are allowed to choose any version of MS SQL required. On OS greater than Vista, SQL 2008 R2 Express is installed. On Vista and below, SQL 2005 Express is installed. 52 EventTracker v7.5 Enterprise Install Guide Figure 65 Web Server page displays. If MS SQL Express is not installed, then click Next >. 53 EventTracker v7.5 Enterprise Install Guide Figure 66 The pre-installer prompts to download SQL Server Express Edition. 54 EventTracker v7.5 Enterprise Install Guide Figure 67 a. Click the Download button. Please select a location to download the SQL installer window displays. 55 EventTracker v7.5 Enterprise Install Guide Figure 68 b. Select the path to download SQL Express on a particular location and then click Save. SQL Express starts downloading and is installed in the background. 56 EventTracker v7.5 Enterprise Install Guide Figure 69 After MS SQL Express is installed, Web Server page displays. 6. Select IIS Express option, and then select the Next > button. NOTE: Only IIS Express will be installed, if IIS is not installed on the machine. From now on we are supporting IIS Express since it is a lightweight tool. You can choose to install IIS Express/Manager based on the requirement. If you prefer to use IIS Manager, click Configuration Guide link for detail instructions to install IIS. 57 EventTracker v7.5 Enterprise Install Guide Figure 70 If IIS Express is already installed, on clicking Next >, Disk Usage page displays. If IIS Express is not installed, please refer Figure 71 and proceed to install it. 58 EventTracker v7.5 Enterprise Install Guide Figure 71 a. If IIS Express (Not Installed) option is selected, then click the Next > button. Installation of IIS Express proceeds. 59 EventTracker v7.5 Enterprise Install Guide Figure 72 b. Click the Install button. 60 EventTracker v7.5 Enterprise Install Guide Figure 73 c. After IIS Express is installed successfully, click the Next > button. Disk Usage page displays. 61 EventTracker v7.5 Enterprise Install Guide Figure 74 7. Click the Next > button. Installation Summary page displays. 62 EventTracker v7.5 Enterprise Install Guide Figure 75 8. Click the Next > button. Define User Group page displays. 63 EventTracker v7.5 Enterprise Install Guide Figure 76 9. Select Local Machine or Active Directory option, and then select the Next > button. If Local Machine option is selected, then You have selected to use local machine page displays. Please refer step 10 for further instructions. NOTE: While creating group and/or user, the user should be part of the administrators group in the local machine. The user should have ‘Logon as Batch’ and ‘Logon as Service’ rights granted. If Active Directory option is selected, then You have selected Active Directory domain: page displays. Please refer Step 11 , for further instructions. 10. Select Create User Group EventTracker or Select existing User Group option, and then select the Next > button. If local machine was selected earlier, then ‘You have selected to use local machine’ page displays. 64 EventTracker v7.5 Enterprise Install Guide Figure 77 NOTE: When creating group, We encourage users to use the group name as ‘EventTracker’, though EventTracker works with any group name. In case this group name does not exist then the default choice will be to ‘Create User Group EventTracker’ else the default choice will be ‘Select Existing Group’. a. If Create User Group EventTracker is selected, click Next >. Members of this User Group can access EventTracker page displays. 65 EventTracker v7.5 Enterprise Install Guide Figure 78 The group name must be unique otherwise an error message displays stating that the group already exists. Figure 79 b. Click the OK button. c. To solve this issue, enter a unique Group Name, and then click the Next > button. Define User page displays. Please refer step 12 to continue installing EventTracker. (OR) 66 EventTracker v7.5 Enterprise Install Guide a. If Select existing User Group option is selected, then select any group, and then click the Next > button. Figure 80 Define User page displays. Please refer step 12 to continue installing EventTracker. If Active Directory is selected earlier, You have selected Active Directory domain: page displays. 11. Select Create User Group EventTracker or Select existing User Group option, and then select the Next > button. NOTE: When creating group, We encourage users to use the group name as ‘EventTracker’, though EventTracker works with any group name. 67 EventTracker v7.5 Enterprise Install Guide In case this group name does not exist then the default choice will be to ‘Create User Group EventTracker’ else the default choice will be ‘Select Existing Group’. Figure 81 If Create User Group EventTracker option is selected, then Members of this User Group can access EventTracker page displays. 68 EventTracker v7.5 Enterprise Install Guide Figure 82 Enter unique and appropriate Group Name, and then click the Next > button. NOTE: If user does not have appropriate permissions to create a group on the Active Directory machine, then error message ‘Access Denied’ displays. Please contact administrator if you do not have sufficient permissions. Figure 83 A. Click the OK button. 69 EventTracker v7.5 Enterprise Install Guide Figure 84 If Select existing User Group option is selected, a. Select any group, and then select the Next > button. Figure 85 70 EventTracker v7.5 Enterprise Install Guide Define User page displays. 12. Select Create EventTrackerAdmin/Find User/Select existing User option. If Create EventTrackerAdmin option is selected, please refer Figure 85. NOTE: Administrator should have sufficient privileges on Active Directory machine as well as to create a group. Figure 86 a. Click the Next > button. This User will manage EventTracker page displays. 71 EventTracker v7.5 Enterprise Install Guide Figure 87 b. Enter relevant credentials, and then click the Next > button. Summary page displays. If Find User option is selected, a. Enter a name in the box, and then click the Find button. NOTE: A wildcard can also be entered. 72 EventTracker v7.5 Enterprise Install Guide Figure 88 b. Click the Next > button. Summary page displays. If Select existing User option is selected, select an appropriate user, and then select the Next > button. 73 EventTracker v7.5 Enterprise Install Guide Figure 89 Summary page displays. If user is not EventTracker Administrator then below message displays. Figure 90 a. Click the Yes button. 13. In Summary page, verify all the data entered, and then click the Install button. 74 EventTracker v7.5 Enterprise Install Guide Figure 91 EventTracker Pre-Install Check window displays a message to confirm and proceed with installation of EventTracker. Figure 92 14. Click the Yes button. InstallShield Wizard displays the Welcome screen. 75 EventTracker v7.5 Enterprise Install Guide Figure 93 15. Click Next >. InstallShield Wizard displays the License Agreement screen. 76 EventTracker v7.5 Enterprise Install Guide Figure 94 16. Read the license agreement, and then click ‘I accept the terms in the license agreement’ option to accept the terms and condition. 17. Click the Next > button. Select a Certificate File page displays. NOTE: If the user has selected Custom option in EventTracker Pre Install Check, then the installer prompts to add the certificate file. 77 EventTracker v7.5 Enterprise Install Guide Figure 95 18. To locate the path of the certificate file, click the Browse button. InstallShield Wizard displays the Select File window. 19. Go to the appropriate folder, and then select the file. 20. Click Open. InstallShield Wizard updates the folder path. Figure 96 21. Click Next >. InstallShield[R] Wizard displays the Select Components screen. 78 EventTracker v7.5 Enterprise Install Guide Figure 97 EventTracker Components Description EventTracker Console Select this option to install manager console on target computer. Change Audit Optional component. Installing this component enables you to monitor and manage change over the enterprise. Agent component will also be installed along with the Manager Console. You can also deploy agent to the monitored computers using System Manager after installing the Manager Console. Trap Tracker Optional component. Installing this component enables you to monitor and manage traps sent by SNMP compliant devices. 79 EventTracker v7.5 Enterprise Install Guide Optional component. Installing this component enable you to monitor and manage TCP/IP networks, Web sites, applications, and ports in mission critical environment. Status Tracker Click To Select different destination folder to install EventTracker. 80 EventTracker v7.5 Enterprise Install Guide View Select Component conventions. Check the disk space available in the target computer. 81 EventTracker v7.5 Enterprise Install Guide 22. Click Next >. InstallShield Wizard displays the Select EventTracker Console Type screen. Standard Console: Best for flat network topologies where all monitored nodes report directly to one (or redundant) EventTracker Console. Figure 98 Collection Point: Used in hierarchical network topologies where monitored nodes report to a local EventTracker Console which in turn replicates its event log archive to a Collection Master. 82 EventTracker v7.5 Enterprise Install Guide Figure 99 a) Select the console type as Collection Point, and then click Next >. InstallShield Wizard displays Configure Collection Point site page. b) Enter Site name: and then select the Next > button. Figure 100 83 EventTracker v7.5 Enterprise Install Guide NOTE: Some special characters are not allowed while providing site/group name. InstallShield[R] Wizard will display a pop-up window if site or group name is provided with such special characters. Figure 101 Collection Master: Used in hierarchical network topologies where collection points replicate their event log archives to a Collection Master. Figure 102 23. Select a console type, and then click Next >. If you have selected Change Audit component, then InstallShield[R] Wizard displays Change Audit SnapShot dialog box. 84 EventTracker v7.5 Enterprise Install Guide Figure 103 24. Click the Next > button to keep the default store location. (OR) Click the Change button to change the snapshot store location. Figure 104 85 EventTracker v7.5 Enterprise Install Guide 25. Browse the destination folder, and then click the OK button. NOTE: The Change Audit snapshot store location can be changed only during fresh install and if snapshots are not retained during uninstall. In case of upgrade, if the change audit snapshots are retained during product uninstallation, then the snapshot store location path cannot be changed. Figure 105 If you have not selected to install Change Audit, then InstallShield[R] Wizard displays the Ready to Install the Program screen. 26. Select the Install Remedial Action EXEs on this machine option. Remedial Action EXEs are copied to <InstallDir>\EventTracker\Agent\Script folder. 86 EventTracker v7.5 Enterprise Install Guide Figure 106 27. Click the Install button. InstallShield Wizard installs the selected components. 87 EventTracker v7.5 Enterprise Install Guide Figure 107 InstallShield Wizard initializes the configuration settings required for proper operation of EventTracker. After initializing the necessary configuration settings, InstallShield[R] Wizard displays the Basic configuration dialog box. 88 EventTracker v7.5 Enterprise Install Guide Figure 108 28. Select appropriate options, and then click OK. InstallShield Wizard displays the Alert and Report generation settings dialog box. 89 EventTracker v7.5 Enterprise Install Guide Figure 109 29. Select/enter appropriate data in the relevant fields, and then click Add. (OR) Click Skip if you do not wish to add the basic settings. InstallShield Wizard displays the last screen. 90 EventTracker v7.5 Enterprise Install Guide Figure 110 30. Click Import existing event log entries option to import event logs of EventTracker. Windows Security Alert message will be displayed if Firewall is on. Figure 111 91 EventTracker v7.5 Enterprise Install Guide Firewall blocks the incoming network connection, if getallevt.exe does not exist in the Program and Services Exceptions and displays a notification. 31. Click Unblock for the getallevt.exe to import event logs. 32. Check Add a shortcut to the desktop option, to add the shortcuts to the EventTracker application on the desktop. Add EventTracker diagnostics as a startup program option is selected by default to notify problems about EventTracker, if any. 33. Click Finish to conclude the installation process. InstallShield[R] Wizard displays the EventTracker Configuration screen. Figure 112 NOTE: Make sure that you select/enter the correct User Credentials, User Authentication and EventTracker Group in order to login successfully. The user name/authentication that is done in EventTracker Preinstall Check, reflects in this screen, but user has the option to override it. 34. Type valid user credentials in the User Name and Password fields respectively. NOTE: EventTracker services run under this account. By default, this user is assigned the ‘Event Tracker Administrator’ role and can login to EventTracker. 35. Select a User Authentication option. Local Account: Authentication is done locally on the computer where EventTracker is being 92 EventTracker v7.5 Enterprise Install Guide installed. Active Directory: Authentication is done in the Active Directory. 36. Type the EventTracker group name in the EventTracker Group field. 37. Click OK. After successfully validating the user credentials, InstallShield[R] Wizard displays the EventTracker Configuration message box. Figure 113 38. Click OK. NOTE: If you change the system logon password, EventTracker logon password has to be updated. In order to synchronize the password, please update the same in EventTracker Configuration. i. To find ‘EventTracker Configuration’, select the Start button, select All Programs. ii. Select Prism Microsystems, select EventTracker, and then select EventTracker Configuration. iii. Enter appropriate credentials and then select the OK button. 93 EventTracker v7.5 Enterprise Install Guide Procedure to install EventTracker Manager v7.5.53 Standard / Collection Point NOTE: If Standard or Collection Point is selected, then The archive path will be the drive with the maximum free space Local machine authentication will be used Group will be created as ‘EventTracker’ User name will be ‘EventTrackerAdmin’ This user will be local machine admin This user will be given ‘Logon as batch user’ rights, and ‘Logon as Service’ rights Only express versions of IIS and SQL can be used. To install EventTracker 21 day trial – Standard/Collection Point, please follow the steps given below. 1. Double-click the executable file. Figure 114 2. Click the Yes button. EventTracker Pre-Install Check window displays. 94 EventTracker v7.5 Enterprise Install Guide Figure 115 3. Click the Next > button. Hardware Summary pane displays. 95 EventTracker v7.5 Enterprise Install Guide Figure 116 4. Select Standard/Collection Point option, and then select the Next > button. 96 EventTracker v7.5 Enterprise Install Guide Figure 117 Prerequisites page displays. 97 EventTracker v7.5 Enterprise Install Guide Figure 118 If prerequisites are not installed, please refer Figure 61- Figure 64 to install all the prerequisites mentioned. 5. Click the Next > button. If all the prerequisites are installed, then Database page displays. 98 EventTracker v7.5 Enterprise Install Guide Figure 119 If MS SQL Server Express is not installed, please refer Figure 65 – Figure 69 for detail instructions. 6. Click the Next > button. IIS Web Server page displays. 99 EventTracker v7.5 Enterprise Install Guide Figure 120 If IIS Express is installed, then Define User page displays if EventTrackerAdmin user is not created otherwise Summary page displays. If IIS Express is not installed, please refer Figure 70 - Figure 73 for detail instructions. 7. Enter EventTrackerAdmin credentials, and then click the Next > button. NOTE: It will be displayed only if there are two instances of SQL running or some pre-requisites are missing. 100 EventTracker v7.5 Enterprise Install Guide Figure 121 Summary page displays. 101 EventTracker v7.5 Enterprise Install Guide Figure 122 Welcome page displays. 102 EventTracker v7.5 Enterprise Install Guide Figure 123 8. Click the Next > button. License Agreement page displays. 9. Select I accept the terms in the license agreement option, and then select the Next > button. 103 EventTracker v7.5 Enterprise Install Guide Figure 124 If Standard option is selected earlier, then Install Default Remedial action displays. Please refer Figure 127. If Collection Point option is selected earlier, then Configure Collection Point site page displays. 10. Enter the Collection Point name and then click the Next > button. 104 EventTracker v7.5 Enterprise Install Guide Figure 125 Configure Collection Master page displays. 11. Enter Collection Master: name or IP address, and then click the Next > button. Figure 126 Ready to install the program page displays. 105 EventTracker v7.5 Enterprise Install Guide 12. Select Install default Remedial Action EXEs on this machine option, and then select the Install button. Figure 127 A successful message displays. 106 EventTracker v7.5 Enterprise Install Guide Figure 128 13. Click the Finish button. EventTracker :: Configuration window displays. 14. Enter valid user credentials and then click the OK button. 107 EventTracker v7.5 Enterprise Install Guide Figure 129 NOTE: After logging into EventTracker Enterprise, some of the components are not available as it is a trial version. In Collection Point installation, components like Trap Tracker, Reports etc are omitted. 108 EventTracker v7.5 Enterprise Install Guide Procedure to install EventTracker Manager for v7.5.29 and below versions If you are using EventTracker for the first time, launch the executable program etwrel75.exe and then proceed. If you are a second time user, please uninstall the previous version of EventTracker and then proceed. The detail procedure to uninstall EventTracker is mentioned in Uninstall EventTracker. The detail procedure to install EventTracker is given below. 1. Double-click etwrel.exe. Setup prepares the InstallShield[R] Wizard for installation. Figure 130 EventTracker checks for all the prerequisites. 109 EventTracker v7.5 Enterprise Install Guide Figure 131 NOTE: If there are two instances of MS SQL running or some prerequisites are missing, then the EventTracker Prerequisites will be displayed otherwise it will not be displayed. 2. Click the OK to proceed with installation. 3. In case of multiple SQL instances, select the appropriate instance name from Instance name dropdown, and then click the OK button. Figure 132 NOTE: If default instance of SQLEXPRESS is present in the system, then EventTracker won’t 110 EventTracker v7.5 Enterprise Install Guide prompt for this screen. If the selected SQL Instance is not running then EventTracker Installation wizard will display a message. Figure 133 4. Click Yes to continue. (OR) Click No to abort the installation process, and then click the Finish button. If the mandatory components are found to be installed, InstallShield[R] Wizard displays the EventTracker dialog box. Figure 134 NOTE: If another user who does not have SQL sysadmin privilege has logged in to the system and tries to install EventTracker, then an error message is displayed. Please refer User Permission on SQL Server for detail instructions. 111 EventTracker v7.5 Enterprise Install Guide Figure 135 5. Click Yes to continue, had you created Local / Active Directory user group and added users to that group prior to this installation attempt. InstallShield[R] Wizard displays the Welcome screen. Figure 136 (OR) Click No to abort the installation process, and then click the Finish button. NOTE: If the required components are not installed or found to be missing, InstallShield[R] Wizard 112 EventTracker v7.5 Enterprise Install Guide displays the EventTracker Prerequisites dialog box with appropriate message. Figure 137 Click the Cancel button, and then click the Finish button. InstallShield[R] Wizard safely exits the installation process. After installing the mandatory components, start installing EventTracker Enterprise afresh. (OR) Keep the installation wizard open, install the prerequisites, and then click the Refresh button. Click the OK button to continue with the installation process. 6. Click Next>. InstallShield[R] Wizard displays the License Agreement screen. 113 EventTracker v7.5 Enterprise Install Guide Figure 138 7. Read the license agreement, and then click ‘I accept the terms in the license agreement’ option to accept the terms and condition. 8. Select the Next > button. InstallShield[R] Wizard prompts to provide the path of the certificate file. Figure 139 114 EventTracker v7.5 Enterprise Install Guide 9. Click the Browse button. InstallShield[R] Wizard displays the Select File window. 10. Go to the appropriate folder, and then select the file. 11. Click Open. InstallShield[R] Wizard updates the folder path. Figure 140 12. Click Next >. InstallShield Wizard displays the Select Components screen. 115 EventTracker v7.5 Enterprise Install Guide Figure 141 EventTracker Components Description EventTracker Console Select this option to install manager console on the target computer. Change Audit Optional component. Installing this component enables you to monitor and manage change over the enterprise. Agent component will also be installed along with the Manager Console. You can also deploy agent to the monitored computers using System Manager after installing the Manager Console. Trap Tracker Optional component. Installing this component enables you to monitor and manage traps sent by SNMP compliant devices. 116 EventTracker v7.5 Enterprise Install Guide Status Tracker Click Optional component. Installing this component enable you to monitor and manage TCP/IP networks, Web sites, applications, and ports in mission critical environment. To Select different destination folder to install EventTracker. View Select Component conventions. 117 EventTracker v7.5 Enterprise Install Guide Check the disk space available in the target computer. 118 EventTracker v7.5 Enterprise Install Guide 13. Click Next >. InstallShield[R] Wizard displays the Select EventTracker Console Type screen. Standard Console: Best for flat network topologies where all monitored nodes report directly to one (or redundant) EventTracker Console. Figure 142 119 EventTracker v7.5 Enterprise Install Guide Collection point: Used in hierarchical network topologies where monitored nodes report to a local EventTracker Console which in turn replicates its event log archive to a Collection Master. Figure 143 a) Select the console type as Collection Point, and then click Next >. InstallShield[R] Wizard displays Site or group name screen. 120 EventTracker v7.5 Enterprise Install Guide Figure 144 b) Type an appropriate group/site name for the Collection Point, and then click Next >. NOTE: Some special characters are not allowed while providing site/group name. InstallShield[R] Wizard will display a pop-up window if site or group name is provided with such special characters. Figure 145 Collection Master: Used in hierarchical network topologies where collection points replicate their event log archives to a Collection Master. 121 EventTracker v7.5 Enterprise Install Guide Figure 146 14. Select a console type, and then click Next >. If you have selected Change Audit component, then InstallShield[R] Wizard displays Change Audit SnapShot dialog box. 122 EventTracker v7.5 Enterprise Install Guide Figure 147 15. Click the Next > button to keep the default store location. (OR) Click the Change button to change the snapshot store location. Figure 148 16. Browse the destination folder, and then click the OK button. NOTE: The Change Audit snapshot store location can be changed only during fresh install and if 123 EventTracker v7.5 Enterprise Install Guide snapshots are not retained during uninstall. In case of upgrade, if the change audit snapshots are retained during product uninstallation, then the snapshot store location path cannot be changed. Figure 149 If you have not selected to install Change Audit, then InstallShield[R] Wizard displays the Ready to Install the Program screen. Figure 150 124 EventTracker v7.5 Enterprise Install Guide 17. Select the Install Remedial Action EXEs on this machine option. Remedial Action EXEs are copied to <InstallDir>\EventTracker\Agent\Script folder. 18. Select the Install button. InstallShield[R] Wizard installs the selected components. Figure 151 InstallShield[R] Wizard initializes the configuration settings required for proper operation of EventTracker. After initializing the necessary configuration settings, InstallShield[R] Wizard displays the Basic configuration dialog box. 125 EventTracker v7.5 Enterprise Install Guide Figure 152 19. Select appropriate options, and then click OK. InstallShield Wizard displays the Alert and Report generation settings dialog box. 126 EventTracker v7.5 Enterprise Install Guide Figure 153 20. Select/enter appropriate data in the relevant fields, and then click Add. (OR) Click Skip if you do not wish to add the basic settings. InstallShield Wizard displays the last screen. 127 EventTracker v7.5 Enterprise Install Guide Figure 154 21. Click Import existing event log entries option to import event logs of EventTracker. Windows Security Alert message will be displayed if Firewall is on. Figure 155 Firewall blocks the incoming network connection, if getallevt.exe does not exist in the 128 EventTracker v7.5 Enterprise Install Guide Program and Services Exceptions and displays a notification. 22. Click Unblock for the getallevt.exe to import event logs. 23. Check Add a shortcut to the desktop option, to add the shortcuts to the EventTracker application on the desktop. Add EventTracker diagnostics as a startup program option is selected by default to notify problems about EventTracker, if any. 24. Click Finish to conclude the installation process. InstallShield[R] Wizard displays the EventTracker Configuration screen. Figure 156 NOTE: Make sure that you select/enter the correct User Credentials, User Authentication and EventTracker Group in order to login successfully. 25. Type valid user credentials in the User Name and Password fields respectively. NOTE: EventTracker services run under this account. By default, this user is assigned the ‘Event Tracker Administrator’ role and can login to EventTracker. 26. Select a User Authentication option. Local Account: Authentication is done locally on the computer where EventTracker is being installed. For more information see: Creating Local User and Group Accounts 129 EventTracker v7.5 Enterprise Install Guide Active Directory: Authentication is done in the Active Directory. For more information, please refer ”Create Active Directory User and Group Accounts”. 27. Type the EventTracker group name in the EventTracker Group field. 28. Click OK. After successfully validating the user credentials, InstallShield[R] Wizard displays the EventTracker Configuration message box. Figure 157 29. Click OK. NOTE: If you change the system logon password, EventTracker logon password has to be updated. In order to synchronize the password, please update the same in EventTracker Configuration. a. To find ‘EventTracker Configuration’, select the Start button, select All Programs. b. Select Prism Microsystems, select EventTracker, and then select EventTracker Configuration. c. Enter appropriate credentials and then select the OK button. 130 EventTracker v7.5 Enterprise Install Guide User Permission on SQL Server Users trying to install EventTracker should have sysadmin privilege on respective SQL Server 2005 / 2008 / 2008 R2 / 2012. NOTE: In SQL 2008 / 2008 R2 / 2012, please make sure that sysadmin privilege has been granted to NT AUTHORITY\SYSTEM. Scenario 1: If NT AUTHORITY\SYSTEM is not available under Security -> Logins then it has to be created. The steps are mentioned below. A) Select the Start button, select Microsoft SQL Server (2008 / 2008 R2 / 2012) and then select Microsoft SQL Server Management Studio. B) Expand Security node, right click Logins node and then select New Login. Login – New window displays. 131 EventTracker v7.5 Enterprise Install Guide Figure 158 C) Select the Search... button. Select User or Group window displays. The location should be your local system. 132 EventTracker v7.5 Enterprise Install Guide Figure 159 D) In Enter the object name to select box, type system and then select Check Names. E) Select the OK button. NT AUTHORITY\SYSTEM displays in Login window. 133 EventTracker v7.5 Enterprise Install Guide Figure 160 F) In Select a page pane, select Server Roles and then select sysadmin option. 134 EventTracker v7.5 Enterprise Install Guide Figure 161 G) Select the OK button. Scenario 2: If NT AUTHORITY\SYSTEM is already available under Security -> Logins then please follow the steps mentioned below to grant sysadmin permission. a) Expand Security node, expand Logins node. b) Right click NT AUTHORITY\SYSTEM and then select Properties. 135 EventTracker v7.5 Enterprise Install Guide Figure 162 c) Select Server Roles and then select sysadmin, if not selected. Refer Figure 161. Scenario 3: To grant sysadmin privilege to an individual user or an administrators group, please follow the steps given below. A) Expand Security node, right click Logins node and then select New Login. B) Click the Search button. Select User or Group window displays. C) Select the Object Types... button, select Groups, and then select the OK button. 136 EventTracker v7.5 Enterprise Install Guide Figure 163 D) In Enter the object name to select box, enter ‘administrators/username’ and then click Check Names. 137 EventTracker v7.5 Enterprise Install Guide Figure 164 E) Click OK. F) Select Server Roles and then select sysadmin. Refer Figure 161. G) Click OK. NOTE: If the SQL service is running on a different account apart from system and network account, then the user account on which SQL service is running should have full permission to the reports folder. In order to use persist flex data, EventVault Explorer search and Correl reports, sysadmin permissions is required since SQL data base is created for these reports. 138 EventTracker v7.5 Enterprise Install Guide 1. To grant full permission on Reports folder, browse the path where EventTracker is installed i.e. \\<INSTALLDIR>\EventTracker. 2. Right click Reports folder, and then select Properties. 3. Select Sharing tab, and then select Share this folder. Figure 165 4. Select Permissions, and then select Add.... Select Users, Computers, or Groups displays. 5. In Enter the object names to select box, add the relevant users and then select Check Names. 6. Click OK and assign the relevant permissions. 7. Click Apply and then click OK. 8. Select Security tab, and then select Add... 139 EventTracker v7.5 Enterprise Install Guide Figure 166 9. In Enter the object names to select, add the relevant users and then select Check Names. Assign full permission to appropriate users. 140 EventTracker v7.5 Enterprise Install Guide Deploy EventTracker Windows Agent Pre-install Instructions for Windows Agent • You MUST have Local Admin privileges on the remote systems where you want to remotely install the Agents. • You can also install Agents with Local Admin privileges. • Make sure that the systems that you are selecting to monitor are accessible through the network, have disks that are shared for the Admin, and have disk space up to 50MB that can be used by the Agent. • If the remote system is accessed through a VPN with a slow line speed, the install may take time and it is recommended that you schedule your activities accordingly. • To monitor a system that supports SYSLOG messages (e.g. Unix, Linux, and Cisco etc); configure that specific system to forward the SYSLOG messages to EventTracker Manager. Pre-install Checklist for Windows Agent The pre-installation checklist describes the specific settings, permissions, and privileges that are required for deploying EventTracker agent. Read the checklist before installation to ensure safe and smooth agent installation. User is a member of ‘Local Administrators’ group ENSURE MSI package installation is allowed User has ‘Logon As Service’ rights Network Discovery is enabled File sharing is allowed Access this computer from network VERIFY User has permission on ‘Application install directory’ (Folders and sub folders). User must have create service permission on the target system(SCMservice control manager) User has Read/Write permission on windows registry. User has permission to Admin share(C$) of Target systems and C$ should be accessible from EventTracker Manager system. Table 6 141 EventTracker v7.5 Enterprise Install Guide Different methods to install EventTracker Agents There are 2 methods to deploy EventTracker Agents a. Using the System Manager that is installed as part of the EventTracker Manager. From this System Manager, EventTracker Agents can be deployed onto all computers identified as EventTracker Agents. (OR) b. Using the Manual Agent Installation package on all computers identified as EventTracker Agents. Deploy EventTracker Windows Agent via System Manager Installation procedure is identical for Windows XP/Vista/7/2003/2008/2008 R2/8/2012/2012 R2 (v7.5 Build 29 and above) systems. 1. Select the Start button, select All Programs, and then select Prism Microsystems. 2. Select EventTracker, and then select EventTracker Enterprise. EventTracker displays the login page. 3. Logon with valid user credentials. EventTracker displays the Incident dashboard. 4. Click the Admin drop-down list at the upper-right corner, and then select Systems. EventTracker displays the Systems manager page. Figure 167 142 EventTracker v7.5 Enterprise Install Guide This console displays the list of systems that are members of all trusted domains provided if Auto Discover is ON. Otherwise only EventTracker Manager system will be displayed. It will also indicate the operating system type, asset value, port number, and managed system status through which the agent communicates with the ‘EventTracker Receiver’. 5. Right-click the system group on the right-pane in which the target systems exist. EventTracker displays the shortcut menu. Figure 168 6. From the shortcut menu, click the Install agent/Start poll option. EventTracker displays the Install agent/Start poll dialog box. Figure 169 143 EventTracker v7.5 Enterprise Install Guide There are various options to Select systems and agent type. They are • • • All Systems in selected group Take systems from text file Specific systems in the selected group Details are given in the below table. Option To All systems in the selected group Click this option to install agents on all the systems present in the selected group. Take systems from the text file Create a text file containing agent system names on which the agent is to be installed. The text file should contain one system name per line. If you select this option then browse the text file to select the agent system names. Agent type Select the agent type to be Installed Specific systems in the selected group Out of all the systems present in the group, select specific system(s) to install the agent. 7. Click Next. Figure 170 8. To install EventTracker/Change Audit Agent on all the system present in the domain, select the respective EventTracker/Change Audit option. 144 EventTracker v7.5 Enterprise Install Guide (OR) Select the respective check box against the systems where you wish to deploy the EventTracker/Change Audit agent. (OR) In the System manager page, move the mouse pointer over the system where you wish to install the agent. a) Click the dropdown. EventTracker displays the drop-down list. b) Click Install agent/ Start poll. Figure 171 EventTracker displays the Install Agent/Start poll dialog box. 145 EventTracker v7.5 Enterprise Install Guide Figure 172 c) Check the EventTracker option to install EventTracker agent. d) Check the Change Audit option to install Change Audit agent. 9. Click Next. 10. Select EventTracker Agent Type i.e. Agent based (Full Featured) / Agent-less (limited feature)* option. Figure 173 146 EventTracker v7.5 Enterprise Install Guide Agent based (Full featured) Install default Remedial Action EXEs on this system Remedial Actions are scripts or executable files that can be launched at either the agent or the manager side, in response to events. If this option is enabled, predefined scripts will be placed in the EventTracker\Agent\Script folder at the manager side. These may be installed at the agent side also, during deployment via the System manager. Deploy SCAP Provides an option to install SCAP components to remote machines while deploying agent(s). Deploy WinSCP Provides an option to install WinSCP components to remote machines while deploying agent(s). Agentless (limited feature) Poll Every By default, the frequency is set to 15 min to receive events from the remote agent system. You can change the poll frequency as per the requirement. 11. If agent type is selected as ‘Agent based (Full Featured)’, then remedial actions EXEs can be installed on the system. i. Select the Install default Remedial Action EXEs on this system check box to install remedial action scripts. EventTracker displays a message box. Figure 174 NOTE: ‘Install default Remedial Action EXEs on this system’ option is available for ‘Agent based (Full featured)’ installation. ii. Click OK to install remedial action EXEs 147 EventTracker v7.5 Enterprise Install Guide (OR) Click Cancel to not to install remedial action EXEs. iii. Click Next. EventTracker displays the Install agent/Start poll dialog box with default client installation path on the remote computer. Figure 175 12. To install the agent in a different drive apart from the default one, type the new installation path in the Select installation path on the remote machines field. 13. Check the Create “Program Menu” shortcuts option to create shortcuts. 14. Enter valid Account name and Password. 15. Reenter the password in Confirm Password. 16. Click Install. The agent will be installed on the selected machine with the default etaconfig.ini configuration. (OR) a) To set a more specific configuration, click Advanced. The Default option is selected by default to apply manager side ‘Agent configuration’ settings (etaconfig.ini). 148 EventTracker v7.5 Enterprise Install Guide Figure 176 b) Select Default or Custom config option to select a custom configuration file as per the requirement. The custom configuration will provide you the templates which you have created in Agent configuration and two more predefined templates. You can select the template of your choice. etaconfig_Servers.ini: This predefined template contains the ideal server configurations which can be applied to the selected agent system. etaconfig_Workstations.ini: This predefined template contains the ideal workstation configurations which can be applied to the selected agent system. This option disables the ‘Offline event sending’ option. Figure 177 NOTE: In case you select etaconfig_Servers.ini, etaconfig_Workstations.ini, Manager Name will be 149 EventTracker v7.5 Enterprise Install Guide empty after installation. If you want to use any of the pre-defined configuration (i.e. etaconfig_Servers.ini, etaconfig_Workstations.ini) you have to configure the Manager. To configure Manager Name follow the steps given below. i. Select Admin drop-down in EventTracker home page. ii. Select Windows Agent Config and then select Load Template. iii. Select the required file name i.e. etaconfig_Servers/etaconfig_Workstations accordingly. Select Load. iv. In EventTracker Managers tab, select Add. v. In Add Destination window, enter the relevant Destination and Port. vi. In Connect to Manager using box, select High Performance Mode (UDP) or Guaranteed Delivery Mode (TCP) and then select the OK button. c) Select the configuration file from the File dropdown, and then click the Install button. EventTracker displays the pop-up window with appropriate message. Figure 178 17. Click OK. EventTracker displays Installation Status screen. Figure 179 150 EventTracker v7.5 Enterprise Install Guide Select To Application Sort the Installation Status results by the application installed. Available options are EventTracker & Change Audit. Status Sort the Installation Status results by status of the application installed. Available options are All, New, Success, and Failed. Sort by Sort the Installation Status results by Date application was installed /on which System it is installed / Type of activity performed/ Status of the application. Purge all status older than Remove the older installation status details from the list. Export Export the ‘System Status’ into Excel format 18. Click Refresh to view the current status. (OR) Reopen the Installation Status dialog box to see the updated status. 19. Click Close. 20. Refresh the System manager. 151 EventTracker v7.5 Enterprise Install Guide Configure EventTracker Windows Agent All configurations for agent(s) are set by default during installation. If you are interested in changing the default configuration settings, then 1. Click the Admin drop-down list at the upper-right corner. 2. Click the Windows Agent Config. Figure 180 (OR) 1. Open EventTracker Control Panel. 152 EventTracker v7.5 Enterprise Install Guide Figure 181 2. Double-click EventTracker Agent Configuration. EventTracker Agent Configuration window displays. 153 EventTracker v7.5 Enterprise Install Guide Figure 182 3. Click appropriate tabs and configure the agent as you wish. 154 EventTracker v7.5 Enterprise Install Guide Deploy EventTracker Windows Agent – Vista and Above Prerequisites for Windows Agent – Vista and Above Following are the mandatory settings you ought to do on Vista and above system(s) before you deploy an Agent. 1. By default, the Startup Type of Remote Registry is manual. Modify the Startup Type as Automatic and Start the service. 2. Enable File and Printer Sharing. 3. Turn on and enable Network Discovery. 4. To configure agent remotely, add port no 14506 TCP to Firewall Exceptions. 5. The user must be domain administrator, member of domain admin, or must be added to the local administrator group where the agent has to be deployed. Install / Uninstall Vista and above Agent Install and uninstall procedure for Vista and above Agent is identical to the procedures for other Windows Agents. No other additional configuration settings are required. Agent Deployment To install EventTracker Agent and Change Audit Agent please refer EventTracker Agent Deployment – User Manual. Secure EventTracker To secure EventTracker, please refer EventTracker Hardening Guide and OWASP Complaint EventTracker Guide. 155 EventTracker v7.5 Enterprise Install Guide Uninstall EventTracker Windows Agent There are several methods to uninstall EventTracker Windows Agent. Few methods are mentioned below. Uninstall EventTracker Windows Agent via Control Panel 1. Select the Start button, select All Programs, and then select Control Panel. 2. Select Add or Remove Programs, select EventTrackerAgent, and then select Remove. Windows Installer displays. Figure 183 3. Select the Yes button. EventTracker window displays. 4. Select Yes/No as per the requirement. Figure 184 NOTE: If you wish to retain the agent configuration settings, select the Yes button. If you do not wish to retain agent configuration settings, select the No button. 156 EventTracker v7.5 Enterprise Install Guide Uninstall EventTracker Windows Agent via System Manager 1) Click Admin drop down, select Systems. 2) Select the Groups or Computer name on which un-installation is required. Figure 185 3) Select Uninstall agent/Stop poll. Uninstall Remote agent(s)/Stop poll displays. 157 EventTracker v7.5 Enterprise Install Guide Figure 186 4) Select the required EventTracker, Change Audit options and then select the Next button. Uninstall Remote agent(s)/Stop poll window displays. Figure 187 5) Enter valid credentials and then select Uninstall. 158 EventTracker v7.5 Enterprise Install Guide Uninstall EventTracker 1. Select the Start button, select All Programs, and then select Prism Microsystems. 2. Select EventTracker, and then select Uninstall EventTracker. Figure 188 Windows Installer window appears displays. Figure 189 3. Select the Yes button. EventTracker window displays. 159 EventTracker v7.5 Enterprise Install Guide Figure 190 4. Select the Ok button. Uninstall EventTracker Enterprise window displays. Figure 101 Figure 191 NOTE: In case you wish to retain Configuration, Reports and Data, Snapshots files then select the respective check box otherwise uncheck the options. 5. Select the Ok button. 160