1
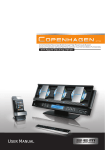
BK0111000EN.book 33 ページ
2009年8月26日 水曜日 午後5時32分
For pleasant driving
CD control panel and display
E00709501090
123456789101112131415-
CD eject button
Disc-loading slot
FOLDER (Folder down) button
FOLDER (Folder up) button
TEXT (Title display) button
PAGE (Title scroll) button
TRACK (Track down/up) button
PWR (On-Off) switch
CD (CD mode changeover) button
RPT (Repeat) button
RDM (Random) button
SCAN button
SCAN/RPT/RDM indicator
TRACK indicator
Track play time indicator
16- CD indicator
5
5-33
BK0111000EN.book 34 ページ
2009年8月26日 水曜日 午後5時32分
For pleasant driving
To listen to a CD
To fast-forward/fast-reverse the disc
E00709602030
1. Insert a disc with the label facing up, and the CD player
will begin playing even if the radio is being used. The CD
indicator (16), the track number, the playing time will
appear on the display. The CD player will also start playback when the CD button (9) is pressed with a disc in the
player.
2. To adjust the volume and tone, refer to “To adjust the volume” on page 5-28 and “To adjust the tone” on page 5-28.
3. To stop the CD, turn off the power by pressing the PWR
switch (8) or change over to radio mode by pressing the
AM/FM buttons, or eject the disc by pressing the eject
button (1).
NOTE
5
● When an 8 cm compact disc is used, the adapter is not
needed for playback. Insert the disc in the centre of the
disc-loading slot.
● For information concerning the handling of compact
discs, refer to “Handling of compact discs” on page 5-47.
5-34
To fast-forward or fast-reverse the disc, press the TRACK button (7).
Fast-forward
You can fast-forward the disc by pressing the
side of the
TRACK button (7). While the button is kept pressed, the disc
will be fast-forwarded.
Fast-reverse
You can fast-reverse the disc by pressing the
side of the
TRACK button (7). While the button is kept pressed, the disc
will be fast-reversed.
NOTE
● When you have fast-forwarded/fast-reversed the disc, the
playing-time may be shown with deviation.
BK0111000EN.book 35 ページ
2009年8月26日 水曜日 午後5時32分
For pleasant driving
To listen an MP3 CD
This CD player allows you to play MP3 (MPEG Audio Layer3) files recorded on CD-ROMs, CD-Rs (recordable CDs), and
CD-RWs (rewritable CDs) in ISO9660 Level 1/Level 2, Joliet,
and Romeo formats. Each disc may have a maximum of 16
trees, 100 folders, and 255 files per disc. During MP3 playback, the unit can display ID3 tag information. For information
concerning ID3 tag, refer to “CD text and MP3 title display” on
page 5-39.
1. Insert a disc containing MP3 files into the slot.
2. The display shows the folder number and the file number,
then playback will begin.
NOTE
● While listening to a disc on which CD-DA (CD-Digital
Audio) and MP3 files have both been recorded, you can
switch between reading of the CD-DA, reading of the
MP3 files, and the external audio input mode (AUX) by
pressing the CD button for 2 seconds or longer.
● With a disc that contains both CD-DA and MP3 files, the
CD-DA are automatically played first.
● The playback sound quality differs depending on the
encoding software and the bit rate. For details, refer to the
user manual of your encoding software.
● Depending on file/folder configurations on a disc, it may
take some time before playback starts.
● MP3 encode software and writing software are not supplied to this unit.
● You may encounter trouble in playing an MP3 or displaying the information of MP3 files recorded with certain
writing software or CD recorders (CD-R/RW drivers).
● If you record too many folders or files other than MP3
onto a disc, it may take some time before playback starts.
● This unit does not record MP3 files.
● For information concerning CD-Rs/RWs, refer to “Notes
on CD-Rs/RWs” on page 5-49.
!
CAUTION
● Attempting to play a file not in the MP3 format
which has the “.mp3” file name may produce noise
from the speakers and speaker damage, and can
damage your hearing.
5-35
5
BK0111000EN.book 36 ページ
2009年8月26日 水曜日 午後5時32分
For pleasant driving
Folder selection order/MP3 file playback order (Example)
Root folder (root directory)
5
Tree 1
Folder selection
In the order
File selection
In the order
5-36
Tree 2
Tree 3
Tree 4
To select a desired folder (MP3 CDs only)
You can select your desired folder by pressing the FOLDER
buttons (3 or 4).
Folder up
Press the FOLDER button (4) until the desired folder number
appears on the display.
Folder down
Press the FOLDER button (3) until the desired folder number
appears on the display.
BK0111000EN.book 37 ページ
2009年8月26日 水曜日 午後5時32分
For pleasant driving
To select a desired track
To repeat a track
You can select your desired track by using the TRACK button
(7).
Press the RPT button (10) briefly while the track is playing.
“RPT” will appear on the display.
To exit the repeat mode, press the RPT button.
Track up
Press the
side of the TRACK button (7) repeatedly until the
desired track number appears on the display.
Track down
Press the
side of the TRACK button (7) repeatedly until the
desired track number appears on the display.
Repeat mode
CD-DA
NOTE
● Pressing the
side of the TRACK button (7) once during the song will cause the CD player to restart playback
from the beginning of the song.
MP3
5
NOTE
● The repeat mode will be cancelled by pressing the track
button (7), the SCAN button (12) or eject button (1).
● With a disc that contains both CD-DA and MP3 files, the
repeat mode causes only files of the same format (CD-DA
only or MP3 files only) to be repeated.
5-37
BK0111000EN.book 38 ページ
2009年8月26日 水曜日 午後5時32分
For pleasant driving
To change the order of tracks for playback
Random playback for a disc (music CDs only)
Press the RDM button (11) briefly. “RDM” will appear on the
display. Tracks on the currently selected disc will be played in
a random sequence.
To exit the random mode, press the RDM button again.
Random playback for all folders on a disc (MP3 CDs only)
Press the RDM button (11) briefly. “RDM” will appear on the
display. Tracks from all the folders on the currently selected
disc will be played in a random sequence.
To exit the random mode, briefly press the RDM button again.
Random mode
CD-DA
To find the start of each track on a disc for playback
Press the SCAN button (12). “SCAN” will appear on the display and the CD player will play back the first 10 seconds of
each track on the selected disc.
The track number will blink while the scan mode is selected.
To exit the scan mode, press the SCAN button again.
NOTE
● Once all tracks on the disc have been scanned, playback
of the disc will restart from the beginning of the track that
was playing when scanning started.
● The scan mode will be cancelled when radio or CD operation is selected.
● With a disc that contains both CD-DA and MP3 files, the
scan mode causes only files of the same format (CD-DA
only or MP3 files only) to be played.
To eject a disc
When the CD eject button (1) is pressed, the disc automatically
stops and is ejected. The system automatically switches to
radio mode.
5
MP3
NOTE
● With a disc that contains both CD-DA and MP3 files, the
random mode causes only files of the same format (CDDA only or MP3 files only) to be played in a random
sequence.
5-38
BK0111000EN.book 39 ページ
2009年8月26日 水曜日 午後5時32分
For pleasant driving
CD text and MP3 title display
E00725000546
This CD player can display CD text and MP3 titles including
ID3 tag information.
CD text
The CD player can display disc and track titles for discs
encoded with disc and track title information. Press the TEXT
button (5) repeatedly to make selections in the following
sequence: disc name → track name → normal display mode.
Example
MP3 title
The CD player can display folder and file titles for discs
encoded with folder and file information. Press the TEXT button (5) for less than 1 second repeatedly to make selections in
the following sequence: folder name → file name → normal
display mode.
Example
Folder
name
Disc
name
File
name
5
Track
name
NOTE
● The display can show up to 16 characters. If a disc name
or track name has more than 16 characters, press the
PAGE button (6) to view the next 16 characters.
● When there is no title information to be displayed, the display shows “NO TITLE”.
● Characters that the CD player cannot display are shown as
“ ”.
5-39
BK0111000EN.book 40 ページ
2009年8月26日 水曜日 午後5時32分
For pleasant driving
ID3 tag information
The CD player can display ID3 tag information for files that
have been recorded with ID3 tag information.
1. Press the TEXT button (5) for 2 seconds or longer to
switch to the ID3 tag information.
2. Then press the TEXT button for less than 1 second repeatedly to make selections in the following sequence: album
name → title name → artist name → normal display
mode.
NOTE
5
● To return from ID3 tag information to the folder name,
press the TEXT button (5) again for 2 seconds or longer.
● When there is no title information to be displayed, the display shows “NO TITLE”.
● The display can show up to 16 characters. If a folder
name, track name, or item of ID3 tag information has
more than 16 characters, press the PAGE button (6) to
view the next 16 characters.
● Folder names and track names can each be displayed up to
a length of 16 characters. Items of ID3 tag information
can each be displayed up to a length of 16 characters.
● Characters that the CD player cannot display are shown as
“ ”.
To use the external audio input function*
E00732200683
Auxiliary Audio connector
(RCA)
Auxiliary Video connector
(RCA)
Auxiliary Audio connector (RCA)
A- Left audio input connector (white)
B- Right audio input connector (red)
Auxiliary Video connector (RCA)
A- Left audio input connector (white)
B- Right audio input connector (red)
C- Video input connector (yellow)
You can listen to commercially available audio equipment,
such as a portable audio system, from your vehicle’s speakers,
by connecting the audio equipment to the audio input connectors, which are external input connectors (pin jacks).
5-40
BK0111000EN.book 41 ページ
2009年8月26日 水曜日 午後5時32分
For pleasant driving
NOTE
● On vehicles equipped with Mitsubishi Multi-Communication System (MMCS), refer to the separate owner’s manual for a Mitsubishi Multi-Communication System.
To activate the external audio input mode
!
CAUTION
● Do not operate the connected audio equipment while
driving.
This could distract you and an accident might occur.
NOTE
G
F
D
E
1. Use a commercially available audio cable to connect the
audio equipment to the external audio input connector.
2. Press the CD button (D) for more than 2 seconds. The display (E) will show “AUX” and then the external audio
input mode will be activated.
3. To deactivate the external audio input mode, press the AM
button (F) or the FM button (G) or the CD button (D) to
switch to another mode.
● The connected audio equipment cannot be operated with
the vehicle’s audio system.
● Depending on the connected audio equipment, it may produce noise from the speakers.
● Use the connected audio equipment’s own power source,
such as its battery.
Noise may be produced from the speakers if the connected
audio equipment is used while charging it using the accessory socket of the vehicle.
● Do not activate the external audio input mode when no
audio equipment is connected.
Otherwise, noise may be produced from the speakers.
● Connect audio equipment when the external audio input
mode is deactivated or lower the vehicle’s speaker volume
before connecting it.
Noise may be produced from the speakers if audio equipment is connected after the external audio input mode is
activated.
● For information on how to connect and operate the audio
equipment, refer to the owner’s manual for the equipment.
5-41
5
BK0111000EN.book 42 ページ
2009年8月26日 水曜日 午後5時32分
For pleasant driving
Steering wheel remote control switch*
E00710000489
The remote control switches are located on the left side of the
steering wheel.
These switches can be used when the ignition switch is in the
“ON” or “ACC” position.
To turn on the power
PWR ON-OFF button — 3
When the power is off, press this button to turn the power on.
To turn the power off, press this button for 2 seconds or longer.
To adjust the volume
Volume up button — 1
The volume will increase when this button is pressed.
Volume down button — 2
The volume will decrease when this button is pressed.
To listen to the audio system
Select the desired mode by lightly pressing the mode change
button (3).
The mode switches between the radio and CD with each push
of the button.
To listen to the radio
5
To select AM/FM mode
12345-
Volume up button
Volume down button
PWR (ON-OFF)/Mode change button
Seek up/Track up/Fast-forward button
Seek down/Track down/Fast-reverse button
NOTE
● Do not push two or more of the steering wheel remote
control switches at the same time.
5-42
Mode change button — 3
Select the desired band by pressing this button.
The order is: AM → FM → CD → AM.
Automatic radio tuning
Seek up button — 4/Seek down button — 5
After pressing these buttons, the reception of the selected station will begin.
BK0111000EN.book 43 ページ
2009年8月26日 水曜日 午後5時32分
For pleasant driving
To listen to a CD
To fast-forward/fast-reverse the disc
To fast-forward or fast-reverse the disc, press the fast-forward
button (4) or the fast-reverse button (5).
Fast-forward button — 4
You can fast-forward the disc by pressing the fast-forward button. While the button is kept pressed, the disc will be fast-forwarded.
Fast-reverse button — 5
You can fast-reverse the disc by pressing the fast-reverse button. While the button is kept pressed, the disc will be fastreversed.
NOTE
● In the case of an MP3 CD, you can fast-forward and fastreverse tracks in the same folder.
To select a desired track
5
Track up button — 4
Press the button repeatedly until the desired track number
appears on the display.
Track down button — 5
Press the button repeatedly until the desired track number
appears on the display.
5-43
BK0111000EN.book 44 ページ
2009年8月26日 水曜日 午後5時32分
For pleasant driving
Error codes
E00710101214
If an error code (1) appears in the display, take action in accordance with the table below.
5
Error display
NO DISC
Problem
Description
Repair
No disc inserted
Disc is not in CD player.
Insert disc.
ERROR 01
Focus error
Disc is not loaded correctly, or condensation
on disc.
Insert disc with label facing up.
Remove moisture from disc.
ERROR 02
Disc error
Disc is dirty, scratched, or deformed; or exces- Clean or replace disc.
sive vehicle vibration.
Retry when vibrations stop.
ERROR 03
Mechanism error
Loading or eject error.
Pick-up is out of position.
Eject disc and reload. If disc will not eject,
have the equipment inspected by an authorized
MITSUBISHI MOTORS dealer.
ERROR
HOT
High temperature
Internal protection against high temperatures.
Allow radio to cool by waiting about 30 minutes.
5-44
BK0111000EN.book 45 ページ
2009年8月26日 水曜日 午後5時32分
For pleasant driving
Error display
ERROR
Problem
Communication or
power supply error
Description
Repair
Communication error between external device
Consult an authorized MITSUBISHI
and audio equipment.
MOTORS dealer.
Power supply error of external device.
5
5-45
BK0111000EN.book 46 ページ
2009年8月26日 水曜日 午後5時32分
For pleasant driving
Audio system anti-theft feature
E00710200221
To prevent theft of the audio system, the control knob can be
removed. Always remove the control knob when you leave the
vehicle.
2. With the key in the “LOCK” position
The lamp (B) will start flashing to deter thieves.
Removing the control knob
Slide the release button (A) to the right and remove the control
knob from the audio system.
Anti-theft function operates in two ways depending on the
position of the ignition key.
NOTE
● When sliding the release button, place one hand on the
control knob to prevent it from falling out.
5
Refitting the control knob
Put the control knob back into the original position and then
push it until it clicks. The “Please refit the control panel” indicator will disappear or the lamp (B) will stop flashing.
1. With the key in the “ON” or “ACC” position
“Please refit the control panel” indicator will appear on
the display. Any audio system operation will be disabled
while the “Please refit the control panel” indicator is displayed.
5-46
NOTE
● Do not leave the control knob in any place where it may
become hot (for example, the dashboard) or in any place
where it may become wet.
● If you lose the control knob, contact an authorized MITSUBISHI MOTORS dealer.
BK0111000EN.book 47 ページ
2009年8月26日 水曜日 午後5時32分
For pleasant driving
Handling of compact discs
E00723000249
● Use only the type of compact discs that have the mark
shown in the illustration below. (Playback of CD-R or
CD-RW discs may cause problems.)
5
● The use of special shaped, damaged compact discs (like
cracked discs) or low-quality compact discs (like warped
discs or burrs on the discs) such as those shown will damage the CD player.
5-47
BK0111000EN.book 48 ページ
2009年8月26日 水曜日 午後5時32分
For pleasant driving
● In the following circumstances, moisture can form on
discs and inside the audio system, preventing normal
operation.
• When there is high humidity (for example, when it is
raining).
• When the temperature suddenly rises, such as right after
the heater is turned on in cold weather.
5
In this case, wait until the moisture has had time to dry
out.
● When the CD player is subjected to violent vibrations,
such as during off-road driving, the tracking may not
work.
● When storing compact discs, always store them in their
separate cases. Never place compact discs in direct sunlight, or in any place where the temperature or humidity is
high.
● Never touch the flat surface of the disc where there isn’t a
label. This will damage the disc surface and could affect
the sound quality. When handling a compact disc, always
hold it by the outer edge and the centre hole.
5-48
● To clean a disc, use a soft, clean, dry cloth. Wipe directly
from the centre hole toward the outer edge. Do not wipe in
a circle. Never use any chemicals such as benzine, paint
thinner, a disc spray cleaner, or an anti-static agent on the
disc.
● Do not use a ball point pen, felt pen, pencil, etc. to write
on the label surface of the disc.
BK0111000EN.book 49 ページ
2009年8月26日 水曜日 午後5時32分
For pleasant driving
● Do not put additional labels (A) or stickers (B) on compact discs. Also, do not use any compact disc on which a
label or sticker has started to peel off or any compact disc
that has stickiness or other contamination left by a peeledoff label or sticker. If you use such a compact disc, the CD
player may stop working properly and you may not be
able to eject the compact disc.
Notes on CD-Rs/RWs
E00725100013
● You may have trouble playing back some CD-R/RW discs
recorded on CD recorders (CD-R/RW drives), either due
to their recording characteristics or dirt, fingerprints,
scratches, etc. on the disc surface.
● CD-R/RW discs are less resistant to high temperatures and
high humidity than ordinary music CDs. Leaving them
inside a vehicle for extended periods may damage them
and make playback impossible.
● The unit may not successfully play back a CD-R/RW that
was made by the combination of writing software, a CD
recorder (CD-R/RW drive) and a disc if they are incompatible with one another.
● This player cannot play the CD-R/RW discs if the session
is not closed.
● This player cannot play CD-R/RW discs which contain
other than CD-DA or MP3 data (Video CD, etc.).
● Be sure to observe the handling instructions for the CDR/RW disc.
!
WARNING
● Operating the CD player in a manner other than
specifically instructed herein may result in hazardous radiation exposure. Do not remove the cover
and attempt to repair the CD player by yourself.
There are no user serviceable parts inside. In case of
malfunction, contact an authorized MITSUBISHI
MOTORS dealer.
5-49
5