1
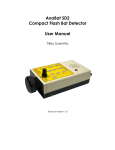
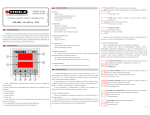
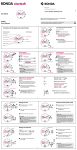
Roostloggers (Titley) An introductory manual By Cori Lausen Wildlife Conservation Society Canada, and Birchdale Ecological Ltd. Taking it out of the box… The RL comes with: – A piece of bubble wrap to protect the mic. • The mic is the only ‘sensitive’ feature on the detector • Mic can scratch easily, so always carry it in a way that the mic will not rub up against something hard. Taking it out of the box… The RL comes with: – A magnet. • This is used to test that the unit is working before you walk away from it. • It may be desirable to attach this onto the pelican case. Example in photo: magnet attached to handle using releasable zip-tie. Taking it out of the box… The RL comes with: – A USB cable that has an elbow on one end. • This cable is needed to change the clock on the detector. If will usually come set on central time zone from Titley. • You will need to load a USB driver onto your computer to communicate with the RL via this USB cable. (see next section) – A CD with software and driver. The Outside… • Microphone – Take precautions to not scratch this! • LED light on front panel – A red LED light tells you if the unit has power and is functioning. – see LED light summary in Deployment section for details (Deployment slide) The Inside Lid… Plug for USB cable that will attach RL to computer. Serial number of RL (white box with writing). SD card ejection button push to allow SD card to be ejected safely; yellow light will flash SD card slot (you can push on card to eject only if you have first pushed the eject button to the right, or you’ve removed power to the RL). Setting it up for the first time… 1. Copy all CD contents into a folder on your computer. 2. Place 4 D batteries in the RL to power it. – You may need to wiggle them a bit to ensure good contact. – You will know the detector has power as the LED on the outside of the lid flashes red. – The red LED will not flash if there is an SD card installed and/or the USB cable is connected to the RL. – see Battery Options section for details on batteries to use in different situations Setting it up for the first time… 3. Set the clock on the RL. i. use the USB cable to attach the RL to your computer. -when the USB cable is connected between the RL and the computer, you should see a yellow flashing light Note: this yellow light has dual purpose – it will also flash when the SD eject button is pushed for the safe ejection of the SD card. Setting it up for the first time… 3. Set the clock on the RL (cont’d) ii. Driver installation. If this is the first time you have had the RL attached to your computer, once it is plugged in, it will ask to install a driver as it will be an ‘unknown device’. This process differs depending on the operating system you are using. In most cases it will come up with a window that asks to look for the driver file. You should direct it to the folder in which you copied all of the CD materials. Installing Driver in Windows7 Control Panel; Devices; right click mouse on unspecificed device (ie. Roostlogger) Properties Hardware, Properties General, Change Settings General, Update Driver Browse to the folder/file you’ve copied from the CD Setting it up for the first time… 3. Set the clock on the RL (cont’d) iii. Checking port number. Once the driver is installed, the RL will be assigned a port number. Look this number up in DEVICE MANAGER (Ports); again, this is slightly different with each operating system. Generally you reach this through Control Panel, Hardware and Sound (or System), Devices (or Device Manager), Ports. To open the Device Manager: • For Windows 7, click on Start > Control Panel > System > Device Manager • For Window XP, click on Start > Control Panel > System > Hardware > Device Manager Setting it up for the first time… 3. Set the clock on the RL (cont’d) iii. Checking port number (cont’d) Roost Logger will appear in an entry under “Ports (Com and LPT)”. Take note of the port number for the RoostLogger device (COM XX). If it has been assigned a port greater than 9, then you will need to change this number to be 9 or lower. To change the Com port number: • Right click on the Roost Logger entry • Click on Properties > Port Settings > Advanced • Click on the drop down list from the “COM port number” box to see the options. Take note of the port number for the RoostLogger device (COM XX). Note that checking this port number may need to be done in subsequent times when you connect the RL to your computer for future clock changes. Setting it up for the first time… Device Manager Ports If the COM port number listed for the Roostlogger is >9 then you will need to reassign the port number. RIGHT CLICK THE MOUSE PROPERTIES ADVANCED Setting it up for the first time… Setting it up for the first time… 3. Set the clock on the RL (cont’d) iv. Open CFCRead. One piece of software provided on the CD is CFCread. Note: Be sure you have the RL plugged into your computer and powered on (you should see the yellow flashing light on the Board of the RL by the USB connection, and the red flashing LED on the front outside of the pelican lid. Double click the .exe file to open this program. Setting it up for the first time… CFCRead: Always check you are using the most recent version of software, but clicking the top left corner and then ‘about CFCread’. You must use 4.4j or later. If ever troubleshooting, Titley will ask you for this version number. Setting it up for the first time… CFCRead: In the bottom window of the CFCRead program, select the port number that corresponds to the RL. Then click OPEN. Setting it up for the first time… Bottom window of CFCRead: You can check VERSION of firmware on your RL – this will upgrade over time so ask Titley if you are unsure if you are running the latest version). GetID (this is the Serial Number of your RL. This same number is inscribed on the Board in the RL. Check (to see how far off the clock is relative to your computer’s clock) Set (will change the RL’s clock to the same time as your computer) Setting it up for the first time… CFCRead: When you have set the clock on the RL, you may wish to CHECK that the clock has indeed been adjusted. Important: When done, click CLOSE. Setting it up for the first time… 3. Initialize the SD card. i. Choose an SD Card. You can use any size of SD card, but only 4 GB of memory can be used by the RL, so it is cheapest to just buy this size of card or smaller. To minimize the amount of battery power that the RL consumes, use SD cards that write ‘slow’ (ie. Not Ultra; ideally class 4 or lower). Setting it up for the first time… 3. Initialize the SD card. ii. Format SD card in your computer. -in “my computer” select the card -right click and select FORMAT -select Fat32 and Quick format -OK iii. Open CFCread program. Use UPPER Part of the software window. Setting it up for the first time… CFCRead: Note that the top part of this software window is used for the SD card ONLY (vs. the bottom window is used for communications with the RL via USB cable). Setting it up for the first time… CFCRead: Choose Input File Find the SD card that you just formatted. Click INITIALIZE CF. Setting it up for the first time… CFCRead, initializing card: Click YES. Setting it up for the first time… CFCread, Programming SD card. After initialization, you are ready to program the card (see next section) Programming the SD card… CFCread, Programming SD card. Use CFCRead (open .exe file) Always be sure you are using the latest version of software -see CFCRead slide for how to do this. Programming the SD card… CFCread, Programming SD card. Choose Input File Select the SD card Push Erase if this card has been used previously Click SAMPLING Programming the SD card… • Decide which sample period best suits your needs. • Programmed Sampling Table will adjust to meet this goal by subsampling. • The RL will record longer than this period if there is still battery life. Programming the SD card… • Decide which sampling regime best suits your needs. • If you select a sampling regime too intense for battery life, the Net Sampling Ratio will decrease (see subsequent slide). Programming the SD card… Enter your site’s waypoint in decimal degrees (latitude and longitude). • here in North America the latitude will be a +(positive) number, but the longitude will be a – (negative) number! • CFCread requires you enter a number first, then use the back arrow key to insert a negative sign Programming the SD card… Enter your time zone. If you are not sure what time zone, be sure to consult your computer’s date/time (see next slide) - Recall that CFCread requires you enter a number first, then use the back arrow key to insert a negative sign Programming the SD card… Enter your time zone. If you are not sure what time zone, be sure to consult your computer’s date/time. Standard time vs daylight savings (e.g. Mountain Time zone –7 in winter during MST but -6 in summer during MDT) This must match the time zone of your RL; otherwise, change the clock on your RL (see Getting Started section). Programming the SD card… • Select a conservative estimate of battery AmpHours (AH) – see next slide for tips Programming the SD card… Always take note of the ‘Net Sampling Ratio’ If this drops below 100%, then each 5 minute sampling period will be subsampled by the percentage indicated. This is RL’s way of allowing sampling to continue as long as the desired time period. (see next slides for more details) Programming the SD card… • Estimating battery AmpHours – You are FAR BETTER to underestimate these AmpHrs if it is important that the RL last for the duration of the desired recording (run) time (e.g. 6 months). • The RL will strive to have the batteries last as long as the desired sampling timeframe (e.g. 6 months). To do this, CFCRead will program the RL to ‘subsample’ if necessary in each 5 minute period to extend battery life through the desired time period. You will know if you have exceeded the system’s power capacity (or potential card space) and must therefore subsample by taking note of the %Nett Sampling Ratio. Programming the SD card… % nett sampling ratio • Indicates whether the RL will subsample in 5 minute periods or not. • For example, if this says 80% that means it will subsample each 5 minute period, recording for only 4 minutes in total instead. This would allow the RL to continue to sample for the desired sampling period length (e.g. 6 months). • If 100% nett, then the AmpHrs of the batteries selected should provide enough power to run the RL for the desired sampling period length. – However, recall that battery performance can vary dramatically, depending on temperature, manufacturer, age of battery, draw of SD card, etc. Programming the SD card… • Estimating battery AmpHours – As a general guideline, reasonable quality D alkaline batteries should provide about 10-17 AmpHrs. To maximize power you MUST use higher quality D batteries (eg. Energizer Max, Energizer Industrial, Duracell Pro). – If you are using 4 Lithium AA batteries, the AmpHrs will be ~3-3.5 AmpHr but this may be sufficient for your needs (see Battery Options Section). – 2 Lithium D batteries are the best option for cold weather (see Battery Options Section) • there are generally 2 types of Li D batteries: 1. the standard ones can provide ~17 AmpHrs; 2. higher capacity Li D batteries can be purchased that will provide even higher AmpHrs but are very expensive. Programming the SD card… • Select a location for the log (sampling table info) to be stored as a text file. Programming the SD card… • Optional: check to make sure the card has a sampling table programmed on it. Click CHECK CARD. Two Models of RL’s The old style – has no power switch. To turn it on, you simply add power by engaging batteries. The new style – has a flip switch inside, beside the battery compartment. Old Style There is no power switch. The unit is turned on when there is power added to it – either 4 D alkaline batteries, or 2 D Lithium batteries. New Style Power switch has 3 positions: MIDDLE = off; LEFT = 2 Lithium D batteries are being used for power; RIGHT = 4 Alkaline D batteries are being used for power. Power switch OLD STYLE Deploying the Roostlogger Steps: 1. Insert batteries (See Battery Options section for type) – In some cases, if the detector has been prepared already for deployment, batteries may already be in the detector • I often use a small piece of paper inserted between a battery pole and its connection with the battery box. This will need to be removed to power up the unit. 2. Ensure red LED light flashing (ie. RL has power) 3. If there is not already an SD card in the slot in the Board, then insert SD card. Yellow light will flash briefly (3 times) to indicate SD card sampling table has been read. 4. Red LED on front cover will stop flashing (ie. Turn off). Deploying the Roostlogger Steps: 5. Close lid of pelican case. There should be no red light showing on the lid. 6. Check it is running: Hold magnet close to LED. • it will flash red briefly to indicate that it has power and is thus running • if at this time the RL is its programmed recording period: – the red light will flicker red as the magnet is held close when data is not being recorded – the red light will stay on brightly/continuously if data is actually being written at that moment. – No light?? Something is wrong….. See Troubleshooting section (next) NEW STYLE Deploying the Roostlogger Steps: 1. Find the power switch located by the battery box inside the detector. Turn the detector ON by flipping to the left if you are using 2 Lithium D batteries; flip to the right if you are using 4 Alkaline D batteries. 2. Ensure red LED light flashing (ie. RL has power) 3. If there is not already an SD card in the slot in the Board, then insert SD card. Yellow light will flash briefly (3 times) to indicate SD card sampling table has been read. 4. Red LED on front cover will stop flashing (ie. Turn off). Deploying the Roostlogger Steps: 5. Close lid of pelican case. There should be no red light showing on the lid. 6. Check it is running: Hold magnet close to LED. • it will flash red briefly to indicate that it has power and is thus running • if at this time the RL is its programmed recording period: – the red light will flicker red as the magnet is held close when data is not being recorded – the red light will stay on brightly/continuously if data is actually being written at that moment. – No light?? Something is wrong….. See Troubleshooting section (next) Deployment - Troubleshooting If the RL’s LED does not light up with the magnet, then the RL is not working correctly, and thus follow these steps, and then test again: 1. Pull out at least one battery, to disconnect the power (old style detector). Or flip the switch to the middle “off” position (new style). 2. Eject the SD card by pushing on it. 3. Reposition batteries and ensure they are all engaged. Red LED will flash if unit is getting power. -If it is not, then wiggle and check batteries until power has been established. 4. Reinsert the SD card. Ensure the yellow light by the SD slot flashes to indicate the SD card’s programmed sampling table has been recognized. -If this does not happen, check card in CFCread to see if card has a sampling table (see CFCRead Slide). Reprogram card if needed (see Programming Slide). 5. Retest with the magnet near the LED on front panel. If still not working, go back to Step 1. Caution…. THE SD CARD SHOULD NOT BE REMOVED FROM THE ROOSTLOGGER WHILE IT HAS POWER. EITHER: 1. Remove a battery to cut power, then eject SD card by pushing on it (spring-loaded). 2. Push the special SD Eject button (see Inside of RL picture). The yellow light next to the slot will flash to indicate it is safe to eject SD card. Eject SD card by pushing on it. Placement of the RL…. • The RL is designed to record bats that pass close to the detector (<10 m) – Thus be sure to position the RL in a place where bats in the roost, or moving in/out of the roost are likely to fly within a few metres of the detector • Dripping water and movement (e.g. woodrats) can produce ultrasound intense enough to trigger the RL, and could thus generate noise files. – Thus, reduce the recording of noise (increases file numbers and depletes battery supply faster) • If water freezes on the mic, bats will not be recorded (no ultrasound will pass through mic). Placement of the RL…. • The RL is waterproof, but if it gets submersed in COLD water, it may take on water, thus it is best to place RL where it will not submerge. • The RL has a built in temperature datalogger and a .txt file will be produced that show logged temperatures. Thus if there is a certain location in the roost where you’d like to know about microclimate, position the RL in this location. Placement of the RL…. • Remember that your RL might come in contact with animals, such as humans or woodrats. – You may wish to lock it in place. A padlock can secure the lid. A chain might be used to lock it to something. – You may wish to secure the RL in a way that woodrats cannot chew on the mic, and cannot chew off any straps that hold it into place. (e.g. in photo, where rocks have been used prevent woodrats from chewing on strap. Wire can also be used to keep RL’s in place.) Placement of the RL…. You may want to put some ‘notes’ on your RL: -indicate what this unit does to let people know this pelican case contains nothing of value to them -a contact name/address/ phone number may be a good idea. Other user tips…. Internal Time Zone Label To remind yourself what time is on the internal clock of the RL, especially if you work in different time zones. You need to know this information when you program an SD card for the unit. Battery Options Battery Basics: Lithium vs Alkaline – alkaline performance (amphours) is substantially reduced in cold temperatures. Consider Lithium for anything less than 10oC. Lithium batteries are also substantially lighter in weight. Voltage – internal batteries must provide roughly between 5-7.5 volts to operate. • Four alkaline D batteries are 1.5x4V = 6 volts. • If you use Lithium D batteries, each is 3.6V, thus only use TWO (ie. 3.6V x 2 = 7.2V). • If you use Lithium AA batteries (in D shells – see below) then each battery is 1.5V, thus 1.5V x 4 = 6V. Battery Options Battery Basics (cont’d) AmpHours – what really matters is how many amphours you are providing to the RL (ie. How much total energy). Amp hours are the standard measure of the energy storage capacity. When in use, a battery's voltage remains constant. The current (amperage) varies depending on how much power is being used. Eg. For example, a battery rated at 80 amp hours can deliver a 20-amp current for up to four hours. Read more: How to Calculate 12 Volt AMP Hours | eHow.com http://www.ehow.com/how_5567042_calculate-volt-amphours.html#ixzz2Fipyw4Rh Battery Options Battery Basics (cont’d) AmpHours – what really matters is how many amphours you are providing to the RL (ie. How much total energy). Typical alkaline D batteries (good quality) = 8-10 AH Long-lasting alkaline D batteries (e.g. Max, Ultra) = ~12 AH Standard Lithium (Li-Thionyl Chloride) D batteries (e.g. SAFT) = 17 AH perform well in cold High capacity Lithium D batteries (e.g. SAFT) = 19 AH perform well in cold Remember that when batteries are placed into the RL they are done so in SERIES, as such, the voltages sum (e.g. 1.5+1.5+1.5+1.5 = 6 V),but the amphours remain the same. So if an alkaline D battery is rated at 8000mAH (ie. 8 AH), then 4 of them in the RL will still have a capacity of 8AH, but will provide 6 volts. Battery Options Battery Basics (cont’d) AmpHours – Reduction in cold temperatures. It is hard to figure out exactly what types of capacity decreases may be experienced, but the following can be a bit of a guide: • Expect about 60% decrease in AmpHour capacity of batteries at ~-7oC • Expect about 40% decrease in AmpHour capacity of batteries at ~-1oC Eg., If 4 alkaline D batteries in a RL in a roost that will remain around freezing, or slightly below, are rated at 17000 mAH (ie. 17AH) then you should assume in the programming of the RL that the realized capacity will only be about 10 AH (40% reduction in capacity due to cold). Battery Options Keep in mind that if you choose a low AH battery, the RL will sample less, and if it can’t actually sample for the duration of time that you have requested, it will subsample within each 5 minute period to lower its overall battery consumption. It is important that you are conservative with your battery AH estimates because the sampling table programmed onto the SD card does not know whether you are placing these RL’s into cold or warm weather, and whether you will record many or few bats. Battery Options Cost: Li D batteries are expensive, with each standard Li battery usually $25 - $50. You need only two of these batteries though (see next section). Your cheapest option is D alkalines, but if you are working in cold conditions (<10oC), alkalines do not perform well, so your best option may be Li AA’s (you’ll need D shells, see slide below). Battery Options Cost: Li D batteries are 3.6 V each Thus you only use two, not four. e.g. http://www.amazon.com/LS33600Lithium-Thionyl-ChlorideBattery/dp/B00608YAFM/ref=sr_1_8?ie=UTF8 &qid=1355469376&sr=88&keywords=saft+lithium+d+battery OLD STYLE ROOSTLOGGER ONLY Battery Options – D shells (plastic, ‘fake’ D batteries) Adapting the RL to accommodate other batteries: Cold Weather Option #1: Li D batteries – you only need 2. To fill the two empty cells, use one of the following 3 options: 1. Dummy D batteries (e.g. http://www.diamond-growlights.com/Illumitex-LED-Bulbs-For-Maglite/DummyBatteries/D-Size-Dummy-Battery::153.html ) 2. Make a wire with alligator clip on each end to short circuit the last 2 cells (see photo next slide). 3. Carefully solder a wire across the last 2 cells (negative of 3rd cell to positive of 4th cell). OLD STYLE ROOSTLOGGER ONLY Battery Options Two Lithium D cell batteries (3.6V each) go into these first 2 cells. a wire with alligator clip on each end to short circuit the last 2 cells. -be sure the connection is secure and won’t pop off if jarred. Battery Options Adapting the RL to accommodate other batteries: Cold Weather Option #2: Li AA batteries – use 4 batteries, but adapt size by using ‘D shells’. (AA’s have low AmpHours: 3 – 3.5 AmpHrs ) • E.g. http://www.amazon.com/Lenmar-Adapter-Size-ShellBattery/dp/B0008D5FRW + Downloading Data 1. Eject SD card – Remember! Do not do this without first doing one of the following: • Remove a battery to cut the power to the detector, then eject SD card by pushing on it. OR • Push the SD eject button (see Inside of RL slide); you will see a yellow light flash, then you can eject the card by pushing on it. Downloading Data 2. Put SD Card into computer. 3. Open CFCRead. 4. Choose input file. 5. Select the SD card. 6. Select Download. 7. Indicate which folder to save data. (you can make a new folder if needed) Note: you can push “check card” before downloading if you want to see the status of the card. Downloading Data 8. Keep all defaults as shown in this slide. Push OK. – only select Split Nights if you’d like files to be put into subfolders, each representing one night of recordings. – You will be given the option of where to store the data, and can create a new folder from CFCRead. Downloading Data 9. After the download is complete, files generated can be viewed in AnalookW, another program included on the CD. Other info • As firmware for the RL is upgraded (ie. The ‘software that runs the roostlogger), you will need to attach your RL to a computer and follow a special process to upgrade the firmware. Refer to the User Manual for these instructions. Other info • Changing the RL internal Clock: – As you change time zones, you will likely want to adjust the internal clock of the RL to match the current time zone. – To do this, follow the steps outlined in the CFCread slides.