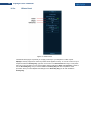
1
1 Pdplayer User’s Manual I. II. III. Introduction .............................................................................................................. 3 I.1. Using This Manual ..................................................................................................... 3 I.2. About Pdplayer .......................................................................................................... 3 Installation and Licensing ....................................................................................... 4 II.1. Installation ................................................................................................................. 4 II.2. Licensing ................................................................................................................... 4 II.3. Network Licensing ..................................................................................................... 5 II.3.a. General ....................................................................................................... 5 II.3.b. Setting-up the Server................................................................................... 5 II.3.c. Securing the Pdplayer License Server ......................................................... 5 II.3.d. Sharing a License Across the Network ......................................................... 5 Quick Start ............................................................................................................... 6 III.1. Working with Layers.................................................................................................. 6 III.2. The Timeline and Work Area ..................................................................................... 7 III.3. Saving with Pdplayer ................................................................................................. 8 III.4. Export from Pdplayer .............................................................................................. 10 IV. Interface ................................................................................................................. 13 IV.1. Main Graphic User Interface.................................................................................... 13 IV.2. Timeline Area ........................................................................................................... 14 IV.3. Information Bar ........................................................................................................ 20 IV.4. Preview Area ............................................................................................................ 22 IV.5. Properties Panel ...................................................................................................... 26 IV.5.a. Color Panel .............................................................................................. 26 IV.5.b. Placement Panel ...................................................................................... 28 IV.5.c. Blending Panel ......................................................................................... 29 IV.5.d. Text Panel................................................................................................ 33 IV.5.e. Effects Panel ............................................................................................ 34 IV.5.f. Brush Panel ............................................................................................. 35 IV.5.g. Source Panel ........................................................................................... 36 V. Stereoscopy Support............................................................................................. 39 V.1. General Information................................................................................................. 39 V.2. Setting up the Composition .................................................................................... 39 V.2.a. Quick Set-up ............................................................................................ 39 V.2.b. Manual Set-up.......................................................................................... 40 VI. Layers ..................................................................................................................... 42 VI.1. Layer Types ............................................................................................................. 42 VI.1.a. Normal Layers.......................................................................................... 42 VI.1.b. Special Layers ......................................................................................... 42 VI.2. Working with Layers................................................................................................ 43 VII. HTTP Server for Remote Collaboration ................................................................ 45 VII.1. Starting the Server................................................................................................... 45 2 Pdplayer User’s Manual VII.2. Customizing the Web Page ..................................................................................... 46 VIII. Pdplayer Integration .............................................................................................. 48 VIII.1. Extended Command Line Support .......................................................................... 48 VIII.1.a. Overview................................................................................................. 48 VIII.1.b. System Options....................................................................................... 48 VIII.1.c. Layers ..................................................................................................... 48 VIII.2.d. Examples ................................................................................................ 49 VIII.2. Pdplayer and Autodesk Maya ................................................................................. 50 VIII.3. The Lightwave Plug-in ............................................................................................. 51 VIII.4. Pdplayer and Nuke .................................................................................................. 53 IX. Menu ....................................................................................................................... 54 IX.1. File Menu.................................................................................................................. 54 IX.2. Edit Menu ................................................................................................................. 56 IX.3. View Menu ................................................................................................................ 58 IX.4. Play Menu ................................................................................................................ 60 IX.5. Layer Menu .............................................................................................................. 61 X. Shortcut Keys ........................................................................................................ 64 X.1. Default Shortcut Keys ............................................................................................. 64 X.2. Custom Shortcut Keys ............................................................................................ 67 XI. Command Reference ............................................................................................. 68 XII. Known Limitations ................................................................................................. 76 XII.1. Limitations common to 32 bit and 64 bit versions ................................................. 76 XII.2. Limitations of the 32 bit version ............................................................................. 76 XII.3. Limitations of the 64 bit version ............................................................................. 76 3 Pdplayer User’s Manual I. I.1. Introduction Using This Manual This manual is designed as a comprehensive guide to introduce users to the unique features and tools of Pdplayer. We will describe each feature and give tips how to properly use them. By the time you are finished reading this manual you will have a complete understanding of the product and be able to implement it in your daily work. I.2. About Pdplayer Pdplayer is an advanced sequence player capable of playing movie clips and image sequences for the purposes of quality control. Its approach on handling information allows it to play multiple sequences and apply corrections in real time. Even though Pdplayer is a reviewing tool its wide range of capabilities allows it to be used for basic compositing and editing. As a contemporary sequence player Pdplayer supports all the industry standard file formats including HDR, EXR, CIN, DPX, SGI, TGA, VRIMG, PIC and more. You can also use Pdplayer to view the different channels of EXR and VRIMG files. However it’s most important feature is its layered sequence playback which means that Pdplayer caches each sequence or movie clip on an independent layer. This way of handling information allows for multiple layers to be played simultaneously while applying changes in real time. You can fully control the way layers are composed together and how they are set in the time line. You can also scale each layer independently and change the aspect ratio independently or globally for all layers. Pdplayer allows you to move layers in an infinite work space. Pdplayer allows for basic color corrections to be made in real time . These include gamma, contrast, hue and saturation as well as the exposure and soft – clip for high dynamic range images. All these options are explained in Section IV.5. Pdplayer also supports several color blending modes which can be applied in real time. With Pdplayer’s extended alpha support you can assign any channel from a given layer as an alpha channel for another layer. Further more Pdplayer supports the depth channel of EXR, RLA, RPF file formats. The different blending and alpha modes are explained in Section IV.5.c. Pdplayer offers several specific layer types to speed up your work. (Section VI.1). The Brush Layer and Brush Sequence Layer allow you to put notes on your compositions. You can use the Adjustment Layer to make color corrections to several layers simultaneously. Finally the Embedded Image Layer allows you to paste the contents of the clipboard directly in your composition. With Pdplayer you can save you work in several different ways. You can export the whole composition or just a single layer as a sequence of images or as an AVI/Quicktime movie. You can save the composition into Pdplayer’s specific file format (Section III.3). or export your composition to either Adobe After Effects JSX script, The Foundry Nuke script or Pdplayer Command File (Section III.4). Pdplayer’s extensive command support (Section VIII.1) allows it to be integrated into any production pipeline. You can also assign single commands as well as series of commands or macros to a short key combination thus speeding up the work process. Another important feature of Pdplayer is that it can play sequences on external devices allowing you to preview your work on a broadcast monitor (Section IV.2). Finally you can use Pdplayer’s built-in http server (Section VII) to easily show your partners or clients the result of your work. 4 Pdplayer User’s Manual II. II.1. Installation and Licensing Installation You will receive your copy of the software as a downloaded installation file. To install it double click on the setup file and follow the instructions. II.2. Licensing Figure 1. License not Found When you run Pdplayer for the first time you will be presented with the License not Found dialogue (Figure 1) In order to be able to use Pdplayer you will need to authorize it with a license key. Pdplayer's license system allows for two modes of operation - Local and Network. In Local mode, you run Pdplayer on the machine for which you have been issued a license. To authorize a machine you need to enter a license code in the provided field and press the Validate button (Figure 1). If you do not have a code you can request one by entering your Order ID in the provided field and pressing on the Request License button. This should open the default e-mail client. If it does not you can send us an e-mail at [email protected] with your Order ID and the Node Identifier provided in the first field of the License not Found dialogue. In network mode, you run the Pdplayer license server on the licensed machine. This allows you to run Pdplayer on other machines on the network. 5 Pdplayer User’s Manual II.3. II.3.a. Network Licensing General The Pdplayer network licensing system is composed of an independent licensing routine (the Pdplayer floating license server, with a license locked to the specific hardware) and the Pdplayer itself. The communication between the two is based on the HTTP protocol, even if the license server and the Pdplayer are on the same computer. This means that in order for the licensing to work, the computer must have TCP/IP installed properly. II.3.b. Setting-up the Server The Pdplayer floating license server consists of a single executable file that has to be run prior to launching the Pdplayer. The Pdplayer installer creates a shortcut to the license server in the Start menu. You can also choose to register the Pdplayer floating license server as a Windows service that is started automatically by Windows. When you start the Pdplayer license server for the first time you will be prompted to enter a registration code (Figure 2). To get the license copy the data provided on the first row and send it to [email protected] along with your Order ID. You will receive a reply with a license code. Copy that to the second row and press OK to run the license server. Figure 2. Pdplayer floating license All of the settings of the license server can be found in an .xml file called VRFLServer2.xml that would be usually located in C:\Documents and Settings\All Users\Application Data\ChaosGroup\VRFLServer2.xml. In case of any problems the user can edit the file directly, but we strongly recommend that, unless the user is experienced, they should not do so. II.3.c. Securing the Pdplayer License Server Please keep in mind that it is up to you and/or your system administrator to keep the machine running the Pdplayer license server secure from unauthorized access and usage of your Pdplayer licenses, especially if the Pdplayer license server is running on a machine that can be accessed from the Internet. II.3.d. Sharing a License Across the Network To share a license across your network install, license and run the Pdplayer license server on a suitable machine. Now install Pdplayer on multiple machines across your network. Run Pdplayer and when asked for a license (Figure 1) in the bottom field, enter the IP address of the machine which has the Pdplayer license server running. Now you will be able to run Pdplayer on multiple machines free, provided that the number of copies of Pdplayer running does not exceed the number of licenses provided by the license server. 6 Pdplayer User’s Manual III. Quick Start Pdplayer has been designed to provide fast and effective workflows. All it takes to preview a sequence is to drag a single file from it over an open Pdplayer window and press play. III.1. Working with Layers One of the most powerful features of Pdplayer is its layered timeline workflow. Every sequence, movie clip or still image you will ever work with in Pdplayer will be placed on a layer. To add a sequence as a layer in Pdplayer you can do several things: Go to File > Add Layer or press Ctrl + L. This will bring out the Add Layer dialog (Figure 3). Here you can select an image file and click Open to add it as a layer. Pdplayer will automatically detect if it is a part of a sequence or a single file and create the appropriate layer type. If you want to add just a single file from a sequence you have to select the Add as single image check box. Checking the Position after current layer box will place the layer after the current one in the time line. If you are loading one part of a stereoscopic sequence you can select the Add other stereo view checkbox to automatically add the sequence for the other view. Pdplayer will recognize key words in the path and file name to load the correct sequence. The recognized words are: "left", "Left", "LEFT", "L", "lf", "LF" identify the left view "right", "Right", "RIGHT", "R", "rt", "RT" identify the right view Drag and drop a file over an open Pdplayer window. Note that if you want to add an image that is a part of sequence as a Still Image Layer you should hold the Ctrl key while dragging and dropping it. Holding the shift key while dragging will place the layer current one in the time line. Double click on a file if it associated with Pdplayer Copy/paste a file from windows explorer. Note that if it is an image file it will be added as a still image layer Right click in windows explorer Open With > Pdplayer Figure 3. Add Layer dialog 7 Pdplayer User’s Manual When you add files that have an alpha channel to your composition Pdplayer will by default set the alpha mode for their layers to Premultiplied Mask. If you want to change this value you can right click on the blending and alpha mode icon on the right of the layer in the Layer Stack and choose a mode from the menu. You can also have a more advanced control over the blending and alpha modes through the Properties Panel (Section IV.5.c). Once you have added layers to your composition you may want to arrange them. You can change how different layers stack over each other by dragging them in the layer stack. You can move the layers in the workspace by holding the Shift key and dragging with the left mouse button. In Pdplayer you can decide that you want to play only a part of a layer. By dragging the sides of a layer you can place a Layer In Point and a Layer Out Point. When the player starts playing the composition it will only show the frames between those two points of the layer. Double clicking on an In Point will reset it to 0 and double clicking on an out point will move it to the next complete loop. While you are arranging the different parts of the composition you may want to see how they fit together. You can preview your work with the Playback Buttons in the Timeline Area (Figure 4). Pdplayer allows you to play the composition both forwards and backwards or go through it frame by frame. Upon installation the default frame rate at which Pdplayer works is 24 frames per second. You can see the current frame rate in the little box on the left side of the Timeline. There are several ways to change this value. First you can right click on the box and choose from a list of common values. You can also left click on the box and drag or double click on the box and enter a different value. Figure 4. Timeline Area III.2. The Timeline and Work Area The timeline and work area determine the composition length in frames. You can change the length of the time line by double clicking on the value to the right of it and entering a number or by dragging the handles on its sides. You can also choose to make the timeline fit the length of the layers in the scene or trim it to the length of the work area. Double clicking on the side handles of the timeline will fit it to the length of the layers. The work area is a part of the timeline that serves as an indicator which parts of the different layers will be played. Anything outside of it will not be played. You can change the length of the work area by left clicking on the sides of it and dragging to scale it. When the work area is shorter than the timeline you can shift it by dragging it with the middle mouse button. Double clicking on either edge of the timeline area will move it to the closest In or Out point of a layer. The layer stack holds all the layers in the composition. It allows you to arrange them in the time line. You can stack them vertically so that when you play the composition the top layers will be in front of the bottom ones. To arrange the layers drag them with the left mouse button. Pdplayer allows you to play just a part of a layer by placing In and Out points for it. To do that, go to the start or to the end of a layer until the mouse becomes a two sided arrow and drag. When you drag the end point beyond the end of the layer, Pdplayer will add a loop. Double clicking on the In point of a layer will move it to the first frame of the sequence. Double clicking on an Out point will move it to the closest end of a loop. 8 Pdplayer User’s Manual III.3. Saving with Pdplayer Pdplayer allows you to save your work in several different ways. You can save individual layers as well as the result in the mask area (Section IV.4) as either a sequence of one of the five supported image files (.sgi, .tga, .png, .jpg and .tiff) or as one of the two supported video file formats (.AVI Movie or Quicktime Movie). Pdplayer also has its own file format in which you can save your whole composition. File > Save Compositions As… - this will save the whole composition as a .pdpcomp file. File > Save Screen As… - this will save Pdplayer’s window as an image file File > Save Frame As… - this will save the current frame of the current layer as an image file File > Save Layer As… - Pdplayer will save the current layer as either a sequence or a video file. File > Save Mask As…- Pdplayer will save just the result in the mask area as either Figure 5. Save as JPEG Sequence When you choose to save out a JPEG Sequence (Figure 5) you can specify the quality of the compression. 9 Pdplayer User’s Manual Figure 6. Save as AVI movie When you choose to save an AVI Movie (Figure 6) you only need to select the compression method and the quality of the clip. 10 Pdplayer User’s Manual III.4. Export from Pdplayer With the current version of Pdplayer you can export your composition to an After Effects script, a Nuke script and Pdplayer’s specific Pdplayer Command File (.pdpcmd). This is done by going to File>Export Composition As which will bring out the “Export Composition as” dialog (Figure 7). Figure 7. Export Composition as dialog The following three pictures show a composition in Pdplayer which has been exported to both After Effects and Nuke. 11 Pdplayer User’s Manual Figure 8. Composition in Pdplayer Figure 9. Composition in After Effects 12 Pdplayer User’s Manual Figure 10. Composition in Nuke Additional information about integrating Pdplayer with external software packages can be found in Section VIII. The .pdpcmd file is actually a text file that contains a set of commands. Executing these commands will set-up a composition the way you have saved it. The format is a very simple text format that is easy to read from and write to. This feature of Pdplayer can be used in a couple of different cases. First it can be used to create macros or a long set of commands to help you in your work. You can very easily set up an initial configuration for your composition for example with a certain image as a background, a resolution for the mask, frame-rate etc. Instead of trying to figure out what commands to use and write them by hand you can just set up the composition and then export it to a .pdpcmd file. The .pdpcmd file can also be used to enable integrating Pdplayer with third party applications that are currently not supported. Exporting your composition into .pdpcmd file it can then very easily be read by a script or a simple application and then imported into a third party compositing application. You can also use any application that has scripting capabilities to create a .pdpcmd with the composition set the way you want it. Further more you can very easily generate reference .pdpcmd files just by setting up several compositions in Pdplayer and exporting them to .pdpcmd files. You can then use these files as examples when creating your script in the third party application. Saving your compositions in .pdpcmd files also makes it easier to quickly change the directory paths in cases where the sequences in the composition have been moved. To do that you can edit the .pdpcmd file with any text editor and use the Find and Replace feature to replace the old paths with the new ones. 13 Pdplayer User’s Manual IV. Interface In this chapter we will go through each feature of the Pdplayer’s GUI and explain its purpose, the options available to it and show you how to use it. Later on we will show how to combine the different features to achieve a desired result. IV.1. Main Graphic User Interface The interface in Pdplayer is divided into several parts where similar features and tools are grouped together. All the operations are just a click away and every command can have a shortcut key assigned to it. Figure 11. Pdplayer GUI Figure 11 shows the Pdplayer Graphic User Interface. There all the different areas of the interface can be seen. The Menu holds all the commands and options for Pdplayer sorted in five different menus. The Preview Area is the workspace where the files loaded for preview will be shown. Here you will also be able manipulate them and see how different options affect them. The Information bar shows useful information about the current settings of the Pdplayer and lets you quickly change them. The Timeline Area holds the Layer Stack where all the layers can be seen and manipulated. Here you can also find the Control Buttons the Playback Buttons and the Channel View Buttons. Finally there is the Properties Panel which holds the parameters for each layer and lets you control them. 14 Pdplayer User’s Manual IV.2. Timeline Area The Timeline area (Figure 12) holds the Layer Stack and Timeline area buttons along with the Timeline and Work Area. Here you can set the length of your composition, adjust the frame rate and arrange the different layers in the time line. Figure 12. Timeline Area The upper most part of the Timeline Area is where the Control Buttons, the Playback Buttons and the View Buttons can be found. Each group gives you control over different aspects of Pdplayer. Figure 13. Timeline Area Buttons The Playback Buttons (Figure 14) as their name suggests control the playback. You can use those to play your composition both forward and backward or if you want to closely inspect it you can go through it frame by frame. You can also change the frame rate at which the composition is being played. Figure 14. The Playback buttons 1 – Moves the time slider to the composition’s next frame 2 – Moves the time slider to the compositions’ previous frame 3 – Plays the work area backwards 4 – Plays the work area forwards 5 – Moves the time slider to the first frame of the work area 6 – Moves the time slider to the last frame of the work area 7 – Toggles the repeat mode between once, loop and ping-pong 15 Pdplayer User’s Manual The channel view buttons (Figure 15) control the channels which Pdplayer will show in the Preview Area. They are: Red, Green, Blue, Alpha, Luma and Depth. You can view a particular channel by left clicking on it this will make all buttons “dark” except for the one being shown. You can also right click on any of the buttons and choose which channels to be displayed from a menu. The following pictures show the Channel View Buttons along with the effect each option has. Figure 15. Channel View Buttons and different channel modes Figure 16. Stereoscopic view button The Stereoscopic view button (Figure 16) allows you toggle between the different views in the Preview Area when working with a stereoscopic composition. You can also right click to select between Anaglyph Stereo and Interlaced Stereo modes. 16 Pdplayer User’s Manual The control buttons (Figure 17) allow you to control what is seen in the Preview Area. Figure 17. Control Buttons 1 – Shows and hides the Properties Panel (Section IV.5) 2 – Shows and hides the safe area and mask. Right click to choose from a set of predefined settings for the mask and safe area. (Section IV.4) 3 – Shows and hides the workspace grid 17 Pdplayer User’s Manual 4 – Toggles between black and checkerboard background. Right click to choose from a list of different backgrounds. In addition to the default colors you can choose a custom color or paste a color that you have copied. Finally you can set any color as a Default color. 5 – Toggles the vertical synchronization on and off for the screen. Prevents tearing but will have a performance hit.. Right click on the button to bring out additional options for the screen synchronization. 6 – Toggles the cache resolution between full, half and quarter. This is useful to speed up the working process when you are short of RAM. 7 – Toggles the web server on and off. Section VII gives more detailed information about the http server. 8 – Enables or disables the output device. Right click to choose from a list of available devices. It is important to note that the resolution of the output signal will be the same as the resolution of the Mask. In cases where the output device does not support the Mask resolution it will not work. One of the great features of Pdplayer is its ability to play different sequences or clips simultaneously. This is achieved by adding each sequence or movie as a layer. Figure 18 shows the Layer Stack. It has several elements incorporated in it that allow us to work with the different layers and the timeline. 18 Pdplayer User’s Manual Figure 18. Layer Stack The upper most part of the Layer stack is the Timeline. It displays information about the parameters at which the composition is being played and allows us to change them. On the right hand side of the Timeline is a number specifying the Timeline length in frames. It can be changed by double clicking and entering a different number. It can also be set to fit the length of all layers or the length of the Work Area by right clicking and choosing a command from the context menu. The work area is actually the part of the time line that is being played. It is represented by a blue bar inside the Timeline. You can change the length of the Work Area by going to the left or right side of it with the mouse and click and drag to scale it. You can also move it within the Timeline by dragging it with the middle mouse button. On the left hand side of Timeline is the Playback Frame rate parameter that specifies the rate at which the movie or sequence is being played in frames per second. You can change this either by clicking and dragging with the left mouse button or by double clicking it and typing a number. You can also right click on the number to select from list of predefined frame rates. 19 Pdplayer User’s Manual Below the Timeline are all the layers. Each layer is represented by a bar with a name. On the left hand side of the layers there are three indicators. The first one is the number of the layer. The next icon is the transparency of the layer. You can show or hide the layer by clicking on this icon or change the transparency using the mouse wheel over it. The third icon controls the layer blending. Right click on it to change the blending and alpha mode of this layer (Figure 19). Figure 19. Blending modes context menu The first part of the menu allows you to choose between the five basic blending modes for the layer. You can also choose the alpha mode for the layer and the way Pdplayer uses the information in the depth channel. The different Alpha and Blending modes are explained in Section IV.5.c. 20 Pdplayer User’s Manual IV.3. Information Bar The Information bar (Figure 20) shows some useful information about the current settings at which Pdplayer is working. It also allows you to quickly change these settings. Figure 20. The Information bar Selected layer size – Shows the resolution of the current layer Current mask size – Shows the resolution of the current mask. You can left click to show/hide the mask it in the Preview Area or right click to choose from a set of predefined resolutions. Double clicking on the value allows you to set a custom resolution for the Mask. Global Audio Volume – left click and drag to the sides or use mouse wheel to globally control the audio volume. Double click to mute the sound. Current playback framerate – Shows the current frame rate at which Pdplayer is playing. Click to allow or disallow skipping of frames in order to maintain the frame rate. Available memory – Displays the amount of free RAM in percent. You can right click to set a minimum amount of free RAM to be left by Pdplayer. Zoom – Shows the current zoom factor. You can left click and drag to zoom in and out or right click to choose from a list of predefined zoom factors. Double click to toggle between 100 percent and fit to window. Global aspect ratio – Shows the current global aspect ratio correction. Right click to choose from a list of predefined ratios. Left click to toggle between 1 and the selected ratio. 21 Pdplayer User’s Manual Current time – Shows the current time in frames or seconds. Pdplayer can also display embedded information about the frame number, time code, edge code and key code from .DPX, .RLA, .EXR and .CIN files. Finally the current frame number can also be read from the file name. You can right click and select from a list which information is going to be displayed in that field. 22 Pdplayer User’s Manual IV.4. Preview Area The preview area is where most of the work with Pdplayer takes place. Figure 21 shows the different parts of the Preview Area. Figure 21. The Preview Area The work space is where the layers are shown. Here they can be moved in respect to each other and the center of the work space. You can also scale them and see the results from other modifications you apply on them. The Mask makes it easy for us to see what parts of the layers will be visible in the final out put. The Safe Area is a part of the mask that takes into consideration the fact that monitors and TV sets clip out the corners of the incoming video signal. The Safe Area actually shows the user which parts of the final output will be clipped out and which will be shown when it is displayed by a regular TV Set. You can pan and scan the work space in respect to the mask and safe area by dragging with the middle mouse button. To reset the zoom and position of the workspace press the Num Pad 5 button once. Pressing it again will toggle the zoom factor between 100% and the one that will fit the current workspace to the window size. Figure 22. Layers in work space 23 Pdplayer User’s Manual Figure 22 shows two layers in the work space. The top one is selected and we can see the Scale handles in the corners. You can click on each handle and drag to scale the layer. Pdplayer also allows you to crop the layer by pressing Shift + K. This will bring out the crop area which is represented by a dotted line rectangle (Figure 23). You can scale and move the crop area just like you would do with a layer while holding down the Shift Key. When you have finished positioning and release the Shift Key you will be able to see only the part of the layer that lies within the crop area. Figure 23. Crop Layer To work with the layers in the Preview Area use the following commands: 24 Pdplayer User’s Manual You can bring the preview area context menu (Figure 24) by right clicking anywhere in it. It has some commands that are already available as buttons as well as some new commands along with shortcut keys to them. Figure 24. Preview area context menu Reset/Fit to window – toggles the zoom factor between 100 percent and one that would fit to the window size. Full Screen Mode – toggles between normal and full screen mode where you have larger preview area and the Menu Area is hidden. Timeline – shows and hides the Timeline Area. Layer Stack – shows and hides the Layer Stack. Information Bar – shows and hides the Information bar. Layer Properties – shows and hides the Layer Properties Panel. Preview Area Tooltip - when this option is selected holding the mouse pointer over a pixel will bring out a tooltip containing information about that pixel. Mask – shows and hides the Mask and Safe Area. Grid – shows and hides the grid. Synchronize Display – toggles vertical synchronization on and off. Resize Window to Fit – this command resizes the window to fit the current zoom factor. This will only work if the window is not maximized. E-mail Screen as JPEG – E-mails a screenshot of the window in .jpg format using the system’s default e-mail client. 25 Pdplayer User’s Manual E-mail Screen as PNG – E-mails a screenshot of the window in .png format using the system’s default e-mail client. Copy Mask as Image – takes whatever is visible in the Safe Area and Mask and puts it in the clipboard. Copy Screen as Image – takes the current screen and puts it in the clipboard. Paste - Pastes the clipboard content as new layer. If the clipboard contains previously copied frame or layer from Pdplayer it will be pasted as a new still image layer or sequence layer respectively. You can copy one or more images from Windows Explorer to the clipboard and paste them as clipboard layers. In cases where single or multiple directories are copied, Pdplayer will paste them as sequence layers. Paste as Single Frame – pastes the content of the clipboard as a Single Frame Layer. Paste as Embedded Image – Pastes the content of the clipboard as a new Embedded Image Layer. Copy Color – copies the RGB values of the color under the cursor. 26 Pdplayer User’s Manual IV.5. Properties Panel The properties panel (Figure 25) is the main tool we can use to make any changes to the layers. Here we can edit the color settings for a given layer, control its placement and size or set its blending options. We can also change the settings for the brush and text layers. The properties panel also holds the Effects Tab which controls the Color Key effects. The last tab of the Properties Panel is the Source tab. It holds the controls for the stereoscopic effect and allows you to choose between different versions of a given sequence or between different layers of an Open EXR or .vrimg sequence. Most of the settings in the properties panel are controlled with sliders. You can set values for those settings either by double clicking and entering a number or by dragging the slider. Alternatively you can hold down the Alt key to change the dragging speed for the slider. IV.5.a. Color Panel Figure 25. Properties panel Figure 25 shows the Properties Panel and in particular the Color panel. You can cycle through the different panels by clicking on the Previous Panel or the Next panel button or by right clicking and choosing from the context menu. To choose which layer you will edit you can select it in the Layer Stack, use the Previous layer and Next layer buttons on the Properties Panel or right click and pick it from the Layer context menu. Lookup Table – Pdplayer supports 1D and 3D lookup tables (LUTs). To use a lookup table right click on the Lookup Table chooser and pick one from the list. You can also import your own lookup tables. The supported formats are Autodesk .3dl, Nucoda .cms and Iridas .cube. 3dl tables are assumed to have 12 bits of output (range 0…4095). .3dl and .cube are assumed to contain sRGB values by default whereas .cms is assumed to be linear. Color Space - allows you to control the color space for the particular layer. You can choose from three different options Default, Linear and sRGB. You can cycle through them with the arrows on both sides of the value or right click and choose a color space from the context menu. 27 Pdplayer User’s Manual Exposure/Soft Clip - these sliders control the Exposure and Soft Clip levels for the current layer. You can change the values either by clicking on the slider and dragging or by double clicking on it and entering a value in the box. The first slider controls the Exposure and it can take values between minus infinity and plus infinity. An exposure of + 1 means that the image will be two times brighter and exposure of -1 means that the image will be two times darker. The second slider controls the Soft Clip levels and it can take values equal to or larger than zero. Lift /Gamma / Gain – these sliders allow you to control the Lift, Gamma and Gain values for the current layer. You can change these values for the Red, Green and Blue channel simultaneously or click on the Separate channel switch to edit them independently. The next two sliders control the Brightness and Contrast levels. Both can take values between minus infinity and plus infinity and you can change them by clicking on the slider and dragging or by double clicking on it and entering a value in the box. The last two sliders control the Hue and Saturation respectively. Hue can take values between -180 and 180 degrees and Saturation can take values between -100 and plus infinity. Both values can be changed by clicking on the slider and dragging or by double clicking on it and entering a value in the box. Finally there is the Disable Corrections checkbox. You can use this option to quickly toggle between the original image and the one with the color corrections applied to it. You can toggle this option with the short key Shift + C. You can right click on any slider to bring the Slider context menu. From it you can copy/paste and reset its value. 28 Pdplayer User’s Manual IV.5.b. Placement Panel The next part of the Properties Panel is the Placement Panel (Figure 26). From this panel you can control the Position, Scale and pixel Aspect of the current layer. You can also flip the layer horizontally and vertically. The X and Y coordinates of the layer are controlled by the first two sliders. Like any slider you can left click and drag to change the value or you can double click and write a value in the box. The Scale of the layer is controlled by the next two sliders. By default the values are locked together so that they have the same value. You can unlock them by clicking on the link slider switch. You can flip the layer horizontally and vertically with the two check boxes Flip horizontally and Flip Vertically. Finally you can control the pixel aspect for the current layer from the Aspect slider. In addition to the common ways of setting a value for a slider you can right click on the Aspect slider and choose from list of predefined values. You can also enable or disable the preview of a Border and a Safe Area for each layer by enabling or disabling the respective check boxes. You can enable or disable the Crop Area from the Crop check box. When the crop area is enabled you will be able to control its X and Y position as well as its Width and Height with the help of the four fields below the check box. You can also drag the edges of the Crop Area in the preview area to resize it or double click on them to reset their position. Finally you can hold Shift and drag the Crop Area to position it. Figure 26. Placement panel 29 Pdplayer User’s Manual IV.5.c. Blending Panel Figure 27 shows the Blending Panel. It gives you options to control the color blending, alpha and depth for the current layer. You can also assign channels from other layers to be used as an alpha channel in the current layer. Figure 27. Blending Panel The Color Mode section allows you to choose from five different color blending modes. They are Normal, Add, Multiply, Screen and Difference. You can cycle through them with the Previous Mode and Next Mode buttons or you can right click and choose a mode from the context menu. The next slider controls the Layer opacity in percent. You can invert the colors by checking the Invert Color box. Normal - This is the standard blend mode which simply takes each pixel from the top layer if present. Otherwise the bottom layer is used. Add - This blend mode simply adds pixel values of one layer with the other. In case of values above 256 (in the case of RGB), white is displayed. Multiply - Multiply blend mode multiplies the RGB numbers for each pixel of the top layer with the RRB number for the corresponding pixel from the bottom layer. As a simple multiplication can get values as high as 65025, which is far higher than the maximum allowed value, 255, the result is divided by 255. The result is a darker picture. Screen - With Screen blend mode the values of the pixels in the two layers are inverted, multiplied, and then inverted again. This is in some way the opposite of multiply. The result is a brighter picture. Difference - Difference subtracts the top layer from the bottom layer or the other way round, to always get a positive value. Blending with black produces no change, as values for all colors are equal to 0. (The RGB value for black is 0,0,0). Blending with white inverts the picture. 30 Pdplayer User’s Manual The Alpha Mode section controls how the Alpha channel is applied. Again you can choose from several modes - Ignore Alpha, Normal Alpha, Premultiplied Alpha and Premultiplied Mask. You can cycle through them with the Previous Mode and Next Mode buttons or you can right click and choose a mode from the context menu. You can invert the alpha channel by checking the Invert Alpha box. The different alpha modes will wield different results when applied. The following explanations assume a Normal blending mode. Ignore Alpha -The image is treated as fully opaque. The existing alpha channel (if any) is ignored. The alpha channel of the result will show a white rectangle. Normal Alpha - The foreground color is mixed with the background color according to the formula: foreground * alpha + background * ( 1 - alpha ) As an example, a 70% opaque red foreground - (R:1.0, G:0.0, B:0.0, A:0.7) - and a green background - (R:0.0, G:1.0, B:0.0) - will be combined to form the color (R:0.7, G:0.3, B:0.0). This blend mode is suited for images with independent color and alpha channels. These images can be color-corrected without running into problems with their transparent portions (such as antialiased edges) no longer blending correctly. Premultiplied Alpha - The first portion of blend formula above - foreground * alpha - does not depend on the background color, so it's possible to perform it beforehand. This is known as premultiplication - the image color is pre-multiplied by the alpha channel. Such images are mixed with the background according to the modified formula: foreground + background * (1 - alpha ) Since the foreground has already been multiplied by the alpha, this produces the same results as the "Normal Alpha" formula when applied to the original, non-premultiplied image data. Getting back to our example, the premultiplied equivalent of our foreground color (R:1.0, G:0.0, B:0.0, A:0.7) will be (R:0.7, G:0.0, B:0.0, A:0.7) and the result of its composition over a background color (R:0.0, G:1.0, B:0.0) will again be (R:0.7, G:0.3, B:0.0). If a non-premultiplied image is composed over a black background - a color of (0.0, 0.0, 0.0) the Normal Alpha formula gives us: foreground * alpha + 0 * (1 - alpha ) which is the same as: foreground * alpha In other words, the result of a non-premultiplied image composed over black is a premultiplied image. The reverse operation - obtaining a non-premultiplied image from one that has already been premultiplied - can be accomplished in an image editing package by using the "Remove Black Matte" command. (Note that the accepted terminology in this case - Normal Alpha and Premultiplied Alpha - is a bit confusing as it is the image color being premultiplied, not the image alpha.) 31 Pdplayer User’s Manual Premultiplied Mask - In a standard dynamic range image, the values of the color channels are between 0.0 and 1.0 (inclusive). This means that a premultiplied image would never have a color value bigger than the corresponding alpha value (because the maximum color value of 1.0, multiplied by an alpha value A, yields A). Not all images conform to this rule, though. It is not uncommon to come across a premultiplied image in which some pixels have a color value bigger than the alpha value. This may be intentional and can represent high dynamic range (color values higher than 1.0) or an additive glow (non-zero color values in areas where the alpha is zero). Sometimes the image data is not intended to contain such color values. Using Premultiplied Alpha with such images can lead to compositing artifacts. In these cases, one can use the Premultiplied Mask mode, which is the same as Premultiplied Alpha, except that it clamps the color value to the alpha value, effectively constraining the colors into the safe 0.0 - 1.0 range. The next two pictures illustrate the difference between Premultiplied Alpha and Premultiplied Mask. Figure 28. Premultiplied Alpha and Premultiplied Mask 32 Pdplayer User’s Manual Figure 29. Image rendered with 3D software The Depth Mode parameter allows you to choose from three blending modes for the depth channel. They are Ignore Depth, Replace Depth and Combine Depth. You can cycle through them with the Previous Mode and Next Mode buttons or you can right click and choose a mode from the context menu. Opacity and Fade – the next three sliders control the Opacity and Fade effects for the current layer. The first controls the Opacity – you can drag it to change the opacity or right click and reset its value from the context menu. The next two sliders allow you to animate the Opacity of the layer in order to achieve Fade-in and Fade-out effects. The opacity will always be animated from 0% to its current value or vice versa. The left and right sliders control the length (in frames) of the Fade-in and Fade-out effects respectively. A value of 30 for the left slider means that the Opacity of the layer will be animated from 0% to its current value for 30 frames. The animation will start at the beginning of the sequence or at the In point if there is one. A value of 30 for the right slider means that the Opacity of the layer will be animated from its current value to 0% for 30 frames. The animation will start 30 frames before the end of the sequence or the Out point if there is one. Pdplayer gives you the option to assign any channel from any layer in the scene to act as alpha channel for the current channel. This is done through the Alpha Source options. First you must select a layer to act as a source. You can do that by cycling through the available layers with the right and left arrow or by right clicking on the layer chooser and picking a layer from the Alpha Source context menu. Next you select a channel from the layer to be used as Alpha source. Again you can cycle through the different channels in the layer or right click on the channel chooser and select a channel from the Channel context menu. Next you have the option to choose whether or not to invert the source channel and if the two layers have different sides you can choose to stretch the source layer to fit the current one. Then you can choose a blending mode for the source channel. The available options are Replace, Combine with and Multiply with. Finally you can choose with which channel from the current layer you’d like the source channel to blend. You can choose either by cycling through the options within the layer chooser with the left and right arrow or by right clicking on it and choosing a channel from the Channel context menu. 33 Pdplayer User’s Manual IV.5.d. Text Panel Figure 30. Text Panel The next panel in the Properties Panel is the Text Panel (Figure 30). It is active when you have selected a Text Layer and it allows you to control its settings. The first field holds the actual text that is displayed by the Text Layer. You can change it by double clicking on the Text field or by holding Shift and double clicking on the Text Layer in the Preview Area. Next you have controls for the horizontal and vertical alignment along with settings for the Font, Size and color of the Text. The following controls allow you to add some effect like Outline and Shadow to the text. The last settings allow you to put a background color for the text and set a transparency for that background. 34 Pdplayer User’s Manual IV.5.e. Effects Panel Figure 31. Effects Panel The Effects Panel (Figure 31) allows you to apply Color Key to your Sequence or Video Layers. Pdplayer currently supports two Color Keys which will be applied on the fly. To cut out a color from your sequence enable the Primary Key, right click on the color in the Preview Area and copy it. Then paste that color in the color field. You can use the sliders below to adjust the Slope and Tolerance. In order to use the Secondary Key, first you need to disable the Primary Key and then complete the same procedure. Once you have adjusted the settings for the Secondary Key you can then enable the Primary Key. 35 Pdplayer User’s Manual IV.5.f. Brush Panel The next panel in the Properties Panel is the Brush Panel (Figure 32). It is available when you have selected a Brush Layer or a Brush Sequence Layer (Section VI.1.b). Figure 32. Brush Panel In the Brush Panel you have four sliders to control the Size, Softness, Spacing and Opacity of the brush. You can change their values like you do with all sliders – by dragging the slider or by double clicking on the slider and entering a number in the box. You can also hold down ctrl key and drag up and down in the preview area to change the brush Softness and left and right to change its Size. Two more elements are present in the Brush Panel. First there is the Brush Preview which shows you the size and softness of the brush. Second there is the Brush color chooser which allows you to choose a color for the brush. 36 Pdplayer User’s Manual IV.5.g. Source Panel Figure 33. Source Panel The Source panel (Figure 33) is the last tab of the Properties panel. The first field allows you to view custom layers (other than RGB, Alpha, Luma and Z-Depth) inside .vrimg and .exr files. You can either flip through the layers by clicking on the Previous and Next buttons or you can right click and select a layer from the drop down menu. Switching between the different layers causes the image to be reloaded which may cause a small delay. Figure 34. Different layers of a an EXR file 37 Pdplayer User’s Manual Figure 35.shows a composition in which a single EXR file with render elements has been split into layers. On the left we can see the RGB part of the image. The left image is created by composing the render elements together using the Add operator. It is clearly visible that the two images look the same. However using render elements allows for much more control when applying color corrections for example. Figure 35. Open EXR with Render Elements The Channels field allows you to display different channels of the current layer. You can either flip through the different channels or right click and select a channel from the drop down menu. Figure 36. Different channels of an image The Version field is enabled when Pdplayer detects that you have loaded a sequence which has several versions. It will detect certain key words in the file path and find the other versions automatically. You can then cycle through the versions with the Previous and Next buttons or right click and choose from the drop down menu. Pdplayer will recognize versioned footage when the file path contains a directory with a name of the form prefix_v#_suffix, where prefix and suffix are arbitrary strings, and # is a sequence of digits. The prefix_ and _suffix parts are optional. Examples of versioned directory names: v2, V004, v04_before_cc, animation_v05, scene_v2_2009_05_31.The version string is automatically replaced in the file name, if present. 38 Pdplayer User’s Manual Examples of versioned footage: Example 1 D:\shot08\scene_15\v02\bg\bg_v02_0001.tga D:\shot08\scene_15\v03\bg\bg_v03_0001.tga Example 2: C:\projects\promo\v2_before_cc\0001.tga C:\projects\promo\v3_after_cc\0001.tga Example 3: X:\Footage\conv\V002_2009_05_27\conv_proxy_h264.mov X:\Footage\conv\V003_2009_05_31\conv_proxy_h264.mov Example 4: D:\shot08\scene15_v2\bg\shot08_scene15_v2_bg_0001.tga D:\shot08\scene15_v3\bg\shot08_scene15_v3_bg_0001.tga Example 5: C:\projects\promo_v2_before_cc\v2_0001.tga C:\projects\promo_v3_after_cc\v3_0001.tga Example 6: X:\Footage\conv\V002_2009_05_27\conv_V002_proxy_h264.mov X:\Footage\conv\V003_2009_05_31\conv_V003_proxy_h264.mov Pdplayer will automatically recognize when you have added versioned footage and it will enable the Version field. The next option allows you to select a target for the current layer when using the Stereoscopy feature of Pdplayer (Section V). You can either scroll through the options or right click and choose from the drop down menu. 39 Pdplayer User’s Manual V. V.1. Stereoscopy Support General Information Pdplayer has built-in support for playback of stereoscopic sequences. Currently there are two different methods for stereoscopy supported – Anaglyph Stereo and Interlaced Stereo. Both can be used directly without having to apply any color corrections or masks. V.2. Setting up the Composition V.2.a. Quick Set-up Using Pdplayer you can very quickly set-up a stereoscopic composition. You can use either two separate sequences – one for each view or you can load an SXR sequence. The SXR sequence is an Open EXR sequence that holds both the left and the right views as separate layers within the same file. To automatically set-up the stereoscopic composition just check the Add other stereo view check box in the Add Layer dialog: If you are loading an SXR file Pdplayer will automatically detect the left and right channels and make the correct set-up. When loading a non SXR sequence Pdplayer will examine the path and file name of the sequence. It recognizes certain key words and based on them tries to find and load the other channel of the stereo sequence. The following words are recognized: "left", "Left", "LEFT", "L", "lf", "LF" identify the left view "right", "Right", "RIGHT", "R", "rt", "RT" identify the right view Once Pdplayer has identified both views it will automatically set up the stereoscopic composition. If you are adding the sequences in Pdplayer without using the Add Layer dialog you can use the Add Other Stereo View command from the Layer menu to automatically set up the composition. The same command can be found in the layer context menu by right clicking on a layer in the Layer Stack. This command will perform the same operations as the Add other stereo view check box and works with both SXR and non SXR sequences. Once the composition has been set you can use the stereoscopic view button (next to the channel view buttons) to cycle between left, right and stereo views. 40 Pdplayer User’s Manual V.2.b. Manual Set-up To manually set up a stereoscopic composition you need to do perform the following steps: First you need to load the sequence for the left and right channel in Pdplayer. (Section III.1) In the Source tab of the Properties Panel select each layer and specify its target. (i.e. set the Target View for the left channel to Left and for the right channel to Right). Figure 37. Setting up the Left and Right views You can toggle between the Left, Right and Stereo view in the Preview Area by clicking on the Stereoscopic view button (next to the Channel view buttons). To select the Stereoscopy method right click on the Stereoscopic view button and select the method from the drop down menu. You can choose between two different methods: Anaglyph Stereo and Interlaced Stereo. 41 Pdplayer User’s Manual Figure 38. Anaglyph and Interlaced Stereo 42 Pdplayer User’s Manual VI. Layers VI.1. Layer Types One of Pdplayer’s unique features is its ability to process multiple layers at the same time. Furthermore it can handle different types of layers and layers with different type of content without the need of complex procedures. All you need to do to add any kind of media content to a layer is drag and drop. Pdplayer provides several types of layers divided into normal and special layers according to their functions. VI.1.a. Normal Layers Still Image Layer – a normal layer with a single image loaded in it. This image will appear on each frame no matter how many frames there are. Sequence Layer – a layer containing a sequence of images Movie Layer – a layer with a movie file loaded in it. Audio Layer – a layer containing an audio file. All these layers can be loaded in Pdplayer simply by dragging and dropping. Pdplayer will automatically add the correct type of layer according to the type of the file you have dropped. VI.1.b. Special Layers Brush Layer – a still layer that you can draw on. Whatever is drawn on this layer will be shown on all frames. Brush Sequence Layer – a brush layer that keeps information for each frame. This means that you can have different drawings on different frames. Both brush layers are meant to be used for putting notes in the composition. Adjustment Layer – it allows us to apply color corrections to multiple layers globally. The color corrections that you make to an adjustment layer will be applied to all layers under it in the Layer Stack. If you make this layer invisible the effect of the color corrections will also be not visible. Embedded Image Layer – this layer is created when there is an image of any kind in the clipboard and you paste it in the composition or when you paste a frame as an Embedded Image. It behaves as a still image layer with the only difference that it can be saved within the .pdpcomp file. Embedded Audio Layer – this layer is created when an Audio Layer that contains a .WAV file is embedded into the composition with the Embed Layer command from the Layer menu. Text Layer – the text layer is a special kind of layer that allows you to put notes on your composition. You can control the settings for the text layer from the Text tab of the Properties Panel. Video Layer – the video layer is a Pdplayer specific type of layer which allows you to insert live video footage inside Pdplayer. To do this just go to Edit>New Video Layer> and select from list of video devices that are currently attached to your computer. Frame Buffer Layer – the frame buffer layer is very similar to the clip board layer. The only difference is that the input comes from an external source. For the moment Pdplayer supports input only from V-Ray and LightWave 43 Pdplayer User’s Manual VI.2. Working with Layers Once you have added layers to your composition you may want to arrange them. You can change how different layers stack over each other by dragging them in the layer stack. It is important to know that only the part of a layer which is inside the work are will be displayed. You can further limit which parts of a layer will be shown by adding In and Out Points to it. This is done by dragging the edges of a layer. If you drag the right edge of a layer outside of it Pdplayer will automatically add a loop for this layer. Double clicking on an In Point will reset it to 0 and double clicking on an Out Point will move it to the next complete loop. Right clicking on a layer will bring out the layer context menu which holds some additional commands. Figure 39. Layer context menu Delete Selected – deletes the layer from the composition. Half Width Left – moves the layer half of its resolution width to the left in the work space. Half Width Right – moves the layer half of its resolution width to the right in the work space. Preload into Cache – loads the sequence into the cache without playing it. Disable Caching – disables caching of the layer and forces direct playback from disk. Remove Layer from Cache – Removes the layer from the cache so in the next play back it will be reloaded from the hard drive. Duplicate – Duplicates the selected layer. The new layer will become selected and will appear over the original layer. 44 Pdplayer User’s Manual Duplicate and Split – Duplicates the selected layer and sets the Out point one frame before current time. The new layer will become selected and the In point will be set at current time. Expand into Layers – this option is available only for .vrimg and .exr sequences which have additional layers inside. When executed this command creates additional layers in the composition each of which is displaying one of the layers in the .vrimg or .exr sequence. Add Other Stereo View – adds the other stereo view of a stereo sequence. Pdplayer recognizes certain key words in the path and file name of the loaded sequences in order to find and load the other par part of the stereo sequence. The following words are recognized: "left", "Left", "LEFT", "L", "lf", "LF" identify the left view "right", "Right", "RIGHT", "R", "rt", "RT" identify the right view Resize to Timeline – resizes the current Still image Layer or Embedded Image Layer to the length of the Timeline. Resize to Work Area – resizes the current Still image Layer or Embedded Image Layer to the length of the Work Area. Replace with… – opens the standard Open File dialog so a new file which will replace the current can be selected All settings of the layer will be preserved. In case you have multiple layers selected you will have to specify the root folder in which the sequences are placed. Update Modified Frames – checks which frames have been updated on the disk since the last caching and removes them from the cache, so they can be reloaded on the next playback. Automatic Update – when this option is on Pdplayer will continuously scan for updated frames and reload them in the cache when needed. Rescan Sequence for New Frames – checks the sequence for additional frames. Watch Sequence for New Frames – continuously watches the sequence for additional or removed frames. Copy Layer and Frame – copies the current frame and layer into the clipboard (in .pdpcomp file format). It can later be pasted either as a Sequence Layer or a Still Image Layer in any Pdplayer window. E-mail Frame as JPEG – emails the current frame of the selected layer in a .jpg format using the system’s default e-mail client. E-mail Frame as PNG – emails the current frame of the selected layer in a .png format using the system’s default e-mail client. Embed Layer – embeds a Still Image Layer or an Audio Layer (containing a .WAV file) in the composition so that it can be saved in the in the .pdpcomp file. Locate in Explorer – opens the original location of the layer in Windows Explorer. Open with…– Opens the standard Windows List with programs so you can choose in which program to open the selected layer from within Pdplayer. 45 Pdplayer User’s Manual VII. HTTP Server for Remote Collaboration VII.1. Starting the Server The HTTP Server for Remote Collaboration is a build in http server that comes with Pdplayer. When you start the server your computer will host a web page that will display the current frame that Pdplayer is displaying. This option is useful for showing your compositions to people over the internet. To start the server all you have to do is press the Toggle web server (Figure 40 – button 7) button from the control buttons. Figure 40. Button 7 – Toggle web server Right click on the button to bring out the context menu (Figure 41). From here you can copy the address on which the web page displaying the sequence can be found. You can also directly open the page in the default browser for you to view. Figure 41. HTTP Server context menu 46 Pdplayer User’s Manual VII.2. Customizing the Web Page Figure 42 shows the default look of the web page for remote collaboration. The index.HTML file is stored in \Program files\pdplayer\httpdocs\. Figure 42. Pdplayer Web page 47 Pdplayer User’s Manual <html> <head> <title>Pdplayer</title> </head> <body bgcolor="Black"> <div style="position: absolute; top: 48%; left: 50%; margin-top: -288px; margin-left: -384px;"> <iframe src="768,576?refresh=2" width="768" height="576" scrolling="no" marginwidth="0" marginheight="0" frameborder="0"> </iframe> <br> <img src="pdplayer.jpg"> </div> </body> </html> Figure 43. Index.html Figure 43 shows the HTML code of the index.html. Editing this HTML will affect the look and functionality of the web page. In order to be able to fully customize this web page you need to know how it functions. The built-in http server is a standard web server. Making a query to it that says http://localhost:8001/768,576 it will return a picture of the current view in Pdplayer with resolution of 768 by 576. As an example if you would want to use the original html but have the picture resolution see to 800 by 600 pixels you will have to change few things in the HTML code. First of all you have to ask the web server for the picture with resolution of 800 by 600 pixels. In our case this is done with the following code: <iframe src="800,600?refresh=2" width="800" height="600" scrolling="no" marginwidth="0" marginheight="0" frameborder="0"> First you have to define the source for the iframe this is done with the iframe src="800,600?refresh=2" part of the code. Here you declare that every two seconds iframe will be refreshed with an image with resolution of 800 by 600 pixels. You also have to set the size of the iframe this is done with the width="800" height="600" part of the code. <div style="position: absolute; top: 48%; left: 50%; margin-top: -300px; margin-left: -400px;"> 48 Pdplayer User’s Manual VIII. Pdplayer Integration VIII.1. Extended Command Line Support VIII.1.a. Overview Pdplayer’s extensive command line support allows you to have full control over Pdplayer through any external application that can pass commands to it. The set of commands and their function is explained the pdplayer.cmdline.txt file that can be found in the installation directory of Pdplayer. The general form of a Pdplayer command line is: "C:\Program Files\pdplayer\pdplayer.exe" [--attach] <options> layer1 <layeroptions> layer2 <layer-options> ... [--exit] where <options> are the global (composition) options and <layer-options> are the layer-specific options that are applied to the layer that was last added. A full reference of the options is available in Section XI VIII.1.b. System Options The optional --attach should be the first option. If it's absent, a new instance of Pdplayer is started with the specified options. If --attach is present, the command line is sent to an existing instance of Pdplayer, which then executes it. If no Pdplayer instances are active, a new one is started. If several Pdplayer instances are active, a random one among them is chosen. The optional --exit should be the last option. It makes Pdplayer exit after processing the command line and before creating the main window. This is useful for batch conversions. The --cmdfile=file.ext option instructs Pdplayer to read the text file file.ext and to execute the commands in it as if they were given directly on the command line. VIII.1.c. Layers layerN represents the file name (or names) of the source of the new layer. For still images and movies, it is the name of the file. For sequences, it can have the following forms: path/file014.ext - names one frame of the sequence. Pdplayer will automatically detect that the file is part of a sequence by examining the trailing digits in the name. Both \ and / are valid as path separators. path/file####.ext or path/file????.ext - the ? or # characters are automatically replaced with digits as appropriate. path/file%04d.ext - the %04d is equivalent to ####, where the number of the # characters corresponds to the number before the d. Supported for Nuke compatibility. The file name can be followed by the --range option, which has the following general format: --range=B1-E1/S1,B2-E2/S2... where Bi is the start frame, Ei is the end frame, and Si is the frame step. -Ei and /Si are optional. As an example, test.####.tga --range=1-4,100-200/20,204,207 represents the sequence 49 Pdplayer User’s Manual test.0001.tga test.0002.tga test.0003.tga test.0004.tga test.0100.tga test.0120.tga test.0140.tga test.0160.tga test.0180.tga test.0200.tga test.0204.tga test.0207.tga VIII.1.d. Examples Building a simple PAL composition from the command line start pdplayer --fps=25 --global_aspect=1.067 --back_color=black -mask=720,576 d:\footage\back0001.tga --alpha=ignore --brightness=0.1 d:\footage\front0001.tga –blend=add --opacity=20 Batch converting an EXR sequence to TGA start pdplayer d:\footage\seq0001.exr --exposure=-0.5 --soft_clip=3.5 -save_layer_as=d:\footage\seq2.tga –exit Creating a quick time H.264 movie from a sequence start pdplayer d:\footage\seq2.0001.tga -save_layer_as=d:\footage\seq2.mov,avc1 --exit 50 Pdplayer User’s Manual VIII.2. Pdplayer and Autodesk Maya Pdplayer can very easily be integrated with Autodesk Maya to view single images or sequences. To do this, open the Preferences dialog in Maya and in the Applications Category choose Pdplayer to be used as the default software for viewing images and sequences (Figure 44). You should also put %f in each Optional Flags field in order to specify the file name. Figure 44. Integration with Autodesk Maya 51 Pdplayer User’s Manual VIII.3. The Lightwave Plug-in The Pdplayer installation comes with a plug-in for Lightwave. The plug-in files can be found in the \Program Files\pdplayer\extras\lightwave folder. There two files - pdplayfb.p and pdplayfb64.p for the 32 bit and the 64 bit versions of Lightwave respectively. In order to use the plug-in you must copy the corresponding file into your Lightwave plug-in folder and install it. After doing that you can access the plug-in form the Render Globals>Render Display menu(Figure 45). Figure 45. Render Globals After selecting Pdplayer from the Render Display menu you can assign the default color space in which the images will be shown in Pdplayer (Figure 46). Figure 46. Color Space selection If you are using the Lightwave Default Image Viewer you can always send the current render to Pdplayer (Figure 47). A new Framebuffer Layer holding the current render will appear in Pdplayer every time the Send Image command is executed. 52 Pdplayer User’s Manual Figure 47. Send Image to Pdplayer 53 Pdplayer User’s Manual VIII.4. Pdplayer and Nuke In addition to exporting compositions to Nuke Script (Section III.4) Pdplayer can be further integrated with Nuke with the use of the Nuke integration script that comes with Pdplayer. The script can be found in C:\Program Files\Pdplayer\extras\nuke folder. To integrate Pdplayer within Nuke 5 you need to copy the file named nuke.py in …/plugins/user folder in the Nuke installation folder. This will add a new command in the Render menu (Figure 48) that will allow you to view your work in Pdplayer. Figure 48. Pdplayer integration for Nuke 5 To integrate Pdplayer in Nuke 4 you need to copy the files menu.tcl and Pdplayer_this.tcl to the …plugins/user folder in the Nuke installation folder. Once you install the integration script, you will be able to review your composition with Pdplayer. 54 Pdplayer User’s Manual IX. Menu The menu is an organized collection of all the commands you have available in Pdplayer. They have been grouped in five menus according to their function. The following table shows the five groups and explains the commands in them: IX.1. File Menu Figure 49 shows the file menu. It holds the basic commands for handling files. Figure 49. The File Menu Add Layer – opens the standard Open File dialog (Figure 3) to select a file to be added as a new layer. Add Recent – shows a list of recently added files. New Composition – closes the current composition. Open Composition – Opens a composition saved in .pdpcomp format. Open Recent – Shows a list of recently opened compositions. Open Unsaved – Shows a list of recently closed or reset compositions that were not saved. Save Composition – Saves the changes made to the current composition file. Save Composition as… – Saves a new .pdpcomp composition file. 55 Pdplayer User’s Manual Export Composition as…– Exports composition as Adobe After Effects .jsx script, The Foundry Nuke .nk script or .pdpcmd command file (Section III.4). Execute Command File… - executes the commands in a .pdpcmd file. Save Screen as… – Saves a screenshot of the interface as file. Save Frame as…– Saves the current frame of the selected layer as file. Save Mask as Image… - Saves the part of the composition that is currently visible in the mask as an image in one of the five supported file formats. All transformations and color corrections are applied. Save Layer as… – Saves the selected layer as a sequence or a still image with the original resolution and color correction applied. Save Mask as Sequence… – Renders the work area with the current mask resolution as a sequence. All transformations and color corrections are applied. E-mail Screen as JPEG – Emails a screenshot of the Pdplayer window in a .jpg format using the system’s default e-mail client. E-mail Screen as PNG – Emails a screenshot of the Pdplayer window in a .png format using the system’s default e-mail client. E-mail Mask as JPEG – E-mails the current view in the Mask as a JPEG image. E-mail Mask as PNG – E-mails the current view in the Mask as a PNG image. E-mail Frame as JPEG – Emails the current frame of the selected layer in a .jpg format using the system’s default e-mail client. E-mail Frame as PNG – Emails the current frame of the selected layer in a .png format using the system’s default e-mail client. Exit – Exits Pdplayer. 56 Pdplayer User’s Manual IX.2. Edit Menu Figure 50 shows the Edit menu. It holds the basic command for working with layers. Figure 50. The Edit menu Undo – Undoes the last command. Copy Layer and Frame – copies the current frame and layer into the clipboard(in .pdpcomp file format). It can later be pasted either as a Sequence Layer or a Still Image Layer in any Pdplayer window. Copy Color Corrections – Copies the color corrections of the selected layer. These can be than pasted to another layer. Copy Layer as Nuke Script - Copies a Nuke script that describes the current layer. The clipboard can now be pasted into Nuke as a graph that reproduces the current layer when rendered. Copy Mask as Image – Copies a screenshot of the Mask area to the clipboard. 57 Pdplayer User’s Manual Copy Screen as Image – Copies a screenshot of the entire Pdplayer interface to the clipboard. Paste – when there is a file in the clipboard it will be added as a new layer. If this file is a part of a sequence – the whole sequence will be added. Paste as Single Frame – when there is a file in the clipboard it will be added as a Single Frame Layer even if it is a part of a sequence. Paste as Embedded Image – Pastes the content of the clipboard as a new Embedded Image Layer. Select Previous Layer – Selects the layer on top of the current layer. Select Next Layer – Selects the layer under the current layer. Select First Layer – Selects the top layer in the layer stack. Select Last Layer – Selects the bottom layer in the layer stack. Select All Layers – Selects all layers in the layer stack. Clear Selection – Deselects the layer. New Adjustment Layer – Creates a new Adjustment Layer in the Timeline. New Brush Layer – Creates a new Brush Layer in the Timeline. New Brush Sequence Layer – Creates a new Brush Sequence Layer in the Timeline. New Text Layer – creates a new Text Layer in the Time Line. New Video Layer – creates a new Video Layer in the Time Line from the selected device. Clear Canvas – Clears the canvas for the current Brush Layer or for the current frame of the selected Brush Sequence Layer. Set Work Area Begin at Current – Sets the beginning of the work area at the current time slider position. Set Work Area End at Current – Sets the end of the work area at the current time slider position. Set Work Area to Selection – Sets the work area to the in/out points of the selected layer. Resize Time Line to Fit All Layers – resizes the time line so that the beginning is at first frame of the first layer and the end is at the last frame of the last layer. Trim Time Line to Work Area – trims the Time Line to the current size of the Work Area. Update All Layers – updates all layers with modified frames. Clear Cache – Clears the cache for all layers. Enable Automatic Preload – if this option is selected when you open a sequence in Pdplayer it will be loaded automatically without having to press the play button. Preload All Layers – preloads all layers into the cache. Stop Preload – stops the preloading. 58 Pdplayer User’s Manual IX.3. View Menu Figure 51 shows the View Menu. It holds the commands for handling Pdplayer`s interface and the way it displays the different layers. Figure 51. The View Menu Full Screen Mode – Toggles the full screen mode. Timeline – Shows/Hides the timeline area user interface. Layer Stack – shows and hides the layer stack. Information Bar – Shows/Hides the information bar. Layer Properties – Shows/Hides the layer properties panel. Preview Area Tooltip – when this option is selected holding the mouse pointer over a pixel will bring out a tooltip containing information about that pixel. Mask – Shows/Hides the resolution mask in the preview area. Grid – Shows/Hides the workspace grid. Synchronize display – Toggles the vertical synchronization. Prevents tearing but will have a performance hit. Reset/Fit to Window – Resets the workspace pan to the default 0, 0 position and the zoom to 100%/ Fits all visible layers to the preview area performing pan and zoom at the same time. 59 Pdplayer User’s Manual Zoom In – Zooms in the workspace in steps (10%, 20%, 30%, 50%, 100%, 200%, 400%). Zoom Out – Zooms out the workspace in steps (10%, 20%, 30%, 50%, 100%, 200%, 400%). Resize Window to Fit – Resizes the Pdplayer window to fit all viewable layers. Enable secondary playback buttons – When this option is enabled and if you are working with the Timeline hidden you will be able to use the secondary playback buttons by moving your mouse pointer to the bottom part of the screen. Toggle Red Channel – Toggles the visibility of the composition’s red channel in grayscale. Toggle Green Channel – Toggles the visibility of the composition’s green channel in grayscale. Toggle Blue Channel – Toggles the visibility of the composition’s blue channel in grayscale. Toggle Alpha Channel – Toggles the visibility of the composition’s alpha channel in grayscale. Toggle Luma Channel – Toggles the visibility of the composition’s luma channel in grayscale. Toggle Depth Channel – Toggles the visibility of the composition’s depth channel in grayscale. Toggle Red Channel Mode – Toggles the visibility of the composition’s red channel in color. Toggle Green Channel Mode – Toggles the visibility of the composition’s green channel in color. Toggle Blue Channel Mode – Toggles the visibility of the composition’s blue channel in color. 60 Pdplayer User’s Manual IX.4. Play Menu Figure 52 shows the Play Menu. It holds commands for controlling the playback in Pdplayer. Figure 52. The Play menu Play Forward – Plays the work area forward. Play Backward – Plays the work area backwards. Pause – Start/Stop playback. Reverse Playback Direction – Reverses the direction of the playback. Next Frame – Moves the time slider to the composition’s next frame. Previous Frame – Moves the time slider to the composition’s previous frame. Go to First Frame – Moves the time slider to the first frame of the work area. Go to Last Frame – Moves the time slider to the last frame of the work area. Toggle Repeat Mode – Toggles between repeat, ping pong and play once mode. Increase Playback Rate – Increases the playback rate with 1 FPS. Decrease Playback Rate – Decreases the playback rate with 1 FPS. 61 Pdplayer User’s Manual IX.5. Layer Menu Figure 53 shows the Layer Menu, It holds the advanced commands for working with layers. Figure 53. The Layer Menu 62 Pdplayer User’s Manual Go to Begin – Moves the time slider to the beginning of the selected layer. Go to End – Moves the time slider to the end of the selected layer. Go to In Point – Moves the time slider to the In point of the selected layer. Go to Out Point – Moves the time slider to the Out point of the selected layer. Align Begin at Current – Moves the selected layer in the timeline so that the beginning of the layer matches the current time. Align End at Current – Moves the selected layer in the timeline so that the end of the layer matches the current time. Align In at Current – Moves the selected layer in the timeline so that the In point of the layer matches the current time. Align Out at Current – Moves the selected layer in the timeline so that the Out point of the layer matches the current time. Position after next Layer – Positions the first frame of the selected layer after the last frame of the layer below it in the Layer Stack. Set In Point at Current – Sets the In point of the selected layer at the current time. Set Out Point at Current – Sets the Out point of the selected layer at the current time. Move Up – Moves the selected layer one position up in the layer stack. Move Down – Moves selected layer one position down in the layer stack. Shift One Frame to the Left – Moves the selected layer one frame to the left in the timeline. Shift One Frame to the Right – Moves the selected layer one frame to the right in the timeline. Duplicate – Duplicates the selected layer. The new layer will become selected and will appear over the original layer. Duplicate and Split – Duplicates the selected layer and sets the Out point one frame before current time. The new layer will become selected and the In point will be set at current time. Expand into Layers – this option is available only for .vrimg and .exr sequences which have additional layers inside. When executed this command creates additional layers in the composition each of which is displaying one of the layers in the .vrimg or .exr sequence. Add Other Stereo View – adds the other stereo view of a stereo sequence. Pdplayer recognizes certain key words in the path and file name of the loaded sequences in order to find and load the other par part of the stereo sequence. The following words are recognized: "left", "Left", "LEFT", "L", "lf", "LF" identify the left view "right", "Right", "RIGHT", "R", "rt", "RT" identify the right view Resize to Timeline – resizes the current Still image Layer or Embedded Image Layer to the length of the Timeline. Resize to Work Area – resizes the current Still image Layer or Embedded Image Layer to the length of the Work Area. Update Frame – Forces Pdplayer to reload the current frame. Does not work on movie files. Update Modified Frames from Cache – Checks which frames have been updated on the disk since the last caching and removes them from the cache, so they can be reloaded on the next playback. 63 Pdplayer User’s Manual Automatic Update – When this option is on Pdplayer will continuously scan for updated frames and reload them in the cache when needed. Rescan Sequence for New Frames – Checks the sequence for new frames and if there are any loads them in the cache. Watch Sequence for New Frames – watches the sequence for new frames and automatically adds them to the layer. Preload into Cache – loads the sequence into the cache without playing it. Remove Layer from Cache – Removes the layer from the cache so in the next play back it will be reloaded from the hard drive. Disable Caching – Disables caching of the layer and forces direct playback from disk. Embed Layer – embeds a Still Image Layer or an Audio Layer (containing a .WAV file) in the composition so that it can be saved in the in the .pdpcomp file. Replace With… – Opens the standard Open File dialog so a new file which will replace the current can be selected All settings of the layer will be preserved. In case you have multiple layers selected you will have to specify the root folder in which the sequences are placed. Replace with Previous Image – Replaces the current still image layer with the previous image in the directory. Replace with Next Image – Replaces the current still image layer with the next image in the directory. Locate in Explorer – Opens the original location of the layer in Windows Explorer. Open With… – Opens the standard Windows List with programs so you can choose in which program to open the selected layer from within Pdplayer. Reset Position – Resets the selected layer’s position to 0, 0 in the preview area. Half Width Left – Moves the selected layer half of its resolution width to the left in the work space. Half Width Right – Moves the selected layer half of its resolution width to the right in the work space. Half Height Up – Moves the selected layer half of its resolution height upwards in the work space. Half Height Down – Moves the selected layer half of its resolution height downwards in the work space. Nudge Left – Moves the selected layer one pixel to the left in the preview area. Nudge Right – Moves the selected layer one pixel to the right in the preview area. Nudge Up – Moves the selected layer one pixel upwards in the preview area. Nudge Down – Moves the selected layer one pixel downwards in the preview area. Delete – Deletes the selected layer from the composition. 64 Pdplayer User’s Manual X. X.1. Shortcut Keys Default Shortcut Keys Pdplayer has shortcut keys for almost any command you will ever use. The following table lists the default keys and their function. Shortcut Key Command Ctrl + N New composition Ctrl + Delete Delete selected layer Ctrl + A Select all layers Shift + Page Up Move selected layer up in the layer stack Shift + Page Down Move selected layer down in the layer stack Shift + Home Shift + End Move selected layer to the top of the layer stack Move selected layer to the bottom of the layer stack Esc Deselect layer Left Go to previous frame Right Go to next Frame Home Go to first frame End Go to last frame Space Pause Enter Pause , Play backward Up Play forward Numpad * Increase fps Numpad / Decrease fps C Disable/enable layer color corrections Shift + C Disable/enable layer color corrections V Toggle layer visibility Shift + V Toggle layer visibility Q Show/Hide layer stack D Alt + Home Toggle the blend mode of the selected layer between Normal and Difference Set the Work Area beginning at current frame Alt + End Set the Work Area end at current frame I Go to the selected layer’s In Point O Go to the selected layer’s Out Point 65 Pdplayer User’s Manual Shortcut Key Command Shift + I Place In point at current frame Shift + O Place Out point at current frame B Show blue channel in grayscale G Show green channel in grayscale R Show red channel in grayscale A Show alpha channel L Show luma channel Z Show depth channel Shift + B Show blue channel in color Shift + G Show green channel in color Shift + R Show red channel in color [ Align layer’s In Point at current frame ] Align layer’s Out Point at current frame Alt + [ Place In point at current frame Alt + ] Place Out point at current frame Alt + Left Move selected layer to the left in the time line Alt + Right Move selected layer to the right in the time line Alt + Up Move selected layer up in the layer stack Alt + Down Move selected layer down in the layer stack Numpad 5 Toggle zoom factor between 100% and Fit Window Ctrl + Numpad 5 Reset layer position Numpad + Increase zoom factor Numpad - Decrease zoom factor Ctrl + Numpad + Increase zoom factor Ctrl + Numpad - Decrease zoom factor Shift + Left Shift + Right Shift + Up Shift + Down Shift + A Move selected layer to the left in the work space Move selected layer to the right in the work space Move selected layer upwards in the work space Move selected layer downwards in the work space Sets the work area to match the selected layer Ctrl + Shift +H Start the built-in http server F5 Update all layers F11 Toggle full screen F12 Toggle full screen 66 Pdplayer User’s Manual Shortcut Key Command Tab Show/hide the time line Ctrl+ Shift+ Left Move selected layer half its width to the left Ctrl+ Shift+ Right Move selected layer half its width to the right Ctrl+ Shift+ Up Move selected layer half its height upwards Ctrl+ Shift+ Down Move selected layer half its height downwards Shift + D Duplicate layer Ctrl + Shift + D Duplicate and split layer \ Show/hide the property panel Ctrl + M e-mail screen as JPEG Ctrl + Shift + M e-mail frame as JPEG Ctrl + V Ctrl + Shift + V Ctrl + Alt + V Ctrl + C Ctrl + Shift +C Ctrl + Alt + C Paste the contents of the clipboard as a new layer Paste the contents of the clipboard as a new Still Image Layer Paste the image on the clipboard as a new Embedded layer, ignoring other formats Copy the current frame of the selected layer to the clipboard Copy an image of the mask contents to the clipboard Copy an image of the window contents to the clipboard F8 Resize window to fit Work space ~ Show/hide information bar Ctrl + L Add layer U Update frame Shift + U Update modified frame Ctrl + Shift + U Toggle automatic update F3 F4 Previous image of a sequence in a still image layer Next image of a sequence in a still image layer Ctrl + O Open Composition Ctrl + S Save Composition Ctrl + Shift + S Save Composition As… Ctrl + T Create new text layer M Flip layer horizontally Shift + M Flip layer vertically Ctrl + Z Undo Ctrl + Shift + Z Undo K Crop layer Shift + K Crop layer 67 Pdplayer User’s Manual X.2. Shortcut Key Command Shift + Space Preload layer to cache Shift + Esc Stop preload / Toggle Preview Area tooltip Shift + Alt + Left Set the target view for the layer to Left Shift + Alt + Right Set the target view for the layer to Right Shift + Alt + Down Set the target view for the layer to Left Ctrl + Alt + Left Display the left view Ctrl + Alt + Right Display the right view Ctrl + Alt + Down Display both views Ctrl + Alt + Up Switches the left and right view Custom Shortcut Keys In addition to the default shortcut keys you can define your own. The default shortcut keys are defined in a file named pdplayer.keydefs.txt that can be found in the /config folder of the installation directory. You can create your own set of shortcut keys by creating a file named pdplayer.keydefs.txt in the /users folder of the installation directory and add your shortcut keys using the commands listed in the Commands Reference (Section XI). 68 Pdplayer User’s Manual XI. Command Reference Command Description System --attach --cmdfile=filename.txt --transient, --transient={0,1} Attach to an existing Pdplayer and pass it the rest of the command line Execute the commands from filename.txt Start Pdplayer in transient mode, that is, do not save settings on exit Global --back_color=black (dark_grey, green, blue, magenta, white, transparent) Set background color --safe_area=none (blue, orange) Set safe area type --mask_type=none (transparent, crop, crop_safe) Set mask type --mask_size=720,576 Set mask size --grid=0 (1) Turn grid on or off --counter=frame (timecode) Set counter type --repeat_type=none (ping_pong, loop) Set repeat type --fps=29.97 Set fps --timeline=140 Set the timeline length in frames --wa_begin=10 Set work area start frame --wa_end=120 Set work area end frame --time=7 Set current time --zoom=250 Set zoom (in percents) --pan=0,0 Set pan position --frame_base=0 (1) Set frame base (whether frames start from 0 or from 1) --ext_device= {decklink,firewire,vtoaster,bluefish} Set external output type --selected_layer=4 Select the specified track/layer --pp_visible={0,1} --pp_position=0.02,0.98 Set whether the property panel is visible Set the position of the property panel in 0.0-1.0 coordinates --infobar_visible={0,1} Set infobar visibility --window_size=1280,720 Set window size --http_port=80 Set HTTP server port 69 Pdplayer User’s Manual Command Description --always_on_top={0,1} Set the always on top property for the window --brush_size=10 --brush_softness=25 --brush_spacing=5 --brush_color=255,255,255 --brush_opacity=100 Set brush size, softness, spacing, color, or opacity. --global_aspect=1.067 Set global pixel aspect --timeline_visible={0,1} Set whether the timeline is visible --pv_tooltip_enabled={0,1} --spb_enabled={0,1} --automatic_preload={0,1} --always_on_top={0,1} --apply_transforms_to_mask={0,1} --stereo_view={left,right,both|stereo} --stereo_mode={anaglyph,interlaced} --switch_stereo_views={0,1} Enables/disables the preview area tooltip Enables/disables the secondary playback buttons Enables or disables the automatic preload Enables or disables the always on top mode Controls whether pan, zoom and global aspect are applied to the mask Displays the left view, the right view, or a stereo view Sets the stereo mode to anaglyph or interlaced Switches the left and right view Layer Properties --range=1-10,12,13,20-80/2 (first-last/step) --still_image --force_sequence Select a range of frames from a sequence. Must immediately follow the file name. Example: pdplayer.exe d:\footage\sequence.####.tga -range=1-200/2 Add a still image layer instead of autodetecting a sequence. Must immediately follow the file name. Add a sequence layer, even if the file doesn't exist or the sequence has a single frame. Must immediately follow the file name. --begin=8 Set layer starting frame on the timeline --length=25 Set layer length in frames --in_point=4 Set layer in point --out_point=84 Set layer out point --name=foo Set layer name --position=0,0 Set layer position --alpha={ignore,normal,pm,mask} Set layer alpha mode --blend={normal,add,multiply,screen,difference} Set layer blend mode --depth={ignore,replace,combine} Set layer depth mode --opacity=0..100 Set layer opacity --invert_color=0,1 Invert layer color --invert_alpha=0,1 Invert layer alpha --invert_depth=0,1 Invert layer depth 70 Pdplayer User’s Manual Command Description --color_space={default,linear,srgb|sRGB} Set layer color space --lookup_table=filename Set layer lookup table --lookup_table=default, --lookup_table="" Reset layer lookup table to default --exposure=2.4 Set layer exposure --soft_clip=3.1 Set layer soft clip --lift=0.14, --lift_r=-0.01 --gamma=1.4, --gamma_r=1.8 --gain=1.2, --gain_r=0.8 Set layer lift; --lift_r, --lift_g, --lift_b are per channel Set layer gamma; --gamma_r, -gamma_g, --gamma_b are per channel Set layer gain; --gain_r, --gain_g, -gain_b are per channel --brightness=-0.1 Set layer brightness --contrast=0.4 Set layer contrast --hue=180 Set layer hue shift --saturation=-8 Set layer saturation shift --disable_cc=0,1 Disable color corrections --auto_update=0,1 Set layer auto update mode --disable_caching=0,1 Disable caching for this layer --pixel_aspect=1.067 Set layer pixel aspect --scale=150 --scale_x=150 --scale_y=150 --flip_x={0,1} --filp_y={0,1} --border=255,255,255 --border=none Set layer scale Flip layer horizontally or vertically Set layer border --border={0,1} Enable/disable layer border --crop=X,Y,W,H --crop=none Set layer crop rectangle --text=0,0,"Lorem ipsum" Set layer text to "Lorem ipsum". --text_align_x={left,center,right} Set horizontal text alignment. --text_align_y={top,center/middle,bottom} Set vertical text alignment. --text_font="Times New Roman" Set text font to "Times New Roman" --text_size=18 Set text size to 18px. --text_bold={0,1} Set whether the text is bold. --text_italic={0,1} Set whether the text is italic --text_color=R,G,B Set text color --text_outline_color=R,G,B; --text_outline_color=none --text_shadow_color=R,G,B; --text_shadow_color=none --text_back_color=A,R,G,B; --text_back_color=none --fade_in=15 --fade_out=15 Set text outline color Set text shadow color Set text background color. A is the alpha and controls the opacity Set fade in or fade out portion, in frames 71 Pdplayer User’s Manual Command Description --primary_key=R,G,B,S,T --primary_key=none --secondary_key=R,G,B,S,T --secondary_key=none Set primary or secondary color key to (R, G, B), slope S, tolerance T. --image_layer="Diffuse" Set the image layer by name --image_layer="" Reset the image layer to the default --image_layer_index=5 Set the image layer by index --target_view={left,right,both} Set the target view --layer_safe_area={0,1} Enable/disable the per-layer safe area --border_color=R,G,B Set the layer border/safe area color (without enabling the border) --layer_channels={r_grayscale,r_color,r_hidden, g_grayscale,g_color,g_hidden, b_grayscale,b_color,b_hidden,rgb,alpha,luma,depth} Set the layer channnels Commands Note: While the commands in this section can be used from the command line, their primary purpose is to be bound to keys using pdplayer.keydefs.txt (where they are not preceded by --.) The reverse is also true; while the options in the preceding two sections are intended to be used from the command line, they can too be bound to a hot key, again, not preceded by --. --layer_delete_selected Delete selected layer --layer_delete_all Delete all layers --layer_select_up Select previous layer --layer_select_down Select next layer --layer_select_first Select first layer --layer_select_last Select last layer --layer_select_none Select no layer --layer_select_all Select all layers --layer_move_selected_up Move selected layer up in Z-order --layer_move_selected_down Move selected layer down in Z-order --play_forward --play_backward --toggle_pause Start playing forward, or pause if already playing forward Start playing backward, or pause if already playing backward Pause or resume playing if already paused --reverse_playback_direction Reverse playback direction --first_frame Go to first work area frame --next_frame Advance one frame --prev_frame Go back one frame --last_frame Go to the last work area frame 72 Pdplayer User’s Manual Command Description --toggle_repeat Toggle repeat mode --increase_fps Increase frames per second --decrease_fps Decrease frames per second --workarea_set_begin Set work area beginning at the current frame --workarea_set_end Set work area end at the current frame --layer_go_to_begin Go to layer start --layer_go_to_end Go to layer end --layer_go_to_in Go to layer in point --layer_go_to_out Go to layer out point --layer_align_begin Align layer start at current frame --layer_align_end Align layer end at current frame --layer_align_in Align layer in point at current frame --layer_align_out Align layer out point at current frame --layer_shift_left Shift layer left one frame --layer_shift_right Shift layer right one frame --increase_zoom_factor Increase zoom factor --decrease_zoom_factor Decrease zoom factor --reset_zoom_factor Reset zoom factor --reset_pan_position Reset pan position --reset_pan_and_zoom --reset_layer_position --layer_move_left --layer_move_right --layer_move_up --layer_move_down --layer_set_in_at_current --layer_set_out_at_current --workarea_set_to_selection --channel_b --channel_g --channel_r Reset pan and zoom, or zoom to fit window if already reset Reset the position of the selected layer to 0,0 Nudge the selected layer one pixel to the left Nudge the selected layer one pixel to the right Nudge the selected layer one pixel up Nudge the selected layer one pixel down Set the in point of the selected layer at the current frame Set the out point of the selected layer at the current frame Set the work area to the in/out points of the selected layer Toggle green channel display between RGBA, grayscale, green, or hidden Toggle blue channel display between RGBA, grayscale, blue, or hidden Toggle red channel display between RGBA, grayscale, red, or hidden --channel_a Toggle alpha channel --channel_l Toggle luma --channel_z Toggle depth channel 73 Pdplayer User’s Manual Command Description --toggle_timeline Toggle the timeline --layer_half_width_left --layer_half_width_right Move selected layer half width to the left Move selected layer half width to the right --layer_half_height_up Move selected layer half height up --layer_half_height_down Move selected layer half height down --layer_duplicate Duplicate current layer --layer_duplicate_and_split Duplicate current layer, splitting it at the current frame --layer_remove_from_cache Remove selected layer from cache --layer_toggle_disablecache Toggle caching for the selected layer --layer_toggle_autoupdate Toggle automatic update for the selected layer --toggle_property_panel Toggle the layer property panel --toggle_mask Toggle mask --toggle_grid Toggle grid --toggle_vsync Toggle display synchronization -layer_rescan_sequence Rescan the sequence of the selected layer, looking for new or removed frames --toggle_infobar Toggle the infobar --http_start Start HTTP server --http_stop Stop HTTP server --http_toggle Toggle HTTP server --cache_clear Clear all cache --toggle_fullscreen Toggle full screen mode --mail_screen_as_jpeg E-mail screenshot as JPEG --mail_screen_as_png E-mail screenshot as PNG --mail_mask_as_jpeg --mail_mask_as_png --mail_frame_as_jpeg --mail_frame_as_png --clipboard_paste --clipboard_paste_frame --clipboard_paste_image --clipboard_copy_layer --clipboard_copy_mask --clipboard_copy_screen --clipboard_copy_layer_as_nk E-mail the contents of the current mask as JPEG E-mail the contents of the current mask as PNG E-mail the current frame of the selected layer as JPEG E-mail the current frame of the selected layer as PNG Paste the contents of the clipboard as a new layer Paste the contents of the clipboard as a new single frame layer Paste the image on the clipboard as a new layer, ignoring other formats Copy the current frame of the selected layer to the clipboard Copy an image of the mask contents to the clipboard Copy an image of the window contents to the clipboard Copy the the selected layer to the clipboard as a Nuke script 74 Pdplayer User’s Manual Command --locate_in_explorer --open_with --resize_window_to_fit Description Open Windows Explorer on the current frame of the selected layer Show the "Open With..." dialog for the current frame of the selected layer Resize the Pdplayer window to fit the visible layers --add_layer Open the Add Layer dialog --save_screen_as Open the Save Screen As dialog --save_frame_as Open the Save Frame As dialog --save_frame_as=filename Save the current frame as 'filename' --exit Exit Pdplayer --layer_update_frame Update current frame --layer_update_modified Remove modified frames from cache --layer_replace_with_previous --layer_replace_with_next --layer_replace_with --layer_replace_with=filename --layer_replace_with_image=filename Replace an image layer with the previous image in the directory Replace an image layer with the next image in the directory Open the Replace with... dialog and replace the current layer Replace the current layer with 'filename' Replace the current layer with 'filename', treating it as a still image --layer_flip_x --layer_flip_y Flip layer horizontally or vertically --layer_toggle_visible Toggle layer visibility --layer_toggle_disable_cc Disable/enable layer color corrections --new_adjustment_layer --new_adjustment_layer=W,H,L --new_brush_layer --new_brush_layer=W,H,L --new_brush_sequence_layer --new_brush_sequence_layer=W,H,L --new_text_layer --new_text_layer=W,H,L Adds a new adjustment layer (with the specified width, height, and length) Adds a new brush layer Adds a new brush sequence layer Adds a new text layer --save_mask_as_image Opens the "Save Mask as Image" dialog --save_mask_as_image=filename Saves the current mask as 'filename' --save_mask_as_sequence --save_mask_as_sequence= file.ext,codec,quality,target Opens the "Save Mask as Sequence" dialog Saves the current mask as a sequence or a movie. The parameters are optional. For AVI or Quicktime, the available values for 'codec' can be seen in the Save Mask As dialog. For TGA images, 'codec' can be 'none' or 'rle'. 'quality' can be a value between 1 and 100. 'target' can be windows (default) or mac. --save_layer_as Opens the "Save Layer as" dialog --save_layer_as=file.ext,codec,quality,target Saves the current layer as a sequence or a movie --clear_canvas Clear layer canvas --layer_toggle_crop Enable/disable layer crop rectangle 75 Pdplayer User’s Manual Command --layer_resize_to_timeline --layer_resize_to_workarea --layer_preload_into_cache Description Resizes a single-frame layer to cover the timeline Resizes a single-frame layer to cover the work area Preload the selected layer into the cache --toggle_automatic_preload Toggles the automatic preload --toggle_pv_tooltip Toggles the preview area tooltip --save_composition_as Open the Save Composition As dialog --save_composition_as=filename Saves the current composition as 'filename' --save_composition Saves the current composition --open_composition Open the Open Composition dialog --new_composition Discards the current composition --toggle_always_on_top Toggles the always on top mode --export_composition_as Open the Export Composition As dialog --cache_stop_preload Stops preloading a layer --add_recent_layer=K Add the recent layer with index K (starting from 1) as if chosen from the Add Recent menu --timeline_fit_all_layers Resize timeline to fit all layers --timeline_trim_to_workarea Trim timeline to work area --layer_position_after Position the in point of the selected layer at the out point of the layer beneath --toggle_layer_stack Toggle layer stack --update_all_layers --layer_toggle_difference --embed_layer Update all layers as if by using -layer_update_frame and -layer_update_modified on each Toggle the blend mode of the selected layer between Normal and Difference Embed a still image or an audio layer into the composition --preload_all_layers Preload all layers into cache --switch_stereo_views Switch the left and right view --expand_into_layers Expand the current layer into its corresponding image layers --layer_select_all Select all layers --add_other_stereo_view Add the other stereo view 76 Pdplayer User’s Manual XII. Known Limitations This section lists the known limitations of Pdplayer. XII.1. Limitations common to 32 bit and 64 bit versions Pdplayer cannot create AVI files larger than 2 GB. The classic AVI format files cannot be larger than 2 GB in size. Pdplayer cannot yet create OpenDML format AVI files that do not have this limitation. XII.2. Limitations of the 32 bit version Pdplayer (as a 32 bit application) cannot access more than 2 GB of memory on a 32 bit version of Windows, and more than 4 GB on a 64 bit version of Windows. In some situations (a machine with 4 GB running a 32 bit version of Windows) this can lead the free memory indicator to report more than 50%, whereas in fact this memory is not available for use by Pdplayer. XII.3. Limitations of the 64 bit version A 64 bit application is not allowed to load or interoperate with 32 bit DLLs. As a consequence, Pdplayer cannot load or create Quicktime movies because Apple has not yet provided a 64 bit version of Quicktime for Windows. Most AVI codecs do not have a 64 bit version, which makes the support for AVI files extremely limited. Uncompressed AVI files do work, though, subject to the 2 GB limitation above. RTV files do not work, even if rtvlib2.dll is installed. The e-mail features only work if the default mail client is 64 bit. Note that Outlook Express is 64 bit under Windows XP64, but Outlook is not, and does not work when invoked from a 64 bit application.