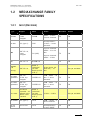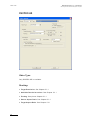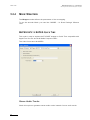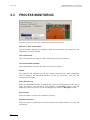
1
User’s Manual Version 1.16 - May 2009 Video Transcoding and Wrapping Software MediaXchange Version 1.16 – User’s Manual Issue 1.16.D Author: Serge Comes - EVS Broadcast Equipment – May 2009 C OPYRIGHT EVS Broadcast Equipment – Copyright © 2004-2009. All rights reserved. D ISCLAIMER The information in this manual is furnished for informational use only and subject to change without notice. While every effort has been made to ensure that the information contained in this user manual is accurate, up-to-date and reliable, EVS Broadcast Equipment cannot be held responsible for inaccuracies or errors that may appear in this publication. I MPROVEMENT R EQUESTS Your comments will help us improve the quality of the user documentation. Do not hesitate to send improvement requests, or report any error or inaccuracy in this user manual, by e-mail to [email protected]. 1 Issue 1.16.D MediaXchange Version 1.16 User’s Manual Author: Serge Comes - EVS Broadcast Equipment – May 2009 Table of Contents TABLE OF CONTENTS .................................................................................................... 2 1. INTRODUCTION....................................................................................................... 4 1.1 KEY FEATURES..........................................................................................................................4 1.2 MEDIAXCHANGE FAMILY SPECIFICATIONS............................................................................5 1.2.1 Input (Decoder) .......................................................................................................................5 1.2.2 Output (Encoder) ....................................................................................................................8 2. HARDWARE RECOMMENDATIONS .................................................................... 11 3. SOFTWARE INSTALLATION ................................................................................ 12 3.1 PROCEDURE ............................................................................................................................13 3.1.1 Previous versions clean-up ...................................................................................................13 3.1.2 MediaXchange Installation ....................................................................................................13 4. XSECURE LICENSE KEYS ................................................................................... 19 4.1 5. MEDIAXCHANGE SOFTWARE OPTIONS................................................................................19 SYSTEM CONFIGURATION .................................................................................. 21 5.1 GENERAL SETTINGS ...............................................................................................................21 5.1.1 History Logs ..........................................................................................................................22 5.1.2 Scan Mode............................................................................................................................22 Miscellaneous ..........................................................................................................................................................23 TXT Files..................................................................................................................................................................23 5.1.3 EVS Trimming.......................................................................................................................25 5.1.4 Graphic Files Encoding .........................................................................................................26 5.1.5 Post Processing ....................................................................................................................26 5.1.6 Miscellaneous .......................................................................................................................28 5.2 CODEC SETTINGS ...................................................................................................................30 5.2.1 UP/DOWN conversion ..........................................................................................................30 5.2.2 Mode: Encoders....................................................................................................................32 M-JPEG - EVS XT....................................................................................................................................................33 DV Family.................................................................................................................................................................36 DVCPRO HD............................................................................................................................................................38 IMX – D10 ................................................................................................................................................................40 MPEG-2 ...................................................................................................................................................................43 MPEG-1 ...................................................................................................................................................................45 XDCAM HD Family ..................................................................................................................................................48 Windows Media........................................................................................................................................................50 Avid DNxHD® Encoder ............................................................................................................................................52 H.264 Encoder .........................................................................................................................................................55 Audio PCM ...............................................................................................................................................................57 5.2.3 Graphic Files Encoder...........................................................................................................58 5.2.4 Mode: Wrappers ...................................................................................................................60 MJPEG EVS to MJPEG Quick Time ........................................................................................................................60 MJPEG Quick Time to MJPEG EVS ........................................................................................................................62 IMX EVS to IMX MXF OP1A ....................................................................................................................................63 IMX MXF OP1A to IMX EVS ....................................................................................................................................64 2 MediaXchange Version 1.16 – User’s Manual Issue 1.16.D Author: Serge Comes - EVS Broadcast Equipment – May 2009 IMX EVS to IMX Quick Time ....................................................................................................................................65 IMX Quick Time to IMX EVS ....................................................................................................................................67 IMX EVS to Avid MXF OPAtom ...............................................................................................................................68 IMX Avid MXF OPAtom to IMX EVS ........................................................................................................................69 IMX EVS to AVI........................................................................................................................................................70 AVID DNXHD® EVS to Quick Time .........................................................................................................................71 AVID DNXHD® Quick Time to EVS .........................................................................................................................72 DNxHD EVS to Avid MXF OPAtom..........................................................................................................................73 DNxHD Avid MXF OPAtom to IMX EVS ..................................................................................................................74 MPEG2 HD Iframe EVS to AVI ................................................................................................................................75 EVS to EVS 2MB Blocks..........................................................................................................................................76 Apple ProRes EVS to QuickTime.............................................................................................................................77 Apple ProRes QuickTime to EVS.............................................................................................................................79 6. GUI OVERVIEW ..................................................................................................... 80 6.1 6.2 6.3 6.4 6.5 7. APPLICATION MODES .............................................................................................................81 PROCESS MONITORING .........................................................................................................82 HISTORY LOG...........................................................................................................................83 ALARMS ....................................................................................................................................84 DESTINATION DRIVE STATUS ................................................................................................84 APPLICATION MODES.......................................................................................... 85 7.1 SINGLE MODE ..........................................................................................................................85 7.1.1 Description of the interface ...................................................................................................86 Input ......................................................................................................................................................................... 86 Output ...................................................................................................................................................................... 86 7.1.2 How to Convert a File in Single Mode ...................................................................................89 7.2 BATCH MODE ...........................................................................................................................90 7.2.1 Description of the interface ...................................................................................................90 Default Group Box.................................................................................................................................................... 90 Input Area................................................................................................................................................................. 94 7.2.2 How to Convert a List of Files ...............................................................................................94 7.3 SCAN MODE .............................................................................................................................95 7.3.1 Description of the interface ...................................................................................................96 Output Group Box .................................................................................................................................................... 96 Scanning Area.......................................................................................................................................................... 98 7.3.2 Procedure .............................................................................................................................99 7.3.3 Conversion Criteria .............................................................................................................100 3 Issue 1.16.D MediaXchange Version 1.16 User’s Manual Author: Serge Comes - EVS Broadcast Equipment – May 2009 1. Introduction MediaXchange is the latest software application to bridge the gap between EVS world-renowned broadcast production servers and 3 r d party tools. Whether in live production or in post-production, it helps to build a more transparent workflow by converting media between an EVS XT[2] server and other vendors' applications. MediaXchange is the ideal complement to EVS Integrated Production System (IPS). Thanks to its support for the industry standard MXF file format, MediaXchange eases the transition to new environments. For example, footage shot on Sony XDCAM™ Panasonic P2™ camcorders can be made directly available on EVS XT[2] series servers for live production with a maximum efficiency. As another example, content produced on an XT[2] server, can be re-edited on popular editors such as Apple Final Cut Pro™, Avid™ thanks to MediaXchange batch conversion processes. 1.1 KEY FEATURES • Supports all popular codecs: MPEG-1, MPEG-2, MPEG-4, DV, DVCPRO-25/50, WM9, IMX-D10, M-JPEG, DVCPRO HD, XDCAM HD, Avid DNxHD® Codec, H264. • Interoperates with MXF and new video formats (P2™, XDCAM™) in both low and high resolution • Generation of sequence from graphic files & sequences • Natively supports SD and HD (encoder mode) • UP/DOWN conversion • Seamlessly interfaces with popular Non-Linear Editors: Apple Final Cut Pro™, Avid™, etc. • Advanced proxy generator • Flexible workflow with powerful automation and batch processing interface • Runs on a standard Windows XP™ platform 4 MediaXchange Version 1.16 – User’s Manual Issue 1.16.D Author: Serge Comes - EVS Broadcast Equipment – May 2009 1.2 MEDIAXCHANGE FAMILY SPECIFICATIONS 1.2.1 INPUT (DECODER) Type Wrapper Video Audio Metadata Status TC OK D V C AM MXF OP-1A, Frame wrapped DVCAM. AES3 – 16 bits – 2 mono channels D V AV I AVI (type 2) DV25 uncompressed – 16 bits – 2 mono channels 4 mono channels AES3 – 16 or 24 bits OK MXF OP-1A, frame wrapped D10 (IMX) MXF OP-1a XDCAM HD MXF OP-1A MPEG-4 (Advanced real time Simple profile level 4). A-law (8 kHz, 48 kbits/sec) – 16 bits P2 HiRes DVCPRO2 5 MXF OPATOM, clip wrapped DVCPRO 25 PCM – AES3 – 16 bits – 2 mono channels TC OK P2 HiRes DVCPRO5 0 MXF OPATOM, clip wrapped DVCPRO 50 PCM – AES3 – 16 bits – 2 mono channels TC OK P2 LoRes Quicktime extended – as defined in the MPEG-4 ISO standard MPEG-4 (Advanced real time Simple profile level 4) 16 bits – 24 kHz Not yet available D V 2 5 AV I AVI (type 2) DV 25 PCM – 16 bits – 2 mono channels OK DV 25 Quick Quick Time DV 25 Uncompressed – 16 bits (SOWT: IMX X D C AM HD X D C AM sub (Proxy) TC OK TC OK 8 mono channels AES3 – 16 bits Not yet available TC OK 5 Issue 1.16.D MediaXchange Version 1.16 User’s Manual Author: Serge Comes - EVS Broadcast Equipment – May 2009 Type Wrapper Video Audio Metadata Status bytes inverses) – 2 mono channels Time DV 25 Raw None DV 25 PCM – 16 bits – 2 mono channels OK DVCPRO 2 5 AV I AVI (type 2) DVCPRO 25 PCM – 16 bits – 2 mono channels OK DVCPRO 25 QuickTim e QuickTime DVCPRO 25 Uncompressed – 16 bits (SOWT: bytes inverses) – 2 mono/stereo channels DVCPRO 25 Raw None DVCPRO 25 PCM – 16 bits – 2 mono channels OK DVCPRO 5 0 AV I AVI (type 2) DVCPRO 50 PCM – 16 bits – 4 mono/stereo channels OK TC OK DVCPRO 50 QuickTim e QuickTime DVCPRO 50 Uncompressed – 16 bits (SOWT: bytes inverses) – 2 mono/stereo channels DVCPRO 50 Raw None DVCPRO 50 PCM – 16 bits – 4 mono channels DVCPRO HD Quick Time Quick Time DVCPRO HD PCM – 16 bits – 2 mono/stereo channels TC OK EVS MXF SD MXF Proprietary MJPEG (Huffman tables not included) uncompressed – 24 bits – 4 or 8 mono channels TC, ClipName , Keywords OK for decoding, DPS conversion, QT conversion EVS QT SD QuickTime MJPEG-A PCM – 16 bits – 2 mono/stereo channels TC OK for conversion to EVS MXF SD EVS MXF HD MXF Proprietary MJPEG (Huffman tables not included) – 1 band uncompressed – 24 bits – 4 or 8 mono channels TC, ClipName , Keywords OK for decoding, QT conversion EVS QT HD QuickTime MJPEG-A PCM – 16 bits – 2 mono channels TC OK for conversion to EVS MXF HD 6 TC OK OK MediaXchange Version 1.16 – User’s Manual Issue 1.16.D Author: Serge Comes - EVS Broadcast Equipment – May 2009 Type Wrapper Video Audio Metadata Status MPEG-1 PS or TS MPEG-1 MPEG-1 Layer 2 – 16 bits TC OK MPEG-2 PS or TS MPEG-2 (MP@ML) MPEG-1 Layer 2 – 16 bits TC OK TC OK TC OK TC OK IMX OP1a MXF OP-1a D10 (IMX) 4 mono channels AES3 – 16 or 24 bits 8 mono channels AES3 – 16 bits IMX EVS MXF MXF EVS D10 (IMX) 4 mono channels AES3 – 16 or 24 bits 8 mono channels AES3 – 16 bits 4 mono channels AES3 – 16 bits IMX Quick Time Quick Time DPS Velocity DPS, DVA MJPEG (DPS) uncompressed – 24 bits – 2 mono channels (DVA) TC (in DVA file) OK, only to EVS MXF SD Av i d DNxHD® Decoder MXF EVS MXF EVS Avid DNxHD® Codec 8 audios channels TC OK Pictures BMP, TGA, TIFF Bitmap D10 (IMX) 2 mono/stereo channels OK 7 Issue 1.16.D MediaXchange Version 1.16 User’s Manual Author: Serge Comes - EVS Broadcast Equipment – May 2009 1.2.2 OUTPUT (ENCODER) Type Wrapper Video Audio Metadata Status TC OK DVCAM MXF OP-1A, Frame wrapped DVCAM. AES3 – 16 bits – 2 mono channels DV AVI AVI (type 2) DV25 uncompressed bits – 2 channels – 16 mono OK 4 mono channels AES3 – 16 or 24 bits MXF OP-1A, frame wrapped D10 (IMX) MXF OP-1a XDCAM HD 2 audios only MXF OP-1A MPEG-4 (Advanced real time Simple profile level 4). A-law (8 kHz, 48 kbits/sec) – 16 bits P2 HiRes DVCPRO25 MXF OP-ATOM, clip wrapped DVCPRO 25 PCM – AES3 – 16 bits – 2 mono channels TC OK P2 HiRes DVCPRO50 MXF OP-ATOM, clip wrapped DVCPRO 50 PCM – AES3 – 16 bits – 2 mono channels TC OK P2 LoRes Quicktime extended – as defined in the MPEG-4 ISO standard mpeg4 (Advanced real time Simple profile level 4) 16 bits – 24 kHz Not yet available DV 25 AVI AVI (type 2) DV 25 PCM – 16 bits – 2 mono channels OK DV 25 Quick Time Quick Time DV 25 Uncompressed – 16 bits (SOWT: bytes inverses) – 2 mono channels DV 25 Raw None DV 25 PCM – 16 bits – 2 mono channels OK DVCPRO 25 AVI AVI (type 2) DVCPRO 25 PCM – 16 bits – 2 mono channels OK IMX XDCAM HD XDCAM sub (Proxy) 8 mono channels AES3 – 16 bits TC OK TC OK - channels Not yet available TC OK DVCPRO 25 QuickTime QuickTime DVCPRO 25 Uncompressed – 16 bits (SOWT: bytes inverses) – 2 mono/stereo channels DVCPRO 25 Raw None DVCPRO 25 PCM – 16 bits – 2 mono channels OK DVCPRO 50 AVI AVI (type 2) DVCPRO 50 PCM – 16 bits – 4 mono channels OK DVCPRO 50 QuickTime DVCPRO 50 Uncompressed bits (SOWT: 8 – 16 bytes TC TC OK OK MediaXchange Version 1.16 – User’s Manual Issue 1.16.D Author: Serge Comes - EVS Broadcast Equipment – May 2009 Type Wrapper Video QuickTime Audio Metadata Status inverses) – 2 mono/stereo channels DVCPRO 50 Raw None DVCPRO 50 PCM – 16 bits – 4 mono channels DVCPRO HD Quick Time Quick Time DVCPRO HD PCM – 16 bits – 2 mono/stereo channels TC OK Video Audio Metadata Status MXF Proprietary MJPEG (Huffman tables not included) uncompressed – 24 bits – 4 or 8 mono channels TC OK for encoding, DPS conversion, QT conversion QuickTime MJPEG-A PCM – 16 bits – 2 mono channels TC OK for conversion to EVS MXF SD MXF Proprietary MJPEG (Huffman tables not included) – 1 band uncompressed – 24 bits – 4 or 8 mono channels TC OK for encoding, QT conversion EVS QT HD QuickTime MJPEG-A PCM – 16 bits – 2 mono/stereo channels TC OK for conversion to EVS MXF HD MPEG-1 PS or TS MPEG-1 MPEG-1 Layer 2 – 16 bits TC OK MPEG-2 PS or TS MPEG-2 (MP@ML) MPEG-1 Layer 2 – 16 bits TC OK MPEG-4 Windows Media MPEG-4 WM audio 9 – 2 mono channels Type EVS SD Wrapper MXF EVS QT SD EVS HD MXF OK OK 4 mono channels AES3 – 16 or 24 bits IMX OP-1a MXF OP-1a D10 (IMX) 8 mono channels AES3 – 16 bits IMX MXF EVS IMX Quick Time TC OK TC OK - 4 mono channels AES3 – 16 or 24 bits MXF EVS D10 (IMX) 8 mono channels AES3 – 16 bits Quick Time - D10 (IMX) 4 mono channels AES3 – 16 bits – 2 mono/stereo channels TC OK TC, ClipName, Keywords (optional – registry key) (DVA) OK, only from EVS MXF SD DPS Velocity DPS, DVA & WAV MJPEG (DPS) uncompressed – 24 bits – 2 mono (DVA) channels or 4 monos (DVA+WAV) WM 7o Windows Media WM 7 WM audio 7 – 2 mono channels OK WM 8o Windows Media WM 8 WM audio 8 – 2 mono channels OK 9 Issue 1.16.D MediaXchange Version 1.16 User’s Manual Author: Serge Comes - EVS Broadcast Equipment – May 2009 Type Wrapper Video Audio WM audio 9 – 2 mono channels WM 9o Windows Media WM 9 Avid DNxHD® Encoder MXF EVS MXF EVS Avid Codec H264 MP4 H264 8 audios channels Audio PCM Wav / PCM 10 DNxHD® 8 audios channels Metadata Status OK TC OK OK / OK MediaXchange Version 1.16 – User’s Manual Issue 1.16.D Author: Serge Comes - EVS Broadcast Equipment – May 2009 2. Hardware Recommendations The MediaXchange software is installed on a workstation operating under Windows XP or Windows 2003 server. The minimum system requirements are: • Workstation or laptop • XP Pro or Windows 2003 server OS • CPU Pentium P4, 2.0 Ghz + • 512 MB RAM • GigE connector compatible Jumbo Frame • USB2 connector (for P2 link) • VGA 1024x768 The MediaXchange software runs either on a standalone workstation or EVS XFile & XStore servers. 11 Issue 1.16.D MediaXchange Version 1.16 User’s Manual Author: Serge Comes - EVS Broadcast Equipment – May 2009 3. Software Installation A new installation procedure has been set up since the release 1.14.20. • EVSEditFramework: MediaXchange no longer uses the EVS Edit framework installed on the computer (in case it is installed). This new version of MediaXchange uses his own framework DLLs which are installed with the installshield. This installshield installs all the DLLs except the DV, DVCPRO HD and MPEG codecs that must be installed separately. • Encoder Dll (DV,DVCPRO,Mpeg): All Encoder Dll are including into the MediaXchange installshield. • XSecure: From version 1.06.02 onwards, XSecure will be used instead of the Dallas dongle to secure MediaXchange software. XSecure is automatically installed with MediaXchange installshield. 12 MediaXchange Version 1.16 – User’s Manual Issue 1.16.D Author: Serge Comes - EVS Broadcast Equipment – May 2009 3.1 PROCEDURE 3.1.1 PREVIOUS VERSIONS CLEAN-UP 1. Uninstall previous versions of MediaXchange. 2. For version older than v1.08.04, delete the MediaXchange and EVSEditFramework directories in C:\Program Files\EVS Broadcast Equipment\ . In the registry, suppress following keys: a. \HKEY_CURRENT_USER\Software\EVS Broadcast Equipment\MediaXchange b. \HKEY_LOCAL_MACHINE\Software\EVS Broadcast Equipment\EvsEdit Framework\ 3.1.2 MEDIAXCHANGE INSTALLATION 1. Copy all the files in the installshield directory in a temp directory (e.g. C:\Install Software\MediaXchange\ ). 2. Run MediaXchange installshield MXC_setup_1.16.xx.exe and follow the steps of the Setup Wizard. 3. Press NEXT. 13 Issue 1.16.D MediaXchange Version 1.16 User’s Manual Author: Serge Comes - EVS Broadcast Equipment – May 2009 4. Select the destination directory to install the new software and press NEXT. 14 MediaXchange Version 1.16 – User’s Manual Issue 1.16.D Author: Serge Comes - EVS Broadcast Equipment – May 2009 5. Select Install MS libraries if you install MediaXchange 1.16 for the first time. This option will install the Visual C++ 2005 redistributable DLLs, which are used in MediaXchange. 6. Press INSTALL to launch the MediaXchange installation. 15 Issue 1.16.D MediaXchange Version 1.16 User’s Manual Author: Serge Comes - EVS Broadcast Equipment – May 2009 7. XSecure Manager will be installed now. Press NEXT. 8. Select the destination directory to install the new software and then press NEXT. 16 MediaXchange Version 1.16 – User’s Manual Issue 1.16.D Author: Serge Comes - EVS Broadcast Equipment – May 2009 9. Select the Start Menu Folder for XSecure Manager. Press NEXT. 10. Press INSTALL to begin the installation. The XSecure software installation is successfully completed. 17 Issue 1.16.D MediaXchange Version 1.16 User’s Manual Author: Serge Comes - EVS Broadcast Equipment – May 2009 The MediaXchange software installation is successfully completed. Note that a shortcut to the MediaXchange application has been automatically created on the desktop. Note The installer includes a registry key that disables the autorun function on USB keys to avoid virus intrusion 18 MediaXchange Version 1.16 – User’s Manual Issue 1.16.D Author: Serge Comes - EVS Broadcast Equipment – May 2009 4. XSecure License Keys From MediaXchange v.1.06.02, XSecure is used instead of the Dallas dongle to secure MediaXchange software. XSecure is automatically installed with MediaXchange installshield. XSecure uses hardware information from the device where MediaXchange is running. This means it is impossible to exchange licenses or codes between devices. Please refer to the XSecure User’s Manual to: 4.1 • Start XSecure Manager • Collect information about your device • Request a license key from the EVS support • Import new licenses keys MEDIAXCHANGE SOFTWARE OPTIONS Since MediaXchange 01.16.xx there are only two options: • MXCBP – 10: Base Package: it is mandatory to run MediaXchange and it allows you to use all the Wrapper conversion (all the old NLE interface XSecure code). • MJPEG EVS to MJPEG Quick Time: to convert an MJPEG EVS MXF file to MOV QuickTime format • MJPEG QuickTime to MJPEG EVS: to convert MJPEG MOV Quick Time format to EVS XT MXF format. • IMX EVS to IMX MXF OP1A: to convert an IMX EVS MXF file to MXF OP1A format • IMX MXF OP1A to IMX EVS: to convert an IMX MXF OP1A file to IMX EVS format • IMX EVS to IMX Avid MXF OPAtom: to convert an IMX EVS MXF file to Avid MXF OPAtom format • IMX AVID MXF OPAtom to IMX EVS: to convert an IMX Avid MXF OPAtom file to IMX EVS format • IMX EVS to IMX AVI: to convert an IMX EVS MXF file to AVI format 19 Issue 1.16.D MediaXchange Version 1.16 User’s Manual Author: Serge Comes - EVS Broadcast Equipment – May 2009 • IMX EVS to IMX Quick Time: to convert an IMX EVS MXF file to Quick Time format • IMX Quick Time to IMX EVS: to convert an IMX Quick Time file to IMX EVS format • AVID DNXHD® EVS to Quick Time: to convert a AVID DNXHD® EVS MXF file to Quick Time format • AVID DNXHD® Quick Time to EVS: to convert a AVID DNXHD® Quick Time file to EVS MXF format • AVID DNXHD® EVS to AVID MXF OPAtom: to convert a AVID DNXHD® EVS MXF file Avid MXF OPAtom format • AVID DNXHD® MXF OPAtom to EVS: to convert a AVID DNXHD® MXF OPAtom file to EVS MXF format • EVS to EVS 2MB Blocks: to convert file to EVS MXF 2MB Blocks format • MPEG2 Intra EVS to MPEG2 Intra AVI: to convert an MPEG2 Intra EVS file to MPEG2 Intra AVI format • Apple ProRes EVS to Quick Time: to convert a ProRes EVS MXF file to Quick Time format • Apple ProRes Quick Time to EVS: to convert a ProRes Quick Time file to ProRes EVS format • MXC – 00: All Option: It allows using all the codec in decoding (import) and encoding (export). 20 • M-JPEG (EVS XT): to encode in EVS M-JPEG compatible with XT server family. • DV Family: to encode using DV family formats (DV 25, DVCPRO 25/50, XDCAM (DVCAM), P2) • DVCPRO HD: to encode using DVCPRO HD format • IMX- D10: to convert to IMX format • MPEG2: to convert to MPEG-2 formats. • MPEG1: to convert to MPEG-1 formats. • XDCAM HD: to convert to XDCAM HD compliant XDCAM HD. • Windows Media: to convert to Windows Media family formats (WM9, MPEG-4) • Avid DNxHD® Encoder: to convert to Avid DNxHD® format • H264 Encoder: to convert to H264 format • Audio PCM: to convert to audio WAV format MediaXchange Version 1.16 – User’s Manual Issue 1.16.D Author: Serge Comes - EVS Broadcast Equipment – May 2009 5. System Configuration The system configuration is available for modifications from the Tools menu. Two levels of configuration are defined: General Settings and Codecs Settings. 5.1 GENERAL SETTINGS 21 Issue 1.16.D MediaXchange Version 1.16 User’s Manual Author: Serge Comes - EVS Broadcast Equipment – May 2009 5.1.1 HISTORY LOGS Use History Files: Select this option to generate history files. An history file is a kind of as-run log which logs the following elements for each job: • date and time of the start and the end of the process • type of conversion • source file • destination file. Use a single history file: Select this option to merge all history logs into a single file. Otherwise, daily files are generated. Output Path: The Output Path field defines the path where the history files are stored. The path can be modified manually or by browsing the folders. If no path is defined, the files will be stored in the current directory of MediaXchange software (typically C : \ P r o g r a m F i l e s \ E V S B r o a d c a s t E q u i p m e n t \ M e d i a X c h a n g e \ ). 5.1.2 SCAN MODE Auto Start Scan Mode: Check this option to start the scan mode automatically after launching MediaXchange. For additional information, see Section 7.3 ‘Scan Mode’ on page 95 . Use File Date/Time: Select this option to use the Date/Time criteria. Otherwise the scan mode will automatically scan the given directory without taking into account the date and time of the file and workstation. See also Section 7.3.3 ’Conversion Criteria’, on page 100 ). • File Date Criteria: The Scan Mode scans files in directories and the decision of conversion is based on several criteria. One of the criteria is based on the Windows properties of the file to be converted. Select either File Creation Date or File Modification Date. 22 MediaXchange Version 1.16 – User’s Manual Issue 1.16.D Author: Serge Comes - EVS Broadcast Equipment – May 2009 Tip As XFile can update metadata information after backup of EVS MXF file, the modification date can change really often. In order to avoid untimely file conversion, it is advised to select this option. • Start Date/time: Choose the date by browsing the Windows calendar. Time is related to Windows time. Check the format is 24h, and not 12h AM/PM. • Delay (min.): Typical value: 0 See conversion criteria defined below to setup correctly these timing parameters. M ISCELLANEOUS Process oldest first: Check this option to start with the oldest file to be scanned in the directory, otherwise alphabetic order is taken into account. TXT F ILES Create TXT File: Select this option to generate a TXT file. This option must be selected in Scan Mode to work properly. This TXT file contains all the information related to the successive conversions applied to the related source file. Use a Single TXT Output Path: Check this option to use the TXT path defined below. TXT Path: Browse and select the path where the TXT file will be stored. If no path is defined, the TXT file will be located in the same directory as the data file. 23 Issue 1.16.D MediaXchange Version 1.16 User’s Manual Author: Serge Comes - EVS Broadcast Equipment – May 2009 Example of TXT File: [M2005/07/13 16:23:44 (Mpeg)] STATUS = Terminated MACHINE = DVBCLIENT1057 SOURCE PATHNAME = C:\test050712\source\PAL_3.mxf DEST PATHNAME = C:\test050712\mpeg2\PAL_3.m2t STARTDATETIME = 13/07/2005 16:23:44 STOPDATETIME = 13/07/2005 16:24:12 CODEC = Mpeg SETTINGS = <EVSEncoderCfg> <VType>MPEG-2</VType> <FType>TS</FType> <GopN>2</GopN> <GopM>1</GopM> <VRate>15000000</VRate> <ARate>256000</ARate> <Stereo>1</Stereo> <InitialTC>00:00:11.20</InitialTC></EVSEncoderCfg> [M2005/07/13 16:24:21 (EVS XT to QuickTime)] STATUS MACHINE SOURCE PATHNAME DEST PATHNAME STARTDATETIME STOPDATETIME CODEC SETTINGS = = = = = = = = Terminated DVBCLIENT1057 C:\test050712\source\PAL_3.mxf C:\test050712\mpeg2\PAL_3.mov 13/07/2005 16:24:21 13/07/2005 16:24:30 EVS XT to QuickTime [M2005/07/13 16:24:34 (EVS XT to Leitch Velocity)] STATUS MACHINE SOURCE PATHNAME DEST PATHNAME STARTDATETIME STOPDATETIME CODEC SETTINGS = = = = = = = = Terminated DVBCLIENT1057 C:\test050712\source\PAL_3.mxf C:\test050712\mpeg2\PAL_3.dps 13/07/2005 16:24:34 13/07/2005 16:24:43 EVS XT to Leitch Velocity [M2005/07/13 16:24:49 (DVC Pro)] STATUS = Terminated MACHINE = DVBCLIENT1057 SOURCE PATHNAME = C:\test050712\source\PAL_3.mxf DEST PATHNAME = C:\test050712\mpeg2\PAL_3.mov STARTDATETIME = 13/07/2005 16:24:49 STOPDATETIME = 13/07/2005 16:25:07 CODEC = DVC Pro SETTINGS = <EVSEncoderCfg> <VRate>25000000</VRate> <VType>DVCPro</VType> <FType>MOV</FType> <InitialTC>00:00:11.20</InitialTC></EVSEncoderCfg> 24 MediaXchange Version 1.16 – User’s Manual Issue 1.16.D Author: Serge Comes - EVS Broadcast Equipment – May 2009 5.1.3 EVS TRIMMING Trimming Mode: See XFile User’s Manual for boundaries definitions. • File In/Out: The whole MXF file is converted • In/Out: Only data between Protect IN & Protect OUT points are converted • Clip In/Out: Only data between IN and OUT (also known as Mark IN & Mark OUT) are converted Guardbands: This value represents the guardband added before and after the values selected in the above-described Trimming Mode option. Build Destination File Name: Select this option to rename the destination file following the structure %cl i p N a m e _ %L S M I D . m x f . If there are some characters which are not allowed for windows file in the clipname they will be replaced by “ _” . Keep Metadata (Full file only): Check this option to keep the metadata when transcoding MJPEG to IMX and vice versa with wrappers as EVS MXF formats. Metadata stored in the EVS MXF source file will be copied into the EVS MXF destination file. Only available with Trimming Mode equals to File In/Out. SuperMotion Mode (Wrappers only): This setting is only available for the rewrapping job only. In transcoding: MediaXchange will always use the Real Time mode. • Real Time [1/2 or 1/3 frames with audio]: MediaXchange will keep only one frame over 2 or 3 (following the Super Motion Rec mode) and keep the audio. Audio. The TC are correct • All Frame [with unsynchronized/without audio]: MediaXchange will keep all the frames of the SSLM Clip. TC are not correct. 25 Issue 1.16.D MediaXchange Version 1.16 User’s Manual Author: Serge Comes - EVS Broadcast Equipment – May 2009 5.1.4 GRAPHIC FILES ENCODING Those settings are related to the generation of files from a bitmap (BMP, TIFF & TGA formats). To be used with any encoder: MJPEG, IMX-D10, etc. System: Select either Pal or NTSC. Duration: Select the duration (only valid for pictures, not for animated sequences). Fill & Key: Generation of 2 synchronous files based on Alpha Channel: one file with the Fill sequence and one file with the Key sequence. Enable Audio: This option allows you to add audio to the sequence created with your graphic files. The audio files must be 16 Bits audio file of 48 kHz (1 to 8 channels). The file format must be Broadcast Wave Uncompressed (BWAVE) (.wav). To add an audio file to your sequence, you have to put it into the same folder as your graphic files. 5.1.5 POST PROCESSING This option is used to generate a post-processing job after the conversion. For example, this XML file could control EVS XFile or XTAccess to restore automatically an EVS MXF clip to an XT server. Enable Post Process: Select this option to generate an XML file once the job is completed. Create GUID FileName: Select this option to generate a unique job XML filename base on a GUID. If you do not select this option, the Job XML filename will be the input “ filename.xml” . Example: 3B9D425B9A2A61438D6B38265B096D9D.xml Enable Post Process: Allows you to prefix the job XML filename. This option is also available into the template keyword for the creation of template XML. See “ C:\Program Files\EVS Broadcast Equipment\MediaXChange\PostProcess\Template Keywords.txt” file. 26 MediaXchange Version 1.16 – User’s Manual Issue 1.16.D Author: Serge Comes - EVS Broadcast Equipment – May 2009 Example: “ MXC_3B9D425B9A2A61438D6B38265B096D9D.xml” if you have put MXC_ as prefix and selected the “ Create GUID FileName” option PostProcess Template: This is the default TPL file used to generate the XML file. MediaXchange usually scans the job directory to find a template to use. Otherwise, this default template is used. The template must be edited accordingly. In case of restore to XT via XFile, please refer to the document XFile XML Jobs v1.10.09.pdf for information about this XML structure. Examples of templates for automatic restore are available in C : \ P r o g r a m F i l e s \ E V S B r o a d c a s t E q u i p m e n t \ P o s t P r o c e s s \ folder for info. Examples: • C:\Program Files\EVS Broadcast Equipment\ mediaxchange.tpl. Restore to Xfile: ##GEN_ID####ID_1## <?xml version="1.0"?> <EVS_XFile_Job_List> <EVS_XFile_Job> <Job_Id>12384</Job_Id> <Job_Creation_Time>0</Job_Creation_Time> <Job_Type>2</Job_Type> <Job_Src_File>##OUTPUT_FILE##</Job_Src_File> <Job_Dest_Id>##ID_1##</Job_Dest_Id> <Job_Dest_User_Nb>10</Job_Dest_User_Nb> <Job_Dest_ClipName>##INPUT_FILE_NAME##</Job_Dest_ClipName> </EVS_XFile_Job> </EVS_XFile_Job_List> • C:\Program Files\EVS Restore to XTAccess: Broadcast Equipment\MediaXchange_XTACCESS.tpl. <?xml version="1.0"?> <EVS_XFile_Job_List> <EVS_XFile_Job> <Job_Id>12384</Job_Id> <Job_Creation_Time>0</Job_Creation_Time> <Job_Src_File>##OUTPUT_FILE##</Job_Src_File> <Job_Type>2</Job_Type> <Job_Dest_XT_IP_Address1>1.1.243.243</Job_Dest_XT_IP_Address1> <Job_Dest_XT_Port1>21</Job_Dest_XT_Port1> <Job_Dest_XT_IP_Address2>1.1.241.241</Job_Dest_XT_IP_Address2> <Job_Dest_XT_Port2>21</Job_Dest_XT_Port2> <Job_Dest_XT_FTP_Login>evs</Job_Dest_XT_FTP_Login> <Job_Dest_XT_FTP_Password>evs!</Job_Dest_XT_FTP_Password> <Job_Dest_Page>3</Job_Dest_Page> <Job_Dest_ClipName>MXC_Created</Job_Dest_ClipName> </EVS_XFile_Job> </EVS_XFile_Job_List> Template Output Path: Browse and select the location where the XML file for post-processing will be copied to. In case of XFile control, you must select the UNC path of the XFile device 27 Issue 1.16.D MediaXchange Version 1.16 User’s Manual Author: Serge Comes - EVS Broadcast Equipment – May 2009 \XFile_XML\Jobs_Incoming\. In case of XTAccess control, you must select the UNC path of the XTAccess device \ X T A c c e s s _ X M L \ J o b s _ I n c o m i n g \ . 5.1.6 MISCELLANEOUS Use Smart Rendering for PLST: Select this option to only transcode content that must be rendered in a PLST sequence. See the CleanEdit User’s Manual for information about Smart Rendering. Serial Number: This is the serial number associated with the generation of an EVS MXF file. The value must be in the range between 10 and 163330 and a multiple of 10 to be compliant with EVS Multicam. The Serial Number on each EVS software which is on the same computer must be the same. Overwrite Output File: Select this option to overwrite the output file if it already exists. If this option is not selected, MediaXchange will automatically rename the output file to have a different name than the existing file. Actually MediaXchange add “ (1)” ,” (2)” , etc at the end of the file. Transcode Live Feed: Select this option to start the wrapping/encoding process while the EVS MXF source file is being recorded. This option does not work with Quick Time File wrapping. If you use it anyway with the wrapping of Quick Time file, MediaXchange will wait for the end of the writing of the Quick Time file before doing its wrapping job. Encoded Audios: Limit the number of audio channels in the output file depending on the wrapper format. Example: Your original clip has 8 audios and you have selected 2 channels in the Encoded Audios field. The output transcoded file will have only 2 audios if the output wrapper format supports 2 audios (like QT). However, if the wrapper supports only 0, 4, 8 audios like EVS MXF, the output file will have 4 audios but 28 MediaXchange Version 1.16 – User’s Manual Issue 1.16.D Author: Serge Comes - EVS Broadcast Equipment – May 2009 the last two audios will be empty. ‘Channel’ can mean stereo or mono audio channel depending on your Audio type setting into your codec setting. Show CPU Activity This option MUST NOT be selected. 29 Issue 1.16.D MediaXchange Version 1.16 User’s Manual Author: Serge Comes - EVS Broadcast Equipment – May 2009 5.2 CODEC SETTINGS Codec settings refer to the “ encoder” or “ wrapper” modes settings. 5.2.1 UP/DOWN CONVERSION MediaXchange can automatically change the resolution and aspect ratio of your files when transcoding. If you select an SD or HD encoder with an HD or SD file: MediaXchange will automatically UP or DOWN convert the resolution of your original file. UP/DOWN conversion available: SD to HD • SD to HD 1080i MJPEG (EVS and Standard modes) DVCPRO HD Avid DNxHD® Codec • SD to HD 720p MJPEG (EVS and Standard modes). Avid DNxHD® Codec HD -> SD • HD 1080i to SD format (Anamorphic format) DV family MJPEG MPEG1 MPEG2 Windows Media • HD 720P to SD DV family only 30 MediaXchange Version 1.16 – User’s Manual Issue 1.16.D Author: Serge Comes - EVS Broadcast Equipment – May 2009 MediaXchange can also modify the aspect ratio of your source file. All the codec, except Windows Media coder has resizing capability: Target Resolution: It is the resolution of the output file. Depending on the codecs, some resolution (SD-HD) are available or not. Source Aspect Ratio: This is the aspect ratio of your source file. If auto is selected, MediaXchange will automatically detect the aspect ratio of your source file. Target Aspect Ratio: This is the aspect ratio of your destination file. If auto is selected, MediaXchange will automatically use the best aspect ratio based on your Target Resolution and codec. 31 Issue 1.16.D MediaXchange Version 1.16 User’s Manual Author: Serge Comes - EVS Broadcast Equipment – May 2009 Framing Mode: Here is a table with the different framing modes: Cropping Offset [0-10000]: Vertical offset of the cropping windows where the video is kept. See picture. 5.2.2 MODE: ENCODERS The Encoders mode defines the encoder parameters. The decoding process is automatic provided the MediaXchange version supports the file format. To use the encoder Mode: you need the “ M XC – 00: All Option” XSecure code. 32 MediaXchange Version 1.16 – User’s Manual Issue 1.16.D Author: Serge Comes - EVS Broadcast Equipment – May 2009 M-JPEG - EVS XT Video Bitrate: Choose the value among 20, 25, 30, 35, 40, 45 & 50 Mbps for SD and 100 & 150 Mbps for HD. Those values can be modified in the C o d e c V a l u e s file located in the directory C : \ P r o g r a m F i l e s \ E V S B r o a d c a s t E q u i p m e n t \ M e d i a X c h a n g e . Codec Type: • Standard M-JPEG (1-band): Standard MJPEG encoder, valid for SD and HD formats. • EVS HD M-JPEG (4-band): EVS proprietary MJPEG format in HD only. Also called “ 4-band” M-JPEG. • M-JPEG Proxy: This option encodes SD frame by keeping 1 field over the two fields of a frame. Video bitrate can be set up like the others M-JPEG types . Please contact EVS staff in order to use this configuration properly. 33 Issue 1.16.D MediaXchange Version 1.16 User’s Manual Author: Serge Comes - EVS Broadcast Equipment – May 2009 Resizing: • Target Resolution: See Chapter 5.2.1 • Available Resolution values: • Unchanged • HD1080i@1920 • SD • HD720p • HD1080i • HD720p@640 • HD1080i@960 • HD720p@798 • HD1080i@1024 • HD720p@960 • HD1080i@1280 • HD720p@1024 • HD1080i@1440 • HD720p@1280 If you select EVS HD M-JPEG [4-band], you then select “ XT[1] legal settings” which will only give you the resolution compatible with the EVS XT[1]. • Framing: See picture Chapter 5.2.1 • Source Aspect Ratio: See Chapter 5.2.1 • Target Aspect Ratio: See Chapter 5.2.1 34 MediaXchange Version 1.16 – User’s Manual Issue 1.16.D Author: Serge Comes - EVS Broadcast Equipment – May 2009 TimeCode: • Keep Original TC: Select this option to keep the original TC included in the source file. • Initial TC: Enter the value of the first TC included in the file to be converted. File Wrapper: Select either: • EVS MXF: the wrapper will be the EVS MXF proprietary format • Quick Time: the wrapper will be Quick Time, compatible with Apple Final Cut Pro EVS MXF Settings: Those settings are metadata associated with the EVS MXF file to be used into XFile and XT Server. Default values are set if the parameters are left blank. • UmID: Enter the UmID • Clip Name: Enter the clip name string • Num clip: Enter a clip ID • Camera: Enter a camera value among A, B, C, D, E & F. • Num Machine: Enter the device ID on the SDTI network Quick time Settings: • XML File Generation: Check this option to create an XML file along with the Quick Time file. This is dedicated to the XML import in Final Cut Pro. With encoders (contrary to wrappers), no metadata (except TC) can be transferred. • Quick time Movie Path: Specify the UNC of the destination path for the Quick Time file. The XML import does not use relative links. 35 Issue 1.16.D MediaXchange Version 1.16 User’s Manual Author: Serge Comes - EVS Broadcast Equipment – May 2009 DV F AMILY Video Type: Choose among DV, DVCPRO and DVCPRO50. Resizing: • Target Resolution: See Chapter 5.2.1 • Available Resolution values: See Chapter 5.2.1 • Framing: See picture Chapter 5.2.1 • Source Aspect Ratio: See Chapter 5.2.1 • Target Aspect Ratio: See Chapter 5.2.1 36 MediaXchange Version 1.16 – User’s Manual Issue 1.16.D Author: Serge Comes - EVS Broadcast Equipment – May 2009 TimeCode: • Keep Original TC: Select this option to keep the original TC included in the source file. • Initial TC: Enter the value of the first TC included in the file to be converted. File type: Select either: • Raw DV: select this format for raw DV (extension.dv) • DV-DIF: select this format for DV-DIF • Quick Time: select this format for Quick Time format (extension .mov) • Quick Time Ref: select this format for Quick Time Reference format (allows edition in Transcode progress) • AVI: select this format for Video for Windows AVI (extension .avi) • XDCAM: select this format in order to generate DVCAM into XDCAM format (extension .mxf) • P2: select this format in order to generate P2 file format structure. Note P2 have some rules about file name and ClipName: You have to create a file with 4 numeric (except 0000) + 2 alphameric characters (example: 0001AA.MXF) and to copy clip on a P2card: you have to copy each file such as XML, MXF, BMP in the correct folder on the P2card. Audio Output: • Depends of the File type you can select 24 bits or 16 bits. • You can also select if you want stereo tracks or not. Quick time Settings: • XML File Generation: Check this option to create an XML file along with the Quick Time file. This is dedicated to the XML import in Final Cut Pro. With encoders (contrary to wrappers), no metadata (except TC) can be transferred. • Quick time Movie Path: Specify the UNC of the destination path for the Quick Time file. The XML import does not use relative links. 37 Issue 1.16.D MediaXchange Version 1.16 User’s Manual Author: Serge Comes - EVS Broadcast Equipment – May 2009 DVCPRO HD Video Type: Only DVCPRO HD is available. Resizing: • Target Resolution: See Chapter 5.2.1 • Available Resolution values: See Chapter 5.2.1 • Framing: See picture Chapter 5.2.1 • Source Aspect Ratio: See Chapter 5.2.1 • Target Aspect Ratio: See Chapter 5.2.1 38 MediaXchange Version 1.16 – User’s Manual Issue 1.16.D Author: Serge Comes - EVS Broadcast Equipment – May 2009 TimeCode: • Keep Original TC: Select this option to keep the original TC included in the source file. • Initial TC: Enter the value of the first TC included in the file to be converted. File Wrapper: Only Quick Time Movie is available (developed for Final Cut Pro only). • Quick Time: select this format for Quick Time format (extension .mov) • Quick Time Ref: select this format for Quick Time Reference format (allows edition in Transcode progress) • P2: select this format in order to generate P2 file format structure Note P2 have some rules about file name and ClipName: You have to create a file with 4 numeric (except 0000) + 2 alphameric characters (example: 0001AA.MXF) and to copy clip on a P2card: you have to copy each file such as XML, MXF, BMP in the correct folder on the P2card. Audio Output: • Depends of the File type you can select 24 bits or 16 bits. • You can also select if you want stereo tracks or not. Quick time Settings: • XML File Generation: Check this option to create an XML file along with the Quick Time file. This is dedicated to the XML import in Final Cut Pro. With encoders (contrary to wrappers), no metadata (except TC) can be transferred. • Quick time Movie Path: Specify the UNC of the destination path for the Quick Time file. The XML import does not use relative links. 39 Issue 1.16.D MediaXchange Version 1.16 User’s Manual Author: Serge Comes - EVS Broadcast Equipment – May 2009 IMX – D10 Video Bitrate: Select the video bitrate among 30, 40 & 50 Mbps. Audio Output: Only valid for the MXF OP-1a file format. • 24 bits: XDCAM mode 4 audios/24 bits. • 16 bits: XDCAM mode 8 audios/16 bits. User Quant. Table[Avid] • Possibility to use specific User Quantification table to create IMX file compatible with the Avid MediaComposer 40 MediaXchange Version 1.16 – User’s Manual Issue 1.16.D Author: Serge Comes - EVS Broadcast Equipment – May 2009 Resizing: • Target Resolution: SD only is available • Available Resolution values: See Chapter 5.2.1 • Framing: See picture Chapter 5.2.1 • Source Aspect Ratio: See Chapter 5.2.1 • Target Aspect Ratio: See Chapter 5.2.1 TimeCode: • Keep Original TC: Select this option to keep the original TC included in the source file. • Initial TC: Enter the value of the first TC included in the file to be converted. File Wrapper: Select either: • EVS MXF: the wrapper will be the EVS MXF proprietary format • MXF IMX OP-1a [D-10]: the wrapper will be IMX MXF OP-1a, compatible with XDCAM & Avid • Quick Time: the wrapper will be Quick Time, compatible with Apple Final Cut Pro • Quick Time Ref: select this format for Quick Time Reference format (allows edition in Transcode progress) • AVI: select this option for AVI format • Avid MXF OPAtom: The wrapper will be Avid MXF OPAtom. Audio Output: • Depends of the output File type you can select 24 bits or 16 bits. • You can also select if you want stereo tracks or not. EVS MXF Settings: Those settings are metadata associated with the EVS MXF file to be used into XFile and XT Server. Default values are set if the parameters are left blank. 41 Issue 1.16.D MediaXchange Version 1.16 User’s Manual Author: Serge Comes - EVS Broadcast Equipment – May 2009 • UmID: Enter the UmID. • Clip Name: Enter the clip name string. • Num clip: Enter a clip ID. • Camera: Enter a camera value among A, B, C, D, E & F. Quick time Settings: • XML File Generation: Check this option to create an XML file along with the Quick Time file. This is dedicated to the XML import in Final Cut Pro. With encoders (contrary to wrappers), no metadata (except TC) can be transferred. • Quick time Movie Path: Specify the UNC of the destination path for the Quick Time file. The XML import does not use relative links. 42 MediaXchange Version 1.16 – User’s Manual Issue 1.16.D Author: Serge Comes - EVS Broadcast Equipment – May 2009 MPEG-2 TimeCode: • Keep Original TC: Select this option to keep the original TC included in the source file. • Initial TC: Enter the value of the first TC included in the file to be converted. Resizing: • Target Resolution: See Chapter 5.2.1 • Available Resolution values: See Chapter 5.2.1 • Framing: See picture Chapter 5.2.1 • Source Aspect Ratio: See Chapter 5.2.1 • Target Aspect Ratio: See Chapter 5.2.1 43 Issue 1.16.D MediaXchange Version 1.16 User’s Manual Author: Serge Comes - EVS Broadcast Equipment – May 2009 Video • Video Bitrate: Choose among 3, 4, 5, 6, 7, 8, 9, 10, 12, 15 Mbps for 4:2:0 MPEG-2. Those values can be modified in the CodecValues file located in the directory C : \ P r o g r a m F i l e s \ E V S B r o a d c a s t E q u i p m e n t \ M e d i a X c h a n g e . • GOP Structure: o I-Frame: GOP of length 1, only frame are encoded o I-P GOP: GOP of length 2 of type IP o Long GOP: GOP of length 12 of type IBBPBBPBBPBBP Audio • Audio Bitrate: Choose among 64, 96, 112, 128, 160, 192, 224, 296, 320, 384 Kbps. • Type: Choose between mono or stereo File Wrapper: Select either: • Program Stream: The wrapper will be a Program stream (PS) (.mpg) format. • Transport Stream: The wrapper will be a Transport stream (TS) (.m2t) format. • Multiple Streams: The wrapper will be a Multiple Streams (ES) (.xml .m2v .m2a) format. • System Bitrate: Select this setting to specify the system bitrate in bits/s If it is not selected, the encoder will automatically add stuffing accordingly. 44 MediaXchange Version 1.16 – User’s Manual Issue 1.16.D Author: Serge Comes - EVS Broadcast Equipment – May 2009 MPEG-1 TimeCode: • Keep Original TC: Select this option to keep the original TC included in the source file. • Initial TC: Enter the value of the first TC included in the file to be converted. Resizing: • Target Resolution: See Chapter 5.2.1 • Available Resolution values: See Chapter 5.2.1 • Framing: See picture Chapter 5.2.1 • Source Aspect Ratio: See Chapter 5.2.1 • Target Aspect Ratio: See Chapter 5.2.1 45 Issue 1.16.D MediaXchange Version 1.16 User’s Manual Author: Serge Comes - EVS Broadcast Equipment – May 2009 Video • Video Bitrate: Choose among 500, 800 Kbps, 1.0, 1.5, 2.0 & 3.0 Mbps. Those values can be modified in the CodecValues file located in the directory C:\Program Files\EVS Broadcast Equipment\MediaXchange. • GOP Structure: Fixed Long GOP of length 12 (type IBBPBBPBBPBBP) Audio • Audio Bitrate: Choose among 64, 96, 112, 128, 160, 192, 224, 296, 320, 384 Kbps. • Type: Choose between mono or stereo File Wrapper: Select either: • Program Stream : The wrapper will be a Program stream (PS) (.mpg) format. • Transport Stream : The wrapper will be a Transport stream (TS) (.m2t) format. • Multiple Streams: The wrapper will be a Multiple Streams (ES) (.xml .m2v .m2a) format. o This file format has been developed to be integrated into CleanEdit Suite to support more than 4 audio tracks. o File format structure is not PS or TS, but rather an XML description file pointing to audio and video files, one file for each A/V essence. Example of XML file below : <?xml version="1.0" ?> <EVSMultiStream> <TCSystem>3</TCSystem> <TCIn>180000</TCIn> <TCOut>180806</TCOut> <nAudioStreams>4</nAudioStreams> <nAudioChannels>8</nAudioChannels> <StreamType>ES</StreamType> <VideoStream AspectRatio="4:3" Codec="MPEG1"> <StreamFile>TEST IMX PAL 8AUDIO.m2v</StreamFile> <StreamRate>1500000</StreamRate> </VideoStream> <AudioStream Id="0" Stereo="1"> <StreamFile>TEST IMX PAL 8AUDIO.00.m2a</StreamFile> <StreamRate>64000</StreamRate> </AudioStream> <AudioStream Id="1" Stereo="1"> <StreamFile>TEST IMX PAL 8AUDIO.01.m2a</StreamFile> <StreamRate>64000</StreamRate> </AudioStream> <AudioStream Id="2" Stereo="1"> <StreamFile>TEST IMX PAL 8AUDIO.02.m2a</StreamFile> <StreamRate>64000</StreamRate> </AudioStream> <AudioStream Id="3" Stereo="1"> <StreamFile>TEST IMX PAL 8AUDIO.03.m2a</StreamFile> 46 MediaXchange Version 1.16 – User’s Manual Issue 1.16.D Author: Serge Comes - EVS Broadcast Equipment – May 2009 <StreamRate>64000</StreamRate> </AudioStream> </EVSMultiStream> • System Bitrate: Select this setting to specify the system bitrate in bits/s. If it is not selected, the encoder will automatically add stuffing accordingly. 47 Issue 1.16.D MediaXchange Version 1.16 User’s Manual Author: Serge Comes - EVS Broadcast Equipment – May 2009 XDCAM HD F AMILY Target Type: • XDCAM HD 4:2:0 @ 17.5 Mb/s [1080i only] • XDCAM HD 4:2:0 @ 25 Mb/s [1080i only] • XDCAM HD 4:2:0 @ 35 Mb/s [1080i & 720p] • XDCAMHD 4:2:2 @ 50 Mb/s [1080i & 720p] 48 MediaXchange Version 1.16 – User’s Manual Issue 1.16.D Author: Serge Comes - EVS Broadcast Equipment – May 2009 Resizing: • Target Resolution: See Chapter 5.2.1 • Available Resolution values: See Chapter 5.2.1 • Framing: See picture Chapter 5.2.1 • Source Aspect Ratio: See Chapter 5.2.1 • Target Aspect Ratio: See Chapter 5.2.1 49 Issue 1.16.D MediaXchange Version 1.16 User’s Manual Author: Serge Comes - EVS Broadcast Equipment – May 2009 W INDOWS M EDIA Video Bitrate: Choose among 128, 256, 384 & 512 Kbps. Those values can be modified in the CodecValues file located in the directory C:\Program Files\EVS Broadcast Equipment\MediaXchange. Audio bitrate: Choose among 16, 32, 64 & 128 Kbps. Those values values can be modified in the CodecValues file located in the directory C : \ P r o g r a m F i l e s \ E V S B r o a d c a s t E q u i p m e n t \ M e d i a X c h a n g e . 50 MediaXchange Version 1.16 – User’s Manual Issue 1.16.D Author: Serge Comes - EVS Broadcast Equipment – May 2009 Video Type: • WMV7: Windows Media version 7 • WMV8: Windows Media version 8 • WMV9: Windows Media version 9 • WMP4: Windows Media MPEG-4 Half resolution: Select this option for Half resolution QCIF instead of full resolution CIF. Video Resolution: Enter the requested horizontal & vertical resolution. Aspect Ratio: There is not resizing feature for the Windows Media codec. • Automatic: the aspect ratio will be automatically selected following the information available in the source file • 4:3: to force to 4:3 aspect ratio • 16:9: to force to 16:9 aspect ratio The next parameters (Title, Author and Copyright) refer to contextual information embedded into Windows Media file format. 51 Issue 1.16.D MediaXchange Version 1.16 User’s Manual Author: Serge Comes - EVS Broadcast Equipment – May 2009 A VID DN X HD® E NCODER Video Bitrate: • 100 Mbps : Special mode used by EVS. This is compatible with Avid DNxHD Low Level (120/145 Mbps) when used with Avid Transfer Manager server to export into Avid framework. • 120/145 Mbps: Avid DNxHD Low Level: 120 Mbps (1080i50) or 145 Mbps (1080i59.94 & 720p59.94) • 185/220 Mbps: Avid DNxHD High Level: 185 Mbps (1080i50) or 220 Mbps (1080i59.94 & 720p59.94) Codec Type: Only one type: Avid DNxHD® Codec 8-bit 52 MediaXchange Version 1.16 – User’s Manual Issue 1.16.D Author: Serge Comes - EVS Broadcast Equipment – May 2009 Resizing: • Target Resolution: See Chapter 5.2.1 • Available Resolution values: See Chapter 5.2.1 • Framing: See picture Chapter 5.2.1 • Source Aspect Ratio: See Chapter 5.2.1 • Target Aspect Ratio: See Chapter 5.2.1 TimeCode: • Keep Original TC: Select this option to keep the original TC included in the source file. • Initial TC: Enter the value of the first TC included in the file to be converted. File Wrapper: Select either: • EVS MXF: The wrapper will be the EVS MXF proprietary format. • Quick Time: The wrapper will be Quick Time. Note that this is not compatible with Avid and Apple Final Cut Pro. • Avid MXF OPAtom: The wrapper will be Avid MXF OPAtom. Audio Output: • Depends of the File type you can select 24 bits or 16 bits. • You can also select if you want stereo tracks or not. EVS MXF Settings: Those parameters are metadata associated with the EVS MXF file to be used into XFile and XT server. Default values are set if the parameters are left blank. • UmID: Enter the UmID. • Clip Name: Enter the clip name string. • Num clip: Enter a clip ID. • Camera: Enter a camera value among A, B, C, D, E & F. • Num Machine: Enter the device ID on the SDTI network 53 Issue 1.16.D MediaXchange Version 1.16 User’s Manual Author: Serge Comes - EVS Broadcast Equipment – May 2009 Quick time Settings: • XML File Generation: Not valid for this codec ! 54 MediaXchange Version 1.16 – User’s Manual Issue 1.16.D Author: Serge Comes - EVS Broadcast Equipment – May 2009 H.264 E NCODER Codec Type: Choose between H.264 [BaseLine], H.264 [Main], H.264 [High]. Video Bitrate: • Auto : MediaXchange will automatically choose the video bitrate depending on your Codec type. • xxx Mbps: Select the video bitrate you want to use. TimeCode: • Keep Original TC: Select this option to keep the original TC included in the source file. 55 Issue 1.16.D MediaXchange Version 1.16 User’s Manual Author: Serge Comes - EVS Broadcast Equipment – May 2009 • Initial TC: Enter the value of the first TC included in the file to be converted. Resizing: • Target Resolution: See Chapter 5.2.1 • Available Resolution values: See Chapter 5.2.1 • Framing: See picture Chapter 5.2.1 • Source Aspect Ratio: See Chapter 5.2.1 • Target Aspect Ratio: See Chapter 5.2.1 File Wrapper: Select either: • MP4 (moov first): The wrapper will be the MP4 with the MP4 moov table in the beginning of the file. If you select the wrapper, MediaXchange will first create a temporary file. • MP4: The wrapper will be the MP4 with the MP4 moov table at the end of the file. • M2T: The wrapper will be MT2. Stream Settings: Those parameters can be used to do streaming on internet. • Enable UDP Streaming: Check this option if you want to do streaming UDP through internet in MP4. • Stream Only (Do not write to disk) : Check this option if you want to do only streaming and not write file on the local disk. • Destination IP: IP address of the UDP streaming server. • Destination Port: Destination port of the UDP streaming server. Audio Settings: • Audio Codec: Choose between AAC and HEAAC • Audio bitrate: o Auto: MediaXchange will automatically choose the Audio bitrate depending on your Codec type and the Audio Codec. o XX Kb/s: Select the Audio bitrate you want to use. • Channels: Check this option to generate stereo audio tracks or mono audio tracks. 56 MediaXchange Version 1.16 – User’s Manual Issue 1.16.D Author: Serge Comes - EVS Broadcast Equipment – May 2009 A UDIO PCM File: • Wave PCM • 16 bits PCM • Float PCM Stereo: Check this option to generate stereo audio tracks instead of mono audio tracks. 57 Issue 1.16.D MediaXchange Version 1.16 User’s Manual Author: Serge Comes - EVS Broadcast Equipment – May 2009 5.2.3 GRAPHIC FILES ENCODER A graphic file or a sequence of graphic files can be encoded to any encoder available in MediaXchange. You can set up your graphic file encoder in the General Settings, Graphic Files Encoding group box. System: Select the video format: • PAL (50 fields/sec) • NTSC (59.94 fields/sec) • 50 P (50 frames/sec) • 59.94 P (59.94 frames/sec) The file resolution is automatically detected and must be compliant with the video format. • PAL: 720 x 576 • NTSC: 720 x 480 to 496 • HD 720p: 1280 x 720 • HD 1080i: 1920 x 1080 Duration: Select the duration (only valid for source still picture, not source animated sequences). Fill & Key: Generation of 2 synchronous files based on Alpha Channel: one file with the Fill sequence and one file with the Key sequence. 58 MediaXchange Version 1.16 – User’s Manual Issue 1.16.D Author: Serge Comes - EVS Broadcast Equipment – May 2009 Enable Audio: This option allows you to add audio to the sequence created with your graphic files. The audio files must be 16 Bits audio file of 48 kHz (1 to 8 channels). The file format must be Broadcast Wave Uncompressed (BWAVE) (.wav). To add an audio file to your sequence, you have to put it into the same folder as your graphic files. Procedure: In this version, only TIFF (.tif), BMP (.bmp) and TGA (.tga) graphic files can be decoded. Two types of encoding processes have been implemented: • Still picture encoding: Select the file through Windows Explorer. Then select an encoder and start the encoder (A sequence duration must be set up). • Picture sequence encoding: All pictures must be located in the same directory and must have names as follows: picture001.tga, picture002.tga, etc. Select the first picture: e.g. picture000.tga. Then, select an encoder and start the encoder. You can add audio to the encoding processes if you have selected ‘Enable Audio’ in the General Settings window and if you have stored the audio file in the same directory as your original file. Tip • If you have not selected the Enable Audio option: The number of files in the directory or the specified duration will determine the sequence duration. • If you have selected Enable Audio: The number of files in the directory or the duration of the audio files will determine the sequence duration. • If the audio file lasts less than your graphic files, your last graphic files will be encoded with a mute audio and the clip duration will be the one of all your graphic files. • If the audio file lasts more than the graphic files, the encoded sequences will have the duration of the audio files. The last image of your graphic files will be kept until the audio ends. 59 Issue 1.16.D MediaXchange Version 1.16 User’s Manual Author: Serge Comes - EVS Broadcast Equipment – May 2009 5.2.4 MODE: WRAPPERS The Wrappers mode defines the parameters of the re-wrapping. To use the encoder Mode: you need the “ MXCBP – 10: Base Package” XSecure code. MJPEG EVS TO MJPEG Q UICK T IME This mode is used to replace the EVS MXF wrapper to Quick Time compatible with Apple Final Cut Pro and Avid Media Composer NLEs. The video format must be MJPEG. Stereo Audio Tracks: Check this option to generate stereo audio tracks instead of mono audio tracks. 60 MediaXchange Version 1.16 – User’s Manual Issue 1.16.D Author: Serge Comes - EVS Broadcast Equipment – May 2009 Map Clip Name: Check this option to map the metadata clip name in EVS MXF to the Final Cut Pro name in the XML file, otherwise the file name of the source file will be used. XML File Generation: Check this option to create an XML file along with the Quick Time file. This is dedicated to the XML import in Final Cut Pro. This associated XML file is mandatory to exchange metadata with Final Cut Pro, like File in/out, TC in/out and 4:3/16:9 (anamorphic), etc. • Quick time Movie Path: Specify the UNC of the destination path for the Quick Time file. The XML import does not use relative links. Audio Output: Select between 16 and 24 bits for the output audio format 61 Issue 1.16.D MediaXchange Version 1.16 User’s Manual Author: Serge Comes - EVS Broadcast Equipment – May 2009 MJPEG Q UICK T IME TO MJPEG EVS This mode is used to replace the Quick Time wrapper to EVS MXF compatible with Apple Final Cut Pro and Avid Media Composer NLEs. The video format must be MJPEG. • UmID: Enter the UmID • Clip Name: Enter the clip name string • Num clip: Enter a clip ID • Camera: Enter a camera value among A, B, C, D, E & F. 62 MediaXchange Version 1.16 – User’s Manual Issue 1.16.D Author: Serge Comes - EVS Broadcast Equipment – May 2009 IMX EVS TO IMX MXF OP1A This mode is used to replace the EVS MXF wrapper to MXF OP-1a compatible with Avid Media Composer NLE and XDCAM. The video format must be IMX. Audio Output: • 24 bits: XDCAM mode 4 audios/24 bits. • 16 bits: XDCAM mode 8 audios/16 bits 63 Issue 1.16.D MediaXchange Version 1.16 User’s Manual Author: Serge Comes - EVS Broadcast Equipment – May 2009 IMX MXF OP1A TO IMX EVS This mode is used to replace the MXCF OP-1a wrapper to EVS MXF compatible with Avid Media Composer NLE and XDCAM. The video format must be IMX. UmID: Enter the UmID Clip Name: Enter the clip name string Num clip: Enter a clip ID Camera: Enter a camera value among A, B, C, D, E & F. 64 MediaXchange Version 1.16 – User’s Manual Issue 1.16.D Author: Serge Comes - EVS Broadcast Equipment – May 2009 IMX EVS TO IMX Q UICK T IME This mode is used to replace the EVS MXF wrapper to Quick Time compatible with Apple Final Cut NLE. The video format must be IMX. Stereo Audio Tracks: Check this option to generate stereo audio tracks instead of mono audio tracks. Force IMX-50 Quick Time: Apple Final Cut Pro (FCP) provides RT effect only for IMX 50 (Note: also for IMX 30 in FCP v.5.1.2). By selecting this parameter, the wrapping in Quick Time will add stuffing to reach IMX 50 from a source file in IMX 30 or IMX 40. Note that the size of the file will be increased accordingly. Map Clip Name: Check this option to map the metadata clip name in EVS MXF to the Final Cut Pro name in the XML file, otherwise the file name of the source file will be used. 65 Issue 1.16.D MediaXchange Version 1.16 User’s Manual Author: Serge Comes - EVS Broadcast Equipment – May 2009 XML File Generation: Check this option to create an XML file along with the Quick Time file. This is dedicated to the XML import in Final Cut Pro. This associated XML file is mandatory to exchange metadata with Final Cut Pro, like File in/out, TC in/out and 4:3/16:9 (anamorphic), etc. • Quick time Movie Path: Specify the UNC of the destination path for the Quick Time file. The XML import does not use relative links. Audio Output: Select between 16 and 24 bits for the output audio format 66 MediaXchange Version 1.16 – User’s Manual Issue 1.16.D Author: Serge Comes - EVS Broadcast Equipment – May 2009 IMX Q UICK T IME TO IMX EVS This mode is used to replace the Quick Time wrapper compatible with Apple Final Cut Pro NLE to EVS MXF. The video format must be IMX. UmID: Enter the UmID Clip Name: Enter the clip name string Num clip: Enter a clip ID Camera: Enter a camera value among A, B, C, D, E & F. 67 Issue 1.16.D MediaXchange Version 1.16 User’s Manual Author: Serge Comes - EVS Broadcast Equipment – May 2009 IMX EVS TO A VID MXF OPA TOM This mode is used to replace the EVS MXF wrapper to Avid MXF OPAtom compatible with Avid Media Composer NLE and XDCAM. The video format must be IMX. Audio Output: Select between 16 and 24 bits for the output audio format 68 MediaXchange Version 1.16 – User’s Manual Issue 1.16.D Author: Serge Comes - EVS Broadcast Equipment – May 2009 IMX A VID MXF OPA TOM TO IMX EVS This mode is used to replace the Avid MXF OPAtom wrapper to EVS MXF compatible with Avid Media Composer NLE and XDCAM. The video format must be IMX. UmID: Enter the UmID Clip Name: Enter the clip name string Num clip: Enter a clip ID Camera: Enter a camera value among A, B, C, D, E & F. 69 Issue 1.16.D MediaXchange Version 1.16 User’s Manual Author: Serge Comes - EVS Broadcast Equipment – May 2009 IMX EVS TO AVI This mode is used to replace the EVS MXF wrapper to AVI Wrapper The video format must be IMX. Stereo Audio Tracks: Check this option to generate stereo audio tracks instead of mono audio tracks. 70 MediaXchange Version 1.16 – User’s Manual Issue 1.16.D Author: Serge Comes - EVS Broadcast Equipment – May 2009 AVID DNXHD® EVS TO Q UICK T IME This mode is used to replace the EVS MXF wrapper to Quick Time compatible with DNxHD HD codecs in Avid Media Composer NLE. The video format must be AVID DNXHD® HD codec in XT server. Stereo Audio Tracks: Check this option to generate stereo audio tracks instead of mono audio tracks. Map Clip Name: Check this option to map the metadata clip name in EVS MXF to the output file name. Audio Output: Select between 16 and 24 bits for the output audio format 71 Issue 1.16.D MediaXchange Version 1.16 User’s Manual Author: Serge Comes - EVS Broadcast Equipment – May 2009 AVID DNXHD® Q UICK T IME TO EVS This mode is used to replace the Quick Time wrapper to EVS MXF compatible with DNxHD HD codecs in Avid Media Composer NLE. The video format must be AVID DNXHD® HD codec in XT server. UmID: Enter the UmID Clip Name: Enter the clip name string Num clip: Enter a clip ID Camera: Enter a camera value among A, B, C, D, E & F. 72 MediaXchange Version 1.16 – User’s Manual Issue 1.16.D Author: Serge Comes - EVS Broadcast Equipment – May 2009 DN X HD EVS TO A VID MXF OPA TOM This mode is used to replace the EVS MXF wrapper to Avid MXF OPAtom compatible with Avid Media Composer NLE and XDCAM. The video format must be DNxHD. Audio Output: Select between 16 and 24 bits for the output audio format 73 Issue 1.16.D MediaXchange Version 1.16 User’s Manual Author: Serge Comes - EVS Broadcast Equipment – May 2009 DN X HD A VID MXF OPA TOM TO IMX EVS This mode is used to replace the Avid MXF OPAtom wrapper to EVS MXF compatible with Avid Media Composer NLE and XDCAM. The video format must be DNxHD. UmID: Enter the UmID Clip Name: Enter the clip name string Num clip: Enter a clip ID Camera: Enter a camera value among A, B, C, D, E & F. 74 MediaXchange Version 1.16 – User’s Manual Issue 1.16.D Author: Serge Comes - EVS Broadcast Equipment – May 2009 MPEG2 HD I NTRA EVS TO AVI This mode is used to replace the EVS MXF wrapper to AVI compatible with MPEG2 IFrame HD codecs in Adobe NLE. The video format must be MPEG2 Intra codec in XT server. Stereo Audio Tracks: Check this option to generate stereo audio tracks instead of mono audio tracks. 75 Issue 1.16.D MediaXchange Version 1.16 User’s Manual Author: Serge Comes - EVS Broadcast Equipment – May 2009 EVS TO EVS 2MB B LOCKS This mode is used to rewrap any EVS MXF file to EVS MXF 2MB blocks compatible with Multicam 8 and earlier versions. 76 MediaXchange Version 1.16 – User’s Manual Issue 1.16.D Author: Serge Comes - EVS Broadcast Equipment – May 2009 A PPLE P RO R ES EVS TO Q UICK T IME This mode is used to replace the EVS MXF wrapper to Quick Time compatible with Apple Final Cut NLE. The video format must be ProRes. Stereo Audio Tracks: Check this option to generate stereo audio tracks instead of mono audio tracks. Map Clip Name: Check this option to map the metadata clip name in EVS MXF to the Final Cut Pro name in the XML file, otherwise the file name of the source file will be used. XML File Generation: Check this option to create an XML file along with the Quick Time file. This is dedicated to the XML import in Final Cut Pro. This associated XML file is mandatory to exchange metadata with Final Cut Pro, like File in/out, TC in/out and 4:3/16:9 (anamorphic), etc. 77 Issue 1.16.D MediaXchange Version 1.16 User’s Manual Author: Serge Comes - EVS Broadcast Equipment – May 2009 • Quick time Movie Path: Specify the UNC of the destination path for the Quick Time file. The XML import does not use relative links. Audio Output: Select between 16 and 24 bits for the output audio format 78 MediaXchange Version 1.16 – User’s Manual Issue 1.16.D Author: Serge Comes - EVS Broadcast Equipment – May 2009 A PPLE P RO R ES Q UICK T IME TO EVS This mode is used to replace the Quick Time wrapper to EVS MXF The video format must be ProRes. UmID: Enter the UmID Clip Name: Enter the clip name string Num clip: Enter a clip ID Camera: Enter a camera value among A, B, C, D, E & F. 79 Issue 1.16.D MediaXchange Version 1.16 User’s Manual Author: Serge Comes - EVS Broadcast Equipment – May 2009 6. GUI Overview The GUI of the application MediaXchange is divided in 5 areas: Application Modes, Process Monitoring, History Log, Destination Drive Status and Alarms. 80 MediaXchange Version 1.16 – User’s Manual Issue 1.16.D Author: Serge Comes - EVS Broadcast Equipment – May 2009 6.1 APPLICATION MODES This area contains the different processing modes defined in the MediaXchange application. Each mode works as a separate application. Only one application can run at a time. Each mode is explained in the Section ‘ Application Modes’, on page 85 . 81 Issue 1.16.D MediaXchange Version 1.16 User’s Manual Author: Serge Comes - EVS Broadcast Equipment – May 2009 6.2 PROCESS MONITORING From this area, the users can monitor the conversion process. Number of files transcoded: This information displays the number of files that have been converted since the application has been started. Last codec used: This field specifies the type of codec used during the last conversion. Last transcoded datetime: This field specifies the date and time of the last conversion. Status: This progress bar displays how far the current conversion has been completed: The bar displays the estimated duration for the full conversion (left) and the remaining time (right). Video Monitoring: Select the Preview checkbox to display the result of the decoding process with 4 audio VU meters. This preview is only available for Encoders modes, involving decoding of the source file. It does not display any picture in Wrappers modes. Start button: Press this button to start the conversion process. Stop/Abort button: Press this button to abort the conversion (manual and batch modes) or to stop the scan mode. 82 MediaXchange Version 1.16 – User’s Manual Issue 1.16.D Author: Serge Comes - EVS Broadcast Equipment – May 2009 6.3 HISTORY LOG This area displays the history of the as-run log of all the processes launched since the application has been started. State: Status of the jobs done or being processed: • Completed: the jobs is done and finished properly. • Failed: some errors occurred during the job. Check the Alarm area for more information • Encoding: a job is currently under going. Start: Date and time when the job started Stop: Date and time when the job ended Source: Path and name of the source file Output: Path and name of the destination file Tip Right-clicking on a job allows displaying two commands: • Clear: to clear the job from the History windows • Play: to launch a player in order to display the converted file. This option is only available with XT server, MPEG and DV codecs. 83 Issue 1.16.D MediaXchange Version 1.16 User’s Manual Author: Serge Comes - EVS Broadcast Equipment – May 2009 6.4 ALARMS This area displays the alarms generated by the application. Typically 2 types of alarms could occur: • Errors: This means the application has encountered a problem during the conversion or the source file analysis. For example, the file format is not recognized or the file extension is not supported. The history status will display a ‘failed’ status for this job. • Warnings: This means the application is not allowed or not able to handle the process as it is set up. Tip Right-clicking the ‘Alarms’ area allows displaying the following options: • Autoscroll • Clear logbook: to clear the alarms logs. 6.5 DESTINATION DRIVE STATUS This area shows the output drive or destination drive status with the remaining storage available. 84 MediaXchange Version 1.16 – User’s Manual Issue 1.16.D Author: Serge Comes - EVS Broadcast Equipment – May 2009 7. Application Modes 7.1 SINGLE MODE This mode is aimed at converting one file at once by defining the parameters manually. 85 Issue 1.16.D MediaXchange Version 1.16 User’s Manual Author: Serge Comes - EVS Broadcast Equipment – May 2009 7.1.1 DESCRIPTION OF THE INTERFACE I NPUT Source pathname: Select the source file to be converted by browsing the folders. This path could be either a local directory, a remote directory (mapped drive) or a UNC. Information: The Information group box lists the attributes of the source file after analysis by the TimeCode Extractor application. When available, this application returns the following parameters: • File type • TC in • TC out • Duration • PTS: if available • System: video format (PAL or NTSC) O UTPUT File Path [Drive/UNC]: Select the destination file to be converted by browsing the folders. This path could be either a local directory, a remote directory (mapped drive) or a UNC. XT GigE FTP [ONLY for EVS MXF Format!]: Use to directly write on the XT[2] GigE FTP. This output mode is only available with the EVS MXF Format (MJPEG, IMX, DNxHD) XT IP IP address of the target XT server XT User FTP login of the target XT server XT Password FTP password of the target XT server Location ClipID of the first location to check when restoring. 2 modes are considered: 86 MediaXchange Version 1.16 – User’s Manual Issue 1.16.D Author: Serge Comes - EVS Broadcast Equipment – May 2009 • 123X: X could be A, B, C, D, E or F. In that case MediaXchange will check the availability of the clip, e.g. 123A clip. o If not available, MediaXchange will show an error message on the main windows. You will need to try again with a different location. o If available, The transfer will be done In any case, after each transfer, MediaXchange will increase by 1 the LSM ID with the same camera label, e.g. 124 A,125A,126A. Etc. • 123?: In this case, MediaXchange to check check the availability of 123E, 123F, 124A, 124B, the “ Question Mark” allows all the camera labels. First 123A, then 123B, 123C, 123D, etc. Mode: Select between ‘Wrappers’ (decoding/encoding process). (only file format replacement) or ‘Encoders’ Type for wrappers: Select the type of wrapper to be used: • MJPEG EVS to MJPEG Quick Time: to convert an MJPEG EVS MXF file to MOV QuickTime format • MJPEG QuickTime to MJPEG EVS: to convert MJPEG MOV Quick Time format to EVS XT MXF format. • IMX EVS to IMX MXF OP1A: to convert an IMX EVS MXF file to MXF OP1A format • IMX MXF OP1A to IMX EVS: to convert an IMX MXF OP1A file to IMX EVS format • IMX EVS to IMX Avid MXF OPAtom: to convert an IMX EVS MXF file to Avid MXF OPAtom format • IMX AVID MXF OPAtom to IMX EVS: to convert an IMX Avid MXF OPAtom file to IMX EVS format • IMX EVS to IMX AVI: to convert an IMX EVS MXF file to AVI format • IMX EVS to IMX Quick Time: to convert an IMX EVS MXF file to Quick Time format • IMX Quick Time to IMX EVS: to convert an IMX Quick Time file to IMX EVS format • AVID DNXHD® EVS to Quick Time: to convert a AVID DNXHD® EVS MXF file to Quick Time format • AVID DNXHD® Quick Time to EVS: to convert a AVID DNXHD® Quick Time file 87 Issue 1.16.D MediaXchange Version 1.16 User’s Manual Author: Serge Comes - EVS Broadcast Equipment – May 2009 to EVS MXF format • AVID DNXHD® EVS to AVID MXF OPAtom: to convert a AVID DNXHD® EVS MXF file Avid MXF OPAtom format • AVID DNXHD® MXF OPAtom to EVS: to convert a AVID DNXHD® MXF OPAtom file to EVS MXF format • EVS to EVS 2MB Blocks: to convert file to EVS MXF 2MB Blocks format • MPEG2 Intra EVS to MPEG2 Intra AVI: to convert an MPEG2 Intra EVS file to MPEG2 Intra AVI format • Apple ProRes EVS to Quick Time: to convert a ProRes EVS MXF file to Quick Time format • Apple ProRes Quick Time to EVS: to convert a ProRes Quick Time file to ProRes EVS format Type for encoders: Select the type of codec to be used: • M-JPEG (EVS XT): to encode in EVS M-JPEG compatible with XT server family. • DV Family: to encode using DV family formats (DV 25, DVCPRO 25/50, XDCAM (DVCAM), P2) • DVCPRO HD: to encode using DVCPRO HD format • IMX- D10: to convert to IMX format • MPEG2: to convert to MPEG-2 formats. • MPEG1: to convert to MPEG-1 formats. • XDCAM HD: to convert to XDCAM HD formats. • Windows Media: to convert to Windows Media family formats (WM9, MPEG-4) • Avid DNxHD® Encoder: To convert to Avid DNxHD® format • H264 Encoder: To convert to H264 format • Audio PCM: To convert to audio WAV format Settings: This button allows accessing the selected codec settings. 88 MediaXchange Version 1.16 – User’s Manual Issue 1.16.D Author: Serge Comes - EVS Broadcast Equipment – May 2009 7.1.2 HOW TO CONVERT A FILE IN SINGLE MODE To convert a file in Single Mode, proceed as follows: 1. In the Single Mode tab, select the source file to convert. 2. Check that the information related to the source file is correct. 3. Select the output mode. • File Path: The file name will be identical to the source name with another extension. • XT GigE FTP: The clip name on the XT will be the file name. 4. Select the mode. 5. Select the wrapper or the codec. 6. Double-check the codec settings. 7. Start the process by clicking the Start button in the monitoring window. During the process, a ‘Transcoding’ status is displayed in the bottom right corner of the application window. The ‘Encoding’ status is also displayed in the History log window, and the progress bar is moving continuously or step by step. 8. At the end of the process, check that the status in the History log is ‘completed’ for this job. A Post Process is started at the end of the job in case this option is selected in General Settings menu. 89 Issue 1.16.D MediaXchange Version 1.16 User’s Manual Author: Serge Comes - EVS Broadcast Equipment – May 2009 7.2 BATCH MODE This mode is aimed at converting a list of files (jobs) at once by defining the parameters manually for each file (job) separately. 7.2.1 DESCRIPTION OF THE INTERFACE D EFAULT G ROUP B OX Default parameters for the conversion. Output Mode: • Folder Out: Select the destination file to be converted by browsing the folders. • 90 XT Ftp Out: MediaXchange Version 1.16 – User’s Manual Issue 1.16.D Author: Serge Comes - EVS Broadcast Equipment – May 2009 XT Ftp IP IP address of the target XT server User FTP login of the target XT server Password FTP password of the target XT server Location ClipID of the first location to check when restoring. 2 modes are considered: • 123X: X could be A, B, C, D, E or F. In that case MediaXchange will check the availability of the clip, e.g. 123A clip. o If not available, MediaXchange will show an error message on the main windows. You will need to try again with a different location. o If available, The transfer will be done In any case, after each transfer, MediaXchange will increase by 1 the LSM ID with the same camera label, e.g. 124 A,125A,126A. Etc. • 123?: In this case, the “ Question Mark” allows MediaXchange to check all the camera labels. First check the availability of 123A, then 123B, 123C, 123D, 123E, 123F, 124A, 124B, etc. Mode: Select between ‘Wrappers’ (decoding/encoding process). (only file format replacement) or ‘Encoders’ Type for wrappers: Select the type of wrapper to be used: • MJPEG EVS to MJPEG Quick Time: to convert an MJPEG EVS MXF file to MOV QuickTime format • MJPEG QuickTime to MJPEG EVS: to convert MJPEG MOV Quick Time format to EVS XT MXF format. • IMX EVS to IMX MXF OP1A: to convert an IMX EVS MXF file to MXF OP1A format • IMX MXF OP1A to IMX EVS: to convert an IMX MXF OP1A file to IMX EVS format • IMX EVS to IMX Avid MXF OPAtom: to convert an IMX EVS MXF file to Avid MXF OPAtom format 91 Issue 1.16.D MediaXchange Version 1.16 User’s Manual Author: Serge Comes - EVS Broadcast Equipment – May 2009 • IMX AVID MXF OPAtom to IMX EVS: to convert an IMX Avid MXF OPAtom file to IMX EVS format • IMX EVS to IMX AVI: to convert an IMX EVS MXF file to AVI format • IMX EVS to IMX Quick Time: to convert an IMX EVS MXF file to Quick Time format • IMX Quick Time to IMX EVS: to convert an IMX Quick Time file to IMX EVS format • AVID DNXHD® EVS to Quick Time: to convert a AVID DNXHD® EVS MXF file to Quick Time format • AVID DNXHD® Quick Time to EVS: to convert a AVID DNXHD® Quick Time file to EVS MXF format • AVID DNXHD® EVS to AVID MXF OPAtom: to convert a AVID DNXHD® EVS MXF file Avid MXF OPAtom format • AVID DNXHD® MXF OPAtom to EVS: to convert a AVID DNXHD® MXF OPAtom file to EVS MXF format • EVS to EVS 2MB Blocks: to convert file to EVS MXF 2MB Blocks format • MPEG2 INTRA EVS to MPEG2 INTRA AVI: to convert an MPEG2 Intra EVS file to MPEG2 Intra AVI format • Apple ProRes EVS to Quick Time: to convert a ProRes EVS MXF file to Quick Time format • Apple ProRes Quick Time to EVS: to convert a ProRes Quick Time file to ProRes EVS format Type for encoders: Select the type of codec to be used: • M-JPEG (EVS XT): to encode in EVS M-JPEG compatible with XT server family. • DV Family: to encode using DV family formats (DV 25, DVCPRO 25/50, XDCAM (DVCAM), P2) • DVCPRO HD: to encode using DVCPRO HD format • IMX- D10: to convert to IMX format • MPEG2: to convert to MPEG-2 formats. • MPEG1: to convert to MPEG-1 formats. • XDCAM HD: to convert to XDCAM HD compliant XDCAM HD. • Windows Media: to convert to Windows Media family formats (WM9, MPEG-4) • Avid DNxHD® Encoder: to convert to Avid DNxHD® format • H264 Encoder: to convert to H264 format • Audio PCM: to convert to audio WAV format 92 MediaXchange Version 1.16 – User’s Manual Issue 1.16.D Author: Serge Comes - EVS Broadcast Equipment – May 2009 Settings: This button allows accessing the selected codec settings. 93 Issue 1.16.D MediaXchange Version 1.16 User’s Manual Author: Serge Comes - EVS Broadcast Equipment – May 2009 I NPUT A REA This area is used to add source files in the batch list and to list the parameters selected for the conversion of each file. Input File: Path and name of the source file. This path could be either a local directory, a remote directory (mapped drive) or a UNC. Codec: Choice of wrapper or encoder Output Path Path of the destination file or FTP Address of the destination Clip. 7.2.2 HOW TO CONVERT A LIST OF FILES To convert a list of files, proceed as follows: 1. To add a new source file to be converted: • Check the default parameters (Output, Mode and type). Modify them if necessary and double check the codec settings. • Right click in the Input area and select Add. • Choose your file to be converted by browsing the folders. 2. Repeat step 1 for each source file you want to add. This means you can select different settings for each file to be converted. A separate job will be performed. 3. Start the process by pressing the Start button in the monitoring window. During the process, a ‘Transcoding’ status is displayed in the bottom right corner of the application window. The ‘Encoding’ status is also displayed in the History log window, and the progress bar is moving continuously or step by step. 4. At the end of the batch process, check that the status in the History log is ‘completed’ for the list of jobs. A Post Process is started at the end of each job in case this option is selected in General Settings menu. 94 MediaXchange Version 1.16 – User’s Manual Issue 1.16.D Author: Serge Comes - EVS Broadcast Equipment – May 2009 7.3 SCAN MODE This mode is aimed at continuously scanning pre-defined directories and afterwards converting new coming files. Multi-scan allows defining scanning jobs with different parameters. This is useful if you need to automate a two-way process with NLEs like Avid or Apple Final Cut Pro. Tip The Scan mode cannot be used with Graphic Files. The Scan job does not scan read-only files. 95 Issue 1.16.D MediaXchange Version 1.16 User’s Manual Author: Serge Comes - EVS Broadcast Equipment – May 2009 7.3.1 DESCRIPTION OF THE INTERFACE O UTPUT G ROUP B OX Mode: Select between ‘Wrappers’ (decoding/encoding process). (only file format replacement) or ‘Encoders’ Type for wrappers: Select the type of wrapper to be used: • MJPEG EVS to MJPEG Quick Time: to convert an MJPEG EVS MXF file to MOV QuickTime format • MJPEG QuickTime to MJPEG EVS: to convert MJPEG MOV Quick Time format to EVS XT MXF format. • IMX EVS to IMX MXF OP1A: to convert an IMX EVS MXF file to MXF OP1A format • IMX MXF OP1A to IMX EVS: to convert an IMX MXF OP1A file to IMX EVS format • IMX EVS to IMX Avid MXF OPAtom: to convert an IMX EVS MXF file to Avid MXF OPAtom format • IMX AVID MXF OPAtom to IMX EVS: to convert an IMX Avid MXF OPAtom file to IMX EVS format • IMX EVS to IMX AVI: to convert an IMX EVS MXF file to AVI format • IMX EVS to IMX Quick Time: to convert an IMX EVS MXF file to Quick Time format • IMX Quick Time to IMX EVS: to convert an IMX Quick Time file to IMX EVS format • AVID DNXHD® EVS to Quick Time: to convert a AVID DNXHD® EVS MXF file to Quick Time format • AVID DNXHD® Quick Time to EVS: to convert a AVID DNXHD® Quick Time file to EVS MXF format • AVID DNXHD® EVS to AVID MXF OPAtom: to convert a AVID DNXHD® EVS MXF file Avid MXF OPAtom format • AVID DNXHD® MXF OPAtom to EVS: to convert a AVID DNXHD® MXF OPAtom file to EVS MXF format • EVS to EVS 2MB Blocks: to convert file to EVS MXF 2MB Blocks format • MPEG2 INTRA EVS to MPEG2 INTRA AVI: to convert an MPEG2 Intra EVS file to MPEG2 Intra AVI format 96 MediaXchange Version 1.16 – User’s Manual Issue 1.16.D Author: Serge Comes - EVS Broadcast Equipment – May 2009 • Apple ProRes EVS to Quick Time: to convert a ProRes EVS MXF file to Quick Time format • Apple ProRes Quick Time to EVS: to convert a ProRes Quick Time file to ProRes EVS format Type for encoders: Select the type of codec to be used: • M-JPEG (EVS XT): to encode in EVS M-JPEG compatible with XT server family. • DV Family: to encode using DV family formats (DV 25, DVCPRO 25/50, XDCAM (DVCAM), P2) • DVCPRO HD: to encode using DVCPRO HD format • IMX- D10: to convert to IMX format • MPEG2: to convert to MPEG-2 formats. • MPEG1: to convert to MPEG-1 formats. • XDCAM HD: to convert to XDCAM HD compliant XDCAM HD. • Windows Media: to convert to Windows Media family formats (WM9, MPEG-4) • Avid DNxHD® Encoder: to convert to Avid DNxHD® format • H264 Encoder: to convert to H264 format • Audio PCM: to convert to audio WAV format Settings: This button allows accessing the selected codec settings. Output Mode: • Folder Out: Select the destination file to be converted by browsing the folders. • XT Ftp Out: XT Ftp IP IP address of the target XT server User FTP login of the target XT server Password FTP password of the target XT server 97 Issue 1.16.D MediaXchange Version 1.16 User’s Manual Author: Serge Comes - EVS Broadcast Equipment – May 2009 Location ClipID of the first location to check when restoring. 2 modes are considered: • 123X: X could be A, B, C, D, E or F. In that case MediaXchange will check the availability of the clip, e.g. 123A clip. o If not available, MediaXchange will show an error message on the main windows. You will need to try again with a different location. o If available, The transfer will be done In any case, after each transfer, MediaXchange will increase by 1 the LSM ID with the same camera label, e.g. 124 A,125A,126A. Etc. • 123?: In this case, the “ Question Mark” allows MediaXchange to check all the camera labels. First check the availability of 123A, then 123B, 123C, 123D, 123E, 123F, 124A, 124B, etc. Cancel Auto Start: In case Auto Start Mode is selected in the General Settings menu, the Scan mode will automatically start when MediaXchange is launched. If you want to stop the Scan mode before, click on this button before the end of the countdown. Apply Changes: Once a scan job has been defined, it is possible to change its settings. Select first the job, make the changes, and then click on this button to update the scan job. S CANNING A REA This area is used to add source directories to be scanned. This directory could be either a local directory, a remote directory (mapped drive) or a UNC directory. Each directory to be scanned is listed. The directory must be checked in order to enter in the conversion criteria. By right-clicking the scan job, you have the possibility to : • Add a new scan job • Delete this scan job • Change the settings of this scan job Settings : When you select Settings, the following window is displayed. 98 MediaXchange Version 1.16 – User’s Manual Issue 1.16.D Author: Serge Comes - EVS Broadcast Equipment – May 2009 • Scan Filter: You can add some file extension in order to only scan those kinds of file formats. *.* means that you accept all file formats to be scanned. • Enable Post Processing: o Check this option to launch a Post Processing after the completion of a job o Post Processing Output path: if you select Default Output Path, MediaXchange will use the Post Processing Output Path defined in General Settings. Otherwise, the path defined below will be used instead. 7.3.2 PROCEDURE 1. Check the General Settings in the Tools menu: 2. Select the Use TXT File check box in General Settings (mandatory). a. Choose the timing mode: file creation date or file modification date. It is recommended to check File Creation Date instead of File Modification Date in General Settings window. b. Verify the Auto Start Mode selection. 3. To add a new scan job: a. Select the output (File or FTP). b. Select the mode. c. Select the wrapper or the encoder. d. Double check the codec settings. e. Add a new directory to scan by right-clicking the scanning area. Note that sub-directories are not scanned. They must be defined explicitly. Modify the settings of this scan job if needed (i.e. scan filtering and post processing). 4. Repeat step 2 for each scan job you want to add. This means different settings can be selected for each directory to scan (multi-scan mode). 5. Once a scan job has been defined, it is possible to change its settings. First select the scan job in the scanning area, make the changes, and then click on Apply Changes button to update the scan job. 6. Set up the Timing parameters (start Date/Time and Delay). 99 Issue 1.16.D MediaXchange Version 1.16 User’s Manual Author: Serge Comes - EVS Broadcast Equipment – May 2009 7. Select the directories to be scanned by checking them in the scanning area. 8. Start the scanning process by pressing the Start button in the monitoring window. The directories will be scanned successively approximately every 5 seconds. For each new file to be converted, a ‘Transcoding’ status is displayed in the bottom right corner of the application window. The ‘Encoding’ status is also displayed in the History log window, and the progress bar is moving continuously or step by step. A Post Process is started at the end of each job in case this option is selected in the General Settings menu. To stop the scanning process or change the parameters, push the Stop button in the monitoring area. 7.3.3 CONVERSION CRITERIA A file will not be converted in the following cases: • The file does not belong to the directories checked in the scanning area. • The date and time defined in the file creation date or file modification date are earlier than the start date/time (+ delay) defined in the Scan Mode parameters. • The date and time defined in the file creation date or file modification date are earlier than the local Windows time of the workstation. • For each job in the TXT file, the date and time are not earlier than the start date/time (+ delay) defined in the Timing parameters AND the codec is identical. A file will always be converted in the following cases: • The file belongs to the directories checked in the scanning area AND • No TXT file is associated. AND • The date and time defined in the file creation date or file modification date are more recent than the start date/time (+ delay) defined in the Timing parameters. 100 MediaXchange Version 1.16 – User’s Manual Issue 1.16.D Author: Serge Comes - EVS Broadcast Equipment – May 2009 Regional Contacts AMERICA (NORTH & LATIN) EVS Americas Tel: +1 973 575 7811 Fax: +1 973 575 7812 Tech. line: +1 973 575 7813 [email protected] EVS Canada Tel: +1 514 750 7544 Fax: +1 514 750 7518 Tech. line: +1 973 575 7813 [email protected] EVS Australia Tel: +61 02 9452 8600 Fax: +61 02 9975 1368 Mobile: +61 420 307 387 [email protected] EVS China Tel: +86 10 6808 0248 Fax: +86 10 6808 0246 Tech. line: +86 139 1028 9860 [email protected] EVS Hong-Kong Tel: +852 2914 2501 Fax: +852 2914 2505 Tech. line: +852 9401 2395 [email protected] EVS India Tel: +91 22 6697 2999 Fax: +91 22 2673 2092 Mobile: +91 98 9017 5958 [email protected] ASIA & PACIFIC EUROPE, MIDDLE EAST & AFRICA EVS Belgium Headquarters Tel: +32 4 361 7000 Fax: +32 4 391 7099 Tech. line: +32 495 284 000 [email protected] [email protected] marketing evs.tv EVS Brussels Tel : +32 2 421.78.78 Fax : +32 2 421.78.79 [email protected] EVS France Tel: +33 1 46 99 9000 Fax: +33 1 46 99 9009 Tech. line: +33 1 46 99 9003 [email protected] EVS Iberica Tel: +34 91 490 3930 Fax: +34 91 490 3939 Tech. line: +34 91 490 3933 [email protected] EVS Italy Tel: +39 030 296 400 Fax: +39 030 294 3650 Tech. line: +39 334 631 1493 [email protected] 101 Issue 1.16.D MediaXchange Version 1.16 User’s Manual Author: Serge Comes - EVS Broadcast Equipment – May 2009 102 EVS Middle East Tel: +971 4 365 4222 Fax: +971 4 425 3501 Mobile: +971 50 887 8758 [email protected] EVS UK Tel: +44 1372 387 250 Fax: +44 1372 387 269 Tech. line: +44 1372 387 266 [email protected] EVS Broadcast Equipment Liège Science Park 16, rue Bois St Jean B-4102 Ougrée Belgium Corporate Headquarters North & Latin America Headquarters Asia & Pacific Headquarters Other regional offices available on +32 4 361 7000 +1 973 575 7811 +852 2914 2501 www.evs.tv/contact To learn more about EVS go to www.evs.tv