1
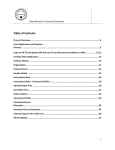
Learning Management System Powered by SARAS User Manual Copyright Copyright © 2013. Excelsoft. All rights reserved. If this document is distributed with software that includes an end-user agreement, this document, as well as the software described in it, is furnished under license and may be used or copied only in accordance with the terms of such license. Except as permitted by any such license, no part of this document may be reproduced, stored in a retrieval system, or transmitted, in any form or by any means, electronic, mechanical, recording, or otherwise, without the prior written permission of Excelsoft Technologies. Please note that the content in this document is protected under copyright law even if it is not distributed with software that includes an end-user license agreement. The content of this document is furnished for informational use only, is subject to change without notice, and should not be construed as a commitment by Excelsoft Technologies. Excelsoft Technologies assumes no responsibility or liability for any errors or inaccuracies that may appear in the informational content contained in this document. Please remember that existing artwork or images that you may want to include in your project may be protected under copyright law. The unauthorized incorporation of such material into your new work could be a violation of the rights of the copyright owner. Please be sure to obtain any permission required from the copyright owner. Any references to company names in sample templates mentioned in this document are for demonstration purposes only and are not intended to refer to any actual organization. Headquarters Excelsoft Technologies Pvt. Ltd. 1-B, Hootagalli Industrial Area, Mysore - 570 018 www.excelindia.com LMS/User Manual 2 Contents Table of Figures..................................................................................................................................5 New and Changed Information ...........................................................................................................6 Preface ..............................................................................................................................................7 Intended audience .................................................................................................................................... 7 Organization of this document ................................................................................................................. 7 Typographical conventions ....................................................................................................................... 7 Support ..................................................................................................................................................... 7 Chapter 1 – Introduction ....................................................................................................................8 Chapter 2 – Getting Started ................................................................................................................9 Starting the application........................................................................................................................... 10 Searching Programs ............................................................................................................................ 10 Registering as a new user.................................................................................................................... 10 Viewing Frequently Asked Questions ................................................................................................. 15 Launching Help.................................................................................................................................... 15 Viewing Contact Details ...................................................................................................................... 16 Signing in to the application................................................................................................................ 16 Retrieving your forgotten password ................................................................................................... 17 Viewing the available programs .......................................................................................................... 17 Viewing the footer .............................................................................................................................. 19 Understanding the interface ................................................................................................................... 20 Helpdesk.................................................................................................................................................. 22 Creating a new ticket .......................................................................................................................... 22 Technical support .................................................................................................................................... 24 Exiting the application............................................................................................................................. 24 Chapter 3 – Using Home Section ....................................................................................................... 25 Viewing programs in progress ................................................................................................................ 26 Viewing the program progress............................................................................................................ 26 Viewing the course certificate ............................................................................................................ 26 LMS/User Manual 3 Viewing the time remaining to complete the program ...................................................................... 27 Viewing the time spent on the program so far ................................................................................... 27 Viewing Course Reports ...................................................................................................................... 27 Starting or continuing a program ........................................................................................................ 28 Viewing completed programs ................................................................................................................. 31 Viewing the program certificate ......................................................................................................... 31 Viewing Program Reports ................................................................................................................... 32 Providing Feedback ............................................................................................................................. 33 Browsing the catalog............................................................................................................................... 34 Viewing detailed information ............................................................................................................. 35 Adding to cart...................................................................................................................................... 36 Chapter 4 – Using Intelligence Panel ................................................................................................. 43 Viewing and editing your profile ............................................................................................................. 44 Viewing announcements ........................................................................................................................ 48 LMS/User Manual 4 Table of Figures Figure 1: Application start page/Sign In page ........................................................................................................................... 10 Figure 2: Individual Registration page (Login Details)............................................................................................................... 11 Figure 3: Individual Registration page (Login Details entry) ...................................................................................................... 12 Figure 4: Individual Registration page (Contact Details) ........................................................................................................... 12 Figure 5: Individual Registration page (Contact Details entry) .................................................................................................. 13 Figure 6: Individual Registration page (Profile Details) ............................................................................................................. 14 Figure 7: Individual Registration page (Successful registration) ................................................................................................ 14 Figure 8: FAQ page ................................................................................................................................................................. 15 Figure 9: Contact Us page ....................................................................................................................................................... 16 Figure 10: Application start page (Forgot Password) ................................................................................................................ 17 Figure 11: Program details page .............................................................................................................................................. 18 Figure 12: Browse Programs page ........................................................................................................................................... 18 Figure 13: Application interface ................................................................................................................................................ 20 Figure 14: Ticket Summary screen........................................................................................................................................... 22 Figure 15: Creating a new ticket - 1.......................................................................................................................................... 22 Figure 16: Creating a new ticket - 2.......................................................................................................................................... 23 Figure 17: Success message – new ticket raised ..................................................................................................................... 23 Figure 18: Viewing the submitted ticket .................................................................................................................................... 23 Figure 19: Technical support.................................................................................................................................................... 24 Figure 20: Home page ............................................................................................................................................................. 26 Figure 21: Course Certificate ................................................................................................................................................... 27 Figure 22: Program Report ...................................................................................................................................................... 28 Figure 23: Home page ............................................................................................................................................................. 29 Figure 24: Program details page (new program) ...................................................................................................................... 29 Figure 25: Course displayed in course player (new program) ................................................................................................... 30 Figure 26: Home page ............................................................................................................................................................. 31 Figure 27: Program Certificate ................................................................................................................................................. 32 Figure 28: Program Report ...................................................................................................................................................... 32 Figure 29: Home page ............................................................................................................................................................. 34 Figure 30: Browse Catalog....................................................................................................................................................... 35 Figure 31: More information about the program........................................................................................................................ 36 Figure 32: Status message – item added to cart ...................................................................................................................... 36 Figure 33: My basket ............................................................................................................................................................... 37 Figure 34: Address details ....................................................................................................................................................... 37 Figure 35: Address details - 2 .................................................................................................................................................. 38 Figure 36: Confirm details ........................................................................................................................................................ 39 Figure 37: Selecting payment method ...................................................................................................................................... 40 Figure 38: Entering card details - 1 .......................................................................................................................................... 41 Figure 39: Entering card details - 2 .......................................................................................................................................... 42 Figure 40: Home page ............................................................................................................................................................. 44 Figure 41: Edit Profile (Login Details) ....................................................................................................................................... 45 Figure 42: Edit Profile (Contact Details) ................................................................................................................................... 46 Figure 43: Edit Profile (Profile Details)...................................................................................................................................... 47 Figure 44: Profile updated........................................................................................................................................................ 47 LMS/User Manual 5 New and Changed Information Document Version Date Changes 1.0 2 Sep 2013 Initial version 2.0 25 Oct 2013 Updated the following: 3.0 16 Jan 2014 A new field „CFA Charter Holder Id‟ added to the Individual Registration page A new field „CFA Charter Holder Id‟ added to the Edit Profile screen Helpdesk information Updated the following: LMS/User Manual A new option to buy course by making payment over a payment gateway Replaced the logo and captured new screenshots to reflect the new UI 6 Preface This document describes the features of Copal Amba LMS application and guides you with intuitive procedures to use its web interface for configuring and using the system. Intended audience The intended audience for this manual is personnel responsible for using Copal Amba LMS application. It describes the features of Copal Amba LMS application and procedures for using it. Organization of this document This document contains the following chapters: Chapter 1 Introduction Chapter 2 Getting Started Chapter 3 Using Home Section Chapter 4 Using Intelligence Panel Typographical conventions It is important to understand the typographical conventions used in this guide prior to using Copal Amba LMS application. This Represents Bold Menus, menu option, radio button, check boxes, command buttons or a link. CAPS Keys on the keyboard and buttons on screens. Note: A note, providing additional information about a certain section/topic. Support In case you have any queries, contact the Copal Amba customer support team. E-mail address: [email protected] Please e-mail us any feedback you may have on this document to [email protected] LMS/User Manual 7 Chapter 1 – Introduction The Copal Amba application is designed to facilitate a seamless learning experience. Its various features help in improving the quality of learning and offers smart interaction capabilities among users. It aids them to carry out learning tasks anytime, anywhere. Users make learning engaging, stimulating, and more fun. They can browse through the available programs, search for a particular program, view and edit their profile, and view announcements. They can also generate various reports. LMS/User Manual 8 Chapter 2 – Getting Started In this chapter, you will learn how to: Login to the application Understand the interface Logout of the application LMS/User Manual 9 Starting the application 1 Type the URL in the web browser address bar and click GO. Figure 1: Application start page/Sign In page Searching Programs Located at the top right corner, this feature helps you to search for available programs by typing the program name in the text box and or pressing ENTER key on the keyboard. Registering as a new user If you are not a registered user, you can register yourself to access the application. To do this, 1 Click Register. LMS/User Manual 10 Figure 2: Individual Registration page (Login Details) Field Description First Name Enter your first name in this field. Last Name Enter your last name in this field. Email address Enter your valid email address in this field. Note that the email address is used for signing into the application. Confirm email address Confirm the email address you entered in this field. Password Enter a sign in password in this field. Note that the password characteristics are displayed in green text below this field. Choose a password accordingly. Confirm Password Confirm the password you entered in this field. CFA Charter Holder Id Enter your Certified Financial Analyst (CFA) Charter Holder id in this field. NOTE: Fields marked * are mandatory. 2 Fill in the details as below: LMS/User Manual 11 Figure 3: Individual Registration page (Login Details entry) 3 Click NEXT. Figure 4: Individual Registration page (Contact Details) LMS/User Manual 12 Field Description Address 1 Enter your address for communication in this field. Address 2 Enter your address for communication in this field. City/Town Enter your city/town in this field. Telephone number Enter your telephone number in this field. Postcode/Zip code Enter your area‟s postal code/zip code in this field. Country Select your country of origin from the drop-down list. NOTE: Fields marked * are mandatory. 4 Fill in the contact details as below: Figure 5: Individual Registration page (Contact Details entry) 5 Click NEXT. NOTE: You can revisit the previous page, if required, by clicking PREVIOUS. LMS/User Manual 13 Figure 6: Individual Registration page (Profile Details) 6 Click BROWSE to select a photograph from your computer. 7 Click UPLOAD PHOTO. The uploaded photo will be displayed under PROFILEPICPREVIEW. 8 Click SAVE to save the photo or REMOVE to remove the uploaded photo. 9 Select “I have read and agreed to the terms and conditions.” NOTE: To view the terms and conditions, click terms and conditions link. 10 Click SUBMIT. Figure 7: Individual Registration page (Successful registration) LMS/User Manual 14 Viewing Frequently Asked Questions 1 Click FAQ. The frequently asked questions page opens in a new window. Figure 8: FAQ page Launching Help 1 Click Help to launch the application help file. LMS/User Manual 15 Viewing Contact Details 1 Click Contact us to view the Copal Amba‟s contact details. Figure 9: Contact Us page Signing in to the application 1 Type the login credentials provided to you. 2 Click SIGN IN. NOTE: An attempt to log in with an incorrect email id or password displays an appropriate error message in red font above the E-mail field. LMS/User Manual 16 Retrieving your forgotten password 1 In case you forgot your sign in password, click Forgot your password? Figure 10: Application start page (Forgot Password) 2 Enter your registered email address in the E-mail field. 3 Click GET PASSWORD. The password will be sent to your email address. Viewing the available programs NOTE: Listed under the Special offers section, by default, 5 recently added programs are displayed. 1 Click on any program to view its details. LMS/User Manual 17 Figure 11: Program details page 2 To view the entire list of programs, click VIEW MORE. Figure 12: Browse Programs page NOTE: You can view more details about a program by clicking MORE INFORMATION. To sign in to the application, click SIGN IN. To find a specific program, use the search feature on the top. LMS/User Manual 18 Viewing the footer The footer section displays the SARAS branding, link to view disclaimer, and copyright information, as below: LMS/User Manual 19 Understanding the interface The application is designed for extreme ease-of-use. The GUI is simple and offers a seamless navigation experience. This section of the guide explains the screen layout, the menus and the general interface, as seen in the figure below. Figure 13: Application interface Welcome Banner – This section on the top displays the application logo, links for technical support and logout, option to search programs, and links to Home, FAQ, Help, and Contact us sections. Home Section – This section contains a listing of programs – whether in progress or completed. Intelligence Panel – This section on the right displays your profile information (uploaded photo and name). You can edit your profile and view related announcements in this section. LMS/User Manual 20 Links and Buttons on the screen - Links and Buttons help in carrying out a specific task. For example, clicking the Tech support link will open the technical support pop-up in the same window and clicking Logout will exit the application. Commonly used across the application – These actions are commonly used across the application: Navigation path – This is the path navigated by you to your current location, located below the welcome banner. For example, denotes that you are now on the Program details page. This trail, commonly referred to as the breadcrumb, allows you to keep track of your location within the Copal Amba LMS application. Pagination - If the entries on a screen exceed than one page, then by default, first page is displayed. You can navigate to a different page by clicking the corresponding page number at the bottom the screen. LMS/User Manual 21 Helpdesk This section displays the helpdesk information, where you can view the ticket summary. The Ticket Summary page opens in a new window. Figure 14: Ticket Summary screen Creating a new ticket 1 Click New Ticket link. Figure 15: Creating a new ticket - 1 Field Description Category Select a category from the drop-down list. Priority Select the priority from the drop-down list. Subject Type the subject of the ticket, usually the brief description of the problem, in this field. Detail Type the problem description in detail, in this field. Attachment Click 2 to insert a file as an attachment. Enter the relevant details. LMS/User Manual 22 Figure 16: Creating a new ticket - 2 3 Click SUBMIT. Figure 17: Success message – new ticket raised 4 To view the submitted ticket, click View link under View column. Figure 18: Viewing the submitted ticket LMS/User Manual 23 Technical support This section displays the technical details of the application, like the URL, build number, user name, session id, operating system used, browser being used to browse the application, server name that is being accessed, and the current timestamp. Figure 19: Technical support Exiting the application The application has to be exited properly by logging out. To log out of the application at any point of time, you can click Logout ). NOTE: If you do not use the application for a fixed time, then the current session expires and Login page is displayed. LMS/User Manual 24 Chapter 3 – Using Home Section In the chapter, you will learn about: Viewing programs in progress View completed programs Browsing Catalog Starting a program Continuing an existing program Viewing the program progress Viewing the program certificate Viewing the time remaining to complete the program Viewing the time spent on the program so far Viewing the program report LMS/User Manual 25 Viewing programs in progress This section allows you to view all programs that are in „in progress‟ state. For each program, you can track the percentage of completion, view certificate, view time remaining for completion, view time already spent on the program, and view program report. 1 Login using the credentials provided to you. Figure 20: Home page The programs that are in progress are displayed under the Programs in progress section. The programs that are completed are displayed under the Programs completed section. For each program, you can do the following activities: Viewing the program progress You can view the progress of the program as indicated in percentage on the progress bar ). Viewing the course certificate You can view the course certificate by clicking the Certificate link. LMS/User Manual 26 Figure 21: Course Certificate NOTE: The Certificate link is enabled only when the course is 80% completed. You can print the certificate by clicking Print. Viewing the time remaining to complete the program You can view the time left for the program to be completed, as indicated by Time remaining ( ). Viewing the time spent on the program so far You can view the time spent on the program, as indicated by Time spent ). Viewing Course Reports You can view the report related to a course by clicking Report link. LMS/User Manual 27 Figure 22: Program Report Field Description Chapters/Topics This column displays the topic name/course name in the program. Time Spent This column displays the time spent on the course (in hh:mm:ss format). Status This column displays the status of the course. NOTE: The Report link is enabled only when the program is started. Starting or continuing a program You can start a program and browse its courses. Alternatively, you can also continue a program that is already browsed. 1 Login using the credentials provided to you. LMS/User Manual 28 Figure 23: Home page 2 Under Programs in progress section, click START or CONTINUE. NOTE: If you have already started the program, CONTINUE button is displayed. Figure 24: Program details page (new program) 3 Click Play to open the course in a course player, in a new window. LMS/User Manual 29 Figure 25: Course displayed in course player (new program) 4 Select a course from the left pane and click Start to start browsing the course. LMS/User Manual 30 Viewing completed programs This section allows you to view all programs that are in „completed‟ state. For each program, you can view certificate, view program report, and provide feedback. 1 Login using the credentials provided to you. Figure 26: Home page The programs that are completed are displayed under Programs completed section. For each program, you can do the following activities: Viewing the program certificate You can view the program certificate by clicking the Certificate link. LMS/User Manual 31 Figure 27: Program Certificate NOTE: The Certificate link is enabled only when each of the individual courses in the program is 80% completed. If there are any assessments, then it has to be fully completed. You can print the certificate by clicking Print. Viewing Program Reports You can view the report related to a program by clicking Report link. Figure 28: Program Report Field Description Program name This column displays the name of the program. Program start date This column displays the date when the program was first started. Program end date This column displays the date when the program was completed. Score (%) This column displays the score clocked in the program, in percentage terms. Test status LMS/User Manual 32 Providing Feedback You can provide feedback for the program by clicking Feedback link. You can enter the feedback in the feedback template. NOTE: You can provide feedback only for completed programs. LMS/User Manual 33 Browsing the catalog This section allows you to view all programs that are available. 1 Login using the credentials provided to you. Figure 29: Home page LMS/User Manual 34 2 Click BROWSE CATALOG. Figure 30: Browse Catalog NOTE: To search for a specific program in the list of available programs, type a program name in the Find textbox and click . Viewing detailed information 1 To view more information about the program, click MORE INFORMATION. LMS/User Manual 35 Figure 31: More information about the program Adding to cart 1 To add programs to your shopping cart, click ADD TO CART. Figure 32: Status message – item added to cart The total number of items that are added to the cart is displayed on the top, next to the shopping basket icon ( ). 2 Click on the number link. LMS/User Manual 36 Figure 33: My basket NOTE: The program name (s) being purchased, its price, and the total price is displayed. If any discount is applicable, then the discounted amount, followed by the net amount (rounded to the nearest whole number) is displayed. You can remove the chosen program from the cart by clicking REMOVE. If you want to browse more programs, then click BROWSE MORE PROGRAM. 3 Click PROCEED TO CHECKOUT. Figure 34: Address details NOTE: The address provided during registration is displayed by default. If you want to mention an alternate billing address, select Want to Give Alternate Billing Address. LMS/User Manual 37 Figure 35: Address details - 2 4 You can type the alternate address details and click ADD THIS ADDRESS. Then click NEXT. LMS/User Manual 38 Figure 36: Confirm details 5 After confirming all the details, select “I have read and agreed to the terms and conditions.” 6 Click PAY. You will be directed to the payment gateway. NOTE: To view the terms and conditions, click terms and conditions link. LMS/User Manual 39 Figure 37: Selecting payment method 7 Select your preferred payment method by clicking on the logo of fund transfer facilitator. LMS/User Manual 40 Figure 38: Entering card details - 1 8 Enter your card details as specified. LMS/User Manual 41 Figure 39: Entering card details - 2 9 Click PAY. If the payment is approved and the transaction is successful, you will be redirected back to the Amba website. LMS/User Manual 42 Chapter 4 – Using Intelligence Panel In the chapter, you will learn about: Viewing your profile Editing your profile Viewing discussions LMS/User Manual 43 Viewing and editing your profile This section displays your profile details, including your name and photograph (if uploaded). You can also edit your profile. Below your profile details, you can view announcements. 1 Login using the credentials provided to you. Figure 40: Home page On the right pane, under My Profile section, you can view your profile details. To further edit your profile, 2 Click EDIT PROFILE. LMS/User Manual 44 Figure 41: Edit Profile (Login Details) Field Description First Name Edit your first name in this field. Last Name Edit your last name in this field. Email address Your valid email address is displayed in this field. Note that this field cannot be edited. Confirm email address Your valid email address is displayed in this field. Note that this field cannot be edited. Password Enter a sign in password in this field. Note that the password characteristics are displayed in green text below this field. Choose a password accordingly. Confirm Password Confirm the password you entered in this field. CFA Id Edit your Certified Financial Analyst (CFA) id in this field. NOTE: Fields marked * are mandatory. 3 Make any edits if required and click NEXT. LMS/User Manual 45 Figure 42: Edit Profile (Contact Details) Field Description Address 1 Edit your address for communication in this field. Address 2 Edit your address for communication in this field. City/Town Edit your city/town in this field. Telephone number Edit your telephone number in this field. Postcode/Zip code Edit your area‟s postal code/zip code in this field. Country Select your country of origin from the drop-down list. NOTE: Fields marked * are mandatory. 4 Make any edits if required and click NEXT. NOTE: You can revisit the previous page, if required, by clicking PREVIOUS. LMS/User Manual 46 Figure 43: Edit Profile (Profile Details) 5 Add a new photograph if required and click UPDATE. NOTE: You can revisit the previous page, if required, by clicking PREVIOUS. Figure 44: Profile updated LMS/User Manual 47 Viewing announcements You can view any announcements in the Announcements section, below your profile. Click on the link to view the announcement in a pop-up. LMS/User Manual 48