1
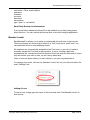
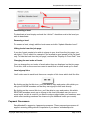
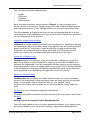
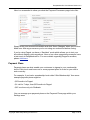
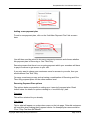
EasyMemberPro
User Manual
Version 2.0
http://www.easymemberpro.com
EasyMemberPro User Manual Version 2.0
Table of Contents
Pre Requisites.................................................................................. 5
Getting A Web Hosting Account................................................................... 5
Getting A Domain Name................................................................................5
Installation (New install)..................................................................6
Uploading your EasyMemberPro files......................................................... 6
Introduction to FTP....................................................................................... 6
Uploading the zip directly............................................................................. 7
Unzipping the zip first, and then uploading................................................ 7
Setting up a mySQL database...................................................................... 7
License key.................................................................................................... 8
Installation page............................................................................................ 8
Cron Job......................................................................................................... 8
Installation (Upgrade).................................................................... 10
Uploading your EasyMemberPro files....................................................... 10
Uploading the zip directly........................................................................... 10
Unzipping the zip first, and then uploading.............................................. 11
License key.................................................................................................. 11
Upgrade page...............................................................................................11
Setting Up Your Membership Site ................................................
12
Site Settings................................................................................................. 12
Member Levels............................................................................................ 14
Payment Processors................................................................................... 15
Payment Plans............................................................................................. 17
Coupons....................................................................................................... 20
Autoresponders........................................................................................... 22
Copyright 2009 Keep Moving Forward LLC
Page 2 of 51
EasyMemberPro User Manual Version 2.0
Email Templates.......................................................................................... 23
User Fields................................................................................................... 24
Template Setup............................................................................................ 25
Template Graphics...................................................................................... 25
Template Colors........................................................................................... 26
Page Management......................................................................... 27
Adding Pages...............................................................................................27
Editing Pages...............................................................................................30
Deleting Pages............................................................................................. 30
File Management............................................................................31
Uploading files via the control panel......................................................... 31
Uploading files via FTP............................................................................... 32
How to use your Secure Links when creating your pages...................... 33
Folder Management....................................................................... 35
Creating Folders / Sub Menus....................................................................35
Member Management.................................................................... 37
Add Members Manually.............................................................................. 37
Edit Members............................................................................................... 38
Search Members.......................................................................................... 39
Email Members............................................................................................ 39
Export Members.......................................................................................... 40
Import Members.......................................................................................... 40
Affiliate Management..................................................................... 41
Signing Up Affiliates Without Them Being A Member............................. 41
Affiliate Options........................................................................................... 41
Pay Affiliates................................................................................................ 42
Affiliates Files.............................................................................................. 43
Copyright 2009 Keep Moving Forward LLC
Page 3 of 51
EasyMemberPro User Manual Version 2.0
Email Affiliates............................................................................................. 43
Export Affiliates........................................................................................... 43
Promo Tools : Subject Lines...................................................................... 43
Promo Tools: Emails................................................................................... 44
Promo Tools: Graphics............................................................................... 45
Unpaid Commissions Report..................................................................... 46
Backups ......................................................................................... 47
Backup Database.........................................................................................47
Restore Database........................................................................................ 47
Delete Backups............................................................................................48
Additional Support.........................................................................49
Forum........................................................................................................... 49
Helpdesk...................................................................................................... 49
Resources ...................................................................................... 50
Hosting......................................................................................................... 50
Autoresponder............................................................................................. 50
Designers..................................................................................................... 50
Freelance Sites............................................................................................ 50
Copyright 2009 Keep Moving Forward LLC
Page 4 of 51
EasyMemberPro User Manual Version 2.0
Pre Requisites
Before you can install the EasyMemberPro script, you will need web hosting and a domain
name. If you donʼt already have a web hosting account or a domain name, follow these
steps:
Getting A Web Hosting Account
EasyMemberPro requires a Unix server and will not run on a Windows server. You will also
need to ensure that your server supports PHP 5 and mySQL 4.1
You can signup for web hosting for as little as $3.95/month at companies such as JustHost
(http://www.justhost.com)
If you donʼt already have a domain name, Just Host give you a free domain when you sign
up for their web hosting package.
Getting A Domain Name
A domain name is like a universal identifier for your membership site. Itʼs how people will
find your membership site on the Internet.
We always register our domains at a company called Name Cheap (http://
www.namecheap.com) which are very easy to use and offer good prices. A .com domain
costs around $9 per year to register.
Once you have registered your domain name, you need to “point” it to your web hosting
company. Your web hosting company will have “name servers” which look something like
this:
ns1.webhost.com
ns2.webhost.com
You need to “point” your new domain name to these nameservers. Hereʼs how to do this
with Name Cheap:
• Login to your account
• Click on the domain you want to transfer on the domain listing page.
• Enter the nameservers provided by the webhost. At least two nameservers are
recommended.
• Save Changes. The update will take at least 24 hours to take effect.
• Please note that email forwarding, URL forwarding and other services that are
dependent on our nameservers being used will no longer work.
Copyright 2009 Keep Moving Forward LLC
Page 5 of 51
EasyMemberPro User Manual Version 2.0
Installation (New install)
Please note: We have an installation service available for $25 which you can take
advantage of if youʼre not able to install the software yourself. If you would like this service,
please go to:
http://www.easymemberpro.com/index.php?page=login
Then, click on the “Additional Services” tab.
Uploading your EasyMemberPro files
The first step you need to do, is to upload your Easy Member Pro software files to your
web hosting account. If you donʼt already have a web host and domain name, please see
Page 5 of this guide.
There are two methods of uploading your files to your web hosting account.
1) Upload the easymemberpro-2.X.X.zip file directly to your web hosting account and
unzipping it using cPanel (this is faster!)
2) Unzipping the zip file on your computer first, and then uploading all the files to your web
hosting account.
Weʼll go over both options, but first, an introduction to FTP which you will need for both
options:
Introduction to FTP
To upload the Easy Member Pro zip file, you need an FTP client.
For those of you who donʼt know what FTP is, itʼs simply a way to upload files from one
computer to another, using a desktop software known as an FTP Client. There are free
FTP Clients available for both PC and Mac computers, one of the most popular is File Zilla
which you can download at http://filezilla-project.org/download.php
After installing and opening up your FTP client software, connect to your website using
your FTP details (these are available from your web host if you havenʼt already been sent
them). They usually look something like this:
FTP Host Name: ftp.yoursite.com
FTP Username: yourusername
FTP Password: yourpassword
The root of your website usually has a folder name called “public_html”, and any files you
upload inside public_html will be visible on the Internet.
So, if your website was called www.yourwebsite.com and your root folder was called
“public_html” then if you upload a file called index.html inside the public_html folder, it can
be accessed from www.yourwebsite.com/index.html
Copyright 2009 Keep Moving Forward LLC
Page 6 of 51
EasyMemberPro User Manual Version 2.0
Uploading the zip directly
Upload the easymemberpro-2.X.X.zip to your public_html folder. (Note, if you want to
install Easy Member Pro in a sub-folder such as www.website.com/protectedarea then you
should upload the zip file to public_html/protectedarea
Next, open up your cPanel control panel. The URL for this is usually www.site.com/cpanel
Your login details are usually the same as your FTP login details.
Once you are inside cPanel, go to File Management and browse to the location where you
uploaded your easymemberpro-2.X.X.zip file.
Once you can see the zip file, click on it once. Then on the right hand side of your cPanel,
you should see a menu option to Extract the zip. Click on that and all the files will be
extracted.
Note: If you donʼt have cPanel, or your cPanel doesnʼt have the extract option,
please use the following method of installation.
Unzipping the zip first, and then uploading
Browse to the easymemberpro-2.X.X.zip file on your computer and then right-click on it.
You should see a menu with an option to extract the files which are inside the zip.
If you donʼt have this option, you may first need to install an unzipping program such as 7Zip which you can get here:
Download 7-Zip
Once all the files have extracted, open up your FTP Client and then connect to your web
host using the FTP details they have provided you.
Upload the extracted files to your public_html folder using BINARY MODE. (Note, if you
want to install Easy Member Pro in a sub-folder such as www.website.com/protectedarea
then you should upload the extracted files to public_html/protectedarea.
The Easy Member Pro software is quite big, so this may take a while.. good time to get a
coffee!
Setting up a mySQL database
In order for your Easy Member Pro software to work, it needs a database to be set up.
Hereʼs a video tutorial showing you how to create a database.
Please take note of the database name, username and password when creating your
database.
Copyright 2009 Keep Moving Forward LLC
Page 7 of 51
EasyMemberPro User Manual Version 2.0
Hereʼs the video tutorial for creating a mySQL database on your web site.
http://www.youtube.com/watch?v=Wlx3dT19wuU
License key
Now that your files are all uploaded to your website, you need to install it. Make sure you
have your license key available because you wonʼt be able to install the software without it.
If you have lost your license key, please contact us at the support desk:
http://support.kmfmarketing.com
Make sure you include your receipt details when you purchased the software so that we
can verify your order.
Installation page
By now, you should have all your files uploaded to your website and your license key
ready. You should also have your mySQL database details ready.
Now, go to http://www.yoursite.com/install.php
If you installed the Easy Member Pro software in a sub-folder, please go to http://
www.yoursite.com/subfolder/install.php
Youʼll then be asked to enter some information such as your email, password, database
details and so on.. for the database host, enter “localhost”.
Follow the instructions and Easy Member Pro should be set up correctly. If you encounter
any problems at this stage, please check our installation topic at the support forum here:
http://www.easymemberpro.com/forum/viewforum.php?f=5
Cron Job
The final step in the installation process is to set up your cron job. The cron job acts as an
automatic timer which will carry out some maintenance functions on a regular basis (in the
case of the Easy Member Pro script, the cron job will carry out these functions once per
day.
Hereʼs how you set up your cron job:
• Login to your site's cPanel
• Click the Cron jobs icon
• Click Standard for the experience level
Copyright 2009 Keep Moving Forward LLC
Page 8 of 51
EasyMemberPro User Manual Version 2.0
• Type: lynx -dump http://www.yoursite.com/cron.php in the Command to Run
field
• Select 0 for Minute(s)
• Select 0 for Hour(s) — the Cron will run at midnight (server time) ∗
• Select Every Day for Day(s)
• Select Every Weekday for Weekday(s)
• Select Every Month for Month(s)
• Click Save Crontab
Copyright 2009 Keep Moving Forward LLC
Page 9 of 51
EasyMemberPro User Manual Version 2.0
Installation (Upgrade)
Please note: We have an installation service available for $25 which you can take
advantage of if youʼre not able to upgrade the software yourself. If you would like this
service, please go to:
http://www.easymemberpro.com/index.php?page=login
Then, click on the “Additional Services” tab.
Uploading your EasyMemberPro files
Please note: Before commencing any upgrade, make sure you backup your database
and your website files. If youʼre using cPanel you can do this on the “Backup” section
inside cPanel.
The first step you need to do, is to upload your Easy Member Pro upgrade files to your
web hosting account. You must make sure that the new upgrade files OVERWRITE your
existing files.
There are two methods of uploading your files to your web hosting account.
1) Upload the easymemberpro-upgrade-X.X.X-X.X.X.zip file directly to your web hosting
account and unzipping it using cPanel (this is faster!)
2) Unzipping the zip file on your computer first, and then uploading all the files to your web
hosting account.
Uploading the zip directly
Upload the easymemberpro-upgrade-X.X.X-X.X.X.zip to your public_html folder. (Note, if
your site has been installed in a sub-folder such as www.website.com/protectedarea then
you should upload the zip file to public_html/protectedarea.
Next, open up your cPanel control panel. The URL for this is usually www.site.com/cpanel
Your login details are usually the same as your FTP login details.
Once you are inside cPanel, go to File Management and browse to the location where you
uploaded your easymemberpro-upgrade-X.X.X-X.X.X.zip file.
Once you can see the zip file, click on it once. Then on the right hand side of your cPanel,
you should see a menu option to Extract the zip. Click on that and all the files will be
extracted.
Note: If you donʼt have cPanel, or your cPanel doesnʼt have the extract option,
please use the following method of installation.
Copyright 2009 Keep Moving Forward LLC
Page 10 of 51
EasyMemberPro User Manual Version 2.0
Unzipping the zip first, and then uploading
Browse to the easymemberpro-upgrade-X.X.X-X.X.X.zip file on your computer and then
right-click on it. You should see a menu with an option to extract the files which are inside
the zip.
If you donʼt have this option, you may first need to install an unzipping program such as 7Zip which you can get here:
Download 7-Zip
Once all the files have extracted, open up your FTP Client and then connect to your web
host using the FTP details they have provided you.
Upload the extracted files to your public_html folder using BINARY MODE. (Note, if you
installed your site in a sub-folder such as www.website.com/protectedarea then you should
upload the extracted files to public_html/protectedarea.
The upgrade files may be large, so this may take a while.. good time to get a coffee!
License key
Now that your files are all uploaded to your website, you need to upgrade it. Make sure
you have your license key available because you wonʼt be able to upgrade the software
without it.
If you have lost your license key, please contact us at the support desk:
http://support.kmfmarketing.com
Make sure you include your receipt details when you purchased the software so that we
can verify your order.
Upgrade page
By now, you should have all your files uploaded to your website and your license key
ready. Now, go to http://www.yoursite.com/upgrade.php
If you installed the Easy Member Pro software in a sub-folder, please go to http://
www.yoursite.com/subfolder/upgrade.php
Youʼll then be asked to enter your license key.
Follow the instructions and Easy Member Pro should be upgraded correctly. If you
encounter any problems at this stage, please check our installation topic at the support
forum here:
http://www.easymemberpro.com/forum/viewforum.php?f=5
Copyright 2009 Keep Moving Forward LLC
Page 11 of 51
EasyMemberPro User Manual Version 2.0
Setting Up Your Membership Site
Before you can unleash your membership site to the world, you need to set it up. This
process is easy but please ensure you go through all the steps so you donʼt miss anything.
The script will not work unless youʼve set it up correctly.
Before you begin these steps, please make sure you are logged in to your admin control
panel at http://www.yourwebsite.com/admin or if you installed the software in a sub-folder,
then go to http://www.yourwebsite.com/subfolder/admin.
Site Settings
Website Name
The name of your website (e.g My Super Site)
Website URL
The domain name of your site. If you installed EasyMemberPro in a subfolder,
include the subfolder in the URL.
Eg: http://www.mysupersite.com or http://www.mysupersite.com/folder
Site Owner Name
Your name (e.g. Joe Bloggs) This will appear on the bottom of emails that are sent
to your members.
Email Address
Your email address (e.g. [email protected]) Please ensure this email
address is active and working. Notifications such as when members join or cancel
will be sent to this email address.
Website Support Email
This will be the “from” email address that is used when emails are sent to members/
affiliates.
Date Format
This is the date format that will be shown to members/affiliates on various reports in
the members area. The date format used in the admin area is the American date
format (mm/dd/yyyy)
Currency Type
Copyright 2009 Keep Moving Forward LLC
Page 12 of 51
EasyMemberPro User Manual Version 2.0
This is used when displaying currency amounts to members/affiliates throughout
the site.
Display One Time Offer Page
If this is checked, then when members login for the first time, they will be redirected
to the One Time Offer page. You can edit the One Time Offer page in the Page
Management area. The One Time Offer page is inside the “member” folder.
Display Support Page Contact Form
If this is checked, then a contact form will be made available to members in the
members area. You would usually turn this off if you have your own support desk
website and you wish to use that instead.
Easy Member Pro Affiliate Link
At the bottom of your website, youʼll notice the “Powered by EasyMemberPro” link.
As an EasyMemberPro affiliate, you can get paid 50% for any sales you refer to us
as a result of people clicking on your link at the bottom of your pages.
When you bought your Easy Member Pro license, you automatically became an
Easy Member Pro affiliate! To get your affiliate link, simply login to the Easy
Member Pro customerʼs member area here:
http://www.easymemberpro.com/index.php?page=login
Then, go to the Affiliates tab and view your details. You can then get your affiliate
link.
Next, simply copy and paste your affiliate link into the Affiliate Link box on your own
site and when your site visitors purchase EasyMemberPro via your link, youʼll get
50% commission!
For more promotional tools you can use, please have a look here:
http://www.easymemberpro.com/affiliates.php
HTTP Post URL
This is for advanced users only. If you have an external script that you wish to call
when members signup on your EasyMemberPro membership site, then you can put
the URL of your script in this box.
Then, whenever members signup or cancel their account, a HTTP Post will be sent
to the URL you specify, so that your script can carry out other operations.
The variables that are posted are:
user_id = The EasyMemberPro database unique id for the member
Copyright 2009 Keep Moving Forward LLC
Page 13 of 51
EasyMemberPro User Manual Version 2.0
username = Their email address
password
forename
surname
itemname
itemnumber
type (“new” or “cancelled”)
Email Daily Backup to Adminstrator
If you would like a database backup file to be emailed to you daily, then please
check this box. You can restore the backup files at any time using phpMyAdmin.
Member Levels
EasyMemberPro allows you to setup a membership site with one or more levels.
There are already two levels built-in which is a “free” level and a “paid” level. You
can deactivate those or add additional levels.
All members are automatically assigned to the Free level, so you do not need to
manually assign the Free level to any member. If youʼre running a paid only
membership site, members will still be linked to the Free level but that doesnʼt mean
they will access your site for free, so donʼt worry about that.
Once a level has been added, you canʼt delete it, you can only deactivate it.
To manage your levels, click on the “Member Levels” link on your side bar within the
main “Settings” tab.
Adding A Level
To add a level, simply type the name of the level and click “Add Member Level” as
seen below:
Copyright 2009 Keep Moving Forward LLC
Page 14 of 51
EasyMemberPro User Manual Version 2.0
Deactivating a level
To deactivate a level simply uncheck the “Active?” checkbox next to the level you
wish to deactivate.
Renaming a level
To rename a level, simply edit the level name and click “Update Member Level”.
Hiding levels from the join page
If you donʼt want people to be able to signup to your level from the join page, you
can hide it. This is useful for example if you wanted to send people a link via email
only. To hide the level from the join page, uncheck the “Display on Front End?” box.
Changing the sort order of levels
You can change the sort order of levels when they are displayed on the join page.
To do this, click on the arrow icons next to each level to move levels up or down.
Level signup links
Youʼll notice next to each level there are a couple of link icons which look like this:
By clicking on the first link icon, youʼll be able to copy and paste a link which you
can give to NONE members so that they can signup to this level directly.
By clicking on the second link icon, youʼll be able to copy and paste a link which
EXISTING members must use to signup to this level (members can join one or
more levels, so this is useful if you want to setup a page inside your members area
which offers existing members the chance to join additional levels you create).
Payment Processors
EasyMemberPro supports 4 payment processors. These payment processors all
support recurring billing which is imperative if you have a membership site.
Copyright 2009 Keep Moving Forward LLC
Page 15 of 51
EasyMemberPro User Manual Version 2.0
The 4 processors that are supported are:
•
•
•
•
Paypal
2Checkout
Clickbank
Authorize.Net
By far the most commonly used processor is Paypal. Itʼs easy to signup for an
account and the costs are low. Paypal accept most major credit and debit cards so
even customers that donʼt have a paypal account yet, can still pay with their card.
The only drawback to Paypal is that you canʼt sell your membership site to a new
owner because all the subscriptions on your account will be linked to you and these
canʼt be changed as far as we know.
Signup for a paypal account here.
2Checkout is another payment processor you may wish to try. Transaction charges
are higher than paypal and it takes longer to get paid but they are reliable and have
been in business for a long time. It costs around $50 to setup an account with
2Checkout. You should be able to transfer ownership of a 2Checkout account
should you wish to sell your membership site at some point in the future.
Signup for 2Checkout here.
Clickbank allows your members to pay via credit card or paypal, so you get the
best of both worlds. It costs around $50 to setup an account with Clickbank and
accounts are transferable. Fees are reasonable and they can pay you via check or
direct bank deposit, even on a weekly basis in some cases. One of the best benefits
of using Clickbank is that they pay affiliates automatically, which can be a big time
saver, especially as itʼs something you might need to do every month.
Signup for Clickbank here.
Authorize.Net can be used by merchants who have their own Internet merchant
account. The main benefit is that transaction costs are lower and that you get paid
faster. You will need a secure certificate (SSL) on your website if using
Authorize.net. Please ask your web host for more information if going down this
route.
Click here for more information regarding Authorize.net
Powerpay is a popular merchant account provider and you may wish to check them
out here.
Setting up your processor(s) inside EasyMemberPro
Once you have signed up for one or more payment processors, youʼll need to enter
the relevant details on the “Payment Processors” page inside EasyMemberPro.
Copyright 2009 Keep Moving Forward LLC
Page 16 of 51
EasyMemberPro User Manual Version 2.0
Here is a screenshot to show you what the Payment Processors page looks like:
Simply enter your account information and click “Save Changes” when youʼre done.
Make sure that any processors youʼre not using are unchecked before saving.
If youʼre using Paypal, we have a “Sandbox” mode which allows you to test your
site without making real transactions. None of our other supported processors have
a test mode in EasyMemberPro. For more details regarding Paypalʼs sandbox,
please click here.
Payment Plans
Payment plans are what enable your customers to signup to your membership
levels. Each level must have one or more payment plans in order for your site to
work correctly.
For example, if you had a membership level called “Gold Membership” then some
example payment plans might be:
• $37/month via Paypal
• $1 trial for 7 days, then $37/month via Paypal
• $97 one time only via Clickbank
You can manage your payment plans on the Payment Plans page within your
Settings area:
Copyright 2009 Keep Moving Forward LLC
Page 17 of 51
EasyMemberPro User Manual Version 2.0
Adding a new payment plan
To add a new payment plan, click on the “Add New Payment Plan” link as seen
here:
You will then need be asked to choose a payment processor and choose whether
this payment plan is Recurring or One Time Only.
Recurring means that there is an on-going payment which your members will have
to pay to continue to get access to your site.
If you only want to charge your customers once for access to your site, then you
would choose One Time Only.
On many occasions you may end up having a combination of Recurring and One
Time Only payment plans for the same member level.
Recurring Payment Plan options
The options below are specific to setting up a “recurring” payment plan. Read
further below for details on options relating to a “one time only” plan.
Processor
This will be selected for you already.
Plan Name
This is what will appear on a drop down menu on the join page. Potential customers
will read this when making their payment choice. An example plan name would be
“Free 7 Day Trial then $47/Month”.
Copyright 2009 Keep Moving Forward LLC
Page 18 of 51
EasyMemberPro User Manual Version 2.0
Item Number
This should just be a number which uniquely identifies this payment plan. The
software will not allow you to enter a number which has already been used.
Member Level
This is the membership level which is linked to the payment plan. So when your
customers choose a level to join, they will only see the payment plans specific to
that level.
Recurring Amount
The recurring on-going price.
E.g. If your plan was a free 7 day trial and then $37/Month you would enter 37 in
this box.
Recurring Period
The number of days/weeks/months/years between regular payments.
E.g For a monthly subscription you could enter 1 and then choose Months for
Recurring Period Type.. that would mean “charge the customer every one month”
Recurring Period Type
How often should members be charged this price? Daily / Weekly / Monthly / Yearly
etc
How Many Times Will This Payment Recur?
How many payments will the member make in order to complete their subscription?
For example if you wanted to charge your customer each month, for 3 months, you
would enter 3. If you wish to charge the customer forever (until you or the customer
cancel the subscription), then enter 0.
Trial Period 1 Amount
If you wish to offer a free (paypal or Authorize.net only) or paid trial then enter the
price of the trial payment.
Trial Period 1 Period
This is where you enter the number of days/weeks etc between this trial payment
and the regular payment (or the 2nd trial payment if you decide to use that with
Paypal).
Trial Period 1 Type
Copyright 2009 Keep Moving Forward LLC
Page 19 of 51
EasyMemberPro User Manual Version 2.0
Days / Weeks / Months etc
Trial Period 2 Amount (Paypal only)
See above but for Paypal only
Trial Period 2 Period (Paypal only)
See above but for Paypal only
Trial Period 2 Type (Paypal only)
See above but for Paypal only
One Time Only Payment Plan options
The options below are specific to a One Time Only payment plan only.
Processor
This will be selected for you already.
Plan Name
This is what will appear on a drop down menu on the join page. Potential customers
will read this when making their payment choice. An example plan name would be
“$97 One Time Only”.
Item Number
This should just be a number which uniquely identifies this payment plan. The
software will not allow you to enter a number which has already been used
Member Level
This is the membership level which is linked to the payment plan. So when your
customers choose a level to join, they will only see the payment plans specific to
that level.
Amount
The price that you wish to charge for this one time plan!
Coupons
Coupons are a useful way to offer an incentive to get people to join your
membership site.
Copyright 2009 Keep Moving Forward LLC
Page 20 of 51
EasyMemberPro User Manual Version 2.0
For example, you could issue coupons to your past customers, or give them to your
affiliates to use in order to boost sales.
With EasyMemberPro every coupon is linked to a payment plan. The idea works
like this.
Letʼs say that your normal price is $37/month and youʼve already setup a payment
plan for that price.
Then, if you wanted to offer a coupon which would give people the chance to signup
for $27/month, you would need to create a payment plan specifically for that
coupon.
Once you have created the payment plan that will be used for a coupon, you need
to create the coupon in the system.
How to create a coupon
1) Click on the “Coupons” link on the side bar within the “Settings” page.
2) In the “Add New Coupon” section at the top, you need to enter a name for the
coupon, followed by the expiry date and quantity available. For an unlimited
quantity leave the value as 0. Once all information has been entered, click the
“Add Coupon Code” button.
3) Underneath the “Add New Coupon” section, you can see all the existing coupons
that you have previously saved. You can edit the coupon code names, or modify
the expiry date and quantity available values, as well as turn the coupon on or off
using the “Active” checkbox. Click the “Update Coupon Codes” button to save
any changes you make.
How to assign a coupon to a payment plan
Remember that you need to first create a discounted payment plan before you can
use any coupon that youʼve created.
When you have done this, you can assign a coupon to a payment plan by following
these steps:
1) Click on “Payment Plans” in the left side menu.
Copyright 2009 Keep Moving Forward LLC
Page 21 of 51
EasyMemberPro User Manual Version 2.0
2) On the Payment Plans page, go to the Existing Payment Plans section and
choose an existing level to display all payment plans inside that level.
3) Look for your discounted payment plan and then in the “Only For Coupon?”
column, select the coupon that you created previously.
4) Click “Update Payment Plans” to save these changes.
The coupon code is now linked to this payment plan. So, when members enter the
coupon code into the Join page, they will only see the payment plan that is linked to
that coupon code.
Autoresponders
EasyMemberPro has a built-in system for emailing your members, but you might
prefer to use an external autoresponder service to contact your members instead.
EasyMemberPro supports any autoresponder service, as long as they can provide
you with some simple HTML code.
The way the autoresponder works in EasyMemberPro is that when members first
login to their memberʼs area, in the background a special “post” will be made to the
autoresponder but the member wonʼt notice this happening.
Weʼll use Aweber as an example to show you how to go about setting up an
autoresponder in EasyMemberPro.
How to setup the autoresponder code
1) Click on “Autoresponders” in the left side menu.
2) Complete the fields such as Name / URL etc
3) Click “Save Settings”
Here is an example of what you might enter if youʼre using Aweber. Note, that
aweber will give you your own code, so donʼt copy this word for word.
Name
This is just used to remind yourself what autoresponder youʼre using. So if you used
Aweber, youʼd just enter “Aweber” in this box.
URL
This is the HTML FORM URL which you must take from the programming code that
your autoresponder give to you. Aweberʼs URL is “http://www.aweber.com/scripts/
addlead.pl”
Hidden Form Fields
These are HTML FORM fields that your autoresponder code may or may not
contain. They look something like this:
Copyright 2009 Keep Moving Forward LLC
Page 22 of 51
EasyMemberPro User Manual Version 2.0
<input type=”hidden” name=”name_here” value=”value_here”>
You must copy ALL hidden form fields from the code that your autoresponder gives
you and paste it into this box. For example here are what Aweberʼs fields might look
like:
<input name="meta_web_form_id" value="12345678"
type="hidden">
<input name="meta_split_id" value="" type="hidden">
<input name="unit" value="unit_here" type="hidden">
<input name="redirect" value="http://www.aweber.com/form/
thankyou_vo.html" id="redirect" type="hidden">
Name
All autoresponder forms have a “Name” box and an “Email” box. Different
autoresponders call these boxes by different names.
Following on from our Aweber example, they call the “Name” textbox “name” so we
would enter “name” in this box.
Email
Similarly, the Email textbox in Aweber HTML code is “from”. So we would enter
“from” in this box.
Active
Make sure this box is checked, otherwise your autoresponder will not be active on
your site.
When all values have been entered, click on “Save Settings”.
You may want to test your autoresponder is setup correctly, by creating a new
member account and then logging on as that member. Make sure they have a valid
email address. Then, after you have logged in, check in your autoresponderʼs
control panel (eg Aweber) and see if that email address was successfully added to
the relevant email list.
Email Templates
All the emails that are sent from the EasyMemberPro software are editable via builtin Email Templates. You can edit these emails from the Email Templates page
which can be located here:
Copyright 2009 Keep Moving Forward LLC
Page 23 of 51
EasyMemberPro User Manual Version 2.0
There are 3 kinds of emails, Member emails (these are sent to members), Admin
emails (these are sent to the administrator of the site) and Affiliate emails. Affiliate
emails are only sent to affiliates if youʼre using the built-in affiliate program (all
payment processors other than Clickbank use the built-in affiliate program)
Inside the email templates youʼll notice some text such as [[NAME]] and [[SITE
NAME]]. These are variables which the software substitutes with real information
when emails are sent. Please ensure they remain in-tact when editing your email
templates.
Email Footer
Also on the Email Templates page, is the Email Footer section. The text you enter
here is sent at the bottom of ALL out-going emails. Itʼs ideal if you wanted to
promote something to your list or perhaps add some details about your company
such as how to contact you for additional support.
User Fields
User fields allow you to turn on/off certain fields from the Join page. Specifically you
can enable/disable the following fields:
Address (including town, county, zip/postcode, country etc)
Phone
Mobile
Coupon field
Custom Fields
You can add up to 10 custom fields for capturing additional information from
members when they signup. You can view the information that members have
entered from the Member Management section in the admin panel.
Copyright 2009 Keep Moving Forward LLC
Page 24 of 51
EasyMemberPro User Manual Version 2.0
Template Setup
The Template Setup page allows you to configure how your membership site will
look from a visual perspective. It also has some options to enter SEO information
on a site-wide basis.
Meta Tags, Javascript
Meta-Tags are usually used to define keywords and a description for your site.
These days meta tags are not very important for ranking your site on the search
engines.
The Javascript box can be used for pasting a javascript which you want to be called
on every page. A good example of what this could be used for is the Google
Analytics code.
Template Layout Files
This is for advanced users only.
Although EasyMemberPro sites have a default look and feel (e.g a header, footer
and background graphic) you can actually use a completely custom website design.
Inside the /layout folder on your website, you can upload your own website layout
(can be a .html or .php file) There is one file for the non-members pages and one
file for members only pages.
You should use the default templates as guides for creating your own, because
there is code you need which you can copy and paste from the default templates
into your own.
Miscellaneous Template Settings
If youʼre using the default layout and not a custom layout, you can change various
page formatting options using these settings. They are all self explanatory so we
wonʼt go into any more detail here.
Template Graphics
If youʼre using the default layout and not a custom layout, then you can modify the
header, footer and background graphics of your members and non-members pages
here.
Copyright 2009 Keep Moving Forward LLC
Page 25 of 51
EasyMemberPro User Manual Version 2.0
Simply browse for a file to replace the default graphics and click “Save Changes” at
the bottom of the page.
You must ensure that your graphics are in JPG format (filename.jpg) and an
appropriate width/height before uploading. Consult a web designer if in doubt about
this.
Template Colors
Use these color options to match the layout of the website to your graphics. Click
“Save Changes” after making any changes.
You can click on the palette icon
Copyright 2009 Keep Moving Forward LLC
to choose from a larger range of colors.
Page 26 of 51
EasyMemberPro User Manual Version 2.0
Page Management
All pages on your EasyMemberPro site should be created inside the EasyMemberPro
software, using our easy WYSIWYG online page editor.
If you prefer to use a web design program such as Dreamweaver to create your pages,
you can create them and then copy and paste the source code into the EasyMemberPro
editor, or you just create a blank page in EasyMemberPro (eg called mypage) and create a
corresponding file called mypage.php within the /member folder and put your code inside
that, bypassing the built-in editor altogether.
You can access the Page Management section by clicking the “Page Management” tab in
your EasyMemberPro admin panel.
Adding Pages
When you first click on the Page Management tab, youʼll see a list of all the pages that are
currently inside your site.
To add a new page, first choose the folder where this page should be located.
Hereʼs where you choose the folder:
After choosing the folder for your new page, click the “New Page” icon as seen here:
After clicking the new page icon, youʼll need to create the actual page itself. If youʼre
adding a page in the main (non-member) folder, youʼll see two sections... “General
Settings” and “Page Content”.
Copyright 2009 Keep Moving Forward LLC
Page 27 of 51
EasyMemberPro User Manual Version 2.0
If youʼre adding a page within the Members folder (or any sub folders inside the members
folder) then youʼll see 4 sections.. “General Settings”, “Access Rights”, “Drip Feed
Settings” and “Page Content”.
Letʼs go through these sections now.
General Settings
Menu Bar Name
This is the text that will appear on the menu bar of your site. An example menu bar name
could be “Home”.
Page Title (for SEO)
Here, you can specify the text that is displayed in the browser tool bar... hard-core SEO
fanatics might recognise this as the HTML <title></title> tag. An example title tag could be
“Welcome to the XYZ website, selling ABC widgets since 1960”
File Name
The file name is used by the software to identify your page. For example in this link
index.php?page=filename you can see how it is used. Ensure that the file name is
lowercase and that is contains no spaces or special characters.
Access Rights (only for member pages)
Which member levels have access to this page?
You can assign which levels can have access to this page by clicking on the level name in
the list. To choose more than one level, hold down the CTRL key (or CMD key on Mac)
simultaneously while clicking.
This page should be unavailable to members that join after the following date:
If you want to prevent members from accessing the page after a certain date, check the
box and then choose the Month and Year from the drop downs.
This is useful if you upload content on a regular basis and you donʼt want new members to
access past content.
Drip Feed Settings (only for member pages)
How many days until user can view this page?
If you want the page to become available only after a specific number of days, then enter
the number of days in this box.
Display this as a dynamic page in menu bar?
Copyright 2009 Keep Moving Forward LLC
Page 28 of 51
EasyMemberPro User Manual Version 2.0
Instead of showing the name of the page in the menu bar (e.g. My Page), the name of the
page will instead be shown as MONTH YEAR (e.g. Nov 2009) The month and year will
show differently for different members, depending on when they joined the level that the
page is linked to.
Send email when page is active?
Check this box if you want an email to be sent to the member when this page becomes
available (according to the number of days set above)
Email content
If you checked the box above, then you need some content which will be sent to the
member via email when the page is available. Enter this email content here.
Page Content
EasyMemberPro uses a WYSIWYG text editor so that you can build your pages without
knowing any HTML code. You just type your text and add images similarly to how you
would use Microsoft Word.
You can hover over any of the toolbar icons of the page editor to see what they do. Most of
them will already be familiar to you if youʼve ever used Microsoft Word before.
Important: If youʼre copying and pasting any content from a Word document into the
EasyMemberPro editor, you MUST paste it by clicking on the “Paste from Word” icon
which looks like this:
Also there are certain variables which you can use inside your page to display other
information:
{%first_name%} = First Name of logged in member
{%last_name%} = Last Name of logged in member
{%email%} = Email/Username of logged in member
{%uid%} = User ID of logged in member
{%current_month%} = Current Month Name
After adding a new page, it wonʼt be viewable by your siteʼs visitors straight away. You will
first have to activate it. You can do this by clicking on the monitor icon when in Page
Management view as seen here (Make sure the monitor icon doesnʼt have a red X on it):
Copyright 2009 Keep Moving Forward LLC
Page 29 of 51
EasyMemberPro User Manual Version 2.0
Editing Pages
Editing pages is quite straight forward. When you first click on the Page Management tab,
youʼll see a list of all pages in the folder that youʼre currently viewing.
Simply choose a different folder to see the pages in that folder.
Donʼt forget that there may be more than one list of pages in a folder so you may have to
scroll through them using the pagination links as seen here:
Once you have found the page you wish to edit, simply click on the pencil icon as seen
here:
Please refer the the “Adding Pages” section above regarding the various page options and
also how to edit the content on the page itself.
Deleting Pages
You can delete any page that youʼve created on the system. You canʼt delete core pages
which are required by the script to function properly.
To delete a page, simply find the page inside Page Management, and then click on the red
X icon, as seen here:
Copyright 2009 Keep Moving Forward LLC
Page 30 of 51
EasyMemberPro User Manual Version 2.0
File Management
Easy Member Pro can protect your files from unauthorized access. The way it does this, is
that any files you upload, can be given a special “secure link” which requires members to
be logged in before they can access the file(s).
To create your files securely in this way, go to Page Management > File Management as
seen here:
You then need to upload your files to the system. This can be done in two ways:
1) Upload them via the Easy Member Pro control panel
2) Upload them via FTP (recommended if the files are larger than 5MB each)
Uploading files via the control panel
Click on “Add files” button as seen here:
On the Add Files page, you then need to browse for one or more files which you have
saved on your computer.
To browse for files, click on “Browse Files” as seen here:
Then choose your files (hold down CTRL button whilst selecting files to choose more than
Copyright 2009 Keep Moving Forward LLC
Page 31 of 51
EasyMemberPro User Manual Version 2.0
one file) and then click the Select/Choose button on your computer to confirm the file(s)
youʼve chosen.
Next, you should see the files youʼve selected on the Add Files page. The page will also
tell you the file size and give you an option to Remove the file incase you chose the wrong
one to upload.
Before the file(s) are actually uploaded, you need to click “Start Upload” as seen here:
Your files will then begin uploading and youʼll see a progress bar to give you an idea of the
status of the upload.
Once your files have uploaded, go back to the main File Management page and youʼll see
a list of the files, along with their Secure Links which Easy Member Pro would have
automatically generated.
Uploading files via FTP
If you have large files, or just prefer to use FTP, then you can use this method of uploading
your files.
For those of you who donʼt know what FTP is, itʼs simply a way to upload files from one
computer to another, using a desktop software known as an FTP Client. There are free
FTP Clients available for both PC and Mac computers, one of the most popular is File Zilla
which you can download at http://filezilla-project.org/download.php
After installing and opening up your FTP client software, connect to your website using
your FTP details (these are available from your web host if you havenʼt already been sent
them). They usually look something like this:
FTP Host Name: ftp.yoursite.com
FTP Username: yourusername
FTP Password: yourpassword
Next, navigate to your web hosting installation of EasyMemberPro and look for the admin/
assets folder. You simply need to drag your files across from your computer so that they
are copied across to the web hosting computerʼs admin/assets folder.
When all your files have been uploaded, close your FTP program and open up your
EasyMemberPro control panel.
Copyright 2009 Keep Moving Forward LLC
Page 32 of 51
EasyMemberPro User Manual Version 2.0
Then go to Page Management > File Management and click on the “Import Current
Assets” folder as seen here:
All the files inside your admin/assets folder will then appear on the main File Management
page, and secure links for each file will be automatically generated by the Easy Member
Pro software.
How to use your Secure Links when creating your pages
To ensure that your file downloads are kept safe and not viewable by non-members, you
need to use the “Secure Links” that Easy Member Pro generates for your files in the File
Management section.
To use a secure link, simply copy the link from the “Secure Link” column (highlight the link
with your mouse, right-click and choose “Copy Link / Copy”) as you can see below:
Then, open up your page where you wish to use the link in Page Management, and rightclick anywhere on the page and choose “Paste”. For example see below:
Copyright 2009 Keep Moving Forward LLC
Page 33 of 51
EasyMemberPro User Manual Version 2.0
Now, if someone tries to access that link without being logged in, they will simply be
redirected to your member login page!
Copyright 2009 Keep Moving Forward LLC
Page 34 of 51
EasyMemberPro User Manual Version 2.0
Folder Management
Creating Folders / Sub Menus
If you have many pages and would like to better organize them, then you need to use
Folders. The menu bar inside EasyMemberPro enables you to have 2 further sub-menus
like this:
Home
Members
|__ Another Sub Menu
|_____And Another Sub Menu
To create folders, go to Page Management in your admin panel and then click on “Folders”
in the side bar, as you can see here:
Adding A New Folder
To add a new folder, click on the Add Folder icon:
When you add the folder, youʼll be asked to enter the Folder Name and choose the Folder
Parent.
Folder Name
Just enter any name for your folder such as “Fishing Downloads”. Make sure that you donʼt
write the word “Folder” because that is added automatically by the script.
Folder Parent
The Folder Parent is the folder that your new folder will be located inside. So, if you chose
the Member Folder, your menu bar will look like this.
Member Folder
|____ Your New Folder
Editing / Deleting / Hiding A Folder
Copyright 2009 Keep Moving Forward LLC
Page 35 of 51
EasyMemberPro User Manual Version 2.0
To edit a folder, delete a folder or hide a folder, use these icons on the main Folders page:
The pencil icon allows you to edit the folder name (the folder name will appear at the top of
the page and you can edit it or change itʼs parent folder).
The red X icon allows you to delete the folder.
The monitor icon allows you to hide the folder (or display it if it was hidden).
Changing the order of menu bar folders
By default, folders are arranged alphabetically in the menu bar. If you want folders to
appear in a particular order, you can change the sort order from the main Folders page.
Click “Save Changes” after making any changes.
Copyright 2009 Keep Moving Forward LLC
Page 36 of 51
EasyMemberPro User Manual Version 2.0
Member Management
Managing members is really easy with EasyMemberPro. Donʼt forget, that members are
added/deactivated automatically to your site after they pay/cancel but you can also add/
edit/delete members at any time manually by using the “Member Management” section of
your admin panel.
Youʼll find the Member Management section on the top menu bar inside your
EasyMemberPro admin panel:
Add Members Manually
Click on “Add Members” in the side menu as seen here:
On the Add Members page you just need to enter details about the member youʼre adding.
Fields marked with a * are compulsory.
Most of the information that you enter is straight forward, but here is an explanation of
some of the requested information which you may not know:
Membership Expires
When you add a member, you need to assign them to a level (you can assign additional
levels to a member by editing the member and then choosing additional levels).
The expiry date that you choose on the Add Member page, will be the expiry date of the
level that you assign them. So, once the expiry date has occured, the member will no
longer be able to access that level (they will however still be able to login).
Note: The date format is in US format (mm/dd/yyyy)
Admin
If you want this member to be able to access the admin area of your site, check this box.
Affiliate
If you want this member to be able to promote your site as an affiliate, check this box.
Copyright 2009 Keep Moving Forward LLC
Page 37 of 51
EasyMemberPro User Manual Version 2.0
Paypal Email
If the member is marked as an affiliate and you are paying affiliates via Paypal, then you
need to enter the paypal email address of the member, so that they can be paid affiliate
commissions.
Commission Percentage
The site-wide commission percentage is set in the “Affiliate Management” area of your
site, but if you want to give a member a custom commission percentage, then you can
enter it here. This is useful for super affiliates / JVs who you wish to award a greater
commission percentage.
Member Level
Choose a level to assign to this new member. You can assign more levels later by editing
this member account.
Comments
If thereʼs any information you wish to save that relates to this member, then you can enter
it here.
Edit Members
To edit members, click on the “Manage Members” link in the side bar (or alternatively click
on “Member Management” in the top menu bar.
Here is the sidebar link:
Once youʼre on the Manage Members page, youʼll see a list of all the members in your
site. To edit a member, you can click on their First Name or simply look to the “Actions”
column and click the Edit icon as seen below:
The Edit Member page is similar to the Add Member page except that you can add/delete
the levels that members are linked to.
Copyright 2009 Keep Moving Forward LLC
Page 38 of 51
EasyMemberPro User Manual Version 2.0
To manually assign a level to a member, click on the “Assign a level to this member” drop
down and choose a level. Then click on the calendar icon next to the expiry date to choose
the date when access to the level will expire. If you donʼt want the access to expire, just
choose a year far into the future.
To delete a level that the member has access to, choose it from the “View all levels
assigned to this member” drop down and then click “Delete”.
Search Members
You can search for members by their name or email address by clicking on the Search
Members link in the side bar:
Email Members
You can email members directly from inside EasyMemberPro. To do this, click on the
“Email Members” link on the side bar:
Here is an explanation of the options on the Email Members page.
Email To
Choose “All Active Members” to email all members on your site that are signed up to at
least one paid level.
Choose “Cancelled Members” to email all members that are not signed up to any paid
level (but who once upon a time was signed up to a paid level).
Choose “Affiliates” to only email members who are also affiliates.
If you want to email members that are in a specific member level, you can choose the
level(s) from the list that is shown.
Subject
Enter the subject of your email
Copyright 2009 Keep Moving Forward LLC
Page 39 of 51
EasyMemberPro User Manual Version 2.0
Body
Enter the content of your email. Youʼll notice on the right hand side of the page, there are
various “Merge Codes” you can use within your email. For example if you wrote “Dear
[[FIRST NAME]]” in your email body, [[FIRST NAME]] will be substituted with the memberʼs
actual first name when the email is sent.
Send Test Email To Admin
Itʼs always a good idea to test your email before you send it. Check this box to only send
the email to yourself before sending it for real to your members.
Export Members
In the sidebar, you can click on Export Members to generate a CSV file of all the members
on your site. You can then import them into a spreadsheet application such as Excel for
further processing.
Import Members
EasyMemberPro also supports the importing of members via a CSV file. Please note, that
if you have active subscription payments that are already being sent to you from some
other software, then you canʼt import these into EasyMemberPro.
The EasyMemberPro import routine is only good for importing members, but not any
associated payments that you have already set up from another program.
The CSV you import must have the following fields in this order:
First Name
Last Name
Email
Address Line 1
Address Line 2
Address Line 3
City / Town
State / County
Postcode / ZIP
Country
Telephone
Mobile
Copyright 2009 Keep Moving Forward LLC
Page 40 of 51
EasyMemberPro User Manual Version 2.0
Affiliate Management
EasyMemberPro has a built-in affiliate program, and all members that join your site are by
default, affiliates as well.
This means that your members/affiliates can promote your site and earn commissions for
their trouble. You can set the commission percentage that they receive and you can also
assign custom percentages to individual members/affiliates.
With EasyMemberPro you can pay affiliates using Paypal Masspay which enables you to
pay hundreds of affiliates at the same time (a huge time saver).
You can email your affiliates from your admin panel, export them and even view
outstanding commissions at any time.
Lastly, the promotional tools section lets you upload emails and graphics which your
members/affiliates can see when they login to their memberʼs area under the “Affiliates”
tab.
All the affiliate related settings and reports are available from the “Affiliate Management”
tab on the top menu in your EasyMemberPro control panel, as seen here:
Signing Up Affiliates Without Them Being A Member
If you want affiliates to signup without actually having to signup as a member, then you
can simply tell them to visit:
http://www.yoursite.com/index.php?page=affiliates
Affiliate Options
This is the page where you can set options for your affiliate program. To access this
section, click on “Affiliate Options” in the side bar. Itʼs also the default page shown when
you first view the Affiliate Management section from the top menu bar.
Here is an explanation of the various options on this page:
Copyright 2009 Keep Moving Forward LLC
Page 41 of 51
EasyMemberPro User Manual Version 2.0
Affiliate Program
Hide Affiliate Program
Check this box if you donʼt want to have an affiliate program on your site (or if you are
using Clickbank, in which case you wonʼt want to use your built-in affiliate program).
Hide Memberʼs Name and Email Address from Affiliate Commissions Report
For privacy reasons you may not want to show the memberʼs name and email address to
affiliates when they check their commissions report. If this is the case, then you can
choose to hide these columns by checking this box.
Percentage of each sale
This is the default affiliate commission percentage which all affiliates will receive when
they refer sales to you. The percentage is paid on ALL payments, even recurring ones.
Payment Methods
Paypal = Choose this if you want to pay affiliates by Paypal Mass Pay
Check = Choose this if you want to pay affiliates by check
Pay Affiliates
Use this page when itʼs time to pay your affiliates. You can choose to pay your affiliates
whenever you want, thereʼs no set date when you need to pay them.
Use the “From” and “To” date range to find all unpaid commissions in a date range. By
default you will see all unpaid commissions that have occurred during the past year.
Note: The date format is the US date format (mm/dd/yyyy)
If you have chosen to pay affiliates by paypal, then any commissions which are due to be
paid to affiliates that have entered their paypal email address into the system, will be
displayed under “Paypal”.
Copyright 2009 Keep Moving Forward LLC
Page 42 of 51
EasyMemberPro User Manual Version 2.0
If you have chosen to pay affiliates by check, (or paypal affiliates that havenʼt entered their
paypal email address), then those unpaid commissions will appear in the Check section of
the page.
To generate the payment file for unpaid commissions (a CSV file), then click on the
“Generate Pay File” link on the right hand side of the page.
After downloading the payment files you must mark the commissions as “paid” which you
do in the next page “Affiliates Files”.
Affiliates Files
The Affiliates Files page allows you to re-download any payment files at any time. It also
allows you to mark unpaid commissions as paid, which you MUST remember to do each
time you pay your affiliates.
To mark commissions as paid, simply click on the “Mark As Paid” link next to the relevant
payment file.
Email Affiliates
To email all affiliates, click on “Email Affiliates” in the sidebar and youʼll then be redirected
to the “Email Members” page. You then need to choose the “Affiliates” option and only
members that are marked as affiliates will be emailed.
Export Affiliates
Similar to the Export Members page, the Export Affiliates page will export all members that
are marked as affiliates as a CSV file which you can import into other programs such as
Excel.
Promo Tools : Subject Lines
Copyright 2009 Keep Moving Forward LLC
Page 43 of 51
EasyMemberPro User Manual Version 2.0
Use this page to enter some promo email subject lines which your affiliates will see in their
memberʼs area. Itʼs a good idea to enter several alternative email subject lines for each
promo email that you enter in the system. This gives the affiliates more choice when
promoting your email to their mailing lists.
Note: You can only enter subject lines after youʼve first entered some emails into the
system.
Adding a New Subject Line
To add a new subject line, click on the “Add New Subject Line” link on the right hand side
of the page as seen here:
You then need to choose which Promo email that this subject line belongs to and enter the
Subject line itself.
Click “Submit” to save the subject line.
Editing an Existing Subject Line
Click on the pencil icon under “Actions” on the main Email Subject Lines page.
Deleting an Existing Subject Line
Click on the delete icon under “Actions” on the main Email Subject Lines page.
Hiding an Existing Subject Line
If you just need to hide the subject line but not delete it, then click on the green flag icon
until it turns red. This indicates that itʼs now hidden.
Promo Tools: Emails
Promo emails are used by your affiliates to send to their mailing lists. Many sales can be
made from email marketing (affiliates sending emails to their lists), so itʼs well worth your
time to add several promotional emails into your website for affiliates to use.
Adding a New Promotional Email
Click on “Add New Promotional Email” on the right hand side of the “Promotional Emails”
page, as seen here:
Copyright 2009 Keep Moving Forward LLC
Page 44 of 51
EasyMemberPro User Manual Version 2.0
You then need to enter the Email Title, Sort order and the Body content of the email.
Thereʼs also a button called “Insert Affiliate Link” use this button to insert a special code
which, when viewed by your affiliates will be replaced with their unique affiliate link.
Editing an Existing Promotional Email
Click on the pencil icon under “Actions” on the main Promotional Emails page.
Deleting an Existing Promotional Email
Click on the delete icon under “Actions” on the main Promotional Emails page.
Hiding an Existing Promotional Email
If you just need to hide the email but not delete it, then click on the green flag icon until it
turns red. This indicates that itʼs now hidden.
Promo Tools: Graphics
Promotional graphics are used by your affiliates to put on their websites and blogs.
Adding a New Promo Graphic
Click on “Add New Promotional Graphic” on the right hand side of the “Promotional
Graphics” page, as seen here:
You then need to browse for a file on your computer. Make sure that you choose a Gif or
Jpg file and that the file dimensions and file size are suitable for using on the web.
Click the “Submit” button to upload the graphic into EasyMemberPro.
Editing an Existing Promotional Graphic
Click on the pencil icon under “Actions” on the main Promotional Graphics page.
Deleting an Existing Promotional Graphic
Click on the delete icon under “Actions” on the main Promotional Graphics page.
Hiding an Existing Promotional Graphic
Copyright 2009 Keep Moving Forward LLC
Page 45 of 51
EasyMemberPro User Manual Version 2.0
If you just need to hide the graphic but not delete it, then click on the green flag icon until it
turns red. This indicates that itʼs now hidden.
Unpaid Commissions Report
The Unpaid Commissions report allows you to view all unpaid commissions and all
affiliates who earned those commissions.
Commissions for each affiliate are totaled but you can drill down to see individual
commissions by clicking on the link under the “View Details” column.
If you need to add a commission manually, you can do so on this page by clicking on the
“Add New Commission” link at the top of the page:
Copyright 2009 Keep Moving Forward LLC
Page 46 of 51
EasyMemberPro User Manual Version 2.0
Backups
Keeping backups of your website files and database is always a good idea.
EasyMemberPro can help you to backup your database by emailing you a daily database
backup file. You can set this on the Settings page in your EasyMemberPro admin panel.
Make sure you have setup the cron job on your website, otherwise this wonʼt work.
You can also backup and restore your EasyMemberPro database manually at any time via
the EasyMemberPro admin control panel. Simply navigate to the “Backup” tab in the top
menu:
Backup Database
In the backup section, the first page youʼll see is the “Backup Database” page. This page
displays a list of all the database tables in your website and you simply need to click the
“Backup” button to create the backup. Once the backup is created, it will be available on
the “Restore Database” page.
Restore Database
On this page youʼll see a list of all the manual backups which you have made. Simply
select any backup and click the “Restore” button to restore it.
Note, that any data that was added to the database between the backup and the current
date will be gone. Itʼs therefore better to set backups to be emailed to you on a daily basis
and restore these via phpMyAdmin (if you have cPanel on your website).
To restore a daily database backup file via phpMyAdmin, follow these steps:
1) Login to phpMyAdmin (usually a link to phpMyAdmin can be found on your websiteʼs
cPanel control panel.
2) Click on the tab labeled SQL
3) Uncheck the “show query here again” box
4) Choose your backup file (You should have saved the daily backup file to your computer
somewhere)
Copyright 2009 Keep Moving Forward LLC
Page 47 of 51
EasyMemberPro User Manual Version 2.0
5) Click “Go”
Delete Backups
On the “Delete Backups” page you can delete any manual backups youʼve made.
Copyright 2009 Keep Moving Forward LLC
Page 48 of 51
EasyMemberPro User Manual Version 2.0
Additional Support
If you need any further help, we have a forum and help desk available for you to use.
The forum is a great place to discuss all aspects of membership sites with fellow
membership site owners who are also using EasyMemberPro.
The helpdesk should be used for any bug reports or questions of a private nature.
Forum
To access the community forum, please register a free account at:
http://www.easymemberpro.com/forum
NOTE, that any negative comments about the software or other forum users will result in
your forum account being banned.
ALSO NOTE If you have a problem with the software (e.g bugs) then you must let us know
via the helpdesk. This is so that only qualified personnel who understand the script fully
respond to technical questions so that other forum users are not inadvertently given
incorrect information.
Helpdesk
To access our helpdesk, please visit http://support.kmfmarketing.com and choose the
EasyMemberPro department when submitting your ticket.
Copyright 2009 Keep Moving Forward LLC
Page 49 of 51
EasyMemberPro User Manual Version 2.0
Resources
Here are a list of resources which we have personally used when building and running our
membership sites. We highly recommend these resources for your own membership sites.
Hosting
If youʼre just starting out with your membership site then Shared Hosting is more than
adequate to host your site on. Itʼs cheap and these days youʼre offered plenty of web
space and bandwidth.
Our recommended Shared Hosting provider is Just Host. They offer unlimited web space,
bandwidth and a free domain name... all for just $3.95 at the time of writing.
Click here to find out more about Just Host.
If youʼre expecting to have a huge launch with tens of thousands of visitors daily, then you
should consider a VPS or Dedicated Server.
We have used the company Wired Tree who offer great value servers, excellent 24/7
support and all the features we could ask for.
Click here to find out more about Wired Tree.
Autoresponder
Autoresponders allow you to set up emails in advance that are sent to your subscribers
automatically without you having to do anything. You can also email subscribers at any
time too.
The most popular autoresponder services are Aweber and GetResponse.
Click here to find out more about AWeber.
Click here to find out more about GetResponse.
Designers
If you need help with designing website graphics for your EasyMemberPro site, then we
recommend you try Karl Warren at EcoverNinja. Weʼve worked with Karl for years and heʼs
very familiar with EasyMemberPro and an expert at minisite design. His prices are very
competitive too.
Click here to find out more about EcoverNinja.
Freelance Sites
For any additional work you need help with, such as article writing, content creation, SEO
services, programming services, video production etc, then you should consider using one
Copyright 2009 Keep Moving Forward LLC
Page 50 of 51
EasyMemberPro User Manual Version 2.0
of these freelance websites. There are literally thousands of people around the world doing
work for people and they could be doing yours for very competitive prices.
The freelance sites we recommend are:
GetAFreelancer
RentACoder (not just for programmers)
Elance
Copyright 2009 Keep Moving Forward LLC
Page 51 of 51