1
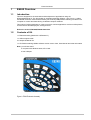
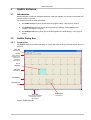
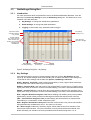
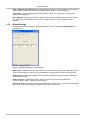
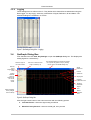
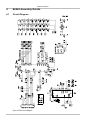
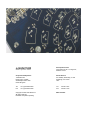
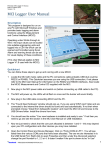
E6240 User Manual
2
Setting Up and Using the E6240
2.1
Setting Up
To prepare the E6240 for use, proceed as follows:
1. Using the USB cable provided, connect the E6240 to the computer (see Figure 2). Both LEDs
on the E6240 light constantly to indicate that there is power to the assembly.
2. Install the QmBtn software; either method is acceptable:
a. Put the supplied CD in the CD drive of the computer. Copy the contents of the CD to the
computer. Double-click the QmBtn software to open it.
OR
b. Go to www.qprox.com, point to the Support tab and click Download Archive. Click
Software and then the qmbtn (version 3.28 or later) link for the E6240. A dialog box
appears asking if you want to run or save the file that you are about to download. Click
Run. This automatically downloads the QmBtn software.
If a dialog box appears saying “The publisher could not be verified. Are you sure you want
to run this software?” click Run.
3. QmBtn software is displayed on the computer monitor. One LED is extinguished and the other
flickers continuously to indicate that the software is communicating with the E6240. Refer to
Section 2.2 and Section 3 for information about using the E6240 and QmBtn.
LED1 and LED2
Connector J2
USB cable to computer
Figure 2: E6240 Connections
2.2
Using the E6240 Assembly
1. Place the E6240 assembly on a level surface.
2. Keeping clear of the E6240, click Recall All on the QmBtn software.
3. Touch any key area on the E6240. Every time a key area is touched the corresponding key
area on the QmBtn software turns blue for the duration of the touch.
4. If the QmBtn software is not detecting, or detection is sporadic, decrease the detection
threshold slightly (NTHR, Section 3.3.2, page 9).
5. Refer to Section 3.3.2, page 9 and Section 3.3.3, page 10 for details of which parameters you
can change.
4 of 17