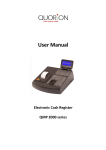
1
Transactional Technologies, LLC 3361 Boyington Drive, Suite 180 Carrollton, TX 75006 (p) 972.503.8900 (f) 972.503.9100 Transactional Technologies, LLC Virtual Terminal User Manual (vtum 2.0.0) June 26, 2004 Virtual Terminal User Manual © 2000-2003 Transactional Technologies. All Rights Reserved. 1 Transactional Technologies, LLC 3361 Boyington Drive, Suite 180 Carrollton, TX 75006 2 © 2000-2003 Transactional Technologies. All Rights Reserved. Virtual Terminal User Manual (p) 972.503.8900 (f) 972.503.9100 Transactional Technologies, LLC 3361 Boyington Drive, Suite 180 Carrollton, TX 75006 (p) 972.503.8900 (f) 972.503.9100 Primary Contact: Customer Support Center P 972.503.8900 F 972.503.9100 [email protected] Virtual Terminal User Manual © 2000-2003 Transactional Technologies. All Rights Reserved. 3 Transactional Technologies, LLC 3361 Boyington Drive, Suite 180 Carrollton, TX 75006 4 © 2000-2003 Transactional Technologies. All Rights Reserved. Virtual Terminal User Manual (p) 972.503.8900 (f) 972.503.9100 Transactional Technologies, LLC 3361 Boyington Drive, Suite 180 Carrollton, TX 75006 (p) 972.503.8900 (f) 972.503.9100 Table of Contents: 1 INTRODUCTION.............................................................................................................. 1-1 1.1 1.2 2 PREREQUISITES ............................................................................................................. 2-1 2.1 2.2 2.3 2.4 2.5 3 PURPOSE ....................................................................................................................... 1-1 SYNTAX CONVENTIONS ................................................................................................ 1-1 OBTAINING THE VTJETCOM SOFTWARE ....................................................................... 2-1 IDENTIFICATION AND REMOVAL OF PREVIOUS VTJETCOM APPLICATIONS .................. 2-3 SYSTEM SETTINGS ........................................................................................................ 2-4 INSTALL THE VTJETCOM APPLICATION SOFTWARE ..................................................... 2-5 INSTALLING SECURITY CERTIFICATES .......................................................................... 2-8 CONFIGURING THE VTJETCOM SOFTWARE ..................................................... 3-14 3.1 TERMINAL ID CONFIG ................................................................................................ 3-17 3.1.1 Settings for Non Process File Terminal Mode................................................... 3-17 3.1.2 Process File Terminal Mode.............................................................................. 3-21 3.2 HTTPS SETTINGS ....................................................................................................... 3-25 3.2.1 Production Gateway .......................................................................................... 3-26 3.2.2 Backup Gateway ................................................................................................ 3-26 3.2.3 Test Gateway...................................................................................................... 3-27 3.2.4 Backup Test Gateway......................................................................................... 3-27 3.2.5 Proxy Server....................................................................................................... 3-28 3.2.6 Proxy Port.......................................................................................................... 3-29 3.2.7 Use Production Gateway ................................................................................... 3-29 3.2.8 Gateway Time Out ............................................................................................. 3-30 3.3 GENERAL CONFIGURATION ......................................................................................... 3-30 3.3.1 Terminal Behavior ............................................................................................. 3-31 3.3.2 Receipt Format................................................................................................... 3-33 3.4 MAIL-TELEPHONE CONFIGURATION ........................................................................... 3-36 3.4.1 Mail-Telephone Order Terminal Configuration................................................ 3-36 3.4.2 User Data Description....................................................................................... 3-43 3.5 RETAIL CONFIGURATION ............................................................................................ 3-45 3.5.1 Retail Terminal Settings..................................................................................... 3-45 3.5.2 User Data Description....................................................................................... 3-49 3.6 FEATURES CONFIGURATION ........................................................................................ 3-51 3.6.1 Enable Off-Line Transactions............................................................................ 3-51 3.6.2 Process File Terminal........................................................................................ 3-52 3.6.3 Restaurant Mode................................................................................................ 3-53 3.6.4 Restaurant Settings ............................................................................................ 3-53 3.6.5 Check Settings.................................................................................................... 3-57 3.6.6 Process File Settings.......................................................................................... 3-58 3.7 COMPLETION............................................................................................................... 3-60 4 FEATURES ...................................................................................................................... 4-61 4.1 RESTAURANT MODE ................................................................................................... 4-62 Virtual Terminal User Manual © 2000-2003 Transactional Technologies. All Rights Reserved. i Transactional Technologies, LLC 4.2 4.3 5 3361 Boyington Drive, Suite 180 Carrollton, TX 75006 (p) 972.503.8900 (f) 972.503.9100 ENABLE OFF LINE TRANSACTIONS ............................................................................. 4-65 PROCESS FILE ............................................................................................................. 4-68 PASSWORDS................................................................................................................... 5-68 5.1 5.2 5.3 5.4 START-UP PASSWORD................................................................................................. 5-69 MERCHANT PASSWORD............................................................................................... 5-70 TRANSACTION PASSWORD .......................................................................................... 5-71 REPORTING PASSWORD ............................................................................................... 5-73 6 ABOUT ............................................................................................................................. 6-74 7 USING THE VTJETCOM APPLICATION................................................................... 7-1 7.1 TRANSACTION TYPES .................................................................................................... 7-1 7.1.1 Sale....................................................................................................................... 7-1 7.1.2 Auth Only ............................................................................................................. 7-1 7.1.3 Force .................................................................................................................... 7-1 7.1.4 Refund .................................................................................................................. 7-1 7.1.5 Void ...................................................................................................................... 7-1 7.1.6 Capture ................................................................................................................ 7-2 7.1.7 Check.................................................................................................................... 7-2 7.1.8 Check Void ........................................................................................................... 7-2 7.1.9 Check Reversal..................................................................................................... 7-2 7.1.10 Inquiry.................................................................................................................. 7-2 7.2 SWITCHING TERMINAL TYPES ....................................................................................... 7-2 7.2.1 Switching from Retail to MOTO or File Processing ........................................... 7-2 7.2.2 Switching from MOTO to Retail or File Processing ........................................... 7-3 7.3 USING THE VIRTUAL TERMINAL - RETAIL TERMINAL ................................................... 7-4 7.3.1 Field Information ................................................................................................. 7-5 7.3.2 Sale....................................................................................................................... 7-6 7.3.3 Auth Only ............................................................................................................. 7-7 7.3.4 Force .................................................................................................................... 7-8 7.3.5 Refund .................................................................................................................. 7-9 7.3.6 Void .................................................................................................................... 7-10 7.3.7 Capture .............................................................................................................. 7-11 7.3.8 Check.................................................................................................................. 7-12 7.3.9 Check Void ......................................................................................................... 7-13 7.3.10 Check Reversal................................................................................................... 7-14 7.3.11 Inquiry................................................................................................................ 7-15 7.4 USING THE VIRTUAL TERMINAL - MAIL/TELEPHONE ORDER TERMINAL .................... 7-16 7.4.1 Field Information ............................................................................................... 7-16 7.4.2 Sale..................................................................................................................... 7-18 7.4.3 Auth Only ........................................................................................................... 7-19 7.4.4 Force .................................................................................................................. 7-20 7.4.5 Refund ................................................................................................................ 7-21 7.4.6 Void .................................................................................................................... 7-22 7.4.7 Capture .............................................................................................................. 7-23 7.4.8 Check.................................................................................................................. 7-24 ii © 2000-2003 Transactional Technologies. All Rights Reserved. Virtual Terminal User Manual Transactional Technologies, LLC 3361 Boyington Drive, Suite 180 Carrollton, TX 75006 (p) 972.503.8900 (f) 972.503.9100 7.4.9 Check Void ......................................................................................................... 7-25 7.4.10 Check Reversal................................................................................................... 7-26 7.4.11 Inquiry................................................................................................................ 7-27 7.5 USING THE FILE PROCESS TERMINAL .......................................................................... 7-28 7.6 EXITING THE VTJETCOM APPLICATION ...................................................................... 7-31 8 PERFORMING DIAGNOSTICS..................................................................................... 8-1 8.1 8.2 8.3 9 TESTING THE HTTPS PRODUCTION GATEWAY ............................................................. 8-1 TESTING THE HTTPS TEST GATEWAY.......................................................................... 8-3 REQUEST FOR ASSISTANCE ........................................................................................... 8-4 GET CARD NUMBER...................................................................................................... 9-1 10 REPORTS..................................................................................................................... 10-1 10.1 10.2 10.3 11 PRINTING THE REPORT ............................................................................................... 10-1 REPORTS ..................................................................................................................... 10-1 CLOSED BATCH........................................................................................................... 10-7 PROCESS FILE FORMAT ........................................................................................ 11-1 11.1 TRANSACTION FIELDS ................................................................................................. 11-1 11.1.1 Leading Field ..................................................................................................... 11-1 11.1.2 Clerk................................................................................................................... 11-1 11.1.3 Comment ............................................................................................................ 11-1 11.1.4 Credit Card Number .......................................................................................... 11-1 11.1.5 Expiration Date.................................................................................................. 11-1 11.1.6 Amount ............................................................................................................... 11-1 11.1.7 Approval Code ................................................................................................... 11-2 11.1.8 ZIP...................................................................................................................... 11-2 11.1.9 Address............................................................................................................... 11-2 11.1.10 CVV2/CVC ..................................................................................................... 11-2 11.2 EXAMPLE TRANSACTIONS ........................................................................................... 11-2 11.3 CARD SWIPE TRANSACTION FORMAT ......................................................................... 11-2 11.3.1 Formatting a Request File Using Track 1 and Track 2 Data ............................ 11-3 11.3.2 Formatting a Request File Using Only Track 1 Data........................................ 11-3 11.3.3 Formatting a Request File Using Only Track 2 Data........................................ 11-3 11.3.4 Interpreting Results............................................................................................ 11-4 11.3.5 Transaction Format Quick Reference................................................................ 11-4 12 CARD SWIPE .............................................................................................................. 12-4 12.1 12.2 12.3 12.4 12.5 13 CONNECTION .............................................................................................................. 12-5 USE ............................................................................................................................. 12-5 SPECIFICATIONS .......................................................................................................... 12-5 OPERATING ENVIRONMENT ........................................................................................ 12-5 STANDARD CONFIGURATIONS ..................................................................................... 12-6 ACTION CODES......................................................................................................... 13-1 13.1 13.2 TRANSACTIONAL TECHNOLOGIES ACTION CODES ...................................................... 13-1 VIRTUAL TERMINAL ACTION CODES .......................................................................... 13-2 Virtual Terminal User Manual © 2000-2003 Transactional Technologies. All Rights Reserved. iii Transactional Technologies, LLC 14 3361 Boyington Drive, Suite 180 Carrollton, TX 75006 (p) 972.503.8900 (f) 972.503.9100 INSTALLING A VERIFONE PRINTER 900 .......................................................... 14-1 14.1 VERIFONE PRINTER 900 SETTINGS .............................................................................. 14-1 14.2 PHYSICAL CONNECTIVITY ........................................................................................... 14-1 14.2.1 Cabling Pin-Outs ............................................................................................... 14-1 14.2.2 Connecting The Printer...................................................................................... 14-2 14.3 CONFIGURE THE COM PORT ...................................................................................... 14-3 14.3.1 Windows 2000® .................................................................................................. 14-3 14.3.2 Windows 95®, Windows 98® and Windows NT® 4.0.......................................... 14-5 14.4 CONFIGURE THE PRINTER ........................................................................................... 14-7 14.4.1 Windows 2000® .................................................................................................. 14-7 14.4.2 Windows 95®, Windows 98® and Windows NT® 4.0........................................ 14-13 15 ADDENDUM................................................................................................................ 15-1 15.1 SERVER-CLIENT ARCHITECTURE ................................................................................ 15-1 15.1.1 Server Installation.............................................................................................. 15-1 15.1.2 End-User Workstation (Client) Installation....................................................... 15-3 15.2 CONFIGURE THE VTJETCOM DATABASE PATH (WINDOWS 9X).................................. 15-5 15.3 WINDOWS 95® AND WINDOWS 98®............................................................................. 15-5 iv © 2000-2003 Transactional Technologies. All Rights Reserved. Virtual Terminal User Manual Transactional Technologies, LLC 3361 Boyington Drive, Suite 180 Carrollton, TX 75006 (p) 972.503.8900 (f) 972.503.9100 1 Introduction 1.1 Purpose The purpose of this document is to provide information to the user in regards to installation, configuration and use of the Virtual Terminal application. If the end user has a question or concern, the end user can contact the Transactional Technologies 24/7 Customer Support Center for assistance. Transactional Technologies, LLC Customer Support Center 3361 Boyington Drive, Suite 180 Carrollton, Texas 75006 (800) 834-4405 option 2 (972) 503-8900 option 2 [email protected] 1.2 Syntax Conventions The conventions used to present command syntax in this manual are described as follows: • • • • • Square brackets [ ] indicate menu items Angled brackets < > indicate specific buttons on the application window. Courier indicates keywords or commands that are entered literally as shown. In actual configuration examples and output (not general command syntax), courier indicates commands that are manually input by the user. Italics indicates title elements (windows, text boxes, etc.) Boldface indicates keywords. Virtual Terminal User Manual © 2000-2003 Transactional Technologies. All Rights Reserved. 1-1 Transactional Technologies, LLC 3361 Boyington Drive, Suite 180 Carrollton, TX 75006 THIS PAGE INTENTIONALLY LEFT BLANK 1-2 © 2000-2003 Transactional Technologies. All Rights Reserved. Virtual Terminal User Manual (p) 972.503.8900 (f) 972.503.9100 Transactional Technologies, LLC 3361 Boyington Drive, Suite 180 Carrollton, TX 75006 (p) 972.503.8900 (f) 972.503.9100 2 Prerequisites This section defines the prerequisites required in preparation and installing the VTJetCom software. It explains how to obtain the software and provides information in regards to the removal of previous versions, as well as the procedure for installing the current version prior to first using the software. 2.1 Obtaining the VTJetCom Software The Virtual Terminal (VTJetCom) can be downloaded, free of charge, from the following location: FTP Site: User-ID: Password: ftp://zubat.jetpay.com dnload dnload ;N OTE: If connecting to the FTP site from a web browser (Internet Explorer®, Netscape®, etc.), enter ftp://dnload:[email protected] in the URL field (see Figure 2-1). Figure 2-1: FTP Download Navigate to the “vt-current” directory/folder (see Figure 2-2). Virtual Terminal User Manual © 2000-2003 Transactional Technologies. All Rights Reserved. 2-1 Transactional Technologies, LLC 3361 Boyington Drive, Suite 180 Carrollton, TX 75006 (p) 972.503.8900 (f) 972.503.9100 Figure 2-2: FTP Download Directory Download the executable file displayed in the window (copy and paste to desktop). The file name is formatted as VirtualTerminalYYYYMMDD.exe, where YYYYMMDD is equal to the 4digit year, month and day that the executable file was compiled (see Figure 2-3). Figure 2-3: FTP Download Files ;N OTE: In addition to the executable VTJetCom installation application, the merchant may desire to download the portable document formatted (.pdf) Virtual Terminal User Manual (VTUM). This user manual is located in the same directory as the installation package. 2-2 © 2000-2003 Transactional Technologies. All Rights Reserved. Virtual Terminal User Manual Transactional Technologies, LLC 3361 Boyington Drive, Suite 180 Carrollton, TX 75006 (p) 972.503.8900 (f) 972.503.9100 If unable to download via the Internet, contact the Transactional Technologies Customer Support Center for assistance. 2.2 Identification and Removal of Previous VTJetCom Applications ;N OTE: To ensure a successful application download over the Internet to a host terminal, the following steps must be performed before initiating a download to each terminal. • • Verify the Windows operating system running on the terminal (i.e., Windows 95®, Window 98®, Windows 2000®) Remove all VTJetCom versions currently installed on the terminal • • • Click on [Start] + [Setting] + [Control Panel] Select [Add/Remove Programs]. The Add/Remove Programs window will appear (see Figure 2-9). Figure 2-9: Add/Remove Programs Window • Scroll down in this window and locate/click on the VTJetCom software listed (see Figure 2-10). Virtual Terminal User Manual © 2000-2003 Transactional Technologies. All Rights Reserved. 2-3 Transactional Technologies, LLC 3361 Boyington Drive, Suite 180 Carrollton, TX 75006 (p) 972.503.8900 (f) 972.503.9100 Figure 2-10: Add/Remove VTJetCom • • Click on the <Change/Remove> button to remove the application from the system. The automatic application removal will begin. When prompted for verification of removal (see Figure 2-11), click on the <Yes> button. Figure 2-11: Verification of Application Removal • The operator will be notified once the application has been removed (see Figure 212). When the notification pop-up appears, click on the <OK> button. Figure 2-12: Application Removal Notification 2.3 System Settings It is recommended that the video display resolution not be set lower than 1024 x 768. If the resolution is below this recommended level, the Virtual Terminal window will not fit on the screen and the user will be unable to see part of the terminal window. 2-4 © 2000-2003 Transactional Technologies. All Rights Reserved. Virtual Terminal User Manual Transactional Technologies, LLC 3361 Boyington Drive, Suite 180 Carrollton, TX 75006 (p) 972.503.8900 (f) 972.503.9100 2.4 Install the VTJetCom Application Software ;N OTE: If the Virtual Terminal is being installed on a Windows 95®, Windows 98® or Windows ME© platforms, please read Chapter 15 (Addendum) before continuing. Locate the “VirtualTerminal.YYYYMMDD.exe” file previously downloaded to the desktop. Double-click on this file to begin the installation. The first window to appear is to inform the installer that the Virtual Terminal software is about to be installed (see Figure 2-13). Figure 2-13 Click on the <OK> button. The WinZip Self-Extractor – VirtualTerminal.030414.exe window will appear (see Figure 2-14). Click on the <Setup> button to begin the installation. Figure 2-14 The same window will provide the installer with a status of the files being extracted from a compressed state (see Figure 2-15). Figure 2-15 The initial Install window will appear indicating that temporary installation files are being copied (see Figure 2-16). Virtual Terminal User Manual © 2000-2003 Transactional Technologies. All Rights Reserved. 2-5 Transactional Technologies, LLC 3361 Boyington Drive, Suite 180 Carrollton, TX 75006 (p) 972.503.8900 (f) 972.503.9100 Figure 2-16 The VTJetCom Setup window will appear (see Figure 2-17). Click on the <OK> button. Figure 2-17 A screen will appear containing the software license agreement. (See Figure 2-18) After reading this agreement, select <I Accept the Agreement>, then <Next> to continue the installation. Figure 2-18 2-6 © 2000-2003 Transactional Technologies. All Rights Reserved. Virtual Terminal User Manual Transactional Technologies, LLC 3361 Boyington Drive, Suite 180 Carrollton, TX 75006 (p) 972.503.8900 (f) 972.503.9100 A second VTJetCom Setup window will appear (see Figure 2-19). To begin the installation, click on the large button (picture of a computer) in the upper left corner. Figure 2-19 The VTJetCom – Choose Program Group window will appear (see Figure 2-20). Ensure that the “Program Group:” is set to VTJetCom and then click on the <Continue> button. Figure 2-20 The VTJetCom Setup window will appear providing the installer with the status of the software installation (see Figure 2-21). Figure 2-21 The amount of time required to install the software is short. Upon completion of the installation, the installer will be informed that the setup was completed successfully (see Figure 2-22). Click on the <OK> button. Virtual Terminal User Manual © 2000-2003 Transactional Technologies. All Rights Reserved. 2-7 Transactional Technologies, LLC 3361 Boyington Drive, Suite 180 Carrollton, TX 75006 (p) 972.503.8900 (f) 972.503.9100 Figure 2-22 2.5 Installing Security Certificates After completely installing Virtual Terminal, the security certificates must be installed in the proper directory in order for the software to communicate properly. To begin, open Windows Explorer (see Figure 2-23) and navigate to the VTJetCom folder (see Figure 2-24). Figure 2-23 The VTJetCom folder should be located in the folder Program Files under the local C: drive. 2-8 © 2000-2003 Transactional Technologies. All Rights Reserved. Virtual Terminal User Manual Transactional Technologies, LLC 3361 Boyington Drive, Suite 180 Carrollton, TX 75006 (p) 972.503.8900 (f) 972.503.9100 Figure 2-24 In the VTJetCom folder is a file named TTca0.crt (see Figure 2-25). Double click on this file to open it. Virtual Terminal User Manual © 2000-2003 Transactional Technologies. All Rights Reserved. 2-9 Transactional Technologies, LLC 3361 Boyington Drive, Suite 180 Carrollton, TX 75006 (p) 972.503.8900 (f) 972.503.9100 Figure 2-25 Opening this file will open the Certificate Information dialog box (see Figure 2-26). 2-10 © 2000-2003 Transactional Technologies. All Rights Reserved. Virtual Terminal User Manual Transactional Technologies, LLC 3361 Boyington Drive, Suite 180 Carrollton, TX 75006 (p) 972.503.8900 (f) 972.503.9100 Figure 2-26 Click on the button <Install Certificate>, which will start the Certificate Import Wizard (see Figure 2-27). Figure 2-27 Click <Next > > to continue. This screen will determine in what folder the certificate will be stored. Choose the option to Place all certificates in the following store (see Figure 2-28), then click <Browse> to continue. Virtual Terminal User Manual © 2000-2003 Transactional Technologies. All Rights Reserved. 2-11 Transactional Technologies, LLC 3361 Boyington Drive, Suite 180 Carrollton, TX 75006 (p) 972.503.8900 (f) 972.503.9100 Figure 2-28 You will now see a list of folders (see Figure 2-29). Choose the folder titled Trusted Root Certification Authorities, then choose <OK>. Figure 2-29 This will return you to the screen for Certificate Store, but will include the name of the storage folder (see Figure 2-30). Figure 2-30 Click <Next > > to continue. This will continue into the completion screen (see Figure 2-31.) 2-12 © 2000-2003 Transactional Technologies. All Rights Reserved. Virtual Terminal User Manual Transactional Technologies, LLC 3361 Boyington Drive, Suite 180 Carrollton, TX 75006 (p) 972.503.8900 (f) 972.503.9100 Figure 2-31 Click on <Finish>, and the Root Certificate Store warning window will appear (see Figure 2-32). Click on the <Yes> button. Figure 2-32 Now, you should see a box saying the import was successful (see Figure 2-33). Click <OK> and then close the Certificate Information screen by clicking <OK> again. Figure 2-33 Now the only screen showing is the Windows Explorer screen. Double click on the file named Equifax.crt (see Figure 2-34), and repeat the above procedure step by step, placing the Equifax certificate into the Trusted Root Certification Authorities as well. Virtual Terminal User Manual © 2000-2003 Transactional Technologies. All Rights Reserved. 2-13 Transactional Technologies, LLC 3361 Boyington Drive, Suite 180 Carrollton, TX 75006 (p) 972.503.8900 (f) 972.503.9100 Figure 2-34 This concludes the installation of the Transactional Technologies Trusted Root CA certificate. If the operating system on the machine running Virtual Terminal is Windows 98® or earlier, proceed to the addendum in Section 15.3. Otherwise, continue. 3 Configuring the VTJetCom Software Before beginning the installer must know the following information: • • • Terminal ID Internet connection is available Have configured a printer within the Windows® operating system for use in printing receipts. To launch the application, from the Windows menu bar select [Start] + [Programs] + [VTJetCom] + [VTJetCom] (see Figure 3-1). 3-14 © 2000-2003 Transactional Technologies. All Rights Reserved. Virtual Terminal User Manual Transactional Technologies, LLC 3361 Boyington Drive, Suite 180 Carrollton, TX 75006 (p) 972.503.8900 (f) 972.503.9100 Figure 3-1 The first time the VTJetCom software is executed, a “Data Base Connection Error” may appear (see Figure 3-2). Figure 3-2 If this occurs, click on the <OK> button. The ODBC Data Source Name window will appear (see Figure 3-3). Figure 3-3 This menu defaults to VTLocal. You only need to change this if you have a previous database existing on a host computer in a multi-computer environment that you would like this terminal to access. If this is the case, and the host computer has already been mapped, select the previous database from the drop-down menu (see Figure 3-4). Figure 3-4 Click on the <Save> button and then click on the <Close> button. The Virtual Terminal – Retail window will appear (see Figure 3-5). Virtual Terminal User Manual © 2000-2003 Transactional Technologies. All Rights Reserved. 3-15 Transactional Technologies, LLC 3361 Boyington Drive, Suite 180 Carrollton, TX 75006 (p) 972.503.8900 (f) 972.503.9100 Figure 3-5 The installer must configure the application before use. To configure the Virtual Terminal application, select [Options] from the top-line menu and then select [Configure] (see Figure 3-6). Figure 3-6 3-16 © 2000-2003 Transactional Technologies. All Rights Reserved. Virtual Terminal User Manual Transactional Technologies, LLC 3361 Boyington Drive, Suite 180 Carrollton, TX 75006 (p) 972.503.8900 (f) 972.503.9100 The Virtual Terminal - Config window will appear (see Figure 3-7). Figure 3-7 3.1 Terminal ID Config Click on the tab labeled Terminal ID Config. This section is divided into two parts, one detailing the settings available in Process File Terminal mode, which will be further explained in section 4.6, and the other section for the settings available when not operating as a Process File Terminal. 3.1.1 Settings for Non Process File Terminal Mode The Terminal ID Config settings will appear (see Figure 3-8). Virtual Terminal User Manual © 2000-2003 Transactional Technologies. All Rights Reserved. 3-17 Transactional Technologies, LLC 3361 Boyington Drive, Suite 180 Carrollton, TX 75006 (p) 972.503.8900 (f) 972.503.9100 Figure 3-8 This window is configured with three fields (Terminal ID, Alias, and Routing Code (Optional)). An unlimited number of Terminal ID’s can be created. However, Terminal ID’s are NOT assigned arbitrarily but must be provided to the merchant by Transactional Technologies. To create a Terminal ID, you click on the <Add> button. To modify a Terminal ID, select (click on) the appropriate Terminal ID and then click on the <Modify> button. To delete a Terminal ID, select the appropriate Terminal ID and then click on the <Delete> button. 3.1.1.1 Adding a Terminal ID To create a Terminal ID, click on the <Add> button. The Add Terminal ID window will appear (see Figure 3-9). Figure 3-9 Enter a Terminal ID in the “Terminal ID” field. This must be entered in CAPITAL letters and can be no more than twelve alpha-numeric characters and can contain no special characters (i.e., @, %, $, etc.). If you have not yet been issued your permanent Terminal ID, TESTTERMINAL 3-18 © 2000-2003 Transactional Technologies. All Rights Reserved. Virtual Terminal User Manual Transactional Technologies, LLC 3361 Boyington Drive, Suite 180 Carrollton, TX 75006 (p) 972.503.8900 (f) 972.503.9100 is a valid Terminal ID set up for a test environment and can be used to familiarize oneself with the software. Enter a name in the “Alias” field to identify the Terminal ID (see Figure 3-10). Figure 3-10 Click on the <Add> button. The Terminal ID/Alias will be added and the fields will return empty. To add another Terminal ID, enter the appropriate data and click on the <Add> button. If no more terminal ID’s are to be configured, click on the <Close> button. 3.1.1.2 Modifying a Terminal ID To modify a Terminal ID, select the appropriate Terminal ID in the “Terminal ID” drop-down list and then click on the <Modify> button (see Figure 3-11). Figure 3-11 Virtual Terminal User Manual © 2000-2003 Transactional Technologies. All Rights Reserved. 3-19 Transactional Technologies, LLC 3361 Boyington Drive, Suite 180 Carrollton, TX 75006 (p) 972.503.8900 (f) 972.503.9100 The Modify Terminal ID window will appear. Make the appropriate modification and then click on the <Save> button. Click on the <Close> button once all modifications have been made and verified (see Figure 3-12). Figure 3-12 You will be returned to the Virtual Terminal - Config window. 3.1.1.3 Deleting a Terminal ID To delete a Terminal ID, select the appropriate Terminal ID in the “Terminal ID” drop-down list and then click on the <Delete> button (see Figure 3-13). Figure 3-13 A window will appear requesting verification to delete the selected Terminal ID (see Figure 314). If the Terminal ID displayed is the appropriate ID to delete, click on the <Yes> button. Otherwise, click on the <No> button. 3-20 © 2000-2003 Transactional Technologies. All Rights Reserved. Virtual Terminal User Manual Transactional Technologies, LLC 3361 Boyington Drive, Suite 180 Carrollton, TX 75006 (p) 972.503.8900 (f) 972.503.9100 Figure 3-14 3.1.2 Process File Terminal Mode When the Process File Terminal setting has been selected in the Features Config tab, as discussed in section 4.6, the Terminal ID Config tab will appear slightly different (see Figure 315). Figure 3-15 3.1.2.1 Adding a Terminal ID To add a terminal ID, click on the <Add> button, and the Add Terminal ID window will appear (see Figure 3-16). Virtual Terminal User Manual © 2000-2003 Transactional Technologies. All Rights Reserved. 3-21 Transactional Technologies, LLC 3361 Boyington Drive, Suite 180 Carrollton, TX 75006 (p) 972.503.8900 (f) 972.503.9100 Figure 3-16 Enter a Terminal ID in the “Terminal ID” field. This must be entered in CAPITAL letters and can be no more than twelve alpha-numeric characters and can contain no special characters (i.e., @, %, $, etc.). If you have not yet been issued your permanent Terminal ID by our staff, TESTTERMINAL is a valid Terminal ID that has been set up for a test environment and can be used to familiarize a user with the software. Enter a name in the “Alias” field to identify the Terminal ID (see Figure 3-17). Figure 3-17 Choose the paths for your input file and output file, or click on <Same Location >>> > if the paths are the same. Enter the input and output file names if you wish (see figure 3-18). If an input filename is not specified, the software will try to process all files located in the given directory, excepting only those with extensions of “*.ANS”, “*.ERR”, or “*.END”. If the output 3-22 © 2000-2003 Transactional Technologies. All Rights Reserved. Virtual Terminal User Manual Transactional Technologies, LLC 3361 Boyington Drive, Suite 180 Carrollton, TX 75006 (p) 972.503.8900 (f) 972.503.9100 filename is not defined, the output file will be the input file, renamed with an extension of “.ANS”. Figure 3-18 Click on the <Add> button. The Terminal ID/Alias will be added and the fields will return empty. To add another Terminal ID, enter the appropriate data and click on the <Add> button. If no more terminal ID’s are to be configured, click on the <Close> button. 3.1.2.2 Modifying a Terminal ID To modify a Terminal ID, select the appropriate Terminal ID in the “Terminal ID” drop-down list and then click on the <Modify> button (see Figure 3-19). Virtual Terminal User Manual © 2000-2003 Transactional Technologies. All Rights Reserved. 3-23 Transactional Technologies, LLC 3361 Boyington Drive, Suite 180 Carrollton, TX 75006 (p) 972.503.8900 (f) 972.503.9100 Figure 3-19 The Modify Terminal ID window will appear. Make the appropriate modification and then click on the <Save> button. Click on the <Close> button once all modifications have been made and verified (see Figure 3-20). Figure 3-20 You will be returned to the Virtual Terminal - Config window. 3-24 © 2000-2003 Transactional Technologies. All Rights Reserved. Virtual Terminal User Manual Transactional Technologies, LLC 3361 Boyington Drive, Suite 180 Carrollton, TX 75006 (p) 972.503.8900 (f) 972.503.9100 3.1.2.3 Deleting a Terminal ID To delete a Terminal ID, select the appropriate Terminal ID in the “Terminal ID” drop-down list and then click on the <Delete> button (see Figure 3-21). Figure 3-21 A window will appear requesting verification to delete the selected Terminal ID (see Figure 322). If the Terminal ID displayed is the appropriate ID to delete, click on the <Yes> button. Otherwise, click on the <No> button. Figure 3-22 3.2 HTTPS Settings Virtual Terminal User Manual © 2000-2003 Transactional Technologies. All Rights Reserved. 3-25 Transactional Technologies, LLC 3361 Boyington Drive, Suite 180 Carrollton, TX 75006 (p) 972.503.8900 (f) 972.503.9100 If the site installing the software will be using the Internet to process transactions, the HTTPS settings must be configured. If the site will not be using the Internet for this purpose, this step may be skipped. Click on the tab labeled HTTPS Settings (see Figure 3-23). By default, the Production Gateway, Backup Gateway, Test Gateway and Backup Test Gateway fields are automatically populated with the current information. The following steps are provided to ensure that the information in these fields is accurate. Figure 3-23 3.2.1 Production Gateway The Production Gateway setting is the URL with which the application will connect to in order to process the transaction. The Production Gateway should be configured as: https://gateway17.jetpay.com/jetpay Refer to Figure 3-24 as a graphical representation of this configuration item. Figure 3-24 3.2.2 Backup Gateway 3-26 © 2000-2003 Transactional Technologies. All Rights Reserved. Virtual Terminal User Manual Transactional Technologies, LLC 3361 Boyington Drive, Suite 180 Carrollton, TX 75006 (p) 972.503.8900 (f) 972.503.9100 The Backup Gateway setting is the URL with which the application will connect to in order to process the transaction in the event that communications cannot be established with the Production Gateway. The Backup Gateway should be set to: https://gateway17.jetpay.com/jetpay Refer to Figure 3-25 as a graphical representation of this configuration item. Figure 3-25 3.2.3 Test Gateway The Test Gateway setting is the URL with which the application will connect to in order to process a test transaction. The Test Gateway should be set to: https://test1.jetpay.com/jetpay Refer to Figure 3-26 as a graphical representation of this configuration item. Figure 3-26 3.2.4 Backup Test Gateway Virtual Terminal User Manual © 2000-2003 Transactional Technologies. All Rights Reserved. 3-27 Transactional Technologies, LLC 3361 Boyington Drive, Suite 180 Carrollton, TX 75006 (p) 972.503.8900 (f) 972.503.9100 The Backup Test Gateway setting is the URL with which the application will connect to in order to process a test transaction in the event that communications cannot be established with the Test Gateway. The Backup Test Gateway should be set to: https://test1.jetpay.com/jetpay Refer to Figure 3-27 as a graphical representation of this configuration item. Figure 3-27 3.2.5 Proxy Server If a proxy server is being used at the location where the Virtual Terminal is being installed, enter the IP Address or fully-qualified hostname of the proxy server. Refer to Figure 3-28 as a graphical representation of this configuration item. Figure 3-28 3-28 © 2000-2003 Transactional Technologies. All Rights Reserved. Virtual Terminal User Manual Transactional Technologies, LLC 3361 Boyington Drive, Suite 180 Carrollton, TX 75006 (p) 972.503.8900 (f) 972.503.9100 3.2.6 Proxy Port If a proxy server is being used, enter the port number (tty port) used. Refer to Figure 3-29 as a graphical representation of this configuration item. If you are unsure of the Proxy Port, ask your system administrator. Figure 3-29 3.2.7 Use Production Gateway If the site is using the VTJetCom application to process “test” transactions, such as those using the TESTTERMINAL terminal ID, this check box should remain un-checked. If the site is using the VTJetCom application to process “live” transactions, the Use Production Gateway check box should be checked (see Figure 3-30). Figure 3-30 Virtual Terminal User Manual © 2000-2003 Transactional Technologies. All Rights Reserved. 3-29 Transactional Technologies, LLC 3361 Boyington Drive, Suite 180 Carrollton, TX 75006 (p) 972.503.8900 (f) 972.503.9100 3.2.8 Gateway Time Out The value entered in this field represents the number of seconds the application will wait before receiving a response from the production gateway. After the set number of seconds, the application will then attempt to connect to the Backup Gateway. Thirty (30) seconds is the default time out value (see Figure 3-31). Figure 3-31 3.3 General Configuration To configure the general configuration items, click on the tab labeled General Config (see Figure 3-32). The General Config tab allows the site to identify the default Startup Terminal and the data that will be printed on a receipt’s header and footer. In addition, the General Config window allows the operator to customize the application’s “look and feel”. The General Config is divided into two sections (Terminal Behavior and Receipt Format). The Receipt Format section provides an additional section to define “Optional Features for Receipt”. Figure 3-32 3-30 © 2000-2003 Transactional Technologies. All Rights Reserved. Virtual Terminal User Manual Transactional Technologies, LLC 3361 Boyington Drive, Suite 180 Carrollton, TX 75006 (p) 972.503.8900 (f) 972.503.9100 3.3.1 Terminal Behavior The Terminal Behavior allows the operator to configure the Startup Terminal (Standard Retail or Mail-Telephone Order), the Merchant Name, Merchant GIF, Merchant ICON and Check Surcharge. 3.3.1.1 Startup Terminal Startup Terminal allows the operator to define the terminal type that will be displayed when the application is opened. The three options available at this time are Standard Retail, Mail-Telephone Order, and File Processing. File Processing appears in the list only if the Process File option is enabled (see Section 3.6.2). Refer to Figure 3-34 for a graphical representation of this option. Figure 3-34 Virtual Terminal User Manual © 2000-2003 Transactional Technologies. All Rights Reserved. 3-31 Transactional Technologies, LLC 3361 Boyington Drive, Suite 180 Carrollton, TX 75006 (p) 972.503.8900 (f) 972.503.9100 3.3.1.2 Merchant Name Enter the name of the merchant processing the transactions in the Merchant Name field (see Figure 3-35). Figure 3-35 3.3.1.3 Merchant GIF If the merchant desires that their logo appears on the screen of the Virtual Terminal, the location/file name of the Graphical Interchange Format (GIF) picture can be entered in the Merchant GIF field (see Figure 3-36). Figure 3-36 3-32 © 2000-2003 Transactional Technologies. All Rights Reserved. Virtual Terminal User Manual Transactional Technologies, LLC 3361 Boyington Drive, Suite 180 Carrollton, TX 75006 (p) 972.503.8900 (f) 972.503.9100 3.3.1.4 Merchant ICON If the merchant desires that the icon of the application appear as their own “branded” icon, the location/file name of the ICON file can be entered in the Merchant ICON field (see Figure 3-37). Figure 3-37 3.3.2 Receipt Format The Receipt Format section identifies what will print on the header and trailer of the receipt. In addition, it identifies the default Terminal ID of the Virtual Terminal that will be printed on the receipt, if the Associate Terminal ID option is enabled. Virtual Terminal User Manual © 2000-2003 Transactional Technologies. All Rights Reserved. 3-33 Transactional Technologies, LLC 3361 Boyington Drive, Suite 180 Carrollton, TX 75006 (p) 972.503.8900 (f) 972.503.9100 3.3.2.1 Receipt Header Line 1, 2, 3, 4 Enter the appropriate information in the fields titled Receipt Header Line 1, 2, 3, and 4 (see Figure 3-38). Figure 3-38 3.3.2.2 Receipt Trailer Enter the appropriate information in the Receipt Trailer field. This field defines what will be printed at the end of the receipt (see Figure 3-39). Figure 3-39 3-34 © 2000-2003 Transactional Technologies. All Rights Reserved. Virtual Terminal User Manual Transactional Technologies, LLC 3361 Boyington Drive, Suite 180 Carrollton, TX 75006 (p) 972.503.8900 (f) 972.503.9100 Once the receipt header and trailer information has been entered, click on the <Save> button. This will save the receipt information for the Terminal ID previously selected. The merchant will not be able to edit these fields without clicking on the <Modify> button and performing the procedures outlined above. 3.3.2.3 Associate Terminal ID To have the Virtual Terminal print the terminal ID on the receipt, check the box labeled “Associate Terminal ID with Headers in the Receipt” (see Figure 3-40). When this option is enabled, a drop down menu of “Terminal ID” will automatically appear. Ensure that the appropriate “Terminal ID” is selected. Figure 3-40 Virtual Terminal User Manual © 2000-2003 Transactional Technologies. All Rights Reserved. 3-35 Transactional Technologies, LLC 3361 Boyington Drive, Suite 180 Carrollton, TX 75006 (p) 972.503.8900 (f) 972.503.9100 3.3.2.4 Optional Features for Receipt The “optional features” permits additional information to be printed on the receipt. To enable printing of any of these additional items, select the desired features (see Figure 341). The optional features are listed below: • Order Number – Merchant’s Order Number • Origin – Defines Mail Order or Telephone Order • Exp Date – Credit card expiration date • User Data 1, 2, 3 – Merchant defined fields Figure 3-41 3.4 Mail-Telephone Configuration The Mail-Telephone Configuration tab allows the merchant to configure various processorspecific options. This window is divided into two sections, Mail-Telephone Order Terminal Configuration and User Data Description. 3.4.1 Mail-Telephone Order Terminal Configuration This section defines the Default Terminal ID, Routing ID, Default Origin, Default Transaction Type, Default Billing Country, Default Billing State, Number of Receipts, Default Printer, Enable Decline Receipt and Verify Password Return Transactions. 3-36 © 2000-2003 Transactional Technologies. All Rights Reserved. Virtual Terminal User Manual Transactional Technologies, LLC 3361 Boyington Drive, Suite 180 Carrollton, TX 75006 (p) 972.503.8900 (f) 972.503.9100 3.4.1.1 Default Terminal ID The Default Terminal ID field defines the default ID to be used when processing transactions. Using the drop-down box, select the desired default terminal ID (see Figure 342). Figure 3-42 3.4.1.2 Routing ID The Routing ID will be supplied to the merchant by Transactional Technologies. If one has not been provided, or if you are unsure, leave it blank (see Figure 3-43). Figure 3-43 Virtual Terminal User Manual © 2000-2003 Transactional Technologies. All Rights Reserved. 3-37 Transactional Technologies, LLC 3361 Boyington Drive, Suite 180 Carrollton, TX 75006 (p) 972.503.8900 (f) 972.503.9100 3.4.1.3 Default Origin The Default Origin field defines that the default for the transactions to be processed will be Phone Order or Mail Order. Using the drop-down box, select the appropriate origin (see Figure 3-44). Figure 3-44 3.4.1.4 Default Transaction Type The Default Transaction Type is used to define the type of transaction. The types of transactions are: • • • • • • • • • • Sale Authonly Force Refund Void Capture Check Check Void Check Reversal Inquiry Select the appropriate transaction type (see Figure 3-45). Figure 3-45 3-38 © 2000-2003 Transactional Technologies. All Rights Reserved. Virtual Terminal User Manual Transactional Technologies, LLC 3361 Boyington Drive, Suite 180 Carrollton, TX 75006 (p) 972.503.8900 (f) 972.503.9100 3.4.1.5 Default Billing Country The Virtual Terminal is only configured to be used in the United States and in Canada. Select the appropriate billing country (see Figure 3-46). Figure 3-46 Virtual Terminal User Manual © 2000-2003 Transactional Technologies. All Rights Reserved. 3-39 Transactional Technologies, LLC 3361 Boyington Drive, Suite 180 Carrollton, TX 75006 (p) 972.503.8900 (f) 972.503.9100 3.4.1.6 Default Billing State Select the appropriate billing state of the merchant from the drop-down list provided. The appropriate states/provinces will be displayed for the United States or Canada, depending on the option selected in the Default Billing Country field (see Figure 3-47). Figure 3-47 3.4.1.7 Number of Receipts The Number of Receipts field identifies how many receipts are to be printed (see Figure 348). Figure 3-48 3-40 © 2000-2003 Transactional Technologies. All Rights Reserved. Virtual Terminal User Manual Transactional Technologies, LLC 3361 Boyington Drive, Suite 180 Carrollton, TX 75006 (p) 972.503.8900 (f) 972.503.9100 3.4.1.8 Default Printer By default, the Virtual Terminal will select the system’s default printer. ;N OTE: The printer must already be configured within the Windows® operating system before selecting. If a printer has not been configured, this step can be skipped. A printer can then be configured and this step can be modified afterwards. Using the drop-down list, select the desired printer to be used as the default printer for the Virtual Terminal application (see Figure 3-49). Figure 3-49 Virtual Terminal User Manual © 2000-2003 Transactional Technologies. All Rights Reserved. 3-41 Transactional Technologies, LLC 3361 Boyington Drive, Suite 180 Carrollton, TX 75006 (p) 972.503.8900 (f) 972.503.9100 3.4.1.9 Enable Decline Receipts The Enable Decline Receipts check box allows the merchant to print receipts for declined transactions. If the merchant desires/requires this option, ensure that this box is checked (see Figure 4-50). Figure 3-50 3.4.1.10 Verify Password Return Transactions The Verify Password Return Transactions permits the merchant to restrict who has authorization to perform Refunds, Voids, Check Voids, etc. To enable this function, check this box (see Figure 3-51). Figure 3-51 3-42 © 2000-2003 Transactional Technologies. All Rights Reserved. Virtual Terminal User Manual Transactional Technologies, LLC 3361 Boyington Drive, Suite 180 Carrollton, TX 75006 (p) 972.503.8900 (f) 972.503.9100 3.4.2 User Data Description This section defines whether mandatory checking of CVV2 information, billing address information and/or billing postal code (zip) will be used. In addition to this, the merchant has the ability to ensure that their own user data is entered when performing the transaction. 3.4.2.1 CVV2 If the merchant desires that all transactions have a CVV2 check performed, check this box (see Figure 3-52). Figure 3-52 Virtual Terminal User Manual © 2000-2003 Transactional Technologies. All Rights Reserved. 3-43 Transactional Technologies, LLC 3361 Boyington Drive, Suite 180 Carrollton, TX 75006 (p) 972.503.8900 (f) 972.503.9100 3.4.2.2 Billing Address If the merchant desires that the billing address of the card holder be verified, check the Billing Address – Mandatory check box (see Figure 353). Figure 3-53 3.4.2.3 Billing Zip/Postal Code If the merchant desires that the billing postal code (zip code) of the card holder be verified, check the Billing Zip/Postal Code – Mandatory check box (see Figure 3-54). Figure 3-54 3-44 © 2000-2003 Transactional Technologies. All Rights Reserved. Virtual Terminal User Manual Transactional Technologies, LLC 3361 Boyington Drive, Suite 180 Carrollton, TX 75006 (p) 972.503.8900 (f) 972.503.9100 3.4.2.4 User Data 1, 2 and 3 Use the User Data 1, 2, and 3 fields to define user specific data. If the merchant desires that this information be mandatory for all transactions, the Mandatory check box next to the user data field can be checked (see Figure 3-55). Figure 3-55 3.5 Retail Configuration Like the Mail-Telephone Configuration, the Retail Config defines how the Virtual Terminal Retail will process transactions. The Retail Config is divided into two sections, Retail Terminal Settings and User Data Description. 3.5.1 Retail Terminal Settings The Retail Terminal Settings defines the Default Terminal ID, Routing ID, Default Transaction Type, Number of Receipts, Default Printer, Enable Decline Receipt and Verify Password Return Transactions. Virtual Terminal User Manual © 2000-2003 Transactional Technologies. All Rights Reserved. 3-45 Transactional Technologies, LLC 3361 Boyington Drive, Suite 180 Carrollton, TX 75006 (p) 972.503.8900 (f) 972.503.9100 3.5.1.1 Default Terminal ID The Default Terminal ID field defines the default ID to be used when processing transactions. Using the drop-down list, select the desired default terminal ID (see Figure 356). Figure 3-56 3.5.1.2 Routing ID The Routing ID will be supplied to the merchant by Transactional Technologies. If you do not receive a routing ID or if you are unsure, leave this field blank(see Figure 3-57). Figure 3-57 3-46 © 2000-2003 Transactional Technologies. All Rights Reserved. Virtual Terminal User Manual Transactional Technologies, LLC 3361 Boyington Drive, Suite 180 Carrollton, TX 75006 (p) 972.503.8900 (f) 972.503.9100 3.5.1.3 Default Transaction Type The Default Transaction Type is used to define the type of transaction. The types of transactions are: • • • • • • • • • • Sale Authonly Force Refund Void Capture Check Check Void Check Reversal Inquiry Select the appropriate transaction type (see Figure 3-58). Figure 3-58 3.5.1.4 Number of Receipts The Number of Receipts field identifies how many receipts are to be printed (see Figure 359). Figure 3-59 Virtual Terminal User Manual © 2000-2003 Transactional Technologies. All Rights Reserved. 3-47 Transactional Technologies, LLC 3361 Boyington Drive, Suite 180 Carrollton, TX 75006 (p) 972.503.8900 (f) 972.503.9100 3.5.1.5 Default Printer By default, the Virtual Terminal will select the system’s default printer. ;N OTE: The printer must already be configured within the Windows® operating system before selecting. If a printer has not been configured, this step can be skipped. A printer can then be configured and this step can be modified afterwards. Using the drop-down list, select the desired printer to be used as the default printer for the Virtual Terminal application (see Figure 3-60). Figure 3-60 3.5.1.6 Enable Decline Receipts The Enable Decline Receipts check box allows the merchant to print receipts for declined transactions. If the merchant desires/requires this option, ensure that this box is checked (see Figure 3-61). Figure 3-61 3-48 © 2000-2003 Transactional Technologies. All Rights Reserved. Virtual Terminal User Manual Transactional Technologies, LLC 3361 Boyington Drive, Suite 180 Carrollton, TX 75006 (p) 972.503.8900 (f) 972.503.9100 3.5.1.7 Verify Password Return Transactions The Verify Password Return Transactions permits the merchant to restrict who has authorization to perform Refunds, Voids, Check Voids, etc. To enable this function, check this box (see Figure 3-62). Figure 3-62 3.5.2 User Data Description This section defines whether mandatory checking of CVV2 information, permits the merchant to define user data fields and/or determine if these fields are required for processing a transaction. Virtual Terminal User Manual © 2000-2003 Transactional Technologies. All Rights Reserved. 3-49 Transactional Technologies, LLC 3361 Boyington Drive, Suite 180 Carrollton, TX 75006 (p) 972.503.8900 (f) 972.503.9100 3.5.2.1 CVV2 If the merchant desires that all transactions have a CVV2 check performed, check this box (see Figure 3-63). Figure 3-63 3.5.2.2 User Data 1, 2 and 3 Use the User Data 1, 2, and 3 fields to define user specific data. If the merchant desires that this information be mandatory for all transactions, the Mandatory check box next to the user data field can be checked (see Figure 3-64). Figure 3-64 3-50 © 2000-2003 Transactional Technologies. All Rights Reserved. Virtual Terminal User Manual Transactional Technologies, LLC 3361 Boyington Drive, Suite 180 Carrollton, TX 75006 (p) 972.503.8900 (f) 972.503.9100 3.6 Features Configuration The Features Configuration is where you verify Off-Line Transactions, Restaurant Mode, Process File Terminal, Restaurant Settings, Process File Settings, and Check Settings. 3.6.1 Enable Off-Line Transactions If you would like to complete transactions in an Off-Line Mode, should you be traveling with a laptop or lose connectivity for some reason, select this option to continue accepting transactions until you are connected again. If you wish to operate in Restaurant Mode or Process File Terminal, Off-Line Transactions cannot be enabled. (see Figure 3-65) Figure 3-65 When this option is selected, the regular Virtual Terminal screen will reflect this by presenting a button <<ON Line Transactions>> to switch back and forth between off and on line transactions (see Figure 3-66). Virtual Terminal User Manual © 2000-2003 Transactional Technologies. All Rights Reserved. 3-51 Transactional Technologies, LLC 3361 Boyington Drive, Suite 180 Carrollton, TX 75006 (p) 972.503.8900 (f) 972.503.9100 Figure 3-66 3.6.2 Process File Terminal Enable this option if you would like to process all of your transactions at once, taking information from an input file and returning the results for all transactions (see Figure 367). If you would like to select this option, both Enable Off Line Transactions and Restaurant Mode must not be selected. Figure 3-67 3-52 © 2000-2003 Transactional Technologies. All Rights Reserved. Virtual Terminal User Manual Transactional Technologies, LLC 3361 Boyington Drive, Suite 180 Carrollton, TX 75006 (p) 972.503.8900 (f) 972.503.9100 3.6.3 Restaurant Mode Enable this option if you are operating as a restaurant and would like those features available, such as Gratuity Guideline, Automatic Adjustment Time, Additional Authorization, Restaurant Amount and Tip. In order to select Restaurant Mode, Enable Off Line Transactions and Process File Terminal must not be selected (see Figure 3-68). Figure 3-68 Selecting this option reflects on the regular Virtual Terminal screen as Sale and Capture are no longer accessible transaction types (see Figure 3-69). Figure 3-69 3.6.4 Restaurant Settings This section refers to options that are available when operating in Restaurant Mode. Virtual Terminal User Manual © 2000-2003 Transactional Technologies. All Rights Reserved. 3-53 Transactional Technologies, LLC 3361 Boyington Drive, Suite 180 Carrollton, TX 75006 (p) 972.503.8900 (f) 972.503.9100 3.6.4.1 Gratuity Guideline Enable this option if you would like to automatically calculate the gratuity for a ticket as a guide for the customer. (See Figure 3-70) Figure 3-70 3.6.4.2 Automatic Adjustment Time Select this option and configure it to offset for the batch run at the end of the shift. (see Figure 3-71) Figure 3-71 3-54 © 2000-2003 Transactional Technologies. All Rights Reserved. Virtual Terminal User Manual Transactional Technologies, LLC 3361 Boyington Drive, Suite 180 Carrollton, TX 75006 (p) 972.503.8900 (f) 972.503.9100 3.6.4.3 Additional Authorization Enable and configure this option for whatever percentage amount of the original ticket you would like to authorize in addition to the original bill, as an estimated tip. The final capture will reflect the correct amount of the bill and the tip. (see Figure 3-72) Figure 3-72 3.6.4.4 Optional Features for Receipt These features determine what is printed on the customers’ receipts, and is divided into Restaurant Amount and Tip. 3.6.4.4.1 Restaurant Amount Virtual Terminal User Manual © 2000-2003 Transactional Technologies. All Rights Reserved. 3-55 Transactional Technologies, LLC 3361 Boyington Drive, Suite 180 Carrollton, TX 75006 (p) 972.503.8900 (f) 972.503.9100 Enable this option if you would like to display an additional line of “Total Amount ______” on the receipt where the customer can write the final amount, including both cost and tip. (see Figure 3-73) Figure 3-73 3.6.4.4.2 Tip Enable this option if you would like to display an addition line on the receipt reading “Tip ________” where the customer can write in the tip amount (see Figure 3-74). Figure 3-74 3-56 © 2000-2003 Transactional Technologies. All Rights Reserved. Virtual Terminal User Manual Transactional Technologies, LLC 3361 Boyington Drive, Suite 180 Carrollton, TX 75006 (p) 972.503.8900 (f) 972.503.9100 3.6.5 Check Settings This section contains options for accepting checks, including Default Check Account Type and Check Surcharge. 3.6.5.1 Default Check Account Type Choose the type of account you would like to use for your transactions (see Figure 3-75). Figure 3-75 Virtual Terminal User Manual © 2000-2003 Transactional Technologies. All Rights Reserved. 3-57 Transactional Technologies, LLC 3361 Boyington Drive, Suite 180 Carrollton, TX 75006 (p) 972.503.8900 (f) 972.503.9100 3.6.5.2 Check Surcharge In this field, enter the amount you would like to charge for check transactions (see Figure 376). Figure 3-76 3.6.6 Process File Settings If you are operating in Process File Terminal mode, configure these settings to your satisfaction (see Figure 3-77). Figure 3-77 3-58 © 2000-2003 Transactional Technologies. All Rights Reserved. Virtual Terminal User Manual Transactional Technologies, LLC 3361 Boyington Drive, Suite 180 Carrollton, TX 75006 (p) 972.503.8900 (f) 972.503.9100 3.6.6.1 Full Format Answer File Select this option if you wish your answer file to occur in full format (see Figure 3-78). It will then contain both the information originally sent and the response information, including address verification, if applicable. The value defaults to disabled. Figure 3-78 Virtual Terminal User Manual © 2000-2003 Transactional Technologies. All Rights Reserved. 3-59 Transactional Technologies, LLC 3361 Boyington Drive, Suite 180 Carrollton, TX 75006 (p) 972.503.8900 (f) 972.503.9100 3.6.6.2 Delete Input File Select this option if you wish your input file to be automatically deleted upon processing. If you do not wish this to happen, the input file will automatically be renamed to extension “*.END” (see Figure 3-79). This option defaults to enabled. If any error is detected in the input file, the output file will be empty, and the error file will be found under the input filename with extension “.ERR”. Figure 3-79 3.7 Completion Upon completion of all configuration items, click on the <OK> button. The installer will be returned to the original Virtual Terminal window (see Figure 3-78). Figure 3-78 3-60 © 2000-2003 Transactional Technologies. All Rights Reserved. Virtual Terminal User Manual Transactional Technologies, LLC 3361 Boyington Drive, Suite 180 Carrollton, TX 75006 (p) 972.503.8900 (f) 972.503.9100 4 Features The next option on the top-line menu is features (see Figure 4-1). The appearance of this menu will vary depending on the options selected in Features Config, discussed in Section 3.6. Figure 4-1 The option of Transactions Declined is always available on this menu, regardless of what options are enabled, or if no options are enabled (see Figure 4-2). Figure 4-2 When selecting Transactions Declined, the Reporting Password (see section 5.4) will appear if it has been set (see Figure 4-3). Enter in the password and click <Accept>. Figure 4-3 This will take you to the Transactions Declined screen (see Figure 4-4). Virtual Terminal User Manual © 2000-2003 Transactional Technologies. All Rights Reserved. 4-61 Transactional Technologies, LLC 3361 Boyington Drive, Suite 180 Carrollton, TX 75006 (p) 972.503.8900 (f) 972.503.9100 Figure 4-4 You then have the option to Copy to Clipboard for printing, to Delete All to clear the records, or simply to exit without doing anything. 4.1 Restaurant Mode When the Restaurant Mode option has been enabled, as discussed in Section 3.6.3, the Features Menu will appear as in Figure 4-5, with both Tip Adjustment and Transactions Declined available to selection. Figure 4-5 Choosing Tip Adjustments will open the Tip Adjustments window (see Figure 4-6), showing all pending transactions. 4-62 © 2000-2003 Transactional Technologies. All Rights Reserved. Virtual Terminal User Manual Transactional Technologies, LLC 3361 Boyington Drive, Suite 180 Carrollton, TX 75006 (p) 972.503.8900 (f) 972.503.9100 Figure 4-6 In the yellow column, enter the tip amounts as given by the customer, and then click <Calculate Totals> (see Figure 4-7). Figure 4-7 Now clicking <Save Tips> will save these amounts so the window may be closed and reopened without having to reenter the tip amounts. If some of the tip amounts are greater than the percentage configured in the Additional Authorization discussed in section 3.6.4.3, a warning will appear to notify you of this (see Figure 4-8). Figure 4-8 Click <OK> and a message will inform you that the Tips were saved (see Figure 4-9). Virtual Terminal User Manual © 2000-2003 Transactional Technologies. All Rights Reserved. 4-63 Transactional Technologies, LLC 3361 Boyington Drive, Suite 180 Carrollton, TX 75006 (p) 972.503.8900 (f) 972.503.9100 Figure 4-9 Click <OK>. Now the transactions may be settled by clicking <Send All>. You will see a message asking if you want to make the adjustment (see Figure 4-10). Figure 4-10 Click either <Yes> if you are sure, or <No> if you are not. Clicking <Yes> will proceed to send all of the transactions (see Figure 4-11). Figure 4-11 The response will show approved transactions in green and declined transactions in red (see Figure 4-12). Figure 4-12 Now you may either Copy to Clipboard for printing, or Close the window. 4-64 © 2000-2003 Transactional Technologies. All Rights Reserved. Virtual Terminal User Manual Transactional Technologies, LLC 3361 Boyington Drive, Suite 180 Carrollton, TX 75006 (p) 972.503.8900 (f) 972.503.9100 4.2 Enable Off Line Transactions When the option has been selected to Enable Off Line Transactions, as discussed in Section 3.6.1, the Features menu will appear as in Figure 4-13, with both Off Line Transactions and Transactions Declined as options. Figure 4-13 Choosing [Off Line Transactions] will open the Off Line Transactions screen (see Figure 4-14). Figure 4-14 If any of the information showing for a transaction is incorrect, click on <Edit Transaction> to change the transaction information. This will open the Modify Transaction screen, where all changes can be made (see Figure 4-15). Virtual Terminal User Manual © 2000-2003 Transactional Technologies. All Rights Reserved. 4-65 Transactional Technologies, LLC 3361 Boyington Drive, Suite 180 Carrollton, TX 75006 (p) 972.503.8900 (f) 972.503.9100 Figure 4-15 Make all necessary alterations, then click <Save> to save the changes and <Close> to exit the screen when all changes have been made. The Off Line Transactions screen should now be showing the altered information (see Figure 4-16). Figure 4-16 If there are any transactions showing that should not be present, click on the transaction to remove, then click <Remove Transaction>. This will highlight the transaction in an olive brown color to indicate it has been removed (see Figure 4-17). 4-66 © 2000-2003 Transactional Technologies. All Rights Reserved. Virtual Terminal User Manual Transactional Technologies, LLC 3361 Boyington Drive, Suite 180 Carrollton, TX 75006 (p) 972.503.8900 (f) 972.503.9100 Figure 4-17 If this transaction has been removed in error, click on the highlighted transaction, then click <Restore Transaction> to return it to the list to be processed (see Figure 4-18). Figure 4-18 Choosing <Save Amount> will open a message to confirm that the amount information has been saved (see Figure 4-19). Figure 4-19 Now choosing <Send All> will ask to confirm (see Figure 4-20), then submit the off line transactions for processing (see Figure 4-21). Figure 4-20 Virtual Terminal User Manual © 2000-2003 Transactional Technologies. All Rights Reserved. 4-67 Transactional Technologies, LLC 3361 Boyington Drive, Suite 180 Carrollton, TX 75006 (p) 972.503.8900 (f) 972.503.9100 Figure 4-21 If one of the transactions is declined, an error message will appear asking if the transaction should be removed (see Figure 4-22). Figure 4-22 Click either <Yes> to remove or <No> to re-try and the submission will continue until complete (see Figure 4-23). Figure 4-23 Now click <Copy to Clipboard> to copy the information to a word processing program for printing, or <Close> to exit. 4.3 Process File Enabling the File Process option in Features Config as discussed in Section 3.6.2 will cause the Features menu to appear as it does when no options are selected (see Figure 4-2). 5 Passwords Passwords permit the merchant to protect the integrity of their transactions. By assigning passwords, the merchant protects unauthorized modifications to the application configuration as well as protecting from unauthorized REFUND and VOID transaction types. 5-68 © 2000-2003 Transactional Technologies. All Rights Reserved. Virtual Terminal User Manual Transactional Technologies, LLC 3361 Boyington Drive, Suite 180 Carrollton, TX 75006 (p) 972.503.8900 (f) 972.503.9100 There are four passwords that can be configured. They are: • • • • Start-Up Password Merchant Password Transaction Password Reporting Password 5.1 Start-Up Password The Start-Up Password protects the entire program. It will require the entry of this password before it will run the program each time Virtual Terminal is opened. This password should be available only to those individuals having a valid reason to use the VTJetCom application. When entering this password, it can ONLY contain alphanumeric data (i.e. 1 2 3, a b c, etc.). It can accept no special characters (i.e. $%&*/, etc.). The password must be at least one character in length but cannot exceed eight characters. To set the Start Up Password, go to Passwords and Start Up Passwords on the top menu (see Figure 5-1) Figure 5-1 The merchant will then be required to enter the Old Password (if this is the initial configuration, no password will be entered), the New Password and then to Confirm Password. The Confirm Password is the same password entered in the New Password field and is required to ensure that the password was typed correctly (see Figure 5-2). If the merchant forgets this password, the only way to reset it is to contact the Transactional Technologies help desk at 1-800-834-4405 option 2. ;N OTE: Virtual Terminal User Manual © 2000-2003 Transactional Technologies. All Rights Reserved. 5-69 Transactional Technologies, LLC 3361 Boyington Drive, Suite 180 Carrollton, TX 75006 (p) 972.503.8900 (f) 972.503.9100 The password must be an alphanumeric value. Special characters #, +, =, etc.) are not allowed in the password field. Although there is no minimum requirement for the password, it cannot exceed 8 characters in length. Figure 5-2 Once the password fields have been filled out, click on the <Accept> button. If this screen automatically appears, and the merchant does not wish to set a password, leave all fields blank and the password will not be required. 5.2 Merchant Password The Merchant Password protects the integrity of the configuration of the VTJetCom application. If the merchant is requiring their staff to enter a password to perform Refunds and Voids, it is imperative that the merchant configures the Merchant Password. This will prevent their staff from disabling the password protection on Refunds and Voids. Like all passwords, the Merchant Password should never be written down nor discussed with personnel not authorized to have this information. However, if the password is written down, it should be kept in a secure location with restricted access (safe, lock box, etc.) The Merchant Password protects the integrity of Virtual Terminal configuration. Once configured, the merchant will be required to enter the Merchant Password when a configuration change is required. When assigning a password, the password field can contain ONLY alphanumeric data (i.e., 1, 2, 3, 4, a, b, c, D, etc.). It cannot contain special characters. The password must be at least one (1) digit in length but cannot exceed eight (8) digits. To configure the Merchant Password, select [Passwords] + [Merchant Password] from the topline menu of the application (see Figures 5-3). 5-70 © 2000-2003 Transactional Technologies. All Rights Reserved. Virtual Terminal User Manual Transactional Technologies, LLC 3361 Boyington Drive, Suite 180 Carrollton, TX 75006 (p) 972.503.8900 (f) 972.503.9100 Figure 5-3 The merchant will then be required to enter the Old Password (if this is the initial configuration, no password will be entered), the New Password and then to Confirm Password. The Confirm Password is the same password entered in the New Password field and is required to ensure that the password was typed correctly (see Figure 5-4). ;N OTE: The password must be an alphanumeric value. Special characters (#, +, =, etc.) are not allowed in the password field. Although there is no minimum requirement for the password, it cannot exceed 8 characters in length. Figure 5-4 Once the password fields have been filled out, click on the <Accept> button. 5.3 Transaction Password Due to the nature of REFUND and VOID transactions, it is highly recommended that a Transaction Password be set. This will prevent unauthorized REFUND and/or VOID transactions from being conducted by the merchant’s staff. Virtual Terminal User Manual © 2000-2003 Transactional Technologies. All Rights Reserved. 5-71 Transactional Technologies, LLC 3361 Boyington Drive, Suite 180 Carrollton, TX 75006 (p) 972.503.8900 (f) 972.503.9100 Like all passwords, the Transaction Password should never be written down nor discussed with personnel not authorized to have this information. However, if the password is written down, it should be kept in a secure location with limited access (safe, lock box, etc.) The Transaction Password protects the integrity of REFUND and VOID transactions. Once configured, the merchant will be required to enter the Transaction Password when a REFUND or a VOID transaction is performed. To configure the Transaction Password, select [Passwords] + [Transaction Password] from the top-line menu of the application (see Figure 5-5). Figure 5-5 The merchant will then be required to enter the Old Password (if this is the initial configuration, no password will be entered), the New Password and then to Confirm Password. The Confirm Password is the same password entered in the New Password field and is required to ensure that the password was typed correctly (see Figure 5-6). ;N OTE: The password must be an alphanumeric value. Special characters #, +, =, etc.) are not allowed in the password field. Although there is no minimum requirement for the password, it cannot exceed 8 characters in length. 5-72 © 2000-2003 Transactional Technologies. All Rights Reserved. Virtual Terminal User Manual Transactional Technologies, LLC 3361 Boyington Drive, Suite 180 Carrollton, TX 75006 (p) 972.503.8900 (f) 972.503.9100 Figure 5-6 Once the password fields have been filled out, click on the <Accept> button. 5.4 Reporting Password The reporting password is designed to restrict access to reports generated by the virtual terminal. It highly recommended, but not required, to assign a password to the reporting function of the Virtual Terminal. Like all passwords, the Reporting Password should never be written down nor discussed with personnel not authorized to have this information. However, if the password is written down, it should be kept in a secure location with limited access (safe, lock box, etc.) To configure the Reporting Password, select [Passwords] + [Reporting Password] from the topline menu of the application (see Figures 5-7). Figure 5-7 The merchant will then be required to enter the Old Password (if this is the initial configuration, no password will be entered), the New Password and then to Confirm Password. The Confirm Password is the same password entered in the New Password field and is required to ensure that the password was typed correctly (see Figure 5-8). ;N OTE: The password must be an alphanumeric value. Special characters (/, #, +, =, etc.) are not allowed in the password field. Although there is no minimum requirement for the password, it cannot exceed 8 characters in length. Virtual Terminal User Manual © 2000-2003 Transactional Technologies. All Rights Reserved. 5-73 Transactional Technologies, LLC 3361 Boyington Drive, Suite 180 Carrollton, TX 75006 (p) 972.503.8900 (f) 972.503.9100 Figure 5-8 Once the password fields have been filled out, click on the <Accept> button. 6 About The next option in the top-line menu is About (see Figure 6-1). Figure 6-1 Clicking on this option will open a screen to give the details about this version of Virtual Terminal, as well as the contact information for Transactional Technologies, LLC (see Figure 62). 6-74 © 2000-2003 Transactional Technologies. All Rights Reserved. Virtual Terminal User Manual Transactional Technologies, LLC 3361 Boyington Drive, Suite 180 Carrollton, TX 75006 (p) 972.503.8900 (f) 972.503.9100 Figure 6-2 When you are ready to close this screen, click <Accept> to exit. Virtual Terminal User Manual © 2000-2003 Transactional Technologies. All Rights Reserved. 6-75 Transactional Technologies, LLC 3361 Boyington Drive, Suite 180 Carrollton, TX 75006 THIS PAGE INTENTIONALLY LEFT BLANK 6-76 © 2000-2003 Transactional Technologies. All Rights Reserved. Virtual Terminal User Manual (p) 972.503.8900 (f) 972.503.9100 Transactional Technologies, LLC 3361 Boyington Drive, Suite 180 Carrollton, TX 75006 (p) 972.503.8900 (f) 972.503.9100 7 Using the VTJetCom Application With the Virtual Terminal application, the merchant is able to perform a Sale, Auth Only, Force, Refund, Void, Capture, Check, Check Void, Check Reversal and Inquiry transaction. Certain functions may be restricted to specific staff member for security purposes (i.e., Refunds and Voids). 7.1 Transaction Types There are various transaction types available to the merchant. With a clear understanding of what each transaction type is capable of, the merchant becomes more informed and is able to receive the desired results. 7.1.1 Sale A Sale is a transaction where a customer purchases goods or services. Both authorization of the transaction and the settlement of the transaction occur. 7.1.2 Auth Only An Auth Only is a transaction that does not submit the transaction for settlement. An Auth-Only transaction will not settle unless it is subsequently captured. 7.1.3 Force When a referral message response is received, or a temporary interruption of service occurs, a voice authorization must be obtained to use the card. After receiving the voice authorization, a Force transaction can be performed to conduct the sale. The Force transaction forces the settlement of the authorized transaction by entering the following information: Card Number Expiration Date Total Amount Approval Code Process As 7.1.4 Refund A Refund is a transaction that is performed to credit a customer’s card for the amount of a settled Sale transaction. If the transaction has not settled (attempting to re-credit the customer’s card the same day as the sale), a Void transaction must be performed. 7.1.5 Void Virtual Terminal User Manual © 2000-2003 Transactional Technologies. All Rights Reserved. 7-1 Transactional Technologies, LLC 3361 Boyington Drive, Suite 180 Carrollton, TX 75006 (p) 972.503.8900 (f) 972.503.9100 A Void is a transaction that is performed to remove a Sale transaction that was mistakenly completed through the credit card system. A void can only be performed on the same day as the sale. If the transaction has already been settled, a Refund transaction must be performed. 7.1.6 Capture A Capture is a transaction that is performed to move an authorized transaction, which was previously authorized through an Auth-Only transaction, into settlement. 7.1.7 Check A Check transaction is a sale that is being paid by check. 7.1.8 Check Void A Check Void is a transaction used to void a check transaction type. A Check Void transaction can ONLY be processed if the original Check transaction type has not been settled by the processor. 7.1.9 Check Reversal A Check Reversal is a transaction that actually transfers money from the merchant to the individual’s checking account that originally paid by check. A Check Reversal transaction is used by the merchant if the original Check transaction type has already been settled by the processor. 7.1.10 Inquiry An Inquiry is a transaction that is performed to determine the status of an unsettled transaction. The Inquiry specifies that the transactions is accepted, authorized or not found. 7.2 Switching Terminal Types The merchant is capable of changing from the Virtual Terminal - Retail interface to the Virtual Terminal Mail/Telephone Order at any time. 7.2.1 Switching from Retail to MOTO or File Processing If the displayed terminal is the Virtual Terminal - Retail, select [Options] + [Terminal Type] + [Mail/Telephone] from the applications top-line menu (see Figure 7-1). This will change the terminal type from Retail (Virtual Terminal - Retail) to MOTO (Virtual Terminal Mail/Telephone Order Terminal). If the [Process File Terminal] has been enabled in the Features Config (Section 3.6.2), then Process File will be one of the menu options (see Figure 72). Select [Process File] to switch to Virtual Terminal - File Processing Status. 7-2 © 2000-2003 Transactional Technologies. All Rights Reserved. Virtual Terminal User Manual Transactional Technologies, LLC 3361 Boyington Drive, Suite 180 Carrollton, TX 75006 (p) 972.503.8900 (f) 972.503.9100 Figure 7-1 Figure 7-2 7.2.2 Switching from MOTO to Retail or File Processing If the displayed terminal is the Virtual Terminal - Mail/Telephone Order Terminal, select [Options] + [Terminal Type] + [Retail] from the applications top-line menu (see Figure 7-3). Virtual Terminal User Manual © 2000-2003 Transactional Technologies. All Rights Reserved. 7-3 Transactional Technologies, LLC 3361 Boyington Drive, Suite 180 Carrollton, TX 75006 (p) 972.503.8900 (f) 972.503.9100 This will change the terminal type from MOTO (Virtual Terminal - Mail/Telephone Order Terminal) to Retail (Virtual Terminal - Terminal). If [Process File Terminal] has been enabled under the Features Config (section 3.6.2), File Process will also appear in this list (see Figure 74). Select [File Process] to switch to Virtual Terminal - File Processing Status. Figure 7-3 Figure 7-4 7.3 Using the Virtual Terminal - Retail Terminal 7-4 © 2000-2003 Transactional Technologies. All Rights Reserved. Virtual Terminal User Manual Transactional Technologies, LLC 3361 Boyington Drive, Suite 180 Carrollton, TX 75006 (p) 972.503.8900 (f) 972.503.9100 The Virtual Terminal - Retail window is primarily used by merchants that sale goods and services over the counter. 7.3.1 Field Information Like the Virtual Terminal - Mail/Telephone Order Terminal window, the Virtual Terminal Retail window is divided into three unique areas. One area defines the type of transaction to be performed (Sale, Auth Only, Force, etc.) and is defined in more detail in chapter 6.1. The other two areas are Transaction Information and Response Information, which are described in detail within this chapter. The Transaction Information frame deals with the actual data used in submittal of the transaction. The Response Information frame identifies the various responses and codes that can be returned during/after the processing of the transaction. 7.3.1.1 Transaction Information The more information the merchant can input in the Transaction Information pane the less risk involved with being required to perform Refunds and Voids. A description of the fields available in the Virtual Terminal - Retail window follows: • Card Number: • Expiration Date: • CVV2 Number: • Total Amount: • Check Acct Type: • • Tax Amount: Card Holder Name: • Approval Code: Input the 15 or 16 digit card number (American Express cards have 15 numbers whereas all others have 16). This is a required field. Input the expiration date as it appears on the card. Note: The format of this field is MMYY (month and year). Only 4 numerical digits can be entered in this field. Do not enter dashes “-“ or slashes “/”. This is a required field. Input the CVV2 number as it appears on the signature block on the back of the card. This is a required field if the CVV2 field was checked in the configuration settings. Input the total amount of the sale (goods and services plus tax). This is a required field. Type of checking account (displayed only when processing payment by check). Input the amount of taxes for this sale. Input the name of the card holder (as it appears on the card). Used for Force and Void transactions. The processor would have provided the approval code during the initial transaction either verbally (Voice Auth – when Virtual Terminal User Manual © 2000-2003 Transactional Technologies. All Rights Reserved. 7-5 Transactional Technologies, LLC 3361 Boyington Drive, Suite 180 Carrollton, TX 75006 (p) 972.503.8900 (f) 972.503.9100 the network is down) or electronically after successful completion of the transaction. • Order Number: Merchant’s purchase identification number (i.e., invoice number, purchase order number, etc.) • Transaction ID: Unique 18-character ID that identifies a jetpay transaction through its life-cycle. • User Data 1: Input information that the merchant deems necessary. This is a required field if the User Data 1 field was defined AND was checked as a mandatory field. • User Data 2: Input information that the merchant deems necessary. This is a required field if the User Data 2 field was defined AND was checked as a mandatory field. • User Data 3: Input information that the merchant deems necessary. This is a required field if the User Data 3 field was defined AND was checked as a mandatory field. • Process As: Select the appropriate Terminal ID for this sale. If the merchant only has one terminal ID, this field will not need to be modified. This information may be entered manually or can be entered through a card reader, as discussed in Section 10. Transactions entered through a card reader are referred to as swiped transactions. Swiped transactions generally offer the retailer a better discount rate. 7.3.1.2 Response Information The following is a brief description of the information fields: • • Response/Status: Action Code: • CVV2 Response: • • Authorization Code: Response Transaction ID: Brief description of the status of the transaction. The Virtual Terminal provides this code only if there was an error entering the data into any of the fields (incorrect format, invalid price, invalid cvv2, etc.) Refer to Chapter 8 for a list of available Action Codes. This data is provided by the association (Visa, MasterCard, etc.) to verify that the appropriate CVV2 data was provided. The CVV2 number is located on the back of the card on the signature panel (last 3 digits separated from the card number). This code is provided by the host processor. The Transaction ID is provided by the host processor. 7.3.2 Sale A Sale is a transaction where the customer purchases goods or services. Both authorization of the transaction and the settlement of the transaction occur.To perform a Sale transaction select SALE on the left side of the Virtual Terminal - Retail window (see Figure 7-5). 7-6 © 2000-2003 Transactional Technologies. All Rights Reserved. Virtual Terminal User Manual Transactional Technologies, LLC 3361 Boyington Drive, Suite 180 Carrollton, TX 75006 (p) 972.503.8900 (f) 972.503.9100 Figure 7-5 If using the Magtek Mini-Wedge Card Reader, swipe the card and then enter other desired information in the fields provided (Total Amount is a required field). If the site is not using the Magtek Mini-Wedge Card Reader, the merchant must manually input the record data. Required fields for a Sale transaction are: • • • • Card Number Expiration Date Total Amount Process as (Terminal ID) Click on the <Submit> button to execute the transaction. The response to the sale will appear in the pane titled Response Information. 7.3.3 Auth Only An Auth Only is a transaction that does not submit the transaction for settlement. An Auth Only transaction will not settle unless it is subsequently captured. To perform an Auth Only transaction select AUTH ONLY on the left side of the Virtual Terminal - Retail window (see Figure 7-4). Virtual Terminal User Manual © 2000-2003 Transactional Technologies. All Rights Reserved. 7-7 Transactional Technologies, LLC 3361 Boyington Drive, Suite 180 Carrollton, TX 75006 (p) 972.503.8900 (f) 972.503.9100 Figure 7-6 The merchant must then enter the data to perform the transaction. The following items are required fields: • • • • Card Number Expiration Date Total Amount Process As (Terminal ID) Click on the <Submit> button to execute the transaction. The response to the sale will appear in the pane titled Response Information. 7.3.4 Force When a referral message response is received, or a temporary interruption of service occurs, a voice authorization must be obtained to use the card. After receiving the voice authorization, a Force transaction can be performed to conduct the sale. To perform a Force transaction select FORCE on the left side of the Virtual Terminal - Retail window (see Figure 7-7). 7-8 © 2000-2003 Transactional Technologies. All Rights Reserved. Virtual Terminal User Manual Transactional Technologies, LLC 3361 Boyington Drive, Suite 180 Carrollton, TX 75006 (p) 972.503.8900 (f) 972.503.9100 Figure 7-7 The merchant must then enter the data to perform the transaction. The following items are required fields for all Force transactions: • • • • • Card Number Expiration Date Total Amount Approval Code Process As (Terminal ID) ;N OTE: In the event of a problem, the merchant can receive a voice authorization by the processor that will enable them to process the transaction. In this event, the Approval Code will be provided to the merchant at that time. If the transaction was successfully completed electronically, the Approval Code would have been provided at that time. Click on the <Submit> button to execute the transaction. The response to the sale will appear in the pane titled Response Information. 7.3.5 Refund A Refund is a transaction that is performed to credit a customer’s card for the amount of a settled Sale transaction. If the transaction has not settled (Attempting to re-credit the customer’s card the same day as the sale), a Void transaction must be performed. To perform a Refund transaction select Refund on the left side of the Virtual Terminal - Retail window (see Figure 78). Virtual Terminal User Manual © 2000-2003 Transactional Technologies. All Rights Reserved. 7-9 Transactional Technologies, LLC 3361 Boyington Drive, Suite 180 Carrollton, TX 75006 (p) 972.503.8900 (f) 972.503.9100 Figure 7-8 The merchant must then enter the data to perform the transaction. The following items are required fields: • • • • Card Number Expiration Date Total Amount Process As (Terminal ID) Click on the <Submit> button to execute the transaction. The response to the sale will appear in the pane titled Response Information. 7.3.6 Void A void is a transaction that is performed to remove a Sale transaction that was mistakenly completed through the credit card system. A void can only be performed on the same day as the sale. If the transaction has already been settled, a Refund transaction must be performed. To perform a Void transaction select Void on the left side of the Virtual Terminal - Retail window (see Figure 7-9). 7-10 © 2000-2003 Transactional Technologies. All Rights Reserved. Virtual Terminal User Manual Transactional Technologies, LLC 3361 Boyington Drive, Suite 180 Carrollton, TX 75006 (p) 972.503.8900 (f) 972.503.9100 Figure 7-9 The merchant must then enter the data to perform the transaction. The following items are required fields: • • • • • Card Number Expiration Date Total Amount Approval Code Process As (Terminal ID) ;N OTE: In the event of a problem, the merchant can receive a voice authorization by the processor that will enable them to process the transaction. In this event, the Approval Code will be provided to the merchant at that time. If the transaction was successfully completed electronically, the Approval Code would have been provided at that time. Click on the <Submit> button to execute the transaction. The response to the sale will appear in the pane titled Response Information. 7.3.7 Capture A Capture is a transaction that is performed to move an authorized transaction, which was previously authorized through an Auth Only transaction, into settlement. To perform a Capture Virtual Terminal User Manual © 2000-2003 Transactional Technologies. All Rights Reserved. 7-11 Transactional Technologies, LLC 3361 Boyington Drive, Suite 180 Carrollton, TX 75006 (p) 972.503.8900 (f) 972.503.9100 transaction select Capture on the left side of the Virtual Terminal - Retail window (see Figure 710). Figure 7-10 The merchant must then enter the data to perform the transaction. The following items are required fields: • • • • Card Number Expiration Date Transaction ID Process As (Terminal ID) Click on the <Submit> button to execute the transaction. The response to the sale will appear in the pane titled Response Information. 7.3.8 Check A Check transaction is a sale that is being paid by check. To perform a Check transaction select Check on the left side of the Virtual Terminal - Retail window (see Figure 7-11). 7-12 © 2000-2003 Transactional Technologies. All Rights Reserved. Virtual Terminal User Manual Transactional Technologies, LLC 3361 Boyington Drive, Suite 180 Carrollton, TX 75006 (p) 972.503.8900 (f) 972.503.9100 Figure 7-11 The following items are required fields (see Figure 7-9). • • • • • • • Account Number ABA Number Check Number Total Amount Check Account Type Account Holder Name Process As (Terminal ID) Click on the <Submit> button to execute the transaction. The response to the sale will appear in the pane titled Response Information. 7.3.9 Check Void Check Void is a transaction that voids a Check transaction type. This must be performed if the transaction has already settled, or is occurring any day after the day of the check transaction. To void a check transaction on the same day, use the Check Reversal transaction. To perform a Check Void transaction select Check Void on the left side of the Virtual Terminal - Retail window (see Figure 7-12). Virtual Terminal User Manual © 2000-2003 Transactional Technologies. All Rights Reserved. 7-13 Transactional Technologies, LLC 3361 Boyington Drive, Suite 180 Carrollton, TX 75006 (p) 972.503.8900 (f) 972.503.9100 Figure 7-12 The following fields are required to perform a Check Void transaction: • • • • • • • Account Number ABA Number Check Number Total Amount Check Acct Type Account Holder Name Process As (Terminal ID) Click on the <Submit> button to execute the transaction. The response to the sale will appear in the pane titled Response Information. 7.3.10 Check Reversal A Check Reversal is a transaction used to void a check transaction type. A Check Reversal transaction can ONLY be processed if the original Check transaction type has not been settled by the processor. To perform a Check Reversal transaction select Check Reversal on the left side of the Virtual Terminal - Retail window (see Figure 7-13). 7-14 © 2000-2003 Transactional Technologies. All Rights Reserved. Virtual Terminal User Manual Transactional Technologies, LLC 3361 Boyington Drive, Suite 180 Carrollton, TX 75006 (p) 972.503.8900 (f) 972.503.9100 Figure 7-13 The following fields are required to perform a Check Reversal transaction: • • • • • • • Account Number ABA Number Check Number Total Amount Check Account Type Account Holder Name Process As (Terminal ID) Click on the <Submit> button to execute the transaction. The response to the sale will appear in the pane titled Response Information. 7.3.11 Inquiry An Inquiry is a transaction that is performed to determine the status of an unsettled transaction. The Inquiry specifies that the transaction is accepted, authorized, or not found. Should the inquiry be performed after the transaction has settled, it will return not found. To perform an Inquiry transaction, select Inquiry on the left side of the Virtual Terminal - Retail window (see Figure 7-14). The Inquiry can be performed only before the transaction has settled. If the daily settlement is run every night, and the inquiry is performed after this, the transaction will not be found in the records. Virtual Terminal User Manual © 2000-2003 Transactional Technologies. All Rights Reserved. 7-15 Transactional Technologies, LLC 3361 Boyington Drive, Suite 180 Carrollton, TX 75006 (p) 972.503.8900 (f) 972.503.9100 Figure 7-14 The following fields are required to perform an Inquire transaction: • • Transaction ID Process As (Terminal ID) Click on the <Submit> button to execute the transaction. The response to the sale will appear in the pane titled Response Information. 7.4 Using the Virtual Terminal - Mail/Telephone Order Terminal The Virtual Terminal - Mail/Telephone Order Terminal window is primarily used by merchants that sale goods and services via mail and/or phone. Due to the nature of MOTO (Mail Order/Telephone Order) transactions, more data fields are provided to aid in preventing the use of stolen cards and to aid in preventing Refunds and Voids. 7.4.1 Field Information Like the Virtual Terminal - Retail window, the Virtual Terminal - Mail/Telephone Order Terminal window is divided into three unique areas. One area defines the type of transaction to be performed (Sale, Auth Only, Force, etc.) and is defined in more detail in chapter 6.1. The other two areas are Transaction Information and Response Information, which is described in detail within this chapter. The Transaction Information frame deals with the actual data used in submittal of the transaction. 7-16 © 2000-2003 Transactional Technologies. All Rights Reserved. Virtual Terminal User Manual Transactional Technologies, LLC 3361 Boyington Drive, Suite 180 Carrollton, TX 75006 (p) 972.503.8900 (f) 972.503.9100 The Response Information frame identifies the various responses and codes that can be returned during/after the processing of the transaction. 7.4.1.1 Transaction Information The more information the merchant can input in the Transaction Information pane the less risk involved with being required to perform Refunds and Voids. A description of the fields available in the Virtual Terminal - Mail/Telephone Order Terminal window follows: • Card Number: • Expiration Date: • CVV2 Number: • Total Amount: • Origin: • Card Holder Name: • Order Number: • Approval Code: • Billing Zip/Postal Code: • • • • Billing Address: Billing City: Billing Phone: Billing Country: • Transaction ID: Input the 15 or 16 digit card number (American Express cards have 15 numbers whereas all others have 16). This is a required field. Input the expiration date as it appears on the card. Note: The format of this field is MMYY (month and year). Only 4 numerical digits can be entered in this field. Do not enter dashes “-“ or slashes “/”. This is a required field. Input the CVV2 number as it appears on the signature block on the back of the card. This is a required field if the CVV2 Mandatory check was made in the configuration settings. Input the total amount of the sale (goods and services plus tax). This is a required field. Defines that this transaction is either a Phone Order or a Mail Order transaction. Input the name of the card holder as it appears on the card. Merchant’s purchase identification number (i.e., invoice number, purchase order number, etc.) Used for Force and Void transactions. The approval code would have been provided by the processor during the initial transaction either verbally (Voice Auth – when the network is down) or electronically after successful completion of the transaction. Input the zip code of the billing address of the card holder. Input the billing address of the card holder. Input the city of the billing address of the card holder. Input the phone number of the card holder. Input the country of the billing address of the card holder. Unique 18-character ID that identifies a jetpay transaction through its life-cycle. Virtual Terminal User Manual © 2000-2003 Transactional Technologies. All Rights Reserved. 7-17 Transactional Technologies, LLC • • 3361 Boyington Drive, Suite 180 Carrollton, TX 75006 (p) 972.503.8900 (f) 972.503.9100 Billing State/Prov: User Data 1: Input the state of the billing address of the card holder. Input information that the merchant deems necessary. This is a required field if the User Data 1 field was defined AND checked as mandatory. • User Data 2: Input information that the merchant deems necessary. This is a required field if the User Data 2 field was defined AND checked as mandatory. • User Data 3: Input information that the merchant deems necessary. This is a required field if the User Data 3 field was defined AND checked as mandatory. • Process As: Select the appropriate Terminal ID for this sale. If the merchant only has one terminal ID, this field will not need to be modified. This information will generally be entered by hand, as the nature of MOTO suggests the card is not physically present. If, however, a swiped transaction is given to the Mail/Telephone Terminal, the software will automatically switch to the Virtual Terminal – Retail screen until the transaction is processed, and then will automatically return to the Virtual Terminal – Mail/Telephone screen. 7.4.1.2 Response Information The following is a brief description of the information fields: • • Response/Status: Action Code: • CVV2 Response: • • Authorization Code: Address Match: • • Response Transaction ID: Zip Match: • AVS Description: Brief description of the status of the transaction. This code is provided by the Virtual Terminal only if there was an error entering the data into any of the fields (incorrect format, invalid price, invalid cvv2, etc.) Refer to Chapter 9 for a list of available Action Codes. This data is provided by the association (Visa, MasterCard, etc.) to verify that the appropriate CVV2 data was provided. The CVV2 number is located on the back of the card on the signature panel (last 3 digits separated from the card number). This code is provided by the host processor. This code identifies whether the billing address verification matched or not. The Transaction ID is provided by the host processor. This code identifies whether the billing zip/postal code verification matched or not. This field provides an easy to read/understand of the AVS transaction response code. 7.4.2 Sale 7-18 © 2000-2003 Transactional Technologies. All Rights Reserved. Virtual Terminal User Manual Transactional Technologies, LLC 3361 Boyington Drive, Suite 180 Carrollton, TX 75006 (p) 972.503.8900 (f) 972.503.9100 A Sale is a transaction where the customer purchases goods or services. Both authorization of the transaction and the settlement of the transaction occur. To perform a Sale transaction select Sale on the left side of the Virtual Terminal - Mail/Telephone Order Terminal window (see Figure 7-13). Figure 7-13 The merchant must manually input the record data. The following items are required fields for all Sale transactions: • • • • Card Number Expiration Date Total Amount Process As (Terminal ID) Click on the <Submit> button to execute the transaction. The response to the sale will appear in the pane titled Response Information. 7.4.3 Auth Only An Auth Only is a transaction that does not submit the transaction for settlement. An Auth Only transaction will not settle unless it is subsequently captured. To perform an Auth Only transaction select Auth Only on the left side of the Virtual Terminal - Mail/Telephone Order Terminal window (see Figure 7-14). Virtual Terminal User Manual © 2000-2003 Transactional Technologies. All Rights Reserved. 7-19 Transactional Technologies, LLC 3361 Boyington Drive, Suite 180 Carrollton, TX 75006 (p) 972.503.8900 (f) 972.503.9100 Figure 7-14 The merchant must then enter the data to perform the transaction. The following items are required fields: • • • • Card Number Expiration Date Total Amount Process As (Terminal ID) Click on the <Submit> button to execute the transaction. The response to the sale will appear in the pane titled Response Information. 7.4.4 Force When a referral message response is received, or a temporary interruption of service occurs, a voice authorization must be obtained to use the card. After receiving the voice authorization, a Force transaction can be performed to conduct the sale. To perform a Force transaction select Force on the left side of the Virtual Terminal - Mail/ Telephone Order Terminal window (see Figure 7-15). 7-20 © 2000-2003 Transactional Technologies. All Rights Reserved. Virtual Terminal User Manual Transactional Technologies, LLC 3361 Boyington Drive, Suite 180 Carrollton, TX 75006 (p) 972.503.8900 (f) 972.503.9100 Figure 7-15 The merchant must then enter the data to perform the transaction. The following items are required fields: • • • • • Card Number Expiration Date Total Amount Approval Code Process As (Terminal ID) ;N OTE: In the event of a problem, the merchant can receive a voice authorization by the processor that will enable them to process the transaction. In this event, the Approval Code will be provided to the merchant at that time. If the transaction was successfully completed electronically, the Approval Code would have been provided at that time. Click on the <Submit> button to execute the transaction. The response to the sale will appear in the pane titled Response Information. 7.4.5 Refund A Refund is a transaction that is performed to credit a customer’s card for the amount of a settled Sale transaction. If the transaction has not settled (Attempting to re-credit the customer’s card the same day as the sale), a Void transaction must be performed. To perform a Refund Virtual Terminal User Manual © 2000-2003 Transactional Technologies. All Rights Reserved. 7-21 Transactional Technologies, LLC 3361 Boyington Drive, Suite 180 Carrollton, TX 75006 (p) 972.503.8900 (f) 972.503.9100 transaction select Refund on the left side of the Virtual Terminal - Mail/Telephone Order Terminal window (see Figure 7-16). Figure 7-16 The merchant must then enter the data to perform the transaction. The following items are required fields: • • • • Card Number Expiration Date Total Amount Process As (Terminal ID) Click on the <Submit> button to execute the transaction. The response to the sale will appear in the pane titled Response Information. 7.4.6 Void A void is a transaction that is performed to remove a Sale transaction that was mistakenly completed through the credit card system. A void can only be performed on the same day as the sale. If the transaction has already been settled, a Refund transaction must be performed. To perform a Void transaction, select Void on the left side of the Virtual Terminal - Mail/Telephone Order Terminal window (see Figure 7-17). 7-22 © 2000-2003 Transactional Technologies. All Rights Reserved. Virtual Terminal User Manual Transactional Technologies, LLC 3361 Boyington Drive, Suite 180 Carrollton, TX 75006 (p) 972.503.8900 (f) 972.503.9100 Figure 7-17 The merchant must then enter the data to perform the transaction. The following items are required fields: • • • • • Card Number Expiration Date Total Amount Approval Code Process As (Terminal ID) ;N OTE: In the event of a problem, the merchant can receive a voice authorization by the processor that will enable them to process the transaction. In this event, the Approval Code will be provided to the merchant at that time. If the transaction were successfully completed electronically, the Approval Code would have been provided at that time. Click on the <Submit> button to execute the transaction. The response to the sale will appear in the pane titled Response Information. 7.4.7 Capture A Capture is a transaction that is performed to move an authorized transaction, which was previously authorized through an Auth Only transaction, into settlement. To perform a Capture transaction select Capture on the left side of the Virtual Terminal - Mail/Telephone Order Terminal window (see Figure 7-18). Virtual Terminal User Manual © 2000-2003 Transactional Technologies. All Rights Reserved. 7-23 Transactional Technologies, LLC 3361 Boyington Drive, Suite 180 Carrollton, TX 75006 (p) 972.503.8900 (f) 972.503.9100 Figure 7-18 The merchant must then enter the data to perform the transaction. The following items are required fields: • • • • Card Number Expiration Date Transaction ID Process As (Terminal ID) Click on the <Submit> button to execute the transaction. The response will appear in the pane titled Response Information. 7.4.8 Check A Check transaction is a sale that is being paid by check. To perform a Check transaction select Check on the left side of the Virtual Terminal - Mail/Telephone Order Terminal window (see Figure 7-19). 7-24 © 2000-2003 Transactional Technologies. All Rights Reserved. Virtual Terminal User Manual Transactional Technologies, LLC 3361 Boyington Drive, Suite 180 Carrollton, TX 75006 (p) 972.503.8900 (f) 972.503.9100 Figure 7-19 The following items are required fields. • • • • • • • Account Number Check Number ABA Number Check Account Type Total Amount Account Holder Name Process As (Terminal ID) Click on the <Submit> button to execute the transaction. The response will appear in the pane titled Response Information. 7.4.9 Check Void Check Void is a transaction that voids a Check transaction type. This must be performed if the transaction has already settled, or is occurring any day after the day of the check transaction. To void a check transaction on the same day, use the Check Reversal transaction. To perform a Check Void transaction select Check Void on the left side of the Virtual Terminal Mail/Telephone Order Terminal window (see Figure 7-20). Virtual Terminal User Manual © 2000-2003 Transactional Technologies. All Rights Reserved. 7-25 Transactional Technologies, LLC 3361 Boyington Drive, Suite 180 Carrollton, TX 75006 (p) 972.503.8900 (f) 972.503.9100 Figure 7-20 The following items are required fields. • • • • • • • Account Number Check Number ABA Number Check Account Type Total Amount Acct Holder Name Process As (Terminal ID) Click on the <Submit> button to execute the transaction. The response will appear in the pane titled Response Information. 7.4.10 Check Reversal A Check Reversal is a transaction used to void a check transaction type. A Check Reversal transaction can ONLY be processed if the original Check transaction type has not been settled by the processor. To perform a Check Reversal transaction select Check Reversal on the left side of the Virtual Terminal - Mail/Telephone Order Terminal window (see Figure 7-21). 7-26 © 2000-2003 Transactional Technologies. All Rights Reserved. Virtual Terminal User Manual Transactional Technologies, LLC 3361 Boyington Drive, Suite 180 Carrollton, TX 75006 (p) 972.503.8900 (f) 972.503.9100 Figure 7-21 The following items are required fields. • • • • • • • Account Number Check Number ABA Number Check Account Type Total Amount Account Holder Name Process As (Terminal ID) Click on the <Submit> button to execute the transaction. The response will appear in the pane titled Response Information. 7.4.11 Inquiry An Inquiry is a transaction that is performed to determine the status of an unsettled transaction. The Inquiry specifies that the transaction is accepted, authorized, or not found. An Inquiry must be performed before the transaction in question is settled. Should the inquiry be performed after the transaction settles, the inquiry will return not found. To perform an Inquiry transaction, select Inquiry on the left side of the Virtual Terminal - Mail/Telephone Order Terminal window (see Figure 7-22). Virtual Terminal User Manual © 2000-2003 Transactional Technologies. All Rights Reserved. 7-27 Transactional Technologies, LLC 3361 Boyington Drive, Suite 180 Carrollton, TX 75006 (p) 972.503.8900 (f) 972.503.9100 Figure 7-22 The merchant must then enter the data to perform the transaction. The following items are required fields. • • Transaction ID Process As (Terminal ID) Click on the <Submit> button to execute the transaction. The response will appear in the pane titled Response Information. 7.5 Using the File Process Terminal The Virtual Terminal – Process File Terminal will automatically look for files to process (see Figure 7-23). 7-28 © 2000-2003 Transactional Technologies. All Rights Reserved. Virtual Terminal User Manual Transactional Technologies, LLC 3361 Boyington Drive, Suite 180 Carrollton, TX 75006 (p) 972.503.8900 (f) 972.503.9100 Figure 7-23 Click <Start> after first opening the application to activate the software. If a specific filename is not given for the input file, the software will automatically begin when a new input file is present in the folder (see Figure 7-24 and Figure 7-25). Figure 7-24 Virtual Terminal User Manual © 2000-2003 Transactional Technologies. All Rights Reserved. 7-29 Transactional Technologies, LLC 3361 Boyington Drive, Suite 180 Carrollton, TX 75006 (p) 972.503.8900 (f) 972.503.9100 Figure 7-25 Click <Stop> in order to stop the processing before all files are processed, or it will continue until all valid input files are complete (see Figure 7-26). Figure 7-26 Click the <Hide> button in order to make the large Virtual Terminal screen disappear from your desktop. The application will be accessible from a small icon in the Start Up Tray on the lower right hand corner of the screen, next to the time (see Figure 7-27). Figure 7-27 7-30 © 2000-2003 Transactional Technologies. All Rights Reserved. Virtual Terminal User Manual Transactional Technologies, LLC 3361 Boyington Drive, Suite 180 Carrollton, TX 75006 (p) 972.503.8900 (f) 972.503.9100 Even though it is hidden, the software will continue to process files as they come into the folder until the user clicks on <Stop>. 7.6 Exiting the VTJetCom Application To exit the application, select [File] + [Exit] from the top-line menu of the application (see Figures 7-28 and Figure 7-29) or click on the <Close> button. Figure 7-28 Virtual Terminal User Manual © 2000-2003 Transactional Technologies. All Rights Reserved. 7-31 Transactional Technologies, LLC 3361 Boyington Drive, Suite 180 Carrollton, TX 75006 Figure 7-29 7-32 © 2000-2003 Transactional Technologies. All Rights Reserved. Virtual Terminal User Manual (p) 972.503.8900 (f) 972.503.9100 Transactional Technologies, LLC 3361 Boyington Drive, Suite 180 Carrollton, TX 75006 (p) 972.503.8900 (f) 972.503.9100 8 Performing Diagnostics The VTJetCom applications permits the merchant to verify communications with the processor. The merchant is able to validate communications with the HTTPS Production Gateway, HTTPS Test Gateway, or with the Dial Up Connection. The diagnostics capabilities will provide a RED/GREEN status as well as more detailed Connection Information. To perform Diagnostics, select [Options] + [Diagnostics] from the top-line menu of the application window (see Figures 8-1 and Figure 8-2). Figure 8-1 8.1 Testing the HTTPS Production Gateway Within the JetPay Diagnostics window, ensure that the radio button to the left of HTTPS Production Gateway is selected (see Figure 8-2). Then click on the <Test> button. Virtual Terminal User Manual © 2000-2003 Transactional Technologies. All Rights Reserved. 8-1 Transactional Technologies, LLC 3361 Boyington Drive, Suite 180 Carrollton, TX 75006 (p) 972.503.8900 (f) 972.503.9100 Figure 8-2 If the test was successful, the “traffic” light will display a GREEN light next to Production Gateway as well as a more detailed description of the test performed (see Figure 8-3). Figure 8-3 If the test was unsuccessful, the “traffic” light will display a RED light next to Production Gateway as well as a more detailed description of the test performed (see Figure 8-4). 8-2 © 2000-2003 Transactional Technologies. All Rights Reserved. Virtual Terminal User Manual Transactional Technologies, LLC 3361 Boyington Drive, Suite 180 Carrollton, TX 75006 (p) 972.503.8900 (f) 972.503.9100 Figure 8-4 If problems are encountered, contact the Transactional Technologies Customer Support Center for assistance (800.834.4405 opt. 2). 8.2 Testing the HTTPS Test Gateway Within the JetPay Diagnostics window, ensure that the radio button to the left of HTTPS Test Gateway is selected (see Figure 8-5). Then click on the <Test> button. Figure 8-5 If the test was successful, the “traffic” light will display a GREEN light next to Test Gateway as well as a more detailed description of the test performed (see Figure 8-6). Virtual Terminal User Manual © 2000-2003 Transactional Technologies. All Rights Reserved. 8-3 Transactional Technologies, LLC 3361 Boyington Drive, Suite 180 Carrollton, TX 75006 (p) 972.503.8900 (f) 972.503.9100 Figure 8-6 If the test was unsuccessful, the “traffic” light will display a RED light next to Test Gateway as well as a more detailed description of the test performed (see Figure 8-7). Figure 8-7 If problems are encountered, contact the Transactional Technologies Customer Support Center for assistance (800.834.4405 opt. 2). 8.3 Request for Assistance 8-4 © 2000-2003 Transactional Technologies. All Rights Reserved. Virtual Terminal User Manual Transactional Technologies, LLC 3361 Boyington Drive, Suite 180 Carrollton, TX 75006 (p) 972.503.8900 (f) 972.503.9100 If at any time the merchant feels that assistance is required (for any reason), the merchant always has capability of contacting the Transactional Technologies Customer Support center. The merchant may contact the Customer Support Center via phone (toll free) or via email. If an immediate need for assistance is required, it is highly recommended that the merchant contact the Customer Support Center via the toll-free number. E-Mail: Toll-Free: Phone: [email protected] 800.834.4405 option 2 (toll free) 972.503.8900 option 2 (local) Virtual Terminal User Manual © 2000-2003 Transactional Technologies. All Rights Reserved. 8-5 Transactional Technologies, LLC 3361 Boyington Drive, Suite 180 Carrollton, TX 75006 (p) 972.503.8900 (f) 972.503.9100 9 Get Card Number By default, only the last four digits of a card number are printed on the receipt. However, in order to perform a refund or void, the merchant must know the full credit card number. The Get Card Number feature allows the merchant to identify the full credit card number. To look up a credit card number, perform the following: • • Launch the VTJetCom application. Select [Options] and then select [Get Card Number Ctrl+G] from the top-line menu (see Figures 9-1). Figure 9-1 • The Merchant Password window will appear (see Figure 9-2). Enter the appropriate password and click on the <Accept> button. Figure 9-2 • The Get Card Number window will appear (see Figure 9-3). 9-1 © 2000-2003 Transactional Technologies. All Rights Reserved. Virtual Terminal User Manual Transactional Technologies, LLC 3361 Boyington Drive, Suite 180 Carrollton, TX 75006 (p) 972.503.8900 (f) 972.503.9100 Figure 9-3 • Enter the Transaction ID exactly as it appears on the receipt (see Figure 9-4). Figure 9-4 • Enter the Reference Number (appears in the header of the receipt) exactly as it appears on the receipt (see Figure 9-5). Figure 9-5 • Click on the button labeled [Get Card Number]. The full card number will be displayed to the merchant (see Figure 9-6). Virtual Terminal User Manual © 2000-2003 Transactional Technologies. All Rights Reserved. 9-2 Transactional Technologies, LLC 3361 Boyington Drive, Suite 180 Carrollton, TX 75006 (p) 972.503.8900 (f) 972.503.9100 Figure 9-6 • To close the Get Card Number window, click on the “X” in the upper right corner of the window (see Figure 9-7). Figure 9-7 9-3 © 2000-2003 Transactional Technologies. All Rights Reserved. Virtual Terminal User Manual Transactional Technologies, LLC 3361 Boyington Drive, Suite 180 Carrollton, TX 75006 (p) 972.503.8900 (f) 972.503.9100 THIS PAGE INTENTIONALLY LEFT BLANK Virtual Terminal User Manual © 2000-2003 Transactional Technologies. All Rights Reserved. 9-4 Transactional Technologies, LLC 3361 Boyington Drive, Suite 180 Carrollton, TX 75006 (p) 972.503.8900 (f) 972.503.9100 10 Reports 10.1 Printing The Report To print the report, click on the button labeled <Copy to Clipboard>. Paste the information into a word processor (Microsoft® Word, WordPerfect®, Notepad, etc.). Adjust the layout of the report as appropriate and print. 10.2 Reports • Creating a daily Transactions or Declined reports for all transaction generate during each day can be customized with unlimited options (see Figure 10-5). Figure 10-4 10-1 © 2000-2003 Transactional Technologies. All Rights Reserved. Virtual Terminal User Manual Transactional Technologies, LLC 3361 Boyington Drive, Suite 180 Carrollton, TX 75006 (p) 972.503.8900 (f) 972.503.9100 Figure 10-5 • • • Customizing reports by selecting a Report Type (Transaction or Declined). Select the desired fields to be displayed (Transaction Type, Terminal ID, Transaction ID, Card Type, Date, Time, Amount, Tip, Tax, and/or Action/Auth Code). Enter the start date/time and the end date/time. The merchant has the option of selecting the Terminal ID for reports. This option is used in the event that a merchant has multiple merchant ID’s assigned for their use. In this scenario, the merchant now has the ability to print off reports for each merchant ID assigned to them. Once all desired options have been selected, click on the <Accept> button (see Figure 106). If you would like to save the configuration of this report so as not to have to enter the information in every time, click on [Save] in the top-line menu (see Figure 10-6). Virtual Terminal User Manual © 2000-2003 Transactional Technologies. All Rights Reserved. 10-2 Transactional Technologies, LLC 3361 Boyington Drive, Suite 180 Carrollton, TX 75006 (p) 972.503.8900 (f) 972.503.9100 Figure 10-6 This will then open a save box, in which you will name your report (see Figure 10-7). The path should default to the installation path of Virtual Terminal (i.e. c:\program files\VTJetCom). Verify that this is the place the report is being saved, or place it in whatever dedicated folder you might choose. Figure 10-7 To retrieve a saved report, from the report screen, click on [Open] on the top-line menu (see Figure 10-8). 10-3 © 2000-2003 Transactional Technologies. All Rights Reserved. Virtual Terminal User Manual Transactional Technologies, LLC 3361 Boyington Drive, Suite 180 Carrollton, TX 75006 (p) 972.503.8900 (f) 972.503.9100 Figure 10-8 This will open a box asking what file you would like to open (see Figure 10-9). Choose whichever report you would like to repeat, and click <Open>. Figure 10-9 If you are satisfied that all of the criteria of your report are correct, click <Accept> (see Figure 10-10), and the report will generate. Virtual Terminal User Manual © 2000-2003 Transactional Technologies. All Rights Reserved. 10-4 Transactional Technologies, LLC 3361 Boyington Drive, Suite 180 Carrollton, TX 75006 (p) 972.503.8900 (f) 972.503.9100 Figure 10-10 The generated report will look like Figure 10-11. The buttons above the top allow you the option of saving the report (see Figure 10-12), copying the report to the clipboard (see Figure 10-13), printing the report (see Figure 10-14), or exiting (see Figure 10-15). Figure 10-11 10-5 © 2000-2003 Transactional Technologies. All Rights Reserved. Virtual Terminal User Manual Transactional Technologies, LLC 3361 Boyington Drive, Suite 180 Carrollton, TX 75006 (p) 972.503.8900 (f) 972.503.9100 Save Report: Figure 10-12 Copy to Clipboard: Figure 10-13 Virtual Terminal User Manual © 2000-2003 Transactional Technologies. All Rights Reserved. 10-6 Transactional Technologies, LLC 3361 Boyington Drive, Suite 180 Carrollton, TX 75006 (p) 972.503.8900 (f) 972.503.9100 Print Report: Figure 10-14 Exit Reporting: Figure 10-15 10.3 Closed Batch Closing a batch at the end of day process is required daily before starting the next day transaction process. This process will remove all transactions for the day after generating a daily report. 10-7 © 2000-2003 Transactional Technologies. All Rights Reserved. Virtual Terminal User Manual Transactional Technologies, LLC 3361 Boyington Drive, Suite 180 Carrollton, TX 75006 (p) 972.503.8900 (f) 972.503.9100 To perform the closed batch from the main screen Select [Options] + [Close Batch Ctrl+B] (see Figure 10-7). Figure 10-16 • The Reporting Password window will appear (see Figure 10-17). Enter the appropriate password and click on the <Accept> button. Figure 10-17 • The Virtual Terminal window will appear. To close batch transaction for end of day click <Yes>, or click on <No> to cancel the operation.(see Figure 10-18) Figure 10-18 If the merchant selects <Yes> to close the batch, the merchant will be informed that all the transactions were deleted and the batch was closed (see Figure 10-19). Virtual Terminal User Manual © 2000-2003 Transactional Technologies. All Rights Reserved. 10-8 Transactional Technologies, LLC 3361 Boyington Drive, Suite 180 Carrollton, TX 75006 (p) 972.503.8900 (f) 972.503.9100 Figure 10-19 Click <OK> to exit this screen and return back to the Virtual Terminal window (see Figure 1020). Figure 10-20 10-9 © 2000-2003 Transactional Technologies. All Rights Reserved. Virtual Terminal User Manual Transactional Technologies, LLC 3361 Boyington Drive, Suite 180 Carrollton, TX 75006 (p) 972.503.8900 (f) 972.503.9100 11 Process File Format The information in the input process files must be in a specific format for the processing network to recognize and properly process it. The file must contain at least the credit card number, expiration date, and amount, placed in a quote, comma delimited format. For example: “C3”, “Clerk4”, “Comment2”, “5432432132102105”, “0512”, “1.00”, “75252”, “2700 Waterview Pkwy” The example above describes a Credit/Refund transaction. 11.1 Transaction Fields Below is the name of each field of a record and the description of that field. 11.1.1 Leading Field This contains the transaction identifier, is case sensitive, and is required. The following are valid entries: C1 Sale C2 Void C3 Credit/Refund CR Void C6 AuthOnly/Pre-Authorization C5 Force 11.1.2 Clerk This entry contains the clerk information and may be up to 32 alphanumeric characters. This field is optional. 11.1.3 Comment This field contains comment information about the transaction and can contain up to 32 alphanumeric characters. It is often used for order numbers, though this is not necessary. 11.1.4 Credit Card Number This field contains the credit card number of the card used in the transaction. It cannot contain spaces or dashes. 11.1.5 Expiration Date This field contains the expiration date on the credit card used in the transaction. The format is YYMM. 11.1.6 Amount This field contains the amount of the sale. Decimal points are recommended, but are not required. Virtual Terminal User Manual © 2000-2003 Transactional Technologies. All Rights Reserved. 11-1 Transactional Technologies, LLC 3361 Boyington Drive, Suite 180 Carrollton, TX 75006 (p) 972.503.8900 (f) 972.503.9100 11.1.7 Approval Code This field contains the six-digit approval code that the processing network gives you to verify the transaction was authorized. This field applies only to Force transactions. 11.1.8 ZIP This field contains the ZIP code of the customer’s billing address. This field can contain the five- or nine- digit ZIP code without spaces or dashes. This field is generally optional, but it becomes required when card swipes do not work. 11.1.9 Address This field contains the customer’s billing address and can be up to 32 alphanumeric characters, allowing for spaces and dashes. 11.1.10 CVV2/CVC This field contains the three-digit CVV2 or CVC number printed on the signature block on the back of Visa or MasterCard credit cards. This can be used for Sale, AuthOnly, and Force transactions, though not all processing networks support this feature. 11.2 Example Transactions Here we will provide the user with some sample input for each transaction type as an example of what the file may look like. Remember to remove any line breaks from your actual request file. Sale “C1”, “Clerk”, “Comment”, “4111111111111111”, “0505”, “10.00”, “ZIP”, “Address” Void “C2”, “Clerk3”, “Comment4”, “4000300020001000”, “0512”, “1.00”, “”, “” Credit/Refund “C3”, “Clerk2”, “Comment2”, “4000300020001000”, “0512”, “10.00”, “”, “” AuthOnly “C6”, “Clerk5”, “Comment6”, “4000300020001000”, “0512”, “1.00”, “ZIP”, “Address” Force “C5”, “CLK”, “CMM”, “4000300020001000”, “0512”, “1.00”, “APV”, “ZIP”, “Address” 11.3 Card Swipe Transaction Format To send a swiped transaction, the same format will be used with the swipe data, minus the start character or sentinel (%), appended to the expiration date. Sample hand-entered Sale (expiration date in bold): 11-2 © 2000-2003 Transactional Technologies. All Rights Reserved. Virtual Terminal User Manual Transactional Technologies, LLC 3361 Boyington Drive, Suite 180 Carrollton, TX 75006 (p) 972.503.8900 (f) 972.503.9100 “C1”, “Clerk”, “Comment3”, “4000300020001000”, “0512”, “1.00” Swipe data, tracks 1 and 2 (start and end sentinels in bold): %B4000300020001000^JANEDOE^051204404002?;4000300020001000=05120167520012? *Note that both Track 1 and Track 2 use “?” as the end sentinel character 11.3.1 Formatting a Request File Using Track 1 and Track 2 Data Using both Track 1 and Track 2 data is desired. The entire above string, minus the start sentinel for Track 1, would be appended to the expiration date in the following manner: “0512B4000300020001000^JANEDOE^051204404002?;4000300020001000=051201675?” The expiration date, end sentinel for Track 1 data and beginning sentinel for Track 2 data are in bold print. The percent symbol signifying the beginning of Track 1 data is removed. The entire entry for a sale transaction would look like this (one continuous line): “C1”, “CLERK1”, “COMMENT2”, “4000300020001000”, “05124000300020001000^JA NEDOE^051204404002?;4000300020001000=0512016752001002?”, “1.00” 11.3.2 Formatting a Request File Using Only Track 1 Data If only Track 1 data is desired, the following will be appended to the expiration date: ”0512B4000300020001000^JANEDOE^051204404002?” The expiration date, followed by the Track 1 data, minus the start sentinel, is used. A sale transaction using Track 1data would look like this (one continuous line): “C1”, “CLERK1”, “COMMENT3”, “4000300020001000”, “0512B4000300020001000^JAN EDOE^051204404002?”, “1.00” 11.3.3 Formatting a Request File Using Only Track 2 Data If only track 2 data is desired, the following will be appended to the expiration date: “05124000300020001000=0512016752001002?” The expiration date and end sentinel for Track 2 are shown in bold. Note that the start sentinel for Track 2, the semicolon, is not present. The entire entry for a sale transaction using Track 2 data would look like this (one continuous line): “C1”, “CLERK3”, “COMMENT2”, “4000300020001000”, “05124000300020001000=05 12016752001002?”, “1.00” Virtual Terminal User Manual © 2000-2003 Transactional Technologies. All Rights Reserved. 11-3 Transactional Technologies, LLC 3361 Boyington Drive, Suite 180 Carrollton, TX 75006 (p) 972.503.8900 (f) 972.503.9100 The files for the process file module may contain more than one entry, and can include both hand keyed entries and card swipe entries. 11.3.4 Interpreting Results The results of the group or request session are written to the output or .ANS file. The output may appear in either of two different ways. If the option is enabled for a Full Format Answer File as discussed in section 3.6.6.1, the input information will appear with the response, as seen below. If this is not selected, only the response will appear. "C1","","","4000300020001000","0410B4000300020001000^Doe/John^041010100000028 801000000362000000?;4000300020001000=0410101288010362?","1.08","","","","","" "06-20-2004","21:19:32","YTEST18","" The Y at the beginning of the response field indicates the transaction was approved. This is followed by the approval code for the transaction and an optional reference number. A declined transaction would appear as below. "C2","John Doe","","4005550000000019","9999","1.00" "020-2004","21:19:28","NInvalid credit card expiration date." 11.3.5 Transaction Format Quick Reference Sale: Void: Credit: Credit Void: Force: AuthOnly: C1, CMc, CMM, ACT, EXP, AMT, ZIP, ADD C2, CMc, CMM, ACT, EXP, AMT, APV CR, CMc, CMM, ACT, EXP, AMT CR, CMc, CMM, ACT, EXP, AMT, APV C5, CMc, CMM, ACT, EXP, AMT, APV, ZIP, ADD C6, CMc, CMM, ACT, EXP, AMT, ZIP, ADD 12 Card Swipe Transactional Technologies, LLC supports the Magtek Mini-Wedge card swipe (reader). The Magtek Mini-Wedge card swipe allows the device to be connected to the keyboard port of the computer with the keyboard then being plugged into the female receptacle of the card swipe (split, or Y-cable). The Magtek Mini-Wedge card swipe is a low-cost, reliable solution that aids in data entry of the Virtual Terminal application software. 12-4 © 2000-2003 Transactional Technologies. All Rights Reserved. Virtual Terminal User Manual Transactional Technologies, LLC 3361 Boyington Drive, Suite 180 Carrollton, TX 75006 (p) 972.503.8900 (f) 972.503.9100 12.1 Connection Before connecting the card swipe, power the computer off. Disconnect the keyboard cable from the CPU. Connect the male 6-pin mini-din connection to the keyboard port on the computer. Then, connect the keyboard cable to the female 6-pin mini-din receptacle at the end of the cable that is permanently attached to the Magtek Mini-Wedge Card Swipe. Power the computer on. 12.2 Use Ensure that the Virtual Terminal application is running on the computer. Swipe the card through the slot on the card reader. 12.3 Specifications Color: Available in black and pearl white. Interface: Wedge Connector: 6-Pin and 5-Pin Din Dimensions: L-100mm (3.94 in) W-32.5mm (1.28 in) H-31.3mm (1.23 in) Weight: 165 Grams (5.8 oz) Cable Length: 1.83 Meters (6 ft) Card Types: ISO, ANSI and AAMVA (drivers license) 12.4 Operating Environment Temperature: Operating: 0o to 55o C (32o F to 131o F) Storage: -30 o C to 70 o C (-22 o F to 158 o F) Humidity: Operating: Storage: 10% to 90% non-condensing Up to 100% non-condensing Altitude: Operating: Storage: 0 – 10,000 ft (0 – 3,048 m) 0 – 50,000 ft (0 – 15,240 m) Virtual Terminal User Manual © 2000-2003 Transactional Technologies. All Rights Reserved. 12-5 Transactional Technologies, LLC 3361 Boyington Drive, Suite 180 Carrollton, TX 75006 12.5 Standard Configurations Track 2 Pearl White – 21080205; Black – 21080206 Track 1 and 2 Pearl White – 21080203; Black – 21080204 Track 1, 2 and 3 Pearl White – 21080201; Black – 21080202 12-6 © 2000-2003 Transactional Technologies. All Rights Reserved. Virtual Terminal User Manual (p) 972.503.8900 (f) 972.503.9100 Transactional Technologies, LLC 3361 Boyington Drive, Suite 180 Carrollton, TX 75006 (p) 972.503.8900 (f) 972.503.9100 13 Action Codes Various Action Codes can be returned to the Virtual Terminal. The ones experienced the most are Transactional Technologies Action Codes and the Virtual Terminal Action Codes. Transactional Technologies Action Codes are those codes that received by the host processor and relay information in regards to the status of the transaction. Virtual Terminal Action Codes are those codes that are generated locally by the Virtual Terminal application. 13.1 Transactional Technologies Action Codes Code 000 001 002 003 004 005 006 007 008 011 012 013 014 015 019 021 025 028 030 039 041 043 051 052 053 054 055 057 058 061 062 063 Description Approved Refer to Issuer Refer to issuer – special Invalid merchant Pick up card Do not honor Error Pick up card – special Approve with ID VIP approval Invalid transaction Invalid amount Invalid card number Invalid issuer Re-enter transaction No action taken Unable to locate record File unavailable Format error No credit account Lost card Stolen card Insufficient funds No checking account No savings account Expired card Invalid PIN Transaction not permitted Transaction not permitted Amount limit exceeded Restricted Card Security violation Code 065 075 076 077 080 081 082 083 085 091 092 093 096 099 107 801 803 805 806 807 908 909 912 917 920 926 942 987 989 992 998 999 Description Count limit exceeded PIN tries exceeded Unable to locate previous message Edit Error Invalid date PIN crypto error Incorrect CVV Unable to verify PIN No reason to decline Issuer inoperative Routing failure Law violation System error Timeout Call Issuer Invalid effective date Invalid biller information Force STP CVV2 failure Miscellaneous error Manual card entry invalid Invalid track information Invalid card format Expired card Invalid amount Invalid Password Refund Not Allowed Issuer unavailable Database Error Transaction timeout Message not supported Communications failure Virtual Terminal User Manual © 2000-2003 Transactional Technologies. All Rights Reserved. 13-1 Transactional Technologies, LLC 3361 Boyington Drive, Suite 180 Carrollton, TX 75006 (p) 972.503.8900 (f) 972.503.9100 13.2 Virtual Terminal Action Codes Code A50 A80 A81 A82 A83 A84 A85 A86 A87 Description Unexpected Error Invalid Transaction Type Missing Merchant ID Invalid Price Invalid ABA Number Missing Checking Account Number Missing Check Number Invalid check surcharge Invalid credit card expiration date A88 A89 Missing credit card number Invalid credit card number A90 A91 E50 E51 E52 Invalid CVV2 number Missing account holder name Unexpected error No Response from JetPay Gateway Incomplete Response from JetPay Gateway Invalid Response from JetPay Gateway Action Code is Not Returned from JetPay Gateway Transaction Identifier Returned from JetPay Gateway Did Not Match the Outbound Transaction Identifier Invalid AVS E53 E54 E55 E981 13-2 © 2000-2003 Transactional Technologies. All Rights Reserved. Causes Virtual Terminal Application Error Transaction Type Code is Not Recognized Merchant ID is Not Present Price is negative ABA Number size problem Account number size is zero Check number size is zero Surcharge is negative The size of the expiration date is different to four digits (must by MMYY) – do not enter a slash “/” Credit card number size is zero The size is incorrect or is not numeric or is invalid CVV must be numeric Account holder name size is zero Possible communications failure. AVS information may have been incorrectly entered. Re-enter AVS information and resubmit. Virtual Terminal User Manual Transactional Technologies, LLC 3361 Boyington Drive, Suite 180 Carrollton, TX 75006 (p) 972.503.8900 (f) 972.503.9100 14 Installing A Verifone Printer 900 Due to the high demand for clients to be able to continue using their existing Verifone Printer 900 receipt printers, Transactional Technologies has provided a means to make this possible. 14.1 Verifone Printer 900 Settings Before connecting the printer to the PC, it is imperative that the dip switch settings on the printer be verified. The settings should be 1-On, 2-On, 3-Off, 4-Off. The ON position is down with the OFF position being up (see Figure 14-1). Figure 14-1 14.2 Physical Connectivity A special cable must be utilized for the connectivity. The cable requires an 8-pin mini din (male) connector (for the printer) and a DB-9 male connector (for the computer’s serial port). 14.2.1 Cabling Pin-Outs The Verifone P250 and P900 use a DB-9 (Female) to Mini-Din-8 (Male) serial cable. The pinouts for this cable is provided in Figure 14-2. Cabling Pin-Outs Without Using The Modular Adapter Virtual Terminal User Manual © 2000-2003 Transactional Technologies. All Rights Reserved. 14-1 Transactional Technologies, LLC 3361 Boyington Drive, Suite 180 Carrollton, TX 75006 (p) 972.503.8900 (f) 972.503.9100 Figure 14-2 14.2.2 Connecting The Printer Plug the 8-pin mini din (male) end of the cable into the RS-232 port on the back of the Verifone Printer 900. Plug the DB-9 (female) connector to the comm(unications) port on the computer. Plug the AC adapter to the power port on the rear of the Verifone Printer 250 (or 900) and then plug it into a wall outlet. Figure 14-3 provides a graphical representation of this connection: Figure 14-3 14-2 © 2000-2003 Transactional Technologies. All Rights Reserved. Virtual Terminal User Manual Transactional Technologies, LLC 3361 Boyington Drive, Suite 180 Carrollton, TX 75006 (p) 972.503.8900 (f) 972.503.9100 14.3 Configure The COM Port Before the Verifone Printer 900 can be utilized, the system must be configured to recognize it as a valid printer. The following chapters provide information on how to do this. 14.3.1 Windows 2000® To begin the setup, click on the <Start> button and then select [Settings] + [Control Panel] + [System] (see Figure 14-4). Figure 14-4 The System Properties window will appear (see Figure 14-5). Figure 14-5 Click on the [Hardware] tab within this window. The click on the [Device Manager…] button. The Device Manager window will appear (see Figure 14-6). Virtual Terminal User Manual © 2000-2003 Transactional Technologies. All Rights Reserved. 14-3 Transactional Technologies, LLC 3361 Boyington Drive, Suite 180 Carrollton, TX 75006 (p) 972.503.8900 (f) 972.503.9100 Figure 14-6 Within this window, select [Ports (COM & LPT)] and double-click on Communications Port (COM1). The Communications Port (COM1) Properties window will appear (see Figure 14-7). Figure 14-7 Within the Communications Port (COM1) Properties window, click on the tab labeled Port Settings. The set the following parameters (see Figure 14-8) • Bits per second: 9600 14-4 © 2000-2003 Transactional Technologies. All Rights Reserved. Virtual Terminal User Manual Transactional Technologies, LLC • • • • Data bits: Parity: Stop bits: Flow control: 3361 Boyington Drive, Suite 180 Carrollton, TX 75006 (p) 972.503.8900 (f) 972.503.9100 8 None 2 Hardware Figure 14-8 Once the settings have been modified, click on the <OK> button. You should be returned to the Device Manager window. Close this window. When returned to the System Properties window, click on the <OK> button. 14.3.2 Windows 95®, Windows 98® and Windows NT® 4.0 To begin the setup, click on the <Start> button and then select [Settings] + [Control Panel] + [System] (see Figure 14-9). Figure 14-9 The Control Panel window will appear (see Figure 14-10). Virtual Terminal User Manual © 2000-2003 Transactional Technologies. All Rights Reserved. 14-5 Transactional Technologies, LLC 3361 Boyington Drive, Suite 180 Carrollton, TX 75006 (p) 972.503.8900 (f) 972.503.9100 Figure 14-10 Double-click on the Ports icon. The Ports window will appear (see Figure 14-11). Figure 14-11 Select the appropriate COM port (COM1 or COM2) and then click on the <Settings…> button. The Settings for COM1 (or COM2) window will appear (see Figure 14-12). Figure 14-12 Within the Settings for COM1 (or COM2) window, set the following parameters. 14-6 © 2000-2003 Transactional Technologies. All Rights Reserved. Virtual Terminal User Manual Transactional Technologies, LLC • • • • • Bits per second: Data bits: Parity: Stop bits: Flow control: 3361 Boyington Drive, Suite 180 Carrollton, TX 75006 (p) 972.503.8900 (f) 972.503.9100 9600 8 None 2 Hardware Once the settings have been modified, click on the <OK> button. You should be returned to the Ports window. Click on the <Close> button and then close the Control Panel window. 14.4 Configure The Printer The next step is to configure the printer. Perform the following steps to complete this task. 14.4.1 Windows 2000® Click on the <Start> button and then select [Settings] + [Printers] + [Add Printer] (see Figure 1413). Figure 14-13 The Add Printer Wizard window will appear (see Figure 14-14). Virtual Terminal User Manual © 2000-2003 Transactional Technologies. All Rights Reserved. 14-7 Transactional Technologies, LLC 3361 Boyington Drive, Suite 180 Carrollton, TX 75006 (p) 972.503.8900 (f) 972.503.9100 Figure 14-14 Click on the <Next> button. The next window to appear will ask whether the printer to add is a Local or Network printer. Click on the radio button to the left of Local Printer and un-check the box to the left of Automatically detect and install my Plug and Play printer (see Figure 14-15). Figure 14-15 Click on the <Next> button. The next window to appear will ask that you identify the printer port. Select the appropriate (COM) port and click on the <Next> button (see Figure 14-16). 14-8 © 2000-2003 Transactional Technologies. All Rights Reserved. Virtual Terminal User Manual Transactional Technologies, LLC 3361 Boyington Drive, Suite 180 Carrollton, TX 75006 (p) 972.503.8900 (f) 972.503.9100 Figure 14-16 The next window to appear will ask that you identify the printer that is being added. In the left window pane (labeled Manufacturers), scroll down and select Generic. In the right window pane select Generic / Text Only and then click on the <Next> button (see Figure 14-17). Figure 14-17 The next window to appear will ask that you identify the printer. In the box labeled Printer name:, enter Verifone. If you want this to be the default printer for your computer, select Yes. Otherwise, select No. Click on the <Next> button (see Figure 14-18). You DO NOT have to set this to the default printer to enable the Virtual Terminal software to use it. The default printer for the Virtual Terminal is set up in the Virtual Terminal configuration settings. Virtual Terminal User Manual © 2000-2003 Transactional Technologies. All Rights Reserved. 14-9 Transactional Technologies, LLC 3361 Boyington Drive, Suite 180 Carrollton, TX 75006 (p) 972.503.8900 (f) 972.503.9100 Figure 14-18 The next window allows you to share the printer. Within this window, check the radio button next to Do not share this printer and then click on the <Next> button (see Figure 14-19). Figure 14-19 The next window will allow you to print a test page. It is highly recommended that you perform this step as it will let you know that the printer has been configured properly. If you do not desire to print a text page, click on the radio button next to No and then click on the <Next> button. If you want to print a test page, click on the radio button to the left of Yes and then click on the <Next> button (see Figure 14-20). 14-10 © 2000-2003 Transactional Technologies. All Rights Reserved. Virtual Terminal User Manual Transactional Technologies, LLC 3361 Boyington Drive, Suite 180 Carrollton, TX 75006 (p) 972.503.8900 (f) 972.503.9100 Figure 14-20 To close the wizard and print a test page, click on the <Finish> button (see Figure 14-21). Figure 14-21 If the test page printed correctly, click on the <OK> button Virtual Terminal User Manual © 2000-2003 Transactional Technologies. All Rights Reserved. 14-11 Transactional Technologies, LLC 3361 Boyington Drive, Suite 180 Carrollton, TX 75006 Figure 14-22 Figure 14-23 provides a graphical representation of a successful printout: Figure 14-23 14-12 © 2000-2003 Transactional Technologies. All Rights Reserved. Virtual Terminal User Manual (p) 972.503.8900 (f) 972.503.9100 Transactional Technologies, LLC 3361 Boyington Drive, Suite 180 Carrollton, TX 75006 (p) 972.503.8900 (f) 972.503.9100 14.4.2 Windows 95®, Windows 98® and Windows NT® 4.0 To begin the setup, click on the <Start> button and then select [Settings] + [Printers] (see Figure 14-24). Figure 14-24 When the Printers window appears, double-click on Add Printer icon (see Figure 14-25). Figure 14-25 The Add Printer Wizard window will appear. Ensure that the radio button to the left of My Computer is selected and then click on the <Next> button (see Figure 14-26). Figure 14-26 Virtual Terminal User Manual © 2000-2003 Transactional Technologies. All Rights Reserved. 14-13 Transactional Technologies, LLC 3361 Boyington Drive, Suite 180 Carrollton, TX 75006 (p) 972.503.8900 (f) 972.503.9100 The next window allows you to select the appropriate port that the printer is connected. Check the box to the left of the appropriate COM port and then click on the <Next> button (see Figure 14-27). Figure 14-27 The next window to appear allows you to select the type of printer being connected to the PC. In the left windowpane scroll down and select Generic. In the right window pane select Generic / Text Only. Then click on the <Next> button (see Figure 14-28). Figure 14-28 The next window allows you to “name” your printer. In the text box labeled Printer name:, enter Verifone. Click on the <Next> button (see Figure 14-29). 14-14 © 2000-2003 Transactional Technologies. All Rights Reserved. Virtual Terminal User Manual Transactional Technologies, LLC 3361 Boyington Drive, Suite 180 Carrollton, TX 75006 (p) 972.503.8900 (f) 972.503.9100 Figure 14-29 The next window to appear will allow you to share the printer. It is recommended that you do not share the printer. Click on the radio button to the left of Not shared. Click on the <Next> button (see Figure 14-30). Figure 14-30 To verify that the printer has been properly configured, you will want to print a test page. To do this, check the radio button to the left of Yes (recommended) and then click on the <Finish> button (see Figure 14-31). Virtual Terminal User Manual © 2000-2003 Transactional Technologies. All Rights Reserved. 14-15 Transactional Technologies, LLC 3361 Boyington Drive, Suite 180 Carrollton, TX 75006 (p) 972.503.8900 (f) 972.503.9100 Figure 14-31 If the printer has been properly configured, a receipt similar to that shown in Figure 14-32 will be printed out. Figure 14-32 14-16 © 2000-2003 Transactional Technologies. All Rights Reserved. Virtual Terminal User Manual Transactional Technologies, LLC 3361 Boyington Drive, Suite 180 Carrollton, TX 75006 (p) 972.503.8900 (f) 972.503.9100 15 Addendum This section deals with special considerations in regards to the software and its interaction with various operating systems. It is intended as a guideline only. The merchant and/or installer/administrator must be familiar with the operating system in use. 15.1 Server-Client Architecture A server-client architecture is a network topology configured where multiple terminals (PC’s) communicate with one or more servers on the network (see Figure 15-1). Figure 15-1 An example of a server-client architecture would be where a Windows NT server is used for account logins, windows file sharing, etc. If the merchant is configured in this way, the installation process must be followed as defined below: 15.1.1 Server Installation To perform the installation on the server, the merchant must be logged on with an account that has administrator access. Once logged on, perform the following steps in the order defined: • • • • • If this is an upgrade, perform the steps identified in section 2 of this manual. Install the Virtual Terminal application. (as defined in section 3.1 of this manual). Configure the VTJetCom database path (as defined in section 3.2 of this manual). Configure the VTJetCom software (as defined in section Share the folder where the VTJetCom application was installed. The default installation directory is C:\Program Files\VTJetCom. To create a share of this directory/folder, perform the following: o Open windows explorer and navigate to the installation directory/folder of the VTJetCom application. o With the directory/folder highlighted, right-click on the installation directory/folder and select “Share” (see Figure 15-2). Virtual Terminal User Manual © 2000-2003 Transactional Technologies. All Rights Reserved. 15-1 Transactional Technologies, LLC 3361 Boyington Drive, Suite 180 Carrollton, TX 75006 (p) 972.503.8900 (f) 972.503.9100 Figure 15-2 o When the properties window appears, click on the radio button titled, “Share this folder”. Ensure that a name appears in the block titled “Share name:”. The default will be the name of the directory/folder (see Figure 15-3). Figure 15-3 o Click on the <OK> button. 15-2 © 2000-2003 Transactional Technologies. All Rights Reserved. Virtual Terminal User Manual Transactional Technologies, LLC 3361 Boyington Drive, Suite 180 Carrollton, TX 75006 (p) 972.503.8900 (f) 972.503.9100 ;N OTE: If the site is concerned with who does/does not have access, restrictions should be applied to the share. 15.1.2 End-User Workstation (Client) Installation The End-User Workstation installation is installed and configured in two phases. The first phase requires that the merchant log in with an account that has administrator access. The second phase is required for each user that will use the system. PHASE I: • Map a network drive to a local drive. To do this, perform the steps defined below: o On the desktop, right-click on “My Computer” and select “Map Network Drive...” (see Figure 15-4.) Figure 15-4 o When the “Map Network Drive” window appears, Select an available “Drive Letter” in the block titled “Drive:”. In the block titled “Folder:”, enter the name of the server Virtual Terminal User Manual © 2000-2003 Transactional Technologies. All Rights Reserved. 15-3 Transactional Technologies, LLC 3361 Boyington Drive, Suite 180 Carrollton, TX 75006 (p) 972.503.8900 (f) 972.503.9100 and then the name of the share (i.e. \\server\VtJetCom). Ensure that the check-box titled “Reconnect at logon” is checked. See Figure 15-5. Figure 15-5 o Click on the <Finish> button. • • • If this is an upgrade, perform the steps identified in section 2 of this manual. Install the VTJetCom Virtual Terminal application. (as defined in section 3.1 of this manual). Configure the VTCom database path (as defined in section 3.2 of this manual). ;N OTE: When configuring the VTCom database path, ensure that the VTCom database selected is the one that was configured on the server. This should be accessible through the mapped drive on the end-user workstation. • • Launch the VTJetCom application and perform the appropriate configurations (as defined in section 4 of this manual). Log out of the end-user workstation. PHASE II This phase must be followed for each account used to access this system. • • • • Log into the end-user workstation as a local user or as an authorized domain user (this is the account normally used for day-to-day operations.) Map a network drive to a local drive (reference the start of Phase I in this section). Launch the VTJetCom application. Configure the VTCom database path (as defined in section 3.2 of this manual). ;N OTE: 15-4 © 2000-2003 Transactional Technologies. All Rights Reserved. Virtual Terminal User Manual Transactional Technologies, LLC 3361 Boyington Drive, Suite 180 Carrollton, TX 75006 (p) 972.503.8900 (f) 972.503.9100 When configuring the VTCom database path, ensure that the VTCom database selected is the one that was configured on the server. This should be accessible through the mapped drive on the end-user workstation. 15.2 Configure the VTJetCom Database Path (Windows 9x) To configure the VTCom Database path, click on [Start] + [Settings] + [Control Panel] + [Data Sources (ODBC 32 bits)] (see Figure 15-6). Figure 15-6 Continue with setup in section 3. 15.3 Windows 95® and Windows 98® If a client is using the Windows® 98 or earlier operating system, an additional step will need to be taken. This will begin at the ftp://zubat.jetpay.com address where the software and certificates can be found, as described in section 1.1 (see Figure 15-7). Virtual Terminal User Manual © 2000-2003 Transactional Technologies. All Rights Reserved. 15-5 Transactional Technologies, LLC 3361 Boyington Drive, Suite 180 Carrollton, TX 75006 Figure 15-7: FTP Download Navigate to the encrypt-soft folder (see Figure 15-8). Figure 15-8 Open this folder, and find the file named “info.reg” ( see Figure 15-9). 15-6 © 2000-2003 Transactional Technologies. All Rights Reserved. Virtual Terminal User Manual (p) 972.503.8900 (f) 972.503.9100 Transactional Technologies, LLC 3361 Boyington Drive, Suite 180 Carrollton, TX 75006 (p) 972.503.8900 (f) 972.503.9100 Figure 15-9 Double click on this file, and you will see a box asking if you want to open or save the file (see Figure 15-10). Choose save, and save this file in the same folder as your Virtual Terminal setup, (C:\Program Files\VTJetCom). Figure 15-10 When the download is complete, you will see a message stating this (see Figure 15-11). Close this message, and exit out of the ftp site. Virtual Terminal User Manual © 2000-2003 Transactional Technologies. All Rights Reserved. 15-7 Transactional Technologies, LLC 3361 Boyington Drive, Suite 180 Carrollton, TX 75006 (p) 972.503.8900 (f) 972.503.9100 Figure 15-11 Now, open up Windows Explorer and navigate to the VTJetCom folder, (see Figure 15-12). Figure 15-12 Find the file info.reg, and double click on it (see Figure 15-13). 15-8 © 2000-2003 Transactional Technologies. All Rights Reserved. Virtual Terminal User Manual Transactional Technologies, LLC 3361 Boyington Drive, Suite 180 Carrollton, TX 75006 (p) 972.503.8900 (f) 972.503.9100 Figure 15-13 A message will appear, asking if you are certain you want to add the information to the registry (see Figure 15-14). Click <Yes>. Figure 15-14 Now there will be a message confirming the information is saved (see Figure 15-15). Click <OK>. Figure 15-14 These steps should allow Virtual Terminal to successfully function in a Windows 98® environment. If this download and install fails for some reason, proceed through the following steps. Go to [Start] + [Run] (see Figure 15-15). Virtual Terminal User Manual © 2000-2003 Transactional Technologies. All Rights Reserved. 15-9 Transactional Technologies, LLC 3361 Boyington Drive, Suite 180 Carrollton, TX 75006 (p) 972.503.8900 (f) 972.503.9100 Figure 15-15 In the command line, type regedit (see Figure 15-16), and click <OK>. Figure 15-16 This will open up the Registry Editor, a window similar to Windows Explorer (see Figure 1517). Figure 15-17 15-10 © 2000-2003 Transactional Technologies. All Rights Reserved. Virtual Terminal User Manual Transactional Technologies, LLC 3361 Boyington Drive, Suite 180 Carrollton, TX 75006 (p) 972.503.8900 (f) 972.503.9100 Here, you need to expand HKEY_LOCAL_MACHINE by clicking on the “+” to the left of the name, and find SOFTWARE (see Figure 15-18). Figure 15-18 Expand SOFTWARE in the same way, and find Transactional Technologies (see Figure15-19). Figure 15-19 Expand Transactional Technologies using the “+” sign, and click on Jetpay Credit Card Gateway COM Library (see Figure 15-20). Virtual Terminal User Manual © 2000-2003 Transactional Technologies. All Rights Reserved. 15-11 Transactional Technologies, LLC 3361 Boyington Drive, Suite 180 Carrollton, TX 75006 (p) 972.503.8900 (f) 972.503.9100 Figure 15-20 Now, in the upper menu, go to [Edit] + [New] + [DWORD Value] (see Figure15-21). Figure 15-21 This will create a new file on the right hand side of the screen (see Figure 15-22). Click on this value, New Value #. 15-12 © 2000-2003 Transactional Technologies. All Rights Reserved. Virtual Terminal User Manual Transactional Technologies, LLC 3361 Boyington Drive, Suite 180 Carrollton, TX 75006 (p) 972.503.8900 (f) 972.503.9100 Figure 15-22 Now, in the upper menu, go to [Edit] + [Rename] (see Figure 15-23). Figure 15-23 Type in UseWinInet (see Figure 15-24), and hit Enter. Virtual Terminal User Manual © 2000-2003 Transactional Technologies. All Rights Reserved. 15-13 Transactional Technologies, LLC 3361 Boyington Drive, Suite 180 Carrollton, TX 75006 (p) 972.503.8900 (f) 972.503.9100 Figure 15-24 Now, return to the upper menu, and select [Edit] + [Modify] (see Figure 15-25). Figure 15-25 This will open up an edit box (see Figure 15-26). Figure 15-26 15-14 © 2000-2003 Transactional Technologies. All Rights Reserved. Virtual Terminal User Manual Transactional Technologies, LLC 3361 Boyington Drive, Suite 180 Carrollton, TX 75006 (p) 972.503.8900 (f) 972.503.9100 In the field titled Value Data: type in the number 1. In Base, select the option for Hexadecimal (see Figure 15-27). Figure 15-27 Now, click <OK>, and exit from the Registry (see Figure 15-28). Figure 15-27 Now, Virtual Terminal should operate correctly on a Windows 98® system. Virtual Terminal User Manual © 2000-2003 Transactional Technologies. All Rights Reserved. 15-15 Transactional Technologies, LLC 3361 Boyington Drive, Suite 180 Carrollton, TX 75006 THIS PAGE INTENTIONALLY LEFT BLANK 15-16 © 2000-2003 Transactional Technologies. All Rights Reserved. Virtual Terminal User Manual (p) 972.503.8900 (f) 972.503.9100