1
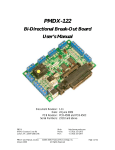
PMDX-150
3 Amp Bipolar
Micro-Stepping Motor Driver
User’s Manual
Document Revision:
Date:
PCB Revision:
Firmware Revision:
PMDX
9704D Gunston Cove Rd
Lorton, VA 22079-2366 USA
PMDX-150_Manual_16.doc
18 January 2007
1.6
18 January 2007
PCB-402D
1.0
Web:
Phone:
FAX:
http://www.pmdx.com
+1 (703) 372-2975
+1 (703) 372-2977
©2004-2007 Practical Micro Design, Inc.
All Rights Reserved
Page 1 of 17
PMDX-150 User’s Manual
Document Revision: 1.6
PCB Revision: PCB-402D
Firmware Revision: 1.0
Table of Contents
1.0
Overview.................................................................................................................................... 3
1.1
Important Safety Information ........................................................................................................................... 3
1.2
Warranty Summary............................................................................................................................................. 3
1.3
Features.................................................................................................................................................................. 4
1.4
Updates to this Manual ...................................................................................................................................... 4
2.0
Connectors ................................................................................................................................ 4
2.1
Power Supply and Control Connector (J1).................................................................................................. 4
2.1.1
Motor Power Supply ................................................................................................................................. 5
2.1.2
Opto-Isolator Ground Reference.......................................................................................................... 5
2.1.3
Step and Direction Inputs ........................................................................................................................ 5
2.1.4
Fault Output ................................................................................................................................................ 6
2.2
Stepper Motor Connector (J2)........................................................................................................................ 6
3.0
DIP Switch Settings.................................................................................................................. 7
3.1
Motor Current Selection................................................................................................................................... 7
3.2
Micro-Step Mode Select .................................................................................................................................... 8
3.3
Reduced Current Enable ................................................................................................................................... 8
3.4
Step Polarity.......................................................................................................................................................... 8
4.0
Micro-Stepping and Step Multiply Modes ............................................................................. 9
4.1
Step Multiplier Operating Constraints........................................................................................................... 9
4.2
Micro-Stepping (non-multiplied) Operating Constraints........................................................................... 9
5.0
Reduced Current Mode ......................................................................................................... 10
6.0
Fault Handling......................................................................................................................... 10
7.0
Miscellaneous .......................................................................................................................... 11
7.1
Activity and Status LED.................................................................................................................................... 11
7.2
Push Button Switch ........................................................................................................................................... 12
7.3
Idle Timer ............................................................................................................................................................ 12
7.4
Cooling Fan (optional)...................................................................................................................................... 12
8.0
Test Mode ................................................................................................................................ 12
9.0
Mechanical Specifications...................................................................................................... 14
10.0
Electrical and Environmental Specifications ...................................................................... 15
Appendix A – Warranty.................................................................................................................... 16
Appendix B – Power Supply and Motor Selection ........................................................................ 17
Appendix C – Motor Wiring............................................................................................................. 17
PMDX-150_Manual_16.doc
18 January 2007
©2004-2007 Practical Micro Design, Inc.
All Rights Reserved
Page 2 of 17
PMDX-150 User’s Manual
Document Revision: 1.6
1.0
PCB Revision: PCB-402D
Firmware Revision: 1.0
Overview
This document describes the configuration and operation of the PMDX-150 Micro-Stepping Motor
Driver. The PMDX-150 provides an interface between a step pulse generator (a PC, etc.) and a single
stepper motor, and includes diagnostic modes to assist in troubleshooting. This document pertains to the
following versions of the PMDX-150:
Circuit Board Revision:
Firmware Revision:
1.1
PCB-402D (marked on the bottom of the board)
1.0 (marked on a label on the top side of the board)
Important Safety Information
The PMDX-150 is intended for integration by the purchaser into industrial control systems. It is solely
the purchaser's responsibility to assure that the system is configured in a manner consistent with
applicable safety requirements. Practical Micro Design, Inc. does not control how this board is integrated
into the purchaser's system and cannot be responsible for guaranteeing the safety of your system.
The PMDX-150 is not guaranteed to be fail-safe. The system into which the PMDX-150 is installed should
provide fail-safe protection and emergency stop capability.
Automated machine tools, into which the PMDX-150 may be integrated, can cause injury. Precautions
should be taken to assure that operators are trained in their proper operation and safety procedures, and
that they are protected from moving parts that may be under remote control and may move
unexpectedly.
This product may not be used in life support or other critical safety applications.
1.2
Warranty Summary
The PMDX-150 is warranted against failure due to defective parts or workmanship for 90 days from the
date of sale. Refer to Appendix A for complete warranty details.
If you have an item requiring service, please see the support page on the PMDX web site
(http://www.pmdx.com) for return instructions.
The purchaser must pay shipping to return the unit to PMDX. We will ship the repaired unit back to you
via ground transportation at our expense. Repairs are normally completed within 10 business days. See
Appendix A for our complete warranty details.
PMDX-150_Manual_16.doc
18 January 2007
©2004-2007 Practical Micro Design, Inc.
All Rights Reserved
Page 3 of 17
PMDX-150 User’s Manual
PCB Revision: PCB-402D
Firmware Revision: 1.0
Document Revision: 1.6
1.3
Features
The PMDX-150 Micro-Stepping Motor Driver is based on the Allegro A3977 micro-stepping driver chip
along with a microprocessor and additional circuits to enhance performance. The use of heat sinks
bonded directly to the A3977’s lead frame allows operation with up to 3.0 Amps of motor current.
The PMDX-150 has the following features:
Control Interface:
Opto-isolated step and direction inputs
Does not require a separate opto-isolator
power supply
3.3V compatibility for laptop computers
Opto-isolated “fault” output to signal error
conditions from the PMDX-150
Latches the “Dir” (direction) input on selected
edge of the “Step” input
Input step rate up to 100 KHz
Motor Interface:
Motor connector positioned so that it can
project through a panel to allow installation in a
box without internal motor wiring
Up to 3.0 Amp motor drive current with bipolar
chopper current limiting
Optional “reduced current” mode after 30
seconds of “idle”
Clamping circuits to prevent damage from
motor disconnect voltage spikes or back-EMF
1.4
Power Supply Input:
Motor power supply input handles up to
+35VDC input
Protection from transient voltage spikes
No separate logic or opto-coupler power supply
required
Self-resetting “poly switch” fuse for over
current protection
Protection against reversed power supply wiring
Special Features:
Pluggable wire clamp screw terminal strips for
all connections to motor and controller
Over-temperature shut-down and fault
indication
Micro-stepping modes – full, half, quarter and
eighth step
Step multiplier can output 4 steps for every one
step input
Test mode supports debug and jogging without
a controller connection
LED flashes with step input and to indicate idle,
“reduced current” and fault conditions
DIP switches for all settings – no jumpers or
trim pots to adjust
Updates to this Manual
Check the PMDX web site for revisions or updates to this manual (http://www.pmdx.com). The latest
revision of this manual is available on the PMDX-150 page (follow the links from the main page).
2.0
Connectors
The PMDX-150 contains the following connectors. Refer to the following sections for details on the pinouts for each connector.
Connector
J1
J2
Description
Power supply and control interface
Stepper motor connections
Table 1 - Summary of PMDX-150 Connectors
2.1
Power Supply and Control Connector (J1)
Connector J1 contains the motor power supply connection along with the “step” and “direction” inputs,
common opto-isolator “ground” and the “fault” output. Pin “1” is the pin closest to the reference
PMDX-150_Manual_16.doc
18 January 2007
©2004-2007 Practical Micro Design, Inc.
All Rights Reserved
Page 4 of 17
PMDX-150 User’s Manual
Document Revision: 1.6
PCB Revision: PCB-402D
Firmware Revision: 1.0
designator (i.e. J1 pin 1 is the pin closest to the “J1” text on the top side of the circuit board). Also, each
pin is labeled on the bottom of the circuit board.
Pin Number
1
2
3
4
5
6
Label
Vneg
Vpos
Gnd
Step
Dir
Fault
Description
Negative motor power supply input
Positive motor power supply input
Opto-isolator common reference
Step input (opto-isolated)
Direction input (opto-isolated)
Fault output (opto-isolated)
Table 2 – Power Supply and Control Connector Pin-Out (J1)
2.1.1 Motor Power Supply
Connect the motor power supply to the two motor power supply terminals. This must be a DC power
supply with a voltage not to exceed the maximum voltage specified in section 10.0, Electrical and
Environmental Specifications. The actual power supply voltage must be chosen to match the stepper motor
and performance requirements of your application. The maximum power supply current depends on the
stepper motor and the PMDX-150 “motor current” DIP switch setting (see section 3.1, Motor Current
Selection).
2.1.2 Opto-Isolator Ground Reference
This pin provides the common “ground” reference for the opto-isolator inputs and output. This pin is
normally connected to the “ground” pin of the device that generates the step and direction signals (i.e.
the PC’s parallel port, a PMDX-120, etc.). This pin may also be connected to the negative motor supply
(“Vneg”), but doing so will remove any isolation between the motor power supply and the step pulse
generator.
2.1.3 Step and Direction Inputs
The “step” and “direction” inputs are optically isolated inputs to the PMDX-150. The PMDX-150 acts on
the “step” input on either the rising or falling edge, depending on the setting of the “SPOL” DIP switch
(see Figure 1 below and section 3.4).
The “direction” signal is latched inside the PMDX-150 on the “active” edge of the “step” pulse (selected
by the SPOL DIP switch). This reduces the setup and hold requirements on the pulse generator system.
See Figure 1 below for a depiction of the required step and direction timings and relationships. See
section 10.0, Electrical and Environmental Specifications, for the “DIR” setup and hold values and the “Step”
pulse and recovery times.
PMDX-150_Manual_16.doc
18 January 2007
©2004-2007 Practical Micro Design, Inc.
All Rights Reserved
Page 5 of 17
PMDX-150 User’s Manual
PCB Revision: PCB-402D
Firmware Revision: 1.0
Document Revision: 1.6
Min "Step"
pulse width
Step
(SPOL switch up)
Min "Step"
pulse recovery
Dir
"Dir" hold time
"Dir" setup
time
Min "Step"
pulse width
Step
(SPOL switch down)
Min "Step"
pulse recovery
Dir
"Dir" hold time
"Dir" setup
time
Figure 1 – Step and Direction Timing Diagrams
2.1.4 Fault Output
The “Fault” output is an open-collector output, which is optically isolated from the PMDX-150’s motor
power, and shares the common “ground” connection with the “Step” and “Dir” inputs. The fault output
is “active low”, meaning that a fault condition exists with the “Fault” output is connected to the “ground”
pin. See section 6.0, Fault Handling, for more information on the PMDX-150’s fault detection capabilities.
2.2
Stepper Motor Connector (J2)
Connector J2 contains the stepper motor connections. The PMDX-150 supports stepper motor
configurations with two motor phase windings and two connections per motor phase. Pin “1” is the pin
closest to the reference designator (i.e. J2 pin 1 is the pin closest to the “J2” text on the circuit board).In
addition, pin 1 has a square pad on the bottom of the circuit board.
This connector can also be used to mount the PMDX-150 on a panel. See section 9.0, Mechanical
Specifications, for the panel cut-out dimensions.
Note that the motor rotation direction can be reversed by one of two methods: by swapping the two
motor leads of one phase (either phase), or by swapping the two phases. See the appendices for more
information about motor wiring.
PMDX-150_Manual_16.doc
18 January 2007
©2004-2007 Practical Micro Design, Inc.
All Rights Reserved
Page 6 of 17
PMDX-150 User’s Manual
PCB Revision: PCB-402D
Firmware Revision: 1.0
Document Revision: 1.6
Pin Number
1
2
3
4
Label
Phase 1A
Phase 1B
Phase 2A
Phase 2B
Description
one end of the “Phase 1” motor coil
other end of the “Phase 1” motor coil
one end of the “Phase 2” motor coil
other end of the “Phase 2” motor coil
Table 3 –Stepper Motor Connector Pin-Out (J2)
WARNING: Short circuits or cross connects between motor windings will damage
the PMDX-150. Be cautious when using motors that have been wired
for connection to a unipolar driver because the center taps of the
motor’s windings may be connected together. Five-wire unipolar setups
employ this configuration.
3.0
DIP Switch Settings
The PMDX-150 contains 8 DIP switches that determine various aspects of its behavior. The DIP switches
are numbered “1” through “8”. These numbers also appear on the DIP switch. The functional labels
shown in the table below also appear on the circuit board’s silkscreen, next to the DIP switch.
In the descriptions that follow, the switch lever positions are described as “open” or “closed”. The
“open” position (also called “up”) is with the switch positioned away from the circuit board (also marked
“open” on the DIP switch). The “closed” position (also called “down”) is with the switch lever positioned
towards the circuit board.
DIP Switch Label Function
1
SEL0
2
SEL1 Motor current selection
3
SEL2 (see section 3.1)
4
SEL3
5
MS0 Micro-Step Mode Select
6
MS1 (see section 3.2)
7
RCEN Reduced current enable
(see section 3.3)
8
SPOL Step polarity (see section 3.4)
New Setting Activated On:
Power-on or push-button press
Power-on or push-button press
Power-on only
Immediately
Table 4 - DIP Switch Summary
As indicated in the table above, most of the switches are read either at power-on or when the pushbutton switch is pressed. This means that in order for the new settings to take effect, you must either
power the board off and back on, or press the push-button switch (possibly entering “test” mode). The
exceptions are the “RCEN” switch, which is only read at power-on, and the “SPOL” switch, which takes
effect immediately.
3.1
Motor Current Selection
DIP switch levers 1 through 4 select the motor current. The table below shows the motor currents
supported by the PMDX-150. Note that the current settings marked with “*” may require forced air
cooling to prevent thermal shutdown. Other current settings may also require forced air cooling at
elevated ambient temperatures – this depends on the installation environment and motor. Section 7.4
describes how to mount a fan directly on the PMDX-150, though any forced airflow will work.
If thermal shutdown occurs there is no harm to the PMDX-150. However, the unit must be reset in
order to resume operation. See section 6.0, Fault Handling, for more information.
PMDX-150_Manual_16.doc
18 January 2007
©2004-2007 Practical Micro Design, Inc.
All Rights Reserved
Page 7 of 17
PMDX-150 User’s Manual
PCB Revision: PCB-402D
Firmware Revision: 1.0
Document Revision: 1.6
DIP Switch
(open=up, closed=down)
4
3
2
1
Closed Closed Closed Closed
Closed Closed Closed Open
Closed Closed Open Closed
Closed Closed Open Open
Closed Open Closed Closed
Closed Open Closed Open
Closed Open Open Closed
Closed Open Open Open
Motor
Current
0.75 Amps ±5%
0.96 Amps ±5%
1.15 Amps ±5%
1.30 Amps ±5%
1.44 Amps ±5%
1.58 Amps ±5%
1.72 Amps ±5%
1.86 Amps ±5%
DIP Switch
4
Open
Open
Open
Open
Open
Open
Open
Open
3
Closed
Closed
Closed
Closed
Open
Open
Open
Open
2
Closed
Closed
Open
Open
Closed
Closed
Open
Open
1
Closed
Open
Closed
Open
Closed
Open
Closed
Open
Motor
Current
2.00 Amps ±5%
2.15 Amps ±5%
2.30 Amps ±5%
2.44 Amps ±5%
2.58 Amps* ±5%
2.72 Amps* ±5%
2.86 Amps* ±5%
3.00 Amps* ±5%
Table 5 – Motor Current Select DIP Switch Settings
3.2
Micro-Step Mode Select
DIP switch levers 5 and 6 select the micro-step (and step multiply) mode as described in the following
table. Refer to section 4.0, Micro-Stepping and Step Multiply Modes, for information on the step pulse
multiplier and the various micro-stepping modes.
DIP Switch Selected Step
6
5
Mode
Closed Closed
Full Step
Closed Open
Half Step
Open Closed Quarter Step
Open Open
Eighth Step
Driver Response
to Step Input
Four (4) quarter-steps for each step input
Four (4) eighth-steps for each step input
One (1) quarter-step for each step input
One (1) eighth-step for each step input
Table 6 – Micro-Step Mode Select DIP Switch Settings
3.3
Reduced Current Enable
DIP switch lever 7 is the “reduced current enable” (RCEN) switch. It determines whether the
PMDX-150 reduces current to the motor after a period without movement. If the switch lever is
“Closed” (or “down”), then the PMDX-150’s “Reduced Current” mode is disabled. If the switch lever is
“Open” (or “up”), the “Reduced Current” mode is enabled. See section 5.0, Reduced Current Mode, for
information on reduced current mode.
WARNING: The “RCEN” switch only takes effect after powering on the board. If
you change the setting of this switch you must power the board off and
back on. Pressing the push-button switch will not “re-read” this setting
(see section 7.2, Push Button Switch).
3.4
Step Polarity
DIP switch lever 8 is the step polarity (SPOL) switch. It determines which edge of the incoming step
pulse the PMDX-150 acts on. If the switch is “Closed” (or “down”), then the PMDX-150 acts on the
falling edge of the incoming step pulses. If the switch is “Open” (or “up”), the PMDX-150 acts on the
rising edge.
WARNING: The “SPOL” switch takes effect immediately. All other DIP switches
take effect only after power-on or after pressing the push-button switch
(see section 7.2, Push Button Switch).
PMDX-150_Manual_16.doc
18 January 2007
©2004-2007 Practical Micro Design, Inc.
All Rights Reserved
Page 8 of 17
PMDX-150 User’s Manual
Document Revision: 1.6
4.0
PCB Revision: PCB-402D
Firmware Revision: 1.0
Micro-Stepping and Step Multiply Modes
The PMDX-150 always drives the stepper motor in a micro-stepping mode – either quarter-step or
eighth-step. When “full step” mode is selected via the DIP switches, the motor is actually driven in
quarter step mode and the PMDX-150’s step multiplier is enabled. The PMDX-150 then outputs four
step pulses for every one incoming step pulse. When “half-step” mode is selected, the motor is driven in
eighth-step mode with the step multiplier enabled (generating four step pulses for every one incoming
step pulse). This allows the PMDX-150 to emulate these two stepping modes while providing a smoother
transition between incoming steps.
When “quarter step” or “eighth step” modes are selected the PMDX-150 disables the step multiplier.
The motor is driven directly in the corresponding micro-step mode.
The step multiplier operates like a phase-locked loop (PLL). It predicts the interval between the mostrecent step input and the next step input. It then outputs four equally spaced step pulses during that time
interval. If the incoming step rate is below a certain rate (approximately 250 steps/second), the step
multiplier ceases to predict the step interval and simply outputs the four step pulses at an approximate
250 step/second rate.
4.1
Step Multiplier Operating Constraints
It takes time for the step multiplier PLL to adjust to the incoming step frequency. Therefore, there are
limits on the incoming step rate and how fast it can change, as shown in the following table.
NOTE: These step rate limits refer to the PMDX-150’s ability to follow the step input.
In actual practice, the motor’s performance will usually limit the step rates to
much lower values.
Parameter
Operational Limit
Jump-Start rate
(initial step rate when
starting from a dead stop)
250 steps/second maximum, but also may be limited by the motor
Maximum step rate
25 KHz input step rate, multiplied to 100 KHz micro-steps to the motor
Maximum step slew rate
20% change in step period between subsequent step pulses for step rates
over the “jump-start” rate (250 steps/second), below that there is no limit
to the slew rate (except as limited by the motor)
Table 7 – Step Multiplier Operating Constraints
4.2
Micro-Stepping (non-multiplied) Operating Constraints
When the PMDX-150 is operating with the step multiplier disabled (quarter-step or eighth-step modes),
each step pulse in generates a single step pulse to the motor. In these cases, there are fewer constraints
on the input step signal, as follows:
NOTE: These step rate limits refer to the PMDX-150’s ability to follow the step input.
In actual practice, the motor’s performance will usually limit the step rates to
much lower values.
PMDX-150_Manual_16.doc
18 January 2007
©2004-2007 Practical Micro Design, Inc.
All Rights Reserved
Page 9 of 17
PMDX-150 User’s Manual
Document Revision: 1.6
Parameter
Operational Limit
Jump-Start rate
(initial step rate when
starting from a dead stop)
40 KHz
Maximum step rate
100 KHz
Maximum step slew rate
No limit
PCB Revision: PCB-402D
Firmware Revision: 1.0
Table 8 – Micro-Stepping (non-multiplied) Operating Constraints
5.0
Reduced Current Mode
When the DIP switches are set to enable reduced current mode (see section 3.3), the PMDX-150 will
detect periods of no motion (no incoming step pulses). When a motor has not moved for 30 seconds,
the PMDX-150 will reduce the motor drive current to approximately half of the current specified by the
DIP switches (see section 3.1). When an incoming step pulse is detected, the motor current is returned
to its full value and then the motor is advanced. While the PMDX-150 is in “reduced current” mode, the
LED will flash in a repeating pattern of two long flashes (one second each) followed by 3 seconds off (see
also section 7.1, Activity and Status LED).
6.0
Fault Handling
The PMDX-150 is self-monitoring and can detect and report several different fault conditions. When a
fault is detected, the PMDX-150 enters “fault” mode and does the following:
• drives the “Fault” output low
• disables the motor drivers
• flashes a pattern on the LED that indicates the reason for the fault
Once the PMDX-150 enters “fault” mode, it remains in “fault” mode until either power is removed or the
push-button is pressed. Even if the fault condition “goes away”, the PMDX-150 remains in “fault” mode
until one of the two above events. This allows you to see the cause of a transient fault and assures that
the system does not continue with corrupt motor positions. If the push-button is pressed and the fault
condition remains (or another fault is detected), the system will re-enter “fault” mode. See section 7.2
for more information on the push-button switch.
When a fault has been detected, the activity LED repeats the following pattern:
• three short flashes
• a short pause
• some number of short flashes (indicates fault condition, see Table 9 below)
• a longer pause
This pattern repeats until the user presses the push button switch or power is removed from the
PMDX-150. The second group of flashes indicates the reason for the fault condition as described below.
PMDX-150_Manual_16.doc
18 January 2007
©2004-2007 Practical Micro Design, Inc.
All Rights Reserved
Page 10 of 17
PMDX-150 User’s Manual
Document Revision: 1.6
Number of flashes
in second group
PCB Revision: PCB-402D
Firmware Revision: 1.0
Fault condition
1
Over temperature, under-voltage shutdown, or charge pump failure
2
Step pulse timing violation (see note below)
3
Reserved
4
Allegro A3977 interface failure (hardware problem)
5 to 10
Self-test or firmware error
Table 9 – Fault Mode LED Indications
NOTE: In addition to controller-generated step pulse timing violations, the “step pulse
timing” error can also occur when strong interference signals generate false
step inputs. This can occur if you run the step signal wires near the motor’s
power leads, or when there is a loose connection.
7.0
Miscellaneous
7.1
Activity and Status LED
The Activity LED (DS1) indicates various states in the PMDX-150 as shown in the following table:
LED Pattern
Off (for more than 5 seconds)
Very short flashes (or flicker)
One slow flash then 2 short flashes
One slow flash
(one second on, three seconds off)
Two slow flashes
(one second on, one second off,
one second on, three seconds off)
Three short flashes followed by a
number of short flashes (repeats
this pattern)
On solid
Description
No power to the PMDX-150, or PMDX-150 board failure
Incoming step pulses detected. Note that for “slow” pulse rates
(less than 15 steps/second) you can discern a flash for each step
pulse. For faster step rates you will see only a very fast flicker.
Power on sequence complete and self-test passed
Idle mode (see section 7.3, Idle Timer)
Reduced current mode (see section 5.0, Reduced Current Mode)
Fault mode. The second set of flashes indicates the fault that was
detected. See section 6.0, Fault Handling, for more information.
Push button switch pressed (see section 7.2, Push Button Switch,
and section 8.0, Test Mode)
Table 10 – Activity LED Flash Patterns
PMDX-150_Manual_16.doc
18 January 2007
©2004-2007 Practical Micro Design, Inc.
All Rights Reserved
Page 11 of 17
PMDX-150 User’s Manual
Document Revision: 1.6
7.2
PCB Revision: PCB-402D
Firmware Revision: 1.0
Push Button Switch
Pressing the push button switch provides several functions:
•
When a fault condition exists, pressing the switch attempts to clear the fault and re-start the motor,
see section 6.0.
•
Re-reads the DIP switches and implements the new settings (regardless of whether or not a fault
condition exists). There are two exceptions to this:
(a) The “SPOL” switch always takes effect immediately (see section 3.0, DIP Switch Settings)
(b) The “RCEN” switch, which only takes effect after power-on (see section 3.0, DIP Switch Settings)
•
When no fault condition exists, pressing (and holding) the switch will enter “Test” mode (see section
8.0)
Note that whenever the push-button switch is pressed, the LED turns on solid.
7.3
Idle Timer
The PMDX-150 contains a “idle” timer. This timer detects when two seconds have elapsed since either
the last incoming step pulse, or the last test mode step pulses. If two seconds elapse, the LED flashes an
“idle” pattern of one slow flash (one second on, three seconds off, see section 7.1, Activity and Status LED).
This gives a visual indication that the PMDX-150 has power and is active. Note that “reduced current”
mode will override the “idle” LED pattern with its own flash pattern when the “reduced current” timer
expires and “reduced current” mode is enabled (see section 5.0, Reduced Current Mode).
7.4
Cooling Fan (optional)
Depending on the ambient temperature, motor current setting and motor that is connected to the
PMDX-150, you may need to supply force-air cooling to the PMDX-150 board to prevent thermal shutdown. The forced-air cooling may be provided by an external fan moving air over the board (as is the
case in the PMDX Motion Management System units), or by a fan mounted directly on the PMDX-150
board as described below.
The PMDX-150 has mounting holes in two of its heat sinks for use in mounting a 45mm square fan
directly to the board. The fan will be secured at only two of its corners and will be rotated 45 degrees
with respect to the board. After mounting the fan, make sure that the impeller is free to rotate. Cooling
is effective either with air blowing onto or away from the board. Power for the fan is not supplied by the
PMDX-150 board – you must provide the fan power separately.
One example of a fan that is suitable for use with the PMDX-150 is DigiKey part number 259-1196.
8.0
Test Mode
The PMDX-150 provides a method for stand-alone motor testing. This test mode generates internal step
and direction signals without a controller connected, using the momentary-contact push-button switch
(SW2). The test mode will also operate when the PMDX-150 connected to a controller. If a controller
is connected to the PMDX-150 while in test mode, the PMDX-150 will ignore the incoming step and
direction signals for as long as test mode is active.
While in test mode, all motor movements are made in “full step” equivalent increments. For example, in
“full step” mode, a “full step” equivalent is four steps because the PMDX-150 actually drives the motor in
quarter-step mode (see Table 6 on page 8 for a list of micro-step modes).
Pressing and holding the push-button (when no fault is indicated) turns the LED on solid and causes the
PMDX-150 to move the motor using the following profile:
PMDX-150_Manual_16.doc
18 January 2007
©2004-2007 Practical Micro Design, Inc.
All Rights Reserved
Page 12 of 17
PMDX-150 User’s Manual
Document Revision: 1.6
PCB Revision: PCB-402D
Firmware Revision: 1.0
(1) Brief pause
(2) 5 full steps at a rate of 2 steps per second
(3) Ramp up to 400 “full steps” per second and maintain that rate until the push button is released (note
that the ramp-up, plateau and ramp-down are done using eighth-step mode, but the step rate is in
“full step equivalent” steps per second)
(4) Ramp down from 400 “full steps” per second to 25 “full steps” per second then stop
(5) Toggle the “test mode” direction so that the next push-button press will move the motor in the
opposite direction (except as described below).
If the push-button is released during step (1) of the test profile, the motor halts at the next “full step”
boundary. If the push-button is released during step (2) of the test profile, it immediately ramps down
from the current step frequency and then stops (i.e. it does not wait until the ramp has reached it
maximum frequency before ramping down and stopping).
Note that if the push-button is pressed while a fault is indicated, the push-button serves to attempt to
clear the fault, it does not enter test mode. When a fault is indicated, it takes two button presses to
enter test mode – one to clear the fault and the second to enter test mode.
Each time test mode is entered, the motor direction is reversed from the previous test mode. It is
possible to “tap” the push-button to force a direction reversal without holding the switch long enough to
generate a step pulse. In this manner, you can achieve successive runs of slow steps in the same direction.
While not in test mode (i.e. push button not pressed), if 30 seconds elapse with no incoming step pulses,
the test mode starting direction will be reset to its default power-on value. The actual motor direction
depends on how the motor is connected to the PMDX-150.
WARNING: If you press the push-button for test mode and nothing happens, a fault
may have occurred while starting test mode. Release the push-button
and look at the LED. If there was a fault, the LED will flash to indicate
the fault as shown in sections 6.0 and 7.1. If the LED does not indicate a
fault condition, then double-check the motor wiring and the motor
power supply.
PMDX-150_Manual_16.doc
18 January 2007
©2004-2007 Practical Micro Design, Inc.
All Rights Reserved
Page 13 of 17
PMDX-150 User’s Manual
PCB Revision: PCB-402D
Firmware Revision: 1.0
Document Revision: 1.6
9.0
Mechanical Specifications
3.500"
2.900"
2.600"
0.150"
3.200"
4 each
0.150" dia holes
(for #6 screw)
0.150"
Figure 2 - PMDX-150 Dimensions and Mounting Holes
WARNING: The PMDX-150 should be protected from liquids, dirt, or chips
(especially metal chips which can cause shorts) coming in contact with
the board.
PMDX-150_Manual_16.doc
18 January 2007
©2004-2007 Practical Micro Design, Inc.
All Rights Reserved
Page 14 of 17
PMDX-150 User’s Manual
PCB Revision: PCB-402D
Firmware Revision: 1.0
Document Revision: 1.6
10.0 Electrical and Environmental Specifications
Motor Power:
+12V DC to +35V DC, 2.0 Amps maximum (note that the chopper motor driver allows
up to 3 amp motor currents using power supplies with less than 3 amp capacities)
Motor Current
Chopping Frequency:
Step & Direction
Inputs:
20 KHz (nominal)
Optically isolated input signals:
Max. input “high”:
12.0V at 11 mA max (referenced to the “Gnd” terminal)
Min. input “high”:
3.0V at 1.6 mA (referenced to the “Gnd” terminal)
Max. input “low”:
0.4V (referenced to the “Gnd” terminal)
“Step” pulse width:
1.0 µs (minimum)
“Step” pulse recovery: 2.0 µs (minimum)
“Step” frequency:
Depends on micro-stepping mode, see section 4.0
“Dir” setup time:
“Dir hold time:
Fault Output:
1.0 µs minimum (see section 2.1.3)
1.0 µs minimum (see section 2.1.3)
Open-collector optically isolated output signal:
Max “sink” current:
100 mA (referenced to the “Gnd” terminal)
Max pull-up voltage:
24VDC (referenced to the “Gnd” terminal)
NOTE: The open-collector output requires a pull-up resistor in the receiving
equipment
Environmental:
Temperature:
Relative Humidity:
0° to +55° C
20% to 80% relative humidity, non-condensing
NOTE: Forced-air cooling may be required at elevated temperatures or with
current settings above 2.5 amps. See section 3.1, Motor Current Selection,
for more information.
PMDX-150_Manual_16.doc
18 January 2007
©2004-2007 Practical Micro Design, Inc.
All Rights Reserved
Page 15 of 17
PMDX-150 User’s Manual
PCB Revision: PCB-402D
Firmware Revision: 1.0
Document Revision: 1.6
Appendix A – Warranty
Statement
Practical Micro Design, Inc. (PMD) warrants that this hardware product is in good working
condition, according to its specifications at the time of shipment, for a period of 90 days
from the date it was shipped from PMD. Should the product, in PMD's opinion, malfunction
within the warranty period, PMD will repair or replace the product without charge. Any
replaced parts become the property of PMD. This warranty does not apply to the software
component of a product or to a product which has been damaged due to accident, misuse,
abuse, improper installation, usage not in accordance with product specifications and
instructions, natural or personal disaster or unauthorized alterations, repairs or
modifications.
Limitations
All warranties for this product, expressed or implied, are limited to 90 days from the date of
purchase and no warranties, expressed or implied, will apply after that period.
All warranties for this product, expressed or implied, shall extend only to the original
purchaser.
The liability of Practical Micro Design, Inc. in respect of any defective product will be limited
to the repair or replacement of such product. Practical Micro Design, Inc. may use new or
equivalent to new replacement parts.
Practical Micro Design, Inc. makes no other representations or warranties as to fitness for
purpose, merchantability or otherwise in respect of the product. No other representations,
warranties or conditions, shall be implied by statute or otherwise.
In no event shall Practical Micro Design, Inc. be responsible or liable for any damages arising
(a) from the use of the product;
(b) from the loss of use of the product;
(c) from the loss of revenue or profit resulting from the use of the product; or
(d) as a result of any event, circumstance, action or abuse beyond the control of Practical
Micro Design, Inc.
whether such damages be direct, indirect, consequential, special or otherwise and whether
such damages are incurred by the person to whom this warranty extends or a third party.
PMDX-150_Manual_16.doc
18 January 2007
©2004-2007 Practical Micro Design, Inc.
All Rights Reserved
Page 16 of 17
PMDX-150 User’s Manual
Document Revision: 1.6
PCB Revision: PCB-402D
Firmware Revision: 1.0
Appendix B – Power Supply and Motor Selection
To be determined.
Appendix C – Motor Wiring
To be determined.
PMDX-150_Manual_16.doc
18 January 2007
©2004-2007 Practical Micro Design, Inc.
All Rights Reserved
Page 17 of 17