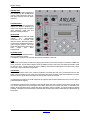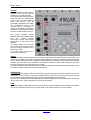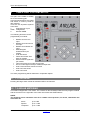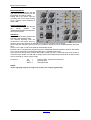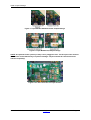
1
AIRLAB
User Manual
Mixing consoles
Version 2.0
D&R ELECTRONICA WEESP BV
Rijnkade 15B
1382 GS Weesp
The Netherlands
Phone: +31 (294) 418014
Fax: +31 (294) 416987
Website: http://www.d-r.nl
E-mail: [email protected]
Contents
1
INTRODUCTION ............................................................................................................................................. 3
2
PACKAGE CONTENTS .................................................................................................................................. 4
3
SYSTEM DESCRIPTION ................................................................................................................................ 5
4
TRIPLE INPUT STEREO MODULE................................................................................................................ 8
4.1
5
SHORT OVERVIEW OF TRIPLE INPUT MODULE FUNCTIONS .......................................................... 10
TELCO MODULE.......................................................................................................................................... 16
5.1
COMMUNICATION WITH TELCO MODULE ......................................................................................... 19
6
MODULE CONNECTORS............................................................................................................................. 20
7
MASTER SECTION....................................................................................................................................... 21
8
TIMER AND SYSTEM-SETUP...................................................................................................................... 24
8.1
8.2
9
7.1 CUE RESET..................................................................................................................................... 24
7.2 AIRLAB METERING......................................................................................................................... 24
BACK PANEL CONNECTORS..................................................................................................................... 26
10
AIRLAB MASTER BACK PANEL WIRING .............................................................................................. 29
11
AIRLAB JUMPER SETTINGS .................................................................................................................. 31
11.1
11.2
TRIPLE INPUT MODULE....................................................................................................................... 31
TELCO MODULE................................................................................................................................... 33
12
INSTALLING/SERVICING THE AIRLAB .................................................................................................. 34
13
HOW TO PROGRAM THE AIRLAB.......................................................................................................... 38
13.1
13.2
13.3
13.4
13.5
14
14.1
14.2
MODULE SETTINGS............................................................................................................................. 38
MASTER SETTINGS ............................................................................................................................. 49
SYSTEM SETUP ................................................................................................................................... 50
TIMER.................................................................................................................................................... 52
MENU DIAGRAM................................................................................................................................... 53
WINDOWS SOFTWARE ........................................................................................................................... 54
INSTALLATION ..................................................................................................................................... 54
GETTING STARTED ............................................................................................................................. 54
15
SPECIFICATIONS..................................................................................................................................... 57
16
SICO REMOTE UNIT ................................................................................................................................ 58
17
DIRECTOR UNIT....................................................................................................................................... 59
18
LIST OF FIGURES .................................................................................................................................... 60
19
LIST OF TABLES...................................................................................................................................... 61
20
AIRLAB USER QUESTIONNAIRE............................................................................................................ 62
21
PRODUCT SAFETY.................................................................................................................................. 63
22
DECLARATION OF CONFORMITY.......................................................................................................... 65
23
DISCLAIMER ............................................................................................................................................ 66
Airlab from D&R Phone +31 294 418014, email: [email protected]
Page 2
Introduction
1
INTRODUCTION
Dear client,
Thank you for choosing the Airlab console.
The Airlab is designed by specialists in the field of radio broadcast and is intended to be used as an 24
hour "On-Air" console as well as a production console.
We are confident that you will be using the Airlab for many years to come, and wish you much success.
We always value suggestions from our clients, and we would therefore be grateful if you could complete
and return the questionnaire included at the back of this manual, once you have become familiar with your
Airlab. We will certainly learn from your comments, and very much appreciate your time doing this.
With kind regards,
Duco de Rijk
PRESIDENT
Airlab from D&R Phone +31 294 418014, email: [email protected]
Page 3
Package Contents
2 PACKAGE CONTENTS
The Airlab package comes with the following parts inside.
•
•
•
•
•
1x Airlab
1x This manual
1x Airlab Control Center supporting Win98SE/Win2000/WinXP/WinNT4.0
1x Chipcard
1x Power cable
Airlab from D&R Phone +31 294 418014, email: [email protected]
Page 4
System Description
3
SYSTEM DESCRIPTION
D&R Quality
D&R has been the largest manufacturer of mixing consoles and signal processors in the Netherlands for
26 years. More than 90% of the total production is exported worldwide. This market demands excellent
pricing and quality standards.
D&R products are used in studios and live performances, both of which require 100% reliability, which is
the result of 26 years of research, design and manufacturing.
These high standards of reliability are also to be found imbedded in the new line of broadcast mixers,
which is particularly important for this type of product, required to work around the clock.
Airlab Quality
The high standard of quality of the Airlab is demonstrated by the welded steel RF screening and sturdy
housing, the heavy duty power supply, its modular approach and locking IDC connectors mounted on high
quality double sided, plated through, glass epoxy printed circuit boards.
The signal paths are electronically switched using CMOS logic and 'FET' components, ensuring reliable
and smooth switching.
High quality 100mm faders control the new redesigned "THAT" VCA's. Switching is performed by isolated
encapsulated reed relays guaranteeing many years of trouble free smooth switching.
Airlab flexibility
The Airlab is a specially designed production/ On-Air broadcast console. Although the design has been
carefully budgeted, no compromises have been made in either quality or features, particularly in the areas
of VCA control, switching, signaling, fader start/stop and communication.
The Airlab is fully modular, which means flexibility in the configuration. The Triple input modules as well as
the Telco input modules can be placed anywhere in the chassis. A partially loaded Airlab can be completed
using low cost 'blind modules'.
Digital programmable
Most of the important module functions such as module set-up as well as overall master settings are
programmable and can be saved on a personal memory card or in the internal memory of the Airlab.
The LCD in the master section helps you with the programming. There is also a possibility to do this on
your PC by way of RS232 communication.
Airlab from D&R Phone +31 294 418014, email: [email protected]
Page 5
System Description
The Airlab is a complete and self-contained piece of hardware, requiring no additional items in order to be
operated. All relevant functions are built-in, such as fader start/stop (pulse or continuously selectable).
There is also no need for complex mic-on/cough switching to the announcer booth. A stereo jack, a LED
and a simple push-button switch complete this task.
The optional SiCo unit is a nice looking alternative with many extras for Cough switching and monitoring.
Built-in stereo headphone amp
The Airlab contains built-in headphone amps for the Announcer and Guests. No additional amps are
needed. The Studio output needs to be hooked up to a power amp that can handle +6 dBu as nominal
level for full power.
Clear layout
To create a clear layout most of the switches have LED indicators, large CUE/SELECT and ON switches
and the front panels are angled for visibility.
All similar functions in the triple input channels are color-coded with additional fader knobs available for
personalized channel color-coding.
Example:
Microphone channels: red fader knobs
Telephone channels: gray fader knobs
Stereo channels:
black fader knobs
Radio communication
On the basis that there's no radio without communication, the Airlab has extensive possibilities for
signaling and communications. Every microphone channel has its own signaling and talk back circuitry and
all outputs can also be connected to the talk back circuitry.
The announcer/technician/producer/director can communicate with the announcer booth, guests,
monitoring system, all connected Telco modules and auxiliaries, either individually or in any combination.
A very intelligent CUE system connects every activated CUE switch with each other to create a transparent
and intuitive communication system. It will be explained in detail further in this manual.
Signaling
It is extremely important in broadcast to know whether a microphone channel is active.
Every channel has a red light signaling available on the remote connector.
The Airlab has two external connectors for ON-AIR (mic-on) signaling to control external relays activating
high voltage ON-AIR lamps.
NEVER CONNECT 115-230 VOLT LAMPS DIRECTLY TO THE ON-AIR SIGNALING OUTPUTS IN
THE MASTER SECTION!!
Airlab from D&R Phone +31 294 418014, email: [email protected]
Page 6
System Description
Broadcasting Options
In designing the Airlab, D&R decided to make the system as flexible for the operator as possible. Therefore
the Airlab can be used in many ways.
There's a minimum of jumper settings, which can be set to suit your own needs. Most of the settings are
under software control in the master section and can be stored to a chip card.
The Airlab can be used in a traditional manner with separate control and announcer rooms, or in a more
open way, whereby announcing and engineering control are carried out in one room. A self-op setup, or a
combination of several setups is possible.
More than one Broadcast Studio
There are numerous monitor facilities in the Airlab for external sources as well as internal sources. The
control monitors (and meters) can be switched to follow the control room for separate (stereo) sources.
These features mean that the Airlab is specially suited to work in a studio-complex environment, where
there is more than one studio/control room being used for broadcast.
In this situation, the Airlab is capable of being the main On-Air console due to the two main outputs it
contains. These main outputs can be fully transformer balanced as an option.
Special Recording Outputs
The Airlab has a special Tape/Recording output on a 0dBu output level.
Double Stereo VU/Peak Metering
In order to achieve a good balance between spoken words and music, it's important to be able to read the
recording level accurately. The Airlab has a standard 4 VU meters reading per pair the main output and the
CUE output. A PPM version of the VU meter is available as an option.
SUMMARY
Whilst using the Airlab, you'll discover its many hidden features, and will continue to appreciate its
extensive capabilities.
Airlab from D&R Phone +31 294 418014, email: [email protected]
Page 7
Triple Input Stereo Module
4
TRIPLE INPUT STEREO MODULE
MONO
Every channel has a mono switch with LED to send a mono input signal to both outputs of
the module.
(PHANTOM POWER, not on frontpanel.
48 volt switchable by a jumper setting (see also chapter 11))
MIC-TRIM
The trim control adds an extra 13dB of mic gain to the mic pre-amp. An optimal gain range
can be accomplished in this way.
GAIN
The gain control adjusts the incoming signal level on the MIC and LINE input.
LINE A
The triple module default is in 'LINE A' mode. Operating the 'LINE B' switch or the MIC
switch changes the mode.
LINE B
When line B is selected (with optional RIAA correction amp), the green LED is illuminated.
MIC
MIC input selector switch between MIC-input or Line-A/B input. When the LED is illuminated
the MIC-input is activated.
HIGH
Adjusts high frequencies with +/- 12 dB at 10 kHz shelve.
MID
Adjusts mid frequencies with +/- 12 dB at 1 kHz bell.
LOW
Adjusts the low frequencies with +/- 12 dB at 60 Hz bell.
SUB
The sub switch assigns the signal in stereo to the sub output.
PROG(RAM)
The program switch assigns the signal in stereo to the program output.
STEREO AUX
Transmits a stereo signal to the AUX master post fader. A jumper on the board determines
whether this is pre or post VCA.
The channel 'ON' switch also affects the aux send (only when set to post fader).
Airlab from D&R Phone +31 294 418014, email: [email protected]
Page 8
Triple Input Stereo Module
PAN
Allows adjustment between the left and right channel outputs.
CUE/SELECT
Stereo pre-fade listening; allows pre-fade listening of the channel with the fader closed.
The CUE function will be automatically TURNED OFF when the channel becomes active.
The CUE switch also generates a start/stop pulse in the line-mode.
The CUE switch also acts as a SELECT switch for the programming of the modules
functions.
ON
Channel on/off switch. The Airlab is capable of sending out a pulse by ON switch as well as
by fader. This is software programmable. In any case the adjacent LED will lit when the ON
switch is activated.
FADER
The linear fader controls a VCA that controls the module's overall level. Electronics sense
when the fader is opened and generates (when programmed) the start for remotely
connected devices.
Airlab from D&R Phone +31 294 418014, email: [email protected]
Page 9
Triple Input Stereo Module
4.1
SHORT OVERVIEW OF TRIPLE INPUT MODULE FUNCTIONS
Microphone input:
Impedance:
Level:
Connectors:
48 Volt phantom:
Mic High pass filter:
Electronically balanced
2 kOhm
From -70 dBu microphone input to 0 dBu
XLR female, Pin 1 = ground. Pin 2 = in phase. Pin 3 = out of phase
Jumper enabled/disabled, (see chapter 11)
At 80 Hz internally set by a jumper, (see chapter 11)
REMOTE:
(Only when programmed)
Remote control of the channels CUE and/or Cough/Communication
'Channel-on' light signaling. Connection by way of a stereo jack
Tip
=
Ring
=
Positive supply voltage, current limited at 6 mA when the channel is 'active
(fader up)'. A direct connection to a LED is possible between tip and sleeve.
When momentarily connected to ground, the channel will be muted and CUE
is activated creating a Cough/Communication function when the channel is in
the Mic mode. CUE can be normally activated when in LINE mode.
ground.
Sleeve =
A-Input and B-Input:
The input impedance for both 'A' and 'B' are >10 kOhm, and the maximum
sensitivity ranges from -20 dBu to +20 dBu. The signal to noise ratio is -90 dBr
(R.I.A.A. = -70 dBr). Nominal level of the A input is +4dBu and for the B input
0dBu.
Connector is Jack:
LINE A =
LINE B =
balanced wired to a female XLR connector Pin 2 is in phase,
Pin3 is out of phase and pin1 is ground
unbalanced on Cinch connectors.
NOTE: By adding an optional plug-in stereo R.I.A.A. pre-amp, the B input is able to accept M.D.
phono pick-ups. See (see chapter 11)!
START:
Stereo jack plug
Tip = Center contact
Ring = Normally open
Sleeve = Normally close
Maximum voltage/current that can be handled=24 volt at 50mA
NOTE: Polarity is not important with reed relays!
DO NOT CONNECT 115/230VOLT AC TO THIS CONNECTOR!!!
Pulse or Continuous Signal:
Software programmable between active or not and between pulse or
continue
Airlab from D&R Phone +31 294 418014, email: [email protected]
Page 10
Triple Input Stereo Module
Mono Microphone input
The front end of this module is designed to amplify balanced microphone signals. A +48 Volt phantom
power supply is available for condenser microphones. The Airlab has the ultimate in mic amplification with
a wide dynamic range and extremely low noise.
The microphone input is electronically balanced and protected against R.F. interference.
Input impedance is 2 kOhm. This is high enough to accept all modern microphones.
The Gain control can vary the input levels with a range of 40dB in one turn.
The signal to noise ratio is -127.0 dBr and is therefore well suited to low noise applications.
Phantom Powering
This +48 Volt power is required for condenser microphones and can be applied to the microphone inputs
via a jumper setting on the PCB. (See also chapter 11)
When the phantom power is applied and the channel is active, a 'click' can be heard when a microphone is
plugged in. This is due to a D.C. component on the input, which is suddenly interrupted and amplified by +/70 dB. It's therefore important NOT to do this with channel faders up and channel ON. It's even better to
switch of the console entirely before connecting or disconnecting any kind of equipment.
DO NOT use unbalanced or electret microphones when the phantom power is applied as it could damage
the microphones.
High-Pass Filter on MIC
The high-pass filter attenuates the low frequencies below 80 Hz and can be switched on or off by jumper
settings (see also chapter 11). It is only active on MIC inputs.
NOTE: Some microphones have built in high-pass filters and therefore do not require use of the
Airlab high-pass filter.
Microphones used for speech are usually set for high-pass filtering in order to avoid 'popping' and other
unwanted low frequency rumble and therefore improve the quality and intelligibility of the spoken word.
Airlab from D&R Phone +31 294 418014, email: [email protected]
Page 11
Triple Input Stereo Module
A. COUGH / REMOTE / SIGNALING IN MIC MODE
This useful feature has two important functions:
1. Cough/Communication,
2. 'MIC-on' (CUE on)
Both functions are software programmable.
1. Cough/Communication
(A push-button needs to be connected to the ring and sleeve of the remote jack plug.)
Using the push-button during broadcast, the announcer can temporarily mute the
microphone in order to cough (where the name comes from). At the same time his
microphone will be routed to the CUE system, in order to give him the opportunity to
communicate with the engineer/producer. Cough works on every programmed mic input.
2. 'MIC-on'
When the channel is active a voltage is applied between Tip (+) and Sleeve (0V),
which can be used to activate a LED (red) or an opto-coupler.
In addition to the localized 'mic-on' signaling, there's also a master signal in the
master section. The ON-AIR signaling outputs 1 and 2 offer the option of driving
external red light indicators in the studio by way of external high voltage relays.
B. REMOTE/SIGNALLING IN LINE MODE
In this mode CUE can be switched on/off via a remote external push-button.
When the channel is active a voltage is applied between Tip (+) and Sleeve (0V),
which can be used to activate a LED (red) or an opto-coupler.
Alignment of the MIC input
With the fader in the 'down' position, and the CUE activated, the input signal is adjusted with the gain
control until the 0 dB position in the master VU meter is reached. When the fader is in its 0 dB position, the
signal has a nominal level in the Airlab. This way of alignment will give enough headroom to compensate
for signal losses of up to 10 dB, whilst the noise floor remains well below the nominal level.
Airlab Line input module
This part of the triple input module is specially designed to accept balanced and unbalanced stereo input
signals. There are two stereo inputs; line A and line B. Both inputs can have fader start functions. By
changing software settings this can be accomplished.
R.I.A.A.
As an option, a stereo phono pre-amp with R.I.A.A. filter curves can be plugged onto the motherboard,
in order to accept Magnetic Dynamic Phono cartridges. The Line B input will be converted.
Airlab from D&R Phone +31 294 418014, email: [email protected]
Page 12
Triple Input Stereo Module
START/STOP FUNCTIONS CONFIGURED
The 'Start' is only active when this is activated in the software.
These remote connectors are activated by the fader and/or `ON' switch in the channel module. The start
jack connectors are electronically separated by use of encapsulated reed relays.
Reed relays are ideal devices for eliminating ground loops and limited life span effects of other switches
and can easily be interfaced with all modern equipment.
The start connectors are connected to separate reed relays.
The maximum VOLTAGE/CURRENT is 24v/50mA. (Polarity is not important with reed relays!)
NOTE 1:
NOTE 2:
NOTE 3:
Nearly all of the modern devices require pulse information. Continuous signals
however, can have the advantage that during broadcast a CD player cannot
be accidentally stopped. One disadvantage however is that some CD players
are blocked from other functions when started with a continuous pulse.
It is advisable to only use the pulse start mode with jingle machines. The cart
has to finish its tape to the end and then automatically rewinds.
Some of the older products such as the A-77, require additional relays or
switching transistors to operate satisfactorily, contact your dealer for more
information.
MIC/LINE GAIN
The Gain control (only active when the line input is selected) adjusts the gain of the stereo channel preamps, within a range of -20 dB to +20 dB for the line level and +/-40 dB for the Mic level. The range of the
fader (VCA) gives an additional 10 dB of gain when needed.
Alignment of the LINE input of a channel
To align the line input of a channel close the fader and activate the cue switch. The gain control is used to
adjust the level of the incoming signal until a 0 dB reading is achieved. If the `ON' switch is now activated,
the signal level will be nominal. When the fader is opened, the CUE signal will be automatically reset, and
its associated LED will switch off.
Airlab from D&R Phone +31 294 418014, email: [email protected]
Page 13
Triple Input Stereo Module
Equalizer
The equalizer is optimized for broadcast. Center detents on all equalizer controls indicate their flat position.
(On special demand we could manufacture modules without an EQ section)
The maximum lift and cut is 12 dB at the following frequencies:
10 kHz:
Shelve
1 kHz:
Bell
60 Hz:
Bell
SUB
The Sub switch switches the stereo modules output to a separate SUB mix amp located in the master
section of the console.
This setup makes production work possible during ON-AIR broadcast due to extremely good cross talk
figures achieved in the Airlab console by careful usage of high-end CAD design systems in the initial
design stage of the console.
PROGRAM
The Program switch switches the stereo modules output to the main mix amps located in the master
section of the console.
Auxiliary
The stereo auxiliary send is post fader, bringing the signal to the master stereo auxiliary send. When the
input module is used for microphone signals only both left and right signal paths are fed by the same mono
mic input signal. The channels `ON' switch will also switch the Auxiliary send on or off when its jumper is
set to post fader.
PAN
The PAN enables adjustment between the left and right signals. The range is not restricted in order to
enable to position any incoming signal anywhere in the stereo image.
CUE
This is an automatic pre-fade-listen system, which enables you to listen to a channel without actually
opening that channel. When the CUE button is activated, the channel signal will be connected to the cue
output and meter circuitry; the red cue LED indicator will illuminate.
When the channel is active, the CUE system will be reset, including its associated LED, however it's
possible to re-activate the CUE switch.
Channel Cueing on DJ channels will only be heard in the headphone outputs. The CRM output will be
muted.
The CUE switch can also generate a start pulse for remotely connected machines by software
programming.
The CUE signal can be heard in two ways:
1.
Through the stereo Control Room Monitors by activating the “CUE to CRM” function switch in
the master section. If the cue is activated in one of the channels, the CRM and meters will be
activated without interruption of the main output.
2.
By way of an externally connected cue amplifier with loudspeaker.
Airlab from D&R Phone +31 294 418014, email: [email protected]
Page 14
Triple Input Stereo Module
ON
The channel on/off switch operates in tandem with the fader.
There are two methods of activating the channel:
A. Press the `ON' switch (Green LED is on). Then by moving up the fader, the signal is sent to
the master and at the same time a mic-on/channel on indication is sent to the remote
connector.
B.
When the 'ON' switch is 'OFF', no LED is illuminated. As the fader is moved upwards, the
channel is put into 'stand-by'.
At this point there is no “mic-on/channel on” signaling or audio to the master. Pressing the 'ON'
switch activates the channel and the green LED is on.
In order to switch the channel and mic-on signaling off, the 'ON' switch should be deactivated, or the
fader closed.
Fader
The fader is an ultra smooth 100mm model controlling the internal high quality VCA's and sending on/off
information to the logic circuitry. There is no audio going through the faders, which guarantees noise free
fading forever! When the fader is closed, the signal is automatically muted, providing a cut-off in excess of
100 dB. This high dB cut-off value ensures that the main output is protected from cross talk from
announcers.
Airlab from D&R Phone +31 294 418014, email: [email protected]
Page 15
Telco Module
5
TELCO MODULE
TRIM
The trim control adjusts the optimum side-tone suppression (R-balance). The trim needs
to be re-adjusted with every new installation.
TELCO SEND
This gain control adjusts outgoing levels coming from the main output or the SUB output.
LINE
The Line input switches the modules input from the internal hybrid to a female XLR on
the connector panel to eventually accept an external (digital) hybrid.
GAIN
This control adjusts incoming call levels.
LC/HC
Fixed low and high frequency roll off.
CONNECT
Indicates that the internal hybrid is active.
SUB
Assigns input signal to separate SUB master.
PROG(RAM)
Assigns input signal to main master busses.
ST(ereo) AUX
Transmit a signal to the aux. master pre or post fader. The channel ON switch also affects
the aux send.
PAN
Allows adjustment between the left and right channel outputs.
CUE
Pre-fade listening. Allows pre-fade listening of the input signal and allows communication
such as taking an incoming call with the fader closed. The CUE LED is also a ring indicator
for incoming calls. When this LED flashes the “call” can be taken by pushing the CUE
switch.
ON
Channel on/off switch. While in closed fader stand-by mode, i.e. when green LED is off
incoming calls can be connected by pressing the "ON" switch.
FADER
Channel VCA volume-control adjusts overall channel level.
Airlab from D&R Phone +31 294 418014, email: [email protected]
Page 16
Telco Module
Airlab TELCO input module
This input module is specially designed to accept a telephone line. An internal telephone
hybrid circuit simplifies connection of telephone lines and phone appliances.
There is a LINE input to accept external hybrids, a WALL connector for connecting to the
telephone line and a “TO PHONE” output that connects to the phone device.
Jumpers
Aux send pre/post and C balance are jumper enabled/disabled. All other functions are
software programmable.
TELCO SEND
The Telco send controls the outgoing signal to the caller. This can be either the MIX and/or
Sub output dependent upon the SUB/PROG switch settings in the Telco module. This
switch not only controls the assignment of the incoming signal to the masters but also which
signal is sent to the caller.
GAIN
The Gain control adjusts the gain of the incoming phone call within a range of -20 dBu to
+20 dBu. The range of the fader (VCA) gives an additional 10 dB of gain when needed.
LC (Low Cut)
The high pass filter smoothly filters out all frequencies below the pass band of the
telephone line.
HC (High Cut)
The low pass filter effectively filters out all above telephone line frequencies.
CONNECT
This LED indicates the internal Hybrid being active.
SUB
The SUB switch switches the Telco modules output to the SUB mix amps located in the
master section of the console.
PROGRAM
The PROGRAM switch switches the stereo modules output to the main mix amps located in
the master section of the console.
Auxiliary
The stereo auxiliary sends a post fader signal, dependent upon the 'ON' switch of the input
channel, to the master auxiliary busses. The PAN control creates a stereo image in the Aux
masters. This setup makes production work possible during ON-AIR broadcast.
Airlab from D&R Phone +31 294 418014, email: [email protected]
Page 17
Telco Module
PAN
The PAN enables positioning of the incoming caller signal. The range is not restricted in
order to enable to position any incoming signal anywhere in the stereo image.
CUE/SELECT/RING
Automatic pre-fade listening/post pan, or cue, allows a caller to be heard without being in
the broadcast. When activating the cue switch, the caller is connected to the CUE bus and
listens to the talk back MIC of the engineer (fader closed).
The CUE switch shows an incoming call by a flashing CUE LED. Hitting the CUE switch
makes a connection as described above. A remote switch can pick up a call by wiring the
remote connector of the Telco module.
The 'ON' switch works in conjunction with the fader switch.
If the green LED is on, the channel is 'active'.
There are two methods of activating an incoming call:
A.
If the 'ON' switch is pressed, the green ON LED and the “CONNECT” LED
will illuminate and the caller is connected to the Telco module but not yet heard in the
broadcast because the fader is still down.
By opening the fader, the Telco module will be activated and the signal will enter the
program. When the fader is closed again the program signal will be muted, when the
fader is at its lowest position.
B.
When the `ON' switch is not pressed, no LED is illuminated even if the fader is
now opened. In this situation, none of the signals are active but as soon as the ON
switch is activated (with a flashing CUE/RING switch) the caller will be "On-AIR".
All switching is carried out electronically and free of noise for years to come.
If the CUE function is active, it will be disabled when the channel is activated.
NOTE: In the Telco module it is not possible to "Cue" when the channel is up and
the module is ON.
FADER
The Airlab is fitted with a modern ultra-smooth linear fader controlling a high quality VCA
and the Airlab internal logic circuitry. This system eliminates any noise from disturbing the
audio signal path. When the fader is closed, the signal will be automatically muted, which
provides excellent fader attenuation in excess of 100dB.
Airlab from D&R Phone +31 294 418014, email: [email protected]
Page 18
Telco Module
5.1
COMMUNICATION WITH TELCO MODULE
ENGINEER TO/FROM TELCO
Communication with the engineer is easily accomplished by activating the CUE switch in the Telco module.
An open communication is achieved now between caller and engineer.
ANNOUNCER TO/FROM TELCO
The CUE switch on the Telco module has to be activated. The moment the Announcer hits his cough
switch communication takes place between announcer and caller (Telco module).
There are several software programmable functions available here. In chapter 13 you can find detailed
information about the programmable options of the Airlab.
ALIGNMENT OF THE CHANNEL
With the fader closed (or muted channel) the CUE switch will be activated; the CUE to CRM function in the
master section must be activated. The gain control is used to adjust the level of the incoming signal until a
0 dB reading is achieved. If the 'ON' switch is now activated, the signal level will be nominal. When the
fader is opened, the CUE signal will be automatically reset (turned off), and its associated LED will be
switched off.
The CUE signal can be heard in two ways:
1. Through the stereo Control Room Monitors by activating the CUE to CRM function in the master
section. If the CUE is activated in one of the channels, the CRM and meters will be activated
without interruption of the main output.
2. By way of an externally connected CUE amplifier with loudspeaker.
Airlab from D&R Phone +31 294 418014, email: [email protected]
Page 19
Module Connectors
6
MODULE CONNECTORS
MIC Input / From Hybrid
Connector type is female XLR: Pin1 = ground
Pin2 = in phase
Pin3 = out of phase
LINE A LEFT / WALL
Connector type is female XLR: Pin1 = ground / ground
Pin2 = in phase / A (wire)
Pin3 = out of phase / B (wire)
LINE A RIGHT / TO PHONE
Connector type is female XLR: Pin1 = ground/ground
Pin2 = in phase / phone line A-wire
Pin3 = out of phase / phone line B wire
The input impedance for 'Phone' is optimized for correct loading of modern telephone
stations.
LINE B INPUT / TELCO OUTPUT
Connectors are Cinch:
Cinch A= left in / Telco out, in phase (+)
Cinch B= right in / Telco out, out of phase (-)
REMOTE
The remote connector lets you activate the CUE of the module / Telco module when
the module is in its "off" or "standby" mode.
An ON LED can be connected to the remote to indicate the "ON" status of the Telco
module. The same LED indicates incoming calls by flashing.
REMOTE - Input
Connector type is jack:
START
Connector type is jack:
Tip
=
Ring
=
Sleeve =
Channel "ON" LED
CUE control
Ground
Figure 1: The
connections on
a module
REED RELAY MAX VOLTAGE 24VOLT/50mA
Tip
=
Center contact
Ring
=
Normally open
Sleeve =
Normally closed
Airlab from D&R Phone +31 294 418014, email: [email protected]
Page 20
Master Section
7
MASTER SECTION
TAPE SEND
This section of the master houses
the switches and controlling what's
going to the tape outputs.
A selection can be made between
three outputs of the Airlab. With all
switches up the main program
signal is recorded. As soon as one
of the other switches is pressed,
the corresponding FROM SUB or
FROM AUX. output signals are
recorded.
NOTE: With this circuitry it is
possible to record stereo
sources from the channels
assigned to the sub buss during
broadcast.
AUX OUT STEREO
This is a stereo output of the AUX
masters. The level is +6dBu.
The corresponding talk back switch
sends the talk back signal to both
outputs.
Figure 2: The Master Section
NOTE: Overall level of Aux.
outputs also affects the talk back level for these outputs only.
CRM
The CRM is normally following the Program output unless one of the input bank switches is active.
EXT(ERN)
This stereo input can be used for any stereo source that needs to be monitored in the CRM outputs. The
input level is set to be 0dBu.
AUX
This input source switch lets you listen to the stereo Aux. outputs.
(FROM) AIR
This is the input select for the CRM/phones output. Either the program mix is heard in the CRM/phones or
the 'from air' signal.
Airlab from D&R Phone +31 294 418014, email: [email protected]
Page 21
Master Section
(FROM) SUB
This is a stereo switch bringing the
Sub output into the CRM/phones
output. It will override the 'from air'
and other selected sources when
selected.
CUE BALANCE
The CUE balance pot continuously
adjusts the balance between the
stereo CUE signal and the stereo
input selection made with the
switches described above.
(AUTO)CUE
This LED indicates that both CRM
outputs
are
automatically
connected to a selected CUE
switch in stereo. When this LED is
not active the CRM will monitor the
main program outputs. The CUE
signal will always be present at the
CUE
output
jack
when
programmed.
PHONES LEVEL
This controls the overall level of the
stereo headphones output.
A headphone socket is conveniently placed just beneath the armrest.
CRM
The control room monitor controls the outgoing level to the control room monitors. The level is +6dBu on a
cinch connector. A mute LED indicates when the CRM is muted. This is the case when the Airlab is used
as “self op” mixer. The DJ channel forces the CRM to mute when the Microphone is active in the control
room itself. This is software configurable.
TALKBACK
This section houses most of the controls needed to communicate with every connected source to the
Airlab. Communication is one of the most important parts of a broadcast, inside and outside the console.
We have done a great deal of thought concerning this part of the console.
The talk back microphone is a built in Electret microphone with its associated level control. The mic-amp is
protected against clipping.
The talk back switches are momentary so leaving talk back mics open is a thing of the past. The talk back
mic can be assigned to several outputs at the same time when more than one switch is activated. The
Studio, Guest and Announcer outputs are driven post their volume controls, so communication is always
possible. Talk back to the SUB output is possible with the talk back switch positioned in the SUB section of
the master.
Airlab from D&R Phone +31 294 418014, email: [email protected]
Page 22
Master Section
STUDIO
In the Studio area are three monitor
systems, which can be used as
needed in your studio situation.
The studio output will give a stereo
signal fed from the "PROGRAM"
signal or from one of the selected
other input sources, such as
(from)AIR, (from)SUB or the CRM.
The associated MUTE LED
indicates that a microphone is
opened in the Studio area avoiding
feedback. The programming of this
function is under software control.
The Studio Talkback switch
instantly injects the talk back signal
from
the
internal
Electret
microphone into the studio output
independent of the studio level
settings.
The studio output can be used as
an overall output to monitor what's
going on during broadcast in the
studio room itself.
The studio output is wired to a
stereo cinch connector.
GUEST
The GUEST output is stereo and follows the program signal unless the input selection of "from AIR", "from
SUB" or "From CRM" is activated. A separate stereo headphone output is provided for a guest and the talk
back is always addressed to both earphones independent of level settings. The program material will be
dimmed when the talk back is activated. The output is identical to that of the announcer and could
therefore be used as a second announcer's output.
The Guest Talkback switch instantly injects the talk back signal from the internal Electret microphone into
the GUEST output independent of studio level settings.
ANNOUNCER
The ANNOUNCER output is stereo and follows the program signal unless the input selection "From air",
"From sub" or "From CRM" is activated. A separate stereo jack socket is provided for the announcer and
the talk back is always addressed to both earphones independent of level settings.
The Announcer Talkback switch instantly injects the talk back signal from the internal Electret microphone
into the Announcer output independent of studio level settings.
COM
A COM(munication) LED is placed nearby the Announcer control to indicate that the talk back is activated.
This is accomplished by pressing the Cough switch on the SiCo remote box, when installed.
Airlab from D&R Phone +31 294 418014, email: [email protected]
Page 23
Timer and System-setup
8
TIMER AND SYSTEM-SETUP
This part of the Airlab is actually
the most interesting part.
In this section decisions are made
and stored on memory cards for
later retrieval.
There are two important systems
active here.
1.
Programming of your
Airlab configuration.
2.
Internal TIMER.
The following functions can be
programmed per module:
•
•
•
•
•
•
•
•
•
•
•
•
Module set as DJ mic
input
Module set as Announcer
mic input
Module set as Studio mic
input
Start/Stop plus
Pulse/Continue per
module
CUE start active
Fader start or/and "ON"
start per module
External remote (in)active
per module
Timer start pulse per module and per item
On-Air control signal on/off per module and per item
Auto Communication Announcer on/off
Auto CUE reset on/off
Auto CUE on/off
The exact programming will be dealt with in a separate chapter.
8.1 7.1 CUE RESET
Pressing this large switch resets all activated CUEs in all channels.
8.2 7.2 AIRLAB METERING
The Airlab is shipped with 4 VU meters. The 2 meters on the left always follow the main program material
and the 2 meters on the right side of the meter hood follow the CRM selectors.
NOTE:
The following levels should be used for a suitable sound pressure, for music, talk shows and
interviews etc.
Music:
Speech:
Telephone:
up to 0 dB
up to +3 dB
up to +3 dB
Airlab from D&R Phone +31 294 418014, email: [email protected]
Page 24
Timer and System-setup
A mild compression such as 2:1 with slow attack and a threshold of -6 dB to limiting around +8 dB will
improve the relationship between different broadcast materials.
NOTE:
These are average settings only, presentation of modern pop music will certainly require
alternative settings.
Airlab from D&R Phone +31 294 418014, email: [email protected]
Page 25
Back Panel Connectors
9
BACK PANEL CONNECTORS
The connector back panel of the
master section has all the
in/outputs to interface with external
equipment and a PC.
SPARE 1 - 4
We have integrated 4 openings,
which fit spare XLR connectors for
"do it yourself" purposes. An
activity extremely loved by inhouse technicians.
Below these spare openings are
the power on/off switch, a power
inlet and the ground connector of
the console to be used as central
star ground point for the studio.
The other two sections are
described on the next page.
Figure 3: The connections on the Master Section
==================================================
The mains input is set for 230 volt 50/60 Hz.
The Airlab can be set to 115 volt only by qualified technicians
==================================================
Airlab from D&R Phone +31 294 418014, email: [email protected]
Page 26
Back Panel Connectors
EXTERN IN/AIR IN
The next section shows the left and
right input Cinch connectors for the
EXTERNAL and AIR in signals.
FROM AIR is the stereo input for
controlling the off air signal coming
from a receiver. Input sensitivity is
either 0 dBu.
GUEST/ANNOUNCER
The next connectors on the right are
the
stereo
GUEST
and
ANNOUNCER headphone outputs on
stereo jack sockets.
ON AIR 1/2
On the left side of these jacks are the
ON-AIR 1 and ON-AIR 2 jacks.
The ON-AIR signaling jacks are
connected to reed relays driven by
the logic of the input channels as described in the channel sections of this manual.
When using the channel in the DJ mode it is possible to operate and be an ANNOUNCER at the same
time.
If the DJ mic is ON or CUE’d, the CRM is automatically muted.
Modules can be connected via programming to the centralized ON-AIR signaling connector. We advise
you to use an externally connected solid-state relay. A suitable model is the
S 201-8 04 from Sharp, which switches 220 Volts/1.5 Amp click-free. A solid-state relay is much safer to
use and is more reliable. The ON-AIR 1/2 output can be connected directly to the S 201-8 04 relay in series
with an external 12-volt DC power supply.
Connector:
Tip
=
Ring
=
Sleeve =
Center contact (maximum 24V/50mA)
Normally open
Normally closed
NOTE:
These signaling outputs are only to be used for low voltage applications!
Airlab from D&R Phone +31 294 418014, email: [email protected]
Page 27
Back Panel Connectors
STUDIO
The two Cinch connectors are the unbalanced Studio outputs. The level is +6 dBu at 47 Ohm.
SUB OUTPUTS
These outputs are electronically balanced and wired to male XLR outputs.
Output level is +6 dBu at 47 Ohm. (Transformers are optional)
RS232
This computer type connector is the interface between the Airlab and a PC. Through this connector and the
delivered software it is possible to program the Airlab on your PC.
Chapter 13 will give you detailed information about this programming.
TO METER
This SubD9 connector provides power and signal to all 4 meters.
MORE OUTPUTS
In this section of the master back panel you find the following output connectors.
Tape-1 out stereo, Tape-2 out stereo, AUX. out stereo, CUE out stereo, CRM out stereo and PROGRAM
left/right.
PROGRAM OUTPUTS
The Airlab contains two electronically balanced outputs that can be transformer balanced as an option.
Both outputs shall have their own line output amps with high quality output transformers as an option. The
output level is +6 dB at 600 Ohm when the meter reads 0 dB.
Connectors are XLR male:
Pin 1 = ground
Pin 2 = in phase
Pin 3 = out of phase
If the Airlab is required to drive unbalanced equipment, Pins 1 and 3 must be shorted.
PHONES OUTPUT
The engineer's stereo headphone output shall also be used as DJ output.
NOTE: DO NOT use headphones with an impedance lower than 200 Ohm. 600 Ohm is
preferable. The jack is positioned on your right hand side under the armrest.
Connector type is stereo jack plug:
Tip
=
Ring
=
Sleeve =
left
right
ground
Airlab from D&R Phone +31 294 418014, email: [email protected]
Page 28
Airlab Master Panel Wiring
10
AIRLAB MASTER BACK PANEL WIRING
EXTERN IN
Connector type is Cinch. Unbalanced, level = 0 dBu 10 kOhm
AIR IN
Connector type is Cinch. Unbalanced, level = 0 dBu 10 kOhm
GUEST OUT STEREO
Connector type:
Jack
Level:
+20 dBu/330 Ohm
ANNOUNCER OUT STEREO
Connector type:
Jack
Level:
+20 dBu/330 Ohm
ON AIR SIGNALING 1
Connector type:
Jack
ON AIR SIGNALING 2
Connector type:
Jack
STUDIO OUT
Connector type:
Level:
SUB OUTPUTS
Connector type:
Level:
Tip
=
Ring
=
Sleeve =
Left
Right
Ground
Tip
=
Ring
=
Sleeve =
Left
Right
Ground
REED RELAY MAX VOLTAGE 24 VOLT/50 mA
Tip
=
Center contact
Ring
=
Normally open
Sleeve =
Normally closed
REED RELAY MAX VOLTAGE 24 VOLT/50 mA
Tip
=
Center contact
Ring
=
Normally open
Sleeve =
Normally close
Cinch, Unbalanced
+6dBu / 47 Ohm
Male XLR
+6dBu
Pin1 = ground
Pin2 = in phase
Pin3 = out of phase
Airlab from D&R Phone +31 294 418014, email: [email protected]
Page 29
Airlab Master Panel Wiring
RS 232
Connector type:
SubD9 Male
1 = CD (Doesn't need to be connected)*
2 = TD
3 = RD
4 = DTR (Doesn't need to be connected)*
5 = gnd
6 = DSR (Doesn't need to be connected)*
7 = RTS (Doesn't need to be connected)*
8 = CTS (Doesn't need to be connected)*
9 = NC
* (Some PC’s require connection instead)
METER
Connector type:
SubD9 Female
1 = CRM-right (feeds meter right)
2 = ground
3 = External CUE LED drive
4 = ground
5 = Program right signal
6 = CRM left signal
7 = +18 volt
8 = -18 volt
9 = Program left signal
TAPE 1 OUT STEREO
Connector type:
Cinch
Level:
0 dBu/100 Ohm
TAPE 2 OUT STEREO
Connector type:
Cinch
Level:
0 dBu/100 Ohm
AUX OUT STEREO
Connector type:
Level:
Cinch
+6 dBu/100 Ohm
CUE OUT STEREO
Connector type:
Level:
Cinch
+6 dBu/100 Ohm
CRM OUT STEREO
Connector type:
Level:
Cinch
+6 dBu/100 Ohm
PROGRAM OUTPUTS
Connector type:
Male XLR
Level is:
+6 dBu
PHONES OUT STEREO
Connector type:
Jack
Level:
+20dBu/330 Ohm
Pin 1 = ground
Pin 2 = in phase
Pin 3 = out of phase
Tip
=
Ring
=
Sleeve =
Airlab from D&R Phone +31 294 418014, email: [email protected]
Left
Right
Ground
Page 30
Airlab Jumper Settings
11
AIRLAB JUMPER SETTINGS
11.1 TRIPLE INPUT MODULE
Figure 4: Airlab Triple Module Jumper Locations
Options
AUX PRE/POST
LC MIC only
48 volt Phantom
EQ ON/OFF
Jumpers
J8 and J9
J7
J13
J11 en J12
Settings
1 + 2 = POST
1+2 / 3+4 = ON
1 + 2 = OFF
1+2 / 3+4 = ON
Settings
3 + 4 = PRE
No Jumper = OFF
3 + 4 = ON
2+3 / 4+5 = OFF
Default
POST
OFF
OFF
ON
Table 1: Airlab Triple Module Jumper settings
Figure 5: Triple Module AUX Jumpersettings
Figure 6: Triple Module MIC LC Jumpersettings
Airlab from D&R Phone +31 294 418014, email: [email protected]
Page 31
Airlab Jumper Settings
Figure 7: Triple Module Phantom Power Jumpersettings
Figure 8: Triple Module EQ Jumpersettings
NOTE: An optional R.I.A.A. phono pre amp can be plugged in here. The 'B' input of the channel
can thus be connected directly to a phono cartridge. Jumpers should be removed from the
channel completely.
Figure 9: R.I.A.A connection on Triple module
Airlab from D&R Phone +31 294 418014, email: [email protected]
Page 32
Airlab Jumper Settings
11.2 TELCO MODULE
Figure 10: Airlab Telco Module Jumper Locations
Options
AUX PRE/POST
Jumpers
J8 and J9
Settings
1 + 2 = POST
Settings
3 + 4 = PRE
Default
POST
Table 2: Airlab Telco Module Jumper settings
Figure 11: Telco Module AUX Jumpersettings
Figure 12: Telco Module C-Balance Setting
OPTIONAL
It's optional to install High quality transformers on the PROGRAM outputs and on the SUB outputs. Please
contact your dealer for further information.
Airlab from D&R Phone +31 294 418014, email: [email protected]
Page 33
Installing/Servicing the Airlab
12
INSTALLING/SERVICING THE AIRLAB
Mains
Please check that the local mains supply corresponds with the voltage selected on the Airlab mains inlet.
The Airlab can be factory set for voltages between 100 - 120 Volts or 220 - 240 Volts. The Airlab is fused
with a 2 Amp slow blow fuse for 110 Volt or 1.0 Amp slow blow fuse for 220 Volt. DO NOT use any other
value, as this would be hazardous and the Airlab guarantee will be voided.
Clean Power Connection
Be sure to use a 'clean' power outlet, i.e. one that is fed directly from the mains, including earth. Only
connect the Airlab to this outlet and its associated equipment. This will act as the centralized mains and
earth for the studio.
It is advisable to install several multiple mains connectors close to the Airlab, with a master power switch to
shut down all power to the studio. Grounding MUST BE a star ground system.
Keep all wires as short as possible and never install audio next to power cables.
"Polluted" mains are caused by changing currents on the outlets, such as air-conditioners, coffee
machines, fridges, computers, dimmer packs etc. DO NOT connect any of these types of items to the
Airlab main power outlet.
Wiring
In cases where all the equipment is transformer balanced, it's usual to connect the shielding of the wiring to
the source side only.
In the Airlab, many of the sources will be unbalanced, so a different strategy needs to be adopted.
Equipment, such as CD players, doesn't have a mains ground connection. In this case the shielding can be
connected on both sides of the connection. There won't be a ground loop. Try to choose a CD player with
metal housing. If you experience problems with the transmitter interfering with the CD sound, connect the
CD housing to a ceramic capacitor of 0.01 uF/250 V to the mains earth.
Audio Connections to the Airlab
Prior to commencing wiring of the studio, it is advisable to obtain some labels, which will simplify troubleshooting. (Example; "CD-1, CH 2A")
The first step is to connect the Airlab to the mains, with all faders closed, no CRM active and the CRM
volume controls fully clockwise.
A.
B.
Connect the CRM amp to the CRM output, and check whether there's any 'hum' or
'noise' noticeable.
Now connect the phono players, and check again for `hum' and 'noise'.
NOTE: In most cases it is a matter of finding the best grounding for the phono ground by trial and
error. This might be directly to the audio ground or to the chassis of the Airlab.
C.
Now connect Tape deck, Cart machines, CD/MD players etc.
Airlab from D&R Phone +31 294 418014, email: [email protected]
Page 34
Installing/Servicing the Airlab
NOTE:
Wiring a tuner needs special attention. If the tuner is "cabled", the coax antennae cable will
probably cause a ground loop. A H.F. transformer must separate the antenna input of the tuner.
Ask your dealer or any radio shop for details.
*IMPORTANT*
SAFETY PRECAUTION - All 'outside' connections to the Airlab, even from the same building, must be
connected via a transformer. This avoids the possibility of ground loops and 'hums'. The shielding must be
connected to the source side.
In areas with a strong H.F. interference, it is wise to connect the other side of the shielding through a 0.1
uF/250 Volt ceramic capacitor. The capacitor will not affect the audio, but will reduce H.F. signals.
Servicing the Airlab
A.
B.
C.
D.
E.
F.
Disconnect the mains supply.
Remove the power cable from the back of the console.
Remove the back panel of the meter hood.
Unscrew the channel module bolts.
Now lift the channel up at the fader section, and then the other side. Carefully lift
the module until you see three connectors mounted to ribbon (flat) cables.
On the PCB part of the connector you will see two ejectors with which to eject the
cable header.
Installing the Channel Module
A.
B.
C.
Plug the three ribbon cable connectors into the PCB connector, ensuring that the
ejectors are securely replaced.
Slowly put the module down into the chassis starting from the rear.
Tighten all screws and reconnect the channel.
Servicing the Master Section
A.
B.
C.
D.
E.
F.
Disconnect the Airlab from the mains supply.
Remove all holding screws.
Lift the master section starting from the fader's side.
Remove the connector to the power PCB.
Lift the section upwards until you are able to remove the ribbon cable from the PCBs.
Reverse this procedure to re-mount the master section.
Airlab from D&R Phone +31 294 418014, email: [email protected]
Page 35
Installing/Servicing the Airlab
INSTALLING / ALIGNMENT OF THE TELCO MODULE
A.
Connect the telephone line with the 'TO PHONE' labeled female XLR and a phone appliance
to the female XLR labeled WALL. (See connector pages)
ALIGNMENT OF N-1 (MixMinus)
NOTE: This alignment has already taken place at the factory, however if you later on extend the
AIRLAB with another TELCO module you need to follow the next steps for a correct alignment of
the N-1 signal for every new installed TELCO module.
1.
2.
3.
4.
5.
6.
7.
8.
9.
10.
11.
Power down the AIRLAB.
Connect the TELCO module to the right connectors and horizontally lay down the module on
the surface of the other modules. Put an isolating material between the TELCO module and
the surface of the other modules to avoid damage and shorts. Now locate trimmer VR2 (close
to switch “LINE”)
Activate the 'LINE IN' switch on the TELCO module.
Connect an audio source to the LINE IN connector, this can be music or a signal generator.
Connect a headphone or power amp to the TELCO SEND CINCH + connector.
Check again if there's no short between PCB of the TELCO module and the surface it's put on.
Power up the AIRLAB.
Move the fader to the 0 dB position. Press the ON switch. Press the PROGRAM switch.
CHECK if the CRM outputs this LINE IN signal (No CRM select switches are active) to be
sure that you have correctly connected and routed your source.
Now adjust the trimmer VR2 to a position where a minimum of signal is heard out of the
TELCO OUT Cinch + connector.
If you need to adjust the RC balance continue with step 1 of the procedure described below.
Otherwise power down the console and install the module again properly.
ADJUSTMENT OF SIDETONE OR R/C BALANCE
The R/C is a one time only adjustment. Only in those situations where the TELCO module is
connected to another telephone line a repeated adjustment could be necessary.
NOTE: The R/C balance trimming can only be performed after you have correctly followed the N-1
alignment procedure.
1.
2.
3.
4.
5.
6.
7.
8.
Power down the AIRLAB.
Connect the TELCO module to the right connectors and horizontally lay down the module on
the surface of the other modules. Put an isolating material between the TELCO module and
the surface of the other modules to avoid damage and shorts.
Connect an audio source to one of the modules and activate the SUB switch only!!
Connect the telephone system to the TELCO module’s WALL connector.
Connect a Phone appliance to the “TO PHONE” connector.
Check if there is no short between PCB of the TELCO module and the surface it is put on.
Power up the AIRLAB.
Now dial on the connected Phone appliance a number outside the building.
Airlab from D&R Phone +31 294 418014, email: [email protected]
Page 36
Installing/Servicing the Airlab
9.
10.
11.
12.
13.
14.
Move the TELCO modules fader to its 0 dB position. Press the ON switch and activate the
PROG and SUB switch only. The LINE IN switch should be off (up).
CHECK if the CRM outputs this PHONE IN signal coming from the PROG buss, (No CRM
select switches are active) to be sure that you have correctly connected and routed your
source.
Now open the fader on the channel where you have connected your audio and Press the ON
switch on that channel.
Now you shall hear the audio signal through the TELCO module that is fed from that channel.
Now adjust the front panel trimmer VR1 (labeled R-BAL) to a minimum audio position and look
for the best combination of C jumper settings and trimmer position.
Power down the console and install the module again properly.
As long as the hybrid remains connected to the same "Phone Company", no changes need to be made to
this setup. If more TELCO modules need to be aligned the same capacitor value shall be used for all
modules so front panel trimming is the only trimming that is left to do for the other modules.
Try to by-pass the in house telephone system if possible. Otherwise it will be extremely difficult to achieve
a good alignment. A direct connection with the incoming phone company gives best results.
NOTE: INSTALLATION OF NEW (EXTRA) MODULES
When installing new (extra) modules in your Airlab it's necessary to re-adjust the internal power supply
voltages to guarantee a stable performance at all times.
More current is taken from the internal power supply because you have put in more modules now. It's
necessary to adjust the power supply voltage to a precise level of 18 volts for both the positive and
negative rails with all modules connected.
Adjustment is performed on the power supply PCB mounted on the bottom of the console located beneath
the master section.
Power supply voltage is measured across the output terminals of the power supply PCB inside the console.
NOTE: If the power supply voltage is not adjusted to 18 volts again, it may be possible that
certain logic functions may not work properly at all times.
Airlab from D&R Phone +31 294 418014, email: [email protected]
Page 37
How to program the Airlab
13
HOW TO PROGRAM THE AIRLAB
As you might have noticed the Airlab has a LCD in the center
section of the master panel with a number of switches
positioned below that display.
If you turn on the Airlab you'll notice the following text in the
display.
00:00:00
TIMER
This is the menu that's normally active. But before we go
into this menu we need to program the Airlab conform to your requirements. This can be done without
opening the frame. Very convenient, isn't it?
BEFORE YOU START TAKE NOTICE OF THE FOLLOWING INFORMATION
To save all the work you've done you simply hit the ENTER switch and all settings are stored in the
internal memory of the Airlab. If you leave the modules set-up section with the ESC switch, all
previously stored data (before you changed it) will still be active.
MAIN MENUS
To leave the timer menu you have to press the UP or DOWN switches in the center of the programming
area. If you do this you'll notice the following four main menus.
TIMER (default)
MODULE SETTINGS
MASTER SETTINGS
SYSTEM
The sequence of these main menus can be different whether you hit the UP or DOWN button, but it will
never be more than these four activities.
13.1 MODULE SETTINGS
LINE A ENABLES START TIMER
To see what’s under these names you hit the ENTER switch.
Lets go to MODULE SETTINGS first and then hit ENTER.
The following display on the right will be shown:
This option allows you to select one or more modules, which
need to be able to activate the internal TIMER when in Line A
input position.
LineA Timerstrt?
Toggle by SELECT
HOW TO PROGRAM
The SELECT switches in the modules have a dual function. They select the module you are
programming and at the same time you can toggle between starting the timer (LED on) and not starting
the timer (LED off) in that module. This is a very quick way of programming.
If you have already programmed several modules, the moment you enter this menu the LED’s located
near the SELECT switch will light up on those modules that are programmed to start the TIMER (when
the fader is up or the ON switch is activated).
Airlab from D&R Phone +31 294 418014, email: [email protected]
Page 38
How to program the Airlab
LINE B ENABLES START TIMER
To enter the next programming possibility you simply hit the
DOWN button again and you'll see a new item. See on the
right what the LCD shows:
This option allows you to select one or more modules, which
need to be able to activate the internal TIMER when in Line B
input position.
LineB Timerstrt?
Toggle by SELECT
HOW TO PROGRAM
The SELECT switches in the modules have a dual function. They select the module you are programming
and at the same time you can toggle between the active and not active setting. This is a very quick way of
programming this function. If you have already programmed several modules, the moment you enter this
menu again the LED’s located near the SELECT switch will light up, on those modules that are
programmed to start the TIMER.
MIC ENABLES TIMER START
To enter the next programming possibility you simply hit the
DOWN button again and you will see a new item. See on the
right what the LCD shows:
This option allows you to select one or more modules, which
need to be able to activate the internal TIMER when in Mic
input position. Not available for Telco Module.
Mic. Timerstrt?
Toggle by SELECT
HOW TO PROGRAM
The SELECT switches in the modules have a dual function. They select the module you are programming
and at the same time you can toggle between the active and not active setting. This is a very quick way of
programming this function. If you have already programmed several modules, the moment you enter this
menu again the LED’s located near the SELECT switch will light up, on those modules that are starting the
TIMER
LINE A ENABLES START
To enter the next programming possibility you simply hit the
DOWN button again and you will see a new item. See on the
right what the LCD shows:
This option allows you to select one or more modules, which
need to be able to give a start pulse, when set in Line A input
mode. Always on for Telco module.
LineA Start?
Toggle by SELECT
HOW TO PROGRAM
The SELECT switches in the modules have a dual function. They select the module you are programming
and at the same time you can toggle between the active and not active setting. This is a very quick way of
programming this function. If you have already programmed several modules, the moment you enter this
menu again the LED’s located near the SELECT switch will light up on the modules that are enabled to
trigger the fader start.
Airlab from D&R Phone +31 294 418014, email: [email protected]
Page 39
How to program the Airlab
LINE B ENABLES START
To enter the next programming possibility you simply hit the
DOWN button again and you will see a new item. See on the
right what the LCD shows:
This option allows you to select one or more modules, which
need to be able to give a start, when set in Line B input mode.
Always on for Telco module.
LineB Start?
Toggle by SELECT
HOW TO PROGRAM
The SELECT switches in the modules have a dual function. They select the module you are programming
and at the same time you can toggle between the active and not active setting. This is a very quick way of
programming this function. If you have already programmed several modules, the moment you enter this
menu again the LED’s located near the SELECT switch will light up on the modules that are enabled for
the Line B position to trigger the fader start.
MIC ENABLES START
To enter the next programming possibility you simply hit the
DOWN button again and you will see a new item. See on the
right what the LCD shows:
This option allows you to select one or more modules, which
need to be able to give a start pulse, when set in Mic input
mode. Not available for Telco Module.
Mic. Start?
Toggle by SELECT
HOW TO PROGRAM
The SELECT switches in the modules have a dual function. They select the module you are programming
and at the same time you can toggle between the active and not active setting. This is a very quick way of
programming this function. If you have already programmed several modules, the moment you enter this
menu again the LED’s located near the SELECT switch will light up on the modules that are enabled to
trigger the fader start when the MIC input is selected.
FADER ACTIVATES START
To enter the next programming possibility you simply hit the
DOWN button again and you will see a new item. See on the
right what the LCD shows:
This option allows you to select one or more modules, which
need to be able to give a start pulse when the fader is
opened. Always off for Telco module.
Start by Fader?
Toggle by SELECT
HOW TO PROGRAM
The SELECT switches in the modules have a dual function. They select the module you are programming
and at the same time you can toggle between the active and not active setting. This is a very quick way of
programming this function. If you have already programmed several modules, the moment you enter this
menu again the LED’s located near the SELECT switch will light up on the modules that are enabled to
generate a fader start.
Airlab from D&R Phone +31 294 418014, email: [email protected]
Page 40
How to program the Airlab
ON SWITCH GENERATES A START PULSE
To enter the next programming possibility you simply hit the
DOWN button again and you will see a new item. See on the
right what the LCD shows:
This option allows you to select one or more modules, which
need to be able to give a start pulse when the ON switch is
activated. Always on for Telco module.
Start by On?
Toggle by SELECT
HOW TO PROGRAM
The SELECT switches in the modules have a dual function. They select the module you are programming
and at the same time you can toggle between the active and not active setting. This is a very quick way of
programming this function. If you have already programmed several modules, the moment you enter this
menu again the LED’s located near the SELECT switch will light up on the modules that are enabled to
generate a “start” by way of the ON switch.
CUE SWITCH GENERATES A START PULSE
To enter the next programming possibility you simply hit the
DOWN button again and you will see a new item. See on the
right what the LCD shows:
This option allows you to select one or more modules, which
need to be able to give a start pulse when the CUE switch is
activated. Always on for Telco module.
Start by Cue?
Toggle by SELECT
HOW TO PROGRAM
The SELECT switches in the modules have a dual function. They select the module you are programming
and at the same time you can toggle between the active and not active setting. This is a very quick way of
programming this function. If you have already programmed several modules, the moment you enter this
menu again the LED’s located near the SELECT switch will light up on the modules that are enabled to
generate a start by way of the CUE switch.
PULSE OR CONTINUE ON START CONNECTOR
To enter the next programming possibility you simply hit the
DOWN button again and you will see a new item. See on the
right what the LCD shows:
This option allows you to set the type of start signal on the
Start jack of one or more modules. You can choose between
Pulse and Continues. Always Continues for Telco module.
Pulse */ Cont 0?
Toggle by SELECT
HOW TO PROGRAM
The SELECT switches in the modules have a dual function. They select the module you are programming
and at the same time you can toggle between the active and not active setting. This is a very quick way of
programming this function. If you have already programmed several modules, the moment you enter this
menu again the LED’s located near the SELECT switch will light up on the modules that are giving a Pulse
on the start jack.
Airlab from D&R Phone +31 294 418014, email: [email protected]
Page 41
How to program the Airlab
REMOTE CUE POSSIBLE IN LINE A MODE
To enter the next programming possibility you simply hit the
DOWN button again and you will see a new item. See on the
right what the LCD shows:
This option allows you to set if the CUE must be activated by
an incoming remote on one or more modules, when set in
Line A input mode.
LineA Rem. Cue?
Toggle by SELECT
HOW TO PROGRAM
The SELECT switches in the modules have a dual function. They select the module you are programming
and at the same time you can toggle between the active and not active setting. This is a very quick way of
programming this function. If you have already programmed several modules, the moment you enter this
menu again the LED’s located near the SELECT switch will light up on the modules that are capable of
activating the CUE by a remote switch.
REMOTE CUE POSSIBLE IN LINE B MODE
To enter the next programming possibility you simply hit the
DOWN button again and you will see a new item. See on the
right what the LCD shows:
This option allows you to set if the CUE must be activated by
an incoming remote on one or more modules, when set in
Line B input mode.
LineB Rem. Cue?
Toggle by SELECT
HOW TO PROGRAM
The SELECT switches in the modules have a dual function. They select the module you are programming
and at the same time you can toggle between the active and not active setting. This is a very quick way of
programming this function. If you have already programmed several modules, the moment you enter this
menu again the LED’s located near the SELECT switch will light up on the modules that are programmed
to activate the CUE by a remote switch in line B input mode.
REMOTE CUE POSSIBLE IN MIC MODE
To enter the next programming possibility you simply hit the
DOWN button again and you will see a new item. See on the
right what the LCD shows:
This option allows you to set if the CUE must be activated by
an incoming remote on one or more modules, when set in
Mic input mode. This option is necessary for COUGH/COMM.
Not available for Telco Module.
Mic. Rem. Cue?
Toggle by SELECT
HOW TO PROGRAM
The SELECT switches in the modules have a dual function. They select the module you are programming
and at the same time you can toggle between the active and not active setting. If you had already
programmed several modules, the moment you enter this menu again the LED’s located near the SELECT
switch will go on, on those modules that are capable of activating the CUE by a remote switch when the
MIC input is selected.
Airlab from D&R Phone +31 294 418014, email: [email protected]
Page 42
How to program the Airlab
WHICH CHANNEL IS YOUR DJ CHANNEL
To enter the next programming possibility you simply hit the
DOWN button again and you will see a new item. See on the
right what the LCD shows:
This option allows you to set one or more modules in DJ
mode. Not available for Telco Module.
DJ. Module?
Toggle by SELECT
HOW TO PROGRAM
The SELECT switches in the modules have a dual function. They select the module you are programming
and at the same time you can toggle between the active and not active setting. This is a very quick way of
programming this function. If you have already programmed several modules, the moment you enter this
menu again the LED’s located near the SELECT switch will light up on the modules that are set in DJ
mode.
ON WHICH CHANNEL IS YOUR ANNOUNCER MIC
To enter the next programming possibility you simply hit the
DOWN button again and you will see a new item. See on the
right what the LCD shows:
This option allows you to set one module in Announcer mode.
Note: you can't select more than one Announcer module.
Not available for Telco Module.
Ann. Module?
Toggle by SELECT
HOW TO PROGRAM
The SELECT switches in the modules have a dual function. They select the module you are
programming and at the same time you can toggle between the active and not active setting. This is a
very quick way of programming this function. If you have already programmed several modules, the
moment you enter this menu again the LED’s located near the SELECT switch will light up on the
modules that are programmed to be an Announcer module.
ON WHICH CHANNEL IS YOUR STUDIO MIC
To enter the next programming possibility you simply hit the
DOWN button again and you will see a new item. See on the
right what the LCD shows:
This option allows you to set one or more modules in Studio
mode. Not available for Telco Module.
Studio Module?
Toggle by SELECT
HOW TO PROGRAM
The SELECT switches in the modules have a dual function. They select the module you are
programming and at the same time you can toggle between the active and not active setting. This is a
very quick way of programming this function. If you have already programmed several modules, the
moment you enter this menu again the LED’s located near the SELECT switch will light up on the
modules that are programmed to handle the Studio MIC input.
Airlab from D&R Phone +31 294 418014, email: [email protected]
Page 43
How to program the Airlab
ON AIR-1 ACTIVE FOR LINE A
To enter the next programming possibility you simply hit the
DOWN button again and you will see a new item. See on
the right what the LCD shows:
This option allows you to set one or more modules to toggle
the ON-AIR-1 relay, when in Line A input mode.
LineA On Air-1?
Toggle by SELECT
HOW TO PROGRAM
The SELECT switches in the modules have a dual function. They select the module you are programming
and at the same time you can toggle between the active and not active setting. This is a very quick way of
programming this function. If you have already programmed several modules, the moment you enter this
menu again the LED’s located near the SELECT switch will light up on the modules that are toggling the
ON-AIR 1 relay when line A is selected.
ON AIR-1 ACTIVE FOR LINE B
To enter the next programming possibility you simply hit the
DOWN button again and you will see a new item. See on
the right what the LCD shows:
This option allows you to set one or more modules to toggle
the ON-AIR-1 relay, when in Line B input mode.
LineB On Air-1?
Toggle by SELECT
HOW TO PROGRAM
The SELECT switches in the modules have a dual function. They select the module you are programming
and at the same time you can toggle between the active and not active setting. This is a very quick way of
programming this function. If you have already programmed several modules, the moment you enter this
menu again the LED’s located near the SELECT switch will light up on the modules that are toggling the
ON-AIR 1 relay when line B is selected.
ON AIR-1 ACTIVE FOR MIC
To enter the next programming possibility you simply hit the
DOWN button again and you will see a new item. See on
the right what the LCD shows:
This option allows you to set one or more modules to toggle
the ON-AIR-1 relay, when in Mic input mode. Not available
for Telco Module.
MIC On Air-1?
Toggle by SELECT
HOW TO PROGRAM
The SELECT switches in the modules have a dual function, they select the module you are programming
and at the same time you can toggle between the active and not active setting. This is a very quick way of
programming this function. If you had already programmed several modules, the moment you enter this
menu again the LED’s located near the SELECT switch will go on, on those modules that are toggling the
ON-AIR 1 relay when MIC is selected.
Airlab from D&R Phone +31 294 418014, email: [email protected]
Page 44
How to program the Airlab
ON AIR-2 ACTIVE FOR LINE A
To enter the next programming possibility you simply hit the
DOWN button again and you will see a new item. See on
the right what the LCD shows:
This option allows you to set one or more modules to toggle
the ON-AIR-2 relay, when in Line A input mode.
LineA On Air-2?
Toggle by SELECT
HOW TO PROGRAM
The SELECT switches in the modules have a dual function. They select the module you are programming
and at the same time you can toggle between the active and not active setting. This is a very quick way of
programming this function. If you have already programmed several modules, the moment you enter this
menu again the LED’s located near the SELECT switch will light up on the modules that are toggling the
ON-AIR 2 relay when line A is selected.
ON AIR-2 ACTIVE FOR LINE B
To enter the next programming possibility you simply hit the
DOWN button again and you will see a new item. See on
the right what the LCD shows:
This option allows you to set one or more modules to toggle
the ON-AIR-2 relay, when in Line B input mode.
LineB On Air-2?
Toggle by SELECT
HOW TO PROGRAM
The SELECT switches in the modules have a dual function. They select the module you are programming
and at the same time you can toggle between the active and not active setting. If you have already
programmed several modules, the moment you enter this menu again the LED’s located near the SELECT
switch will light up on the modules that are toggling the ON-AIR 2 relay when line B is selected.
ON AIR-2 ACTIVE FOR MIC
To enter the next programming possibility you simply hit the
DOWN button again and you will see a new item. See on
the right what the LCD shows:
This option allows you to set one or more modules to toggle
the ON-AIR-1 relay, when in Mic A input mode. Not
available for Telco Module.
Mic OnAir-2?
Toggle by SELECT
HOW TO PROGRAM
The SELECT switches in the modules have a dual function. They select the module you are programming
and at the same time you can toggle between the active and not active setting. If you have already
programmed several modules, the moment you enter this menu again the LED’s located near the SELECT
switch will light up on the modules that are toggling the ON-AIR 2 relay when MIC is selected.
Airlab from D&R Phone +31 294 418014, email: [email protected]
Page 45
How to program the Airlab
ON AT START UP
To enter the next programming possibility you simply hit
the DOWN button again and you will see a new item. See
on the right what the LCD shows:
This option allows you to set one or more modules to be
default ON when powering up the console.
On at Power up?
Toggle by SELECT
HOW TO PROGRAM
The SELECT switches in the modules have a dual function. They select the module you are programming
and at the same time you can toggle between the active and not active setting. This is a very quick way of
programming this function. If you have already programmed several modules, the moment you enter this
menu again the LED’s located near the SELECT switch will light up on the modules that are turning to their
ON mode when the power comes up.
MIC CONNECTED AT LINE A
To enter the next programming possibility you simply hit the
DOWN button again and you will see a new item. See on
the right what the LCD shows:
This option allows you to hook up a Mic to Line A on one or
more modules. The COUGH/COMMUNICATION feature
automatically becomes available when the module is in
Line A mode. Not available for Telco Module.
MIC at Line A?
Toggle by SELECT
HOW TO PROGRAM
The SELECT switches in the modules have a dual function. They select the module you are programming
and at the same time you can toggle between the active and not active setting.
This is a very quick way of programming this function. If you have already programmed several modules,
the moment you enter this menu again the LED’s located near the SELECT switch will light up on the
modules that are assigned for MIC-mode in LINE A.
MIC CONNECTED AT LINE B
To enter the next programming possibility you simply hit the
DOWN button again and you will see a new item. See on
the right what the LCD shows:
This option allows you to hook up a Mic to Line B on one or
more modules. The COUGH/COMMUNICATION feature
automatically becomes available when the module is in
Line B mode. Not available for Telco Module.
MIC at Line B?
Toggle by SELECT
HOW TO PROGRAM
The SELECT switches in the modules have a dual function. They select the module you are programming
and at the same time you can toggle between the active and not active setting. This is a very quick way of
programming this function. If you have already programmed several modules, the moment you enter this
menu again the LED’s located near the SELECT switch will light up on the modules that are assigned for
MIC-mode in LINE B.
Airlab from D&R Phone +31 294 418014, email: [email protected]
Page 46
How to program the Airlab
REMOTE ON POSSIBLE IN MIC MODE
To enter the next programming possibility you simply hit the
DOWN button again and you will see a new item. See on
the right what the LCD shows:
This allows you to operate the ON switch on one or more
selected modules by corresponding remote, when the Mic
input is selected. Not available for Telco Module.
MIC Rem. On?
Toggle by SELECT
HOW TO PROGRAM
The SELECT switches in the modules have a dual function. They select the module you are programming
and at the same time you can toggle between the active and not active setting. If you have already
programmed several modules, the moment you enter this menu again the LED’s located near the SELECT
switch will light up on the modules that are capable of activating the ON by a remote switch when the MIC
input is selected.
REMOTE ON POSSIBLE IN LINE A MODE
To enter the next programming possibility you simply hit the
DOWN button again and you will see a new item. See on
the right what the LCD shows:
This allows you to operate the ON switch on one or more
selected modules by the corresponding remote, when the
Line A input is selected. Always off for Telco module.
LineA Rem. On?
Toggle by SELECT
HOW TO PROGRAM
The SELECT switches in the modules have a dual function. They select the module you are programming
and at the same time you can toggle between the active and not active setting. This is a very quick way of
programming this function. If you have already programmed several modules, the moment you enter this
menu again the LED’s located near the SELECT switch will light up on the modules that are capable of
activating the ON by a remote switch.
REMOTE ON POSSIBLE IN LINE B MODE
To enter the next programming possibility you simply hit the
DOWN button again and you will see a new item. See on
the right what the LCD shows:
This allows you to operate the ON switch on one or more
selected modules by the corresponding remote, when the
Line B input is selected. Always off for Telco module.
LineB Rem. On?
Toggle by SELECT
HOW TO PROGRAM
The SELECT switches in the modules have a dual function. They select the module you are programming
and at the same time you can toggle between the active and not active setting. This is a very quick way of
programming this function. If you have already programmed several modules, the moment you enter this
menu again the LED’s located near the SELECT switch will light up on the modules that are capable of
activating the ON by a remote switch in line B input mode.
SWITCH START
To enter the next programming possibility you simply hit the
DOWN button again and you will see a new item. See on
the right what the LCD shows:
With this option active the module is always ON and
operation On-switch will only trigger the start-remote. Not
available for Telco Module.
Switch Start?
Toggle by SELECT
HOW TO PROGRAM
The SELECT switches in the modules have a dual function. They select the module you are programming
and at the same time you can toggle between the active and not active setting. This is a very quick way of
programming this function. If you have already programmed several modules, the moment you enter this
menu again the LED’s located near the SELECT switch will light up on the modules that are capable of
Switch Start.
Airlab from D&R Phone +31 294 418014, email: [email protected]
Page 47
How to program the Airlab
IMPORTANT INFORMATION
To save all the work you have done you simply hit the ENTER switch and all settings are stored
in the internal memory of the Airlab.
Pressing the ESC switch instead will discard all the changed settings in the last session.
You have now completed the modules set-up and it is now time to go to the Master settings.
Airlab from D&R Phone +31 294 418014, email: [email protected]
Page 48
How to program the Airlab
13.2 MASTER SETTINGS
To enter this part of the programming hit the EXIT button and you will see that the LCD returns to its
TIMER menu.
Now hit the UP or DOWN switch again until you see the text MASTER SETTINGS. This brings you into the
master settings menu. Now push the ENTER switch to enter the four master programming possibilities.
AUTO CUE RESET
Use the YES and NO button to switch 'Auto cue Reset'
option on and off.
HOW TO PROGRAM
With the YES and NO switches you can activate or deactivate this option. Don't forget to confirm changes you
made in software with the enter switch.
CUE TO CRM
CUE to CRM is an option, which enables you to route the
CUE signal to the CRM speakers.
Auto CUE Reset?
YES
CUE to CRM?
HOW TO PROGRAM
With the YES and NO switches you can activate or deactivate this option. Don't forget to confirm changes you
made in software with the enter switch.
YES
AUTO COMMUNICATION
When this feature is activated you can create a
communication link from a remotely connected SiCo box to
an announcer module.
To make this work the 'Mic Rem. CUE' option needs to be
activated.
Auto Comm?
YES
HOW TO PROGRAM
With the YES and NO switches you can activate or de-activate this option. Don't forget to confirm changes
you made in software with the enter switch.
RS232
The RS232 option enables you to connect the Airlab to a
PC. Basically The Airlab software is a graphical user
interface version of the software structure inside the Airlab.
Enable RS 232?
YES
HOW TO PROGRAM
With the YES and NO switches you can activate or deactivate this option. Don't forget to confirm changes you made in software with the enter switch.
IMPORTANT INFORMATION
To save all the work you have done you simply hit the ENTER switch and all settings are stored
in the internal memory of the Airlab.
Pressing the ESC switch instead will discard all the changed settings in the last session.
Airlab from D&R Phone +31 294 418014, email: [email protected]
Page 49
How to program the Airlab
13.3 SYSTEM SETUP
You have now completed the master set-up and it is now time to go to the System settings. To enter this
part of the programming hit the EXIT button to leave the master settings without saving changes or hit the
ENTER switch to leave the master settings with saving changes.
The System menu consists out of 5 submenus, which are:
CONFIGURATION
RECALL
STORE
RECALL Memory CARD
STORE Memory CARD
(only visible with inserted memory card)
(only visible with inserted memory card)
Select these sub menus by pushing the UP or DOWN buttons.
CONFIGURATION
The first item in the System menu is the configuration screen.
This screen displays the current configuration of the Airlab.
XX represents the number of Stereo modules available on the
console and YY represent the number of Telco modules
available on the console.
RECALL
In the Recall menu you can recall a stored setup from the
internal Airlab memory.
By pressing the ENTER switch the data will be recalled from
the internal memory. Subsequently pressing the ESC switch,
the Recall menu will be left without recalling.
Airlab from D&R Phone +31 294 418014, email: [email protected]
Config
StMod:XX Telco:YY
Recall
Press Enter/Esc
Page 50
How to program the Airlab
STORE
In the Store menu you can store a setup to the internal
memory. By pressing the ENTER switch the actual data will
be stored to memory. Subsequently by pushing the ESC
switch, the Store menu will be left.
Store
Press Enter/Esc
RECALL Memory Card
In the Recall memory card menu you can recall a stored
setup from a Memory card. By pressing the ENTER switch
the actual data will be recalled from an inserted memory card.
Subsequently by pushing the ESC switch the Recall Memory
card menu will be left.
Recall Mem. Card
STORE Memory Card
In the Store Memory Card menu you can store a set-up to an
inserted memory card. By pressing the ENTER switch the
actual data will be stored to an inserted Memory Card.
Subsequently by pushing the ESC switch the Store Memory
card menu will be left.
Store Mem. Card
Press Enter/Esc
Press Enter/Esc
All the above explained programming and storing of data can be performed on a Windows PC. You need to
connect the RS232 SubD9 connector of the Airlab to the RS232 connector of your PC and load the Airlab
software. All module and master programming can be dealt with on one PC screen. In this way you will
have a total view of your settings on one screen. This can be edited and when you sorted out all your
settings it can be downloaded to the Airlab’s memory and subsequently stored on a memory card.
Airlab from D&R Phone +31 294 418014, email: [email protected]
Page 51
How to program the Airlab
13.4 TIMER
As earlier mentioned the Airlab has a built in Timer, which is practical and easy to use.The Timer menu
is the basic menu that the Airlab always shows.
To activate the timer it is necessary to first program the modules and make up your mind which
modules and in which mode they should trigger the Timer.
Any module that has been programmed to start the timer shall trigger the timer and the clock is
running, reading from left to right: hours, minutes and seconds.
The moment you pull down a fader or switch an ON switch off the timer stops showing the exact time
the module has been active.
As soon as you open the module again, the timer will be reset it and starts all over again.
The Timer can also be started and stopped by the ENTER switch.
It goes like this:
1. With ENTER the timer will be reset and starts or continues to run.
2. With ESC the timer will be reset and when it runs it continues to do so.
00:00:00
TIMER
Airlab from D&R Phone +31 294 418014, email: [email protected]
Page 52
How to program the Airlab
13.5 MENU DIAGRAM
The menu diagram displays the menu structure as it is programmed in the Airlab.
Timer
Module Settings
Master Settings
System
|
LineA Timerstrt?
|
LineB Timerstrt?
|
Mic. Timerstrt?
|
LineA Start?
|
Line B Start?
|
Mic. Start?
|
Start by Fader?
|
Start by On?
|
Start by Cue?
|
Puls */Cont 0 ?
|
LineA Rem. Cue?
|
LineB Rem. Cue?
|
Mic. Rem. Cue?
|
DJ. Module?
|
Ann. Module?
|
Studio Module?
|
LineA On Air-1?
|
LineB On Air-1?
|
Mic. On Air-1?
|
LineA On Air-2?
|
LineB On Air-2?
|
Mic. On Air-2?
|
ON at Power up?
|
MIC at LineA?
|
Mic at LineB?
|
MIC Rem. On?
|
LineA Rem. On?
|
LineB Rem. On?
|
Switch Start?
|
Auto Cue Reset?
|
CUE to CRM?
|
Auto Comm.
|
Enable RS232?
|
Config
|
Recall
|
Store
|
Recall Mem. Card
|
Store Mem. Card
|
Eprom String
Airlab from D&R Phone +31 294 418014, email: [email protected]
Page 53
Windows Software
14
Windows Software
The RS232 communication option enables you to manage the Airlab programming from a remotely
connected PC. The main advantage is that this gives you a much better overview on all the available
settings that can be made. All the custom settings made can be saved in a file. That way you can create
you own presets.
The settings made can be saved to chipcard. Each user can have a personal chipcard with his or hers
customized setting for the Airlab.
14.1 INSTALLATION
The installation software comes on a 3.5" floppy disk. Please run the setup.exe file to begin the installation.
During the setup you can choose the path for the installation directory.
During the installation process a program folder will be created together with a desktop icon. From these
locations you can startup the application.
14.2 GETTING STARTED
Before you run the software be sure to connect the Airlab to the PC correctly. If this isn't
the case you'll see the following error message:
Clicking the OK button continues to startup the Airlab application but without any
software control.
The screen looks like this:
Figure 13: No
Airlab found
Figure 14: Airlab not connected
After you have connected the Airlab console correctly you have two options. You can reconnect to the
Airlab using the 'Connection' menu or you can reboot the application.
Airlab from D&R Phone +31 294 418014, email: [email protected]
Page 54
Windows Software
If the Airlab is connected correctly you'll see the following screen (Figure 15). You'll notice that the screen
is divided in multiple sections. Each section is individually discussed in this chapter.
Figure 15: Airlab Main Screen
Figure 16 displays a summary of all the modules in the Airlab.
Figure 16: Status bar
As you can see we can have a total of 16 modules in the Airlab. The configuration, as shown in the
second column, consists from 12 triple line modules and 2 Telco modules. The last two slots aren't
used in this case. The third column represents the status of the start remote on the rear side of each
channel.
The section displayed by Figure 17, displays the On Air status of the Airlab.
There's also a small window in this section, which displays the software version
present in the Airlab.
Figure 17: On Air
Status
Airlab from D&R Phone +31 294 418014, email: [email protected]
Page 55
Windows Software
Figure 18: Triple Module
Settings
Figure 19: Telco Module
Settings
Figure 18 and Figure 19 display the module settings for the Telco and the Line modules. Basically this is a
graphical overview of the menu structure in the Airlab. The graphical user interface allows you to make
changes very easily and very fast.
For a detailed overview off all module settings you can read section 13.1 of this manual.
The Master settings in the application are nearly identical to the Master setting of the Airlab. The main
difference is the fourth option.
The fourth Master Setting in the Airlab is the Enable 'RS232'
setting. This option enables or disables the COM port on the
rear side of the airlab.
The fourth Master Setting in the application is the 'Enable
Setup' setting. This option allows or denies users to enter the
menu of the Airlab from the console. This is a protection
feature.
For more detailed information on the Master Settings you can
read section 13.2 of this manual.
Figure 20: Master Settings
The Timer section (Figure 21) allows you to control the Timer
on the Airlab from the PC.
Figure 21: Timer
The Storage section (Figure 22) allows you to save the
changes you made in the Airlab memory or on a chipcard. The
'Save Card' button is only available when a chipcard is
inserted. The main advantage of the chipcard is that you can
make presets for multiple users. And thanks to the 'Enable
Setup' option you can make sure that they won't mess around
with the settings in the console.
Figure 22: Storage
The File => Save and the File => Open options allow you to save the changes you've made to one or more
files so that you can re-open them later again to restore your personal setting again.
Airlab from D&R Phone +31 294 418014, email: [email protected]
Page 56
Specifications
15
SPECIFICATIONS
INPUTS:
Mic inp. bal. 2 kOhm - 128 dBr (+/- 40 dB gain range plus 30 dB of trim range).
Line inp. bal 10 kOhm +/- 20 dB gain range.
Telco input (XLR) 10 kOhm bal. +4 dBu nominal.
CMRR: mic input max. gain: 1kHz 85 dB.
Line input max. gain 1 kHz 30 dB.
EQUALISATION:
+/- 12 dB @ 10 kHz shelving.
+/- 12 dB @ 1 kHz bell curve.
+/- 12 dB @ 60 Hz bell curve.
Low Cut: 80 Hz, 12 dB per octave (Mic only)
Low Cut: 200Hz, 6 dB per octave (Telco only).
High Cut: 8 kHz, 6 dB per octave (Telco only).
OUTPUTS:
Program left/right: +6 dBu electronically balanced (transformer balancing optional).
Sub: +6 dBu electronically balanced. (transformer balancing optional)
All other outputs: +6 dBu unbal.
OVERALL:
Frequency response: 20-20.000 Hz +/-0.5 dB.
Harmonic distortion: 0.035% (VCA in, 2nd harm).
Crosstalk: less than -90 dBr.
Noise: -86 dBr.
Headroom: +22 dB internal, 20 dB on outputs.
Mix-Minus rejection: @1 kHz -60 dB.
Channel fader attenuation: 1 kHz, 100 dB.
WEIGHT:
Airlab loaded with 16 modules: 50 kg (110 Ib).
DIMENSIONS
Drop though mounting 775 mm Width
590 mm Depth
When inserting the Airlab in its mounting hole first position the armrest side in the hole and slowly lower the
back side holding the wood ends on either side of the console. Mount the back panel after installation to
finish the job neatly.
Color scheme before 2002:
Front panels: RAL 7012 / 9016
Frame:
RAL 7016
Wood ends:
RAL 7042
Color scheme after 2002:
Front panels: GISPEN 103
Frame:
GISPEN 103
Wood ends:
GISPEN 103
Airlab from D&R Phone +31 294 418014, email: [email protected]
Page 57
SiCo Remote Unit
16
SICO REMOTE UNIT
The Airlab Sico Remote unit is designed to be the communication interface between the control room and
the announcer or guest. It has a built in headphone amp, a remote connector to be wired via a shielded
stereo cable to the related Airlab channel, and a very convenient CHOUGH/COMMUNICATION button.
We shall describe all functions in detail now.
COUGH/SIGNALLING IN MIC MODE
This useful feature has two important functions:
1. Cough/communication,
2. 'Mic-on'
1. Cough/Communication,
A shielded stereo cable has to be connected between the Sico remote unit and the Airlab input channel
that needs to be communicated to.
Using the push-button during broadcast, the announcer can temporarily mute the microphone in order to
cough (where the name comes from). At the same time his microphone will be routed to the cue system, in
order to give him the opportunity to communicate with the engineer/producer.
2. 'Mic-on',
When the channel is active a voltage is applied between Tip (+) and Sleeve (0V), which can be used to
activate a LED (red) (in this case the internal LED of the SiCo remote unit.
In addition to the localized 'mic-on' signaling, there is also a master signal in the master section. The ONAIR signaling outputs 1 and 2 offer the option of driving external red light indicators in the studio by way of
a relay.
The input jack of the Sico Remote unit needs to be wired to the master of the Airlab, Guest or Announcer
outputs or whatever suits your purpose mostly.
The output jack is a parallel jack to the input jack to simplify wiring to more than one SiCo remote unit in
the presentation room.
Airlab from D&R Phone +31 294 418014, email: [email protected]
Page 58
Director Unit
17
DIRECTOR UNIT
The Director is designed to be the answer for the need of the Station manager to manage the live
broadcast and have control over in and outputs as well as communication to all essential in and outputs of
the Airlab ON-AIR mixing console.
Figure 23: Director front and rear view
The director of the broadcast station can use the 'Director box'. By having this unit in front of him/her,
he/she is capable of sending verbal instructions by Mic to the engineer, announcer, Guests and Studio or
with one button to all outputs. There is also a Talkback output to and external output that can be used for
local situations.
Listening to Program outputs, SUB outputs, On-Air signals, CRM output, External inputs 1 and 2 is of
course possible.
Four Telco module incoming signals can be taken, talked to and muted if necessary. A standard 5-pole
XLR connector is provided for the headset. A separate Mic input and headphone output is also available.
Figure 24: Director
Two large On-Air LEDS are indicating that the Airlab console is ON-Air.
Level control for Headphone, Mic input and internal speaker are provided for. The back panel has 4
adjustments for the Telco levels and all interfacing with the Airlab.
An external power supply is part of the package
Warning: The director option is only supported by Airlabs build after 01-01-2005. All Airlabs
build before this date can be upgraded to support the Director. Please contact your dealer for
further information.
Airlab from D&R Phone +31 294 418014, email: [email protected]
Page 59
List of figures
18
LIST OF FIGURES
Figure 1: The connections on a module ................................................................................................ 20
Figure 2: The Master Section ................................................................................................................ 21
Figure 3: The connections on the Master Section ................................................................................. 26
Figure 4: Airlab Triple Module Jumper Locations .................................................................................. 31
Figure 5: Triple Module AUX Jumpersettings........................................................................................ 31
Figure 6: Triple Module MIC LC Jumpersettings ................................................................................... 31
Figure 7: Triple Module Phantom Power Jumpersettings...................................................................... 32
Figure 8: Triple Module EQ Jumpersettings .......................................................................................... 32
Figure 9: R.I.A.A connection on Triple module...................................................................................... 32
Figure 10: Airlab Telco Module Jumper Locations ................................................................................ 33
Figure 11: Telco Module AUX Jumpersettings ...................................................................................... 33
Figure 12: Telco Module C-Balance Setting .......................................................................................... 33
Figure 13: No Airlab found..................................................................................................................... 54
Figure 14: Airlab not connected............................................................................................................. 54
Figure 15: Airlab Main Screen ............................................................................................................... 55
Figure 16: Status bar ............................................................................................................................. 55
Figure 17: On Air Status ........................................................................................................................ 55
Figure 18: Triple Module Settings.......................................................................................................... 56
Figure 19: Telco Module Settings .......................................................................................................... 56
Figure 20: Master Settings..................................................................................................................... 56
Figure 21: Timer .................................................................................................................................... 56
Figure 22: Storage ................................................................................................................................. 56
Figure 23: Director front and rear view .................................................................................................. 59
Figure 24: Director ................................................................................................................................. 59
Airlab from D&R Phone +31 294 418014, email: [email protected]
Page 60
List of tables
19
LIST OF TABLES
Table 1: Airlab Triple Module Jumper settings ...................................................................................... 31
Table 2: Airlab Telco Module Jumper settings ...................................................................................... 33
Airlab from D&R Phone +31 294 418014, email: [email protected]
Page 61
Airlab User Questionnaire
20
AIRLAB USER QUESTIONNAIRE
Dear Airlab user,
We care very much about your opinion of our product, and would very much appreciate if you could
complete the following questionnaire, and return it to the address below. Please use the reverse, or
additional paper if required.
USER NAME ........................................................................................................................
ORGANIZATION ..................................................................................................................
ADDRESS ..............................................................................................................................
TOWN ....................................................................................................................................
POST CODE ..........................................................................................................................
COUNTRY .............................................................................................................................
EMAIL: [email protected]................................................................................................................
AIRLAB SERIAL NO:
..............................................................................................................................................
CONFIGURATION ..............................................................................................................
DEALER ..............................................................................................................................
HOW DID YOU HEAR ABOUT THE "AIRLAB"? (please circle)
(Dealer / Advertisement / Exhibition / Other user / Other)
WHAT JOURNALS DO YOU TAKE ON A REGULAR BASIS?
..............................................................................................................................................
WHAT IS YOUR OPINION OF THE PRICE/QUALITY OF THE 'AIRLAB'?
..............................................................................................................................................
WHAT PRICE WOULD YOU CONSIDER SUITABLE FOR THE 'AIRLAB'?
..............................................................................................................................................
ANY OTHER SUGGESTIONS?
..............................................................................................................................................
I REQUIRE INFORMATION ABOUT
..............................................................................................................................................
WHAT OTHER EQUIPMENT DO YOU USE?
..............................................................................................................................................
PLEASE SEND/FAX TO:
D&R Electronica Weesp bv, Rijnkade 15B, 1382 GS WEESP, The Netherlands
FAX: +31 294 416987 Email: [email protected]
Airlab from D&R Phone +31 294 418014, email: [email protected]
Page 62
Product Safety
21
PRODUCT SAFETY
This product is manufactured with the highest standards and is double checked in our quality control
department for reliability in the "HIGH VOLTAGE" section.
CAUTION
Never remove any panels, or open this equipment. No user serviceable parts inside. Equipment power
supply must be grounded at all times. Only use this product as described, in user manual or brochure. Do
not operate this equipment in high humidity or expose it to water or other liquids. Check the AC power
supply cable to assure secure contact. Have your equipment checked yearly by a qualified dealer service
center. Hazardous electrical shock can be avoided by carefully following the above rules.
PLEASE READ THE FOLLOWING INFORMATION VERY CAREFULLY
Especially in sound equipment on stage the following information is essential to know. Voltage and current
cause an electrical shock. Actually it's the current that causes the shock. In practice the higher the voltage
the higher the current will be and the higher the shock. But there is another thing to consider and it is
resistance. When the resistance in Ohms is high between two poles, the current will be low and visa versa.
All three of these; voltage, current and resistance are important in determining the effect of an electrical
shock.
However, the severity of a shock is primarily determined by the amount of current flowing
through a person.
A person can feel a shock because the muscles in a body respond to electric current. Current can also be
fatal when it causes the chest muscles to contract and stop breathing.
At what potential is current dangerous? Well the first feeling of current is a tingle at 0.001 Amp of current.
The current between 0.1 Amp and 0.2 Amp is fatal. Imagine that your home fuses of 16 Amp can handle
200 times more current than is necessary to kill.
How does resistance affect the shock a person feels? A typical resistance between your two hands "dry"
condition could be well over 100,000 Ohm. But if you are playing on stage your body is transpiring
extensively and your body resistance is lowered by more than 50%. This is a situation in which current can
easily flow.
Current will flow when there is a difference in ground potential between equipment on stage and in the P.A.
system. Please do check if there is any potential between the housing of the mics and the guitar synth
amps, which will be linked by your body on stage.
Imagine, a guitar in your hand and your lips close to the mic! A ground potential difference of above 10
volts is not unusual. In improperly wired buildings it can possibly be as high as 240 volts. Although
removing the ground wire sometimes cures a system hum, it'll create a very hazardous situation for the
performing musician.
Always earth all your equipment by the grounding pin in your mains plug Hum loops should be
only cured by proper wiring and isolation input/output transformers.
Replace fuses always with the same type and rating after the equipment has been turned off and
unplugged. If the fuse blows again you have an equipment failure. Do not use it again and return it to your
dealer for repair.
And last but not least be careful not to touch a person being shocked as you, yourself could also be
shocked. Once removed from the shock, have someone send for medical help immediately
Airlab from D&R Phone +31 294 418014, email: [email protected]
Page 63
Product Safety
Always keep the, on the previous page, mentioned information in mind when using electrically
powered equipment.
D&R ELECTRONICA B.V. WEESP
HEAD OFFICE
D&R Electronica Weesp b.v.
Rijnkade 15B
1382 GS WEESP
THE NETHERLANDS
Phone: +31 (294) 418 014*
Fax:
+31 (294) 416 987
Website: http//www.d-r.nl
E-mail: [email protected]
Airlab from D&R Phone +31 294 418014, email: [email protected]
Page 64
Declaration of Conformity
22
DECLARATION OF CONFORMITY
DECLARATION OF CONFORMITY
Manufacturers Name:
D&R Electronica Weesp b.v.
Manufacturers Address:
Rijnkade 15B
1382 GS Weesp
The Netherlands
Declares that the product
AIRLAB series
Conforms to the following product specifications:
EMC:
NEN-EN 55103-1
NEN-EN 55103-2
NEN-EN 55013-1
1995
1995
1994
Supplementary Information:
The product herewith complies with the requirements of the EMC Directive 89/336/EEC (1989)
as amended by the CE Marking Directive 93/68/EEC (1993).
D&R Electronica Weesp b.v.
Rijnkade 15 B
1382 GS WEESP
The Netherlands
President of Engineering
Airlab from D&R Phone +31 294 418014, email: [email protected]
Page 65
23
DISCLAIMER
Due to a policy of continuous product improvement, D&R Electronica Weesp B.V. reserves the right to
change specifications, appearance and performance without prior notice.
Since the use of this information, and the conditions by which the products are used are beyond the control
of D&R Electronica Weesp B.V., it is the obligation of the owner and/or the equipment operator to
determine the correct and safe selection, settings and conditions of use of the equipment and products.
To the extent that the law permits, any liability which may be incurred as a result of the use or future use of
a product manufactured or sold by D&R Electronica Weesp B.V. is limited to the cost of repairing or
replacing the failed product or component at the discretion of D&R Electronica Weesp B.V., either within,
or outside of warranty periods, and does not extend to any loss or damage which may be caused as a
consequence of misuse or failure of the equipment or products. D&R Electronica Weesp B.V. shall not in
any event be liable for economic lost of profits including without limitation any incidental or consequential
damage, expenses or other damages arising out of the use or inability to use the product and/or software
even if D&R Electronica Weesp B.V. has been advised of the possibility of such a damage or for any claim
by another party.
You agree to indemnify, hold harmless, and defend D&R Electronica Weesp B.V., its parent, and their
licensors, suppliers, officers, directors, employees, agents, affiliates, subsidiaries (collectively "Indemnified
Parties") from and against any and all liability incurred by or made against the Indemnified Parties in
connection with any claim arising from or related to your use.
Airlab from D&R Phone +31 294 418014, email: [email protected]
Page 66