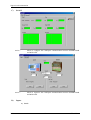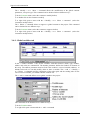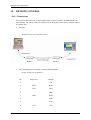
1
PLC Terminal
SUPERVISOR
User manual
SERAD SA
271, route des crêtes
44440 TEILLE – France
+33 (0)2 40 97 24 54
+33 (0)2 40 97 27 04
http://www.serad.fr
[email protected]
S-UM/EN
We reserve the right to make changes to all or part of the
Supervisor documentation
Table of Contents
1-
INTRODUCTION ....................................................................................................................................... 9
1-1- Description of SUPERVISOR .................................................................................................................... 9
Generality ................................................................................................................................................. 9
Performance.............................................................................................................................................. 9
Modularity ..................................................................................................................................................... 9
1-2- Description of SPL software..................................................................................................................... 10
Generality ............................................................................................................................................... 10
2-
INSTALLATION/STARTING................................................................................................................. 11
2-1- Environnemental consideration................................................................................................................ 11
2-2- Safety ........................................................................................................................................................ 11
2-3- Connections .............................................................................................................................................. 12
2-3-1- General explications ......................................................................................................................... 12
2-3-2- Supervisor......................................................................................................................................... 12
S640:....................................................................................................................................................... 12
S80:......................................................................................................................................................... 13
PC <-> SUPERVISOR cable :................................................................................................................ 13
2-4- Getting started .......................................................................................................................................... 14
3-
SPL SOFTWARE...................................................................................................................................... 15
3-1- Installation................................................................................................................................................ 15
3-1-1- System configuration........................................................................................................................ 15
3-1-2- Installation procedure ....................................................................................................................... 15
3-1-3- Upgrade from previous versions....................................................................................................... 16
3-2- Architecture .............................................................................................................................................. 16
3-2-1- Folders .............................................................................................................................................. 16
3-2-2- Project contents ................................................................................................................................ 17
3-3- Description ............................................................................................................................................... 17
3-3-1- Initial screen ..................................................................................................................................... 17
3-4- Menus and icons ....................................................................................................................................... 18
3-4-1- Project menu..................................................................................................................................... 18
3-4-2- Constants/Variables/Tasks menu...................................................................................................... 21
3-4-3- Debug menu...................................................................................................................................... 22
3-4-4- Communication menu....................................................................................................................... 28
3-4-5- Options menu.................................................................................................................................... 31
3-4-6- Help menu ........................................................................................................................................ 33
3-4-7- Configuration tab.............................................................................................................................. 33
A) Serial 1 .......................................................................................................................................... 34
B) Serial 2 .......................................................................................................................................... 34
C) Serial 3 .......................................................................................................................................... 35
D) Inputs............................................................................................................................................. 35
a)
Card : ....................................................................................................................................... 35
b)
Bloc 1 : .................................................................................................................................... 36
c)
Bloc 2 : .................................................................................................................................... 36
E) Outputs .......................................................................................................................................... 37
F)
Accessories.................................................................................................................................... 38
3-4-8- Global constants tab.......................................................................................................................... 38
3-4-9- Global variables tab .......................................................................................................................... 39
3-4-10- Tasks tab......................................................................................................................................... 40
R403
-2-
SERAD S.A.
Supervisor documentation
3-5- Editors ...................................................................................................................................................... 42
3-5-1- Basic task editor ............................................................................................................................... 42
3-5-2- Ladder task editor ............................................................................................................................. 43
4-
PROGRAMMATION LANGUAGE ...................................................................................................... 45
4-1- Introduction .............................................................................................................................................. 45
4-1-1- Description ....................................................................................................................................... 45
4-1-2- Memory plan of SUPERVISOR....................................................................................................... 45
4-2- Data .......................................................................................................................................................... 46
4-2-1- Global constants ............................................................................................................................... 46
4-2-2- Global variables................................................................................................................................ 46
4-2-3- Local variables.................................................................................................................................. 47
4-2-4- Convert data types ............................................................................................................................ 48
4-2-5- Numeric notations............................................................................................................................. 49
4-3- Tasks ......................................................................................................................................................... 49
4-3-1- Multitask principles .......................................................................................................................... 49
4-3-2- Task priority ..................................................................................................................................... 50
4-3-3- Management of task.......................................................................................................................... 50
4-3-4- Basic task structure........................................................................................................................... 51
Main program ......................................................................................................................................... 51
Subroutine............................................................................................................................................... 51
Branch to a label ..................................................................................................................................... 52
Operators ................................................................................................................................................ 52
a)
Arithmetical operators .............................................................................................................. 53
b)
Binary operators ....................................................................................................................... 53
c)
Unary operators ........................................................................................................................ 53
d)
Logical operators...................................................................................................................... 54
e)
Bits operators............................................................................................................................ 54
f)
String operators ........................................................................................................................ 54
g)
Relationship operators .............................................................................................................. 54
B) Tests .............................................................................................................................................. 54
a)
Simple tests............................................................................................................................... 54
b)
Multiple tests ............................................................................................................................ 55
c)
Loops........................................................................................................................................ 55
4-3-5- Event task structure .......................................................................................................................... 56
Events configuration............................................................................................................................... 56
Reading the events detected.................................................................................................................... 57
Clearing the events ................................................................................................................................. 57
Warnings................................................................................................................................................. 57
Example .................................................................................................................................................. 57
4-3-6- Ladder task structure ........................................................................................................................ 58
5-
PROGRAMMATION OF PLC................................................................................................................ 59
5-1- Basic task.................................................................................................................................................. 59
5-1-1- Digital inputs/outputs ....................................................................................................................... 59
A) Inputs reading................................................................................................................................ 59
B) Outputs writing.............................................................................................................................. 59
C) Outputs reading ............................................................................................................................. 59
D) Events handling............................................................................................................................. 60
E) State test ........................................................................................................................................ 60
5-1-2- Timings............................................................................................................................................. 60
A) Passive waiting.............................................................................................................................. 60
B) Active waiting ............................................................................................................................... 60
TIME ........................................................................................................................................................... 60
TIMER......................................................................................................................................................... 61
5-1-3- Events ............................................................................................................................................... 61
Signal or Diffuse and Wait Event................................................................................................................ 61
R403
-3-
SERAD S.A.
Supervisor documentation
Wait ............................................................................................................................................................. 62
5-1-4- Counters............................................................................................................................................ 62
Configuration............................................................................................................................................... 62
Clear ............................................................................................................................................................ 63
Read............................................................................................................................................................. 63
5-1-5- Enhanced PLC Function................................................................................................................... 63
Présentation........................................................................................................................................ 63
Utilisation du PLC ............................................................................................................................. 63
Exemple ............................................................................................................................................. 64
5-2- Ladder task ............................................................................................................................................... 65
5-2-1- Presentation ...................................................................................................................................... 65
5-2-2- Contacts, coils, timers and counters ................................................................................................. 65
Contacts ....................................................................................................................................................... 65
Coils ............................................................................................................................................................ 65
Counters up or down ................................................................................................................................... 65
Timer ........................................................................................................................................................... 66
5-2-3- Free contact and coil......................................................................................................................... 67
5-2-4- System bits........................................................................................................................................ 67
5-2-5- Task architecture............................................................................................................................... 67
6-
PROGRAMMATION OF SERIAL1/SERIAL2 COMMUNICATION PORTS ................................. 68
6-1- Introduction .............................................................................................................................................. 68
6-2- Opening a communication port ................................................................................................................ 68
6-3- Reading data............................................................................................................................................. 68
6-4- Writing data.............................................................................................................................................. 69
6-5- Close a communication port..................................................................................................................... 70
6-6- RS485 treatment ....................................................................................................................................... 70
6-7- Example: RTU Modbus driver.................................................................................................................. 70
7-
PROGRAMMATION OF DISPLAY/KEYBOARD .............................................................................. 73
7-1- Supervisor description .............................................................................................................................. 73
7-1-1- Supervisor 640 :............................................................................................................................... 73
7-1-2- Supervisor 80 :................................................................................................................................. 73
7-2- Operator functions.................................................................................................................................... 74
7-2-1- Screen ............................................................................................................................................... 74
7-2-2- Keyboard .......................................................................................................................................... 75
7-2-3- Edit ................................................................................................................................................... 75
7-2-4- Buzzer............................................................................................................................................... 76
7-2-5- Backlight .......................................................................................................................................... 76
7-2-6- Leds .................................................................................................................................................. 76
7-3- Keys .......................................................................................................................................................... 76
7-3-1- SUPERVISOR keys ......................................................................................................................... 76
7-4- Internals menus......................................................................................................................................... 77
7-4-1- General explications ......................................................................................................................... 77
7-4-2- Main menu........................................................................................................................................ 77
7-4-3- Parameters sub-menu........................................................................................................................ 78
7-4-4- Manual sub-menu ............................................................................................................................. 79
7-4-5- Variables sub-menu .......................................................................................................................... 79
7-4-6- Memory sub-menu............................................................................................................................ 80
7-4-7- Clock sub-menu................................................................................................................................ 80
7-4-8- Tasks sub-menu ................................................................................................................................ 81
8-
R403
OPERATOR AND INSTRUCTIONS LIST............................................................................................ 82
-4-
SERAD S.A.
Supervisor documentation
8-1- Program.................................................................................................................................................... 82
8-2- Arithmetical .............................................................................................................................................. 82
8-3- Mathematical ............................................................................................................................................ 82
8-4- Loops ........................................................................................................................................................ 83
8-5- Logical...................................................................................................................................................... 83
8-6- Test ........................................................................................................................................................... 83
8-7- Char string................................................................................................................................................ 83
8-8- PLC........................................................................................................................................................... 84
8-8-1- Logical inputs / outputs .................................................................................................................... 84
8-8-2- Timing .............................................................................................................................................. 84
8-8-3- Event handling.................................................................................................................................. 84
8-8-4- Counter ............................................................................................................................................. 85
8-9- Display / Keyboard ................................................................................................................................... 85
8-9-1- Supervisor 80 and 640 ...................................................................................................................... 85
8-9-2- Supervisor 640.................................................................................................................................. 85
8-10- Task handling ......................................................................................................................................... 85
8-11- Communication....................................................................................................................................... 86
8-12- Flash, Security and other functions ........................................................................................................ 86
8-13- Conversion.............................................................................................................................................. 86
8-14- Alphabetic list ......................................................................................................................................... 87
8-14-1- Addition (+) .................................................................................................................................... 87
8-14-2- Subtraction (-)................................................................................................................................. 87
8-14-3- Multiplication (*)............................................................................................................................ 87
8-14-4- Division (/)...................................................................................................................................... 87
8-14-5- Lower (<)........................................................................................................................................ 88
8-14-6- Lower or equal (<=)........................................................................................................................ 88
8-14-7- Left shift (<<) ................................................................................................................................. 88
8-14-8- Different (<>) ................................................................................................................................. 88
8-14-9- Affect/Equal (=).............................................................................................................................. 89
8-14-10- Greater (>) .................................................................................................................................... 89
8-14-11- Greater or equal (>=)Diff_rent ..................................................................................................... 89
8-14-12- Right shift (>>) ............................................................................................................................. 89
8-14-13- Exponent (^) ................................................................................................................................. 90
8-14-14- ABS – Absolute value .................................................................................................................. 90
8-14-15- AND – Operator AND.................................................................................................................. 90
8-14-16- ARCCOS – Invert cosine.............................................................................................................. 90
8-14-17- ARCSIN – Invert Sine .................................................................................................................. 90
8-14-18- ASC – Convert char to ASCII ...................................................................................................... 91
8-14-19- ARCTAN – Invert tangent............................................................................................................ 91
8-14-20- BACKLIGHT – S640 in stand by................................................................................................. 91
8-14-21- BEEP – Brief sound...................................................................................................................... 92
8-14-22- BOX – Draw box.......................................................................................................................... 92
8-14-23- BUZZER – Continuous sound...................................................................................................... 92
8-14-24- CALL – Subroutine call................................................................................................................ 93
8-14-25- CASE – Multiple tests .................................................................................................................. 93
8-14-26- CARIN – Input buffer state .......................................................................................................... 93
8-14-27- CAROUT – Output buffer state.................................................................................................... 93
8-14-28- CHR$ - Convert ASCII to char .................................................................................................... 94
8-14-29- CLEARCOUNTER – Counter clear............................................................................................. 94
8-14-30- CLEARIN – Clear input buffer .................................................................................................... 94
8-14-31- CLEAROUT – Clear output buffer .............................................................................................. 94
8-14-32- CLOSE – Close communication port ........................................................................................... 95
8-14-33- CLS – Clear screen ....................................................................................................................... 95
8-14-34- CLEARFLASH – Clear flash memory......................................................................................... 95
R403
-5-
SERAD S.A.
Supervisor documentation
8-14-35- COUNTER_S – Counter reading ................................................................................................. 95
8-14-36- CONTINUE – Continue task execution ....................................................................................... 95
8-14-37- COS - Cosine................................................................................................................................ 96
8-14-38- CURSOR – Print or clear the cursor............................................................................................. 96
8-14-39- CVL – Convert string to long integer ........................................................................................... 96
8-14-40- CVLR – Convert string to long reverse integer ............................................................................ 96
8-14-41- CVI – Convert string to integer .................................................................................................... 97
8-14-42- CVIR – Convert string to reverse integer ..................................................................................... 97
8-14-43- CRC – CRC16 .............................................................................................................................. 97
8-14-44- DATE$ - Current Date.................................................................................................................. 97
8-14-45- DELAY – Passive waiting............................................................................................................ 97
8-14-46- DIFFUSE – Event generation....................................................................................................... 98
8-14-47- DIV – Integer divide..................................................................................................................... 98
8-14-48- EDIT – Editing on operator panel................................................................................................. 98
8-14-49- EDIT$ ........................................................................................................................................... 99
8-14-50- END – Block end.......................................................................................................................... 99
8-14-51- EXIT SUB – Subroutine exit........................................................................................................ 99
8-14-52- EXP - Exponential ........................................................................................................................ 99
8-14-53- FLASHOK – Test flash memory ................................................................................................ 100
8-14-54- FLASHTORAM – Restore saved variables................................................................................ 100
8-14-55- FOR – FOR … NEXT loop ........................................................................................................ 100
8-14-56- FONT – Font selected................................................................................................................. 100
8-14-57- FORMAT$ ................................................................................................................................. 101
8-14-58- FRAC – Fractional part .............................................................................................................. 101
8-14-59- GETDATE – Current date .......................................................................................................... 101
8-14-60- GETEVENT – Events reading.................................................................................................... 102
8-14-61- GETTIME – Current time .......................................................................................................... 102
8-14-62- GOTO – Branch label................................................................................................................. 102
8-14-63- HALT – Stop a task .................................................................................................................... 102
8-14-64- HLINE – Draw horizontal line ................................................................................................... 103
8-14-65- ICALL – Call a sub-routine........................................................................................................ 103
8-14-66- IF - IF…Then…Else................................................................................................................... 103
8-14-67- INKEY– Read a key on the operator panel ................................................................................ 104
8-14-68- INP – Input reading .................................................................................................................... 104
8-14-69- INPB – 8 digital inputs reading .................................................................................................. 104
8-14-70- INPUT – Data reading................................................................................................................ 104
8-14-71- INPUT$ - Char string reading .................................................................................................... 105
8-14-72- INPW – 16 digital inputs reading ............................................................................................... 105
8-14-73- INSTR – Search a sub-string ...................................................................................................... 105
8-14-74- INT – Integer part ....................................................................................................................... 106
8-14-75- JUMP – Branch to label.............................................................................................................. 106
8-14-76- KEY – Last pressed key ............................................................................................................. 106
8-14-77- KEYDELAY – Delay before key repeat .................................................................................... 106
8-14-78- KEYREPEAT – Keyrepeat period ............................................................................................. 107
8-14-79- LCASE$ - Lowercases ............................................................................................................... 107
8-14-80- LED – Driving LEDs.................................................................................................................. 107
8-14-81- LEFT$ - String left part .............................................................................................................. 107
8-14-82- LEN– String length..................................................................................................................... 108
8-14-83- LOCATE – Cursor position........................................................................................................ 108
8-14-84- LOG - Logarithm........................................................................................................................ 108
8-14-85- LONGTOINTEGER – Convert a long integer to integer ........................................................... 108
8-14-86- LTRIM$ - Suppress the left spaces............................................................................................. 108
8-14-87- MID$ - String part ...................................................................................................................... 109
8-14-88- MOD - Modulus ......................................................................................................................... 109
8-14-89- MODIFYEVENT– Events configuration ................................................................................... 109
8-14-90- MKL$ - Convert long integer to string....................................................................................... 110
8-14-91- MKLR$ - Convert long integer reverse to a string ..................................................................... 110
8-14-92- MKI$ - Convert an integer to a string......................................................................................... 110
8-14-93- MKIR$ - Conversion Integer reverse / String............................................................................. 110
8-14-94- NOT – Complement operator ..................................................................................................... 111
R403
-6-
SERAD S.A.
Supervisor documentation
8-14-95- OPEN – Open a communication port ......................................................................................... 111
8-14-96- OR – OR operatorr ..................................................................................................................... 111
8-14-97- OUT – Output writing ................................................................................................................ 112
8-14-98- OUTEMPTY – Communication output buffer empty ................................................................ 112
8-14-99- OUTB – 8 outputs writing .......................................................................................................... 112
8-14-100- PIXEL – Draw point................................................................................................................. 112
8-14-101- PLCINIT – PLC function initialisation .................................................................................... 112
8-14-102- PLCINP – Read TOR input ...................................................................................................... 113
8-14-103- PLCINPB – Read a 8 inputs block ........................................................................................... 113
8-14-104- PLCINPNE – Read a negative edge on PLC TOR input.......................................................... 113
8-14-105- PLCINPPE – Read a positive edge on PLC TOR input ........................................................... 114
8-14-106- PLCINPW – Read a 16 inputs block ........................................................................................ 114
8-14-107- PLCOUT – Write a output........................................................................................................ 114
8-14-108- PLCOUTB – Write a 8 outputs block....................................................................................... 115
8-14-109- PLCOUTW – Write a 16 outputs block.................................................................................... 115
8-14-110- PLCREADINPUTS – Read the PLC inputs ............................................................................. 115
8-14-111- PLCWRITEOUTPUTS – Write the PLC outputs .................................................................... 115
8-14-112- POWERFAIL – Power fail detect ............................................................................................ 115
8-14-113- PRINT – Writing on a communication port ............................................................................. 116
8-14-114- PROG – Program start .............................................................................................................. 116
8-14-115- RAMOK – Test ram status ....................................................................................................... 116
8-14-116- RAMTOFLASH – Backup saved variables.............................................................................. 116
8-14-117- READKEY– Return the state of terminal keyboard................................................................. 117
8-14-118- REALTOLONG – Convert a real to a long integer .................................................................. 117
8-14-119- REALTOINTEGER – Convert a real to an integer .................................................................. 117
8-14-120- REALTOBYTE – Convert a real to a byte............................................................................... 117
8-14-121- REPEAT – Repeat…Until........................................................................................................ 117
8-14-122- RESTART – Restart system ..................................................................................................... 118
8-14-123- RIGHT$ - String right part ....................................................................................................... 118
8-14-124- RTRIM$ - Remove the right spaces ......................................................................................... 118
8-14-125- RUN – Launch a task................................................................................................................ 118
8-14-126- SEEK – Moving to a save file .................................................................................................. 119
8-14-127- SETDATE – Set the date.......................................................................................................... 119
8-14-128- SETINP – Input filters and invert ............................................................................................. 119
8-14-129- SETOUT – Outputs invert ........................................................................................................ 119
8-14-130- SETTIME – Set the hour .......................................................................................................... 120
8-14-131- SETUPCOUNTER – Counter configuration ............................................................................ 120
8-14-132- SGN - Sign ............................................................................................................................... 120
8-14-133- SIN - Sine ................................................................................................................................. 120
8-14-134- SIGNAL – Event generation .................................................................................................... 120
8-14-135- SQR – Square root.................................................................................................................... 121
8-14-136- SPACE$ - Space made string ................................................................................................... 121
8-14-137- STR$ - Char characters convert................................................................................................ 121
8-14-138- STATUS – Task state ............................................................................................................... 121
8-14-139- SUB – Subroutine..................................................................................................................... 122
8-14-140- SUSPEND – Suspend a task..................................................................................................... 122
8-14-141- STRING$ - String creation....................................................................................................... 122
8-14-142- TAN - Tangent.......................................................................................................................... 123
8-14-143- TIME – Time base.................................................................................................................... 123
8-14-144- TIMER – Wide time base ......................................................................................................... 123
8-14-145- TIME$ - Current hour............................................................................................................... 123
8-14-146- TX485 – Modify RS485 output state........................................................................................ 124
8-14-147- UCASE$ - Uppercase ............................................................................................................... 124
8-14-148- VAL – Convert a string in numeric .......................................................................................... 124
8-14-149- VERSION – Operating system version .................................................................................... 124
8-14-150- VLINE – Draw a vertical line................................................................................................... 124
8-14-151- WAIT EVENT – Event waiting................................................................................................ 125
8-14-152- WAIT KEY – Key waiting ....................................................................................................... 125
8-14-153- WAIT – Condition waiting....................................................................................................... 125
8-14-154- WATCHDOG – Watchdog....................................................................................................... 126
R403
-7-
SERAD S.A.
Supervisor documentation
8-14-155- WHILE – While…Do…End While.......................................................................................... 126
8-14-156- XOR – Exclusive OR operator ................................................................................................. 126
9-
CANopen .................................................................................................................................................. 127
9-1- Definition................................................................................................................................................ 127
9-1-1- Introduction .................................................................................................................................... 127
9-1-2- CANopen communication .............................................................................................................. 127
9-1-3- Network configuration.................................................................................................................... 129
9-1-4- Type of send messages ................................................................................................................... 130
9-2- SUPERVISOR CANopen bus .................................................................................................................. 130
9-2-1- Presentation - SCAN board ............................................................................................................ 130
9-2-2- Characteristics ................................................................................................................................ 130
9-2-3- Connections .................................................................................................................................... 131
9-2-4- Test and diagnostic of the Can Open network ................................................................................ 132
VIEW page ........................................................................................................................................... 132
DEBUG page :..................................................................................................................................... 133
9-2-5- Dictionary ....................................................................................................................................... 134
9-3- Intructions list......................................................................................................................................... 137
9-3-1- List of the CANopen instructions ................................................................................................... 137
A) Read and write the dictionary...................................................................................................... 137
B) Modification of local variables.................................................................................................... 137
C) Modification of remote variables ................................................................................................ 137
D) Instructions in mode PDO ........................................................................................................... 137
E) Control instructions..................................................................................................................... 137
F)
Instructions in mode PDO ........................................................................................................... 137
9-3-2- CAN – Read and write a message .................................................................................................. 138
9-3-3- CANERROR – Faults detection ..................................................................................................... 138
9-3-4- CANERRORCOUNTER – Controls and erases the communication errors................................... 138
9-3-5- CANEVENT – Test a message arrival ........................................................................................... 138
9-3-6- CANLOCAL – Read or write a local variable................................................................................ 138
9-3-7- CANSETUP – Read or write a parameter ...................................................................................... 139
9-3-8- CANREMOTE – Read or write a remote variable ......................................................................... 139
9-3-9- PDO – Read or write data from a PDO .......................................................................................... 140
9-3-10- PDOEVENT – Test a PDO arrival ............................................................................................... 140
9-3-11- SDOEVENT – Event SDO........................................................................................................... 140
9-3-12- SDOINDEX – Index SDO............................................................................................................ 140
9-3-13- SDOSUBINDEX – Sub-index SDO............................................................................................. 141
9-3-14- SETUPCAN – Configuration of a message.................................................................................. 141
9-3-15- STARTCAN – Start a CANopen board........................................................................................ 141
9-3-16- STOPCAN – Stop a CANopen board........................................................................................... 141
9-4- Examples................................................................................................................................................. 141
9-4-1- CANopen kink between two SUPERVISOR ................................................................................. 141
9-4-2- CANopen linking between a SUPERVISOR and an I/Os module ................................................. 143
10-
REMOTE CONTROL ....................................................................................................................... 144
10-1- Connections .......................................................................................................................................... 144
10-2- Link establishment ................................................................................................................................ 145
10-3- List of the validated modems ................................................................................................................ 151
11-
APPENDIX.......................................................................................................................................... 152
11-1- Execution errors messages ................................................................................................................... 152
11-2- Compiler error messages...................................................................................................................... 153
R403
-8-
SERAD S.A.
Supervisor documentation
1- INTRODUCTION
1-1- Description of SUPERVISOR
Generality
The SUPERVISOR is an intelligent operator terminal that is capable of completely managing
the automated operation of a machine.
Using its communication ports it can communicate by serial link or fieldbus with the various
elements of an automated system, such as intelligent drives, distributed I/O, PLC, PC, etc.
Easy to program, using the Windows® based application SPL, it has a true multi-tasking core,
RAM and FLASH memory, a real-time clock and up to three serial ports (RS232 , RS485 ,
CANopen).
The SUPERVISOR is an open system that is adaptable for all applications that comprise an
HMI, PLC, and serial communication.
Performance
32 bits Processor at 33 MHz
4Mbits of non-volatile RAM
8Mbits of Flash memory
2 serial communication ports - 1200 to 9600 b/s
20 inputs/outputs
real-time clock
watch dog
backlight
8 character sets (S640 only)
tactile effect keyboard
Modularity
SUPERVISOR have many choice of modules to adapt of your application.
Digital I/O TOR module - 20 channels
RS232, RS422 and RS485 communication board
CANOpen communication board
R403
-9-
SERAD S.A.
Supervisor documentation
1-2- Description of SPL software
Generality
Supervisor programming language is a user program development with SUPERVISOR running
under MICRODOFT WINDOWS environment.
SPL can manage up to 28 basic or PLC tasks and 20 000 user variables.
System configuration with graphic tools
Easy access to advanced instructions with tool box giving
Fastest programming with the PLC tool box
On-line Help and full-screen editor
Debug mode to test your application with a PC
Software oscilloscope captured and displayed up to six simultaneous parameters
R403
- 10 -
SERAD S.A.
Supervisor documentation
2- INSTALLATION/STARTING
2-1- Environnemental consideration
SUPERVISOR must be installed vertically to have a natural convection cooling. SUPERVISOR
must be sheltered from humidity, liquid projection and dust.
Technical features :
Power supply : 24 Vdc 15W
Watchdog : NO Contact liberate from potential - 48Vac maxi 2A maxi
Service temperature : 0 to 45°C
Storage temperature : -20 to 70°C
2-2- Safety
The security rules impose a manual restart after a default due to a power supply falling down,
a watchdog default or an emergency stop.
SUPERVISOR's watchdog must be connected in serial with the emergency stop loop
The watchdog must be closed at the beginning of the program. When a fault is detected (
Internal fault, power fail, ...), the watchdog is automatically open.
Linked the « Power Electrical cupboard OK » to a PLC input and treated it in a safety basic
task.
R403
- 11 -
SERAD S.A.
Supervisor documentation
2-3- Connections
2-3-1- General explications
SUPERVISOR/PC cable must be shielded with shield connected at each end. It will have to
be disconnected from the SUPERVISOR when it is not used. All these cables, as well as the
inputs/outputs cables will have to be separated and distant of the power modules.
Inductive load must have an interference eliminator diode in DC and filter in AC. Diodes and
filters must be
placed as close to the charge as possible.
2-3-2- Supervisor
S640:
EXT. I/O
R403
- 12 -
SERAD S.A.
Supervisor documentation
S80:
WATCHDOG is a NO contact - 48 VAC maxi - 2A maxi.
PC <-> SUPERVISOR cable :
Female SUBD9
SUPERVISOR SERIAL
1 soldering side
R403
Female SUBD9
PC COM
soldering side
- 13 -
SERAD S.A.
Supervisor documentation
2-4- Getting started
SUPERVISOR starting follows this approach :
Define board placement in the setup screen.
Setup each card.
Send setup in SUPERVISOR using "Send setup" menu.
Define the global variables.
Send global variables value in SUPERVISOR.
Write each task.
Compile and transfer tasks in SUPERVISOR.
If the setup is modified it must be sent one more time.
R403
- 14 -
SERAD S.A.
Supervisor documentation
3- SPL SOFTWARE
3-1- Installation
3-1-1- System configuration
Minimal configuration :
PC 486 DX2 66
RAM 8 Mb
Hard disk (35 Mb available)
Microsoft® Windows™ 95 or Microsoft® Windows™NT 4.0 (service pack 3)
CD-ROM (2X)
SVGA colour display
Mouse or other peripheral pointing system
Required configuration :
PC Pentium® 75 or greater
RAM 16 Mb
Hard disk (35 Mb available)
Microsoft® Windows™ 95 or Microsoft® Windows™NT 4.0 (service pack 3)
CD-ROM (4X)
SVGA colour display
Mouse or other peripheral pointing system
This software run on Microsoft® Windows NT™. But, it doesn’t run on Unix, Mac,
MS-DOS and Microsoft® Windows 3.11.
3-1-2- Installation procedure
The Supervisor Programming Language software is provided in a CD-. The installation
procedure is described below :
Verify the required configuration before the software installation
Insert the CD-ROM in the appropriate drive.
, select
In the menu
.
In the « Execute » dialog box , select
.
In the « Parcourir » dialog box, select the drive where the floppy disk or CD-ROM is.
Select
Select
then
in the « Parcourir » dialog box.
in the « Execute » dialog box.
The installation software is running.
R403
- 15 -
SERAD S.A.
Supervisor documentation
In the beginning of the installation, there are some dialog box to drive the installation :
-
Destination folder
-
Installation type (Typical, compact or custom)
-
Select the program manager
' Warning : only one level of folder can be created.
The file installation starts and is indicated by the evolution of a progress bar.
The installation finishes with the adding of icon in the program manager.
3-1-3- Upgrade from previous versions
A program wrote with a previous version can work on a new version if a compilation is done.
Spl software only works with operating system provided in the OS directory of the installation
directory of the software. By default this directory is « C:\Program Files\Serad\Spl ».
Operation system installation is :
Connect SUPERVISOR SERIAL1 communication port on COM1 or COM2 of the PC
Run SPL’s application, go to OPEN PROJET in PROJECT then in OPTIONS ->
OPERATING SYSTEM, click on UPDATE. If you want to update by DOS, follow the next
instructions.
On Windows 95 or greater, open a DOS windows
With the DOS command, take place in the OS folder
Execute the command : INSTALL < Serial port of PC>
For a serial plug on COM1 : INSTALL COM1
Installation starts with old operating system erasure. The « Waiting for erasure » message
appears on PC screen.
Then, programming is starting.
When programming is done, SUPERVISOR restarts with Error n°23 because there is no user
program.
Compile tasks and transfer in the SUPERVISOR.
3-2- Architecture
3-2-1- Folders
Gfx: contains all the chart.
Lib : contains all the file with DLL extensions for the running of the software
Str : contains the language file
OS : contains a copy of the SUPERVISOR operating system
Help : contains all the help file for the SUPERVISOR and SPL.
Project : contains all the files and folders of the user’s project
R403
- 16 -
SERAD S.A.
Supervisor documentation
3-2-2- Project contents
The « project » folder is a reserved folder for the user’s project. Each project is composed on a
« ProjectName.prj » file and a « ProjectName.rep » folder. This folder have the file below :
a configuration file (ProjectName.cfg)
a global variable definition file (ProjectName.var)
a global constant definition file(ProjectName.cst)
a file per basic task (ProjectName.tsk)
an extra file per ladder task (ProjectName.lad)
The result of compilation gives some binary file (ProjectName.bin and ProjectName.b00 to
ProjectName.b07). The sum of the task length (b0*) gives the length of the compiled task.
Other files (.map, .uti) for the SPL internal management
3-3- Description
3-3-1- Initial screen
SPL software is defined by a main window with a main menu, an icons bar and the
multiwindows. The property of multiwindows provides to users the possibilities to go to another
window without to changing it.
R403
- 17 -
SERAD S.A.
Supervisor documentation
3-4- Menus and icons
3-4-1- Project menu
New Project
Icon:
Action:
This command defines a new project. The last running project is closed and a
dialog box appear to choose the Supervisor model.
Then a new configuration window appears.
R403
- 18 -
SERAD S.A.
Supervisor documentation
Open project
Icon:
Action:
This command opens the « Open Project » dialog box. The users can indicate
the path of the project, he wants to load. This command closes the last
running project on the validation of this dialog box.
Save project
Icon:
Action:
This command saves the complete running project.
Save as…
Action:
This command opens the “Save as” dialog box that allows user to change the
path and the name of the project. This command creates a file and a folder
with the name of the project and for the first the “prj” extension and the
second the “rep” extension.
Copy project
Action:
R403
This command has the same properties as Save as… . However, this
command doesn’t change the date of the project creation.
- 19 -
SERAD S.A.
Supervisor documentation
Close project
Action:
This command closes the running project.
Search in tasks
Action:
This command searches a text, a word or a part of a word in all the tasks of
the project. A dialog box appears and gives all the functions to succeed. A
double click on a result line of a search edits the basic task at the right line.
Sort variables
Action:
This command sort globals variables. At first, we find saves globales
variables in growing order of their address, then not saves globales variables
in type order (bit, octet, string …). Inside the same type, a alphabetical order
is doing.
Compile project
Icon:
Action:
This command compiles the project. A first phase verifies the syntax of each
task, the configuration of variables, etc…. When a task has a syntax error, the
basic task is edited and the error is highlighted with the position of the cursor.
It is possible to compile only one task : choose a task in the task’s list, right’s
click on your mouse and select VERIFY SYNTAX.
Informations
Action:
This command give detailed informations on project, on programme’memory
and memory of uses datas.
Printer setup
Action:
R403
This command allows the user to define its print type (printer, paper, etc…).
The paper orientation can’t be changed.
- 20 -
SERAD S.A.
Supervisor documentation
Impression
Icon:
Action:
This command print all of a custom project. The SUPERVISOR configuration
, all the basic’s task and the ladder are printed.
Quit
Action:
This command quit the SPL software.
Projects list
Action :
A click on a project of this list opens it.
3-4-2- Constants/Variables/Tasks menu
The four commands of this submenus act on the main windows of the project. The actions of
each one are different with the selected tab of the windows.
An adding, suppression or modification of an elements needs the project to be compiled
again.
A modification of a parameter value needs the configuration to be sent to the SUPERVISOR.
A modification on a global stored variable value needs the variables to be sent to the
SUPERVISOR.
Add
Icon:
Action :
This command adds a board, a global constant, a global variable or a task
according to the tab selected.
Modify
Icon:
Action :
This command modifies the parameters of a board, a global constant, a global
variable or a task according to the tab selected.
Delete
Icon:
R403
- 21 -
SERAD S.A.
Supervisor documentation
Action :
This command deletes a board, a global constant, a global variable or a task
according to the tab selected.
Show
Icon:
Action :
This command shows the parameters of a board, a global constant, a global
variable or runs the ladder or basic editor according to the tab selected.
3-4-3- Debug menu
Debug mode
Action:
This command allows the working of debug mode. On activate, all the
command of this sub-menus are valid.
Configuration
Action :
This sub-menu displays the SPL debug window or the debug window of the
slot selected. According to the board in the slot, the dialog box is different :
A dialog box with the state of the status display, the state of the watchdog and the time and
date in SUPERVISOR appears. All of these parameters can be modified. If one of this
parameters is driven by an executed task, the manual modification of its state may be transitory.
The debug windows of I/O module boards shows with leds the state of each input or output
of a board. A click on a led modifies the state of the input or output.
Tasks
R403
- 22 -
SERAD S.A.
Supervisor documentation
Action :
In this sub-menu, there are all the tasks defined in the tasks tab. The
validation of one of the tasks launches the basic editor in a debug mode. The
basic code can’t be modified. This mode allows the user to show the evolution
of code trace if it was validate.
StepByStep
R403
- 23 -
SERAD S.A.
Supervisor documentation
Action :
This command allow to run the programm in step by step mode and control
the good functionning of each basic in the task.
Breakpoint
Action :
This command allow to choose a ligne in the task where you want that the
programm stop for control some parameters..
Terminal
Icon:
Action:
R403
This command launches the hyper terminal viewer. This tool allows to ask the
state of SUPERVISOR or to read and write the local and global variables,
parameters, inputs and outputs.
- 24 -
SERAD S.A.
Supervisor documentation
The terminal window has a main window and two other optional windows : the « observations
» window and the « status » window.
The main window allows the reading and the writing in real-time of all the variables and
parameters of SUPERVISOR. To access to these information, there are some functions :
Print <Variable or Parameter Name> : display the value of a variable or a parameter.
<Variable or Parameter Name>=<Value> : assign a value to a variable or a parameter
STATUS : State of the tasks
RUN <Task name> : execute a task
HALT <Task name> : stop a task
SUSPEND <TaskName> : suspend the execution of a task
CONTINUE <TaskName> : continue the execution of a task
CLS : Clear the dialog zone
RESTART : restart SUPERVISOR
EXIT : close the terminal
For an easy way to edit the name of variables or parameters, the terminal has a window of
SUPERVISOR properties. In this window, we can find all the parameters of each board, global
variables and local variables of each task. The parameter or variable name appears on the
terminal window on a double click on one of this variable or parameter.
The « observations » window show the state of variables in a continuous mode. The
maximum of variables or parameters to show is limited to 100. Two commands allow user to
add or delete a variable. The adding command launches the execution of the SUPERVISOR
R403
- 25 -
SERAD S.A.
Supervisor documentation
properties window. The variable or parameter must be choose among board, global variables or
task. You can save or load this 40 variables as a file.
The « status » window shows the state of the SUPERVISOR and the state of the task in a
continuous mode. SUPERVISOR can be remotely driven with a click on the play or stop icon
displayed. A click change the icon displayed. The tasks can be remotely driven too separately.
The state of each task may be : « Stop », « Start », « Suspend » or « Continue ». The
modification of the state is obtained with a click on the state icon of the task. The « trace » row
indicates the executed line of a task. Before, the code trace must be validate, the project
compiled again and the task sent. You can also have a notion of the system’s resources used for
each task.
Scope
Icon:
Action:
This command launches the scope. This tool is able to capture all the
information of axis board or input/output board. This tool is able to store six
different variables.
The scope is configured in three parts: the visualization screen, the acquisition
configuration zone and the channels configuration zone.
In the acquisition configuration zone, user can define the number of samples during an acquisition
cycle. User can start and print an acquisition.
The channels configuration zone have 6 channels tabs and a time-base tab. For channels tabs, user
can define the type of the board, the board, and the acquisition parameter. For example with an axis
board, the following error can be chosen.
R403
- 26 -
SERAD S.A.
Supervisor documentation
The visualization screen displays the six channels. A double-click on this zone and the
window is in full screen. This window gives the position in X and Y of the cursor. We can also define
reference position on X and Y. A click on dX or dY shows a moved vertical or horizontal line. The
position of the new click defines the reference position. The value indicates in dX or dY is the
difference between the cursor position and the reference position.
R403
- 27 -
SERAD S.A.
Supervisor documentation
3-4-4- Communication menu
Setup
Autodetect
Action:
With a new project, this command create automatically the configuration if the PC and
the SUPERVISOR are connected.
Send
Icon:
Action:
The configuration sending initializes SUPERVISOR with the parameters defined in
the configuration screens of each board. At the beginning, there is a test between the
configuration in the SUPERVISOR and the configuration on the PC. If an error is
detected, the transfer is stopped and a message appears with the card where the
contents is incorrect. This command is necessary after an adding, deleting or
modification of a board…
Receive
Icon:
Action:
R403
This command updates the parameters in the screens configuration of boards. The
transfer begins with the test between the configuration in SUPERVISOR and the
configuration on the PC. If an error is detected, the transfer is stopped and a message
appears with the card where the contents is incorrect. If you want to stored this
configuration in the project, you need to execute the « Save as… » command.
- 28 -
SERAD S.A.
Supervisor documentation
Variables
Send
Icon:
Action:
the sending of stored variables initializes the value assigned to this variable in
SUPERVISOR. So, you needn’t to initialize them in a program.
Receive
Icon:
Action:
This command provides a copy of the stored variables in SUPERVISOR in the PC. I you
want to store this values of variables in the project, you need to execute the « Save as…
» command.
Tasks
Send
Icon:
Action:
This command sends all the compiled tasks in the SUPERVISOR. The
execution of the tasks is automatically launched after the transfer. The transfer
begins with the clearing of the memory. During this phase, the "c" symbol
appears on the SUPERVISOR display status and a bar graph indicates the
evolution of the transfer.
Clear
Icon:
Action:
R403
This command clears all the tasks in SUPERVISOR memory. After the
execution of this command, SUPERVISOR indicates an error 23.
- 29 -
SERAD S.A.
Supervisor documentation
SUPERVISOR Flash
Copy data in flash memory
Action:
This command creates a backup in flash memory of the setup parameters and
of the first 10000 stored variables in the non-volatile RAM memory. At each
SUPERVISOR power-on, a checksum is made to test the validity of the data
in non-volatile RAM. If an error is detected, SUPERVISOR transfer the flash
memory backup in the non-volatile RAM and launches tasks. If there is no
backup, SUPERVISOR indicates an error 20.
Clear data in flash memory
Action:
This command clear the data’s copy in the flash’s memory.
Run SUPERVISOR
Icon:
Action:
This command launches the execution of the tasks in SUPERVISOR.
Stop SUPERVISOR
Icon:
Action:
This command stops the execution of the tasks in SUPERVISOR. WatchDog
becomes OFF. All the servo board are in an open loop state (analogue
command=0). The Security instruction has no effect on SUPERVISOR.
Remote control
Action:
R403
With this command, you have access in mode Remote Control. You can drive
the SUPERVISOR at distance with a modem and a telephone line (see chapter
Remote Control).
- 30 -
SERAD S.A.
Supervisor documentation
3-4-5- Options menu
SPL
Language
This sub-menu allows the selection of language.
Editor
This sub-menu allows to customize the colour of the font and the background of text, keywords… in the editor of basic task.
To modify a colour, first you should select a type of text. Then, you choose one colour and you
click on it with the left click to change the font colour or the right click to change the
background colour. A screen shows the result of the modification.
Project
PC Com
R403
- 31 -
SERAD S.A.
Supervisor documentation
This sub-menu allows the selection of the communication port of the PC which is in link with
SUPERVISOR.
Model :
This sub-menu allows to change to Supervisor model.
Compiler
With trace code
Action:
This command adds some information to the compiler to obtain the trace code in task.
This command is interesting to test systems but the compiled file are biggest and the
execution of task is ran slowly. When it is activate or disable, you need to compile the
tasks again.
Force using brackets
Action :
This command strengthens the test of brackets during the compilation.
Multitasking
Action :
This command allows the modifications of multitasking parameters. A dialog box
appears and allows the modification of the ageing time task and the normal slice time.
Operating system
Action :
R403
This command update or clear the operating system. Attention, this procedure is
reserved to experienced user.
- 32 -
SERAD S.A.
Supervisor documentation
3-4-6- Help menu
Wizard
Action:
This command allows the displaying of icon information.
About …
Action:
This command launches a dialog box which indicates the software version,
etc…
3-4-7- Configuration tab
On the configuration window, there are two zones. The first zone is on the left with the front of
SUPERVISOR. This zone allows the SUPERVISOR configuration. We can configure the
display machine, the SERIAL1, SERIAL2, SERIAL3, INPUTS and OUTPUTS. The second
zone is on the right with the name « Périphériques » give the affectation of the different
connectors.
R403
- 33 -
SERAD S.A.
Supervisor documentation
A)
Serial 1
Action :
B)
-
the rate
-
the number of data’s bit
-
the parity
-
the bit’s stop
Serial 2
Action :
R403
Allow to configure the serial port com 1, with this parameters :
Allow to configure the serial port com 2, with this parameters :
-
the rate
-
the number of data’s bit
-
the parity
-
the bit’s stop
- 34 -
SERAD S.A.
Supervisor documentation
C)
D)
Serial 3
Action :
Allow to configure the CANOpen communication between SUPERVISOR
and MCS32EX
Action :
Allow to supervise the CANOpen communication between SUPERVISOR
and MCS32EX
Inputs
a) Card :
R403
- 35 -
SERAD S.A.
Supervisor documentation
Action : Allow to give a name to inputs’bloc and set a filtering.
b) Bloc 1 :
Action : Allow to give a name to each input’s bit and inverse them.
In debug mode, you can see their state and modify them.
c) Bloc 2 :
R403
- 36 -
SERAD S.A.
Supervisor documentation
Action : Samethings for the four last inputs
E)
Outputs
Action : Allow to give a name to each output’bit and inverse them.
In debug mode, you can see their state.
R403
- 37 -
SERAD S.A.
Supervisor documentation
F)
Accessories
Action : Allow to set the clock, modify the backlight (only for S640) and watchdog.
3-4-8- Global constants tab
In the « Global Constants » tab, all the constants with their features (name, type and value) are
summarized. In this tab, we can add, modify or delete a global constants. The add, delete and
modify commands need the compilation of the tasks again and the sending tasks.
The « Add » command create a new global constant to the project. A dialog box appears to
configure the parameters of this new constant.
The « Add » (a constant) command can be obtained in two different ways :
In the Constants menu
A right click open a menu with the « Add » command
R403
- 38 -
SERAD S.A.
Supervisor documentation
The « Modify » or « Show » command allows the modification of the global constant
parameters, except its type. This command can be obtained in three different ways :
In the Constants menu (select the constant to modify before)
A double click on the constant to modify
A right click opens a menu with the « Modify » or « Show » command
constant to modify before).
(select the
The « Delete » command allows to suppress a global constant to the project. This command
can be obtained in two different ways :
In the Constants menu (select the constant to suppress before)
A right click opens a menu with the « Modify » or « Show » command
constant to modify before)
(select the
3-4-9- Global variables tab
In the « Global variables » tab, all the variables with their features (name, type, number,
address and value) are summarized. The number parameter defines the number of elements in
this array. The address parameter must be fixed if the variable is a stored variable (address 1 to
20000). In this tab, we can add, modify, delete or show a variable. The « Add », « Modify »
or « Delete » command need the compilation of the tasks again and the sending tasks. In the
case of a stored variable, you should send the variables too.
The « Add » command defines a new global variable in the project.
This command can be obtained in two different ways : :
In the Variables menu
A right click opens a menu with the « Add » command
R403
- 39 -
SERAD S.A.
Supervisor documentation
The « modify » command allows the modification of the global variables parameters, except
its type. This command can be obtained in two different ways :
In the Variables menu (select the variable to modify before)
A right click opens a menu with the « Modify » command (select the variable to modify
before)
The « Delete » command suppresses a variable of the project. This command can be obtained
in two different ways :
In the Variables menu (select the variable to delete before)
A right click opens a menu with the « Delete » command (select the variable to delete
before)
The « Show » command allows the vizualisation of a variable state. This command shows all
the value of an array. It can be obtained in three different ways :
In the Variables menu (select the variable to show before)
A double-click on the variable to show
A right click opens a menu with the « Show » command (select the variable to show before)
When you want to show a camtable variable, the cam editor is launched. In this editor, we can
define the profile of a cam.
3-4-10- Tasks tab
In the « Tasks » tab, all the tasks with their features (name, date of creation, type of startup and
comments) are summarized. In this tab, we can add, modify, delete or show a task. The « Add
», « Modify », « Delete » or « Show » command need the compilation of the tasks again and
a sending tasks to be done.
The « Add »command defines a new task in the project. A task have different features :
priority (normal or high), type (basic or ladder), startup type (manual, automatic, event) and an
optional comments. The type of the task defines the editor type of the task.
R403
- 40 -
SERAD S.A.
Supervisor documentation
The « Add » (a task) command can be obtained in two different ways :
In the Tasks menu
A right click opens a menu with the « Add » command
The « modify » command allows the modification of the tasks parameters. The « Modify » (a
task) command can be obtained in two different ways :
In the Tasks menu (select the task to modify before)
A right click opens a menu with the « Modify » command (select the task to modify before)
The « Show » command launches the editor of task according to the type choose (basic or
ladder). This command can be obtained in three different ways :
In the Tasks menu (select the task to show before)
A double-click on the task to show
A right click opens a menu with the « Show » command (select the task to show before)
The « Delete » command suppress a task in the project. This command can be obtained in two
different ways :
In the Tasks menu (select the task to delete before)
A right click opens a menu with the « Delete » command (select the task to delete before)
Attention : A ladder task is automatically traduct in basic. It’s advise to not write a long or
complex ladder task, in order to avoid time cycle detoriorations and basic traduction limit.
R403
- 41 -
SERAD S.A.
Supervisor documentation
3-5- Editors
3-5-1- Basic task editor
The basic editor has a zone to edit the program, a toolbox to help the user and another optional
zone with all the parameters and variables of SUPERVISOR. In this last zone, there are all the
parameters of each card of the project, all the constants and global variables.
The toolbox helps the user to use movement and other instructions. Tools are in subroup :
Editor tools
A tool to search a word or a group of word
or dissociate the upper and lower case.
The replace command
. This search is made in the task in confusing
search and replace an occurence in a task.
The print command
The next icon display a quick syntax of the check instruction of task editor.
Copy (CTRL+C), paste (CTRL+V) and cut (CTRL+X).
Communication tools
helps to defines the text on it. Th dialog box is defined with
the terminal panel command
the front of the terminal panel selected in the Option menu. To generate the code corresponding
with the text on the terminal panel display, you should choose the Write command. To show the
result of a part of code, you should select some text and the Read command. The clear
command clears the screen of the terminal panel.
R403
- 42 -
SERAD S.A.
Supervisor documentation
The edit command
helps to define an numeric or alphanumeric edit on a terminal panel.
The format command
helps to define the code to format a variable.
3-5-2- Ladder task editor
The ladder editor is composed with an editor zone of the ladder program (the grid), a toolbar of
chart that can be inserted and a toolbox. A ladder program have lot of rungs limited to 50 in a
task. Each rungs have an optional comment, an expression and 1 to 5 outputs.
The tool bar can define the type of chart that can be put on the ladder grid. To select a chart,
you just have to click on the button with the wanted chart.
The ladder grid allows to put different chart and so to define the program.
A selected case of the ladder grid is indicated with a black background.
To put a chart on the ladder grid, you just have to click with the left button of the mouse on the
ladder grid. The parallel link goes on the top and left corner to the bottom and left corner of the
case.
A double-click on a case of a ladder grid where there is a chart allows user to configure it :
For coils and contacts, a SUPERVISOR configuration screen appears on the toolbar. In this
zone, there are all the bits variables like inputs, outputs and system bits. We can also find 64
bits. By default, there names are like :<bit>+ n)of bit. The name of this bits can be changed by
a click or with the menu which appears on a right click. There are three system bits : an init bit
which is equal to one during the first cycle of the program and two blink bits. One have a semi
period equal to 500 ms and the second to 1s.
For blocs, there is a specific dialog box. For timer, the name and the delay is configured. For
counter, the name, the type and the preset value is configured.
R403
- 43 -
SERAD S.A.
Supervisor documentation
For free blocs, a dialog box allows to edit the basic code. For free contact, the code will be a
condition and for free coil, it will be an action. An error in the code edited will be only detected
by the basic compiler.
The selected rungs is the rungs with the background of the comments in blue. To edit a
comments, you just have to make a double click on it.
Commands
A command to quit the ladder editor
A command to print
.
.
Commands to add a rung
selected rung .
, to insert a rung before the selected one
and to delete the
Commands to cut
, copy
and paste a chart
. The cut or copied chart is the selected
one. The paste chart is inserted on the free selected case.
Commands to cut
, copy
and paste a rung
. The cut or copied rung is the selected
one. The paste rung is inserted before the selected one.
The SUPPR key clears the chart on the selected case. To delete a parallel link, you need to
select this chart in the toolbar and to click in the case of the link.
The «Go at rung» function allows to go to a particular rung.
R403
- 44 -
SERAD S.A.
Supervisor documentation
4- PROGRAMMATION LANGUAGE
4-1- Introduction
4-1-1- Description
Supervisor Programming Language is a complete programming language and easy to use with
its structured programming constructions as found in most other modern programming
languages. This language is built around a multitask kernel and the basic language to ensure
flexible and powerful programming. The basic language also contains all PLC function.
The language manages the constants and variables like global, local or stored variables…
A project developed with SPL software can contain up to 28 tasks working in parallel. Each task
have a priority level and can be describe by the basic or ladder editor. An extra task treats the
fastest events.
4-1-2- Memory plan of SUPERVISOR
Flash memory (1 Mb)
R403
non-volatile ram memory (512 Kb)
- 45 -
SERAD S.A.
Supervisor documentation
4-2- Data
4-2-1- Global constants
The global constants are defined with the global constant tab of the SPL software. The types
accepted are : bit, byte, integer, long integer, real, string char.
Constants are read only data defined in a project. They are stored in the flash memory with the
code of the task compiled. A global constant can be used by all the tasks.
4-2-2- Global variables
The global variables are defined with the global variable tab of the SPL software.
A global variable and a constant variable can’t have the same name in a project because the
compiler can’t do the distinction. The global variable types and the global constant types are the
same.
A global variable can be used by all the tasks and accessed at every time.
This variable is an array if at its creation, the field « number » is greater than one. The first
index of an array is 1. The index can be an immediate value, a byte variable or integer variable.
Example :
Position = PositionArray[5]
' Warning : A writing at the 0 index in an array is forbidden : this error can make trouble in the
operating cycle.
The variable can be a stored variables.
On a power cut, the variable value is preserved. There are 20 000 stored variables at address 1 to
20 000. Then, a stored variable must be assigned to an address.
' Warning : The user must beware of the crossing of variables when he assigns them. For
example, an array with 50 elements is assigned at the address 100, the next variables must be
assigned at an address greater than 150.
The crossing of variables can be used in one case : to allows the address access with multiple
variables.
Example :
TableModbus : array of 50 integer assigned at address 100
DecompteurPiece : integer variable assigned at address 100
If TableModbus[1]=0 Then Goto EndProduction
If DecompteurPiece=0 Then Goto EndProduction
This two last program lines are the same but the last one is the most explicit.
Unlike the local variables, you need to define the global variable before you use it. An nonstored variable will be used as a link between tasks. Whereas the stored variable are used to
preserve adjust parameters etc….
Defined types are :
R403
- 46 -
SERAD S.A.
Supervisor documentation
4-2-3- Local variables
These variables are accessible only in the task where they are declared(main program and subprograms). The accepted types are : bit, byte, integer, long integer, real, char string. Their
values are not preserved between each power on and are cleared to zero.
You often need to store values temporarily when performing calculations with Basic. You need
to preserve the values to compare them but without stocking them in a global variable.
The local variables don't need to be defined before being used. They have an identification
character at the end of the name to indicate the data type. The local variables of a task can't be
used by an other task. Two variables with the same name, used in two tasks, are two different
variables. In a task, the variable can be used in the main program and the subprograms.
The treatment of a local variable is fastest than the global variable. A local array can’t be
defined.
' Warning : Don’t use so much local string variables because each local string variable takes
256 bytes in memory !
Example :
a%=10
If Position !>1000 Then Position
Compteur&=Compteur&+1
FormFeed$=Chr$(10)+Chr$(13)
!=0
‘ integer variable
‘ real variable
‘
long
integer
‘ string char variable
variable
The local variables can have the following types :
R403
- 47 -
SERAD S.A.
Supervisor documentation
4-2-4- Convert data types
To convert a data type to an other data type, use the functions below:
To extract a bit from a byte or integer, the function « .BitNum » can be used.
For a byte, BitNum is between 1 and 8, 1 is the least significant bit.
For an integer, BitNum is between 1 and 16, 1 is the least significant bit.
BitNum maybe a value or a byte variable.
To extract a byte from an integer, the function « .L » or « .H » can be used.
The « .L » function extract the least significant byte and « .H » the most significant byte.
Examples :
VarOctet=4
VarBit=VarOctet.3
VarOctet=16
Index=5
VarBit=VarOctet.Index
VarBit=1
VarOctet=VarBit
VarEntier=259
VarOctet=VarEntier.L
VarOctet=VarEntier.H
VarLong=261
VarReel=38.15
VarOctet=RealToByte(VarReel)
VarBit=1
VarEntier=VarBit
VarOctet=128
VarEntier=VarOctet
VarLong=45200
VarEntier=LongToInteger(VarLong)
VarReel=54200.65
VarEntier=RealToInteger(VarReel)
VarBit=1
VarLong=VarBit
VarOctet=128
VarLong=VarOctet
VarEntier=45200
VarLong=VarEntier
VarReel=154200.65
VarLong=RealToLong(VarReel)
VarOctet=128
VarReel=VarOctet
R403
‘ VarBit=1
‘ VarBit=1
‘ VarOctet=1
‘ VarOctet=3
‘ VarOctet=1
‘ VarOctet=38
‘ VarEntier=1
‘ VarEntier=128
‘ VarEntier=45200
‘ VarEntier=54200
‘ VarLong=1
‘ VarLong=128
‘ VarLong=45200
‘ VarLong=154200
‘ VarReel=128
- 48 -
SERAD S.A.
Supervisor documentation
VarEntier=45200
VarReel=VarEntier
VarEntier=154200
VarReel=VarEntier
VarChaîne= « -125.45 »
VarReel=Val(VarChaîne)
VarReel=1510.55
VarChaîne=Str$(VarReel)
‘ VarReel=45200
‘ VarReel=154200
‘ VarReel=-125
‘ VarChaîne=
«
.45
1510.55
»
4-2-5- Numeric notations
Numeric values can be expressed in decimal, hexadecimal or binary.
Example :
VarOctet=254
VarOctet=0FEh
VarOctet=11111110b
‘ decimal notation
‘ hexadecimal notation
‘ binary notation
4-3- Tasks
4-3-1- Multitask principles
The real time and multitask kernel can manage 32 tasks in parallel :
4 internal tasks reserved to the system
27 users tasks defines in pseudo-basic or ladder
1 extra task for the management of events
The multitask launches the next task if :
the executed time of the task is longer than the task ageing time. This time is defined in the
Options menu. All the task must be compiled after a modification.
execute a lock instruction :
Wait, Delay
Beep, Edit
ClearFlash, FlashToRam, RamToFlash
execute a loop or jump instruction :
Call
Goto, Case
For...Next
Repeat...Until
While...End While
End Prog
The Jump instruction make a jump without launching the next task.
In general, a short task will treat events faster than a big task.
R403
- 49 -
SERAD S.A.
Supervisor documentation
4-3-2- Task priority
Each users task have a priority level : high priority, normal priority.
The multi-task kernel allocates two slices of execution : the high priority slice for the tasks with
high priority, a normal priority slice for the tasks with normal priority.
The slice chain during execution is :
| high priority slice | normal priority slice | high priority slice | normal priority slice | ...
High priority slice :
All the tasks with a high priority are executed one after one in this slice. Each task executes its
instructions up to the ending condition (executes a locked task, ageing time reached ...).
Maximal execution time of a high priority slice = number of high priority task * ageing time
The ageing time is defined in the Options menus and is the same for the high and normal
priority task. All the task must be compiled after a modification.
Normal priority slice:
All the tasks with a normal priority are executed one after one in this slice. Each task executes
its instructions up to the ending condition (executes a locked task, ageing time reached ...).
Normal slice execution time = Normal slice time
Maximal execution time of a normal priority slice = normal slice time + ageing time
The normal slice time is defined in the Options menus. All the task must be compiled after a
modification.
If the execution time of all the normal priority tasks are lower than the normal slice time, all the
tasks are executed one times and the high priority slice is executed.
In the opposite case, the system gives the hand at the high priority slice even if all the normal
priority tasks aren’t executed. These tasks will be executed in the next normal priority task.
Example :
T1, T2 : high priority tasks
T3, T4, T5, T6 : normal priority tasks
Ageing time = 2 ms
Normal slice time = 6 ms
The execution cycle will be | T1,T2 | T3,T4,T5 | T1,T2 | T6,T3,T4 | T1,T2 |
T5,T6,T3 | ...
4-3-3- Management of task
Each task can have a starting mode defined at its creation :
Automatic start : At each power on of SUPERVISOR, the task is launched automatically.
Manual start : The task is not launched automatically.
A project must contain at least a task with automatic starting mode. You should have a task
which have the initialization part and the launching task part.
There are 5 types of instructions to manage the tasks :
R403
Run :
launch a task which is stopped.
Suspend :
suspend (pause) a task in execution
Continue :
continue the execution of a suspended task
Halt :
Stop an executed task
- 50 -
SERAD S.A.
Supervisor documentation
Status :
indicates the state of the task
Example :
Menus1 task
Prog
.....
Run Menus2
Wait Status(Menus2)=0
....
End Prog
Menus2 task
Prog
.....
If Key = @ESC Then Halt Menus2
.....
End Prog
To synchronize the tasks each other, the Signal and Wait Event instructions or global variables
can be used.
Example :
ProcessEnable : global bit variable
Process1 task
Process2 task
Prog
Prog
.....
.....
ProcessEnable=1
Wait ProcessEnable=1
Wait ProcessEnable=0
.....
....
ProcessEnable=0
End Prog
.....
End Prog
4-3-4- Basic task structure
Each task is constituted with a main program defined with the key-word PROG and END
PROG and with subroutine defined with the key-word SUB .. END SUB. For example :
Main program
The main program of a task can call all its subroutine but it can’t call the subroutine of others
tasks. A task is a file. In the last example, the task 1 can call the subroutine 1 and 2 but it can’t
call the subroutine 3 and 4. A subroutine of a task can call a subroutine of the same task.
One and only one PROG ... END PROG structure must be used by a program and may appear at
any place in the program.
During the execution of the task, the execution of the key-word END PROG makes a branch on
the key-word PROG.
Subroutine
A subprogram must be declared by a procedure SUB...END SUB. This procedure may be
before or after the main program.
R403
- 51 -
SERAD S.A.
Supervisor documentation
To call a subroutine, you should use the CALL function. The subroutine called must be in the
same task.
After a subprogram call, the execution continues automatically with the instruction that follows
the subprogram call. You can stop subprogram executions by using the EXIT SUB instruction.
For example :
SUB Calcul
Result%=0
IF b%=0 THEN EXIT SUB ' If b% is equal to zero , the division is impossible
Result%=a% DIV b%
' Division
END SUB
A subroutine can be called anywhere in the program but it can’t call itself. If datas are used in
program and subroutine, you should use some specific variables. In fact, all the variable can be
modified by a subroutine, you can assign the specific variables of a subroutine before it was
called. For example :
...
Diviseur%=a%
Dividende%=b%
CALL Divise
IF Result!>10 THEN ...
...
SUB Divise
Resultat!=0
IF Diviseur%= 0 THEN EXIT SUB
Resultat!= Dividende% / Diviseur%
END SUB
The branch to a subroutine launches the next task.
The instruction ICALL allow also to branch to a subroutine but whithout automatic tipping to
next task.
Branch to a label
The GOTO instruction makes a branch to a label. A label is a name with at the end « : ». If the
GOTO instruction is in a subroutine SUB…END SUB, the label must be in this subroutine.
A branch to a label with the GOTO instruction can be realized before or after the program. For
example :
GOTO Label1
...
Label1:
...
With the GOTO instruction, the multitask kernel launches the next task.
The JUMP instruction have the same features as GOTO but the multitask kernel stays in this
task.
Operators
The expressions are composed of operators and operands. In Basic, almost operators are binary,
this means that they use two operands. Operators that use only one operand are called unary
operands. Binary operators use common algebraic form, for example A + B. Unary operators
come always before their operand, for example NOT A. In complex expressions precedence
rules can suppress all ambiguity in operator order.
R403
- 52 -
SERAD S.A.
Supervisor documentation
The three fundamental rules concerning operators priority are :
An operand placed between two operators whose one has priority will be linked to the higher
priority operator.
An operand placed between two operators whose priority are equal will be linked to the left
operator.
Expressions between brackets are evaluated separately, so results are used as operand.
Operators with same priority are usually used from left to right.
You should used brackets to separate each expression in order to highlight the priority.
IF ((INP(E1)=1) AND (FlagRun=1)) OR (InitOk=0) Then ...
a) Arithmetical operators
'NOT' operator is an unary operator. + and - operators are used as unary and binary operators.
Other operators are only binary operators.
An unary operator has only one parameter. For example :
NOT <Expression>
A binary operator has two parameters. For example :
<Expression1> * <Expression2>
b) Binary operators
c) Unary operators
R403
- 53 -
SERAD S.A.
Supervisor documentation
d) Logical operators
e) Bits operators
f) String operators
g) Relationship operators
B)
Tests
a) Simple tests
Conditional instructions provide a simple way to choose which part of code will be executed in
accordance to a condition. There are two syntax. IF instruction syntax are :
IF <Expression> THEN
<Instruction1>
...
[ELSE
<Instruction2>
...]
END IF
or
R403
- 54 -
SERAD S.A.
Supervisor documentation
IF <Expression> THEN <Instruction1> [ELSE <Instruction2>]
<Expression> must be a bit type value. If <Expression> is true then <Instruction1> and
following instructions are executed. If <Expression> is false then <Instruction2> and following
instructions are executed. In the second syntax form, only one instruction is executed for each
condition, all instructions are in the same line and END IF statement is omitted.Nesting if
instructions are possible but an ELSE always refers to the nearest IF instruction.
b) Multiple tests
Multiple tests are performed with CASE instruction.
CASE instruction syntax is described below :
CASE <Expression> [ GOTO | CALL ] <Subrout1. Identif. > [ { , <Subrout2.
Identif.> } ]
<Expression> type must be byte, integer or long integer. With this instruction, subroutines will
be called in accordance to <Expression> value. For <Expression>=1 the first subroutine is
called, for <Expression>=2 the second subroutine is called ... For example :
REPEAT
INPUT #1,Choice%
'Read choice from serial peripheral device
ON Choice% CALL FirstChoice, SecondChoice, ThirdChoice
UNTIL Choice%=0
GOTO FIN
SUB First Choice
' Called if the first choice is selected
END SUB
SUB SecondChoice
END SUB
' Called if the second choice is selected
SUB ThirdChoice
END SUB
FIN :
' Called if the third choice is selected
c) Loops
If the loop number is already known when writing your program, it is recommended to use the
FOR loop structure, in other case WHILE or REPEAT structures can be used.
FOR instruction
FOR instruction allows the repeated execution of one or more instructions in accordance to a
control variable increment or decrement .
FOR instruction syntax is described below :
FOR <Counter>=<Start> TO <End> [STEP <Increment>]
<Instructions>
NEXT <Counter>
<Counter> must be a local byte, integer or long integer variable. <Start>, <End> and <Step> are
<counter> type compatible expressions. <Start>, <End> and <Step> expressions are computed
only one time before starting loop.
<Counter> is affected to <Start> value at the beginning. At each loop <Step> value is added to
<Counter> and if <Counter> is greater than <End> then loop is stopped.
For example
FOR a%=0 TO 15
OUT(IO1)=1<<a%
NEXT a%
At each execution of NEXT instruction, the multitask kernel launches the next task.
WHILE instruction
R403
- 55 -
SERAD S.A.
Supervisor documentation
WHILE instruction allows the repeated execution of one or more instructions in accordance to
an expression value.
WHILE instruction syntax is described below:
WHILE <Expression> DO
<Instructions>
END WHILE
In this instruction, if <Expression> is false before the WHILE structure beginning there is no
loop. While <Expression> is true <Instructions> are executed.
At each execution of END WHILE instruction, the multitask kernel launches the next task.
REPEAT instruction
REPEAT instruction allows the repeated execution of one or more instructions in accordance to
an expression value.
REPEAT instruction syntax is described below :
REPEAT
<Instructions>
UNTIL <Expression>
In this instruction, if <Expression> is right before the REPEAT structure beginning, there is one
loop. <Instructions> are executed unit <Expression> is right.
At each execution of UNTIL instruction, the multitask kernel launches the next task.
4-3-5- Event task structure
Each extra task can manage about 16 events : 7 PLC inputs, 8 capture input and 1 timer.
Extensive events , tie to standard axis’s board, are also free (see chapter Enhanced Event
Function).
This task is defined once times in a project. When you want to create one, you must chose the
event start mode.
Events configuration
At each power on of SUPERVISOR, no events are configured. This configuration is realized in
a normal basic task (initialization task) with the MODIFYEVENT instruction.
Syntax : MODIFYEVENT– Events configuration
Syntax : MODIFYEVENT (<Mask>,<Counter 1 trigger>,<Counter 2 trigger>,<Delay>)
Limits :
<Delay> : 10ms to 30.000ms
Accepted types : <Mask> : Integer
<Counter 1 Trigger> : Integer
<Counter 2 Trigger> : Integer
<Delay> : Integer
Description :
This instruction allows to configure events.
Remarks :
<Mask> :
Bits 0...7 : Activate the inputs 1 to 8 of the input card. A positive edge
will generate the event. The input take account of the invert and filter
parameters entered during the board configuration.
Bit 8 : Trigger of the counter 1 reached
R403
- 56 -
SERAD S.A.
Supervisor documentation
Bit 9 : Trigger of the counter 2 reached
Bit 10 : SDOEVent
Bit 11 : PDOEvent
Bits 12 : Time base.
<Delay> :
Delay of the time base between 10 ms and 30000 ms. If the time base is
unused, the value of delay will be not treated.
When the event configuration register is affected, the event task is executed when at least one
event is detected. The maxi time between the event detected and its treatment is equal to the task
ageing time.
If you want to modify the event configuration register, you’ll be treated this instruction in a
normal basic task or an event task before the execution of GETEVENT instruction.
Reading the events detected
The GETEVENT instruction is consumed and read the events detected.
Syntax : <Variable>=GETEVENT
<Variable> is an integer type with the same configuration of bits like the <Mask> parameter of
MODIFYEVENT instruction.
Each bit assign to an event is set when the event is detected.
If an event appears during the execution of the event task, it is stored and treated as possible.
Clearing the events
The clearing of events is obtained with MODIFYEVENT(0,0) instruction.
Warnings
The RUN, HALT, SUSPEND, CONTINUE, STATUS instructions didn’t have any effects on
event task.
This task don’t give the hand to the other task. So, it must be a short task with no locked
instructions ( ex : WAIT, ...).
This task mustn’t have branch. The END PROG instruction must appear at the end of the task to
launch the event detection again.
If the MODIFYEVENT instruction is used in an event task, a new detected event can be
changed.
Example
Init Task
PROG
....
MODIFYEVENT(0183H,1000)
.....
END PROG
Tâche EVENEM
PROG
Event%=GETEVENT
IF Event%.1=1 THEN
.
.
END IF
IF Event%.2=1 THEN
.
R403
‘events E1, E2, 1s time base,
‘Capture1 on axis board 1
‘événement E1
‘événement E2
- 57 -
SERAD S.A.
Supervisor documentation
.
END IF
IF Event%.8=1 THEN
.
.
END IF
IF Event%.9=1 THEN
.
.
capture1(…
END IF
‘événement base de temps
‘événement capture 1
‘relance la capture
END PROG
4-3-6- Ladder task structure
It’s a chart form which is composed with rungs. Each rungs can contain contacts, coils, counters
and timers.
Free contact or free coil can also be added to the ladder task.
At the compile phase, the ladder task is translated in a basic task. This basic task can be
displayed on a windows editor : file « LadderTaskName.tsk ».
R403
- 58 -
SERAD S.A.
Supervisor documentation
5- PROGRAMMATION OF PLC
5-1- Basic task
5-1-1- Digital inputs/outputs
A)
Inputs reading
The INP function is used to read 1 bit , INPB a 8 bits bloc and INPW a 16 bits bloc.
The syntax are : INP(<Digital inputs>), INPB(<Digital inputs>), INPW(<Digital inputs>).
<Digital inputs> must represent a valid digital input identifier of 1,8 or 16 bits. This identifier
can be either a symbolic name used in the setup module or the hardware name of the bloc. The
return data type is :
- Bit for 1 input bloc
- Byte for 8 inputs bloc
- Integer for 16 inputs bloc
For example :
A~ = INP(Sensor)
B1# = INPB(Bloc1)
B2# = INPB(Bloc2)
C%= INPW(A)
B)
'input reading
'First bloc of eight input reading
'Second bloc of eight input reading
'Bloc of sixteen input reading
Outputs writing
The OUT function is used to write 1 bit , OUTB is used to write a 8 bits bloc and OUTW is
used to write a 16 bits bloc .
The syntax are : OUT(<Digital outputs>), OUTB(<Digital outputs>), OUTW(<Digital
outputs>)
<Digital outputs>must represent a valid digital output identifier of 1, 8, 16 bits. This identifier
can be either a symbolic name used in the setup module or the hardware name of the bloc. The
return data type is :
- Bit for 1 output bloc
- Byte for 8 inputs bloc
- Integer for 16 inputs bloc
For example :
OUT(Jack)=On
'Output writing
OUT(LAMP)=Defaut.5
OUTB(Data)=00110000b 'Bloc of eight inputs writing
OUTW(B)=0FFFFh
'Bloc of sixteen inputs writing
C)
Outputs reading
All outputs can also be read. The reading value is the last written value. This feature is very
useful when more than one program are using the same output bloc. So, it is possible to write
only desired outputs in one operation without changing the others.
For example :
To put 1 on the fourth lower bit of a 8 bits output bloc named IO1, use the following program :
OUTB(Bloc1)=OUTB(Bloc1) OR 00001000b
R403
- 59 -
'set of the fourth bit of a eight
'inputs bloc
SERAD S.A.
Supervisor documentation
D)
Events handling
We can wait for a state change on an input with the function WAIT.
The syntax is : WAIT <Condition>
The WAIT function is used to handle a special state condition during a normal execution.The
execution is stopped as long as condition is false. When the state condition is true, the
execution continues. This function is very useful to wait for end of movement or mechanical
thrusts sensor...
Example :
WAIT Lim_S(Cutter)=On
Stop(Cutter)
WAIT Inp(StartButton)=On
E)
'Waiting for a soft thrust error
'Axis stop
'waiting for StartButton pressed
State test
We can test the input state with the structure IF…THEN…ELSE.
The syntax is : IF (<Condition>) THEN <Action1> ELSE <Action2>
The IF…THEN…ELSE structure is used to test a condition at a given time. If <Condition> is
true then the <Action1> is executed otherwise the <Action2> is executed.
Example :
IF (Inp(Start)=On) THEN
'Input state test
Out(StartLed)=On
RUN Cycle
ELSE
Out(StartLed)=Off
HALT Cycle
ENDIF
5-1-2- Timings
A)
Passive waiting
The DELAY function is designed to make a passive waiting.
Its syntax is :DELAY <Duration>
<Duration> is a long integer expressed in millisecond.It is recommended using this function for
a long passive waiting because the waiting program doesn't spend any processor time.
With this function, the program is waiting the indicated duration.
For example:
Debut:
WAIT Inp(Start)=ON
...
DELAY 5000
...
GOTO Debut
B)
' 5 seconds delay
Active waiting
TIME
The internal global variable TIME is designed to make active waiting of time. This variable is a
long integer that represents the number of milliseconds passed since power-on. This variable
can then be used as time base for machines which are powered on less than 24 days. At the
power on, the variable is equal to zero. Up to 24 days, the variable is at its maximum value 2^31
R403
- 60 -
SERAD S.A.
Supervisor documentation
and passed to its minimal value 2^-31. This overflow can make some timer errors. In that case,
you must use the global variable TIMER.
For example :
EndDelay& = TIME+5000
‘timer of 5s is loaded
WHILE TIME<EndDelay& DO
...
'Loop during 5s
END WHILE
EndTimeOut& = TIME+200
WAIT (Inp(Sensor)=On) Or (Time>EndTimeOut&)
'Waiting for sensor or
'200ms time-out
TIMER
The internal global variable TIMER is designed to make active waiting of time. This variable is
a real that represents the number of milliseconds passed since power-on. This variable can then
be used as time base for machines which are always powered on. The integer part of the global
variable is the seconds and the decimal part (3 figures after the point) is the milliseconds.
Par example :
EndDelay! = TIMER+5.250
‘timer of 5.25s is loaded
WHILE TIMER<EndDelay! DO
...
'Loop during 5.25s
END WHILE
EndTimeOut! = TIMER+0.200
WAIT (Inp(Sensor)=On) Or (TIMER>EndTimeOut&)
'Waiting for sensor or
'200ms time-out.
5-1-3- Events
In a multi-tasking system, events mechanism are very useful for inter-process communication.
Event handling may also provide process control functions. Event handling instruction allows
sending, waiting and receiving events. Programs can wait for or sent the same event. In the
programming language, there are two mechanisms for events functions.
Signal or Diffuse and Wait Event
To send an event to only one task, there is the SIGNAL function. To send an event to all the
tasks, there is the DIFFUSE function.
Syntax : SIGNAL <EventName> or DIFFUSE <EventName>
The <Eventname> can be any non-keyword name but must be used at least once in an event
waiting or receiving function.
SIGNAL sends the event to the first task which is waiting it. But, DIFFUSE sends the event to
all the tasks which are waiting it.
The WAIT EVENT instruction is used to wait an event.
The syntax of the WAIT EVENT instruction is :
WAIT EVENT <EventName>
After WAIT EVENT instruction, program execution is paused and will be resumed when
event is received.
Example with SIGNAL and WAIT EVENT:
‘Master task
PROG
...
RUN SlaveTask
...
WAIT Inp(StartCycle)=On
...
R403
- 61 -
‘Slave task
PROG
Beginning:
...
...
...
SERAD S.A.
Supervisor documentation
SIGNAL Start
...
...
WAIT Inp(StopCycle)=On
HALT SlaveTask
...
END PROG
WAIT EVENT Start
GOTO Beginning
END PROG
In this example, there is a master task that controls slave task execution. Master task is waiting
for start button pressed state. When this state is reached, the master task starts slave task by
sending start event. If stop button is pressed, master task handles this state and stops slave task.
Slave task is idle and waiting for the start event. When this event is received, slave task
executes a loop.
Example with DIFFUSE and WAIT EVENT:
‘Master Task
PROG
...
RUN SlaveTask
...
WAIT Inp(StartCycle)=On
...
DIFFUSE Start
...
...
WAIT Inp(StopCycle)=On
HALT SlaveTask
...
END PROG
‘Slave task
PROG
Beginning:
...
...
...
WAIT EVENT Start
GOTO Beginning
END PROG
This example is the same like the last example but used the DIFFUSE instruction.
Wait
The second mechanism which waits an event is the WAIT instruction. This instruction doesn’t
allow the execution of the task if the expression is not valid. The Wait instruction used a global
variable or an input. To send an event, you must assign a value to the global variable in another
task.
The example below is the same like the SIGNAL and WAIT EVENT example but with the
mechanism of WAIT :
‘Master Task
WAIT Inp(StartCycle)=On
...
SignalVariable=1
...
‘Slave Task
...
...
WAIT SignalVariable=1
SignalVariable=0
This mechanism has an execution time longer than the other mechanism. The initialization of
the global variable is an extra time in the execution.
5-1-4- Counters
The SUPERVISOR has two 16 bits counters. Each inputs card SIO can be assign to a counter.
' Warning :
- When the counter is at its maximum value, the counter is initialized to zero at the next
edge.(maximum value : 65535)
Configuration
SETUPCOUNTER instruction allows the counter configuration.
Syntax :
R403
SETUPCOUNTER(<Counter>,<Input>,<Invert>,<DesactivateFilter>)
- 62 -
SERAD S.A.
Supervisor documentation
Accepted types : <Counter> : 1 or 2
<Input> : Byte
<Invert>, <Filter> : bit
Description :
This instruction defines the counter configuration
Remarks :
<Counter> : Counter number (1 or 2)
<Input> : Input number of the input card
<Inversion> : edge choice : 0 for a positive edge, 1 for a negative edge
<DesactivateFilter> : 1 without filter, 0 for a 2ms filter.
If the filter isn’t activating, the maximum frequency is 1.5 KHz. Else, the maximum frequency
is 200 Hz.
Clear
CLEARCOUNTER instruction initializes the counter to zero.
Syntax :
CLEARCOUNTER(<Counter>)
Accepted types : <Counter> : Byte
Description :
This instruction initialise the counter to zero.
Remarks :
<Counter> : Counter number (1 or 2)
Read
COUNTER_S allows the reading of the counter.
Syntax :
<Variable>=COUNTER_S(<Counter>)
Accepted types : <Variable> : Integer
<Counter> : Byte
Description :
This instruction reads the counter
Remarks :
<Counter> : Counter number (1 or 2)
5-1-5- Enhanced PLC Function
Présentation
The PLC functions (Enhanced PLC ) allow to integrate the functioning of a PLC in a
multitasks basic program. Like this, we warrant that the I/O used in this tasks are handle
as a PLC. The inputs are memorised in bit’s copy before to be treated, the ouputs to
modify are memorised before to be update.
Utilisation du PLC
The PLC use tables to memorize the status of I/O. Two tables of long integer for inputs
and two tables of integer for outputs.
The function PlcReadInputs read the status of inputs, after to have memorized theirs old
status, to allow detection of edge.
R403
- 63 -
SERAD S.A.
Supervisor documentation
The function PlcInp, PlcInpb, PlcInpw, PlcInpPe ans PlcInpNe allow to read the status
of inputs and detect edges.
The functions PlcOut, PlcOutB and PlcOutW modify bit’s copy of outputs.
The function PlcWriteOutputs write the status of bit’s copy on physical outputs.
Exemple
In this exemple, the outputs’s blocks are used to count positive and negative edge of a
input.
PROG
‘ on utilise toutes les sorties
Masque[1]=0FFFFh
Masque[2]=0FFFFh
‘ on initialise le PLC
PlcInit(Entrees,EntreesOld,Sorties,Masque)
Repeat
‘ lecture des entrées
PlcReadInputs
‘ détection des fronts montants
If PlcInpPe(I1) Then
PlcOutB(JL)=PlcOutB(JL)+1
End If
‘ détection des fronts descendants
If PlcInpNe(I1) Then
PlcOutB(JH)=PlcOutB(JH)+1
End If
‘ écriture des sorties
PlcWriteOutputs
Until False
END PROG
R403
- 64 -
SERAD S.A.
Supervisor documentation
5-2- Ladder task
5-2-1- Presentation
Each ladder task is defined with rungs. The number of rungs is limited to 50 for a task. A rung is
defined by one or more coils and only one expression. Then, coils of a same rung have the same
expression. A rung can have a maximum of 5 coils or contact in parallel and 10 contact in serial.
Attention : A ladder task is automatically traduct in basic. It’s advise to not write a long or
complex ladder task, in order to avoid time cycle detoriorations and basic traduction limit.
5-2-2- Contacts, coils, timers and counters
Contacts
An input name, output name or bit name can be assigned to a contact. A system bit name can be
assigned only to a normal or invert contact.
Normal contact : The state of the contact is the state of the variable assigned.
Invert contact : The state of the contact is the invert state of the variable assigned.
Contact with positive edge detection : The state of the contact is true when the assigned
variable is in the transition state : false to true.
Contact with negative edge detection: The state of the contact is true when the assigned
variable is in the transition state : true to false.
Coils
An output name or a bit name can be assigned to a coil. An input name or a system bit can’t be
assigned to it.
Normal coil : The state of the coil is the state of the expression assigned.
Invert coil : The state of the coil is the invert state of the expression assigned.
Coil with SET action : The state of the coil is true when the expression is true. The state of
the coil is false when the Reset coil is activated.
Coil with RESET action: The state of the coil is false when the expression is false. The state
of the coil is true when the Set coil is activated.
Counters up or down
R403
- 65 -
SERAD S.A.
Supervisor documentation
The counters up or down have two inputs and an output. Each counters up or down is defined
with a name and a pre-selected value. This pre-selected value may be a fixed value or a global
variable. With a global variable, you can modify it at any time during the execution. When you
used a counter up or down, you must link the counter output to a coil even if the coil is not used.
Up counter : CUP is the counter up input. On a positive edge detected on this input, the
counter up variable is incremented. When the value of the counter up variable is greater or equal
to the pre-selected value, the counter up output is true. The RST input has priority. When this
input is true, the counter up variable is initialize to zero. At the power on, the counter up value is
equal to zero.
Down counter : CDN is the counter down input. On a negative edge detected on this input,
the counter down variable is decrements. When the value of the counter down variable is lower
or equal to zero, the counter down output is true. The RST input has priority. When this input is
true, the counter down variable is initialize to the pre-selected value. At the power on, the
counter up value is equal to the pre-selected value.
The counter up or counter down variable can be treated and modify in another basic task :
<CounterName> + <&>.
Example
: Counter name : Counter1
Counter up Local Variable
: Counter1&
Timer
The timers are all on delay timing (TON). The delay may be a fixed value or a global variable.
All the timers uses the TIMER instruction. When you used a timer, you must link the timer
output to a coil even if the coil is not used.
The variable used with the timer can be treated in another basic task. Its syntax is : <Bloc
Name> + <TVAL!>. This variable represents the remaining delay since the activation of timer.
Example
: Timer name : Timer1
Variable : Timer1Val!
On delay timing (TON) :
Example :
Off delay timing (TOFF) :
To make this type of timer, you must use an invert coil with the triggering expression in a first
rung. In the second rung, you use the contact with the same variable as the coil in the last rung
and a timer and another invert coil.
Example :
R403
- 66 -
SERAD S.A.
Supervisor documentation
5-2-3- Free contact and coil
This type of contact and coil provides more capabilities for the ladder. This type of contact and
coil are : the free contact and the free coil.
Free contact : With this type of contact, you can test all type of variables (Ex :byte, Integer,
long integer, real or string). We can make test with movement instructions (Ex :
MOVE_S(X),…). In this contact, you must only edit your expression to test with the bracket.
(Ex : (MOVE_S(X)=1) And (POS(X)>2000))
Free coil : This type of coil allows you to execute any sort of instruction like movement
instruction... With this coil, you can assign all types of variables. (Ex :byte, Integer, long
integer, real or string). In this coil, you must only edit the instruction. (Ex :
STTA(X=100,Y=150))
' Warning : Don ‘t use passive wait instruction. This type of instructions stops anf affects the
ladder task evolution (Ex : MOVA, WAIT,…).
5-2-4- System bits
Initialization bit : This bit is true on the first cycle of the ladder task.
Blink 0.5s : The state of this system bit changes between 0 and 1 every 0.5s.
Blink 1s : The state of this system bit changes between 0 and 1 every 1s.
5-2-5- Task architecture
This is the architecture of the ladder task :
With this architecture, the state of inputs is loaded before the treatment of equations. The
outputs are updated only once times per cycle.
The multitask allows the ladder task to be suspended at any times of the execution cycle.
R403
- 67 -
SERAD S.A.
Supervisor documentation
6- PROGRAMMATION OF SERIAL1/SERIAL2
COMMUNICATION PORTS
6-1- Introduction
SUPERVISOR have an RS232 communication port on Serial1. This communication port is
used to send or receive the configuration, variables, tasks… between PC and SUPERVISOR.
A second optional serial port RS232 or RS485 can be installed on Serial2.
These 2 ports can be treated in basic tasks. With the port, we can open or close it or reading or
writing data.
The function of conversion like MKI$, CVI, MKL$, CVL... can be used to optimize the coded
and decoded of message.
6-2- Opening a communication port
To open a communication port Motion Control Basic provides the OPEN instruction. OPEN
instruction has the following syntax :
OPEN <Communication port> AS # <CommNumber>
<Communication port> is a string that identifies physical communication port name and setup.
<CommNumber> is the number used to identify the opened communication port . This number
will be used by READ, WRITE and CLOSE functions.
<Communication port>string can be decomposed in five parts :
"SERIAL2:[Speed[, Data[, Parity [, Stop ] ] ] ]"
Speed : Communication speed (150, 300, 600, 1200, 2400, 4800 or 9600 b/s)
Data : Number of data bits (7 or 8)
Parity : Parity checking mode (E for Event, O for Odd, M for Mask, S for Space or N for
None)
Stop : Number of stop bits (1 or 2)
The string must respect the parameters order. Speed, data, parity and stop parameters are
optionals. When the task is compiled and if the parameters are not defined, the system takes the
default parameter defined in the configuration screen. (double-click on the SUBD of the Serial
communication port).
Example :
OPEN «SERIAL2
:9600,8,N,1" AS #1
‘ SERIAL2 is opened to communicate
When a port is open by a task, this port can’t be opened again by another task. But a
communication port open can be read or written by any other task.
A communication port must be open before the reading or writing of data.
You should reserve the Serial1 to the downloading between SUPERVISOR and PC. Otherwise,
you need to manipulate the plugs.
If Serial1 is used in a task, you should execute the « Stop task » command before the
downloading.
6-3- Reading data
Received buffer
R403
- 68 -
SERAD S.A.
Supervisor documentation
Each serial port have a received buffer with 500 bytes length
If the buffer is full (500 characters are received and unread), the new received characters clear
the first one.
The CLEARIN instruction clears this buffer.
The CARIN instruction returns the number of characters in the buffer.
To read data, there are two instructions : INPUT and INPUT$.
The INPUT instruction waits the data and assigns the received data to variables.
The syntax is : INPUT #<ComNumber>, <Variable> [ {, <Variable> } ]
<ComNumber> is the number specified in the OPEN instruction. The reading data must come in
the order of the variable list and with the same type.
For example :
OPEN "SERIAL1:" AS #1
INPUT #1, B$, C%
CLOSE #1
' Open the serial port 1 affected to canal 1
' Read a string and an integer
' Close the serial port
For all the numeric variables of the list, the beginning of the number is detected when the first
character is not a space character. The end of the character is detected with a space, a comma or
a carriage return character. An underscore character is a zero. If the numeric variable is not
valid, the variable takes the zero value.
For all the string variables of the list, the beginning of the string is detected when the first
character is not a space character. The end of the character is detected with a space, a comma or
a carriage return character. An underscore character is a string with a string length equal to zero.
The INPUT$ instruction reads some characters on the communication port and stores them in a
string char. The syntax is :
<StringcharVariable> = INPUT$ (#<ComNumber>, <LengthOfCharacters>)
This two instructions stop the task as long as the number of received characters is not valid.
6-4- Writing data
Transmit buffer
Each serial port have a transmit buffer with 500 bytes length
The characters, which are sent by a task with the PRINT instruction, are send to the transmit
buffer. These characters are transmitted one after one on the serial link.
If the transmit buffer is full (500 characters in the buffer), the task, which wants to send data, is
suspended as long as the transmit buffer is full.
The CLEAROUT instruction clears the buffer.
The CAROUT instruction returns the number of characters in the transmit buffer.
The OUTEMPTY instruction indicates if the buffer is empty and the last character is sent.
The PRINT instruction converts data and send them. The syntax is :
PRINT #<ComNumber>, <Expression> [ { [ ; | , ] <Expression> } ] [ ; | , ]
<ComNumber> is the number specified in the OPEN instruction.
For example :
OPEN "SERIAL1:" AS #1
...
PRINT #1, A$, B%;
PRINT #1, C$,
R403
' Open the communication port 1
' Send a string of char and an integer
- 69 -
SERAD S.A.
Supervisor documentation
PRINT #1,CHR$(10)
PRINT #1,CHR$(10)
...
;MESSAGE1$
;MESSAGE2$
;
‘ ASCII 13D is not sent after MESSAGE1$
‘ ASCII 13D is sent after MESSAGE2$
A semicolon between two expressions signifies that the next character is sent immediately after
the last character. A semicolon at an end line signifies that the extra ASCII character 13D is not
sent.
A comma signifies that the character is sent at the beginning of the next line. If there is no
expressions list after the PRINT expression, the ASCII Character 13D is sent.
If the parameter #1 or #2 is not specified, the system send the data on #1.
6-5- Close a communication port
To close a communication port, there is the CLOSE instruction. The syntax is :
CLOSE #<CommNumber>
6-6- RS485 treatment
With a RS232 communication port, SUPERVISOR can communicate with only one peripheral
system. But, with the RS485 communication port, SUPERVISOR can communicate with more
than one peripheral system.
To send a message with a RS485 communication port, SUPERVISOR must drive the
communication line.
The TX485 instruction permits SUPERVISOR to take the line during a given number of
character. When a character is sent, the TX485 value is decrements. When this value reaches
zero, the line is automatically given back.
' Warning : Each character sent is received by the SUPERVISOR as the TX485 value is
different to zero.
Example :
.....
Message$= « Motion Control System »
TX485(#1)=Len(Message$)
PRINT #1,Message$ ;
‘ Take the line during the sending of Message$
CLEARIN #1
‘ Clear the echo characters
6-7- Example: RTU Modbus driver
SLAVE232 Task
Prog
' ***
' *** DRIVER MODBUS ESCLAVE RS232 ***
' ***
'-----------------------------------------------------------' *
' * INITIALISATION *
' *
'
' WARNING!!! =>Defined in global stored variables :
' TableModbus
type:integer
number:255
'
NumeroSUPERVISOR#=1 'number of the SUPERVISOR
TimeOut&=10 '10ms maximum delay between 2 received characters
'
AdressModBus%=600 'Start address of the table
NumberModbus%=300
'Number of words in the table
' init maintenance counters
CmtMessage&=0
ErrLiaison&=0
R403
- 70 -
SERAD S.A.
Supervisor documentation
ErrAdresse&=0
ErrData&=0
'Open serial2
Open "Serial2:9600,8,N,1" As #2
Clearin #2 'Clear the rxd buffer
TempoRxd&=Time
'-----------------------------------------------------------' *
' * RECEIVE *
' *
InitRxd:
PtrRxd#=0
Rxd$=""
'
WaitRxd:
If Carin(#2)<>0 Then Jump ReadRxd
If PtrRxd#=0 Then Goto WaitRxd
If Time>TempoRxd& Then Goto InitRxd
Goto WaitRxd
'
ReadRxd:
TempoRxd&=Time+TimeOut&
If PtrRxd#>=2 Then Jump MessageRxd
If PtrRxd#=1 Then Jump Car2Rxd
Car1Rxd:
CarRxd$=Input$ #2,1
Car1tRxd:
NumSUPERVISOR#=Asc(CarRxd$)
If (NumSUPERVISOR#<>NumeroSUPERVISOR#) And (NumSUPERVISOR#<>0) Then Jump
InitRxd
PtrRxd#=1
Rxd$=CarRxd$
Jump WaitRxd
Car2Rxd:
CarRxd$=Input$ #2,1
NumFonction#=Asc(CarRxd$)
If (NumFonction#<>3) And (NumFonction#<>4) And (NumFonction#<>16) Then Jump
Car1tRxd
PtrRxd#=2
Rxd$=Rxd$+CarRxd$
Jump WaitRxd
MessageRxd:
CarRxd$=Input$ #2,Carin(#2)
PtrRxd#=PtrRxd#+len(CarRxd$)
If PtrRxd#>240 Then Jump InitRxd
Rxd$=Rxd$+CarRxd$
If NumFonction#=16 Then
If PtrRxd#<7 Then Jump WaitRxd
If PtrRxd#<(Asc(Rxd$,7)+9) Then Jump WaitRxd
Rxd$=Left$(Rxd$,Asc(Rxd$,7)+9)
Else
If PtrRxd#<8 Then Jump WaitRxd
Rxd$=Left$(Rxd$,8)
End If
'
TraitementMessage:
Sum$=Left$(Rxd$,Len(Rxd$)-2)
Sum%=Crc(Sum$)
Sum$=Mki$(Sum%)
If Sum$<>Right$(Rxd$,2) Then Jump ErreurLiaison
AdrBus%=Cvir(Mid$(Rxd$,3,2))
NbrBus#=Asc(Rxd$,6)
If (NbrBus#=0) Or (NbrBus#>100) Then Jump ErreurAdresse
If AdrBus%<AdresseModbus% Then Jump ErreurAdresse
A1%=AdrBus%+NbBus#
A2%=AdresseModbus%+NombreModbus%
If A1%>A2% Then Jump ErreurAdresse
If NumFonction#=16 Then Jump WriteWord
R403
- 71 -
SERAD S.A.
Supervisor documentation
'-----------------------------------------------------------'
' reading words
'
ReadWord:
If NumSUPERVISOR#<>NumeroSUPERVISOR# Then Jump ErreurLiaison
Txd$=""
I#=1
A%=(AdrBus%-AdresseModbus%)+1
ReadWordBcl:
Txd$=Txd$+Mkir$(TableModbus[A%])
A%=A%+1
I#=I#+1
If I#<=NbrBus# Then Jump ReadWordBcl
Txd$=Chr$(Len(Txd$))+Txd$
CmtMessage&=CmtMessage&+1
Jump MessageTxd
'-----------------------------------------------------------'
' Write Words
'
WriteWord:
I#=1
J#=0
A%=(AdrBus%-AdresseModbus%)+1
WriteWordBcl:
TableModbus[A%]=Cvir(Mid$(Rxd$,8+J#,2))
A%=A%+1
I#=I#+1
J#=J#+2
If I#<=NbrBus# Then Jump WriteWordBcl
Txd$=Mid$(Rxd$,3,4)
CmtMessage&=CmtMessage&+1
Jump MessageTxd
'-----------------------------------------------------------' *
' * TRANSMIT *
' *
' Erreurs
ErreurLiaison:
ErrLiaison&=ErrLiaison&+1
Jump InitRxd
ErreurAdresse:
NumFonction#=NumFonction#+128
Txd$=Chr$(2)
ErrAdresse&=ErrAdresse&+1
Jump MessageTxd
ErreurData:
NumFonction#=NumFonction#+128
Txd$=Chr$(3)
ErrData&=ErrData&+1
' Send message
MessageTxd:
Clearin #2 'clear rxd buffer
If NumSUPERVISOR#=0 Then Jump InitRxd
Txd$=Chr$(NumSUPERVISOR#)+Chr$(NumFonction#)+Txd$
Sum%=Crc(Txd$)
Print #2,Txd$+Mki$(Sum%);
Jump InitRxd
'
End Prog
R403
- 72 -
SERAD S.A.
Supervisor documentation
7- PROGRAMMATION OF DISPLAY/KEYBOARD
7-1- Supervisor description
7-1-1- Supervisor 640 :
Screen
LCD display with CFL backlight
Display area 122×66 mm
Characters attributes : normal, reverse, blinking
ASCII protocol
Resolution in graphic mode : 240×128 pixels
4 simultaneous sizes of characters in text mode :
3×4 mm
16 lines × 40 characters
4×7 mm
9 lines × 30 characters
5×8 mm
8 lines × 26 characters
7×10 mm
6 lines × 17 characters
Keypad
33 keys with tactile feedback
6 dynamic function keys
6 rewriteable function keys with integrated leds
Control and scrolling keys
Help and alarm keys
Numeric and alphanumeric keys
Buzzer
7-1-2- Supervisor 80 :
Screen
4×20 Characters LCD display with backlight
Display area 74×23 mm
Characters attributes : normal, blinking
ASCII protocolKeyboard
28 keys with tactile feedback
4 dynamic function keys
6 rewriteable function keys with integrated leds
Control and scrolling keys
R403
- 73 -
SERAD S.A.
Supervisor documentation
Help and alarm keys
Numeric and alphanumeric keypad
Buzzer
7-2- Operator functions
7-2-1- Screen
Four functions give the access of the operator panel screen.
The CLS function clears the screen.
The syntax of this function is : CLS.
This instruction have specific extensions :
CLS B : clear the screen with a black background
CLS W : clear the screen with a white background
To display the cursor, you need to use the CURSOR (on/off) instruction. This function
indicates the beginning of a data capture. CURSOR=<ON/OFF>
To locate the cursor on the screen, there is the LOCATE instruction. The origin of the screen
is in the top and left corner of the screen with the 1,1 coordinates. The syntax is : LOCATE
<Line>,<Row>.
The PRINT function displays a text or the contents of a variableon the screen. The syntax is :
PRINT <Expression>[;/,]<Expression>[;/,]
When a comma is used to separate two expressions, a carriage return is inserted between these
expressions. But if a semi-column is used to separate two expressions, the carriage return is not
inserted. (character ASCII 13(D))
Example :
CLS
'Clear screen
CURSOR=ON 'Display the cursor
LOCATE 2,4 'locate the cursor at the line 2 and row 4
The FONT function defines the font to use for the text. The syntax is : FONT=<Value>.
<Value> is an integer between 1and 8 and defines the type of font.
The PIXEL function switch on or off a pixel on the screen. The syntax is :
PIXEL(X,Y,Colour). Colour may be the white (Colour=1) or black (Colour=0).
The BOX function draws a rectangle on the screen. The syntax is :
BOX(X1,Y1,X2,Y2,<BorderColour>,<FillColour>). The X1, Y1 parameters are the top and
left corner of the rectangle and X2, Y2 parameters the bottom and right corner of the rectangle.
<BorderColor> defines the color of the border and <FillColour> the colour of the filling
rectangle.
The HLINE function draws a horizontal line on the screen. The syntax is :
HLINE(X1,Y1,X2,<Colour>). The X1,Y1 parameters are the starting point of the line and
X2,Y1 parameters are the ending point. <Colour> defines the colour of the line.
The VLINE function draws a vertical line on the screen. The syntax is :
VLINE(X1,Y1,Y2,<Color>). The X1,Y1 parameters are the starting point of the line and X1,Y2
parameters the ending point. <Colour> defines the colour of the line.
R403
- 74 -
SERAD S.A.
Supervisor documentation
7-2-2- Keyboard
We have two functions and a system variable to use the keyboard.
The function Inkey allows to read a key and to stock its code in a type byte variable. If no
key is pressed before the function call, this one returns 0.
The syntax is the following : <Variable>=INKEY
Example :
Waiting:
K#=INKEY
IF K#=0 Then Goto Waiting
IF K#=@F1 Then Goto MenuF1
IF Inp(StartButton)=On Then Goto Start
Goto Waiting
The WAIT KEY function allows to wait for pressing a key and stocking then the key code in
the system variable KEY. Contrary to the previous function, this function is locking the task as
long as any other key is pressed. The syntax is : WAIT KEY
Endly, the system variable KEY contains the code of the last key pressed in the functions
WAIT KEY or EDIT. This variable is local to the task and can't be written.
Example :
WAIT KEY
IF KEY=@F1 THEN GOTO ...
IF KEY=@F2 THEN GOTO ...
...
' Key waiting
7-2-3- Edit
The SUPERVISOR allow, via the EDIT function, to type a real with or without sign and point,
displaying it on an exact place on the screen.In the instruction's line, we choose the number of
characters in the real variable, the line and row number of the first character. we can as well
say if yes or no (0 or 1) we use the sign and/or the point.
The syntax is : <Variable> = EDIT(<Line>,<Row>,<Length>,<Sign>, <Point>).
To edit the value, we use the numerical keys, the DEL keys to clear, ENTER to valid and ESC
to stop the editing.
Example :
EditRes!=EDIT(1,5,4,0,0)
'Real four numbers edition without point
'no sign in line 1 and row 5
If Key=@ESC Then Goto MainMenu
If (EditRes!<10) Or (EditRes!>50) Then
Beep
Goto MainMenu
End If
Length=EditRes!
Goto MainMenu
The EDIT function have a second syntax. This second syntax allows to type access code with an
asterisk displaying (*) on a key pressed. This mode is indicated by the <Code> bit. The syntax
is :
<Variable> = EDIT(<Line>,<Row>,<Length>,<Sign>,<Point>,<AccessCode>).
EditCode!=EDIT(1,5,4,0,0,1) 'Real four numbers edition without point
'no sign in line 1 and row 5 with the access
'code mode
If Key=@ESC Then Goto MainMenu
If (EditCode!=AdjustCode) Then
Goto AdjustMenu
Else
Beep
R403
- 75 -
SERAD S.A.
Supervisor documentation
Goto MainMenu
End If
To edit a string char displaying it on an exact place on the screen, the SUPERVISOR had the
EDIT$ instruction. In this instruction, you must define the string char variable (<Variable>), the
line (<Line>) and row (<Row>) of the first editing character and the maximum length of this
editing (<Length>).
the syntax is : <Variable>=EDIT$(<Line>,<Row>,<Length>). To edit a character on an
operator panel, the numeric and alphanumeric key are used, the DEL key to erase, ENTER key
to validate and ESC key to escape. To display an alphanumeric character, you need to press the
key one or more times..
A$=Edit$(2,9,5)
‘Edit in line 2, row 9 of 5 characters
7-2-4- Buzzer
Two possibilities are offered to use the buzzer of the SUPERVISOR :
To produce or to stop a continuous sound - BUZZER instruction
Syntax : BUZZER= <ON/OFF>
To make a brief sound - BEEP instruction - Syntax : BEEP
Example :
IF KEY<>@ENTER THEN BEEP
...
Alarm:
BUZZER=ON
DELAY 1000
BUZZER=OFF
DELAY 1000
GOTO Alarm
‘emit a beep on «
enter
» key press
‘ emit a continuous sound during
‘ a 1s delay
‘ Stop the buzzer
7-2-5- Backlight
The S640 had a function to control the backlight : BACKLIGHT. The backlight will become
inactive after a delay if user don’t push on a key panel. The backlight becomes active when a
key pane is pushed. The syntax is : BACKLIGHT= <Delay>. <Delay> defines the active time
of the backlight after the last key press. This value is an integer which represents the minutes.
The zero value allows the backlight to be always inactive and 1 always active. By default,
<Delay> is equal to 15mn.
' Warning : le Backlight have a 10000h life duration.
7-2-6- Leds
To drive the leds of the SUPERVISOR, you can use the LED (number)=State instruction.The
number parameter is the key name where the led is (@F1 … @F6) or for the specific leds its
name (@ALARM or @HELP). The State parameter defines the state of the led : switch off (0),
switch on (1) or blink (2).
' Warning : The leds of keys F7…F12 on the SUPERVISOR are driven by the
LED(@F1)…LED(@F6) instruction.
7-3- Keys
7-3-1- SUPERVISOR keys
à
R403
@F1 à @F12
@POINT
- 76 -
SERAD S.A.
Supervisor documentation
à
@0 à @9
@UP
@HELP
@DOWN
@ALARM
@RIGHT
@ESC
@LEFT
@MOD
@RETURN
@SIGN
7-4- Internals menus
7-4-1- General explications
This menus allow :
Test inputs / outputs in a manual mode
Read and write the global stored variables
Control the storage and restoration of the data in flash
Adjust the date and the time
Modify the state of the watchdog
This internal menus are executed with the CALL instruction. These menus are used like a subroutine. The name of the menus begins with the character ‘_’. The syntax is : CALL <Name of
menu>.
7-4-2- Main menu
Main Menu : MENUMCS
Syntax : CALL _MENUMCS
Function : Gives the access of all the sub-menus.
Keys :
R403
- 77 -
SERAD S.A.
Supervisor documentation
F1 : parameters sub-menu
F2 : manual sub-menu
F3 : variables sub-menu
F4 : memory sub-menu
F5 : clock sub-menu
F6 : Next page
ESC : quit menu
Function : Gives the access of all the sub-menus.
Keys :
F1 : Previous page
F2 : taks sub-menu
F3 : watchdog sub-menu
ESC : quit menu
7-4-3- Parameters sub-menu
Parameter sub-menu : PARAMMCS
Syntax : CALL _PARAMMCS
Keys :
F1 : Set
R403
F2 : RESET
- 78 -
SERAD S.A.
Supervisor documentation
F1 : LEFT
F2 : RIGHT
ESC : Exit menu or return in main menu
7-4-4- Manual sub-menu
Main menu : MANUMCS
Syntax : CALL _MANUMCS
Keys :
F1 : Set
F2 : RESET
F1 : LEFT
F2 : RIGHT
ESC : Exit menu or return in main menu
7-4-5- Variables sub-menu
Main menu : VARIABMCS
Syntax : CALL _VARIABMCS
Keys :
F1 : Variable number
F3 : Read
F5 : Real time read
R403
F2 : Variable type
F4 : Write
F6 : Stop to read
- 79 -
SERAD S.A.
Supervisor documentation
: Next variable
: Previous Variable
ESC : Exit menu or return in main menu
7-4-6- Memory sub-menu
Main menu : MEMMCS
Syntax : CALL _MEMMCS
Keys :
F1 : Backup data in flash
F2 : Restore dat
a from flash
F3 : Clear data in flash
F4 : Restart SUPERVISOR
F6 : Valid data in memory
ESC : Exit menu or return in main menu
7-4-7- Clock sub-menu
Main menu : TASKMCS
Syntax : CALL _TASKMCS
Keys :
F1 : Next page
F2 : Previous page
ESC : Exit menu or return in main menu
R403
- 80 -
SERAD S.A.
Supervisor documentation
7-4-8- Tasks sub-menu
Main menu : TASKMCS
Syntax : CALL _TASKMCS
Keys :
F1 : Previous page
F2 : Next page
ESC : Exit menu or return in main menu
R403
- 81 -
SERAD S.A.
Supervisor documentation
8- OPERATOR AND INSTRUCTIONS LIST
8-1- Program
CALL
Call a subroutine
ICALL
Call a subroutine
END
bloc end
EXIT SUB
Exit subroutine
GOTO
Branch to label
JUMP
Branch to label
PROG ... END PROG
Program
SUB ... END SUB
Subroutine
8-2- Arithmetical
+
Addition
-
Subtraction
*
Multiplication
/
Division
8-3- Mathematical
ABS
Absolute value
ARCCOS
Cosine invert
ARCSIN
Sine invert
ARCTAN
Tangent invert
COS
Cosine
DIV
Integer divide
EXP
Exponential
FRAC
Fractional part
INT
Integer part
LOG
Logarithm
MOD
Modulus
SGN
Sign
SIN
Sine
SQR
Square root
TAN
Tangent
^
Exponent
R403
- 82 -
SERAD S.A.
Supervisor documentation
8-4- Loops
FOR ... TO ... STEP ... NEXT
REPEAT ... UNTIL
WHILE ... DO ... END WHILE
8-5- Logical
<<
Left shift
>>
Right shift
AND
AND operator
NOT
Complement Operator
OR
OR operator
XOR
Exclusive OR operator
8-6- Test
<
Lower
<=
Lower or equal
<>
Different
=
Equal / affect
>
Greater
>=
Greater or equal
CASE ...
Multiple tests
IF ... THEN ... ELSE ... END IF
Test structure
8-7- Char string
ASC
Convert char to ASCII
CHR$
Convert ASCII to char
FORMAT$
Created a formatted string
INSTR
Search a sub-string
LCASE$
Lowercase
LEFT$
Left part of string
LEN
String length
LTRIM$
Suppress left spaces
MID$
String part
RIGHT$
Right part of string
RTRIM$
Suppress right spaces
SPACE$
Spaces made string
STR$
Convert numeric to string
R403
- 83 -
SERAD S.A.
Supervisor documentation
STRING$
Create a string
UCASE$
Uppercase
VAL
Convert string to numeric
8-8- PLC
8-8-1- Logical inputs / outputs
INP
1 digital input reading
INPB
8 digital inputs reading
INPW
16 digital inputs reading
OUT
1 digital output writing
OUTB
8 digital outputs writing
PLCINIT
PLC function initialisation
PLCINP
Read TOR input
PLCINPB
Read a 8 inputs block
PLCINPNE
Read a negative edge on PLC TOR input
PLCINPPE
Read a positive edge on PLC TOR input
PLCINPW
Read a 16 inputs block
PLCOUT
Write a output
PLCOUTB
Write a 8 outputs block
PLCOUTW
Write a 16 outputs block
PLCREADINPUTS
Read the PLC inputs
PLCWRITEOUTPUTS
Write the PLC outputs
SETINP
Inputs filter and invert
SETOUT
Outputs invert
WAIT
Condition waiting
8-8-2- Timing
DATE$
Current date in string
DELAY
Passive wait
GETDATE
Current date
GETTIME
Current time
SETDATE
Set date
SETTIME
Set time
TIME
Global time base
TIMER
Global wide time base
TIME$
Current time in string
8-8-3- Event handling
DIFFUSE
Send event
GETEVENT
Read event
MODIFYEVENT
Event configuration
R403
- 84 -
SERAD S.A.
Supervisor documentation
SIGNAL
Send event
WAIT EVENT
Passive event wait
8-8-4- Counter
CLEARCOUNTER
RAZ counter
COUNTER_S
Counter read
SETUPCOUNTER
Counter configuration
8-9- Display / Keyboard
8-9-1- Supervisor 80 and 640
BEEP
Brief sound
BUZZER
Continuous sound
CLS
Clear screen
CURSOR
Clear or display cursor
EDIT
Editing
EDIT$
alphanumeric data capture
KEY
Last key
KEYDELAY
Delay before repeat key
KEYREPEAT
Repeat key period
LED
driving leds
LOCATE
Cursor position
PRINT
Print a text
READKEY
Pressed key
WAIT KEY
Key waiting
8-9-2- Supervisor 640
BACKLIGHT
Screen saver control
BOX
Draw box
FONT
Font selection
HLINE
Draw horizontal line
PIXEL
Draw point
VLINE
Draw vertical line
8-10- Task handling
CONTINUE
Continue task execution
HALT
Stop task
RUN
Start task
SUSPEND
Suspend a task
STATUS
Task state
R403
- 85 -
SERAD S.A.
Supervisor documentation
8-11- Communication
CARIN
Input buffer state
CAROUT
Output buffer state
CLEARIN
Clear input buffer
CLEAROUT
Clear output buffer
CLOSE
Close communication port
INPUT
Data reading
INPUT$
Char string reading
OPEN...AS...
Open a communication port
OUTEMPTY
Output buffer status
PRINT
Write on the communication port
TX485
Modify RS485 output state
8-12- Flash, Security and other functions
CRC
Return a checksum value
CLEARFLASH
Clear flash memory
FLASHOK
Test data in flash memory
FLASHTORAM
Restore from flash memory
POWERFAIL
Power failure detect
RAMTOFLASH
Backup to flash memory
RAMOK
Test ram memory
RESTART
Restart system
VERSION
Operating system version
WATCHDOG
Watchdog
8-13- Conversion
CVL
Convert string to long integer
CVLR
Convert string to reverse long integer
CVI
Convert string to integer
CVIR
Convert string to reverse integer
LONGTOINTEGER
Convert long integer to integer
MKL$
Convert long integer to string
MKLR$
Convert reverse long integer to string
MKI$
Convert integer to string
MKIR$
Convert reverse integer to string
REALTOLONG
Convert real to long integer
REALTOINTEGER
Conversion real to integer
REALTOBYTE
Conversion real to byte
R403
- 86 -
SERAD S.A.
Supervisor documentation
8-14- Alphabetic list
8-14-1- Addition (+)
Syntax :
<Expression1> + <Expression2>
Accepted types :
Byte, Integer, Long integer, real or string
Description :
This operator adds two numeric expressions and return a value type identical as its
operand.
Remarks :
<Expression1> and <Expression2> must be numerical valid expressions.
<Expression1> et <Expression2> must have the same type.
Example :
a%=10
b%=5
c%=a%+b%
See also :
'Result : c%=15
`-`, `*' and `/'.
8-14-2- Subtraction (-)
Syntax :
<Expression1> - <Expression2>
Accepted types :
Byte, Integer, Long integer or real
Description :
this operator subtract <Expression2> from <Expression1> and return a value type
identical as its operand.
Remarks :
<Expression1> and <Expression2> must be numerical valid expressions.
<Expression1> and <Expression2> must have the same type.
Example :
a%=10
b%=5
c%=a%-b%
See also :
'Result : c%=5
'+', `*' et `/'.
8-14-3- Multiplication (*)
Syntax :
<Expression1> * <Expression2>
Accepted types :
Byte, Integer, Long integer or real
Description :
This operator multiply <Expression1> by <Expression2> and return a value type
identical as its operand.
Remarks :
<Expression1> and <Expression2> must be numerical valid expressions.
<Expression1> et <Expression2> must have the same type.
Example :
a%=10
b%=5
c%=a%*b%
See also :
'Result : c%=50
'+', '-' and `/'.
8-14-4- Division (/)
Syntax :
<Expression1> / <Expression2>
Accepted types :
Byte, Integer, Long integer or real
Description :
This operator divide <Expression1> by <Expression2>
R403
- 87 -
SERAD S.A.
Supervisor documentation
Remarks :
<Expression1> and <Expression2> must be numerical valid expressions.
<Expression1> et <Expression2> must have the same type. <Expression2> must be
different of zero. This operator always return a real value.
Example :
a%=10
b%=5
c!=a%/b%
See also :
'Result : c!=2.0
'+', '-', `*' and DIV.
8-14-5- Lower (<)
Syntax :
<Expression1> < <Expression2>
Accepted types :
Byte, Integer, Long integer, real or Char string
Description :
This operator tests if <Expression1> is lower than <Expression2>.
Remarks :
<Expression1> and <Expression2> must be numerical valid expressions.
<Expression1> and <Expression2> must have the same type.
Example :
a%=10
IF b%<a% THEN ...
See also :
'=', '>', '>=', '<=', '<>'.
8-14-6- Lower or equal (<=)
Syntax :
<Expression1> <= <Expression2>
Accepted types :
Byte, Integer, Long integer, real or Char string
Description :
This operator tests if <Expression1> is lower or equal than <Expression2>.
Remarks :
<Expression1> and <Expression2> must be numerical valid expressions.
<Expression1> and <Expression2> must have the same type.
Example :
a%=10
IF b%<=a% THEN ...
See also :
'=', '>', '>=', '<', '<>'.
8-14-7- Left shift (<<)
Syntax :
<Expression1> << <Expression2>
Accepted types :
Byte or Integer
Description :
This operator shifts <Expression2> bits from <Expression1> from right to left.
Remarks :
<Expression2> is the number of bits to shift. The shifting is not circular.
Example :
a%=100b
b% =a%<<2
See also :
'Result b%=10000b
'>>'
8-14-8- Different (<>)
Syntax :
<Expression1> <> <Expression2>
Accepted types :
Byte, Integer, Long integer, real or Char string
Description :
This operator tests if <Expression1> and <Expression2> are different.
R403
- 88 -
SERAD S.A.
Supervisor documentation
Remarks :
<Expression1> and <Expression2> must be numerical valid expressions.
<Expression1> and <Expression2> must have the same type.
Example :
a%=10
IF b%<>a% THEN ...
See also :
'=', '>', '>=', '<', '<='
8-14-9- Affect/Equal (=)
Syntax :
<Expression1> = <Expression2> Or <Variable>=<Expression2>
Accepted types :
Bit, Byte, Integer, Long integer, real or Char string
Description :
this operator affects <Variable> to <Expression2> or tests if <Expression1> is
equal to <Expression2>.
Remarks :
<Expression1> and <Expression2> must be numerical valid expressions.
<Expression1> and <Expression2> must have the same type.
Example :
a%=10
IF b%=5 THEN ...
See also :
'>', '>=', '<', '<=', '<>'
8-14-10- Greater (>)
Syntax :
<Expression1> > <Expression2>
Accepted types :
Byte, Integer, Long integer, real or Char string
Description :
this operator tests if <Expression1> is greater than <Expression2>.
Remarks :
<Expression1> and <Expression2> must be numerical valid expressions.
<Expression1> and <Expression2> must have the same type.
Example :
IF b%>a% THEN ...
See also :
'=', '>=', '<', '<=', '<>'
8-14-11- Greater or equal (>=)Diff_rent
Syntax :
<Expression1> >= <Expression2>
Accepted types :
Byte, Integer, Long integer, real or Char string
Description :
This operator tests if <Expression1> is greater or equal than <Expression2>.
Remarks :
<Expression1> and <Expression2> must be numerical valid expressions.
<Expression1> and <Expression2> must have the same type.
Example :
IF b%>=a% THEN ...
See also :
'=', '>', '<', '<=', '<>'
8-14-12- Right shift (>>)
Syntax :
<Expression1> >> <Expression2>
Accepted types :
Byte or Integer
Description :
This operator shifts <Expression2> bits from <Expression1> from left to right.
Remarks :
<Expression2> is the number of bits to shift. The shifting is not circular.
Example :
a%=11010b
R403
- 89 -
SERAD S.A.
Supervisor documentation
b% =a%>>2
See also :
'Result b%=110b
'<<'
8-14-13- Exponent (^)
Syntax :
<Expression1> ^ <Expression2>
Accepted types :
Byte, Integer, Long integer or real
Description :
this operator raises <Expression1> to the <Expression2> power.
Example :
a!=b!^2 ' a=b²
8-14-14- ABS – Absolute value
Syntax :
ABS (<Expression>)
Accepted types :
Byte or Integer
Description :
This function provide the absolute value of <Expression>. A negative number is
then converted in a positive number.
Remarks :
<Expression> must be a valid numerical expression. The absolute value of a
number is its no-signed value.
Example :
a%=ABS(-100)
'Result : a%=100
a%=ABS(25) 'Result : a%=25
8-14-15- AND – Operator AND
Syntax :
<Expression1> AND <Expression2>
Accepted types :
Bit, Byte or integer
Description :
This function makes a binary AND between two expressions and return a value
type identical as its operands.
Remarks :
<Expression1> and <Expression2> must have the same type.
Example :
IF (A% AND 0FF00h)<>0 THEN ...
See also :
OR, NOT, XOR and IF
8-14-16- ARCCOS – Invert cosine
Syntax :
ARCCOS (<Expression>)
Limits :
–1 to +1
Accepted types :
Byte, Integer, Long integer, real
Description :
This function returns the arccosine of <Expression>.
Remarks :
<Expression> must be a numerical valid expression. This function returns an angle
expressed in radians.
Example :
pi!=2*ARCCOS(0)
See also :
SIN, COS and TAN
8-14-17- ARCSIN – Invert Sine
Syntax :
ARCSIN (<Expression>)
Limits :
-1 to +1
R403
- 90 -
SERAD S.A.
Supervisor documentation
Accepted types :
Byte, Integer, Long integer, real
Description :
This function returns the arcsine of <Expression>.
Remarks :
<Expression> must be a numerical valid expression. This function returns an angle
expressed in radians.
Example :
pi!=2*ARCSIN(1)
See also :
SIN, COS and TAN
8-14-18- ASC – Convert char to ASCII
Syntax :
ASC (<String>)
Accepted types :
Char string
Description :
This function returns a numeric value which is the ASCII code for the first
character of a string expression.
Remarks :
If the string length <String> is zero, the zero value is returned.
Example :
a$="A"
b#=ASC(a$) 'Result : b#=65
See also :
CHR$.
8-14-19- ARCTAN – Invert tangent
Syntax :
ARCTAN (<Expression>)
Accepted types :
Byte, Integer, Long integer, real
Description :
This function returns the arctangent of <Expression>.
Remarks :
<Expression> must be a numerical valid expression. the function ARCTAN takes
the ratio of two sides of a right triangle and returns the corresponding angle. The
ratio is the length of the side opposite the angle divides by the length of the side
adjacent to the angle.
Example :
a!=ARCTAN(3)
pi!=4*ARCTAN(1)
See also :
SIN, COS and TAN
8-14-20- BACKLIGHT – S640 in stand by
Syntax :
BACKLIGHT=<duration>
Units :
duration : minutes
Accepted types :
duration : Integer
Description :
this function defines the duration in minute during the backlight of S640 will stay
active if any of the key panel are pressed.
Remarks :
When backlight is switched off, if a key panel is pressed, the backlight is switched
on. The default duration is equal to 15 minutes.
Duration :
0 backlight switch off
1 backlight always switch-on.
(Duration>1)
delay in minutes.
' Warning : The backlight life duration is about 10 000 hours.
Example :
R403
BACKLIGHT=120
'the backlight S640 will be switch off
- 91 -
SERAD S.A.
Supervisor documentation
'if a key panel is not pressed by the users
' in the two hours last
8-14-21- BEEP – Brief sound
Syntax :
BEEP
Description :
this instruction emits a brief sound on the SUPERVISOR.
Example :
IF KEY<>@ENTER THEN BEEP
Voir aussi :
BUZZER
8-14-22- BOX – Draw box
Syntax :
BOX(X1,Y1,X2,Y2,BorderColour, FillColour)
Units :
X1, Y1, X2, Y2 : pixel
Limits :
X1, X2 : 1 to 240
Y1, Y2 : 1 to 128
Accepted types :
X1, Y1, X2, Y2, FillColour : Byte
BorderColour : Bit
Description :
This instruction draws a box with the coordinates X1,Y1 (top left corner) and
X2,Y2 (down right corner) on the operator panel S640.
Remarks :
The BorderColour parameter defines the colour of the border : black (0) or white
(1). The FillColour defines the colour of the filling : black (0), white (1) or
transparent (2).
Example :
BOX(10,50,85,15,0,1)
'Black border with white fil colour
8-14-23- BUZZER – Continuous sound
Syntax :
BUZZER = <ON|OFF>
Description :
This function activates or desactivates the buzzer of SUPERVISOR.
Example :
Alarme:
BUZZER=ON
DELAY 1000
BUZZER=OFF
DELAY 1000
GOTO Alarme
See also :
R403
BEEP
- 92 -
SERAD S.A.
Supervisor documentation
8-14-24- CALL – Subroutine call
Syntax :
CALL <Name>
Description :
This instruction calls a subroutine define by SUB block. <Name> is the block name
of the subroutine.
Remarks :
A subroutine can’t call itself. System contains some predefined subs :
_MENUMCS, _PARAMMCS, _MANUMCS, _VARIABMCS, _MEMORYMCS
and _CLOCKMCS. The execution of this instruction launches the execution of the
next task.
Example :
CALL Move
See also :
SUB, ICALL
8-14-25- CASE – Multiple tests
Syntax 1 :
CASE <Expression> CALL <Label 1> [ { , <Label2> } ]
Syntax 2 :
CASE <Expression> GOTO <Label 1> [ { , <Label2> } ]
Accepted types :
Expression : Integer
Description :
This function allows to make jumps to labels in function of <Expression> values.
Remarks :
<Expression> must be an integer valid value. If the Expression value is equal to
zero or greater than the number of labels, the task goes on at the next line. The
execution of this instruction launches the execution of the next task.
Example :
Case
a% GOTO Move1, Move2
Goto Fin
‘a%=0 or a%>2
...
Move1:
'a% = 1
...
Move2:
'a% = 2
...
Fin:
8-14-26- CARIN – Input buffer state
Syntax :
CARIN (<Number>)
Description :
This function returns the number of characters in the input buffer of the
communication port.
Remarks :
<Number> is the number used to open the communication port with OPEN
instruction. This function returns an integer.
Example :
WAIT CARIN(#1)>=3 ' Wait for at least 3 received characters
A$=Input$ #1,3
See also :
' Read 3 characters
CAROUT, CLEARIN
8-14-27- CAROUT – Output buffer state
Syntax :
<Expression>=CAROUT (<Number>)
Accepted types :
<Expression> : integer
Description :
This function returns the number of characters in the output buffer of the
communication port.
R403
- 93 -
SERAD S.A.
Supervisor documentation
Remarks :
<Number> is the number used to open the communication port with OPEN
instruction.
Example :
WAIT CAROUT(#1)<10
'Waits for place in the buffer
Print A$;
'Characters writing
See also :
CARIN, CLEAROUT
8-14-28- CHR$ - Convert ASCII to char
Syntax :
CHR$(<Code>)
Accepted types :
Code : Byte
Description :
This function returns a one character-string whose ASCII code is the argument.
Example :
a#=97
b$=CHR$(a#)
See also :
'Result : b$="a"
ASASC C
8-14-29- CLEARCOUNTER – Counter clear
Syntax :
CLEARCOUNTER(<Counter>)
Accepted types :
<Counter> : Byte
Description :
This instruction initialise the counter to zero.
Remarks :
<Counter> : Counter number (1 or 2)
See also :
COUNTER_S, SETUPCOUNTER
8-14-30- CLEARIN – Clear input buffer
Syntax :
CLEARIN <Number>
Description :
This instruction suppresses all the characters in the input buffer of the
communication port.
Remarks :
<Number> is the number used to open the communication port with OPEN
instruction.
Example :
See also :
CLEARIN #1
Wait CARIN (#1)>=3
'Wait for at least 3 characters
A$=Input$ #1,3
'Read 3 characters
CARIN
8-14-31- CLEAROUT – Clear output buffer
Syntax :
CLEAROUT <Number>
Description :
This instruction suppresses all the characters in the output buffer of the
communication port.
Remarks :
<Number> is the number used to open the communication port with OPEN
instruction.
Example :
CLEAROUT #1
Print A$;
See also :
R403
'Write the characters
CAROUT
- 94 -
SERAD S.A.
Supervisor documentation
8-14-32- CLOSE – Close communication port
Syntax :
CLOSE #Number
Description :
The number argument is the number used in the OPEN instruction to open the
communication port.
Remarks :
If you want to change the communication mode, you must close and open once
again the communication port.
Example :
CLOSE #1
See also :
OPEN, INPUT and PRINT.
8-14-33- CLS – Clear screen
Syntax :
CLS
CLS 1, CLS 2, CLS 3 or CLS 4 (only with Supervisor 80)
CLS B, CLS W (only with Supervisor 640)
Description :
CLS clears the four lines of the operator panel screen. CLS 1, CLS 2, CLS 3, CLS
4 clears respectively the first, second, third and fourth line of the operator panel
Supervisor 80 screen. The function CLS B clears the screen of the Supervisor 640
with a black background. The function CLS W clears the screen of the Supervisor
640 with a white background
8-14-34- CLEARFLASH – Clear flash memory
Syntax :
CLEARFLASH
Description :
This function clears parameters and the first 10000 safe variables in the flash
memory.
See also :
RAMOK, FLASHOK, FLASHTORAM
8-14-35- COUNTER_S – Counter reading
Syntax :
<Variable>=COUNTER_S(<Counter>)
Accepted types :
<Variable> : Integer
<Counter> : Byte
Description :
This instruction reads the counter
Remarks :
<Counter> : Counter number (1 or 2)
See also :
SETUPCOUNTER, CLEARCOUNTER
8-14-36- CONTINUE – Continue task execution
Syntax :
CONTINUE <Name>
Description :
This instruction is used to continue the execution of a suspended task.
Remarks :
<Name> must be the name of a suspended task. This function has no effect on the
stopped or executed task.
Example :
Wait Inp(Start)
RUN Coupe
Begin:
R403
- 95 -
SERAD S.A.
Supervisor documentation
Wait Inp(Stop)
SUSPEND Coupe
Wait Inp(Start)
CONTINUE Coupe
Goto Begin
See also :
RUN, HALT, SUSPEND
8-14-37- COS - Cosine
Syntax :
COS(<Expression>)
Accepted types :
Expression : real
Description :
This instruction returns the cosine of the <Expression>.
Remarks :
The argument <Expression> must be a valid numerical expression expressed in
radians. The function COS takes an angle and returns the two sides ratio of a
rectangle triangle. The ratio is the length of the adjacent side divided by the length
of the hypotenuse. The result is between -1 et 1.
Example :
a!=COS(3.14159)
See also :
SIN, ARCTAN et TAN
8-14-38- CURSOR – Print or clear the cursor
Syntax :
CURSOR = <ON | OFF>
Description :
This function prints or not the cursor on the operator panel.
Remarks :
This function uses the communication port #1.By default, the communication port
SERIAL1 will be used. If an operator panel is connected to the SERIAL2 port,
please refer to the OPEN function to affect #1 to the port SERIAL2.
8-14-39- CVL – Convert string to long integer
Syntax :
<Variable>=CVL(<Expression>)
Accepted types :
Variable : Long integer
Expression : string of 4 bytes
Description :
The CVL function converts a string of 4 bytes, created with the MKL$ instruction,
in a long integer value. The least significant word then the most significant word
Example :
A&=CVL(A$) 'If
'then
See also :
A$=chr$(2)+chr$(3)+chr$(1)+chr$(0)
A&=2+(3*256)+(1*65536)+(0*16777216)=66306
CVLR, MKL$, MKLR$
8-14-40- CVLR – Convert string to long reverse integer
Syntax :
<Variable>=CVLR(<Expression>)
Accepted types :
Variable : Long integer
Expression : string of 4 bytes
Description :
Example :
R403
The CVL function converts a string of 4 bytes, created with the MKL$ instruction,
in a long integer value. The most significant word then the least significant word
A&=CVLR(A$)'If
A$=chr$(0)+chr$(1)+chr$(3)+chr$(2) then
- 96 -
SERAD S.A.
Supervisor documentation
'A&=(0*16777216)+(1*65536)+(3*256)+(2*1)=66306
See also :
CVL, MKL$, MKLR$
8-14-41- CVI – Convert string to integer
Syntax :
<Variable>=CVI(<Expression>)
Accepted types :
Variable : Integer
Expression : string of 2 bytes
Description :
The CVL function converts a string of 2 bytes, created with the MKI$ instruction,
in an integer value. The most significant byte then the least significant byte
Example :
A&=CVI(A$) 'If
See also :
CVIR, MKI$, MKIR$
A$=chr$(0)+chr$(1) then A&=0+(1*256)=256
8-14-42- CVIR – Convert string to reverse integer
Syntax :
<Variable>=CVIR(<Expression>)
Accepted types :
Variable : Integer
Expression : string of 2 bytes
Description :
The CVL function converts a string of 2 bytes, created with the MKI$ instruction,
in an integer value. The least significant byte then the most significant byte
Example :
A%=CVIR(A$) 'If
See also :
CVI, MKI$, MKIR$
A$=chr$(3)+chr$(2) then A&=(3*256)+(2*1)=770
8-14-43- CRC – CRC16
Syntax :
CRC Value %=CRC(<Expression >)
Accepted types :
Expression : Char string
Description :
This function return the checksum value in a char string with the modbus RTU
format (CRC 16).
Example :
A%=CRC(message$)
8-14-44- DATE$ - Current Date
Syntax :
DATE$
Description :
This instruction returns a 10 characters string under the form dd/mm/yyyy, where
dd is the day (01-31), mm is the month (01-12) et yyyy is the year.
Example :
a$=DATE$ 'Result : a$="01/01/1996"
See also :
TIME$, TIME, TIMER
8-14-45- DELAY – Passive waiting
Syntax :
DELAY <Duration>
Units :
Duration : milliseconds
Accepted types :
Duration : Integer
R403
- 97 -
SERAD S.A.
Supervisor documentation
Description :
This instruction allows to the system to wait for the time <Duration>. The task
continue its execution when the duration is finished. The execution of this
instruction launches to the execution of the next task.
Example :
DELAY 500
'0.5 s. Delay
DELAY Timer1
8-14-46- DIFFUSE – Event generation
Syntax :
SIGNAL <Name>
Description :
This instruction generates an event.
Remarks :
<Name> must be the same name used by WAIT EVENT instruction. Each program
which was waiting for this event can then go on.
Example :
Program1
See also :
Program2
...
...
WAIT EVENT Ready
DIFFUSE Ready
...
...
WAIT EVENT, SIGNAL
8-14-47- DIV – Integer divide
Syntax :
<Expression1> DIV <Expression2>
Accepted types :
Expression1, Expression2 : Integer
Description :
This operator returns the integer divide result.
Remarks :
This operator returns an integer.
Example :
a%=7
a%=a% DIV 2
See also :
'Result : a%=3
MOD
8-14-48- EDIT – Editing on operator panel
Syntax 1:
<Variable>=EDIT(<Line>,<Row>,<Length>,<Sign>,<Point>)
Syntax 2:
<Variable>=EDIT(<Line>,<Row>,<Length>,<Sign>,<Point>,
<Code>)
Limits :
Line : 1 to 4 for Supervisor 80 or 1 to 16 for Supervisor 640.
Row : 1 to 20 for Supervisor 80 or 1 to 40 for Supervisor 640.
Accepted types :
Variable : real
Line, Row, Length : Integer
Sign, Point, Code : bit
Description :
This function allows to edit a real number with the operator panel by using the
numerical keys, the DEL key to suppress, the ENTER key to valid and ESC to
escape. The second syntax defines the access code mode of editing (Code=1). In
this case, all the key press display a star on the operator (*) panel. The execution of
this instruction launches the execution of the next task.
Remarks :
<Line> et <Row> are the first character position. <Length> is the maximum
number of characters. <Sign> is a boolean value which indicates if the sign can be
changed. <Point> is a boolean value which indicates if the point is permitted. The
R403
- 98 -
SERAD S.A.
Supervisor documentation
system variable KEY contains the last pressed key. If the edition is aborted then
KEY=@ESC and otherwise KEY=@RETURN.
Example :
A!=EDIT(1,10,4,0,0)
‘ Capture in line 1 row 10
‘ on 4 characters, the sign and the
‘ point are not autorised..
A!=EDIT(1,10,4,0,0,1)
' Same capture with access code mode
8-14-49- EDIT$
Syntax :
<Variable>=EDIT$(<Line>,<Row>,<Length>)
Limits :
Line : 1 to 4 for Supervisor 80 or 1 to 16 for Supervisor 640.
Row : 1 to 20 for Supervisor 80 or 1 to 40 for Supervisor 640.
Accepted types :
Variable : Char string
Line, Row, Length : Integer
Description :
This function allows to edit a by using the alphanumeric keys, the DEL key to
suppress, the ENTER key to valid and ESC key to escape. For writing an
alphanumeric character, push several times on the associated numeric key, to
change the character. The record of the character makes itself automatically when
you don’t push on the associated numeric touch or you push on other touch.
Remarks :
<Line> and <Row> are the first character position. <Length> is the maximum
number of characters. The system variable KEY contains the last pressed key. If
the edition is aborted then KEY=@ESC and otherwise KEY=@RETURN.
Example :
A$=EDIT$(2,9,5)
'capture in line 2, row 9
'on 5 characters maxi.
8-14-50- END – Block end
Syntax :
END {PROG | SUB |IF | WHILE}
Description :
Bloc end.
Remarks :
You must specify a keyword after END
Examples :
SUB
Manuel
...
END
See also :
SUB
PROG, SUB, IF, WHILE
8-14-51- EXIT SUB – Subroutine exit
Syntax :
EXIT SUB
Description :
This instruction allows to exit of a subprogram.
See also :
SUB
8-14-52- EXP - Exponential
Syntax :
EXP (<Expression>)
Accepted types :
Expression : real
Description :
This function returns e (natural logarithms base) raised to <Expression> power.
R403
- 99 -
SERAD S.A.
Supervisor documentation
Remarks :
The argument <Expression> must be a valid numerical expression.
Example :
a!=EXP(2)
See also :
LOG
8-14-53- FLASHOK – Test flash memory
Syntax :
FLASHOK
Description :
This function indicates if parameters and the first 10000 saved variables are backed
up in flash memory
See also :
RAMOK, RAMTOFLASH, FLASHTORAM
8-14-54- FLASHTORAM – Restore saved variables
Syntax :
FLASHTORAM
Description :
This function restore parameters and the first 10000 saved variables from flash
memory. This function is automatically called by system if variables are corrupted
on start-up.
Voir aussi :
RAMOK, RAMTOFLASH, FLASHOK
8-14-55- FOR – FOR … NEXT loop
Syntax :
FOR <Counter>=<Begin> TO <End> [STEP <step>]
...
NEXT <Counter>
Accepted types :
Counter : Byte, Integer, Long integer
Description :
Repeats an instruction a specified number of time.
Remarks :
FOR starts the FOR ... NEXT loop structure. FOR must appear before all the other
parts of the structure. <Counter> is a local integer variable used as loop counter.
<Counter> is equal to <End>+1 at the end of the loop. <step> must be a positive
value. The execution of this instruction NEXT passed to the execution of the next
task.
Example :
FOR i%=1 TO 10
...
NEXT i%
See also :
WHILE
8-14-56- FONT – Font selected
Syntax :
FONT=<Value>
Accepted types :
<Value> : byte.
Description :
This function defines the font of the operator panel.
Remarks :
<Value> :
Font 1 : 16 lines x 40 characters with text and black background, 3x4mm
Font 2 : 9 l x 30 c with text and black background, 4x7mm
Font 3 : 6 l x 20 c with text and black background, 12x20mm
R403
- 100 -
SERAD S.A.
Supervisor documentation
Font 4 : 4 l x 15 c with text and black background, 16x22mm
Font 5 : 16 l x 40 c with text and white background, 3x4mm
Font 6 : 9 l x 30 c with text and white background, 4x7mm
Font 7 : 6 l x 20 c with text and white background, 12x20mm
Font 8 : 4 l x 15 c with text and white background, 16x22mm
Example :
FONT=1
Locate 2,15
Print "MODE AUTO"
8-14-57- FORMAT$
Syntax :
FORMAT$(<Expression>,<Number>,<Precision>,’<Car>’,
<Sign>,<LeftAlign>)
Accepted types :
Expression : real
Number, Precision : Byte
Car : string char
Sign, LeftAlign : Bit
Description :
This function creates a formatted string.
Remarks :
The argument <Expression> must be a valid numerical expression. <Number> is
the minimum number of characters of the string. <Precision> is the number of
character after the decimal point . <Car> is the substitution character used to
reach this minimum number if it is necessary. <Sign> indicates if the character "+"
or "-" must be added at the beginning of the string. <LeftAlign> indicates if the
string is left aligned.
Example :
a!=1.2562
b$=FORMAT$(a!,5,2," ",0,1)
' a$="1.25 "
8-14-58- FRAC – Fractional part
Syntax :
FRAC(<Expression>)
Accepted types :
<Expression> : real
Description :
This function provides the fractional part of the <Expression>.
Remarks :
This fonction returns a real value.
Example :
b!=3.0214
a!=FRAC(b!)
See also :
'Result a!=0.0214
INT
8-14-59- GETDATE – Current date
Syntax :
GETDATE(<Year>,<Month>,<Day>,<DayInTheWeek>)
Accepted types :
<Year>, <Month>, <Day>, <DayInTheWeek> : Integer.
Description :
This instruction reads the current date.
See also :
GETTIME
R403
- 101 -
SERAD S.A.
Supervisor documentation
8-14-60- GETEVENT – Events reading
Syntax :
<Variable> = GETEVENT
Accepted types :
<Variable> : Integer
Description :
This instruction consumes and reads detected events.
Remarks :
All the event bit are setting if the event is detected. If a new event appears during
the execution of the event task, event is stored and is treated as soon as it is
possible.
See also :
MODIFYEVENT
8-14-61- GETTIME – Current time
Syntax :
GETTIME(<Hour>,<Minute>,<Second>)
Accepted types :
<Hour>, <Minute>, <Second> : Integer.
Description :
This instruction reads the current time.
See also :
GETDATE
8-14-62- GOTO – Branch label
Syntax :
GOTO <Label>
Description :
Jumps to a label
Remarks :
The programs with lots of GOTO instructions can become hard to read and to
perfect. Use the control structures (FOR...NEXT, REPEAT...UNTIL,
WHILE...END WHILE, IF...THEN...ELSE...END IF) each time it is possible. A
label is a name following by character ":". The execution of this instruction passed
to the execution of the next task.
Example :
GOTO Begin
...
Begin :
See also :
JUMP, FOR, REPEAT, WHILE, IF, END
8-14-63- HALT – Stop a task
Syntax :
HALT <Name>
Description :
This instruction is used to stop a task which is going to be executed or suspended.
Remarks :
This function has no effect on the stopped task, on the movements running and on
the buffer of movements.
Example :
Begin :
Wait Inp(Power)=On
RUN
Cutter
Wait Inp(Power)=Off
HALT Cutter
Goto Begin
See also :
R403
RUN, SUSPEND, CONTINUE
- 102 -
SERAD S.A.
Supervisor documentation
8-14-64- HLINE – Draw horizontal line
Syntax :
HLINE(X1,Y1,X2,colour)
Units :
X1, Y1, X2 : pixel
Limits :
X1, X2 : de 1 à 240
Y1 : de 1 à 128
Accepted types :
X1, Y1, X2 : byte.
Colour : Bit
Description :
This instruction draws a line with its starting point in X1, Y1 and its final point in
X2, Y1 on the S640.
Remarks :
Colour changes the colour of the line : black (0) or white (1)
Example :
HLINE(10,15,70,0)
8-14-65- ICALL – Call a sub-routine
Syntax :
ICALL <Name>
Description : This instruction is used to call a sub-routine define by a block SUB. <Name> is the
name of the sub-routine’s block.
Remarks :
A sub-routine can not call himself. The system had predefine sub-routines :
_MENUMCS, _PARAMMCS, _MANUMCS, _VARIABMCS, _MEMORYMCS and
_CLOCKMCS. The execution of this instruction don’t launches the execution of the
next task..
Exemple :
ICALL Move
Voir aussi :
SUB, CALL
8-14-66- IF - IF…Then…Else
Syntax 1 :
IF <Condition> THEN
{<Instruction1>}
...
ELSE
{<Instruction2>}
...
END IF
Syntax 2 :
IF <Condition> THEN <Instruction1> ELSE <Instruction2>
Description :
Allows the conditional execution based on the expression evaluation.
Remarks :
The keyword IF begins a control structure. IF...THEN...ELSE...END IF . It must
appear before all other part of the structure. <Condition> must be a boolean
expression.
If <Condition> is right then <Instructions1> are executed.
R403
- 103 -
SERAD S.A.
Supervisor documentation
If <Condition> is false then <Instructions2> are executed.
Example :
IF (a%>1) AND (a%<10) THEN
Locate 1,1
Print "Length 1"
Else
Locate 2,1
Print "Width 1"
END IF
See also :
END
8-14-67- INKEY– Read a key on the operator panel
Syntax :
<Variable>=INKEY
Accepted types :
Variable : Byte
Description :
This function reads a key from the keyboard of the operator panel and returns its
code.
Remarks :
This function does not stop the task. Cette fonction est non bloquante pour la tâche.
If the input buffer is empty (no key has been pressed) this function returns 0.
Example :
REPEAT
A#=INKEY
UNTIL A#<>0
8-14-68- INP – Input reading
Syntax :
INP (<Input>)
Accepted types :
<Input> : Bit
Description :
This function gives the state of a digital input.
Remarks :
<Input> must represent an input name TOR. The returned data type is Bit.
Example :
C~=INP(HighCutter)
See also :
INPB, INPW, OUT, OUTB, OUTW
8-14-69- INPB – 8 digital inputs reading
Syntax :
INPB (<Input>)
Accepted types :
<Input> : Byte
Description :
This function gives the state of 8 digital inputs TOR..
Remarks :
<Input> must represent the 8 inputs name. The returned data type is Byte.
Example :
B#=INPB(Data)
See also :
INP, INPW, OUT, OUTB, OUTW
8-14-70- INPUT – Data reading
Syntax :
INPUT #<Number>, <Variable> [ {,<Variable>} ]
Accepted types :
Variable : Bit, Byte, Integer, Long integer, real and Char string
Number : #1 or #2
R403
- 104 -
SERAD S.A.
Supervisor documentation
Description :
Reads data from the communication port and assigns the data to the variables. The
execution of this instruction passed to the execution of the next task.
Remarks :
<Number> is the number used to open a communication port with OPEN function.
The read data must appear in the same order that the variables list.
Example :
OPEN "SERIAL1:"
AS #1
INPUT #1,A$,B%
CLOSE #1
See also :
OPEN, PRINT, CLOSE
8-14-71- INPUT$ - Char string reading
Syntax :
<Variable> =INPUT$ <CommNumber>, <NumberOfChar>
Accepted types :
Variable : Char string
CommNumber : #1 or #2
NumberOfChar : Byte
Description :
Reads <NumberOfChar> characters from the communication port and stores them
in a char string. The execution of this instruction launches the execution of the next
task.
Remarks :
<CommNumber> is the number used to open the communication port with OPEN
instruction.<Variable> must be a variable char string type. The task is blocked on
this instruction when the number of character received is different than this
specified in the instruction.
Example :
OPEN "SERIAL1:" AS #1
A$=INPUT$ #1,5
'Read 5 characters from the communication port
CLOSE #1
See also :
OPEN, PRINT, CLOSE
8-14-72- INPW – 16 digital inputs reading
Syntax :
INPW (<Input>)
Accepted types :
<Input> : Integer
Description :
This function gives the state of the16 digital inputs.
Remarks :
<Inputs> must represent the name of a 16 digital inputs board.Data type returns is
integer.
Example :
See also :
A%=INP(Bloc)
INP, INPB, OUT, OUTB, OUTW
8-14-73- INSTR – Search a sub-string
Syntax :
INSTR(<string1>,<string2>)
Accepted types :
string1, string2 : Char string
Description :
This function searches a sub-string in a char string and returns the position of the
first occurrence of the sub-string.
Remarks :
<String1> is the researched string <String2>.
Example :
a$="Press ENTER to start"
EnterPos%=INSTR("ENTER",a$) 'Result : EnterPos%=7
R403
- 105 -
SERAD S.A.
Supervisor documentation
See also :
LEN
8-14-74- INT – Integer part
Syntax :
INT (<Expression>)
Accepted types :
Expression : real
Description :
This function returns the <Expression> integer part.
Remarks :
The argument <Expression> must be a valid numerical expression
Example :
b!=25.36
a!=INT(b!)
See also :
'Result : a!=25
FRAC
8-14-75- JUMP – Branch to label
Syntax :
JUMP <Label>
Description :
Jumps to a label
Remarks :
The programs with lots of GOTO instructions can become hard to read and to
perfect. Use the control structures (FOR...NEXT, REPEAT...UNTIL,
WHILE...END WHILE, IF...THEN...ELSE...END IF) each time it is possible. A
label is a name following by character ":". The execution of this instruction doesn’t
launch the execution of the next task.
Example :
JUMP Begin
...
Begin :
See also :
GOTO, FOR, REPEAT, WHILE, IF, END
8-14-76- KEY – Last pressed key
Syntax :
KEY
Description :
This system variable contains the last pressed key.
Remarks :
This variable must be used after EDIT et WAIT KEY instructions. The key
variable is local for a task.
Example :
WAIT KEY
IF KEY=@F1 THEN CALL ...
IF KEY=@F2 THEN CALL ...
IF KEY=@F3 THEN CALL ...
See also :
EDIT, WAIT KEY
8-14-77- KEYDELAY – Delay before key repeat
Syntax :
KEYDELAY = <Expression>
Units :
Expression : 1/32 of second.
Accepted types :
Expression : Byte
Description :
This instruction defines the delay before the automatic repetition of a key when this
is pressed.
Remarks :
The default value is 1 second (32).
R403
- 106 -
SERAD S.A.
Supervisor documentation
Example :
KEYDELAY = 10
See also :
KEYREPEAT
8-14-78- KEYREPEAT – Keyrepeat period
Syntax :
KEYREPEAT=<Expression>
Units :
Expression : 1/32 of second.
Accepted types :
Expression : Byte
Description :
This instruction defines the delay which separates each automatic key repetition
when this is pressed..
Remarks :
The default value is 0.3 second (10).
Example :
KEYREPEAT = 5
See also :
KEYDELAY
8-14-79- LCASE$ - Lowercases
Syntax :
<Expression> = LCASE$(<String>)
Accepted types :
String : Char string
Description :
This function returns a string in all the letters of the argument have been converted
in lowercases.
Remarks :
The argument <Expression> must be a char string. Only the uppercases are
converted in lowercases, the other letters are not modified.
Example :
a$="Sensor1"
b$=LCASE$(a$) 'Result : b$="sensor1"
See also :
UCASE$
8-14-80- LED – Driving LEDs
Syntax :
LED(Number)=State
Accepted types :
State : bit.
Description :
This function allows to drive the LEDs of SUPERVISOR.
Remarks :
Definition of the LED : de @F1 to @F6 or @ALARM or @HELP
Definition of their state: switch off (0), light (1), blink (2).
Example :
LED(@ALARM)=2
'blink alarm DEL
8-14-81- LEFT$ - String left part
Syntax :
LEFT$(<String>,<Number>)
Accepted types :
String : Char string
Number : Integer
Description :
This function returns the first <Number> left characters of a string.
Remarks :
To find the character numbers in the string <String>, use LEN(<String>).
Example :
a$="Sensor1"
b$=LEFT$(a$,6) 'Result : b$="Sensor"
R403
- 107 -
SERAD S.A.
Supervisor documentation
See also :
RIGHT$, LEN
8-14-82- LEN– String length
Syntax :
LEN(<String>)
Description :
This function returns the number of characters of a string.
Example :
a$="Sensor1"
b%=LEN(a$) 'Result : b%=7
See also :
INSTR
8-14-83- LOCATE – Cursor position
Syntax :
LOCATE <Line>,<Row>
Limits :
Line : 1 to 4 for Supervisor 80 or 1 to 16 for Supervisor 640.
Row : 1 to 20 for Supervisor 80 or 1 to 40 for Supervisor 640.
Accepted types :
Line, Row : Byte
Description :
This function is used to select the cursor position.
Example :
LOCATE 1,1
PRINT "<MAIN MENU>"
8-14-84- LOG - Logarithm
Syntax :
LOG (<Expression>)
Accepted types :
Expression : real
Description :
Returns the natural logarithm of <Expression>
Remarks :
<Expression> must be a numerical expression.
Example :
a!=LOG(1.2)
See also :
EXP
8-14-85- LONGTOINTEGER – Convert a long integer to integer
Syntax :
LONGTOINTEGER(<Expression>)
Accepted types :
Expression : Long integer
Description :
This function converts a long integer type data in integer type data.
Example :
A&=Time
B%=LongToInteger(A&)
8-14-86- LTRIM$ - Suppress the left spaces
Syntax :
LTRIM$(<Expression>)
Description :
Returns a string copy without the left spaces.
Remarks :
<Expression> must be a char string.
Exemples :
a$="
Menu
b$=LTRIM$(a$)
R403
"
' Result b$="Menu
- 108 -
"
SERAD S.A.
Supervisor documentation
See also :
RTRIM$
8-14-87- MID$ - String part
Syntax :
MID$(<String>, <Begin>, <Length>)
Accepted types :
String : Char string
Begin, Length : Byte
Description :
This function returns a string part.
Remarks :
<Begin> defines the beginning of the substring extracted and <Length> the number
of characters to extract.
Example :
a$="MAIN MENU
"
b$=MID$(a$,6,4) ' Result : b$="MENU"
See also :
LEFT$, RIGHT$
8-14-88- MOD - Modulus
Syntax :
<Expression1> MOD <Expression2>
Accepted types :
Expression1, Expression2 : Byte, Integer, Long integer
Description :
This operator returns an integer division rest.
Example :
a%=5
a%=a% MOD 2 'Result : a%=1
See also :
DIV
8-14-89- MODIFYEVENT– Events configuration
Syntax :
MODIFYEVENT (<Mask>, <Counter 1 trigger>, <Counter 2 trigger>, <Delay>)
Limits :
<Delay> : 10ms to 30.000ms
Accepted types :
<Mask> : Integer
<Counter 1 Trigger> : Integer
<Counter 2 Trigger> : Integer
<Delay> : Integer
Description :
This instruction allows to configure events.
Remarks :
<Mask> :
Bits 0...7 : Activate the inputs 1 to 8 of the input card. A positive edge will
generate the event. The input take account of the invert and filter parameters
entered during the board configuration.
Bit 8 : Trigger of the counter 1 reached
Bit 9 : Trigger of the counter 2 reached
Bit 10 : SDOEVent
Bit 11 : PDOEvent
Bits 12 : Time base.
<Delay> : Delay of the time base between 10 ms and 30000 ms. If the time base
is unused, the value of delay will be not treated.
R403
- 109 -
SERAD S.A.
Supervisor documentation
When the event configuration register is affected, the event task is executed when
at least one event is detected. The maxi time between the event detected and its
treatment is equal to the task ageing time.
If you want to modify the event configuration register, you’ll be treated this
instruction in a normal basic task or an event task before the execution of
GETEVENT instruction.
See also :
GETEVENT
8-14-90- MKL$ - Convert long integer to string
Syntax :
<string>=MKL$(<Expression>)
Accepted types :
<string> : string char of 4 bytes
Expression : Long integer
Description :
This function MKL$ convert long integer value in a string of 4 bytes. Least
significant byte and then most significant byte
Example :
A$=MKL$(A&)
See also :
MKLR$, CVL, CVLR
'if A&=66306 then
A$=2310
8-14-91- MKLR$ - Convert long integer reverse to a string
Syntax :
<string>=MKLR$(<Expression>)
Accepted types :
<string> : string char of 4 bytes
Expression : Long integer
Description :
This function MKLR$ convert long integer value in a string of 4 bytes. The most
significant word and the least significant word
Example :
A$=MKL$(A&)
See also :
MKL$, CVL, CVLR
'if A&=66305 then
A$=0132
8-14-92- MKI$ - Convert an integer to a string
Syntax :
<string>=MKI$(<Variable>)
Accepted types :
<string> : string char of 2 bytes
Variable : Integer
Description :
This function MKI$ convert long integer value in a string of 2 bytes. Least
significant byte and then most significant byte
Example :
A$=MKI$(A%)
See also :
MKIR$, CVI, CVIR
'if A%=256 then A$=01
8-14-93- MKIR$ - Conversion Integer reverse / String
Syntax :
<string>=MKIR$(<Variable>)
Accepted types :
<string> : string char of 2 bytes
Variable : Integer
Description :
R403
This function MKI$ convert long integer value in a string of 2 bytes. Most
significant byte and then least significant byte
- 110 -
SERAD S.A.
Supervisor documentation
Example :
A$=MKI$(A%)
See also :
MKI$, CVI, CVIR
'If A%=770 then A$=32
8-14-94- NOT – Complement operator
Syntax :
NOT(<Expression>)
Accepted types :
Expression : Bit, Byte, Integer
Description :
This function returns the complement.
Remarks :
<Expression> must be an integer valid expression.
Example :
a%=0FF00h
b%=NOT a%
See also :
'Result b%=00FFh
AND, OR, XOR
8-14-95- OPEN – Open a communication port
Syntax :
OPEN <CommunicationPort> AS #<Number>
Description :
Authorizes the reading/writing operations on a communication port.
Remarks :
You must open a communication port before any input/output operation
<CommunicationPort> is a char string which defines the parameters with this
following syntax :
"SERIALn:[speed [, data[, parity [, stop ]]]]"
N: Physical number 1 or 2
Speed: 150, 300, 600, 1200, 2400, 4800 or 9600 bauds.
Data : 7 or 8 bits
Parity : E (even), O (odd), M (mark), S (space) or N (without).
Stop : 1 or 2 bits
<Number> defines the communication canal number used by the functions.
Example :
Dialog 80, 160or 640 linked to SERIAL2 : SERIAL2 affected to the
canal 1
OPEN "SERIAL2:9600,8,N,1" As #1
PRINT "<MAIN MENU>";
See also :
INPUT, PRINT, CLOSE
8-14-96- OR – OR operatorr
Syntax :
<Expression1> OR <Expression2>
Accepted types :
Expression1, Expression2 : Bit, Byte, Integer
Description :
This function makes a binary OR between two expressions.
Remarks :
<Expression1> and <Expression2> must have the same
returns the same data type as its arguments.
Example :
A%=A% OR 000FFh
See also :
AND, NOT, XOR and IF
R403
- 111 -
type. This function
SERAD S.A.
Supervisor documentation
8-14-97- OUT – Output writing
Syntax :
OUT (<Output>) = <Expression>
Accepted types :
Expression : Bit
Description :
This function sends a logical state to a digital output.
Remarks :
<Output> must represent an output name.
Example :
OUT(Cutter)=ON
See also :
INP, INPB, INPW, OUTB, OUTW
8-14-98- OUTEMPTY – Communication output buffer empty
Syntax :
<Expression>=OUTEMPTY (<Number>)
Accepted types :
<Expression> : bit
Description :
This function returns communication output buffer state
Remarks :
<Number> is number used to open communication port with the OPEN function.
Example :
WAIT
See also :
CARIN, CAROUT
OUTEMPTY(#1)
8-14-99- OUTB – 8 outputs writing
Syntax :
OUTB (<Outputs>) = <Expression>
Accepted types :
Expression : Byte
Description :
This function sends logical states to a 8 logical outputs block
Remarks :
<Outputs>must represent the name of a 8 outputs bloc.
Example :
OUTB(Bloc1)=0Fh
See also :
INP, INPB, INPW, OUT, OUTW
8-14-100- PIXEL – Draw point
Syntax :
PIXEL(X,Y,Color)
Units :
X, Y : pixel
Limits :
X : 1 to 240
Y : 1 to 128
Accepted types :
X,Y : byte.
Color : Bit
Description :
This function draws a point at coordinates X, Y.
Remarks :
Colour define the colour of the point : black (0) or white (1)
Example :
PIXEL(23,15,0) 'Draw a black pixel at coordinates 23,15
8-14-101- PLCINIT – PLC function initialisation
Syntax :
PLCINIT(<Input table>,< Previous input table>, <Output table>, <Masked output
table>)
Description : This function indicate to the system, the variable table to use.
R403
- 112 -
SERAD S.A.
Supervisor documentation
Remark :
<Input tablea>, <Previous input table> : Long integer table with any elements as that
the system contained the input cards.
<Output table>, <Masked output table> : Integer table with any elements as the system contained the
output cards.
<Masked output table> contained the output masks use by the PLC (bit to 1 => output use by
the PLC)
exemple :
Masque[1]=0FFFFh
Masque[2]=0FFFFh
PlcInit(Entrees,EntreesOld,Sorties,Masque)
See also :
PLCINP, PLCINPB, PLCINPW, PLCINPPE, PLCINPNE, PLCOUT, PLCOUTB,
PLCOUTW
8-14-102- PLCINP – Read TOR input
Syntax :
PLCINP (<Input>) or PLCINP (<Card number>, <Input number>)
Accepted types :<Input> : Bit
<Card number>, <Input number> : Byte
Description : This functionn give the state of PLC TOR input.
Remarks :
<Input> must represent a TOR input name. The data type returned is a bit.
Exemple :
C~=PLCINP(CouteauEnHaut)
See also :
PLCINIT, PLCINPB, PLCINPW, PLCINPPE, PLCINPNE, PLCOUT, PLCOUTB,
PLCOUTW
8-14-103- PLCINPB – Read a 8 inputs block
Syntax :
PLCINPB (<Inputs>)
Accepted types :Inputs : Byte
Description : This function return the state of a block of 8 TOR inputs.
Remarks :
<Inputs> must represente the name of 8 inputs. The data’s type returned is a byte.
Exemple :
B#=PLCINPB(Data)
See also :
PLCINIT, PLCINP, PLCINPW, PLCINPPE, PLCINPNE, PLCOUT, PLCOUTB,
PLCOUTW
8-14-104- PLCINPNE – Read a negative edge on PLC TOR input
Syntax :
PLCINPNE
(<Input>) or PLCINPNE (<Card number>, <Input number>)
Accepted types :<Input> : Bit
<Card number>, <Input number> : Byte
Description :
This function indicate if a negative edge is make on the PLC TOR input.
Remarks :
<Input> must represente the name of a TOR input. The data’s type returned is a Bit.
R403
- 113 -
SERAD S.A.
Supervisor documentation
Exemple :
If PLCINPNE(CouteauEnHaut) Then goto FrontDetecte
See also :
PLCINIT, PLCINP, PLCINPB, PLCINPW, PLCINPPE, PLCOUT, PLCOUTB,
PLCOUTW
8-14-105- PLCINPPE – Read a positive edge on PLC TOR input
Syntax :
PLCINPPE
(<Input>) or PLCINPPE (<Card number>, <Input number>)
Accepted types :<Input> : Bit
<Card number>, <Input number> : Byte
Description :
This function indicate if a positive edge is make on the PLC TOR input.
Remarks :
<Input> must represente the name of a TOR input. The data’s type returned is a Bit.
Exemple :
If PLCINPPE(CouteauEnHaut) Then goto FrontDetecte
See also :
PLCINIT, PLCINP, PLCINPB, PLCINPW, PLCINPNE, PLCOUT, PLCOUTB,
PLCOUTW
8-14-106- PLCINPW – Read a 16 inputs block
Syntaxe :
PLCOUTW (<Output>) = <Expression>
Accepted types :Expression : Integer
Description : This function change the logic state of the 16 associates images outputs.
Remarks :
<Outputs> must represente the name of 16 outputs blocks.
Exemple :
PLCOUTW(Bloc1)=0FFFFh
See also :
PLCINIT, PLCINP, PLCINPB, PLCINPW, PLCINPPE, PLCINPNE, PLCOUT,
PLCOUTB
8-14-107- PLCOUT – Write a output
Syntax :
PLCOUT (<Output>) = <Expression> or
PLCOUT (<Card number>, <Ouput number>) = <Expression>
Accepted types :Expression : Bit
<Card number>, <Output number> : Byte
Description : This function change the logic state of image bit.
Remarks :
<Output> must represente the name of an output
Exemple :
PLCOUT(Couteau)=ON
…
If PLCOUT(Voyant) Then goto Alarm
See also :
R403
PLCINIT, PLCINP, PLCINPB, PLCINPW, PLCINPPE, PLCINPNE, PLCOUTB,
PLCOUTW
- 114 -
SERAD S.A.
Supervisor documentation
8-14-108- PLCOUTB – Write a 8 outputs block
Syntaxe :
PLCOUTB (<Output>) = <Expression>
Accepted types: Expression : Byte
Description : This function change the logic state of the 8 associates images outputs.
Remarks :
<Outputs> must represente the name of 8 outputs blocks.
Exemple :
PLCOUTB(Bloc1)=0Fh
See also :
PLCINIT, PLCINP, PLCINPB, PLCINPW, PLCINPPE, PLCINPNE, PLCOUT,
PLCOUTW
8-14-109- PLCOUTW – Write a 16 outputs block
Syntaxe :
PLCOUTW (<Output>) = <Expression>
Accepted types: Expression : Integer
Description : This function change the logic state of the 16 associates images outputs.
Remarks :
<Outputs> must represente the name of 16 outputs blocks.
Exemple :
PLCOUTW(Bloc1)=0FFFFh
See also :
PLCINIT, PLCINP, PLCINPB, PLCINPW, PLCINPPE, PLCINPNE, PLCOUT,
PLCOUTB
8-14-110- PLCREADINPUTS – Read the PLC inputs
Syntaxe :
PLCREADINPUTS
Description : This function read the PLC inputs and memorize them into the images bits table.
See also :
PLCINIT, PLCINP, PLCINPB, PLCINPW, PLCINPPE, PLCINPNE, PLCOUT,
PLCOUTB, PLCOUTW
8-14-111- PLCWRITEOUTPUTS – Write the PLC outputs
Syntax :
PLCWRITEOUTPUTS
Description : This function write the PLC ouputs memorized into the images bits.
See also :
PLCINIT, PLCINP, PLCINPB, PLCINPW, PLCINPPE, PLCINPNE, PLCOUT,
PLCOUTB, PLCOUTW
8-14-112- POWERFAIL – Power fail detect
Syntax :
POWERFAIL= <ON|OFF>
Description :
This function activates or inhibits power fail detect.
Remarks :
Power fail detect is activated at power-on.
R403
- 115 -
SERAD S.A.
Supervisor documentation
8-14-113- PRINT – Writing on a communication port
Syntax :
PRINT [#<Number>], <Expression> [ { [ ; | , ] <Expression>} ] [ ; | , ]
Description :
Writes data on a communication port.
Remarks :
<Number> is the number used to open the communication port with the OPEN
instruction. A semicolon at the end of this instruction means that the previous
character is printed immediately after the last character. A comma means that the
next character is printed at the next line (by adding a line feed ). Print is equal to
Print #1. If a real expression is printed then decimal part is not printed and Format$
function must be used. if the transmit buffer is full, the task is blocked and
continues when a place in the transmit buffer is liberated.
Example :
PRINT #1,A$,B%
PRINT "LENGTH"
See also :
OPEN, PRINT, CLOSE
8-14-114- PROG – Program start
Syntax :
PROG
Description :
This keyword begins a main program bloc. It is as well used to identify the end of
the main program block when it is preceded by END. <Name> is optional.
Remarks :
One and only one PROG - END PROG bloc must be defined in a program.
Example :
PROG
...
END PROG
See also :
END
8-14-115- RAMOK – Test ram status
Syntax :
RAMOK
Description :
This function indicates if at the last start-up of the SUPERVISOR, the RAM data
checksum was valid.
Remarks :
If RAMOK=1, start-up valid
If RAMOK=0 and data flash copy zone is not blank, the SUPERVISOR backups
the data flash zone in the ram zone and starts the task. If RAMOK=0 and data flash
copy zone is blank, the SUPERVISOR doesn’t start the task and indicates an error
20 on the status display.
See also :
FLASHOK, RAMTOFLASH, FLASHTORAM
8-14-116- RAMTOFLASH – Backup saved variables
Syntax :
RAMTOFLASH
Description :
This function backups parameters and the first 10000 saved variables in flash
memory.
See also :
RAMOK, FLASHTORAM, FLASHOK
R403
- 116 -
SERAD S.A.
Supervisor documentation
8-14-117- READKEY– Return the state of terminal keyboard
Syntax :
<Variable>=READKEY
Accepted types :
Variable : Byte
Description :
This function reads the state of the keyboard of the operator panel and returns the
code of the pressed key.
Remarks :
This function does not stop the task. Cette fonction est non bloquante pour la tâche.
If the input buffer is empty (no key has been pressed) this function returns 0. Use
this funtion if you want to make movement (JOG+, JOG-) on an axe.
Example :
REPEAT
A#=READKEY
UNTIL a#<>0
8-14-118- REALTOLONG – Convert a real to a long integer
Syntax :
REALTOLONG(<Expression>)
Accepted types :
Expression : real
Description :
This function converts a real type data in a long integer type data.
Example :
A!=Edit(1,1,4,0,0)
B&=RealToLong(A!)
8-14-119- REALTOINTEGER – Convert a real to an integer
Syntax :
REALTOINTEGER(<Expression>)
Accepted types :
Expression : real
Description :
This function converts a real type data in an integer type data.
Example :
A!=Edit(1,1,4,0,0)
B%=RealToInteger(A!)
8-14-120- REALTOBYTE – Convert a real to a byte
Syntax :
REALTOBYTE(<Expression>)
Accepted types :
Expression : real
Description :
This function converts a real type data in byte type data.
Example :
A!=Edit(1,1,4,0,0)
B#=RealToInteger(A!)
8-14-121- REPEAT – Repeat…Until
Syntax :
REPEAT
{<Instructions>}
UNTIL <Condition>
Description :
R403
This structure allows to the system to execute a list of instructions in a loop as long
as the given condition is wrong.
- 117 -
SERAD S.A.
Supervisor documentation
Remarks :
In the structure REPEAT ... UNTIL the <Instructions> are executed at least
once even if the condition is true. The execution of this instruction launches the
execution of the next task.
Example :
a%=0
REPEAT
PRINT #1,a%
a%=a%*2
UNTIL a%>100
See also :
WHILE
8-14-122- RESTART – Restart system
Syntax :
RESTART
Description :
This function restarts system.
Remarks :
This can be used to test system start type : If RESTART function result is false
then the system start with power-on and if RESTART function result is true, the
system has been restarted by RESTART function.
8-14-123- RIGHT$ - String right part
Syntax :
RIGHT$(<String>,<Number>)
Accepted types :
String : Char string
Number : Integer
Description :
This function returns the <Number> right characters of a string.
Remarks :
To find the characters number in <String>, use LEN(<String>).
Example :
a$="Sensor1"
b$=RIGHT$(a$,1) 'Result : b$="1"
See also :
LEFT$
8-14-124- RTRIM$ - Remove the right spaces
Syntax :
RTRIM$ (<Expression>)
Accepted types :
Expression : Char string
Description :
Returns a string copy without the right spaces.
Example :
a$="
Menu
"
b$=LTRIM$(a$)
See also :
' Result b$="
Menu"
LTRIM$
8-14-125- RUN – Launch a task
Syntax :
RUN <Name>
Description :
This instruction is used to launch a stopped task (ex : task declared with manual
start).
Remarks :
This function has no effects on a suspended, automatic running tasks or already
launched task.
Example :
Beginning:
R403
- 118 -
SERAD S.A.
Supervisor documentation
Wait Inp(Power)=On
RUN
Cutter
Wait Inp(Power)=Off
HALT Cutter
Goto Beginning
See also :
CONTINUE, HALT, SUSPEND
8-14-126- SEEK – Moving to a save file
Syntax 1 :
SEEK #3,<Long moving>
Syntax 2 :
<Variable> = SEEK #3
Accepted types : <Long moving>, <Variable> : long integer
Description :
The syntax 1 allow to moving in the save file of <Long moving> characters. The
moving start at the current position. The syntax 2 allow to know the current
position in the save file.
Remarks :
The first character is at the position 0l.
Exemple :
P&=Seek(#3)
‘Rapport nominal : ratio 0.5
Seek #3, P&+100
‘Déplacement sur le 100ème caractère à partir
‘de la position courante
See also :
OPEN, INPUT$, PRINT
8-14-127- SETDATE – Set the date
Syntax :
SETDATE(<Year>,<Month>,<Day>,<DayInTheWeek>)
Accepted types :
Year, Month, Day, DayInTheWeek : Integer
Description :
This instruction set the current date.
See also :
GETDATE, SETTIME
8-14-128- SETINP – Input filters and invert
Syntax :
SETINP (<Name>,<Inversion>,<Filtre>)
Units :
Filter : milliseconds
Accepted types :
Inversion : Long integer
Filter : Byte
Description :
This function defines the inputs invert mask and the filter period.
Remarks :
<Invert> is a long integer in which each bit represents the invert of each input.
This parameter can be defined during the input card configuration.
Example :
SETINP(INPUTS11,4,10)
' Second input card invert
' and 10 ms filter
8-14-129- SETOUT – Outputs invert
Syntax :
SETOUT (<Name>,<Inversion>)
Accepted types :
Inversion : Long integer
Description :
This function defines the outputs invert mask.
R403
- 119 -
SERAD S.A.
Supervisor documentation
Remarks :
<Invert> is a long integer in which each bit represents the invert of each output.
This parameter can be defined during the output card configuration.
Example :
SETOUT(OUTPUTS1,3)
' 2 first outputs card invert
8-14-130- SETTIME – Set the hour
Syntax :
SETTIME(<Hours>,<Minutes>,<Seconds>)
Accepted types :
<Hours>, <Minutes> and <Seconds> : Integer.
Description :
This instruction set the current hour.
See also :
GETTIME, SETDATE
8-14-131- SETUPCOUNTER – Counter configuration
Syntax :
SETUPCOUNTER(<Counter>,<Input>,<Invert>,<Filter>)
Accepted types :
<Counter> : 1 or 2
<Input> : Byte
<Invert>, <Filter> : bit
Description :
This instruction defines the counter configuration
Remarks :
<Counter> : Counter number (1 or 2)
<Input> : Input number of the input card
<Inversion> : edge choice : 0 for a positive edge, 1 for a negative edge
<Filter> : Filter validation : 0 without filter, 1 for a 2ms filter.
See also :
COUNTER_S , CLEARCOUNTER
8-14-132- SGN - Sign
Syntax :
SGN (<Expression>)
Accepted types :
Expression : Long integer, real
Description :
This function returns a real equal to –1 for the negative numbers, 1 for the positive
numbers and 0 for the zero number.
Example :
a!=SGN(10) 'Result : a!=1
8-14-133- SIN - Sine
Syntax :
SIN (<Expression>)
Accepted types :
Expression : real
Description :
This instruction returns the sine of <Expression>. <Expression> is expressed in
radians.
Example :
<Expression> must be a numerical expression.
See also :
COS, ARCTAN, TAN
8-14-134- SIGNAL – Event generation
Syntax :
SIGNAL <Name>
Description :
This instruction generates an event.
R403
- 120 -
SERAD S.A.
Supervisor documentation
Remarks :
<Name> must be the name used by WAIT EVENT instruction. The only first task
which was waiting for this event can then continue.
Example :
Program1
See also :
Program2
...
...
WAIT EVENT Ready
SIGNAL Ready
...
...
WAIT EVENT, DIFFUSE
8-14-135- SQR – Square root
Syntax :
SQR (<Expression>)
Accepted types :
Expression : real
Description :
This function returns the square root of <Expression>.
Example :
a!=SQR(2)
8-14-136- SPACE$ - Space made string
Syntax :
SPACE$(<Number>)
Limits :
Number : 1 to 255
Accepted types :
Number : Byte
Description :
This function returns a space made string.
Example :
a$=SPACE$(10) 'Result a$="
See also :
STR$, VAL
"
8-14-137- STR$ - Char characters convert
Syntax :
STR$(<Expression>)
Accepted types :
Expression : Byte … Real
Description :
This function returns a string which represents a numerical expression value.
Remarks :
When the numbers are converted in text, a head space is always reserved for the
sign of <Expression>. If <Expression> is positive, the string returned by Str$
contains a head space and the sign plus is insinuated.
Warning :
This function can send back a value according to the notation of type with
exponent. It’s preferable to use the instruction FORMAT$ with number=1
Example :
a%=10
b$=STR$(a%) 'Result b$=" 10"
See also :
VAL
8-14-138- STATUS – Task state
Syntax :
STATUS (<Name>)
Description :
This function returns a task state
Remarks :
The possible values are :
0 : The task is stopped
1 : The task is suspended
R403
- 121 -
SERAD S.A.
Supervisor documentation
2 : The task is running
Example :
Run Cutter
Wait Status(Cutter)=0
8-14-139- SUB – Subroutine
Syntax :
SUB <Name>
Description :
This keyword begins a subprogram block and is also used to define the end of a
subprogram block when it is preceded by END.
Remarks :
The blocs SUB - END SUB must be outside of a PROG -END PROG bloc .
Example :
SUB Move
...
END SUB
See also :
END
8-14-140- SUSPEND – Suspend a task
Syntax :
SUSPEND <Name>
Description :
This instruction suspends a task in run
Remarks :
This instruction has no effects on stopped tasks. All the movements in the buffer of
movements are executed.
Example :
Wait Inp(Start)
RUN
Cutter
Begin:
Wait Inp(Stop)
SUSPEND Cutter
Wait Inp(Start)
CONTINUE Cutter
Goto Begin
See also :
RUN, CONTINUE, HALT
8-14-141- STRING$ - String creation
Syntax :
STRING$(<Number>, <Code>)
Limits :
Number, Byte : de 0 à 255
Accepted types :
Number, Code : Byte
Description :
This function returns a char string whose characters have the same ASCII code.
Remarks :
We use STRING$ to create a string which is constituted of a repeated character.
<Number> is a numerical expression which indicates the length of the returned
string. <Code> is the ASCII code of the character used to build a string and a
numerical integer expression between 0 and 255.
Example :
a$=STRING$(10,"0") 'Result a$="0000000000"
See also :
STR$, VAL
R403
- 122 -
SERAD S.A.
Supervisor documentation
8-14-142- TAN - Tangent
Syntax :
TAN (<Expression>)
Accepted types :
Expression : real
Description :
This instruction returns the tangent of <Expression>. <Expression>is an angle
expressed in radians.
Remarks :
This argument <Expression> must be a numerical valid expression. The function
TAN takes an angle and returns the ratio of two sides rectangle triangle. The ratio
is the length of the opposite side of an angle divided by the length of the adjacent
side of the angle.
Example :
a!=TAN(PI)
See also :
SIN, ARCTAN,TAN
8-14-143- TIME – Time base
Syntax :
TIME
Description :
This instruction returns a long integer which represents the number of milliseconds
from the last power-on. This instruction allows to execute no-locking waits. At the
start-up of the SUPERVISOR, TIME is equal to zero and increases up to 2^31.
Then, it passed to -2^31 and increases to 0. This cycle is about 24 days long.
Remarks :
If the SUPERVISOR is used more than 24 days, you can use the TIMER
instruction to suppress the crossing of 2^31 to –2^31.
Example :
Tempo&=Time+5000 'loads 5s delay
WAIT
(INP(Start)=On) Or (Time>Time&)
'if the start input is not activate in the 5s,
'the program continues
See also :
TIME$ , TIMER
8-14-144- TIMER – Wide time base
Syntax :
TIMER
Description :
This instruction returns a real which represents the number of milliseconds from
the last power-on. This instruction allows to execute no-locking waits. At the startup of the SUPERVISOR, TIMER is equal to zero and increases with a step equal to
0.001(ms).
Example :
Timer!=Timer+5.25
WAIT
'loads 5.25 delay
(INP(Start)=On) Or (Timer>Time!)
'if the start input is not activate in the 5.25s,
'the program continues
See also :
TIME$, TIME, DATE$
8-14-145- TIME$ - Current hour
Syntax :
TIME$
Description :
This instruction returns a 8 chars string with hh:mm:ss form, where hh are the
hours (00-23), mm are the minutes (00-59) and ss are the seconds (00-59).
See also :
TIME, TIMER, DATE$
R403
- 123 -
SERAD S.A.
Supervisor documentation
8-14-146- TX485 – Modify RS485 output state
Syntax :
TX485(<Number>)=<Expression>
Accepted types :
Expression : Integer
Description :
This function enable RS485 port output for a specified number of characters. If
number is 0 then output is disabled.
Remarks :
<Number> is number used to open communication port with the OPEN function.
In RS485 mode all sent characters are also received.
Example :
TX485(#1)=10
8-14-147- UCASE$ - Uppercase
Syntax :
UCASE$(<Expression>)
Accepted types :
Expression : Char string
Description :
This function returns a string, in which all the letters of the argument have been
converted in uppercases.
Remarks :
The argument <Expression> must be a char string. Only the lowercases letters are
converted in uppercases ; the other letters are not modified.
Example :
a$="Sensor1"
b$=UCASE$(a$) 'Result : b$="SENSOR1"
See also :
LCASE$
8-14-148- VAL – Convert a string in numeric
Syntax :
VAL(<Expression>)
Accepted types :
Expression : Char string
Description :
This function returns the numerical value of the string <Expression>.
Remarks :
The argument <Expression> is a char string which can be interpreted as a
numerical value. The VAL function stops reading the string when the first
character is not known. VAL doesn't know as well the spaces, tabulations and line
jumps. The VAL function always returns a real data type.
Example :
a$="10"
b!=VAL(a$) 'Result b!=10
See also :
STR$
8-14-149- VERSION – Operating system version
Syntax :
<Variable>=VERSION
Accepted type : Variable : chaîne de caractères
Description : This function return a string with the version of the operating system.
8-14-150- VLINE – Draw a vertical line
Syntax :
VLINE(X1,Y1,Y2,color)
Units :
X1, Y1, Y2 : pixel
R403
- 124 -
SERAD S.A.
Supervisor documentation
Limits :
X1 : 1 to 240
Y1, Y2 : 1 to 128
Accepted types :
X1, Y1, Y2 : byte.
Colour : Bit
Description :
This instruction draws a vertical line with its start point in X1, Y1 and its end point
in X1, Y2 on the operator panel S640.
Remarks :
Colour defines the colour of the line : black (0) or white (1)
Example :
VLINE(10,5,25,0)
8-14-151- WAIT EVENT – Event waiting
Syntax :
WAIT EVENT <Name>
Description :
This instruction allows to the system to wait until an event is received. The
execution of this instruction launches the execution of the next task.
Remarks :
In the WAIT EVENT instruction, the following instructions are not executed if the
event is not received. This instruction provides a passive wait for event.
Example :
WHILE Ready=False DO END WHILE
'Active waiting
'This program is similar to :
WAIT EVENT Ready
See also :
'Passive waiting
SIGNAL, DIFFUSE, WAIT STATE, DELAY
8-14-152- WAIT KEY – Key waiting
Syntax :
WAIT KEY
Description :
This function waits for a key pressed on the operator panel and record its code in
the KEY variable. The execution of this instruction launches the execution of the
next task.
Example :
WAIT
KEY
IF KEY=@F1 THEN GOTO ...
IF KEY=@F2 THEN GOTO ...
...
8-14-153- WAIT – Condition waiting
Syntax :
WAIT <Condition>
Description :
This instruction allows to the system to wait for a condition. The execution of this
instruction launches the execution of the next task.
R403
- 125 -
SERAD S.A.
Supervisor documentation
Remarks :
Example :
The WAIT instruction, the following instructions are not executed if the
<Condition> is false. This instruction provides a passive wait for a condition. The
STATE keyword is optional.
WHILE INP(Sensor)=Off
DO END WHILE
'Active waiting
‘this program is similar to :
WAIT
See also :
INP(Sensor)=On
'Passive waiting
WAIT EVENT, DELAY
8-14-154- WATCHDOG – Watchdog
Syntax 1 :
WATCHDOG = ON / OFF
Syntax 2 :
WATCHDOG
Description :
This function allows to the user to read or write the watchdog relay state.
Remarks :
The watchdog state under power-on is OFF. Then, it must be set to ON when the
program starts.
Example :
WATCHDOG=ON.
WAIT WATCHDOG=OFF
8-14-155- WHILE – While…Do…End While
Syntax :
WHILE <Condition> DO
{<Instructions>}
END WHILE
Description :
This instruction allows to the system to execute a list of instructions in a loop as
long as the given condition is true. The execution of this instruction launches the
execution of the next task.
Remarks :
In the WHILE ... DO ... END WHILE instruction, <Instruction>are not executed if
the condition is false.
Example :
a%=0
WHILE a%<=100
PRINT #1,a%
a%=a%*2
END WHILE
See also :
REPEAT
8-14-156- XOR – Exclusive OR operator
Syntax :
<Expression1> XOR <Expression2>
Accepted types :
Expression1, Expression2 : Bit, Byte, Integer
Description :
This function makes a Exclusive Or between the expressions.
Remarks :
<Expression1> and <Expression2> must represent a bit, a byte or an integer.
<Expression1> and <Expression2> must have the same data type. This function
returns the data type of <Expression1>.
Example :
IF A% XOR 0FF00h THEN ...
See also :
AND, OR, NOT, IF
R403
- 126 -
SERAD S.A.
Supervisor documentation
9- CANopen
9-1- Definition
9-1-1- Introduction
The CAN bus (Controller Area Network) appeared in the middle of the 80ies as an answer for
the data transmission in the automotive fields. This kind of bus can have transmission speeds up
to 1 Mb/s.
The CAN specifications are defining 3 layers among the ISO/OSI model: the physical one, the
data linking one and the application one. The physical layer defines the data transmission mode
regarding the transmission support. The data linking layer is the nucleus of the CAN protocol
because it deals with the frame to send, the arbitrage, the defaults detection, etc. The last layer is
also called CAL (CAN Application Layer). It is a general description of the language for the
CAN networks which offers many communication services.
CANopen is a type of network based on the serial bus system and the application layer CAL.
CANopen offers only part of the communication services that CAL has at its disposal. Those are
the necessary advantages that need small performances computer, without storage capability.
So the CANopen is an application layer standardised by the CIA (CAN In Automation)
specifications: DS-201…DS-207
The network manager permits an easier network initialisation. The network can be extended
with all the components the user wants to.
The CAN bus is a multi-master bus. The sent messages are identified, instead of the connected
modules as in the other field-buses. The network elements are allowed to send their message
each time the bus is free. Bus conflicts are solved with a priority level given to messages. The
CAN bus emits messages divided among 2032 priority levels. All the network elements have
the same rights, so this communication is possible only without master bus.
Each element is deciding itself when it has data to send. However it is possible to send data with
another element. This demand is made with the distant frame.
The CANopen specifications (DS-201…DS-207) define the technical and functional
characteristics needed by any device to be plugged in the network. The CANopen bus makes a
distinction from the server devices and the client devices.
9-1-2- CANopen communication
The CANopen communication profile permits to specify information for data exchange in real
time and parameters. The CANopen uses optimised services following the data types:
PDO (Process Data Object)
Data exchange in real time
High priority identifier
Synchronous or asynchronous transmission
8 bytes (one message) maximum
Pre-defined format
SDO (Service Data Object)
Access to the objects dictionary of a device
Low priority identifier
R403
- 127 -
SERAD S.A.
Supervisor documentation
Asynchronous transmission
Data distributed in many telegrams
Data addressed with an index
The characteristics diffused on the CAN bus are received and evaluated by all the connected
devices. Each service of a CAN device is configured by a COBID (Communication OBject
IDentifier). The COBID is an identifier which characterises the message. It tells to a device if
the message must be taken in account. For each service (PDO or SDO), it is necessary to specify
a COBID during the emission (sending a message) and a reception COBID (receiving a
message). For the first SDO server, the COBID is fix and can not be modified remotely.
Moreover, it is calculated from the NodeID. The NodeID is the parameter which characterises
the device and permits the unique access to it.
PDO (Process Data Object)
It is a data exchange arbitrated between 2 modules. The PDO can transfer in turn some
synchronisation or controlled events to realise the message sending request. With the controlled
events mode, the load of the bus can be very reduced. A device can therefore realise a high
performance with a law transfer rate.
The data exchange with the PDO uses the CAN advantages:
Sending messages can be done from an asynchronous event (controlled event)
Sending messages can be done from the reception of a synchronisation event.
Recovery from a remote frame.
SDO (Service Data Object)
It is a data exchange point to point. A device is asking for an access in the objects list of a SDO.
This one sends back an information corresponding to the type of request made by the caller.
Each SDO can be either client and / or server. A server SDO can not send a request to another
SDO, but it can answer any request from another client SDO. Unlike the PDOs, the SDOs must
follow a particular communication protocol . The frame to send must have 8 bytes :
Domain Protocol (Byte 0) : it defines the command (Upload, Download,….)
Index on 16 bits (Bytes 1 et 2) : It defines the objects dictionary address.
Sub-index on 8 bits (Octet 3) : It defines the element of the selected object in the dictionary
Parameter (Octet 4 à 7) : It defines the value of the parameter read or written.
The network manager has a simplified mode to start the network up. The network configuration
is not necessary in all the cases. The default configuration of the parameters may be enough. If
the user wants to optimise the CANopen network or increase its functionalities, he can the
modify himself these parameters. In the CANopen networks, each device has the same rights
and the data exchange is directly regulated between each participant device.
The profile of a device defines the necessary parameters for a communication. The contents of
this profile is specified by the constructor. Devices with the same profile are directly
interchangeable. Most of the parameters are described by the constructor. The profile has empty
places too which are for the future functionality extensions.
In most of the master/slave buses, the efficiency of the master determinates the comportment of
the whole network. Moreover, slaves can not communicate directly one with the other. All these
characteristics are increasing the transmission errors. CANopen suppress all of these drawbacks.
The timing comportment can be specified individually for each respective task of the participant
R403
- 128 -
SERAD S.A.
Supervisor documentation
devices. Like that, the whole communication system does not need to have more efficiency if
only some of the devices need so. Moreover, an automatic task can be separated for each of the
participant devices. So the performances of the network manager can be used in an optimised
way and can increase at any time by adding new participant devices.
The variables mapping used during the PDO type exchanges permits to use in an optimal way
the current bandwidth of the bus. CANopen determinates default values of all the parameters.
9-1-3- Network configuration
The CanOpen network is made of several devices, each of them can be master and slave. They
are identified in the network by an arbitrary number, called Node-Id. This parameter must be
unique: two different devices of the Can Open network can not have the same Node-Id. This
Node-Id is very important, it is the real identity card of the peripheral on the Can Open network.
NodeID
3
NodeID
12
NodeID
1
NodeID
13
NodeID
2
NodeID
5
Example of CanOpen network configuration
The wiring is as follows:
CAN_L
CAN_H
Gnd
Devices
Ending resistors between Can_H and Can_L
Wiring of a Can Open network
Warning: Do not forget the ending resistors at each end of the Can Open network. For the
SERAD products (SCAN, DIALOG and SUPERVISOR), the resistor is validated if the jumper
JP1 is present. If it is not, the resistor is un-validated.
For the other products, see the notice.
R403
- 129 -
SERAD S.A.
Supervisor documentation
9-1-4- Type of send messages
There are two main kinds of messages sent on the Can Open network:
•
The SDO are transmitting data
•
The PDO are transmitting events
9-2- SUPERVISOR CANopen bus
9-2-1- Presentation - SCAN board
The SCAN co-processor board is included in the SUPERVISOR. It owns three local tables of
254 data each, for these 3 data formats: 8 bits, 16 bits, 32 bits.
These tables can be read and written by the SUPERVISOR without going into the Can Open
network, with the instructions CanLocal.
The different parameters and the data tables are stored in a two-dimensions array, called
dictionary.
Each data or parameter is defined by an address index, and a sub-index address.
The SCAN bus can communicate with another device of the network by different ways. It can
let data at other devices disposal by writing them in its local table: any other peripheral can then
read and write this local table. It is the way used for example to communicate between an
intelligent operator terminal Dialog 80 or 640.
The SCAN bus can also read and write a local table of another device. This operation is then
done with the instructions CanRemote.
9-2-2- Characteristics
A SDO default server to set the parameters of the remote board by a supervisor.
A SDO client to access to variables and peripheral parameters such as displays, PLC, PC
boards.
8 PDO in emission to drive the outputs of the I/Os modules or signal an event to
SUPERVISOR.
8 PDO in reception to receive the inputs of the I/Os modules or signal an event to
SUPERVISOR.
An array of 254 variables « 8 bits non signed » with read and write access for SDO.
An array of 254 variables « 16 bits non signed » with read and write access for SDO.
An array of 254 variables « 32 bits non signed » with read and write access for SDO.
Erreur! Signet non défini. Direct access functions to the bus CAN to send and receive specific
messages such as the functions NMT et DBT.
R403
- 130 -
SERAD S.A.
Supervisor documentation
9-2-3- Connections
Use a cable with 2 twisted shielded pairs and a general shielding (type LiY.CY.CY or
equivalent) :
-
one pair for CAN_L and CAN_H
-
one pair for the GND
Link the shieldings to the terminals
Example with 2 MCS 32 EX and 1 SUPERVISOR in a Can Open network :
Can_H
Can_L
GND
S640
SCAN board
MCS n°2
SCAN board
MCS n°1
Warning
At each end of the Can Open network do not forget a 120 Ω ending resistor between CAN_H
and CAN_L (for a Dialog 80, Dialog 640, Supervisor 640 or SCAN board, the installation of the
jumper JP1¨can validate this resistor.
For example, in the previous configuration, we have :
SUPERVISOR 640 : Jumper JP1 ON
SCAN board n°2 : Jumper JP1 OFF
SCAN board n°3 : Jumper JP1 ON
Maximal transmission speed regarding the length of the Can Open network
Maximal transmission speed
R403
- 131 -
Network length
SERAD S.A.
Supervisor documentation
10K to 125 kBauds
500 m
250 kBauds
250 m
500 kBauds
100 m
800 kBauds
50 m
1 Mbauds
25 m
9-2-4- Test and diagnostic of the Can Open network
From the SPL software, activate the debug mode and then double-click on the SCAN board.
VIEW page
Card : visualisation of the communication errors number in the board and its state
3 different states:
STOPPED mode : the CANOpen bus waits for a StartCan instruction
STARTED mode : the CANOpen bus is ready to communicate
ACTIVE mode: the CANOpen bus is communicating
Can : visualisation of the transmission and reception number in free protocol
Server SDO : visualisation of the sent request and correct answers.
Client SDO : visualisation of the sent correct answers and request
Tx PDO : visualisation of the sent PDO number (sub-total per PDO number)
Rx PDO : visualisation of the received PDO number (sub-total per PDO number)
Clear : click here to clear all the counters of this page
R403
- 132 -
SERAD S.A.
Supervisor documentation
DEBUG page :
This page can validate very easily the good comportment of two SCAN boards inside of a Can
Open network.
The procedure is as follows:
On the local board, stop the tasks
Go to the debug menu of the SCAN board
Fill in its Node-Id, the transmission speed and the distant card Node-Id.
For the distant card, there are two different cases :
There is no task in the SUPERVISOR
You have to create one, to start the CANOpen bus, in automatic mode, called INIT for example:
Prog
Delay 2000
StartCan (CardName, Speed, Node-Id)
Halt INIT
End Prog
There are already tasks in the SUPERVISOR
In the automatic task, add at the beginning :
Prog
Delay 2000
R403
- 133 -
SERAD S.A.
Supervisor documentation
StartCan (CardName, Speed, Node-Id)
Halt INIT
…
End Prog
Warning: be sure that there is only one task in automatic mode, otherwise pass the others in
manual mode.
In both cases, compile and transfer the program
Validate the test by clicking on “START” in the local card. The percentage of errors will tell
you very quickly if the Can Open bus is right on a hardware point of view for these two
SUPERVISOR.
NB : The errors percentage is calculated with the values printed in the “View” page. Therefore
it may be useful to clear these values from time to time.
9-2-5- Dictionary
The dictionary contains the different parameters and variables of the board. They are directly
accessible for the SUPERVISOR with the functions CANSETUP. The variables tables are
accessible with the functions CANLOCAL. To access to the other CANopen peripheral
parameters, you have to use the functions CANREMOTE.
R403
- 134 -
SERAD S.A.
Supervisor documentation
Index
Subidx
1000
0
1001
0
1002
0
1003
0
1
1004
0
1
2
100B
0
100F
0
1200
0
1
2
3
1280
0
1
2
3
1400
0
1
2
1401
0
1
2
1402
0
1
2
1403
0
1
2
1404
0
1
2
1405
R403
0
Nom
Type
32 bits non
signé
32 bits non
Error register
signé
Manufacturer Status 32 bits non
Register
signé
8 bits non
predefined error field
signé
32 bits non
actual error
signé
number of PDO's
32 bits non
supported
signé
Number of synchronous 32 bits non
PDO
signé
Number of
32 bits non
asynchronous PDO
signé
32 bits non
Node ID
signé
Number of SDO's
32 bits non
supported
signé
8 bits non
Number of elements
signé
32 bits non
SDO receive COB-Id
signé
32 bits non
SDO transmit COB-ID
signé
node ID of the SDO
8 bits non
client
signé
8 bits non
Number of elements
signé
32 bits non
SDO transmit COB-ID
signé
32 bits non
SDO receive COB-Id
signé
node ID of the SDO
8 bits non
server
signé
8 bits non
Number of elements
signé
32 bits non
COB-ID
signé
8 bits non
Transmission type
signé
8 bits non
Number of elements
signé
32 bits non
COB-ID
signé
8 bits non
Transmission type
signé
8 bits non
Number of elements
signé
32 bits non
COB-ID
signé
8 bits non
Transmission type
signé
8 bits non
Number of elements
signé
32 bits non
COB-ID
signé
8 bits non
Transmission type
signé
8 bits non
Number of elements
signé
32 bits non
COB-ID
signé
8 bits non
Transmission type
signé
8 bits non
Number of elements
signé
Device type
- 135 -
Attr.
Défaut
Description
ro
403
type d'appareil
ro
0
registre d'erreur interne
ro
0
registre d'etat spécifique au
constructeur
ro
1
nombre d'erreurs apparues
ro
0
dernière erreur apparue
ro
00080008h
Nombre de PDO supporté
Nombre de PDO synchrone
supporté
Nombre de PDO asynchrone
supporté
ro
0
ro
00080008h
ro
aucune
ro
00010001h
Nombre de SDO supporté
ro
2
paramètre du 1er SDO serveur
600h+nodeID
580h+nodeID
COB-ID de récéption du 1er
SDO serveur
COB-ID d'envoi du 1er SDO
serveur
rw
none
Node ID du SDO client
ro
2
paramètre du 1er SDO client
ro
aucune
ro
aucune
rw
none
Node ID du SDO serveur
rw
2
paramètre de réception du 1er
PDO
rw
200h +
Node Id
COB-ID utilisé par le PDO
rw
254
Type de la réception
rw
2
paramètre de réception du
2ème PDO
rw
300h +
Node Id
COB-ID utilisé par le PDO
rw
254
Type de la réception
rw
2
paramètre de réception du
3ème PDO
rw
aucune
COB-ID utilisé par le PDO
rw
254
Type de la réception
rw
2
paramètre de réception du
4ème PDO
rw
aucune
COB-ID utilisé par le PDO
rw
254
Type de la réception
rw
2
paramètre de réception du
5ème PDO
rw
aucune
COB-ID utilisé par le PDO
rw
254
Type de la réception
rw
2
paramètre de réception du
6ème PDO
ro
ro
COB-ID de récéption du 1er
SDO client
COB-ID d'envoi du 1er SDO
client
SERAD S.A.
Supervisor documentation
32 bits non
signé
8 bits non
2
Transmission type
signé
8 bits non
0
Number of elements
signé
32 bits non
1
COB-ID
signé
8 bits non
2
Transmission type
signé
8 bits non
0
Number of elements
signé
32 bits non
1
COB-ID
signé
8 bits non
2
Transmission type
signé
8 bits non
0
Number of elements
signé
32 bits non
1
COB-ID
signé
8 bits non
2
Transmission type
signé
8 bits non
0
Number of elements
signé
32 bits non
1
COB-ID
signé
8 bits non
2
Transmission type
signé
8 bits non
0
Number of elements
signé
32 bits non
1
COB-ID
signé
8 bits non
2
Transmission type
signé
8 bits non
0
Number of elements
signé
32 bits non
1
COB-ID
signé
8 bits non
2
Transmission type
signé
8 bits non
0
Number of elements
signé
32 bits non
1
COB-ID
signé
8 bits non
2
Transmission type
signé
8 bits non
0
Number of elements
signé
32 bits non
1
COB-ID
signé
8 bits non
2
Transmission type
signé
8 bits non
0
Number of elements
signé
32 bits non
1
COB-ID
signé
8 bits non
2
Transmission type
signé
8 bits non
0
Number of elements
signé
32 bits non
1
COB-ID
signé
8 bits non
2
Transmission type
signé
from 1
32 bits
Read 32 bits variables
to FEh
signé
from 1
8 bits non
Read 8 bits variables
to FEh
signé
1
1406
1407
1800
1801
1802
1803
1804
1805
1806
1807
7180
7200
R403
COB-ID
- 136 -
rw
aucune
COB-ID utilisé par le PDO
rw
254
Type de la réception
rw
2
paramètre de réception du
7ème PDO
rw
aucune
COB-ID utilisé par le PDO
rw
254
Type de la réception
rw
2
paramètre de réception du
8ème PDO
rw
aucune
COB-ID utilisé par le PDO
rw
254
Type de la réception
rw
2
paramètre d'émission du 1er
PDO
rw
180h +
Node Id
COB-ID utilisé par le PDO
rw
254
Type de l'émission
rw
2
paramètre d'émission du 2ème
PDO
rw
280h +
Node Id
COB-ID utilisé par le PDO
rw
254
Type de l'émission
rw
2
paramètre d'émission du 3ème
PDO
rw
aucune
COB-ID utilisé par le PDO
rw
254
Type de l'émission
rw
2
paramètre d'émission du 4ème
PDO
rw
aucune
COB-ID utilisé par le PDO
rw
254
Type de l'émission
rw
2
paramètre d'émission du 5ème
PDO
rw
aucune
COB-ID utilisé par le PDO
rw
254
Type de l'émission
rw
2
paramètre d'émission du 6ème
PDO
rw
aucune
COB-ID utilisé par le PDO
rw
254
Type de l'émission
rw
2
paramètre d'émission du 7ème
PDO
rw
aucune
COB-ID utilisé par le PDO
rw
254
Type de l'émission
rw
2
paramètre d'émission du 8ème
PDO
rw
aucune
COB-ID utilisé par le PDO
rw
254
Type de l'émission
ro
aucune
ro
aucune
SERAD S.A.
Supervisor documentation
from 1
to FEh
from 1
8180
to FEh
from 1
8200
to FEh
from 1
8280
to FEh
7280
Read 16 bits variables
Write 32 bits variable
Write 8 bits variable
Write 16 bits variable
16 bits non
ro
signés
32 bits
wo
signé
8 bits non
wo
signé
16 bits non
wo
signés
aucune
aucune
aucune
aucune
9-3- Intructions list
9-3-1- List of the CANopen instructions
A)
B)
C)
D)
E)
F)
R403
Read and write the dictionary
CANSETUP#
Read or write a parameter (byte)
CANSETUP%
Read or write a parameter (word)
CANSETUP&
Read or write a parameter (long integer)
Modification of local variables
CANLOCAL#
Read or write a local variable (byte)
CANLOCAL%
Read or write a local variable (word)
CANLOCAL&
Read or write a local variable (long integer)
Modification of remote variables
CANREMOTE#
Read or write a remote variable (byte)
CANREMOTE%
Read or write a remote variable (word)
CANREMOTE&
Read or write a remote variable (long integer)
Instructions in mode PDO
CAN
Read or write data
CANEVENT
Test of a message arrival
PDOEVENT
Test of a PDO arrival
PDO
Read or write data by a PDO
SETUPCAN
configuration of a message
Control instructions
CANERROR
Faults detection
CANERRORCOUNTER
Controls and erases the communication errors
STOPCAN
Starts the CANopen module
STARTCAN
Stops the CANopen module
Instructions in mode PDO
SDOEVENT
Allow to know if a wrtting has been done
SDOINDEX
Allow to know the index of the dictionnary’s object
SDOSUBINDEX
Allow to know the sub-index of the dictionnary’s object
- 137 -
SERAD S.A.
Supervisor documentation
9-3-2- CAN – Read and write a message
Syntax 1 :
CAN(<Board>, <Data>)
Syntax 2 :
<Variable> = CAN(<Board>)
Accepted types : <Data>, <Variable> : Characters string
Description :
This function reads or send a message.
Remark :
<Board> must be a CANopen board. You have to tell the parameters of the
reception COBID to receive the message.
9-3-3- CANERROR – Faults detection
Syntax :
<Variable> = CANERROR(<Board>)
Accepted types : <Variable> : Boolean
Description :
This function tells if a default occurred.
Remark :
<Board> must be CANopen board.
9-3-4- CANERRORCOUNTER – Controls and erases the communication errors
Syntax 1 :
<Variable> = CANERRORCOUNTER (<Board>)
Syntax 2 :
CANERRORCOUNTER(<Board>) = 0
Limits :
<Variable> : from 0000h to FFFFh
Accepted types : <Variable> : integer
Description :
The syntax 1 tells the number of errors which had occurred since the counter has
been reset. The second resets the errors counter.
Remark :
<Board> must be CANopen board.
9-3-5- CANEVENT – Test a message arrival
Syntax :
<Variable> = CANEVENT (<Board>)
Accepted types : <Variable> : Boolean
Description :
This function permits to know if a message has been receipted.
Remark :
<Board> must be a CANopen board. You have to tell the parameters of the
reception COBID to receive the message.
9-3-6- CANLOCAL – Read or write a local variable
Syntax 1 :
CANLOCAL# (<Board>, <Index>, <Expression>)
Syntax 2 :
<Variable> = CANLOCAL# (<Board>, <Index>)
Syntax 3 :
CANLOCAL% (<Board>, <Index>, <Expression>)
Syntax 4 :
<Variable> = CANLOCAL% (<Board>, <Index>)
Syntax 5 :
CANLOCAL& (<Board>, <Index>, <Expression>)
Syntax 6 :
<Variable> = CANLOCAL& (<Board>, <Index>)
Limits :
<Index> : from 0000h to FFFFh
Syntax 1 and 2 : <Variable>, <Expression> : from 00h to FFh
Syntax 3 and 4 : <Variable>, <Expression> : from 0000h to FFFFh
R403
- 138 -
SERAD S.A.
Supervisor documentation
Syntax 5 and 6 : <Variable>, <Expression> : +/- 7FFFFFFFh
Accepted types : Syntax 1 and 2 : <Expression>, <Variable> : Byte
Syntax 3 and 4 : <Expression>, <Variable> : Integer
Syntax 5 and 6 : <Expression>, <Variable> : Long integer
Description :
This function can read or write a local variable of the CANopen board dictionary of
the SUPERVISOR. The syntax 1 and 2 are giving an access to a table of 8 bits nonsigned variables. The syntax 3 and 4 are giving an access to a table of 16 bits nonsigned variables. The syntax 5 and 6 are giving an access to a table of 32 bits
signed variables.
Remark :
<Board> must be a CANopen board. <Index> must refers to a local variable of the
dictionary.
9-3-7- CANSETUP – Read or write a parameter
Syntax 1 :
CANSETUP# (<Board>, <Index>, <Sub-Index>, <Expression>)
Syntax 2 :
<Variable> = CANSETUP# (<Board>, <Index>, <Sub-Index>)
Syntax 3 :
CANSETUP% (<Board>, <Index>, <Sub-Index>, <Expression>)
Syntax 4 :
<Variable> = CANSETUP% (<Board>, <Index>, <Sub-Index>)
Syntax 5 :
CANSETUP& (<Board>, <Index>, <Sub-Index>, <Expression>)
Syntax 6 :
<Variable> = CANSETUP& (<Board>, <Index>, <Sub-Index>)
Limits :
<Index> : from 0000h to FFFFh
<Sub-index> : from 00h to FFh
Syntax 1 and 2 : <Variable>, <Expression> : from 00h to FFh
Syntax 3 and 4 : <Variable>, <Expression> : from 0000h to FFFFh
Syntax 5 and 6 : <Variable>, <Expression> : +/- 7FFFFFFFh
Accepted types :
Syntax 1 and 2 : <Expression>, <Variable> : byte
Syntax 3 and 4 : <Expression>, <Variable> : Integer
Syntax 5 and 6 : <Expression>, <Variable> : Long integer
Description :
This function reads or writes data in the SUPERVISOR CANopen board
dictionary.
Remark :
<Board> must be a CANopen board. <Index> and <Sub-Index> must refer to
elements of the dictionary.
9-3-8- CANREMOTE – Read or write a remote variable
Syntax 1 :
CANREMOTE# (<Board>, <Index>, <Sub-Index>, <Expression>)
Syntax 2 :
<Variable> = CANREMOTE# (<Board>, <Index>, <Sub-Index>)
Syntax 3 :
CANREMOTE% (<Board>, <Index>, <Sub-Index>, <Expression>)
Syntax 4 :
<Variable> = CANREMOTE% (<Board>, <Index>, <Sub-Index>)
Syntax 5 :
CANREMOTE& (<Board>, <Index>, <Sub-Index>, <Expression>)
Syntax 6 :
<Variable> = CANREMOTE& (<Board>, <Index>, <Sub-Index>)
Limits :
<Index> : from 0000h to FFFFh
<Sub-index> : from 00h to FFh
Syntax 1 and 2 : <Variable>, <Expression> : from 00h to FFh
R403
- 139 -
SERAD S.A.
Supervisor documentation
Syntax 3 and 4 : <Variable>, <Expression> : from 0000h to FFFFh
Syntax 5 and 6 : <Variable>, <Expression> : +/- 7FFFFFFFh
Accepted types : Syntax 1 and 2 : <Expression>, <Variable> : Byte
Syntax 3 and 4 : <Expression>, <Variable> : Integer
Syntax 5 and 6 : <Expression>, <Variable> : Long integer
Description :
This function reads or writes a remote variable in the dictionary of the
SUPERVISOR CANopen board.
Remarks :
<Board> must be a CANopen board. <Index> and <Sub-Index> must refer to an
element of the remote dictionary. You have to tell the SDO client and server
parameters of the board before sending any remote variable reading or writing.
9-3-9- PDO – Read or write data from a PDO
Syntax 1 :
PDO (<Board>, <NumPDO>, <Data>)
Syntax 2 :
<Variable> = PDO (<Board>, <NumPDO>)
Limits :
<NumPDO> : from 01h to 08h
<Data>, <Variable> : characters string
Accepted types : <NumPDO> : Byte
<Data>, <Variable> : characters string
Description :
This function reads or writes a PDO.
Remarks :
<Board> must be a CANopen board. You have to tell transmission parameters of
the PDO to receive a PDO.
9-3-10- PDOEVENT – Test a PDO arrival
Syntax :
<Variable> = PDOEVENT (<Board>, <NumPDO>)
Limits :
<NumPDO> : from 01h to 08h
Accepted types : <Variable>, <NumPDO> : Byte
Description :
This function tells if a request of a PDO is effective.
Remark :
<Board> must be a CANopen board. You have to tell the transmission parameters
of the PDO to receive a PDO.
9-3-11- SDOEVENT – Event SDO
Syntax :
<Variable bit> = SDOEvent(<Can Card>)
Description :
This function allow to know if a writting by SPO has been made in the CAN card.
The reading of the bit, reset it.
9-3-12- SDOINDEX – Index SDO
Syntax :
<Variable integer> = SDOIndex(<Can Card>)
Description :
This function allow to know the index of the dictionnary’s object who has been
wrotten.
R403
- 140 -
SERAD S.A.
Supervisor documentation
9-3-13- SDOSUBINDEX – Sub-index SDO
Syntax :
<Variable octet> = SDOSubIndex(<Can Card>)
Description :
This function allow to know the sub-index of the dictionnary’s object who has been
wrotten.
9-3-14- SETUPCAN – Configuration of a message
Syntax :
SETUPCAN (<Board>, <TX COBID>, <RX COBID>)
Accepted types : <TX COBID>, <RX COBID> : Long integer
Description :
This function configures the reception and transmission COBID before sending a
message.
Remark :
<Board> must be a CANopen board.
9-3-15- STARTCAN – Start a CANopen board
Syntax :
STARTCAN (<Board>, <Node ID>, <Freq>)
Limits :
<Node ID> : from 01h to FFh
<Freq> : from 1 to 8
Accepted types : <Node ID>, <Freq> : Byte
Description :
This function links the CANopen board to the network.
Remark :
<Board> must be CANopen board.
9-3-16- STOPCAN – Stop a CANopen board
Syntax :
STOPCAN (<Board>)
Description :
This function puts the corresponding board out of the CANopen network.
Remark :
<Board> must be CANopen board.
9-4- Examples
9-4-1- CANopen kink between two SUPERVISOR
The communication configuration between two SUPERVISOR consists of giving a NodeID
number to each SUPERVISOR. Then a communication with SDO is possible when those are
configured. You can also exchange events with PDO.
The default COBID of the servers are 600h+NodeID in reception and 580h+NodeID in
emission. The default COBID of the first PDO are 200h+NodeID for the reception and
180h+NodeID for the emission. You configures the clients in accordance with that.
Initialisation of the SUPERVISOR 1
'Start the board at 500KBits/s on the node 1
StartCan(Can1,1,5)
'COBID ClientSDO Rx SUPERVISOR1= COBID ServerSDO Tx SUPERVISOR2
CanSetup&(Can1,1280h,1,582h)
'COBID ClientSDO Tx SUPERVISOR1= COBID ServerSDO Rx SUPERVISOR2
R403
- 141 -
SERAD S.A.
Supervisor documentation
CanSetup&(Can1,1280h,2,602h)
'COBID TxPDO1 = COBID RxPDO2
CanSetup&(Can1,1800h,1,202h)
Initialisation of the SUPERVISOR 2
'Start the board at 500KBits/s on the node 2
StartCan(Can2,2,5)
'COBID ClientSDO Rx SUPERVISOR2= COBID ServerSDO Tx SUPERVISOR1
CanSetup&(Can2,1280h,1,581h)
'COBID ClientSDO Tx SUPERVISOR2= COBID ServerSDO Rx SUPERVISOR1
CanSetup&(Can2,1280h,2,601h)
'COBID TxPDO2 = COBID RxPDO1
CanSetup&(Can2,1800h,1,201h)
When this initialisation is over the SUPERVISOR can exchange data and events. In this
example, the SUPERVISOR 2 sends positioning commands to the X axis of the SUPERVISOR
1. The SUPERVISOR 1 receives the order by a PDO and tells the end of the command by
sending a PDO. The position to reach is read in the variable 5 of the table “read 32 bits
variables” of the SUPERVISOR 2. The SUPERVISOR 1 also makes the X axis position
available in the variable 1 of its table “write 32 bits variable”.
Wait PDOEvent(Can1,1)
'Waits for the PDO which signals the message
O$=PDO(Can1,1)
'Reads the PDO
Ordre#=Asc(Left$(O$,1))
'Decoding the command
Pos&=CanRemote&(Can1,7180h,5)
'Reads the position
If Ordre#=1 Then Stta(X=Pos&)
'Execution in absolute
If Ordre#=2 Then Sttr(X=Pos&)
'Execution in relative
...
Repeat
P&=RealToLong(Pos_S(X))
'Read the position
CanLocal&(Can1,1,P&)
'Updates the position
Until Move_S(X)=0
O$=Chr(0)
'Answer
PDO(Can1,1,O$)
'Acquits the command
The SUPERVISOR 2 sends its commands, reads the X axis position in the variable 1 of the
table “read 32 bits variables” and send positions in the variable 5 of the table “write 32 bits
variables”.
CanLocal&(Can2,5,10.25)
'Writes the position
O$=Chr(1)
'Sends a command for absolute motion
PDO(Can2,1,O$)
'Sends the PDO
Repeat
P&=CanRemote&(Can2,7180h,1)
'Reads the position
...
Until PDOEvent(Can2,1)
R403
'Until the end of motion
- 142 -
SERAD S.A.
Supervisor documentation
9-4-2- CANopen linking between a SUPERVISOR and an I/Os module
The communication configuration between a SUPERVISOR and an I/Os module consists of
giving a NodeID number to each of them. In general cases the NodeID of an I/Os device is
configured with switches. Then a communication with SDO and PDO is possible.
The default COBID of the servers are 600h+NodeID in reception and 580h+NodeID in
emission. The default COBID of the first PDO are 200h+NodeID for the reception and
180h+NodeID for the emission. You configures the clients in accordance with that.
Initialisation of the SUPERVISOR
'Start the board at 500KBits/s on the node 1
StartCan(Can1,1,5)
'COBID ClientSDO Rx SUPERVISOR= COBID ServerSDO Tx I/O
CanSetup&(Can1,1280h,1,582h)
'COBID ClientSDO Tx SUPERVISOR= COBID ServerSDO Rx I/O
CanSetup&(Can1,1280h,2,602h)
'COBID TxPDO SUPERVISOR = COBID RxPDO I/O
CanSetup&(Can1,1800h,1,202h)
'COBID RxPDO SUPERVISOR = COBID TxPDO I/O
CanSetup&(Can1,1400h,1,182h)
The I/Os devices need the sending of the message « NMT Start » so they can be operational.
To send this message you use the general CAN functions:
SetupCan(Can1, 0, 0) ' Use the le COBID 0 to access to the NMT server
Nmt$=Chr$(1)+Chr$(2) ' The module NodeID is 2.
Can(Can1,Nmt$)
Read and write I/Os by SDO can be like that:
A#=CanRemote#(Can1,6000h,1)
'Read inputs 1 to 8
A#=CanRemote#(Can1,6000h,2)
'Read inputs 9 to 16
CanRemote#(Can1,6200h,1,01000100b) 'Updates outputs 3 and 7
It is possible to receive inputs states and to modify outputs states with the PDO. The contents of
the PDO is depending on the mapping defined by the construction.
R403
Wait PDOEvent(Can1,1)
'Wiats fr a change on the inputs
E$=PDO(Can1,1)
'Reads the PDO
E1#=ASC(MID$(E$,1,1))
'Reads the first inputs bloc
If E1#.3 Then ...
'Uses the 3rd input
S$=Chr$(00010011b)
'Writes outputs 1, 2 and 5
PDO(Can1,1,S$)
'Sends the PDO
- 143 -
SERAD S.A.
Supervisor documentation
10- REMOTE CONTROL
10-1- Connections
The remote control allows by a simple phone link to remotely control a SUPERVISOR with
SPL software. The remote control is composed of an integrated dialler and two modems linked
by a phone link.
•
Structure
The different parts are linked as shown :
•
RS 232 link between the modem 1 and the SUPERVISOR
9 points SUBD pin assignment :
Pin
Supervisor
Modem
1
CD
2
RXD
RXD
3
TXD
TXD
4
5
DTR
GND
GND
6
DSR
7
RTS
8
CTS
CTS
9
R403
- 144 -
SERAD S.A.
Supervisor documentation
Use a shielded cable with shield connected at each end.
Linking :
•
RS 232 link between the modem 2 and the PC
This link between the modem and the PC is made with the cable provided with the modem.
10-2- Link establishment
•
Setting up the modem 1 connected to the SUPERVISOR
The set-up of the modem connected to the SUPERVISOR is made by connecting this modem
to a PC. A terminal software is used to send commands to the modem.
This set-up have to following objectives :
-
Initialising the modem
-
Defining the number of ringing before the modem pick up to allow an automatic
establishment of the link.
-
Removing all hardware and software flow controls.
-
Storing this configuration into the non-volatile memory of the modem.
-
Selecting these parameters in the non-volatile memory as parameter to be used at power
on.
Example :
R403
- 145 -
SERAD S.A.
Supervisor documentation
Parameters for an « 3Com Us Robotics Sportster » modem type :
-Command : AT&F0
Meaning : Using default factory settings.
-Command : ATS0=3
Meaning : Automatic pick up after 3 ringing.
-Command : AT&H0
Meaning : Disable the flow control when sending
-Command : AT&I0
Meaning : Disable the flow control when receiving
-Command : AT&W0
Meaning : Store current parameters into the non-volatile memory bank #0
-Command : ATY0
Meaning : Selecting these parameters in the non-volatile memory as parameter to be used at
power on.
When the modem take these commands into account it answers « OK » .
Parameters for an « Wertermo TD31 or TD32 » modem type :
-Command : AT&F
Meaning : Using default factory settings.
-Command : ATS0=3
Meaning : Automatic pick up after 3 ringing.
-Command : AT&C1
Meaning : Activate DCD when connected
-Command : AT&K0
Meaning : Disable the flow control
-Command : AT&W0
Meaning : Store current parameters into the non-volatile memory bank #0
-Command : AT&Y0
Meaning : Selecting these parameters in the non-volatile memory as parameter to be used at
power on.
When the modem take these commands into account it answers « OK » .
R403
- 146 -
SERAD S.A.
Supervisor documentation
•
Setting up the modem 2 connected to the PC
The setting up of the modem connected to the PC is done by modifying the information in the
« Modem » part of the SUPERVISOR.INI file that is in the Windows directory (C
:\Windows or C :\Winnt for example).
This set-up have to following objectives :
-
Initialising the modem
-
Remove handling of the DSR and DTR signals to avoid automatic hang-up when the
communication port is closed.
-
Defining the way the calls are made and how to hang-up the line.
-
Defining the messages sent by the modem.
Example :
Parameters for an « 3Com Us Robotics Sportster » modem type :
- Parameter : Init1
Value : ATZ
Meaning : Using default factory settings.
- Parameter : Init1TimeOut
Value : 5
Meaning : Maximal waiting delay in 1/10 before the modem answer.
- Parameter : Init2
Value : AT&D0&S0
Meaning : Remove the DTR and DSR handling
- Parameter : Init2TimeOut
Value : 5
Meaning : Maximal waiting delay in 1/10 before the modem answer.
- Parameter : Dial
Value : ATDT for vocal dial. ATDP for a pulse dial
Meaning : Selecting the way to call.
- Parameter : DialTimeOut
Value : 600
Meaning : Maximal waiting delay in 1/10 before the modem connection.
- Parameter : Ok
R403
- 147 -
SERAD S.A.
Supervisor documentation
Value : OK
Meaning : Modem answer if the command have been handled correctly.
- Parameter : Connect
Value : CONNECT
Meaning : Modem answer when connecting.
- Parameter : Busy
Value : BUSY
Meaning : Modem answer if the line is busy.
- Parameter : Hangup
Value : ATH
Meaning : Selecting the way to hang-up.
- Parameter : HangupOk
Value : NO CARRIER
Meaning : Modem answer when hanging-up
- Parameter : CommandTimeOut
Value : 20
Meaning : Maximal waiting delay in 1/10 before the modem going to the command mode.
- Parameter : HangupTimeOut
Value : 20
Meaning : Maximal waiting delay in 1/10 before the hanging up.
All missing parameter is automatically set to the default values indicated on the first using.
Parameters for an « Westermo TD31 or TD32 » modem type :
-Parameter : Init1
Value : ATZ
Meaning : Using default factory settings.
- Parameter : Init1TimeOut
Value : 20
Meaning : Maximal waiting delay in 1/10 before the modem answer.
- Parameter : Init2
Value : AT&F&K0
R403
- 148 -
SERAD S.A.
Supervisor documentation
Meaning : Remove the DTR and DSR handling
- Parameter : Init2TimeOut
Value : 20
Meaning : Maximal waiting delay in 1/10 before the modem answer.
- Parameter : Dial
Value : ATDT for vocal dial. ATDP for a pulse dial
Meaning : Selecting the way to call.
- Parameter : DialTimeOut
Value : 600
Meaning : Maximal waiting delay in 1/10 before the modem connection.
- Parameter : Ok
Value : OK
Meaning : Modem answer if the command have been handled correctly.
- Parameter : Connect
Value : CONNECT
Meaning : Modem answer when connecting.
- Parameter : Busy
Value : BUSY
Meaning : Modem answer if the line is busy.
- Parameter : Hangup
Value : ATH
Meaning : Selecting the way to hang-up.
- Parameter : HangupOk
Value : NO CARRIER
Meaning : Modem answer when hanging-up
- Parameter : CommandTimeOut
Value : 20
Meaning : Maximal waiting delay in 1/10 before the modem going to the command mode.
- Parameter : HangupTimeOut
Value : 20
Meaning : Maximal waiting delay in 1/10 before the hanging up.
R403
- 149 -
SERAD S.A.
Supervisor documentation
The dialler expect that the modem is setup to send an echo for all sent command and to
receive a text message as answer. If not the communication is unable. It’s possible to be sure
to start with a good set-up for the modem by using the factory settings as default parameters.
A terminal software is used to send commands to the modem.
Parameters for an « 3Com Us Robotics Sportster » modem type :
- Command : AT&F
Meaning : Using default factory settings.
- Command : AT&W0
Meaning : Store current parameters into the non-volatile memory bank #0
- Command : ATY0
Meaning : Selecting these parameters in the non-volatile memory as parameter to be used at
power on.
Parameters for an « Wertermo TD31 or TD32 » modem type :
- Command : AT&F
Meaning : Using default factory settings.
- Command : AT&W0
Meaning : Store current parameters into the non-volatile memory bank #0
- Command : AT&Y0
Meaning : Selecting these parameters in the non-volatile memory as parameter to be used at
power on.
ATTENTION :
- For Westermo modem , it’s also recommended to let the Dips configuration as default ( all
OFF).
•
Call :
By using the phone dialler integrated in the SPL software, we can establish and interrupt the
phone link. The phone dialler is accessible form the Communication menu / Remote control.
R403
- 150 -
SERAD S.A.
Supervisor documentation
After entering the phone number, click on «Dial» button to establish the link. The «Hang up »
button allows to interrupt the link.
These actions are possible only if the SPL software is not using the same link in debug mode
for example. During the connection and disconnection the communication port is not available
for the rest of the SPL application.
When the link is established, we can use all the SPL functions including :
-
Send and receive the configuration
-
Send and receive the variables
-
Send the tasks
-
Start the tasks
-
Stop the tasks
-
Access to debug tools : Hyper-terminal, Scope, Trace, Manual mode.
10-3- List of the validated modems
•
3 Com / US Robotics :
- Sportster Voice 33600 Fax Modem
- Sportster 56 K Fax Modem
•
Westermo :
- TD 31
- TD 32
R403
- 151 -
SERAD S.A.
Supervisor documentation
11- APPENDIX
11-1- Execution errors messages
ERROR N°1 to ERROR N°10 :
The errors from 1 to 10 indicate that a card is not well declared or a declared card in the
configuration is away or has been replaced by an other type. The number following the E
indicates the slot. For example E6 indicates that the card in the slot 6 is not well declared. The
system doesn't use the parameters and doesn't start user tasks.
ERROR N°20 :
The error 20 indicates that the data in the saved memory have been corrupted and it is necessary
to reload the configuration and the saved variables. The system doesn't use the parameters and
doesn't start user tasks.
ERROR N°21 :
The error 21 appears under SUPERVISOR power-on if a parameter of the configuration is
wrong. The parameters must be marked and send before starting once again the SUPERVISOR.
The system doesn't start the user tasks.
ERROR N°23 :
The error 23 indicates that there are no user tasks in the SUPERVISOR.
ERROR N°30 :
When a user program makes a divide by zero error n°30 is displayed.
ERROR N°31 :
This error is due to an infinite recursive call of a subprogram and indicates a stack overflow.
ERROR N°32 :
This error is generated when a floating point overflow is made by a number too high.
ERROR N°34 :
When an invalid floating point operation has been detected this error is generated. It is produced
with the REALTOLONG function if the real number is to big to be stored in long integer.
R403
- 152 -
SERAD S.A.
Supervisor documentation
ERROR N°35 :
This error is generated by an arithmetical overflow in a calculus. This is produced when the
result of an operation is too great to be stocked in the provided variable receiving it.
ERROR N°36 :
This error is generated because an index of save variable’s table is out of limites.
ERROR N°37 :
This error is generated because an index of not save variable’s table is out of limites.
ERROR N°520 :
This error is generated because it’s unable to access to internal global bus. The internal bus is
bad defect.
ERROR N°530 :
This error is generated because it’s unable to access to internal global bus. The internal bus is
bad defect.
These last five errors are generated only during user program execution. When an error is
detected, all the task are stopped, the error message is displayed on the SUPERVISOR screen,
the watchdog is opened and all the servo axis are in a open loop state.
11-2- Compiler error messages
Find <Type1> <Text1> : <Type2> <Text2> Expected
An identifier <Text1> of type <Type1> has been found at the time of the compilation instead of
an identifier <Text2> of type <Type2>.
L or H expected
To change an integer in Byte we must use ".L" or ".H".
<Text> unexpected : Prog name expected
The program name must be an identifier no defined previously.
Prog bloc already defined
More than one PROG ... END PROG block is defined in the task.
<Text> unexpected : PROG or SUB expected
A block begins by PROG or SUB. An instruction has been added outwards a block.
No defined PROG
R403
- 153 -
SERAD S.A.
Supervisor documentation
The current block was not finished before end of source file.
Undefined Label
An unknown label has been used in a Goto instruction.
Undefined Sub
An unknown subprogram identifier has been used in a Call instruction.
Undefined Event
An event generated by Signal is waited by any task or a task waits for an event which will be
never generated.
Undefined Prog
An unknown task identifier has been used in the Run, Halt, Suspend or Continue instruction.
SRV15 Card Expected
To use axis card home input, in the parameter InpHome_p, home input name must be the same
of axis card input.
Instruction expected
An instruction is expected.
Buzzer : Bit constant expected
The Buzzer instruction must be followed by a type bit constant.
Goto or Call instruction expected
A Call or Goto instruction is expected in a Case
Invalid exit instruction
A Exit Sub instruction must be used only in a subprogram.
<Text> Expected
The FOR loop counter variable must be also used in the Next instruction.
If : Instruction expected
An instruction is expected after an If.
Else : Instruction expected
An instruction is expected after an Else.
SERIAL1: or SERIAL2: Expected
In Open instruction, the name of the communication port is either SERIAL1: or SERIAL2:.
POS, VEL, ACC or DEC expected
The TRAJ instruction accepts only POS, VEL, ACC or DEC as parameter.
Undefined variable
The variable contents is used before being defined by an affectation.
String expression expected
A type string expression is expected.
Bit expression expected
A type bit expression is expected.
Comment bloc : Unexpected end of file.
R403
- 154 -
SERAD S.A.
Supervisor documentation
A comments bloc begins by '{{'
Comment bloc : Unexpected char
An other character as '{' has been found.
String constant : Unexpected end of file.
A string constant must finish with quotation marks.
Comment bloc : Unexpected end of line
A comment bloc finishes by '}}'
Bad hex number
An hexadecimal number uses the characters 0 to 9 and A to F
Bad binary number
A binary number uses the characters 0 to 1
Not an hex value
An hexadecimal number uses the characters 0 to 9 and A to F
Not a binary value
A binary number uses the characters 0 to 1
Not a decimal value
A decimal number uses the characters 0 to 9
Real constant : Unexpected end of line
A real constant must finish by a number after the decimal point.
<Text> unexpected : Char from 0 to 9 expected
A real or decimal number uses the characters 0 to 9
System constant : Unexpected end of file
A no complete system constant has been found.
<Text> unexpected : System constant expected
A system constant is expected.
Number : Unexpected end of file
A number finishes by a number
<Text> unexpected : Number from 0 to 9 expected
A number finishes by a number
'<Caracter>' unexpected
A no-waited character has been found.
R403
- 155 -
SERAD S.A.
Supervisor documentation
Index
A
ABS.................................................................................................................................................90
Active waiting............................................................................................................................60, 61
Addition...........................................................................................................................................87
Affect/Equal ....................................................................................................................................89
AND ................................................................................................................................................90
ARCCOS ........................................................................................................................................90
ARCSIN ..........................................................................................................................................90
ARCTAN .........................................................................................................................................91
Arithmetical.....................................................................................................................................82
ASC ................................................................................................................................................91
B
Backlight .........................................................................................................................................76
BACKLIGHT ...................................................................................................................................91
Basic task structure ........................................................................................................................51
BEEP ..............................................................................................................................................92
BOX ................................................................................................................................................92
Buzzer.............................................................................................................................................76
BUZZER .........................................................................................................................................92
C
CALL...............................................................................................................................................93
CAN ..............................................................................................................................................138
CANERROR .................................................................................................................................138
CANERRORCOUNTER ...............................................................................................................138
CANEVENT ..................................................................................................................................138
CANLOCAL ..................................................................................................................................138
CANopen communication.............................................................................................................127
CANopen kink between two MCS ................................................................................................141
CANopen linking between a MCS and an I/Os module ...............................................................143
CANREMOTE...............................................................................................................................139
CANSETUP ..................................................................................................................................139
CARIN.............................................................................................................................................93
CAROUT.........................................................................................................................................93
CASE ..............................................................................................................................................93
Char string ......................................................................................................................................83
Characteristics..............................................................................................................................130
CHR$ ..............................................................................................................................................94
CLEARCOUNTER..........................................................................................................................94
CLEARFLASH ................................................................................................................................95
CLEARIN ........................................................................................................................................94
CLEAROUT ....................................................................................................................................94
Clock sub-menu..............................................................................................................................80
CLOSE............................................................................................................................................95
Close a communication port ...........................................................................................................70
CLS.................................................................................................................................................95
Communication...............................................................................................................................86
Communication menu.....................................................................................................................28
Compiler error messages .............................................................................................................153
Connections..........................................................................................................................131, 144
Contacts coils timers and counters ..............................................................................................65
CONTINUE...............................................................................................................................95, 96
Conversion .....................................................................................................................................86
Convert data types .........................................................................................................................48
R403
- 156 -
SERAD S.A.
Supervisor documentation
COS ................................................................................................................................................96
COUNTER_S .................................................................................................................................95
Counters .........................................................................................................................................62
CRC ................................................................................................................................................97
CURSOR ........................................................................................................................................96
CVI..................................................................................................................................................97
CVIR ...............................................................................................................................................97
CVL.................................................................................................................................................96
CVLR ..............................................................................................................................................96
D
DATE$ ............................................................................................................................................97
Debug menu ...................................................................................................................................22
DELAY ......................................................................................................................................97, 98
Description......................................................................................................................................45
Dialog 640 ......................................................................................................................................76
Dictionary......................................................................................................................................134
Different ..........................................................................................................................................88
DIFFUSE ........................................................................................................................................98
DIV..................................................................................................................................................98
Division ...........................................................................................................................................87
E
Edit............................................................................................................................................75, 76
EDIT................................................................................................................................................98
EDIT$..............................................................................................................................................99
END ................................................................................................................................................99
Environmental consideration ..........................................................................................................11
Event task structure........................................................................................................................56
Events.............................................................................................................................................61
Events handling ..............................................................................................................................60
Example RTU Modbus driver ........................................................................................................70
Execution errors messages ..........................................................................................................152
EXIT SUB .......................................................................................................................................99
EXP.................................................................................................................................................99
Exponent.........................................................................................................................................90
F
Flash Security and other functions ................................................................................................86
FLASHOK.....................................................................................................................................100
FLASHTORAM .............................................................................................................................100
Folders............................................................................................................................................16
FONT ....................................................................................................................................100, 101
FOR ..............................................................................................................................................100
FORMAT$.....................................................................................................................................101
FRAC ............................................................................................................................................101
Free contact and coil ......................................................................................................................67
G
General explication.........................................................................................................................77
GETDATE.....................................................................................................................................101
GETEVENT ..................................................................................................................................102
GETTIME......................................................................................................................................102
Global constants.............................................................................................................................46
Global variables..............................................................................................................................46
GOTO ...........................................................................................................................................102
Greater............................................................................................................................................89
Greater or equal .............................................................................................................................89
R403
- 157 -
SERAD S.A.
Supervisor documentation
H
HALT.............................................................................................................................................102
Help menu ......................................................................................................................................33
HLINE ...........................................................................................................................................103
I
ICALL............................................................................................................................................103
IF 103, 104
INKEY ...........................................................................................................................................104
INP................................................................................................................................................104
INPB .............................................................................................................................................104
INPUT ...........................................................................................................................................105
INPUT$ .........................................................................................................................................105
Inputs reading.................................................................................................................................59
INPW ............................................................................................................................................105
Installation procedure .....................................................................................................................15
INSTR ...........................................................................................................................................105
INT ................................................................................................................................................106
Introduction.............................................................................................................................68, 127
J
JUMP ............................................................................................................................................106
K
KEY...............................................................................................................................................106
Keyboard ........................................................................................................................................75
KEYDELAY...................................................................................................................................107
KEYREPEAT ................................................................................................................................107
L
LCASE$ ........................................................................................................................................107
LED...............................................................................................................................................107
Leds ................................................................................................................................................76
Left shift ..........................................................................................................................................88
LEFT$ ...........................................................................................................................................107
LEN...............................................................................................................................................108
Link establishment........................................................................................................................145
List of the CANopen instructions ..................................................................................................137
List of the validated modems........................................................................................................151
Local variables................................................................................................................................47
LOCATE .......................................................................................................................................108
LOG ..............................................................................................................................................108
Logical ............................................................................................................................................83
LONGTOINTEGER ......................................................................................................................108
Loops ..............................................................................................................................................83
Lower ..............................................................................................................................................88
Lower or equal................................................................................................................................88
LTRIM$ .........................................................................................................................................108
M
Main menu ......................................................................................................................................77
Management of task .......................................................................................................................50
Manual sub-menu for digital inputs ................................................................................................79
Mathematical ..................................................................................................................................82
Memory plan of MCS32 Ex.............................................................................................................45
Memory sub-menu..........................................................................................................................80
MID$ .............................................................................................................................................109
MKI$ .............................................................................................................................................110
R403
- 158 -
SERAD S.A.
Supervisor documentation
MKIR$...........................................................................................................................................110
MKL$ ............................................................................................................................................110
MKLR$..........................................................................................................................................110
MOD .............................................................................................................................................109
MODIFYEVENT............................................................................................................................109
Multiplication...................................................................................................................................87
Multitask principles .........................................................................................................................49
N
Network configuration...................................................................................................................129
NOT ..............................................................................................................................................111
Numeric notations...........................................................................................................................49
O
OPEN............................................................................................................................................111
Opening a communication port ......................................................................................................68
Options menu .................................................................................................................................31
OR ................................................................................................................................................111
OUT ..............................................................................................................................................112
OUTB............................................................................................................................................112
OUTEMPTY..................................................................................................................................112
Outputs reading ..............................................................................................................................59
Outputs writing................................................................................................................................59
P
Parameters sub-menu ....................................................................................................................78
Passive waiting...............................................................................................................................60
PDO ..............................................................................................................................................140
PDOEVENT..................................................................................................................................140
PIXEL............................................................................................................................................112
PLC.................................................................................................................................................84
PLCINP.........................................................................................................................................113
PLCINPB ......................................................................................................................................113
PLCINPNE....................................................................................................................................113
PLCINPPE....................................................................................................................................114
PLCINPW .....................................................................................................................................114
PLCOUT .......................................................................................................................................114
PLCOUTB.....................................................................................................................................115
PLCOUTW....................................................................................................................................115
PLCREADINPUTS .......................................................................................................................115
PLCWRITEOUTPUTS..................................................................................................................115
POWERFAIL ................................................................................................................................115
Presentation ...................................................................................................................................65
Presentation - SCAN board ..........................................................................................................130
PRINT ...........................................................................................................................................116
PROG ...........................................................................................................................................116
Program ..........................................................................................................................................82
Project menu ..................................................................................................................................18
R
RAMOK.........................................................................................................................................116
RAMTOFLASH .............................................................................................................................116
Reading data ..................................................................................................................................69
READKEY ....................................................................................................................................117
REALTOBYTE..............................................................................................................................117
REALTOINTEGER .......................................................................................................................117
REALTOLONG .............................................................................................................................117
REPEAT .......................................................................................................................................118
RESTART .....................................................................................................................................118
R403
- 159 -
SERAD S.A.
Supervisor documentation
Right shift........................................................................................................................................89
RIGHT$.........................................................................................................................................118
RS485 treatment ............................................................................................................................70
RTRIM$ ........................................................................................................................................118
RUN ..............................................................................................................................................119
S
Safety..............................................................................................................................................11
Screen ............................................................................................................................................74
SDOEVENT..................................................................................................................................140
SDOINDEX...................................................................................................................................140
SDOSUBINDEX ...........................................................................................................................141
SEEK ............................................................................................................................................119
SETDATE .....................................................................................................................................119
SETINP.........................................................................................................................................119
SETOUT .......................................................................................................................................119
SETTIME ......................................................................................................................................120
SETUPCAN ..................................................................................................................................141
SETUPCOUNTER........................................................................................................................120
SGN ..............................................................................................................................................120
SIGNAL.........................................................................................................................................121
SIN................................................................................................................................................120
SPACE$........................................................................................................................................121
SQR ..............................................................................................................................................121
State test.........................................................................................................................................60
STATUS........................................................................................................................................121
STOPCAN ....................................................................................................................................141
STR$.............................................................................................................................................121
STRING$ ......................................................................................................................................122
SUB ..............................................................................................................................................122
Substraction....................................................................................................................................87
SUSPEND ....................................................................................................................................122
System bits .....................................................................................................................................67
T
TAN...............................................................................................................................................123
Task architecture ............................................................................................................................67
Task handling .................................................................................................................................85
Task priority ....................................................................................................................................50
Tasks sub-menu .............................................................................................................................81
Test.................................................................................................................................................83
Test and diagnostic of the Can Open network .............................................................................132
TIME .............................................................................................................................................123
TIME$ ...........................................................................................................................................123
TIMER...........................................................................................................................................123
TX485 ...........................................................................................................................................124
Type of send messages ...............................................................................................................130
U
UCASE$ .......................................................................................................................................124
V
VAL ...............................................................................................................................................124
Variables sub-menu........................................................................................................................79
VERSION......................................................................................................................................124
VLINE ...........................................................................................................................................124
W
WAIT.....................................................................................................................................125, 126
R403
- 160 -
SERAD S.A.
Supervisor documentation
WAIT EVENT................................................................................................................................125
WAIT KEY.....................................................................................................................................125
WATCHDOG ................................................................................................................................126
WHILE ..........................................................................................................................................126
Writing data ....................................................................................................................................69
X
XOR ..............................................................................................................................................126
R403
- 161 -
SERAD S.A.