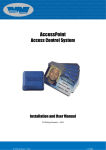
1
Eastern Bank TreasuryConnect Enhanced Lockbox User’s Manual This user’s manual provides instructions for accessing services found within the Lockbox Group. Those services are: Lockbox Permissions (only available to the Corporate Administrators) Manage Reports Remitters Lockbox Reports March 2011 1 Table of Contents ENHANCED LOCKBOX MODULE ......................................................................................................................... 3 I. CORP LOCKBOX PERMISSION SERVICE:..................................................................................................... 3 A. B. Granting the User Lockbox Service Permissions ........................................................................................ 3 Adding Lockbox Permissions....................................................................................................................... 5 II. LOCKBOX MANAGE REPORTS....................................................................................................................... 6 A. Creating New Lockbox Reports ................................................................................................................... 6 III. REMITTERS.......................................................................................................................................................... 9 IV. IMPORTING REMITTERS ............................................................................................................................... 10 A. B. Accessing the Remitter service .................................................................................................................. 10 Changing or Removing Remitter Information ........................................................................................... 11 V. REPORTS .............................................................................................................................................................. 13 A. B. C. Accessing the Reports Service ................................................................................................................... 13 Exporting Data .......................................................................................................................................... 14 Viewing Images ......................................................................................................................................... 15 2 Enhanced Lockbox Module The Enhanced Lockbox service allows the corporate administrators and corporate users to view lockbox information the bank has processed capturing check and remittance data. The bank scans the checks processed and if requested also the additional documents received with the check. The check information and images of items are delivered for viewing through the TreasuryConnect platform the same day they are processed. The corporate administrator can grant rights to users to view Lockbox information required to complete their daily task and reduce the need for paper delivery. I. Corp Lockbox Permission Service: This service allows the Corporate Administrator to add and manage lockbox permissions to other users within the company. A. Granting the User Lockbox Service Permissions Before setting up the user with report permission you will need to grant them the Service Permission(s) for Lockbox. There are 3-4 permissions for this service: Manage Reports – Provides users access to Lockbox custom report set up Lockbox User Permissions – Admin function to permit users Lockbox access Lockbox Reports – permits users to view lockbox reports Remitter Name Mgmt – permits users access to managing remitter information 3 1. Go to the User Administration in the drop down list 2. Click on the User Admin tab 3. Select a User from the User list 4. Click on the Services link. 5. Click Enhanced Lockbox if the user should have all permissions or click which permissions the user should be permitted to. 4 B. Adding Lockbox Permissions To grant User permissions to specific lockboxes, select the Enhanced Lockbox service in the drop down list and click the Lockbox Perms tab: 1. Select a user from the list 2. Click Edit in the far right column 3. Use the arrow buttons to move selected lockboxes between the unassigned and assigned lockbox lists. Select the Lockbox(s) you want to add/remove from the list by either clicking the individual check box next to the lockbox name or using the select all function. 4. Once all of the selections have been made click the Save button 5 II. LOCKBOX MANAGE REPORTS A. Creating New Lockbox Reports Use the Manage Reports feature to create customized reports, as well as make changes to existing reports. (This function is not available to all customers) To create a new custom report, go to Enhanced Lockbox and then the Manage Reports tab: 1. Click Add a Report 2. A list of lockboxes and the report titles page will appear 3. Select the lockboxes to be included in the report, by selecting the checkbox next to the lockbox number. 4. Add a report name, description (optional) and report heading. 5. Click Next 6. Select the columns to be included on the report. This is done by selecting the required field by clicking the check box next to the field name, or clicking select all 7. Click Add Selected to move the required fields from the Available Columns to the Assigned Columns section of the screen 6 8. Click on Next At this point you have the option to change the column headings to be something more meaningful to you and your company. You can also change the order of which the columns appear on the report. 9. To change the column headings for the report, type the new column name in the Change Name to section of the screen. 10. To change the order that the columns will appear on the report, on the Order section of the screen select the desired number to represent the order of the column from the drop down box next to the column heading. 11. To preview the format of the report, select the Preview tab. 12. Click the Save button. The report can now be accessed under the Lockbox Report tab. 7 8 III. REMITTERS Use the remitters service to: Create your own remitter table, this can be done either through a file upload or inputting the information manually To create a remitter table, select the Remitter tab from within the Enhanced Lockbox service 1. To add a remitter manually click on the Add a Remitter button 2. Type the Remitter Name, ABA/ Transit Routing Number and Account number in the corresponding fields. If you would like to add additional accounts for this remitter, select the Add another account checkbox 9 IV. IMPORTING REMITTERS The Lockbox Remitter service allows you to option to import a list of Remitters. A. Accessing the Remitter service 1. Once you are in the Enhanced Lockbox Module, click on the Remitter tab 2. Click Import File 3. Select the order in which the source data file will have the data populated. For example, if you are importing from an Excel spreadsheet and the Remitter Name is the first column, the Account Number was the third column and the ABA/ Transit Routing Number was the second column you would populate the screen as indicated above. 4. Click the Browse button to search for your source file, select the file and click Open. 5. Click Import, the Import File Review Screen will appear, note that the Status and Details columns will show the status of the import file, a status of success and a green check mark indicate that Treasury Connect has imported the entire file. 10 6. To see details on why a file was rejected or was only partially accepted click on the magnifying glass in the details column to get a description 7. The Remitter File Import is complete, you can import another file or go to another function within TreasuryConnect B. Changing or Removing Remitter Information 1. From the main Remitter screen 2. Click either Edit Name, Edit Accounts or Delete next to the remitter that needs to be modified. For specific details for each option see details below 11 Edit Remitter Name 1. To Edit the Remitter Name, click the icon in the Edit Name Column corresponding with the remitter to be edited 2. Make the appropriate modifications, click Save Edit Remitter Accounts 1. To edit remitter account information, click the icon in the Edit Accounts Column corresponding with the remitter to be edited, the screen below will appear 2. At this point you can add an additional account for this remitter (click Add an Account), delete the account (click Delete) or edit the account information (click Edit Account). The edit account function allows you to modify the remitter ABA and Account number. The edit account button will bring up the following screen 3. Once the modifications are made click the Save button 12 V. REPORTS The Lockbox Reports service allows you to run either bank predefined reports or reports that you customized under the Manage Reports function. The Remitter service allows you the option to import a list of Remitters. A. Accessing the Reports Service 1. Once you are in the Enhanced Lockbox Module, click on the Reports tab Note: The lockboxes will only appear under the Lockbox section if there is information to report. If there is no activity for that Lockbox, the box number will not appear 2. Select the report that you would like to run from the Report Type drop down list. 3. Once the report is selected, select the Lockboxes you would like to include in the report. The available lockboxes are listed in the Lockboxes section of the screen. You have the option of selecting an individual box or all of the boxes listed. This is done by clicking on the Select All hyperlink. 4. Report Criteria- there are several options when running reports Pre-Selected Locations- The Eastern Bank Lynn lockbox Facility is the only selection in this drop down listing, you can leave this as the default of All locations Dates- There are several options for selecting dates, your options are: On- report information for a specific date After- report information after a specific date Before- report information before a specific date From to – report information for a specific date range On or After – report information on and after a specific date 13 On or Before – report information on and before a specific date 5. At this point you must select the transactions you would like to appear in the report. The transactions available for the report will be listed in the Transaction Types box. You have the option of selecting the individual transactions or using the Select All hyperlink. Note: If you have created a custom report, when you go to run it you must still select the lockboxes and the detail information to be included in the report. You do have the option to save the specific criteria for the report by clicking the Save Criteria as Default Preferences? check box at the bottom of the screen 6. Click the Submit button, the report will be displayed 7. To view the detail when there is a single check and multiple invoices simply click the plus sign in the left hand column to see the detail for each of the invoices. Please note that if the invoice or payment information for multiple lines within this single payment is the same as the line item above it will be displayed as a blank. 8. Once the report is generated and displayed on your screen, you have the option of printing or exporting the data. 9. To print the report click the printer icon B. Exporting Data 1. To export the data click the computer icon, the file download screen will appear, click open 14 2. At this point a Microsoft Excel like screen will appear. To manipulate the data further you must open the Microsoft Excel application and copy the data form TreasuryConnect into Excel, from here you can manipulate the data as needed. C. Viewing Images To view lockbox images of checks or documents you must first run a detail report. The report can be one of the predefined reports, or a report that you customized through Report Manager. To run the report follow the instructions detailed in the reports section just above this one. Once you have the detail report displayed on your screen. 1. To view the images, of either the document or the check click the check icon or any of the hyperlinks in orange on the detail line of the item, both the check and associated documents will display. If you would like to view document only transactions click on the Document Only Transaction hyperlink at the top of the screen, this will present a listing of those specific transactions. 15 2. Once the image is displayed you have several options from the tool bar at the top of the screen. For example: The The viewing The button will export the item as a PDF buttons will allow you to enlarge or reduce the size of the image for easier will print a copy of the image 16