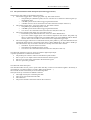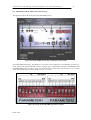
1
INSTITUT NATIONAL DE RECHERCHE EN INFORMATIQUE ET EN AUTOMATIQUE
Infrastructure of the GrImage Experimental
Platform: the Video Acquisition Part
Bertrand HOLVECK, Hervé MATHIEU
N° 0301
November 2004
THEME Cognitive systems
ISSN 0249-0803
apport
technique
INRIA
Infrastructure of the GrImage experimental platform: the video
acquisition part
Bertrand HOLVECK, Hervé MATHIEU
Theme: Cognitive systems - Perception, indexing and communication for images and video
Technical report n° 0301- November 2004 - 52 pages
Abstract: GrImage (Grid and Image) is an experimental platform for the virtual reality domain. It is located
at INRIA Rhône Alpes. GrImage is a test-bed dedicated to interactive applications. GrImage aggregates
commodity components for high performance video acquisition, computation and graphics rendering.
The video acquisition system consists of 25 cameras, connected to 12 computers. The camera placement allows the acquiring of a 2 m by 2 m by 2 m volume space.
A typical application consists in: (1) doing an acquisition from multiple views of a human; (2) extracting the
human visual hull, for instance, by using a background subtraction algorithm; and at the end (3) processing
the immersion of the virtual human visual hull into a virtual world.
The video acquisition system presents some interesting challenges: (1) to get the system real-time; (2) to get
a high frame rate acquisition; (3) to warranty high quality images; (4) to be easy to install and to maintain.
We present in this document the full description of the video acquisition system. It aims to share our knowledge with others similar projects, to help people working on this experimental platform to understand the
system, but also to help maintain the system itself.
Keywords: camera, lens, FireWire, CameraLink, synchronization
Unité de recherche INRIA Rhône-Alpes
655, Avenue de l’Europe, 38330 Montbonnot-St-Martin (France)
Téléphone : +33 4 76 61 52 00 – Télécopie : +33 4 76 61 52 52
Infrastructure of the GrImage experimental platform: the video
acquisition part
Thème : système cognitif- Synthèse d'images, réalité virtuelle, vision par ordinateur et robotique
Rapport technique n° 0301- Novembre 2004 - 52 pages
Résumé: GrImage (Grid and Image) est une plateforme expérimentale en réalité virtuelle. Elle se situe à
l’INRIA Rhône Alpes. Cette plateforme est constituée de trois sous ensembles. La partie acquisition vidéo
composée de 25 caméras, une partie dédiée au calcul composée de 25 ordinateurs, et enfin une partie dédiée
au rendu graphique composée d’un mur d’images basé sur 16 vidéo projecteurs. L’application type de cette
plateforme peut être décrite par les trois phases suivantes : une acquisition multiple d’images d’un personnage est réalisée, puis des algorithmes extraient l’enveloppe visuelle de ce personnage, par exemple en séparant dans les images le personnage de l’environnement (le fond), puis le modèle de ce personnage est plongé
dans un monde virtuel, mis en scène sur le mur d’image.
Réaliser la partie acquisition vidéo pose certains challenges intéressants. Il faut faire un système qui fonctionne à une cadence vidéo, qui garantisse une très bonne qualité de données, et enfin qui soit simple et robuste.
Nous présentons dans ce document ce système d’acquisition vidéo. Ce document a plusieurs buts : tout
d’abord de partager notre expérience dans ce domaine, mais aussi de servir de manuel d’utilisation et de manuel de support.
Mots clés: caméra, objectif, FireWire, CameraLink, synchronisation
INRIA
Authors:
Bertrand Holveck
Research Engineer at INRIA Rhône-Alpes
Software development
Email: [email protected]
Web home page: http://www.holveck.net
Hervé Mathieu
Research Engineer at INRIA Rhône-Alpes
Hardware & Software systems integration
Email: [email protected]
Web home page: http://www.inrialpes.fr/sed/people/mathieu/Welcome.html
RT N° 0301
Contents
Infrastructure of the GrImage Experimental Platform: the Video Acquisition Part ............................................... 1
1
Introduction .................................................................................................................................................... 3
2
The cameras and acquisition boards description ............................................................................................ 3
2.1
The CameraLink based system.............................................................................................................. 4
2.1.1 The CameraLink standard ................................................................................................................. 4
2.1.2 The camera JAI CV-M7+CL ............................................................................................................ 6
2.1.3 The acquisition board (ARVOO LEONARDO) ............................................................................... 7
2.2
The FireWire based system ................................................................................................................... 8
2.2.1 The IEEE 1394 Bus........................................................................................................................... 8
2.2.2 The camera SONY DFW VL500.................................................................................................... 10
2.2.3 The camera SONY DFW X700 ...................................................................................................... 11
2.2.4 The camera POINT GREY DRAGONFLY.................................................................................... 12
2.2.5 The camera AVT MARLIN 046C .................................................................................................. 13
2.3
Note on the BAYER filter layout ........................................................................................................ 15
2.4
The summary of the cameras characteristics ....................................................................................... 16
2.5
The camera lenses................................................................................................................................ 16
2.5.1 How to choose the lenses? .............................................................................................................. 16
2.5.2 Testing the lenses ............................................................................................................................ 18
2.6
The lighting of the scene ..................................................................................................................... 21
3
The synchronization of the cameras............................................................................................................. 21
3.1
Why do we need to synchronize the cameras? .................................................................................... 21
3.2
The synchronization module specification .......................................................................................... 22
3.3
The different solutions......................................................................................................................... 22
3.3.1 The full FireWire solution............................................................................................................... 23
3.3.2 The solution based on an electronic box (pulse generator) ............................................................. 23
3.3.3 The solutions based on a computer (PC)......................................................................................... 24
3.3.4 The comparison of the different systems ........................................................................................ 26
3.4
The experimental setup to test the cameras’ synchronization ............................................................. 27
4
The cameras’ placement............................................................................................................................... 29
4.1
The cameras’ position in the room ...................................................................................................... 29
4.2
The rig of the two CameraLink cameras ............................................................................................. 29
4.3
The triplet of cameras for the OCETRE project.................................................................................. 29
5
Conclusion.................................................................................................................................................... 30
6
Annexes........................................................................................................................................................ 31
6.1
IEEE 1394: Bandwidth requirements for different video modes ........................................................ 31
6.2
The synchronization cable description (External trigger feature) ....................................................... 32
6.3
IMATRIG-I and the add-on electronic circuitry ................................................................................. 35
6.4
The pulse generator based on the RENESAS H8/3664F microcontroller........................................... 37
6.4.1 Overview......................................................................................................................................... 37
6.4.2 The device description .................................................................................................................... 37
6.4.3 The bill of material.......................................................................................................................... 39
6.5
The interconnection card for the external trigger ................................................................................ 40
6.6
The mechanical description of the camera support ............................................................................. 41
6.7
The dealers and prices lists.................................................................................................................. 43
7
Bibliography................................................................................................................................................. 44
INRIA
Infrastructure of the GrImage experimental platform: the video acquisition part
3
1 Introduction
GrImage [web_1] (Grid and Image) is an experimental platform for the virtual reality domain. It is located at
INRIA Rhône Alpes [web_2].
GrImage (Grid and Image) is a test-bed dedicated to interactive applications. GrImage aggregates commodity
components for high performance video acquisition, computation and graphics rendering. The computing
power is provided by a cluster of PCs, with some of them dedicated to video acquisition and others to graphics rendering. A set of digital cameras enables real time video acquisition. The main goal is to rebuild in real
time a 3D model of a scene shot from different points of view. A display wall built around commodity video
projectors provides a large and very high resolution display. This display wall is built to enable stereoscopic
projection using passive stereo. The main goal is to provide a visualization space for large models and real
time interaction.
This document aims at giving the complete hardware specification for the video acquisition setup.
The specification consists of the following features:
• It describes the camera technologies, the video acquisition board technologies, and the software
used to control the hardware. It gives the benefits and the limitations for the experimental platform.
• It presents also the electronic and the mechanic parts developed to make the acquisition system
work.
• The full description of the cables which connect all the hardware is given.
• The hardware references, prices and local dealers coordinate and listed.
At the end, this document may be used to understand how the acquisition system is made, but also to repair
the system when a problem occurs.
Note: Most of the figures appearing in this document have been extracted form the product datasheets. This
document do not aim at replacing the product datasheets, it gives the technical information that is useful to
understand the experimental test bed. The user must refer to the original datasheets, which are referenced in
the bibliography for a full description.
Also, this document describes the experimental platform at the publishing date. Then it is obvious that the
experimental platform will change over the time, for instance by adding new kind of cameras.
2 The cameras and acquisition boards description
The description is split according the technologies used. First, we detail the CameraLink based system, then
the FireWire based system. For each technology we detail the cameras installed, their inputs and outputs, and
the mode how the external trigger is used. The external trigger purpose is described in section [3].
In this section we discuss also the camera lens specification. A test aiming to evaluate the camera lens is detailed.
The lighting installed in the platform is given at the end of the section.
RT N° 0301
4
Bertrand Holveck, Hervé Mathieu
2.1 The CameraLink based system
2.1.1
The CameraLink standard
The Evolution of Camera Link
In late 2000, it became apparent to industrial camera manufacturers and frame grabber manufacturers alike,
that customers were experiencing great difficulty interfacing cameras and frame grabbers. An ad-hoc committee was formed to investigate the possibility of developing a standard camera/frame grabber interface
specific to the vision industry. The result of that investigation is the Camera Link standard [doc_1]. This new
specification defines:
• A standard connector that will be used on both the camera and the frame grabber
• A standard cable to connect the camera and grabber
• Formats for transmitting image data from the camera to the grabber
• Four standard camera control inputs
• A standard method for transmitting serial communication data between the camera and the grabber
• A standard chip set that will be used in the camera and the grabber for image data transfer
The Channel Link Chip Set
In recent years, RS-644 LVDS technology has been used to transfer digital data. With RS-644 LVDS, a pair
of wires is needed to transmit each data bit. This leads bulky cables that are expensive, prone to breakage and
difficult to interface. Also, the maximum data rate in a typical camera application was limited to about 400
Mega_Bits/sec.
Camera Link is based on the new Channel Link LVDS chip set manufactured by National Semiconductor. A
Channel Link chipset consists of a transmitter and a receiver and is used to transfer digital data. This technology offers many advantages over the RS-644 LVDS technology. With Channel Link, 28 bits of data are
transferred over just 4 pairs of wires and a fifth pair is used to transfer a required clock signal. This compares
very favorably with the 56 wires that would be needed with RS-644 LVDS to do the same job. Channel Link
is also capable of much higher data rates than standard LVDS. A single chipset can transfer up to 2.38
Giga_Bits/sec and the Camera Link standard allows the use of up to two chip sets. This high bandwidth capability is more than enough for current needs and allows for future expansion.
CameraLink is obviously the best today in terms of performance to connect a camera to a frame grabber. The
major drawback of this technology is its cost. The cost is much higher than a FireWire system.
The technical information useful for the experimental setup is given in figures [Figure 1] [Figure 2] and table
[Table 1].
Figure 1: The CameraLink connector shape
INRIA
Infrastructure of the GrImage experimental platform: the video acquisition part
Table 1: The CameraLink connector pin out
Figure 2: The CameraLink camera to frame grabber connector description
RT N° 0301
5
6
2.1.2
Bertrand Holveck, Hervé Mathieu
The camera JAI CV-M7+CL
Among the different cameras existing on the market, we chose the JAI [web_5] CV-M7+CL [doc_4].
This camera is interfaced by two connectors: (1) the CameraLink connector described above [Figure 1] and
(2) the Hirose 12-points connector described in [Figure 3].
According to the camera datasheet, the CameraLink external trigger mode used is named “Edge Pre-select”
[Figure 4]. The signal polarity can be inverted. Both TTL and LVDS input may be used, but in an exclusive
way. The other signals appearing in [Figure 4] are internal signals. Please refer to the camera datasheet
[doc_4] for the details.
Because the LVDS connector is only accessible through the acquisition board, we chose the TTL signal to
propagate the external trigger signal.
Figure 3: The CV-M7+CL Hirose connector description
The cable pin out connecting (1) the camera, (2) the PC and (3) the synchronization card is given in the
[Table 15] located in Annex [6.2].
Figure 4: The CV-M7+CL external trigger timing
INRIA
Infrastructure of the GrImage experimental platform: the video acquisition part
2.1.3
7
The acquisition board (ARVOO LEONARDO)
The CameraLink protocol is not supported on actual PC mother boards. An acquisition board must be installed in the PC to interface the camera.
The most difficult task was to find out on the market a CameraLink board supported by the Linux operating
system.
The LEONARDO [doc_2] [doc_3] line is the real solution for ultra fast CameraLink digital video acquisition
and real-time processing of the incoming video data. The product line comes in several formats: PCI, CompactPCI and PMC.
The LEONARDO is equipped with a state of the art Xilinx FPGA, offering real-time preprocessing of the
video data, such as e.g. contrast stretching in gray value domain, RGB mosaic color restoration and random
2D convolution filters.
The LEONARDO CL family is supported on Windows, Linux, Real-time Linux, Solaris and QNX.
The model (PCI64-CL-FL-X100-C-128) we installed has the following features ([Figure 5]):
• Bus PCI.
• CL: CameraLink.
• FL: FL - CameraLink Base-Medium-Full support.
• X100C: Xilinx Virtex-E XCV100E mounted.
• C: commercial temperature range.
• 128 Mega Bytes SDRAM on board.
Figure 5: System overview of the Leonardo CL digital video processor
RT N° 0301
8
Bertrand Holveck, Hervé Mathieu
2.2 The FireWire based system
2.2.1
The IEEE 1394 Bus
IEEE 1394 [web_6] is the designation for a standard, high-performance serial bus. The bus design originated
with Apple Computer as a diagnostic tool. The bus architecture is trademarked by Apple under the name
"FireWire". In 1995, the Institute of Electrical and Electronics Engineers standardized the specification for
the bus. The specification number was 1394 - hence the name IEEE 1394. Some of the basic features of the
bus are:
•
•
•
•
•
•
•
A data rate of up to 400 Mbps (this is expected to increase in the near future).
A packet based transmission protocol.
Designed with multimedia in mind.
Uses standard cables and connectors defined in the specification.
Supports hot plug and unplug.
Support multiple devices within the same bus.
The power supply may be provided through the cable. The specification is 8-40 volts and up to 1.5
amperes.
The 1394 Trade Association and the Digital Camera Specification
The 1394 Trade Association was formed to encourage the growth of devices that use the 1394 bus. Working
groups of industry-experienced volunteers developed specifications by consensus based on the expertise of
the participants. In 1998, a working group of the association issued the 1394-based Digital Camera Specification (current version is 1.30) (ref [doc_5]). The specification defines:
• A number of standard features and how those features should be implemented in the camera
• A number of standard video formats and frame rates
• A flexible video format that allows for variable image sizes and frame rates
• An external triggering method
In essence, the 1394 TA Digital Camera Specification (DCAM Spec [doc_5]) defines the standard features
and characteristics of an industrial camera that is capable of operating on an IEEE 1394 bus. The specification maintains flexibility by giving manufacturers the ability to add "special features" within a framework
defined by the specification. The trade association also periodically refines the specification to meet current
and future user needs.
About the FireWire cables
•
Exceeding the 4.5 meter cable length!
(From UNIBRAIN web site [web_9]) UNIBRAIN FireWire cables do not only achieve a very controlled 110 Ohm impedance but also provide high performance for skew, attenuation and crosstalk.
These latest features were not prerequisites when the first IEEE-1394/1395 specification was issued,
at the time limiting the maximum cable length to 4.5 meters. Therefore we can now secure safe operation of our FireWire cable lengths up to 10 meters.
•
Common rules for a FireWire network:
o Never exceed 63 nodes per bus.
o Never create a loop.
o Extend the cable length (more than 10m) using a repeater.
o Allow a maximum of 16 cables between any two nodes.
o Allow a maximum of 72 meter (cumulated cable lengths) between any two nodes.
INRIA
Infrastructure of the GrImage experimental platform: the video acquisition part
9
The DCAM Advantages
Users of industrial cameras compliant with the DCAM Spec will realize a number of benefits. First, since the
cameras comply with a common standard, they are essentially plug and play. Many of the integration issues
normally associated with using cameras from different manufacturers are avoided. Second, since the connectors, cables, and hubs used on the 1394 bus are all standardized, they are widely available from a number of
manufacturers and are inexpensive. Finally, a simple, inexpensive interface board is used to interface the
camera with the host PC. This eliminates the need for an elaborate frame grabber and does away with the
problems often associated with integrating a camera and a frame grabber.
The DCAM video formats
The DCAM standard defines a certain number of images format. In fact it supports threes full defined video
format:
• Format 0 VGA (up to 640x480) non-compressed format.
• Format 1 Super VGA (up to 1024x768) non-compressed format.
• Format 2 Super VGA (up to 1600x1200) non-compressed format.
A third format (Format_7) is defined for Partial Image Size, but it is used by the camera makers to implement their own format.
Each format includes up to 8 Modes. Each Mode specifies the images size, the pixel type, the frame rate, etc.
A table in the annex [6.1] gives the characteristics of the different formats & modes.
Some adjustable features are also defined in the DCAM specification: Brightness, Auto Exposure, Sharpness, White Balance, Hue, Saturation, Gamma, Shutter, Gain, Trigger Mode, Zoom, Pan, Tilt, Optical Filter.
Please refer to the DCAM specification [doc_5] for a complete description.
The External Trigger mode
In the experimental setup, the external trigger used is compliant with the DCAM 1.3 mode_0 Trigger. The
state machine associated may be described as follows:
• Start at the falling edge on the input signal,
• The exposure period is pre-set in a register.
RT N° 0301
10
2.2.2
Bertrand Holveck, Hervé Mathieu
The camera SONY DFW VL500
The SONY DFW VL500 [doc_6] is the first industrial camera based on the FireWire which delivers non
compressed video data.
This camera is interfaced by two connectors: (1) the FireWire connector and (2) the Hirose 4-points connector. Both are described in [Figure 6].
Figure 6: The SONY DFW VL500 connectors shape & pint out - HIROSE 4 pts (Left), FIREWIRE
(Right)
The extern trigger timing is described in [Figure 7].
Figure 7: The SONY DFW VL500 extern trigger timing chart
As shown in the above figure, the extern trigger pipeline is synchronously attached to the VD signal. This
makes the system particularly inefficient when using the extern trigger mode. In conclusion this camera
should not be used in extern trigger mode.
INRIA
Infrastructure of the GrImage experimental platform: the video acquisition part
2.2.3
11
The camera SONY DFW X700
The SONY DFW X700 [doc_7] is the next generation of the SONY FireWire based camera. The enhancements are as follows:
• The resolution is 1024 by 768.
• The internal architecture allows approaching 15 Hertz video rate when using the external trigger
mode.
This camera is interfaced by two connectors; (1) the FireWire connector and (2) the Hirose 4-points connector. Both are described in [Figure 6] (same as the DFW VL500).
The external trigger timing is described in [Figure 8].
Figure 8: The SONY DFW X700 external trigger timing chart
RT N° 0301
12
2.2.4
Bertrand Holveck, Hervé Mathieu
The camera POINT GREY DRAGONFLY
The POINT GREY Research [web_7] company is located in Canada. The DRAGON FLY product family is
based on SONY CCD image sensors [Table 7].
When purchased, the camera was almost the first FireWire non-SONY high quality camera on the market.
The DRAGON FLY camera [doc_8] is delivered as an OEM type format (default configuration). But a dedicated box container may be purchased, thus making a real end-product [Figure 9]. The inputs-outputs connections are very basic. [Figure 10] shows the FireWire connector and the 2x3 jumper used for the external
trigger plug. Pins GN (ground) and IO2 (signal) are used for the trigger input.
Figure 9: Picture of the DRAGON FLY camera
Figure 10: Rear view (top) & 2x3 jumper pin out (Bottom) of the DRAGON FLY
INRIA
Infrastructure of the GrImage experimental platform: the video acquisition part
13
The external trigger timing is described in [Figure 11].
Figure 11: The POINT GREY DRAGONFLY external trigger timing chart
2.2.5
The camera AVT MARLIN 046C
Allied Vision Technologies (AVT) [web_10] is a German company. The MARLIN product family is based
on SONY CCD image sensors [Table 7].
The AVT MARLIN 046C [doc_9] [Figure 12] resolution is 780x580 pixels (in format_7).
Figure 12: Picture of the AVT MARLIN camera
The main advantage of this camera is to provide a frame rate over 30 Hertz and a resolution over the VGA
format (640x480).
This camera is interfaced by two connectors [Figure 13]; (1) the FireWire connector and (2) the Hirose 12points connector.
The Hirose 12-points pin out is described in [Table 2].
Two LEDs provide a fast way to check the camera. The green LED indicates that the camera is being supplied with sufficient voltage and is ready for operation. The yellow LED indicates the states & errors described in [Table 3]. Please refer to [doc_9] for the description of the error display protocol.
RT N° 0301
14
Bertrand Holveck, Hervé Mathieu
Figure 13: The rear view of the AVT MARLIN 046C
Table 2: The Hirose 12-points pin out
Table 3: The yellow LED indication
The external trigger is compliant with the DCAM specification. The important value to notice is the bounded
delay between the trigger input signal and the exposure start. This time value is 32.17 micro-seconds.
INRIA
Infrastructure of the GrImage experimental platform: the video acquisition part
15
About the FireWire transmission format: The MARLIN 046C resolution is not classified into the video
modes described within the DCAM specification (Annex [6.1]). Therefore the format 7, which is not
bounded in terms of specification, must be used to get the full resolution. Otherwise, a 640x480 image resolution is acquired.
Note that the external trigger input is not a true TTL input, but an optocoupler based input. Thus the current
consumption is higher (between 5 mA and 15 mA). This feature impacts the design of the external trigger
hardware. For instance a trigger signal output (on the PC side) drives less optocoupler inputs than true TTL
inputs.
2.3 Note on the BAYER filter layout
There are two kinds of color cameras:
1. The tri-sensors (tri-CCD or tri-CMOS) camera implements three image sensors and an optical prism
which aims to split the incoming image in three identical images, one for each image sensor. Each
image sensor is coated with a primary filter (Red, Green, and Blue). The tri-CCD camera has a better quality and is more expensive.
2. The mono-sensor camera is based on a black & white camera. The primary filters (Red, Green, and
Blue) are placed over the individual pixels in a “BAYER” mosaic” layout.
Figure 14: The BAYER decoding
All the color cameras in the platform are based on the BAYER mosaic.
Then the BAYER decoding takes place either on the camera or on the remote PC.
In the first case the output format is in the color YUV 4:1:1 or the color YUV 4:2:2 [doc_5]. The image is
directly usable by the computer, but the bandwidth used on the FireWire bus is higher.
In the second case the output format is Y (8 bits). The computer has to perform the BAYER decoding, but
the bandwidth on the bus is lower. This mode is also useful to implement an advanced BAYER decoding
algorithm.
RT N° 0301
16
Bertrand Holveck, Hervé Mathieu
2.4 The summary of the cameras characteristics
BAYER
(on-board,
remote)
Resolution
Image
/ second
Images/sec
with
extern trigger
Extern trigger signal
CV-M7+CL
On-board
or remote
1380x1030
24
24 – exposure time
DFW-VL500
On-board
640x480
30
15
DFW-X700
On-board
1024x768
15
15 – exposure time
DRAGONFLY
DRAGONFLY
MARLIN
046C
BW (not
color)
Remote
640x480
30
30 – exposure time
640x480
30
30 – exposure time
On-board
or remote
780x582
54
54 – exposure time
(Y 8) and 36 - exposure time in
(YUV 4:2:2)
1) TTL level, negative polarity.
2) LVDS level, negative polarity.
Pulse width above 80 micro sec
TTL level, negative polarity,
pulse width above 1 ms
TTL level, negative polarity,
pulse width above 1 ms
TTL level, negative polarity,
pulse above 1 micro second
TTL level, negative polarity,
pulse above 1 micro second
TTL level, negative polarity,
pulse above 2.2 micro second
Table 4: The principal characteristics of the cameras
The cameras may not achieve the indicated frame rates if some parameters are not set properly. For instance
a large exposure time will slow down the frame rate.
Except for the SONY DFW-VL500 and the SONY DFW-X700 the external trigger pulse width is less than
100 micro seconds. It is a bit strange why the pulse has to be so large for the SONY cameras!
2.5 The camera lenses
The SONY DFW VL500 which comes with a 5.5-64 mm zoom. The POINT GREY DRAGON_FLY comes
with “low cost” lenses (3.8, 6 and 8 mm focal length), but it may be replace by a CS mount. The others cameras come without lenses.
This section discusses the lenses mounted on the cameras including the lenses delivered with the
DRAGON_FLY camera.
2.5.1
How to choose the lenses?
A common feature of the lens mounted is the mount which is a C or CS mount type. [Table 5] gives the main
features or the C & CS mount specification.
C mount
CS mount
Flange back focal length (mm)
17.526
12.5
Diameter of screw thread (mm)
25.4 32TPI
25.4 32TPI
Table 5: C & CS mount characteristics
Note: A CS-mount lens does not fit a C-mount camera. A C-mount lens can fit a CS-mount camera by adding a 5mm ring (C-mount adapter).
INRIA
Infrastructure of the GrImage experimental platform: the video acquisition part
17
The first parameter to take into account is the focal length. The couple “focal length” and “image sensor dimensions” gives the field of view. In our case, the room is about 5 meters by 5 meter, and the scene of interest is bounded in a 2 m x 2 m x 2 m cube. Given these data [Figure 15] and [Table 6] show how to calculate
the focal length.
At the end a focal length between 6 mm and 8mm is consistent.
Image Sensor
dimension (w x
h) (diagonal)
(mm)
Classification
name
Focal 6 mm
Angle of view
(deg.)
Focal 6 mm
Field of view at 3
meter (m x m)
Focal 8 mm
Angle of view
(deg.)
Focal 8 mm
Field of view at 3
meter (m x m)
Focal 12.5 mm
Angle of view
(deg.)
Focal 12.5 mm
Field of view at 3
meter (m x m)
Figure 15: The angle of view and the field of view
3.6 x 2.7 (4.5)
4.8 x 3.6 (6.0)
6.4 x 4.8 (8.0)
8.8 x 6.6 (11.0)
¼”
1/3”
½”
2/3”
33.4 x 25.4
43.6 x 33.4
56.1 x 43.6
72.5 x 57.6
1.8 x 1.3
2.4 x 1.8
3.2 x 2.4
4.4 x 3.3
25.4 x 19.2
33.4 x 25.4
43.6 x 33.4
57.6 x 44.8
1.3 x 1.0
1.8 x 1.3
2.4 x 1.8
3.3 x 2.4
16.4 x 12.3
21.7 x 16.4
28.7 x 21.7
38.8 x 29.6
0.8 x 0.6
1.2 x 0.8
1.5 x 1.2
2.1 x 1.6
Table 6: The angle of view & field of view for the image sensors
Camera
CV-M7+CL
DFW-VL500
DFW-X700
DRAGONFLY B&W
DRAGONFLY COLOR
MARLIN 033C
MARLIN 046C
Image sensor classification
2/3”
1/3”
½”
1/3”
1/3”
½”
½”
Image sensor reference
Lens Mount
SONY IT CCD (ICX285AQ)
SONY IT CCD (ICX084AK)
SONY IT CCD (?)
SONY IT CCD (ICX424AL)
SONY IT CCD (ICX424AQ)
SONY IT CCD (ICX414AQ)
SONY IT CCD (ICX415AQ)
C
C
C CS
C CS
C
C
Table 7: The image sensor & lens mount features
RT N° 0301
18
Bertrand Holveck, Hervé Mathieu
Then other parameters have to be evaluated:
• The distortion: the distortion correction is easily computable, but most of people do not like to deal
with it. Therefore it is obvious that 8 mm must be preferred (versus 6 mm) when possible.
• The spectral transmittance specifies the color reproduction. This is the value for light frequency (a
function of time). This parameter is important when working with color cameras, and is very important when working with tri-CCD color cameras. When using B&W cameras, this parameter gives
also the amount of light energy lost though the lens.
• The Modular Transfer function (MTF) shows the delineation performance. This is the value for the
spatial frequency (a function of length). This parameter is today crucial because of the high resolution image sensor. A low MTF acts as a low pass filter on the image.
Lens maker
Lens Ref.
FUJINON
PENTAX
SCHNEIDER
COMPUTAR
PENTAX
DF6HA-1
H612A-TH
CINEGON 1.4/8.0MM
M0814MP
C814-TH
Focal length
(mm)
6
6
8
8
8
Mega pixels
yes
no
no
yes
no
Spectral transmittance & MTF data
yes
yes
yes
no
yes
Price
(Euros)
200
168
700
230
517
Table 8: A list of suitable lenses
More about the Modulation Transfer Function (MTF):
The MTF is a technical term that quantifies how well a particular system propagates information. For cameras, the “system” is the lens and the sensor, and the "information" is the picture they are capturing. MTF
ranges from zero (no information gets through) to 100 (all information gets through), and is always specified
in terms of information density. In most imaging systems, the MTF is limited by the performance of the imaging lens. A lens must be able to transfer enough information to the image sensor to be able to resolve details in the image that are as small as the pixels in the image sensor.
A practical example with a 12-micron pitch image sensor:
The pixels are set on a 12-micron pitch (the center of one pixel is 12 microns from the center of its neighboring pixel). Thus, a lens used should be able to resolve image features as small as 12 microns. Typically, a
lens' MTF is plotted as a function of the number of line pairs per millimeter the lens is attempting to resolve
(more line pairs per millimeter mean higher information densities). For an electronic imaging system, one
line pair will correspond to two image-sensor pixels (each pixel can resolve one line). This is equated as:
LP/mm = 1/(2z), where LP/mm means line pairs per millimeter and z is the image sensor's pixel pitch, in
millimeters. In our case, z = 0.012 mm, such that the sensor has 42 LP/mm. Thus, a lens should provide an
acceptable level of MTF all the way out to 42 LP/mm. For most lenses, the MTF will be highest in the center
of the images they form, and gradually drop off toward the edges of the images they form. As well, MTFs at
low values of LP/mm will generally be larger than MTFs at high values of LP/mm. One of the many tradeoffs that must be decided by the end user is how high the MTF needs to be for a particular imaging situation.
Generally, near an image sensor's LP/mm good MTFs are higher than 40, moderate MTFs are from 20 to 40,
and poor MTFs are less than 20.
2.5.2
Testing the lenses
Getting the full information of the lens is a big issue. Some lenses makers provide the lens datasheets on the
web, others on demand, and some of them do not provide any datasheet at all. And when considering the
camera plus the lens plus the scene, then it is a real problem to know what will happen in terms of image
quality.
In conclusion, we decided to evaluate by our self the system (camera + lens + scene) performance by running
two tests.
The “scene” represents the room including the lighting where the experiment takes place. The lens and the
camera sets are listed in [Table 9].
INRIA
Infrastructure of the GrImage experimental platform: the video acquisition part
19
The first test consists in shooting the scene in the same conditions than during the real application. This test
aims to evaluate the camera sensibility, the lens distortion, the field of view, and the global image quality.
The second test consists in shooting a dedicated pattern [Figure 16]. The test takes place in a room where the
lighting is controlled. This test aims to measure the system (camera + lens) resolution, and to evaluate the
color response of the system.
The [Figure 17] shows the dedicated pattern used for the second test. The three areas highlighted in [Figure
17] have been used to evaluate the criteria shown in [Table 9] as follows:
• The upper area for the distortion parameter.
• The middle area for resolution parameter.
• The lower area for the grayscale response.
The images may be seen in the website referenced in [web_1].
The results shown in the [Table 9] shall be read as relative results. Because our test conditions are not perfect
(e.g. problem to get the optimum focus…), we do not claim that our results are absolute. That is why we
used symbols (++, --) for the distortion and linearity response parameters. The resolution parameter column
reports the values read on the pattern. These values must be interpreted as a numbers without unit scale.
Figure 16: the (camera + lens) second test overview
Figure 17: The pattern used for the camera + lens test
RT N° 0301
20
Bertrand Holveck, Hervé Mathieu
As results:
The first test shows us that a suitable lens focal length should be between 6 and 8 millimeters. The sensibility of all the cameras is sufficient for the lighting conditions.
The second test results are as follows:
• The BAYER structure is clearly visible on the image, when the on-camera BAYER is disabled.
• The focus bag has to be tuned manually to get the sharpest image. So we never know if the optimum
position is achieved.
• The images acquired with C-mount lenses are much better in term of resolution than the images acquired with the “low cost” lenses like the BW38B-1000 lens, delivered with the POINT GREY
DRAGON FLY camera.
The [Table 9] summarizes the test results.
The column “Distortion” is coded as follows; (+) low barrel distortion, (++) medium barrel distortion, (+++)
high barrel distortion, (++++) huge barrel distortion. No pin-cushion distortion is noted. [Figure 18]
The column “Grayscale response” represents the way the image reports a gray scale printed on the pattern.
The coding rule is as follows; (-) good linearity, (--) medium linearity, (---) bad linearity.
The coding rule for the resolution is: higher is better.
Camera
CV-M7+CL
CV-M7+CL
CV-M7+CL
CV-M7+CL
CV-M7+CL
CV-M7+CL
CV-M7+CL
SONY X700
SONY X700
DRAGON FLY
DRAGON FLY
DRAGON FLY
Lens reference (focal length)
C-MOUNT
FUJINON DF6HA-1 (6 mm)
PENTAX H612A-TH (6 mm)
TAMRON 219HA (8 mm)
FUJINON HF12.5HA-1 (12.5 mm)
PENTAX B1214D-TH (12.5 mm)
KINOPTIK (12.5 mm)
SCHNEIDER (17mm)
FUJINON HF12.5HA-1 (12.5 mm)
SCHNEIDER CINEGON (8 mm)
NON C-MOUNT
BOOWON B38 (3.8 mm)
BOOWON B60 (6 mm)
BOOWON B80 (8 mm)
Distortion
Grayscale response
Resolution
++
++
++
+
+
none
+
+
+
----------
650
650
600
650
600
700
650
500 (*)
500 (*)
++++
++
+
---
400
350
400
Table 9: the camera + lens performance test result
(*): The resolution limit is due to the camera sensor used which is a 1024x768 size CCD. We may suppose
that the real resolution is closed to 650.
Figure 18: The barrel and Pin-Cushion distortion models
INRIA
Infrastructure of the GrImage experimental platform: the video acquisition part
21
2.6 The lighting of the scene
The lighting of the scene is always a big issue when working with camera. We choose a professional
grade lighting for minimize the problem. Basically we copy what is used in a TV studio.
The [Table 10] gives the list of the part used.
Name
BALCAR [web_12] QuadLite
BALCAR DualLite
Watt
250
125
Candela
8300
3800
Quantity
7
7
Table 10: The part list of the lighting system
A tubular structure hanging from the ceiling holds the lightings.
Note: Several cameras are also fixed on the tubular structure.
3 The synchronization of the cameras
3.1 Why do we need to synchronize the cameras?
The applications running on the GrImage test bed are mostly based on video tracking and dense stereo vision
algorithms. For this class of algorithms, the image tokens are (1) tracked over the time or (2) matched across
images acquired from different points of views.
A tracking program using a KALMAN filter needs an image time stamp for its time reference.
A process based on the matching algorithm needs to have images acquired at the same time, especially when
the scene is not static. When shooting two or more images, the delta-time between the acquisitions makes
unstable the token matching, and is directly connected to the 3D reconstruction uncertainty.
In order to calculate an acceptable delta-time, we consider the typical scenario as follows:
• A scene where a human is moving. We suppose that the maximum human’s part velocity is 10 meters per second (=v). The distance Human-camera is about 3 meters (=D).
• A multi-cameras system is used. The cameras are the JAI CV-M7+CL with a 12.5mm focal length
lens mounted on it. The camera resolution is 1380 by 1030 pixels. Then using the [Table 6], a pixel
line represents (d = 1.6/1030) meter at the distance D.
• The goal is to warranty that: for each camera, any image point represents the projection of the same
3D point. In other words, the time between two image acquisitions of two cameras must be short
enough to warranty that a 3D projection point will not shift to half a pixel.
As result, the delta time between two acquisitions must be less than 0.8 milli-seconds (800 micro seconds) (d
/ v / 2)
Note that when running several cameras in free mode at 30 Hertz, the delta-time is between 0 and 33 milliseconds, with no control on it.
In conclusion, the acquisition process must be mastered to bind correctly the delta-time.
RT N° 0301
22
Bertrand Holveck, Hervé Mathieu
3.2 The synchronization module specification
The Goal: the synchronization module specification aims to warranty that all the pictures have been acquired
at the same time.
We first have to think about the acquisition environment. The cameras are placed in a room. The room is 5x7
meters, and the cameras may be disposed almost everywhere in the room. To connect all the systems properly we use cable rails hanging from the ceiling. That means that the cable length between the computer and
the camera may be over 12 meters. Then when considering twenty cameras, the total length of the cables
may be over 100 meters. A solution consisting of a dedicated cable supplying the synchronization signal may
be considered with attention to take into account this specification. Also because of the cable length and the
number of cameras, the FireWire based cameras can not be connected on the same FireWire bus, so multiple
FireWire busses must be used.
The specifications concerning the use of the synchronization module are as follows:
• The user controls the start and the stop of the video acquisition process.
• The user controls the number of images acquired. For instance taking only one shoot of images, is
useful to test the system or for the camera calibration process.
Note that the image acquisition system has to mark a time stamp on each image, in order to trace the image
along the processing, and for the storage (data logger). The synchronization module may help for this task,
but is not necessary.
3.3 The different solutions
We present in this section the different solutions that provide a global synchronization for all the cameras.
Each of these solutions has been tested within the platform.
We can find out two families of solutions.
1. The solutions based on the FireWire bus. This solution has no installation cost, because it relies on
the existing cables. Two solutions exist: (1) the first one relies on a proprietary trick, and concerns
only the POINT GREY cameras, (2) the second one relies on the DCAM 1.31 specification. Unfortunately only the FireWire based cameras benefit from it. And these solutions do not work when using multiple FireWire busses. All these restrictions limit the interest of these solutions in our experimental platform.
2. The solutions based on a dedicated electric signal. All the cameras used in the computer vision domain own a TTL compatible input which allows trigging externally the image acquisition. Two different solutions are presented: one based on an electronic box, and another based on a PC.
Note about the solutions based on a TTL signal:
All the cameras currently used own the extern trigger facility. Basically it consists in supplying an electric
pulse. But several specifications do exist for the signal itself. In order to master all the different cameras the
following requirements are specified:
• The signal polarity may be changed. Possible values are positive or negative.
• The signal width may be changed. The value is between 30 micro seconds and 2 milliseconds.
• The signal period may be changed. The value is between 20 milliseconds and 100 milliseconds.
We give in the next sections the detail of the different solutions.
INRIA
Infrastructure of the GrImage experimental platform: the video acquisition part
3.3.1
23
The full FireWire solution
This method is based on the FireWire protocol and does not use the external trigger feature.
Solution 1:
Multiple PTGREY DRAGONFLY (and some other references) cameras on the same IEEE-1394 bus are
automatically synchronized to each other at the hardware level. When using multiple cameras, the timing of
one camera to another is as follows:
•
•
If the cameras are on the same bus, the cameras are synchronized to within 125 microseconds
(maximum) of each other. However the 1394 bandwidth limits the maximum number of cameras
that can be on one bus.
If the cameras are on separate buses, a PTGREY Sync Unit is needed to synchronize the buses. The
Sync Unit can synchronize cameras on different buses within the same computer or on different
buses across multiple computers. This device will ensure that the cameras are synchronized to
within 125 microseconds.
The major drawback is that this trick works only for the designated PTGREY FireWire based cameras.
This solution has been tested but it is not used anymore within the experimental platform.
Solution 2:
The DCAM v1.31 is supposed to provide an equivalent method to synchronize the cameras. Unfortunately,
we do not have yet tested this new feature. Indeed we have first to upgrade the embedded software inside the
camera to be compliant with the new DCAM version.
3.3.2
The solution based on an electronic box (pulse generator)
Two products are currently used in the lab.
Product 1:
We choose the product IMATRIG-I [doc_10] from the company IMASYS [web_8]. In order to be compliant
with the specification we gave above, we add some electronic circuitry to achieve the two following features:
• The purchased system delivers the pulse stream as soon as the power supply is plugged. We add the
feature to start/stop the pulse generation. It is achieved by using an on-board button or one digital
output of a PC parallel port.
• The IMATRIG-I generates a pulse with a fixed width. Unfortunately the pulse width is not large
enough for certain cameras. So we had a Mono-Stable component (74LS123) in order to enlarge the
pulse.
The annex [6.3] describes the IMATRIG-I product and gives the schematic of the electronic circuitry added.
Product 2:
A second electronic box is currently used. This system has been developed in the lab and is based on the
RENESAS [web_13] H8/3664F microcontroller. The specification is given in annex [6.4].
The cameras are connected to the electronic box via home-made cables. The cables description is given in
annex [6.2].
Using the electronic box as a trigger generator, the following system may be implemented to mark the images with a time stamp:
A cable is added from the electronic box to a computer (parallel port input), so the processor receives a signal each time an acquisition trigger pulse is generated.
In detail, the trigger signal is connected to an input pin of the PC parallel port. This input pin has
been configured to send an interruption to the processor. Then, an interrupt handler programmed by
the user, is called at every incoming pulse. The role of the interrupt handler is to store the date.
Then this date is used as time stamp when the image is stored in the memory.
RT N° 0301
24
3.3.3
Bertrand Holveck, Hervé Mathieu
The solutions based on a computer (PC)
The following scenarios have been tested:
1. Only one PC generates the trigger signal for all the cameras.
2. Any PC is in charge to generate the trigger signal. The PCs are not synchronized (main clock system) all together, but a Master-Slave protocol based on the parallel port provides an acquisition synchronization.
3. Any PC is in charge to generate the trigger signal. The PCs are synchronized using the NTP protocol.
For these solutions, the parallel port is used as the hardware interface.
On a PC, the parallel port may be used for digital input output.
A partial specification may be summarized as follows:
• The parallel port connector reference is SUB-D 25 points female.
• Pin 2 up to pin 9 act as outputs and are referenced in the DATA register.
• Pin 10 acts as input, and is referenced in the STATUS register.
• Pin 18 to pin 25 are grounded.
From the software point of view:
The operating system running on the computer is Linux, and the real time module RTAI is added.
The Real Time Application Interface (RTAI) [web_4] consists mainly of two parts:
• A patch to the Linux kernel which introduces a hardware abstraction layer.
• A broad variety of services which make real-time programmers' life easier.
It is free to download and is under GPL license.
A program runs to manage the synchronization.
Remember that the final goal is to grab all the images within a period of 800 micro-seconds. Then Linux is
not adapted for this real-time oriented task, thus justifying the use of RTAI.
The code is not detailed in this document.
Scenario 1: Only one PC generates the trigger signal for all the cameras.
The system is equivalent to make an electronic box by using a PC. The hardware and software implementation is not detailed here. In fact it derivates from the implementation detailed within the next scenario.
Scenario 2: Any of the PC is in charge to generate the trigger signal. The PCs are not synchronized all together.
A PC acts as master. It generates the pulse signal to a sub-set of cameras but also it uses the same signal to
synchronize the other PCs involved in the image acquisition process.
From the hardware point of view, the connections on the parallel port are shown in [Figure 19]. The specification is as follows:
• The upper DB25 connector highlights the pins used. As define in the parallel port datasheet, pin_2
to pin_9 are TTL outputs, pin_10 is a TTL input, and pin_18 to pin_25 are grounded.
• The three others DB25 connectors are drawn to explain the strategy used. Each connector (x3 in the
example) is associated with one computer. Among the three connectors, the upper one acts as the
master. It provides TTL pulses (outputs pin_8, pin_7, pin_6) to the other connector (input pin_10),
but also to itself. This trick is used to get the same path for all the signals, and so to take into account the transmission delay between the output and the input. Therefore the delay between all the
triggers is the same.
• The slave computer state machine is as follows: For each pulse received (pin_10), a TTL pulse is
generated on the output pin_9 which is connected to the camera external trigger input.
INRIA
Infrastructure of the GrImage experimental platform: the video acquisition part
25
Figure 19: The parallel port as a pulse generator
A card has been developed to facilitate the interconnections between the master and the slaves. The schematic is given in Annex [6.5].
Basically the card is composed with several connectors on a PCB.
The PC acting as master is plugged on the card though a terminal blocks (Phoenix contact). On the PC side
the parallel port (DB25 connector) is used. The PCs acting as slaves are plugged on the card either though a
terminal block (Phoenix contact), or though two jumpers (Signal and Ground).
The software requirements for the synchronization process are as follows:
• To deal with the parallel port.
• To implement an interrupt handler connected to the parallel port input. The interrupt handler just
frees a semaphore.
• To implement a high-priority task. This task is unlocked by the previous mentioned semaphore.
Then it generates a controlled pulse on the parallel port output (connected to the camera trigger).
Scenario 3: Each PC is in charge to generate the trigger signal. The PC’s clocks are synchronized using the
NTP protocol.
The implementation is the same that the scenario described above, except, that the inter PCs synchronization
is supply by the NTP (Network Time Protocol).
What is NTP?
NTP [web_3] is a protocol designed to synchronize the clocks of computers over a network. NTP version 3
is an internet draft standard, formalized in RFC 1305. NTP version 4 is a significant revision of the NTP
standard, and is the current development version, but has not been formalized in an RFC. Simple NTP
(SNTP) version 4 is described in RFC 2030.
NTP is a protocol built on top of TCP/IP that assures accurate local timekeeping with reference to radio,
atomic or other clocks located on the Internet, or GPS (Global Positioning System). This protocol is capable
of synchronizing distributed clocks within milliseconds over long time periods.
NTP is benefit in the following case:
Among all the PCs, some of them may be out of reach from the other PCs in terms of cable length. Then the
daisy chain process described above [3.2] does not work correctly. If all the PCs are synchronized using
NTP, then the acquisition process works correctly.
RT N° 0301
26
Bertrand Holveck, Hervé Mathieu
3.3.4
The comparison of the different systems
The Full FireWire Solution:
•
•
•
Advantages: There is no need of additional cables, additional electronics and additional software.
Drawbacks:
o The system only constraints the image flow in a way that the acquisition is done at the
same time. But the beginning of the image capture is not under control. The consequence is
that the first images coming to the system might not be taken at the same date. In other
words, two image sequences may be shifted from one or more images.
o It only works on one FireWire bus. In other words two cameras on the same PC but not on
the same FireWire bus (controller) are not synchronized.
o This system only works on some POINT GREY camera models.
Remarks: A synchronization protocol based on the FireWire bus is included in the new version of
the IIDC specification (version 1.31), thus the next cameras should benefit from it.
Solution based on an electronic box:
Product 1: the IMATRIG generator
• Advantages: An industrial product specialized in trigging the cameras is a reliable generator.
• Drawbacks: An external electronic card has to be developed in order to control the pulse length and
to implement the start & stop feature.
Product 2: the Home-made generator
• Advantages: It is controlled by a serial line (RS232). It is based on a micro controller, so it is a reliable generator.
• Drawbacks: Like all the home made products, this is a big issue to duplicate the system if needed.
Solutions based on computers:
Scenario 1: One PC generates the signal
• Advantages: No need of a third party electronic system.
• Drawbacks: Need to have a real time operating system installed on the PC.
• Remarks: Idem to an electronic box but more encumbering.
Scenario 2: Each PC generates the signal. The PCs are synchronized through the parallel port:
• Advantages: Precise time stamp of the pulse.
• Drawbacks: Need to have a real time operating system installed on the PC. Need to install an additional cable between each PC. If the internal clocks of the computers are not synchronized, the time
stamps (absolute time) between each PC will not be the same.
Scenario 3: Each PC generates the signal. The PCs are synchronized by there clock over NTP.
• Advantages: Precise time stamp of the pulse. Less cables than in Scenario 2.
• Drawbacks: Need to have a real time operating system installed on the PC.
INRIA
Infrastructure of the GrImage experimental platform: the video acquisition part
27
3.4 The experimental setup to test the cameras’ synchronization
The issue is to know if the system is working as we want.
We describe in this section the experiment which aims to validate that all the images are grabbed within the
specified period (800 microseconds). The experiment is independent of the technology used for the synchronization process. But the following description concerns a system based on PCs, part of them connected to a
NTP server.
The experimental setup is described in [Figure 20] and [Figure 21]. It consists of four cameras, three computers (PC), a NTP server, and a CRT display.
The topology is as follows:
• Two cameras are connected to the first PC which also provides the external trigger.
• The third camera is connected to the second PC. This PC receives the timing form the first PC, and
provides the external trigger for the connected camera.
• The fourth camera is connected to the third PC. This PC provides the external trigger.
• The first and the third PCs are synchronized using a NTP server.
• The four cameras are set in front of the CRT screen. The CRT screen displays a test pattern [Figure
22]. The CRT screen has an update frequency of 85 Hertz, for a 1024x768 resolution display. The
resulting period for a line is around 14 microseconds.
Figure 20: The experimental setup (schematic)
RT N° 0301
28
Bertrand Holveck, Hervé Mathieu
Figure 21: The experimental setup (view)
Figure 22: The test pattern displayed on the CRT screen & resulting (reduced) images acquired
INRIA
Infrastructure of the GrImage experimental platform: the video acquisition part
29
The experiment runs as follows:
• A program which aims to acquire four synchronous images is launched.
• The four cameras receive the external trigger and shoot an image. The exposure time (500 micro
seconds) in set in order that the CRT screen displays only few lines (around 10) during this period.
At the end only a thin horizontal strip is highlighted in the image.
• By looking the four images, it is straight forward to identify the pattern located in the horizontal
strip highlighted. By comparing the pattern in the four images, we measure the delay between the
acquisitions.
• We run several times the experiment program in order to get a valuable set of data.
The results are conformed to the specified delay. The average delay is around 20 microseconds.
4 The cameras’ placement
4.1 The cameras’ position in the room
The global cameras’ positioning aims to provide:
• A working volume as large as possible.
• A maximum of point of views.
Several parameters limit the positioning:
• The room size is about 7 m x 5 m.
• The ceiling is 3 m height.
• We must minimize the distortion in the image, therefore too-short focal length lenses must be discarded. The tests done show that a 6 mm focal length is the minimum for an acceptable image distortion.
4.2 The rig of the two CameraLink cameras
The CameraLink cameras purpose is the stereo vision process. It supposes to have a rigid link between both
cameras. A structure based on aluminum is used.
4.3 The triplet of cameras for the OCETRE project
The OCETRE project [web_11] is a project hold by several research teams and industrial companies.
The experimental setup for this project is considered as a sub system in the GrImage platform. Therefore it
benefits from the development done within the GrImage platform.
Basically, the required hardware consists of 3 video acquisition systems each one composed of 3 cameras
rigidly attached. The system is supposed to be low cost.
We designed two holders for the triplet of cameras.
The first holder consists of off-the-shelf parts. The [Table 11] gives the parts list. The [Figure 23] shows the
system.
Reference
MANFROTTO column #190
MANFROTTO extra support #840
MANFROTTO 3/8 ¼ adapter #120
MANFROTTO micro ball head #482
Quantity
4
8
12
12
Table 11: The off-the-shelf based mount part list
RT N° 0301
Price per unit (Euros)
738
31
25
15
30
Bertrand Holveck, Hervé Mathieu
Figure 23: View of the OCETRE system
A second holder is a home made version. It consists of the following parts:
• A 22 mm x 22 mm extruded aluminum profile. Its length gives the maximum baseline between two
cameras.
• 3 brackets to interface the profile and the camera.
• A home made mechanical part to interface a standard camera tripod with the holder.
• 5 M5x8 screws and 1 ¼” nut (Standard camera threaded hole) for assembling the parts.
The technical drawing and the material list are presented in annex [6.6].
This version is cheaper.
5 Conclusion
We successfully developed a multi camera system. The system is based on the digital technologies CameraLink and FireWire. It is the first large acquisition system developed in the lab based only on digital technology.
The contributions of the document are as follows:
• It gives an exhaustive list of the component used within the system.
• The useful technical information has been extracted from the complete documentation, thus making
a kind of global technical manual for the whole system.
• New challenges have been addressed: (1) the limit of the lens technologies for the mega-pixels cameras; (2) the different strategies to trig the cameras.
• All the home made parts have been detailed.
Because the platform is an experimental test bed, new products will update the whole system. Then the document will lack of the new information. However, the technologies we choose, the problems we address, will
be the same.
INRIA
Infrastructure of the GrImage experimental platform: the video acquisition part
31
6 Annexes
6.1 IEEE 1394: Bandwidth requirements for different video modes
The video modes as defined by the "IIDC 1394-based Digital Camera Specification" (DCAM) require different bandwidths as shown in the table below. The values are based on a 400 Mega_Bit/s connection and are
rounded.
Bit/Pixel
Video Format
Format_0
Format_1
Format_2
60
fps
30
fps
15
fps
7.5
fps
3.75
fps
1.875
fps
Mode_0
160 x 120 YUV (4:4:4)
24
6%
3%
2%
Mode_1
320 x 240 YUV (4:2:2)
16
16%
8%
4%
2%
Mode_2
640 x 480 Y (Mono)
8
32%
16%
8%
4%
Mode_3
640 x 480 YUV (4:1:1)
12
48%
24%
12%
6%
Mode_4
640 x 480 Y (Mono16)
16
64%
32%
16%
8%
Mode_5
640 x 480 YUV (4:2:2)
16
64%
32%
16%
8%
Mode_6
640 x 480 RGB
24
96%
48%
24%
12%
Mode_0
800 x 600 Y (Mono)
8
50%
25%
13%
Mode_1
800 x 600 Y (Mono16)
16
100%
50%
25%
13%
Mode_2
800 x 600 YUV (4:2:2)
16
100%
50%
25%
13%
Mode_3
800 x 600 RGB
24
75%
38%
Mode_4
1024 x 768 Y (Mono)
8
39%
20%
10%
5%
Mode_5
1024 x 768 Y
(Mono16)
16
77%
39%
20%
10%
Mode_6
1024 x 768 YUV
(4:2:2)
16
77%
39%
20%
10%
Mode_7
1024 x 768 RGB
24
58%
27%
15%
Mode_0
1280 x 960 Y (Mono)
8
32%
16%
8%
Mode_1
1280 x 960 Y
(Mono16)
16
64%
32%
16%
Mode_2
1280 x 960 YUV
(4:2:2)
16
64%
32%
16%
Mode_3
1280 x 960 RGB
24
75%
38%
Mode_4
1600 x 1200 Y (Mono)
8
50%
25%
13%
Mode_5
1600 x 1200 Y
(Mono16)
16
100%
50%
25%
Mode_6
1600 x 1200 YUV
(4:2:2)
16
100%
50%
25%
Mode_7
1600 x 1200 RGB
24
75%
38%
RT N° 0301
64%
100%
77%
64%
100%
32
Bertrand Holveck, Hervé Mathieu
6.2 The synchronization cable description (External trigger feature)
The following four cables are presented in this annex:
• The external trigger cable – master type [Table 12]. This cable connects:
o The parallel port (SUBD 25 points) of a PC. The PC acts as master for delivering the synchronization pulse.
o A SUBD 9 points for the camera trigger signal transmission.
o A bundle of 8 wires to be connected on the interconnection card (See Annex 6.5).
• The external trigger cable – slave type [Table 13]. This cable connects:
o The parallel port (SUBD 25 points) of a PC.
o A SUBD 9 points for the camera trigger signal transmission.
o Two wires to be connected on the interconnection card (See Annex 6.5).
• The trigger extender cable [Table 14]. This cable connects:
o The SUBD 9 points defined within one of the two cables defined above.
o Up to four cameras trigger inputs. The connectors depend on the camera. The [Table 14]
shows a connection example with; two POINT GREY, one AVT MARLIN and one SONY
cameras. But it can be whatever camera with a TTL compatible trigger input.
• The external trigger cable for the CameraLink based system [Table 15]. The cable dedicated for the
CameraLink based system is not based on the generic cables defined above. We prefer to build special cable because only two of these cameras are currently used. This cable connects:
o The Hirose 12 points of the JAI camera.
o The parallel port (SUBD 25 points) of a PC.
o Two wires to be connected on the interconnection card (See Annex 6.5).
Note about the parallel port of a PC: It may be used for digital input output.
A partial specification is summarized as follows:
• The parallel port connector reference is SUB-D 25 points female.
• Pin 2 to pin 9 act as outputs and are referenced in the DATA register.
• Pin 10 acts as input, and is referenced in the STATUS register.
• Pin 18 to pin 25 are grounded.
Note about the cable description:
The described cables are not point to point cables. But they connect several entities together. Each entity is
represented by a connector (Hirose 12 points, DB9 9 points female …).
We can find out four horizontal layers in the following tables.
The layers from top to bottom are defined as follows:
• The length of each part constituting the cable.
• The type of wires used within the cable.
• The connectors.
• The pin outs and the connections between the connectors.
INRIA
Infrastructure of the GrImage experimental platform: the video acquisition part
33
Cable length:
Å---------------------------10m--------------------Æ
Å-------------------1m------------------Æ
- 10m (DB9f-DB25m) : cable 2x(7x0.1mm2) 28 AWG
Shielded part on the DB25m shell
- 1m (DB25m et x) : Ethernet cable cat5 4x2 twisted wires
Shielded part of the Ethernet cable on theDB25m shell
DB9 female
1 (black)
6 (white)
2 (bridge to 1)
7 (bridge to 6)
3 (bridge to 1)
8 (bridge to 6)
4 (bridge to 1)
9 (bridge to 6)
DB25 male
21
9
Interconnection card
10 (blue)
22 (blue/white)
2 (orange)
3 (orange/white)
4 (brown)
5 (brown /white)
6 (green)
18 (green/white)
(sync in)
(ground)
(sync out 1)
(sync out 2)
(sync out 3)
(sync out 4)
(sync out 5)
(ground)
Table 12: The external trigger cable – master type
Cable length:
Å---------------------------10m--------------------Æ
Å-------------------1m------------------Æ
- 10m (DB9f-DB25m) : cable 2x(7x0.1mm2) 28 AWG
Shielded part on the DB25m shell
- 1m (DB25m et x) : cable 2x(7x0.1mm2) 28 AWG
Shielded part on the DB25m shell
DB9 female
1 (black)
6 (white)
2 (bridge 1)
7 (bridge 6)
3 (bridge 1)
8 (bridge 6)
4 (bridge 1)
9 (bridge 6)
DB25 male
21
9
Interconnection card
10
22
Table 13: The external trigger cable – slave type
RT N° 0301
(sync in)
(ground)
34
Bertrand Holveck, Hervé Mathieu
Cable length:
Å--------------0.5m-----------------Æ
Å--------------------------------0.5m-----------------Æ
Å----------------------------------------------------0.5m-----------------Æ
Å-----------------------------------------------------------------------------0.5m-----------------Æ
cable 2x(7x0.1mm2) 28 AWG
DB9 male
1 (black)
6 (white)
2 (black)
7 (white)
3 (black)
8 (white)
4 (black)
9 (white)
POINTGREY #1
(Jumper)
1 (ground)
2 (trig in)
POINTGREY #2
(Jumper)
AVT MARLIN
HR 12 points
SONY DFW700
HR 4 points
1 (ground)
2 (trig in)
7 (ground)
4 (trig in)
2 (ground)
3 (trig in)
Table 14: The external trigger extender cable
Cables length :
Å-------------5 meters------------Æ
Å-----------------------5meters+0.3meter---------------Æ (via DB25m)
Å--------------------------------------5meters----------------------------------------------Æ
Å---1meter----Æ
- 5m (Hirose & DB25m) : Ethernet type cable cat5 4x2 twisted wires
- 0.2m (DB25m & PC Power supply) : cable 4x(7x0.2mm2) (used by pair)
- 1m (DB25m & Jumpers) : cable 3x(7x0.1mm2) (only 2 wires used)
- Shielded part of the Ethernet cable on theDB25m shell
HR 12points
RS232
1 (ground) (blue/white)
2 (+12volts) (blue)
10 (trigger in) (brown)
12
(ground)
(brown/white)
5 (ground) (green/white)
6 (RXD) (green)
7 (TXD) (orange)
8 (ground) (orange/white)
Extension PC Power Supply
DB25m
Interconnection
card
(green + yellow) +(black)
(red + blue) + (yellow)
9
19
TBD
TBD
TBD
TBD
10 (red)
22 (blue)
(sync in)
(ground)
Table 15: The external trigger cable for the CameraLink based system
INRIA
Infrastructure of the GrImage experimental platform: the video acquisition part
35
6.3 IMATRIG-I and the add-on electronic circuitry
The [Figure 24] shows the front panel of the IMATRIG system.
Figure 24: the IMATRIG-I front face (comments are in French)
In the IMATRIG terminology, the MODE 4 is convenient for our application. The MODE 4 provides a periodic signal in the outputs (Marked as Sortie in [Figure 24]). The parameter switches PARAMETER1 and
PARAMETER2 [Figure 25] allow tuning the output frequency of the signal. The switches act as a 16-bits
word. The formula to get the pulse period is: (N1,2 + 3) x 16 µs.
Figure 25: Zoom on the IMATRIG parameter switches
RT N° 0301
36
Bertrand Holveck, Hervé Mathieu
Figure 26: the IMATRIG-I add-on schematic
INRIA
Infrastructure of the GrImage experimental platform: the video acquisition part
37
6.4 The pulse generator based on the RENESAS H8/3664F microcontroller
6.4.1
Overview
The camera may be triggered by an external signal to control the image acquisition. This trigger signal is
generally a negative or positive pulse compatible with the TTL standard. To generate this signal we usually
use a trigger generator. In our case a standard trigger generator is not convenient. For instance standard trigger generators make the pulse output active as soon as it is plugged (powered). In our system the pulse output must be totally controlled. The controls needed are listed as follows:
• The pulse output stream is started or stopped by the user.
• The system can send a variable number of pulses (one to infinite).
• The pulse polarity may be changed.
• The pulse parameters (width and period) may be changed.
In the past we successfully worked with the RENESAS (formerly Hitachi) H8/3664F for applications like
[web_14].
So we decided to use the same microcontroller to design the trigger generator.
We present in this document: (1) a general description of the device; (2) the user manual; and (3) the cost.
The detailed documentation of the device is not given is this document. [Figure 27] shows the device.
Figure 27: Pictures of the trigger box
6.4.2
The device description
The hardware components are the following:
• The AE-3664FP board is a 40mm x 27mm module, based on H8/3664F RENESAS micro controller.
• The H8 tiny I/O board (TERA2) is a development board for programming AE-3664FP module. This
board is considered as a development board. Anyway it is a high quality PCB, and all the needed
functionalities are present. The PCB footprint is 95 mm x 45 mm.
The inputs-outputs are the following:
• A SUB-D 9 pins allows connecting the device to the serial line of a PC.
• A Green Led is on when the power is plugged.
• A Red Led is activated when the Pulse is active. So because the pulse width is very short compared
to the signal period, the light coming from the Red Led may be weak.
• A Yellow Led is reserved for a future version of the device.
• A terminal block receives the connections from the cameras.
RT N° 0301
38
Bertrand Holveck, Hervé Mathieu
The device control is achieved by using a Serial connection ([Table 16]).
Data format
Flow control
Parity
Stop bit
Bit rate
8 bits
None
None
1
57600 bits per second
Table 16: The serial line configuration
The communication is based on ASCII format command ([Table 17]).
Command
‘i’
‘s’
‘S’
‘+’
‘-’
‘w’
‘W’
‘p’
‘P’
‘n’
‘N’
‘c’
Answer
<i><module id><ok>\n\r
<s><ok>\n\r
<S><ok>\n\r
<+><#CONFIG><ok>\n\r
<-><#CONFIG><ok>\n\r
<w><#CONFIG><ok>\n\r
<W><#CONFIG><ok>\n\r
<p><#CONFIG><ok>\n\r
<P><#CONFIG><ok>\n\r
<n><#CONFIG><ok>\n\r
<N><#CONFIG><ok>\n\r
<c><#CONFIG><ok>\n\r
Meaning
Return module id name (for instance “inria ra – trigger 01”)
Start
Stop
Change the pulse polarity
Change the pulse polarity
Enlarge the pulse width with a constant step (0.5 ms)
Reduce the pulse width with a constant step (0.5 ms)
Enlarge the pulse period with a constant step (0.5 ms)
Reduce the pulse period with a constant step (0.5 ms)
Increment the number of pulse (0 = infinite)
Decrement the number of pulse (0 = infinite)
Print the configuration
Table 17: The command list of the trigger generator
Explanation of the “#CONFIG” term:
String example: <w=2><p=35><n=0><->. The meaning is as follows:
• <w=2>: is the pulse width in millisecond.
• <p=35>: is the pulse period in millisecond.
• <n=0>: is the number of pulses that will be produced. 0 means that an infinite number of pulses will
be generated.
• <->: is the pulse polarity. The character ‘–‘ means a negative pulse (+5volts -> 0volt -> +5volts).
The character ‘+’ means a positive pulse (0 volt -> +5 volts -> 0volt).
The following developments may be considered in the future:
• A button can be added on the box. It aims to start and stop manually the signal emitting.
• An interesting feature would be to synchronize several trigger generators together. For this purpose, a digital input and a digital output must be added.
• In the current version all the output signals have the same polarity. The output signals could be split
in negative and positive polarity signals. Then camera with negative and positive polarity trigger
signal could be connected together.
INRIA
Infrastructure of the GrImage experimental platform: the video acquisition part
6.4.3
39
The bill of material
Name
Company
Reference
Distributor
Reference
Micro controller
module
H8 development
board
Software H8
Flash Toolkit
GNU H8 C
Renesas
AE-3664FP
Microtronique
AE-3664FP
Renesas
Renesas
KPIT
Plastic box (ABS)
Connector (socket)
Connector (plug)
Phoenix Contact
Phoenix Contact
-
Microtronique
HEW 2.2
FDT 2.2
wingnuh8v0303coff
120 x 65 x 40 mm
MC 1,5/2-ST-3,81
MCV 1,5/2-G
Radiospares
Radiospares
Radiospares
281-6835
220-4658
220-4822
Table 18: The bill of material of the trigger generator
RT N° 0301
Qty
1
Price
per Unit
(Euros)
25
1
30
1
1
1
0
0
0
1
16
16
6
1.2
0.4
40
Bertrand Holveck, Hervé Mathieu
6.5 The interconnection card for the external trigger
The [Figure 28] and [Figure 29] describe the home-made card developed for interconnecting the MASTER
PC and the SLAVE PCs involved in the external trigger feature.
The key-points of the card are as follows:
• One MASTER PC (Parallel port) is plugged on the MASTER connector (Terminal Block – Phoenix
Contact).
• One SLAVE PC (Parallel port) may be plugged on the SLAVE connector ((Terminal Block – Phoenix Contact).
• Up to five SLAVE PCs (Parallel port) may be plugged on the SLAVE jumpers. Two jumpers must
be plugged for each SLAVE, one is the signal itself (sync_in), and the other is its ground part
(ground).
Figure 28: the interconnection card (schematic)
Figure 29: The interconnection card (view)
INRIA
Infrastructure of the GrImage experimental platform: the video acquisition part
41
6.6 The mechanical description of the camera support
The system is designed to be fixed on a standard video tripod, and to hold a set of three cameras.
The [Figure 30] shows the system. The [Figure 31] gives the technical drawing to machine the home made
mechanical interface between the holder and the tripod. The [Table 19] gives the part list.
Figure 30: The 3-cameras holder
Figure 31: The interface between the camera tripod and the home made holder
RT N° 0301
42
Bertrand Holveck, Hervé Mathieu
Dimensions (mm)
Extruded aluminum
Caps
Bracket
Nut
Screw
Home made part
Nut
22 x 22 x 300
22 x 22
20 x 20 x 20
M5
M5x8
50 x 50
¼”
Reference (RADIOSPARES)
249-0073
249-0231 (for 10)
219-0398
-
Number
1
2
3
4
4
1
1
Cost (Euros) per
unit
20
1
4
-
Table 19: The 3-cameras holder part list
Some off-the-shelf parts must be machined in order to fit the system.
• One of the two thru holes of the brackets receiving the cameras must be enlarge from 5mm to
6.5mm in order to fit the ¼” camera screw.
INRIA
Infrastructure of the GrImage experimental platform: the video acquisition part
43
6.7 The dealers and prices lists
We report here the part list for the main parts. The “Small” parts are not reported.
COMPANY
JAI
SONY
SONY
AVT
POINTTGREY
FUJINON
FUJINON
SCHNEIDER
ARVOO
UNIBRAIN
UNIBRAIN
-
MODEL
LOCAL DEALER
Camera
CV-M7-CL
DFW-VL500
DFW-X700
MARLIN 046C
DRAGON FLY
Lens
HF12.5HA-1 (12.5mm)
DF6HA-1 (6mm)
CINEGON 1.4/8.0mm
Board
LEONARDO PCI64-CL-FL-X100-C-128
PCI FireWire Red
Cable
FireWire cable - 10 meters
CameraLink cable - 5 meters
IMASYS
ALLIANCE VISION
ALLIANCE VISION
IMASYS
ROBOSOFT
4000
1775
2730
1100
1000
ALLIANCE VISION
IMASYS
IMASYS
160
200
700
ECRIN
ALMA
ALMA
ALLIANCE VISION
Table 20: The dealers and prices lists
RT N° 0301
PRICE per
unit (Euro)
2900
20
35
280
44
Bertrand Holveck, Hervé Mathieu
7 Bibliography
[web_1] http://www.inrialpes.fr/sed/GrImage/
[web_2] http://www.inrialpes.fr/
[web_3] http://www.ntp.org/
[web_4] http://www.rtai.org/
[web_5] http://www.jai.com/
[web_6] http://www.1394ta.org/
[web_7] http://www.ptgrey.com/
[web_8] http://www.imasys.fr/
[web_9] http://www.unibrain.com/
[web_10] http://www.alliedvisiontec.com/
[web_11] http://ocetre.inrialpes.fr/
[web_12] http://www.balcar.com/
[web_13] http://www.renesas.com/
[web_14] http://www.inria.fr/rrrt/rt-0289.html
[doc_1] Specifications of the Camera Link Interface Standard for Digital Cameras and Frame Grabbers
PULNIX (www.pulnix.com)
October 2000
[doc_2] Leonardo PCI-64CL Full, User Manual (draft, rev. B doc 1.2)
ARVOO
2002
[doc_3] Leonardo PCI-64CL Full, Software Development Kit (Draft rev. A, doc 1.1)
ARVOO
2002
[doc_4] CV-M7+CL user manual (M4plusBman1may07.pdf)
[doc_5] IIDC 1394-based Digital Camera Specification
Version 1.30
July 25, 2000
1394 Trade Association
[doc_6] DFW VL500 technical manual (dfwvl500_ug.en.pdf)
[doc_7] DFW X700 technical manual (dfwx700_ug.en.pdf)
[doc_8] DRAGON_FLY technical reference manual, version 2.1.2.13
Point-grey
2003
INRIA
Infrastructure of the GrImage experimental platform: the video acquisition part
[doc_9] MARLIN 046C Technical manual
Allied Vision Technology
2004
[doc_10] IMATRIG-I Manuel de l’utilisateur
IMASYS
RT N° 0301
45
46
Bertrand Holveck, Hervé Mathieu
INRIA
Unité de recherche INRIA Rhône-Alpes
655, Avenue de l’Europe, 38330 Montbonnot-St-Martin (France)
Téléphone : +33 4 76 61 52 00 – Télécopie : +33 4 76 61 52 52