1
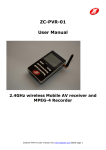
User’s Manual for Receiver RC430 with Remote
Control and USB
Thank you for choosing receiver RC430 with remote control and USB.Please read this manual carefully before
you use it,which will provide you a great help.
І.Introduction
Receiver RC430 use ISM frequency, 2400---2843MHz can receive the video and audio signals transmitted by the
wireless camera.The video signal,which is received and displayed by the personal computer(PC), can be
grasped,produced into recorded video file and replayed by the software
of “LYDMonitor”.Connected with the
monitor/TV and changed to AV system, RC430 can be used as a normal receiver,which is widely used for
entertainment,surveillance,security ctc.
П.Specification
●
Support Windows XP
●
Support UBS 2.0
●
Support audio
●
Support long-distance surveillance
●
ISM frequency:2400---2483MHz
●
Receiving frequency:
and network video phone by PC through software of the third party
CH1=2414MHz,CH2=2432MHz, CH3=2450MHz,CH4=2468MHz
●
Receiving sensitivity:--85dBm
●
Intermediate frequency:480MHz
●
Video output: 1Vp-p
●
Audio output: 2.5Vp-p (maximum)
●
Remote control distance: 6—8m
●
High speed picture compression, Display rate:30f/s
●
Resolution: 640×480, 320×240
●
Power adapter:
PC model: USB power ,no power adapter needed
Monitor/TV model: DC5V/500mA
●
Size: 120x88x30
●
Working temperature: 0~40℃
Ш.sketch map
antennal
Channel button
USB
Audio
Remote control
Receiving window
Channel display window
Video
Ⅳ.Installment and Usage
A.Monitor/TV model:
1.Connect the power adapter with the wireless camera firmly and insert the power adapter into the socket of the
interflow power.
2.If installing two wireless camera synchronously,please keep them 2 metres away from each other So does the
reciever, or they will interference each other and cause bad picture.
3.Revolve the antennal to keep it as vertical as possible,which will ensure a good receiving effect.
4.Use AV lines to link the audio/video output of the receiver together the audio/video input of the monitor/TV
respectively.
5.Plug the power adapter(DC5V/500mA) into the interflow power,the DC line into the USB of the RC430.The
channel display window will show a red spot.
6.Turn on the monitor/TV,alter it to AV system.
7. RC430 button operation:
1).Power on: In the state of power off, press the button once, then power on.It will display channel
“1”.
2).Altering channel: In the state of power on, press the button swiftly.The receiver will skip to the next channel.
3).The channel cycle automatically receiving mode: Press the button for 1—2 seconds ,then release it.The
receiver will enter channel cycle automatically receiving mode the mode of automatically channel cycle---the red
spot begins twinkling and in 5 seconds it will skip to the next channel.
4)Power off:In the state of power on ,press the button for 3 seconds ,then release it till the channel display
shows a red spot .
8.The operation of RC430 remote control
1). Power on: In the state of power off, click the button of “ON/OFF”, then power on.It will display channel
“1”.
2).channel altering:
a.In the state of power on ,click the button of “1,2.3,4”,the receiver will skip to the same channel, and the
channel will be showed in the display window simultaneously.
b.In the state of power on, press
the button of “CH+, CH-”,the channel will be altered in turn and be
showed in the display window simultaneously.
3).The channel circling automatically:Press the button for 1—2 seconds ,and release it.The receiver will
enter the model of automatically channel circling---the red spot is twinkling and in 5 seconds it will skip to the
next channel.
4).Turning the volume: press the button of “VOL+, VOL-”can change the volume .
5). power off:In the state of power on , press the button of “ON/OFF”. The channel display widow will
show a red spot
9.Adjust the lens of the wireless camera to get a nice picture.
10.Adjust the, brightness,contrast, color of the monitor/TV to get a wonderful picture.
B.Setup the driver
5. PC mode
5-1.
system requirements:
1.minimum requirement to the computer
● operation system: Windows XP
● Directx-9x or up
● the precessor of Intel® Pentium III (800MHz)or AMD® Athlon or up
● 128 MB memories(256MB is better)
● CD-ROM driver
● USB interface
● audio driver
●100MB hard disc(1.0GB for video record)
5- 2.Installment based on the Windows XP SP2
1). Insert one end of the USB line into the socket of the PC, the other the RC430 receiver.Connect the RC430A
and PC by the USB cable. The new hardware will be found, “Welcome to the Found New Hardware Wizard” will
be showed on the screen. It will ask whether searching the software in the Windows Update. Please choose
“No,not this time”,click “Next” to continue.
2).When the Wizard asks you to install “USB 2861 device”,please put the CD in the CD-ROM and install the
driver as follow.
Choose “ Install the software automatically(Recommended)”and click “Next”.
3).Click “continue anyway” to skip the windows text and continue.
4).Click “finish”to achieve the installment of “USB 2861 Device”
5).Wait for a moment ,the Wizard system will install “USB EMP Audio Device” automatically for you.
Ⅴ. Installment the software of ”LYDMonitor”
1.
Open “My Computer”,enter into“LYDMonitor” folder of
the CD driver(LYD-RC430) double click
“LYDMonitor” .In the window of “installer language”,choose a language suitable for you ,then click
“OK”.
2.
When “Welcome to LYDMonitor Setup Wizard”emerged,click “Next”.(If it asks to install “Micorsoft
DirectX”,enter into the “directx-9c”,operate “dxsetup.exe”,finish the installment of “Directx”and
“LYDMonitor”.
3.
When asked the install location,click “next”.The acquiesced path is “C:\Program
File\LYDMonitor”.If you want to change an install location ,please click “Browse”,and
choose another one.
4.
single click “Install”
5.
Click “Finish”
Ⅵ.the operation of “LYDMonitor”
1.
start
1). Insert one end of the USB line into the socket of the PC, the other the RC430 receiver.Double click
“LYDMonitor”,the program will begin and enter into the surveillance model.
2).the main window
Control faceplate
Window state
Volume level
Fast forward
Volume up
Record
Mute
Play/pause
Volume down
Stop
Replay rate
Fast backward
Capture picture
Vedio file
Character setting up
3).The window state
You can click
to minimize the window,
to maximize it,
to close it.
Version information
Working state and time display
2 setting up
1).volume setting up
or
You can click
by
to turn the volume up or down,click
to mute.You can also alter the volume
dragging
through the indicator of the mouse
2).charater setting up
Click
a.
to show the character setting window
the setting up of “Quick Record”
Save type: Choose the video file save type ,ASF or AVI
Quality:ASF can change the quality of the compress rate: high (320x240), middle(320x240),low(320x240),
acquiesced(320x240)
Record path:If you want to save the recorded file in another place,please single click
favorite location.(the program recorded file named
and choose your
after the current time,for example, 060720_181316.asf
means( the program was founded at 18:13′16″July 22nd, 2006.)
Disk information:This item will show the used room and balance room per minute of the program according to
the saving type and quality.
b.
The setting up of “Capture”
Grab picture to:set up the picture saving location.If you want to save it in another place,single click
and select the picture saving folder.
The picture saved is named after the current time.For example, 2006720181913.bmp means this picture
was saved at 13seconds,19 minutes past 18 o’clcock,July 22, 2006.
(The picture saved is named after the current time,for example, 060720_181316.asf means18:13′16″of July
22nd, 2006.
3).the setting up of Video
You can adjust the brightness,contrast,hue, saturation and sharpness to optimize the picture.
Video Standard:Please choose it according to your camera,for example,if your camera is NTSC system,you
should choose NTSC_M.If your camera is PAL system,you should choose PAL_I,ect.
4).Language selection
Support English and simple Chinese operation system.(Notice: simple Chinese is not usable (except)
unless your Windows operation system is Chinese.)
3.usage
1).Surveillance mode
The main display window shows the picture transmitted by the wireless camera,and the control faceplate
shows the current state and time.
The channel button on the remote control make the receiver’ frequency comply with the transmitter, or the
channel button on the reveiver make the number in the display window comply with the transmitter.
2),Capturing pictures
You can capture pictures in the video,click
to catch one and save it in your file that you have
founded previously.
3)Recording
a.Click
b.Click
to begin recording
to stop recording,it will ask you whether you are sure to stop current recording.
4).replay the recorded file
a.Single click
to open the record window
please choose suitable type such as: Video File(*.asf)orVideo File(*.avi)`
please choose the recorded file you want to replay ,and click “Open”.
b.The main display window shows the contents of the recorded file, the control faceplate shows the
current state and replaying time.
the indicator of replaying course
●You can click
●Single
replaying time
total time of the record
and drag it to different replaying place ,click
click
speed
the
for
twice
to stop replaying.
fast
forward
the
replaying
,double clicks for four times,three clicks for eight times.
for fast backward.
c.After finishing replaying a file,the replaying state will back to the beginning.
● You can single click
to continue replaying the current file again,or single click
to back to the
surveillance state.
Ⅻ. Problems and solutions
1.
Receiving
1)The light in the channel display window does not shine
please check whether the power adapter and the receiver link tightly,or the interflow power has switched on.
2).can not receive picture or can not receive clear picture
a.please check whether the camera has been powered on.
b.please check whether the camera is too far away from the receiver,whether there are magnetic obstacles
between them.(such as steel construction can seriously obstruct the transmission signal)
c,please check whether the frequency of the camera has been matched with that of the camera(make sure there
should not be two transmitter with different frequency in the limited distance,which may cause interference or
bad receiving picture),whether the antennal has been streched out.(set well)
d.the antennal of the receiver should be far away from magnetic obstacles
e The transmission of the same frequency with huge power or the work of car-loading radio station may
interference the receiver.
2.
software
1).no picture in the main display window
please make sure the number in the channel display window has been matched with the frequeney of the
transmitter and the camera is working right.
2).bad picture
please make sure the TV system of the camera has been matched with that of the LYDMonitor.check
VideoStandard.
3).bad record
please look at the set of
7-2-2 a check the setting up,and change the quality of the recorded file.
4).the size of the record
If you choose AVI with high quality to save the record, huge space of the hard disc will be occupied.
Please select the record-saving quality in accordance with the space of your hard disc.
Ⅷ.accessories and papers
●
AV line
one
●
USB line
one
●
RC430 Driver CD
one
●
DC5V/500mA power adapter
one
●
user’s manual
one
●
warranty card
one