1
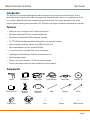
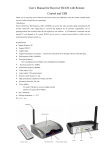
Nissan Techmate Tech•Cam
User Guide
J-50079 Tech•Cam
User Guide
1-800-662-2001 • nissantechmate.com
March 2011
560300 REV B
Nissan Techmate Tech•Cam
User Guide
Table of Contents
Introduction
Features
Components
Initial Set-Up
Battery Charger
Software Installation
Tech•Link Software Installation
Xvid Codec Installation
Attaching Camera
Attaching Monitor
Attaching Camera Accessories
SD Memory Card
Monitor Mounting Bracket
Basic Operation
Recording Video
Taking a Picture
Playback Video or Picture
Deleting Video / Picture
Setting Mode
Language Setting
Video System Setting
Formatting
Default Set-up
View Version Info
Frame Rate Setting
Time Stamp Setting
Recording Type
Date/Time Setting
Event Playback
PC Software Use
Viewing a Live Stream
Specifications
FCC Information
Troubleshooting
Parts List
Warranty
3
3
3
4
4
4
5
5
5
5
6
6
6
6
7
7
7
8
8
8
8
8
9
9
9
9
9
9
9
10
10
11
11
12
12
13
Page 2
Nissan Techmate Tech•Cam
User Guide
Introduction
The Tech.Cam is a precision tool designed to allow a technician to view into inaccessible locations. It has a
detachable wireless monitor that enables the image to be viewed while the camera is in a confined area. It also
has a wireless dongle that will allow remote viewing over the internet. The images and video can be saved
onto the monitors memory and transferred to a PC. These files and images can then be distributed for inspection.
Features
• Allows for easy surveying of small, hard-to-reach places.
• Mini 9mm waterproof LED lens, 1.0 meter flexible tube.
• Manufactured and tested to IP67 waterproof standard.
• 3.5”TFT-LCD detachable/mountable monitor, built-in rechargeable Li-battery.
• Video recording capability, supports up to 32GB micro SD card.
• Adjustable brightness on lens-mounted LED light.
• 3 useful accessories included: Hook, mirror and magnet.
• Lightweight, handheld design, flexible and convenient to use.
• Multi-language support.
• Wireless real-time viewing on a PC with the wireless dongle.
• Can be used retrieve and manipulate small difficult to reach objects.
Components
Handle
LCD Monitor
USB Cable
Power Adapter
Video Cable
Software CD
Micro SD Card
Magnatic
Bracket
Waterproof
LED Lens
Hook
Magnet
Mirror
Rubber Ring
Charger
Not
Not
Not
Pictured
Pictured
Pictured
Case
Dongle
USB Extension
Page 3
Nissan Techmate Tech•Cam
User Guide
Initial Set-up
Battery Charger
To Install Batteries in the camera handle
The AA NiMH batteries can be charged with the
supplied battery charger. Detailed instructions can
be found in the original packaging.
1. Using a Philips head screwdriver, remove
screw and cover as illustrated below:
2. Remove battery compartment and insert four
(4) AA batteries into their appropriate slots,
with proper orientation, as indicated on the
battery compartment.
To charge the monitor connect the monitor to an
appropriate (100-240V ~ 50/60Hz) power source with
the provided adapter. The power indicator LED will
illuminate red and the battery capacity icon on the
LCD will flicker, indicating that the battery is charging.
When the red indicator light disappears, the battery
has been fully charged.
Software Installation
1. Insert the CD.
2. If the CD does not auto run open My Computer and
double click on the CD drive.
3. Install the Tech.Link software with the following
instructions. This will allow you to view the
camera in realtime on the PC.
4. Install the Xvid Codec with the following instructions.
This will allow you to view recorded videos on a PC.
3. Reinstall battery compartment and replace
battery cover and screw.
Page 4
Nissan Techmate Tech•Cam
User Guide
Tech•Link Software Installation
Attaching Camera
1. Run the file named TechLinkSetup.msi
To connect the flexible tube camera with control
handle, first make sure that the keyed end of the tube
is aligned with the slot in the handle, then use slight
force to push them together. Once properly aligned,
twist the treaded knob clockwise until the connection
is securely in place.
2. At the welcome screen click Next.
3. Chose an installation directory. Program Files is
default. Click Next.
4. Click Install.
5. Make sure “Launch TechLink” is checked and
click Finish.
Keyed end plugs into socket
6. The Wireless USB Dongle software wizard
will now launch. When prompted to insert the
camera, plug the TechLink into a USB port
and click Yes.
7. If prompted to install an unsigned driver click
Continue Anyway.
Fasten the treaded knob
8. Click Finish when prompted.
Xvid Codec Installation
1. Click Next at the welcome screen.
1. Accept the license agreement and click Next.
2. Chose the installation folder and click Next.
3. If prompted click Continue Anyway.
4. Click Yes to automatically check for updates.
Attaching Monitor
To attach the monitor, place the slot on the back of
the monitor over the tab on the camera handle. Push
down on the monitor until it clicks into place.
Slide the
monitor
downward
Installed
successfully
Page 5
Nissan Techmate Tech•Cam
User Guide
Attaching Camera Accessories
Monitor Mounting Bracket
Insert the end of either the mirror, hook, or magnet
into the small hole in the end of the camera tube.
Now slide the rubber ring over the accessory and
the camera to secure it.
To install the magnetic monitor mounting bracket, slide
the monitor on using the same method as attaching it
to the camera handle. The mounting surface should be
clean before attaching.
Hook the hole
Wear the rubber ring
SD Memory Card
Basic Operation
After SD card is inserted into SD card slot successfully,
an SD card icon will appear on the monitor screen;
otherwise, the ‘no SD card’ icon will show.
1. As you roll the power switch to turn on the camera,
the power indicator on the camera handle will light.
The rolling switch then acts as a dimmer for the twin
LEDs that surround the camera on the end of the
flexible tube.
SD Card
2. Press and hold the power switch for 2 seconds on
the monitor until the power indicator illuminates
green. Then press the “down” button to select
CH4 (channel 4), or until the picture from the lens is
displayed on the monitor. To toggle between video
recording and picture taking functions, press the
“up” button on the side of the monitor.
Select to
record video
or take
pictures
Select CH4
Page 6
Nissan Techmate Tech•Cam
User Guide
Recording Video
Playback Video or Picture
1. In real-time monitoring mode, press the
button
to toggle to video recording mode.
3. Press again to stop recording.
The video will be automatically saved as an individual
file every 30 minutes.
•
The F icon indicates that the SD card memory is full.
Battery Capacity
Recording
button to
2. Press the and buttons to select your desired folder,
then the press ‘OK’ to toggle to the following interface:
2. Press the ‘OK’ button to begin recording:
•
1. In real-time monitoring mode, press the
toggle to the video/picture folder.
Currrent Channel
2009-01-01
05:53:00
05:53:00
05:53:03
05:56:40
05:59:03
06:05:17
00020005
VID
VID”
VID
VID
VID”
VID
Indicates
picture file
Indicates
video file
CH4
Video
Icon
Note: A quotation mark ( ” ) next to a file name indicates that
the file is a video. No double quotation mark next to a file
indicates that the file is a picture.
2011/02/11
[00:05:43]
14:50:40 2011/02/11 14:50:40
Current
Date/Time
SD Card
Icon
Recorded
Time
2. Press the ‘OK’ button to take a picture.
button to select
your desired video, and then press ‘OK’ to playback.
Pause: press the ‘OK’ button once to pause, press again
Fast Forward: press the
Rewind: press the
Taking a Picture
toggle to picture mode.
or
to resume play.
Time Stamp
1. In real-time monitoring mode, press the
For playback video: Press the
Stop/Exit: press the
button to
button.
button.
button.
To view pictures: Press the
or
button to select your
desired video, press ‘OK’ button to view and press again
to exit.
Photo Icon
OK
2011/02/11 14:50:40
Page 7
Nissan Techmate Tech•Cam
User Guide
Deleting Video/Picture
Language Setting
1. In real-time monitoring mode, press the
toggle to the video/picture folder.
button to
2. Press the or button to select your desired folder,
and then press ‘OK’ button.
1. In the setting mode, press the or button to select
‘SYSTEM SETTING’, and then press ‘OK’ button.
2. Press the or button to select ‘Language’, then
press ‘OK’ button, the following interface will appear:
3. Press the or button to select your desired file,
and then press and hold the button for 2 seconds,
or until the following interface appears:
2009-01-01
05:53:00 CH4
05:53:00
CH4”
DELETE
CURRENT
05:53:03 CH4
05:56:40 VID
05:59:03 CH4”
06:05:17 VID
Language
00020005
FILE?
OK:
NO
English
YES
3. Press the or button to select a
desired language.
4. Press ‘OK’ button to confirm and exit.
4. Press the or button to toggle between
YES and NO, that is, to delete or cancel. Once you have
highlighted your desired selection, press the ‘OK’ button.
Video System Setting
How to Enter the Setting Mode
2. Press the or button to select ‘Video System’ and
then press ‘OK’ button.
In real-time monitoring mode, press and hold the button
for 1-2 seconds, or until the following interface appears:
3. Press the or button to toggle between NTSC and
PAL. Once your desired system is selected, press ‘OK’
button to confirm and exit.
SYSTEM SETTING
1. In the setting mode, press the or button to select
‘SYSTEM SETTING’, then press ‘OK’ button.
Formating
1. In the setting mode, press the or button to select
‘SYSTEM SETTING ’, and then press ‘OK’ button.
2. Press the
or
button to select ‘Format’, and then
press ‘OK’ button.
3. Press the or button to toggle between YES and NO,
that is, to format or cancel. Once you have highlighted
your desired selection, press the ‘OK’ button.
Page 8
Nissan Techmate Tech•Cam
User Guide
Default Setup
Recording Type
1. In the setting mode, press the
or
button to select
‘SYSTEM SETTING’, then press ‘OK’ button.
2. Press the
or
button to select ‘Default Setup’ and
then press ‘OK’ button.
3. Press the
or
button to toggle between YES and NO,
1. In the setting mode, press the
or
button to select
‘SYSTEM SETTING’, and then press ‘OK’ button.
button to select ‘Version’ and then
press ‘OK’ button. You will now be able to view the
‘RECORDER SETTING’, and then press ‘OK’ button.
2. Press the
3. Press the
button to select ‘Recording Type’ and
or
button to toggle between ‘still’ and
Date/Time Setting
1. In the setting mode, press the
1. In the setting mode, press the
Date/Time
or
2011 / 02 / 13
08 : 51
button to select
button to select ‘Frame Rate’ and then
OK:
press ‘OK’ button.
or
button to toggle between different
frame rates. Once your desired rate is selected, press
‘OK’ button to confirm and exit.
or
button to select
‘RECORDER SETTING’, and then press ‘OK button’.
2. Press the
or
button to select ‘Time Stamp’ and then
press ‘OK’ button.
3. Press the
and
2. Press ‘OK’ button to select Date or Time; Press
the
or
button to adjust selection; Press the button
to confirm and exit.
Time Stamp Setting
1. In the setting mode, press the
button to
interface will appear:
‘RECORDER SETTING’, and then press ‘OK’ button.
3. Press the
or
select ‘Date/Time’ and then press ‘OK’, The following
Frame Rate Setting
or
or
button to confirm and exit.
version details of your product.
2. Press the
button to select
‘video’. Once your desired selection is made, press ‘OK’
View Version Information
or
or
then press ‘OK’ button.
that is to restore.
2. Press the
1. In the setting mode, press the
Event Playback
1. In the setting mode, press the
or
button to
select ‘EVENT PLAYBACK’, and then press ‘OK’ button.
2. Refer to user manual instructions on Playback of
buttons to toggle between on and
off. Once your desired selection is made, press ‘OK’
Video/Picture, Deleting Video/Picture, and Deleting
Folder for guidance.
button to confirm and exit.
Page 9
Nissan Techmate Tech•Cam
User Guide
PC Software Use
To download recorded files to PC:
1. Connect the USB cable from the monitor to the laptop
and power on the monitor.
2. The dialogue box should start automatically. Select
“copy pictures to a folder”.
3. The wizard will then guide you through the
download process.
Note: You can also browse the files manually by
clicking “My Computer”
Viewing a Live Stream
1. Connect the dongle to the USB extension.
2. Power on just the camera handle
(the monitor may need to be undocked).
3. Click the “View wireless USB Dongle” icon.
4. This will then launch the live view.
Page 10
Nissan Techmate Tech•Cam
User Guide
Specifications
Model No.
Imaging Sensor
Total Pixels
Horizontal Viewing Angle
Transmission Frequency
Minimum Illumination
Modulation Type
Bandwidth
Power Supply
Unobstructed Effective Range
Waterproof Capacity
Tube Diameter
Camera Dimensions (W x D x H)
Camera Approx. Weight
LCD Screen Type
Effective Pixels
Video System
Transmission Frequency
Exterior Supply Voltage
Consumption Current (Max.)
Working Time
Charging Time
Picture/Video Pixels
Video Size
Frame Rate
Video Output Level
Receiving Sensitivity
Monitor Dimensions (W x D x H)
Monitor Approx. Weight
Operating Temperature
Operating Humidity (Max.)
BB03AL
CMOS
640 480 (PAL) 640 x 480 (NTSC)
45º
2468MHz
0 Lux
FM
18MHz
4 x AA batteries
10m
IP67 (for lens/tube only)
9mm
186 x 145 x 41(mm) (Excluding Flexible Tube)
450g
3.5″TFT-LCD
960 x 240
PAL/NTSC
2414MHz,2432MHz,2450MHz,2468MHz
5v DC
500mA
2 hours
3 hours
640 x 480
27M byte/minute
30 frame/second
0.9-1.3VP-P@75ohm
≤-85dBm
100 x 70 x 25 (mm)
140g
-10~50 c
15~85%rh
FCC Information
This device complies with part 15 of the FCC Rules. Operation is subject to the following two conditions:
1. This device may not cause harmful interference;
2. This device must accept any interference received, including interference that may cause undesired operation. Changes
or modifications not expressly approved by the party responsible for compliance could void the user’s authority to operate
the equipment.
Page 11
Nissan Techmate Tech•Cam
User Guide
Troubleshooting
Problem
Tech•Cam will not start or
Power On
LCD monitor will not charge
Image on the LCD display is
too dark or too light
Possible causes
Possible Solutions
• LCD Monitor Not charged
• Use power adapter to charge LCD monitor
• LCD Monitor needs to be re-set
• Charge AA batteries in the Camera Handle Assembly
• AA batteries in Camera Handle Assembly need
charging or replacement
• Perform LCD monitor re-set procedure by inserting
a pin into the back of the monitor. The hole is
labeled “reset”
• Power adapter cable not attached properly to
LCD Monitor
• Make sure power adapter cable is connected
correctly at the LCD monitor connection point
• Power adapter cable not connected to power
• Make sure that the power adapter cable is securely
plugged into the 110 VAC wall socket
• LEDs near camera need adjustment
• LCD Monitor needs adjustment
• Use dial on camera handle assembly to adjust
brightness of LEDs
• Use contrast and brightness buttons on LCD monitor to
adjust the image
When using the Tech•Link
Wireless Video Receiver,
the two images appear on
the PC display
• Software drivers for Tech•Link are not
properly installed
• Dongle needs to be restarted
• Uninstall drivers from add/remove programs. Reinstall
When using the Tech•Link
Wireless Video Receiver,
there seems to be
interference with the
PC display image
• Wireless radio from the C-III could be causing
the interference
• Make sure the Tech•Link wireless video receiver is
connected to the C-III with the USB extension cable
• Other external wireless devices could be causing
the interference
• Turn Off the wireless radio on the C-III or on the laptop
or PC that you are using
• Unplug dongle from USB and wait 10 seconds.
Reconnect dongle
• Try to keep the Tech•Cam unit as close to the Tech•Link
wireless video receiver as possible
Note: Some interference may not be able to be
prevented due to the nature of this product.
The camera flexible
tube lens appears to be
scratched. There is a line
on the monitor
• End user may have bumped the camera into a solid
surface which created the scratch
LED lights don’t turn
on or adjust
• Switch may not be properly rotated
• Ensure switch is rotated into the on position
• Camera may be bad
• Swap cameras to see if LEDs are bad on camera
• Pixels may be out on monitor
• Use mild detergent to clean the lens
• Swap camera assemblies
• Switch may be bad
Page 12
Nissan Techmate Tech•Cam
User Guide
Parts List
Service P/N
Description
J-50079-1
1 meter long camera, flexible tube cable with 9mm outside diameter
J-50079-2
1 meter long camera, flexible tube cable with 4.5mm outside diameter
J-50079-3
Video Borescope Handle
J-50079-4
Monitor, Power Adapter US
J-50079-5
USB Dongle
J-50079-6
LCD Monitor, 3.5”
J-50079-7
Magnetic Mount
J-50079-8
Accessory Kit: Camera Attachment Mounting Sleeve, Camera Magnet Attachment, Camera Hook Attachment,
Camera Mirror Attachment
Warranty
THIS WARRANTY IS EXPRESSLY LIMITED TO ORIGINAL RETAIL BUYERS OF BOSCH ELECTRONIC
DIAGNOSTIC TOOLS (“UNITS”).
Bosch Units are warranted against defects in materials and workmanship for two years (24months from date of
delivery. This warranty does not cover any Unit that has been abused, altered, used for a purpose other than
that for which it was intended, or used in a manner inconsistent with instructions regarding use. The sole
and exclusive remedy for any Unit found to be defective is repair or replacement, at the option of Bosch. In no
event shall Bosch be liable for any direct, indirect, special, incidental or consequential damages (including lost
profit) whether based on warranty, contract, tort or any other legal theory. The existence of a defect shall be
determined by Bosch in accordance with procedures established by Bosch. No one is authorized to make any
statement or representation altering the terms of this warranty.
THE ABOVE WARRANTY IS IN LIEU OF ANY OTHER WARRANTY, EXPRESS OR IMPLIED, INCLUDING ANY
WARRANTY OF MERCHANTABILITY OR FITNESS FOR A PARTICULAR PURPOSE.
Unit software is proprietary, confidential information protected under copyright law. Users have no right in or
title to Unit software other than a limited right of use revocable by Bosch. Unit software may not be transferred
or disclosed without the written consent of Bosch. Unit software may not be copied except in ordinary backup
procedures.
For questions regarding Replacement Parts, New Orders or Technical Support, contact TECH-MATE
Customer Service at 800-662-2001.
Page 13
Copyright
No part of this manual may be reproduced, stored in a retrieval system or transmitted, in any form or by any means,
electronic, mechanical, photocopying, recording, or otherwise, without the prior written permission of Bosch.
Disclaimer
All information, illustrations, and specifications contained in this technical instruction manual are based on the
latest information available at the time of publication. The right is reserved to make changes at any time without
obligation to notify any person or organization of such revisions or changes. Further, Bosch shall not be liable for
errors contained herein or for incidental or consequential damages (including lost profits) in connection with
the furnishing, performance or use of this material.
1-800-662-2001 • nissantechmate.com
560300 REV B
March 2011