1
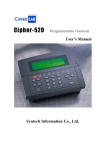
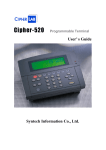
CIPHER-510
PROGRAMMABLE TERMINAL
TIME AND ATTENDANCE SYSTEM
USER'S MANUAL
V1.0
Mar 1, 1999
CipherLab Co. Ltd.
Care has been taken to ensure that the information included in this manual is complete and accurate. However,
CipherLab reserves the right to change any specification at any time without prior notice
COPYRIGHT 1999, CIPHERLAB CO. Ltd.
.
Nomenclature
510 Front View
LCD Display
LED Indicator
Barcode/Magn
etic
Card Reader
LCD View Angle
Membrane Keypad
Keyboard Port
Power Switch
WAND Port
510 Rear View
DC Jack for
Power Input
RS-232/ Digital
IO Port
RS-485 Port
-i-
RS-232 Port
Nomenclature
510 Battery Pack Holder
- ii -
Table of Contents
1.
FEATURES OF CIPHER-510......................................................... 1
2.
THE RESIDED TIME AND ATTENDANCE SYSTEM .......................... 2
2.1.
2.1.1.
2.1.2.
2.2.
2.2.1.
2.2.2.
2.3.
2.3.1.
2.3.2.
2.4.
2.4.1.
2.4.2.
2.4.3.
2.5.
2.6.
2.7.
2.8.
2.9.
2.10.
2.11.
2.12.
2.13.
2.14.
2.15.
2.16.
2.17.
2.18.
3.
PROGRAMMING SYSTEM PARAMETERS .........................................12
3.1.
3.2.
3.3.
3.3.1.
3.3.2.
3.3.3.
3.3.4.
3.3.5.
4.
SYSTEM INTEGRATION ........................................................................... 2
Stand Alone System .................................................................... 2
Multi-station System ................................................................... 2
WORKING SHIFT ..................................................................................... 3
Automatic Shift Change ............................................................. 3
Prefix Code ................................................................................. 4
ID ENTRIES ............................................................................................. 4
Bar Code ..................................................................................... 4
Magnetic Card ............................................................................ 5
ID ENTRY QUALIFICATION .................................................................... 5
Company Code ........................................................................... 5
ID Length .................................................................................... 5
Duplicate Entries........................................................................ 5
LCD DISPLAY......................................................................................... 5
MEMBRANE K EYPAD.............................................................................. 6
DATA MEMORY & BACKUP BATTERY .................................................. 7
CALENDAR CHIP ..................................................................................... 7
PROGRAM MEMORY(FLASH) ................................................................. 7
OPERATIONAL BACKUP BATTERY ..................................................... 7
LED INDICATOR ................................................................................. 8
BUZZER ............................................................................................... 8
PRINTER PORT .................................................................................... 8
DIGITAL INPUT / OUTPUT................................................................... 9
STATION ID ........................................................................................ 9
RS232 PORT ....................................................................................... 9
RS485 PORT .....................................................................................10
MOUNTING STYLE ............................................................................11
MASTER CARD ......................................................................................12
PASSWORD ............................................................................................12
CONTENTS OF MANAGER MODE ..........................................................12
Programming Procedures........................................................12
Setup ..........................................................................................14
Self Test .....................................................................................21
Initiate System...........................................................................21
Clone .........................................................................................22
CIPHER-510 INSTALLATION ..................................................................23
4.1.
4.1.1.
4.1.2.
4.1.3.
4.2.
4.3.
4.4.
4.5.
4.6.
4.7.
4.8.
4.9.
4.10.
4.11.
4.12.
CHARACTERISTICS ................................................................................23
Electrical...................................................................................23
Environmental ..........................................................................23
Physical .....................................................................................23
NOMENCLATURE ..................................................................................24
CIPHER-510 MAIN BOARD ...................................................................26
POWER SOURCE ....................................................................................27
MAGNETIC CARD READER CONNECTOR .............................................27
EXTERNAL K EYBOARD.........................................................................28
RS232 CONNECTION ............................................................................29
RS485 CONNECTION ............................................................................30
SERIAL PORT FOR PRINTER & DIGITAL I/O ........................................32
WAND PORT ...................................................................................32
CHANGE MEMORY CAPACITY .........................................................33
CHANGE MOUNTING STYLE.............................................................33
- iii -
Table of Contents
5.
OPERATING 510...........................................................................................34
6.
RS232 COMMAND .......................................................................................36
6.1.
6.2
6.3
Data Management Commands…………………………………36
Inquire System Parameter Setting Commands………………39
Program System Parameter Commands……………………...43
- iv -
510 T&A User's Manual
1. Features of Cipher-510
The CIPHER-510 Programmable Terminal offers outstanding features in a compact and rugged
housing suitable for industrial applications. It can be used alone or networked for up to 32
stations and is an ideal solution for companies of all sizes. It can be programmed in “C” or
“Basic”. With its versatile programmable features, it can be easily configured to accommodate
most application needs. Features of the Cipher-510 are listed below.
⋅ TLCS-900 16 bit CPU running at 9.8304 Mhz
⋅ Program : 128 KB flash memory
⋅ Data memory : 128 KB to 512 KB SRAM (on an 128 KB base)(up to 1MB)
⋅ Fine-tunable calendar chip
⋅ Memory & calendar chip backup 3.6V NiCd battery
⋅ 1.2V X 7, 1500mAh rechargeable NiCd battery for operation backup
⋅ Battery/external DC voltage monitor circuit on-board
⋅ Self-shutdown circuit on-board
⋅ slot-type bar code input ports
⋅ 2cardreaderreaders
ports for barcode scanners (Wand or Laser-emulation), or up to dual-track magnetic
⋅ 20 characters by 2 lines LCD display with adjustable backlight and viewing angle
⋅ standard 4 by 4 matrix membrane keypad (expandable up to 8 by 8)
⋅ 2 photo-isolated digital input
⋅ 2 photo-isolated digital output
⋅ external keyboard port (AT keyboard)
⋅ RS232 port X 2
⋅ RS485 port
-1-
510 T&A User's Manual
2. The Resided Time And Attendance System
The CIPHER-510 Programmable Terminal is flexible for versatile applications.
Especially,
the CIPHER-510 is a highly efficient yet cost effective tool for employee time and attendance
control. Users can easily create their own program and download this program to the Cipher510 as they wish. But for users’ convenience, CipherLab has developed the Time and
Attendance system which is resided in the Cipher-510.
Following describes the operations of
the resided system which version control is V.1.4.
2.1. System Integration
A Cipher-510 system can be configured as a standalone system or a multi-station system. If
only one Cipher-510 is needed, it should be configured as stand alone system. If multiple 510s
in a network are desired, the multi-station configuration should be used.
2.1.1. Stand Alone System
The line connection setting should be set to single. The Cipher-510 is directly connected to the
host computer through the RS232 port located on the rear panel of Cipher-510 (phone-jack
connector). Since there is only one Cipher-510 in the system, the RS485 communication port is
disabled.
2.1.2. Multi-station System
In multi-station system, all 510s are connected to the RS485 communication line, and only one
of the Cipher-510 is connected to the host computer. The Cipher-510 which is connected to the
host computer is the master station of the Cipher-510 network and the rest of the 510s are
slave stations. All the 510s connected on the same RS485 network should have different
station IDs assigned or it will corrupt the RS485 communication. Please refer to the section
Station ID for more detail description.
1.
Master Station
The master station is the manager of the RS485 communication. It schedules and handles all the
RS485 communication tasks and performs like a gateway between host computer and all the
Cipher-510 stations. Also the transaction data of the ID entry made on slave 510s are sent
immediately to the master station which is waiting for the host computer to fetch. So it is more
appropriate that the master station should have a larger memory capacity than slave stations. A
large memory on the slave station would be less meaningful.
-2-
510 T&A User's Manual
In case the memory full condition occurred on the master station, the master station can not
accept ID entries anymore and a warning is given (showing MEMORY FULL message on the
LCD display) when ID entries are made on the master station. But for the slave stations, ID
entries will be accepted and stored in their own memory. The slave stations will automatically
send the stored data to the master station when there is available free memory on the master
station.
The line connection setting of the master station should be set to master. The RS232
connection to the host computer should be made to the phone-jack connector located on the rear
panel of 510, and the RS485 connection to the slave station should be made to the male (or
female) DB9 connector located on the rear panel of Cipher-510.
2.
Slave Station
The line connection setting should be set to slave. The RS485 bus line from previous Cipher510 should connect to the male (or female) DB9 connector located on the rear panel of 510, and
the RS485 bus line to the next slave station should connect to the female (or male) DB9
connector.
2.2. Working Shift
For time & attendance applications, besides the employee number and registration time, the
working shift type (which is used to indicate the cause of attendance / leave) also has to be
recorded. Basically Cipher-510 provides 4 shift types as shown on the keyboard (F1 to F4), and
can be extended to 40 shift types with the aid of Prefix Code feature which will be described
later. The LED beside the F1 to F4 keys will be lit to indicate which is the active (registered)
shift type. It is the responsibility of employees to select the desired shift type before scanning
the ID card.
2.2.1. Automatic Shift Change
Instead of manual alteration (troublesome tender) of the shift type, the Cipher-510 can alter the
shift type automatically (hands free) according to the timetable programmed into Cipher-510.
The timetable consists of 16 entries of time period (hour & minute) with the desired shift type.
The filling of the entries of the timetable can be in any order, and the Cipher-510 will constantly
scan all the 16 entries to see if there is a match in the time period and update the working status
of shift type. To eliminate (cancel) a pre-programmed timetable entry, simply changes its shift
type to 0, the Cipher-510 will ignore this entry. The following is an example of the timetable
setting.
-3-
510 T&A User's Manual
Entry No.
1
3
5
others
Time Period
0830-1630
0030-0830
1630-0030
don't care
Shift Type
1
3
2
0
In cases where the employee wants to alter the working shift number, he/she can simply press
the desired function keys (F1-F4) on the membrane keypad. The Cipher-510 will store the new
shift number instead of the original one. After current entry is done, the Cipher-510 will restore
the shift number according to the time- table. Note that if the employee fails to scan his/her ID
cards within 5 seconds after the shift type is changed, the shift number will be restored
according to the time- table defined. This is necessary to assure correctness of following entries.
2.2.2. Prefix Code
In cases that four shift types are not sufficient for the specific application, an auxiliary prefix
code (1-digit from 0 to 9) can be utilized to further extend the overall shift types to 40. Prior to
scan the ID card, the employee can press one of the digits (from 0 to 9) of the membrane
keypad, and the Cipher-510 will store the shift type and this prefixed digit. Once this function
was enabled and the employee forgot to press this prefix code, the Cipher-510 will discard this
entry, give a warning and ask the employee to try again.
2.3. ID Entries
The employee ID can be input to the Cipher-510 by either scanning barcodes or magnetic cards.
This depends on which input device is installed on Cipher-510. However, the ID input via
membrane keypad is also allowed only when this feature is enabled.
2.3.1. Bar Code
There are 2 bar code input ports supported on the Cipher-510. Besides the built-in slot type
device, an auxiliary bar code device can be attached via the DIN-6P connector as depicted in the
Nomenclature. (BCR is marked on the housing)
The barcode decoding software of T&A system supports most of the commercially available
symbologies such as,
CODE39
CODE128
INTERLEAVE 25
INDUSTRIAL 25
CODABAR
UPC/EAN
⋅
⋅
⋅
⋅
⋅
⋅
-4-
510 T&A User's Manual
These symbologies are automatically discriminated by the decoding logic and can be
individually enabled or disabled to discriminate unwanted entries.
2.3.2. Magnetic Card
A dual track magnetic card reader can be installed on Cipher-510 for ID entry. But a singletrack magnetic card reader is used for time and attendance application normally. The magnetic
card standard (whether JIS, ISO track 1, ISO track2, or ISO track 3) and the direction of scan is
automatically detected by the decoding logic.
2.4. ID Entry Qualification
Cipher-510 provides several ways to qualify the ID entries made on the station. They are
described below.
2.4.1. Company Code
A company code is a string of up to 30 characters which can be programmed into Cipher-510 to
enable the qualification of all ID inputs. If there is an ID input which does not have the
company code in the beginning of the ID (failed in company code checking), Cipher-510 will
initiate a warning. This is usually used to check against out-siders. By programming the
company code with a null string, this company code checking feature will be disabled.
2.4.2. ID Length
An ID length check can be enabled to prevent faulty entries. A 2-digitss ID length from 01 to 99
can be programmed into Cipher-510 to enable the checking. Only the ID entries with exactly
the same ID length as programmed are accepted. An ID length setting of 00 will disable the ID
length checking.
2.4.3. Duplicate Entries
Normally, Cipher-510 will record all ID entries. But if there is an ID entry with the same ID
code, working shift type, and prefix code as the previous entry within 3 minutes, the new ID
entry will be discarded (not recorded). This is to eliminate unnecessary duplicate entries made.
2.5. LCD Display
A 2 x 20 LCD is used to display current system time, scanned card ID, system message and so
on. This is an easy-to-read wide viewing angle LCD equipped with LED back light and can
-5-
510 T&A User's Manual
easily be read even in a dim environment. The viewing angle can be adjusted via a variable
resistor as depicted in the Nomenclature.
2.6. Membrane Keypad
A 16-key membrane keypad can be used for handy data entry, such as employee ID code,
working shift number, setup value and so on.
F1 - F4
These keys are mainly used for working shift type selection (from 1 to 4).
Each key was accompanied with a corresponding LED, one and only one
of these four LEDs was lit to show the current working shift type. These
keys are also used during setup, which will be described under the section
Setup.
SHIFT
This is an auxiliary key used to toggle usages of keys 0-9. An
accompanying LED is used to show the current shift status. When this LED
was off, the 0-9 stand for normal numerics 0 to 9, otherwise the upper-left
characters printed on the keypad are used (that is A-F, FUNC and so on).
Basically, this key functions are similar to CAPSLOCK of conventional
keyboards rather than SHIFT, the user simply presses it once to change the
shift status without the need to press it all the time.
ENTER
Entry delimiter/terminator, functions as ENTER or RETURN of
conventional keyboards and is used to signify end of current enrty.
0-9
numerics 0 to 9
A-F
characters A to F
FUNC
left arrow (<)
reserved, not applicable to current application
This key functions as BACKSPACE of conventional keyboards and is used
to erase the pre-entered key during data entry.
right arrow (>)
clear
This key functions as SPACE of conventional keyboards.
This key functions as RUBOUT of conventional keyboards and is used to
clear the current data entry. Keys entered after previous ENTER will all be
erased. This key has no effect on ID entries via scanning barcode or
magnetic card.
-6-
510 T&A User's Manual
2.7. Data Memory & Backup Battery
A base memory of 128KB SRAM is equipped for data storage and is expandable up to 512KB.
A 3.6V 60mAh rechargeable NiMH battery is used to keep the data when the main power is
turned off. And since it is rechargeable, constant replacement of this battery is not necessary.
Please be noted that the normal life of the NiMH battery is about 2 years.
2.8. Calendar Chip
An on board calendar chip is used to keep the system time running. This chip is also backed by
the rechargeable NiMH battery on the main PCB board even when the main power was turned
off. In a multi-station configuration, the master station will check the system time among all
stations at every minute sharp. This is to keep the system time of all Cipher-510 station exactly
the same.
2.9. Program Memory(Flash)
A 128 Kbytes flash memory is used to store the program code and is guaranteed to last at least
100,000 erase/program cycles. Differs from conventional RAMs, no battery is needed to keep
the program or data stored in the memory.
2.10. Operational Backup Battery
When fully charged, the 1.2V by 7, 1500 mAh rechargeable NiCd battery pack keeps the
Cipher-510 working after the external line power was down. This battery pack is charged as
long as the line power is asserted (regardless of the main power switch) and automatically takes
over when the line power was down. A battery monitoring circuit will activate the BAT. LOW
warning LED when the battery is going to be drained and Cipher-510 will shutdown the system
when the battery is almost fully drained. This shutdown circuit keeps the battery from fully
drained, which will degrade the useful life of the battery. This battery keeps this time &
attendance terminal almost non-interrupted and is a must under most circumstances.
These seven batteries are firmly packed and should not be torn apart by any means. The safe
operating temperature for this battery pack ranges from -20℃ to 50℃. Beyond this range,
permanent destructions might occur. A separate battery holder provides further protection of the
battery pack and eases the installation. This holder locates right underneath the main box as
been depicted in the Nomenclature and is also used for mounting the Cipher-510 on the wall or
on the table.
-7-
510 T&A User's Manual
2.11. LED Indicator
Several LEDs located at the top-left corner of the main-panel (other than those on the
membrane keypad) are equipped to provide instant indications of current system status,
POWER
This is a red LED to show the presence of external line power, it works
even when the power switch is not turned on.
READY
If the Cipher-510 is working properly, the yellow LED will be flashing
with a period of 2 seconds all the time. This is the mandatory way to see
whether the Cipher-510 is working or not.
GOOD READ
This is a green LED and lit for one second upon successful decoding of
bar code/magnetic card entry.
BAT. LOW
This is a red LED to show the battery which is going to be drained.
Usually the Cipher-510 can still works for 30 minutes to an hour after
this LED was lit. Care should be taken that this LED works only when
external line power was down, and the LED should be off if the line
power was asserted.
F1 to F4
Shift
These are red LEDs to show the working shift (F1, F2, F3, or F4).
This is a red LED to show status of “Shift”.
2.12. Buzzer
Besides LEDs, a buzzer is equipped for further indication of the system status. Combinations of
tones and periods are used to signify various conditions and will be more described in later
sections.
2.13. Printer Port
A serial printer can be directly connected to the aux-RS232 port located at the rear panel of
Cipher-510 (RS-232C/DIO is marked on the housing). If the on-line printing function is enabled,
the ID entries are printed when they are made. This aids in immediate verifications or further
examinations as a backup copy of all entries.
-8-
510 T&A User's Manual
2.14. Digital Input / Output
The Cipher-510 provides 2-digitsal inputs and 2-digitsal outputs for controlling and monitoring
external devices. These inputs and outputs are photo-isolated and share the same DB-25
connector as the COM3 (RS-232C/DIO is marked on the housing).
For the T&A application, two digital output signals are provided for external speaker and door
lock attachment. The first digital output which is connected to an external speaker/buzzer can be
used for scheduling control, such as lunch time, coffee break, off duty, ... and so on. Cipher-510
will automatically activate the digital output according to a timetable programmed into Cipher510. The timetable consists of 16 entries of starting time (hour & minute) and the desired ON
duration (00 - 99) setting in seconds. The filling of the entries of the timetable can be in any
order, and the Cipher-510 will constantly scan all the 16 entries to see if there is a match in the
starting time and activates the digital output with the programmed duration. To eliminate
(cancel) a pre-programmed timetable entry, simply changes its activation duration to 00, the
Cipher-510 will ignore this entry. The following is an example of the timetable setting.
Entry No. Starting Time Duration
1
0800
10
3
1600
15
10
1200
20
Others
don't care
00
Relay Action
10 seconds starts at 08:00
15 seconds starts at 16:00
20 seconds starts at 12:00
none
The second digital output which is connected to a door lock can be used for access control.
Cipher-510 will automatically activate the digital output for opening the door lock when user
punches the card.
2.15. Station ID
A station ID is a 2-digit number (01 - 99) that is assigned (programmed) to each Cipher-510
station. It is used to identify each Cipher-510 station in the system and it plays an important role
in RS-485 / RS-232 communications. Since the station ID is used to identify each Cipher-510
station in the system, there should not have any stations with the same station ID assigned.
2.16. RS232 Port
The RS232 port (COM1) is used for host computer connections. Baud rate, data bits, stop bits
and parity settings can be selectable. The possible values for each setting are listed below.
-9-
510 T&A User's Manual
•
Baud rate : 38400/19200 / 9600 / 4800 / 2400 / 1200 / 600 / 300
•
Data Bits : 7 / 8
•
Parity : Even / Odd / None
•
Handshake : CTS-RTS / XON-XOFF / None
The phone-jack connector located on the rear panel of Cipher-510 (RS-232C is marked on the
housing) is used for RS232.
2.17. RS485 Port
RS485 is a high speed multi-drop communication interface which allows up to 32 stations
(nodes) to be connected on the same bus line and the total distance from the first Cipher-510 to
the last one can extend to 1.2Km long. RS485 has been long used as industrial standard and is
adequate for multi-station time & attendance applications. Being an efficient interface, it is also
cost effective since inexpensive shielded twist-pair cables can be used.
The RS485 communication port of Cipher-510 is exclusively used for connecting multiple
Cipher-510 stations. A unique communication protocol is utilized to ensure data security and
integrity. There is an electrical limitation of the RS485 on the maximum number of nodes can
exist on the RS-485 bus (32 stations). But by use of RS485 repeaters, the maximum number of
Cipher-510 stations allowed on the RS485 bus can be extended to 99 stations.
The RS485 port intentionally occupies two connectors (male and female DB9 connectors
located on the rear panel of Cipher-510 which RS-485 is marked on the housing), that is same
signals are connected to these two connectors. As one of them is male and the other one is
female, if a machine is to be removed from the net for maintenance, cables from previous
station can directly connects to the cable goes to the next station and the net remains unaffected.
- 10 -
510 T&A User's Manual
2.18. Mounting Style
Cipher-510 can either be mounted on a desk or on to a wall (wall mounted) as shown on the
following figure. Normally Cipher-510s are shipped to customers in a desk mount style. By
detaching the battery pack holders, turning the holder 180 degrees, and reattaching the holder,
the Cipher-510 will be changed from desk top mounting style to wall mounted style.
Wall Mount
Desk Top Mount
Figure 2-1 Wall Mount and Desk Top Mount
- 11 -
510 T&A User's Manual
3. Programming System Parameters
The system parameters of Cipher-510 T&A system can be programmed manually or by RS232
commands. Manually programming the Cipher-510 T&A system is described in this section and
programming the Cipher-510 via RS232 commands will be described under the section RS232
Command.
Beside normal working mode, a special mode called manager mode is also provided to setup
system parameters, maintain and so on.
To prevent from neither illegal nor unwanted entry, a
special label (master card) must be swiped followed by correct password entry.
3.1. Master Card
A special card ID is designated as the master card. Scanning this card will instruct the Cipher510 to enter the setup mode and then the system parameters can be accessed. The default
(factory) setting of the master card is 1234567890.
3.2. Password
To further secure the system, a password (up to 6 digits) must be correctly entered after
scanning of the master card. The default (factory) setting of the password is none which implies
no password is needed.
3.3. Contents of Manager Mode
Upon successful entry, the following message will be shown on the display,
System Manager
1.Setup
Under this mode, 4 major tasks can be done as follows,
Setup
Self-test
Initialize System
Flash Clone
⋅
⋅
⋅
⋅
3.3.1. Programming Procedures
For maximum clearness, a step-by-step procedure from the beginning is described below.
- 12 -
510 T&A User's Manual
1.
Make sure that the Cipher-510 is in working mode (510 displaying current system time on
the LCD display). If not, the Cipher-510 might be already in the setup mode, press F2 key
to go back to the working mode.
99/03/01 12:00:10
2.
Scan the master card. If successfully scanned with the correct master card, the Cipher-510
will show,
PASSWORD :
3.
Now Cipher-510 is waiting for entry of the password. However, if the password was set to
none, this message will not be shown and this step is simply ignored. The system manager
must key in the password now. To avoid side-peeking the password, the screen will simply
show "*" instead of the real password entered. Upon completion of the password entry,
press the ENTER key. Note that neither the backspace key nor the clear key is active now,
the system manager must enter the right password at one time. If the password was not
correct, the Cipher-510 will activate a warning beep (lots of consecutive beeps) then go
back to the working mode. If the password is correctly entered, Cipher-510 will be in the
System Management mode.
System Manager
1.Setup
4.
Press the ENTER key and now the Cipher-510 is in the setup mode and is ready to accept
system parameter modification. The Cipher-510 will show the name of parameter on the
upper side of the display and the original setting value on the lower side.
1. Line Connection:
=Master
5.
Press ENTER key then you can change the setting value of this parameter. Use the” ” and
“ ”key for selecting a new setting value or type in a new value via numeric keys. Then
press ENTER key to conclude the new setting value.
- 13 -
510 T&A User's Manual
1. Line Connection:
-><Single>
6.
Instead of key in new value, simply press the ” ” or “ ”key will leave this setting
unchanged and fine out another parameter. This is a handy way to simply peek the current
settings. Note that the backspace (Shift+7) key and the clear key can be used for handy
editing.
7.
After all the system parameter modification are completed, the F1 key must be pressed to
update these modifications and save the new settings into the program memory. System
will restart with the new settings. If F2 key instead of F1 key is pressed, all modifications
of the system parameters will be discarded and retain the original settings.
3.3.2. Setup
After enter the setup mode, user can program the setting of each system parameter via keypad.
All the system parameters available are listed below with the parameter number shown on the
headings. Detail descriptions are given and the allowed settings are shown.
1. Line Connection Setting
Selectable values of the communication line connection parameter are listed below.
<Master> (default value)
Reserved
Single
Slave
⋅
⋅
⋅
⋅
2. On Line Printing Setting
Selectable values of the On-line printing of the ID entries are listed below.
<Disable> (default value)
Enable
⋅
⋅
3. Prefix Code Setting
Selectable values of the prefix code are listed below.
<Disable> (default value)
Enable
⋅
⋅
- 14 -
510 T&A User's Manual
4. Keyboard Entry Setting
Selectable values of the keyboard entry are listed below.
< Enable > (default value)
Disable
⋅
⋅
5. Station Lock Setting
Selectable values of the station lock are listed below.
<Not Locked> (default value)
Locked
⋅
⋅
6. Station ID Setting
Acceptable values of the keyboard entry are list below. Note that In case of multi-station
connection, care should be taken not to set more than one station with the same station ID
which will cause mal-function of the internal RS485 communications.
<1> (default value)
integer up to 99
⋅
⋅
7. Master Card Setting
The master card ID can be modified as needed. However, differing from other parameter
modifications, the new master card must be inputted by scanning the card not by entering from
keyboard. Up to 20 characters of master card ID can be set.
<1234567890> (default value)
please scan the new master card
⋅
⋅
8. Password Setting
Up to 6-digits passwords can be set to further secure the system. Note that if a null string was
entered, the password examination will be skipped when entering setup mode. And if a single
ENTER key is pressed without preceding digits, it will be treated as entering a null password.
That is, peeking only function is not available for this parameter since there is no way to
distinguish between peeking-only and a null password.
<none> (default value)
enter the new password
⋅
⋅
- 15 -
510 T&A User's Manual
9. Time Setting
This is used to modify the system time of Cipher-510. A 12-digits value (YYMMDDHHNNSS)
must be completely entered as follows,
YY : last 2-digits of the year, for example 94 for 1994
MM : month (1 - 12)
DD : day of the month (1 - 31)
HH : hour (24 hour format, 0 - 23)
NN : minute (0 - 59)
SS : second (0 - 59)
⋅
⋅
⋅
⋅
⋅
⋅
10. Timer Fine Tune Setting
A fine-tunable calendar chip is equipped in Cipher-510. The speed of the calendar chip can be
tuned in units of ppm via a digital trimming register. The trimming range is from 0 to 255 ppm.
The bigger value of the trimming register the slower the calendar chip runs. For instance, if the
calendar chip is 1 second slow in one day then the value of the trimming register should
decrease 12 to correctly adjust the calendar chip. During system initialization, this register is
set to 186.
<186> (default value)
0~255
⋅
⋅
11. ID Length Setting
A 2-digits value from 0 to 99 can be set to qualify the ID entries. If set to 0, ID length will not
be checked.
<0> (default value)
0~99
⋅
⋅
12 : Bar Code Symbology Setting
The Cipher-510 decoding software supports 6 types of symbology and each symbology can be
individually enabled/disabled. Press the ENTER key for changing these settings and then press
the F2 key to conclude all the new settings.
12.1. Code 39
Selectable values of Code 39 are listed below.
< Enable > (default value)
Disable
⋅
⋅
- 16 -
510 T&A User's Manual
12.2. Code 128
Selectable values of Code 128 are listed below.
< Enable > (default value)
Disable
⋅
⋅
12.3. Interleave 25
Selectable values of Interleave25 are listed below.
<Enable> (default value)
Disable
⋅
⋅
12.4. Industrial 25
Selectable values of Industrial25 are listed below.
<Enable> (default value)
Disable
⋅
⋅
12.5. Codabar
Selectable values of Codebar are listed below.
<Enable> (default value)
Disable
⋅
⋅
12.6. UPC/EAN
Selectable values of UPC/EAN are listed below.
<Enable> (default value)
Disable
⋅
⋅
13 : COM1 Setting
The communication port (COM1) attributes can be changed individually. Press the ENTER key
for changing these settings and then press the F2 key to conclude all the new settings.
13.1 COM1 BaudRate
Selectable values of COM1 baud rate are listed below.
38400
⋅
- 17 -
510 T&A User's Manual
⋅
⋅
⋅
⋅
⋅
⋅
⋅
19200
<9600> (default value)
4800
2400
1200
600
300
13.2 COM1 Parity
Selectable values of COM1 parity are listed below.
<none> (default value)
Odd
Even
⋅
⋅
⋅
13.3 COM1 Data Bits
Selectable values of COM1 data bits are listed below.
<8> (default value)
7
⋅
⋅
13.4 COM1 Handshake
Selectable values of COM1 stop bits are listed below.
<none> (default value)
XON
CTS
⋅
⋅
⋅
14 : COM3/Aux Device Setting
The auxiliary communication port (COM3) attributes can be changed individually. Press the
ENTER key for changing these settings and then press the F2 key to conclude all the new
settings.
14.1 COM3 BaudRate
Selectable values of COM3 baud rate are listed below.
38400
⋅
- 18 -
510 T&A User's Manual
⋅
⋅
⋅
⋅
⋅
⋅
⋅
19200
<9600> (default value)
4800
2400
1200
600
300
14.2 COM3 Parity
Selectable values of COM3 parity are listed below.
<none> (default value)
Odd
Even
⋅
⋅
⋅
14.3 COM3 Data Bits
Selectable values of COM3 data bits are listed below.
<8> (default value)
7
⋅
⋅
14.4 COM3 Handshake
Selectable values of COM3 stop bits are listed below.
<none> (default value)
XON
CTS
⋅
⋅
⋅
15. Alarm Table Setting
After selecting this parameter, the original settings will be shown on the display, for example,
15.Alarm 01
=16:00 010 SEC
For the example above, the original settings of the timetable entry 01 is 16:00 for 10 seconds.
Following steps can be adopted,
- 19 -
510 T&A User's Manual
⋅ -ToHH
modify this entry, enter a 7 digit string (HHMMDDD), where
: hour (24 hour format, 0 - 23)
-- MM
: minute (0 - 59)
DDD : digital output duration in seconds (01 - 999, 00 if this entry is to be ignored)
⋅⋅ ToPressexitthe”from” this
parameter setting (peeking only), press ENTER key directly.
or “ ”key to shift to next timetable entry. The timetable entry will cycle from
⋅ 01Pressto 16F2accordingly.
key to conclude above settings.
16. Workshift Table Setting
After selecting this parameter, the original settings will be shown on the display, for example,
16.work shift 01
=08:00-10:00 1
For the example above, the original settings of the timetable entry 01 is 08:00 to 10:00 for
working shift type 1.
To modify this entry, enter a 9-digits string (HHMMhhmmW), where,
HH : hour of the starting time (24 hour format, 0 - 23)
MM : minute of the starting time (0 - 59)
hh : hour of the ending time (24 hour format, 0 - 23)
mm : minute of the ending time (0 - 59)
W : working shift type (1 to 4, 0 if this entry is to be ignored)
Press the” ” or “ ”key to shift to next timetable entry. The timetable entry will cycle from
01 to 16 accordingly.
Press F2 key to conclude above settings.
⋅
⋅
⋅
-
17 : LCD Backlight Setting
The LCD backlight can be adjusted by this parameter setting.
Acceptable setting values are
list below.
<high> (default value)
off
low
medium
⋅
⋅
⋅
⋅
18 : Buzzer Volume Setting
The buzzer volume can be adjusted by this parameter setting.
list below.
<loudest> (default value)
louder
⋅
⋅
- 20 -
Acceptable setting values are
510 T&A User's Manual
⋅
⋅
loud
quiet
19 : Max Station ID Setting
The station ID number can be limited by this parameter setting. To modify this setting, enter a
2-digits number from 0 to 99.
<99> (default value)
0-99
⋅
⋅
20 : Year Format Setting
The year format of system time can be selected as the 2-digits year or 4-digits year.
Acceptable setting values are list below.
2-digit-year
<4-digit-year>(default value)
⋅
⋅
3.3.3. Self Test
This mode provides a simple but yet efficient way for diagnostic.
Press ENTER key for
executing the following items test one by one,
Flash test
SRAM test
Beeper test
LCD test
LED test
DI & DO test
COM1 test
COM2 test
COM3 test
485 test
ADC test
Calendar test
Reader test
Keypad test
AT Keyboard test
Shutdown test
⋅
⋅
⋅
⋅
⋅
⋅
⋅
⋅
⋅
⋅
⋅
⋅
⋅
⋅
⋅
⋅
3.3.4. Initiate System
This is used to set all system parameters to their default value and initialize the file systems.
Care should be taken, as this will destroy all data stored in the memory.
- 21 -
510 T&A User's Manual
3.3.5. Clone
This is used to copy the program in FLASH memory to another terminal.
diagnostic or software update.
- 22 -
Usually it is used for
510 T&A User's Manual
4. Cipher-510 Installation
This section contains the hardware information of Cipher-510. The Cipher-510 main board, the
connections inside 510, the relay output port, the RS232 port and the RS485 ports are all
described in this section.
4.1. Characteristics
Basic characteristics of the Cipher-510 are listed below,
4.1.1. Electrical
⋅ thisMainMUST
Power Supply Voltage : 12V ±5% DC (Unlike the Cipher-5000 series data terminal,
be a regulated +12V DC)
⋅ attached
Power consumption : 0.5W maximum with LCD backlight off and no external devices
4.1.2. Environmental
⋅
⋅
⋅
⋅
⋅
Humidity (operating) : non-condensed 20% to 90%
Humidity (storage) : non-condensed 10% to 95%
Temperature (operating) :
0 to 50 °C
Temperature (storage)
: -20 to 70 °C
EMC regulation : FCC class A and CE approved
4.1.3. Physical
⋅
⋅
⋅
⋅
Dimensions : 261 X 125 X 100 mm (including battery holder)
Weight : 1 Kg including all batteries
Material : ABS
Color : Gray
- 23 -
510 T&A User's Manual
4.2. Nomenclature
4
W
O
P
C
e
v
a
H
A
E
R
G
A
B
3
1
2
E
R
W
1
F
3
F
2
F
4
F
3
0
1
2
4
5
6
I
H
S
7
8
9
T
N
E
Figure 4-1 Main Panel
1.
Slot-type reader
2.
Membrane Keypad
3.
LCD display
4.
LED indicators, from top to bottom
(1)
POWER (red)
(2)
READY (yellow)
(3)
GOOD READ (green)
(4)
BATTERY LOW (red)
2
3
D
N
A
W
1
Y
E
K
Figure 4-2 Front Panel
1.
External AT keyboard
2.
External Reader
- 24 -
510 T&A User's Manual
3.
Battery Holder
5
R
4
4
S
R
3
2
S
R
4
S
R
2
1
W
O
P
7
6
Figure 4-3 Rear
Panel
1.
Main power connector
2.
RS232 port (COM1)
3.
RS485 port
4.
RS485 port
5.
RS232 port (COM3) and digital input/output
6.
Holes for fixing Battery clippers
7.
Holes for screw
1
2
Figure 4-4 Left Panel
- 25 -
510 T&A User's Manual
1.
LCD viewing angle adjust
2.
Power switch
4.3. Cipher-510 Main Board
The following figure shows the outline of the Cipher-510 main board. The connectors, jumpers,
and the main components of maintenance/installation interest are shown.
1
17
3
2
5
4
6
4
M
A
R
S
16
3
M
A
R
S
15
2
M
A
R
S
U
P
C
14
M
A
R
S
13
las
F
zer
u
B
V
B
C
P
12
1
10
9
Figure 4-5 Left Panel
1.
J1, External +12V DC
2.
JP14, RS232 COM1
3.
JP8, RS485
4.
JP10, RS485
5.
JP9, RS232 COM3 & Digital
Input / Output
6.
JP1, SRAM5-8 Chip Select
7.
JP6, External Keyboard
8.
JP12, connect for built-in Reader (READER 1)
9.
JP13, wand port for external barcode reader (READER 2)
10.
3.6V NiCd Battery
- 26 -
8
7
510 T&A User's Manual
11.
JP11, connect for READER 2
12.
JP12, LED
13.
JP7, LCD connector for 20X2, 20X4, 40X2
14.
JP2, LCD connector for 40X4
15.
S1, Power Switch
16.
VR6, view angle adjust variable resistor
17.
Operation Backup Battery Connector
4.4. Power Source
The 510 can be powered from 2 sources: the external +12V or operation backup battery. If line
power was down, the 1500mAh NiCd batterypack then took the place to provide the system
power. The switching from external DC power to the battery is accomplished by a simple pair
of diodes and is not even noticed by the operator. However, loss of the main power can be seen
from the POWER LED on the panel.
15
JP
J1
C
D
+
Figure 4-6 Main Power Connector
+
ol
M
Figure 4-7 Battery Pack Connector
4.5. Magnetic Card Reader Connector
There are total 2 reader ports provided, each can be either a Barcode slot reader, Barcode
Scanner (Wand/Laser emulation), or up to dual-track magnetic card reader. They are equivalent
in both hardware and software. However, Cipher-510 assumes that one of them is a built-in slottype reader (READER 1) whereas the other is an external attached scanner (READER 2). Their
connectors and pin-assignments are listed below. Beware that, in order to decode barcode and
magnetic card at the same time, some signals share the same pin. However, the software is able
to tell which types of the readers are attached.
- 27 -
510 T&A User's Manual
1
2
3
4
5
6
7
8
9
2
1
P
J
1
2
3
4
5
6
7
8
9
1
P
J
lex
o
M
3
1
P
J
6
5
4
3
1
2
IN
D
l
o
M
Figure 4-8 Reader 1 Connector
-6
ex
Figure 4-9 Reader 1 Connector
JP11 & 12
Barcode
Magnetic
DIN-6 (JP13)
1
Start Of Scan
Not used
5
2
Data
Clock 1
2
3
Good Read
Not used
4
Not Used
Data 1
5
Switch
Clock 2
4
6
Power Enable
Not used
6
7
Ground
Ground
3
8
Not used
Data 2
9
Vcc, +5V
Vcc, +5V
1
As there are not so many pins in JP13, the external reader, i.e. READER 2 is limited to barcode
readers only.
4.6. External Keyboard
Besides the built-in membrane keypad, an external AT-compatible keyboard can be attached for
handy data entry. The connector and pin assignment conforms to PC/AT standard keyboard.
6
JP
5
4
3
1
2
-5
IN
D
1. clock
2. ground
3. data
4. +5V
5. No connection
Figure 4-10 External Keyboard Connector And Pins Assignment
- 28 -
510 T&A User's Manual
4.7. RS232 Connection
The RS232 connection between master station and the host computer is made through the male
phone jack connector located at the rear panel of Cipher-510. The RS232 port is enabled
(functioning) only when the line connection setting is set either to stand alone single station
or multi-station on-line master.
Besides the pin assignments of the RS232 port, both the hardware setting and the software
setting should be checked before any physical connections are made between Cipher-510 and
the host computer. The pin assignments of the RS232 port are shown below. The DTR and RTS
signals are always set as long as Cipher-510 is operating.
4
1
P
J
1 23456
e
n
o
h
P
1.
No Connection
2. Ground
3. RTS
4. CTS
5. Receive data
6. Transmit data
Figure 4-11 RS-232 Connector And Pins Assignment
- 29 -
510 T&A User's Manual
The factory settings of the RS232 port are 9600 baud rate with 8 data bits, no parity, and 1 stop
bit. And the Cipher-510s delivered from factory all have the line connection setting been set to
multi-station on-line master.
Figure 4-12 RS-232 Connection between Cipher-510 and Host
4.8. RS485 Connection
The RS485 ports are used to connect multiple Cipher-510s. Every Cipher-510 station is
connected to the RS485 bus line in a daisy chain style (no branches allowed). The bus line starts
from the female DB9 connector of master station. The female DB9 connector is always for
connecting an RS485 cable to the next 510, and the male DB9 connector is for connecting an
RS485 cable from the previous station.
8
JP
6
4
3
2
1
10
JP
7
8
5
4
5
9
9
D
em
F
-9P
D
1.
Ground
2.
Data -
3.
Data +
9.
+5V
- 30 -
3
8
2
7
1
6
9
P
510 T&A User's Manual
Others : No Connection
Figure 4-13 RS-485 Connector And Pins Assignment
Figure 4-14 RS-485 Connection between Cipher-510st
The RS485 cable being used to connect Cipher-510s should be a twist pair cable with shielding
and have a male DB9 connector at one end and a female DB9 connector at the other. The
connections of the cable are listed below.
Pin 1 to pin 1 of both ends
Pin 2 to pin 2 of both ends
Pin 3 to pin 3 of both ends
⋅
⋅
⋅
The signal lines of pin 2 and pin 3 should use the wires in the same twist pair, and the cable
shielding should be used to connect pin 1 of both ends.
The following points must be checked before RS485 connections are made to 510s.
One and only one Cipher-510 station can be the master station of the RS485 network. The
rest of the Cipher-510 stations should be the slave station. The host computer can only be
connected to the master station through the RS232 port.
For the master station, the line connection setting should be set to multi-station on-line
master. The RS485 port of the master station is active only when the line connection setting
is set to multi-station on-line master.
For the slave stations, the line connection setting should be set to multi-station on-line slave.
No duplicate station IDs are allowed in the RS485 network.
⋅
⋅
⋅
⋅
- 31 -
510 T&A User's Manual
4.9. Serial Port For Printer & Digital I/O
The Cipher-510 provides 2-digitsal inputs and 2-digitsal outputs for controlling and monitoring
external devices. These inputs and outputs are photo-isolated and share the same DB-25
connector as the COM3 (RS-232C/DIO is marked on the housing). A serial printer can also be
directly connected to the COM3 port for on-line printing.
9
P
J
1
4
1
3
1
2
5
D
2.
5
2
le
a
M
P
Transmit data
3. Receive data
4. RTS
5. CTS
7. Ground
9. Output 0 Emitter
10.
Output 0 Collector
11.
Output 1 Emitter
12.
Output 1 Collector
13.
Input 0 Cathode
14.
Input 0 Anode
15.
Input 1 Cathode
16.
Input 1 Anode
Figure 4-15 Serial Port Connector And Pins Assignment
4.10. WAND Port
This port is used to connect an external WAND or barcode slot. The pin assignments are shown
below.
1. +5V
2. Data (Barcode Image)
3. Ground
4 to 6. No Connection
Figure 4-16 WAND Connector And Pins Assignment
- 32 -
510 T&A User's Manual
4.11. Change Memory Capacity
The step by step procedures for changing (increase or decrease) the data memory capacity are
listed below.
Turn off Cipher-510.
Remove all the SRAM chips from socket on the memory card. This step must not be omitted.
This is to erase the original contents of SRAM.
Insert the desired number of memory chips (at least 1 and up to 4 memory chips with the
same memory type) onto the empty sockets. The insertion of memory chips must be added
sequentially from the start and then the software can correctly recognize them. The sequence
is U2, U3, U7 then U8 (on the PCB, from lower right to upper-right). Due to limited PCB
space, only 4 sockets are provided, if more than 4 SRAMs are to be used, rest of the SRAMs
can be piggy-backed on U2 to U8 and then connect their chip select pins to JP1.
Turn on the Cipher-510. Now the Cipher-510 should be operating. If not, please check all the
connections and the memory chips should be properly inserted on sockets.
⋅
⋅
⋅
⋅
4.12. Change Mounting Style
The Cipher-510 can be in desktop mounting style or in wall mounting style. The procedures for
changing the mounting style are listed below.
Remove the screw on top of the battery pack holder.
Remove the battery pack holder by pushing the holder to the right.
Turn the holder 180 degrees and attach the holder back to Cipher-510.
Secure the screw just removed.
⋅
⋅
⋅
⋅
Figure 4-17 Remove The Battery Pack Holder
- 33 -
510 T&A User's Manual
5. Operating 510
This section provides a step by step procedures in using the Cipher-510 time & attendance
terminal. Assumptions have been made here that these terminals have been properly installed.
Depends on the system configuration and setup, some of the procedures can be omitted.
⋅
⋅
⋅
Turn the main power switch off.
Connect the power cable. The POWER LED should be lit. If not, check the power cord
connection.
Turn on the power switch. The Cipher-510 will activate 3 beeps upon a successful startup
and the LCD will show the start up messages.
510 Time Attendance
Ver. 1.50
The first half of this message is the model of the terminal, which is Cipher-510 and the
second half is the software name. The version number V1.4 is shown on the lower part of
display. The model name, the software version number and the machine serial number have
significant meaning in maintenance purpose and this start up message together with the
serial number must be specified when requesting service.
This start up message stays on the screen for about 2 seconds. Then the Cipher-510 will
show the available space of SRAM (data memory).
Free Memory:
SRAM = 243689 bytes
After this, the Cipher-510 will be in normal operation. The Cipher-510 will be constantly
showing the system time on the display and it is ready to accept ID entries.
99/05/20
⋅
16:41:24
It is recommended to do the following checks to make sure that the Cipher-510 is working
properly.
- The system time on the display should be updated like a normal electrical clock.
- The ready LED should blink on a period of 2 seconds.
- One
and only one of the 4 working shift LEDs should be lit to show the current shift
type.
- Other LEDs should be off.
- 34 -
510 T&A User's Manual
- Besides
If manual selecting of the working shift type is required, press the desired key (F1-F4).
one short beep, the corresponding LED will be lit whereas the original working shift
LED should be off. This procedure can be repeated as many times as necessary. However, it
should be noted as mentioned in previous sections, the ID entry must be done within 5
seconds otherwise the shift number will be restored in the Cipher-510 according to the
automatic shift change timetable. If the automatic-shift-type-change is not defined in the
time when the working shift type is changed, Cipher-510 will stay on the new shift type.
- prefix
If the prefix code was enabled, the employee must press one of the 0-9 keys to input the
code (1-digit, no ENTER key needed) before any ID entry. Besides one short beep,
the prefix code will also be shown on the display for verifications. The ID also must be
entered within 5 seconds after the prefix code is pressed otherwise the prefix code will be
canceled in the Cipher-510.
- from
Scan ID card or input ID code via keyboard (with ENTER key as delimiter) if ID entry
keyboard is enabled. As the card ID is successfully entered, besides one long beep, the
GOOD READ LED should be lit for 1 second and the ID will be shown on the second line
of the display for about 1 second (for verifications). After this, Cipher-510 will be ready for
further entries.
99/05/20
16:41:30
12345
employee ID = 12345
If prefix code was enabled and the employee forgot to enter the prefix code, the Cipher-510
will show an error message and ask for a retry.
NO PREFIX
⋅
Go to step 5 for further entry.
- 35 -
510 T&A User's Manual
6. RS232 Command
This chapter explains how to control the Cipher-510 via the RS232 port. Even in the multistation connection, the host computer can still get access to each station via RS232 port through
the master station. All these commands are summarized as an easy look-up table in the
appendix.
Each communication transaction starts from the host side and ends with an echoed message
from the station (stand-alone, or the master station). The carriage return (hex0d) is used as the
delimiter/terminator of each command or message. Since this carriage return is a must, it is not
shown in the paragraphs below. If any format error occurred, the station would echo a NAK
message.
Commands have been categorized into 3 groups according to their functions. Their formats and
usages are described below.
6.1. Data Management Commands
The commands described in this section are used to manipulate the ID entry data stored in
Cipher-510. Every ID entry made is stored as a record in the memory of Cipher-510. The host
computer must send commands to the master station in order to read the records (the READ
command). The records are always read from the top of the data memory. After a record has
been read, the host computer must send another command (the REMOVE command) to
remove the same record just being read in order to read the next one. So the READ command
and the REMOVE command must be sent in pairs to read the successive records stored in
Cipher-510. If the host computer keeps sending the READ command without a REMOVE
command followed, the host computer will always get the same data record.
On the contrary, if the master station should receive a REMOVE command without a preceding
READ command, no records will be removed from the data memory. That is, a record will be
removed by the REMOVE command only after the record has been read by a READ command.
If there is no record in the data memory of 510, the master station will return an OVER
message when a READ or REMOVE command is received.
READ
Format
Usage
READ
Read one record from top of the data memory.
- 36 -
510 T&A User's Manual
Return
Kppyymmddhhnnabcq..q
K : This letter is always prefixed to the data record of Cipher-510.
pp : A 2-digit station ID indicates the station on which the ID entry was
made.
yy : last 2-digitss of the year when the ID entry was made.
mm : month of the year when the ID entry was made.
dd : day of the month when the ID entry was made.
hh : hour of the day when the ID entry was made (24-hour format).
nn : minute when the ID entry was made.
a : This character is always 0.
b : 1-digit indicates working shift type (1 - 4).
c : 1-digit indicates prefix code (0 - 9). If prefix code is not enabled,
this digit will always be 0.
q..q : card ID
Note
A REMOVE command must be issued to remove this record from data
memory.
REMOVE
Format
Usage
Return
Note
REMOVE
Remove the record just read from the data memory.
NEW
if successfully executed
OVER
if data memory is empty
This command is effective only after the READ command has been executed.
CLEAR
Format
Usage
CLEAR
Initialize memory. All data records, timetables, lock station setting, and ID
length settings will be erased.
Return
DONE
Format
X
X
- 37 -
510 T&A User's Manual
Usage
Ask the master station to return the station IDs of the Cipher-510 stations
connected on the RS485 network. This is quite useful for system maintainence
as to see if the RS485 communication is properly working or not.
Return
aabb....pp
aa, bb, ..., pp are all 2-digit station IDs indicate the Cipher-510 stations
connected on the RS485 network.
Note
This command applies only to the multi-station on-line master. The result
would be meaningless on the stand alone single station.
TR
Format
Usage
Return
TR
Get current system time.
yymmddhhnn
yy : last 2-digitss of the year
mm : month
dd : day of month
hh : hour (in 24-hour format)
nn : minute
ss : second
TWyymmddhhnnss
Format
TWyymmddhhnnss
TW : command identifier
yy : last 2-digitss of the year
mm : month
dd : day
hh : hour (in 24-hour format)
nn :minute
ss :second
Usage
Note
Set new system time.
There is no station ID required in this command. The master station will keep
the system time synchronized among all Cipher-510 stations.
- 38 -
510 T&A User's Manual
6.2. Inquire System Parameter Setting Commands
The commands described in this section are used to get current system parameter settings of
Cipher-510.
G01pp
Format
G01pp
G01 : command identifier
pp : 2-digit station ID
Usage
Return
Get current line connection setting of station pp.
A 2-digit string indicates current setting.
00 : reserved
01 : stand alone single station
10 : multi-station on-line slave
11 : multi-station on-line master
G03pp
Format
G03pp
G03 : command identifier
pp : 2-digit station ID
Usage
Return
Get current on-line printing setting of station pp.
A 1-digit string indicates current setting.
0 : disabled
1 : enabled
G12pp
Format
G12pp
G12 : command identifier
pp : 2-digit station ID
Usage
Get current bar code symbology setting of station pp.
- 39 -
510 T&A User's Manual
Return
abcdef
a : Code 39 setting
b : Code 128 setting
c : Interleave 25 setting
d : Industrial 25 setting
e : Codabar setting
f : UPC/EAN setting
Each digit can be 0 for disable or 1 for enable.
G13pp
Format
G13pp
G13 : command identifier
pp : 2-digit station ID
Usage
Return
Get current prefix code setting of station pp.
A 1-digit string indicates current setting.
0 : disabled
1 : enabled
G14pp
Format
G14pp
G14 : command identifier
pp : 2-digit station ID
Usage
Return
Get current ID entry from keyboard setting of station pp.
A 1-digit string indicates current setting.
0 : keyboard entry not allowed
1 : keyboard entry allowed
G18pp
Format
G18pp
G18 : command identifier
- 40 -
510 T&A User's Manual
pp : 2-digit station ID
Usage
Return
Get current master card ID setting of station pp.
A string indicates current setting.
G19pp
Format
G19pp
G19 : command identifier
pp : 2-digit station ID
Usage
Return
Get current password setting of station pp.
A string indicates current setting.
NRppnn
Format
NRppnn
NR : command identifier
pp : 2-digit station ID
nn : 2-digit (01 - 16) indicates the entry number of the relay output
timetable inquired
Usage
Return
Get current relay output timetable entry of station pp.
hhmmddd
hh : hour of the starting time
mm : minute of the starting time
ddd : relay activate duration in seconds (01 - 99) or 0 (entry undefined)
DRppnn
Format
DRppnn
DR : command identifier
pp : 2-digit station ID
nn : 2-digit (01 - 16) indicates the entry number of the automatic-shiftchange timetable inquired
Usage
Get current automatic-shift-change timetable entry of station pp.
- 41 -
510 T&A User's Manual
Return
hhmmxxyyw
hh : hour of starting time
mm : minute of starting time
xx : hour of ending time
yy : minute of ending time
w : working shift type (1 - 4) or 0 (entry undefined)
FRpp
Format
FRpp
FR : command identifier
pp : 2-digit station ID
Usage
Get current ID length setting of station pp.
Return
A 2-digit string indicates current setting.
Format
VRpp
VRpp
VR : command identifier
pp : 2-digit station ID
Usage
Return
Get current company code setting of station pp.
n…….n
n……..n : current company code setting
ABpp
Format
ABpp
AB : command identifier
pp : 2-digit station ID
Usage
Return
Get current firmware information of station pp.
510 T&A_150
- 42 -
510 T&A User's Manual
6.3. Program System Parameter Commands
The commands described in this section are used to program the system parameters of Cipher510. The host computer should receive a DONE string as the returning message to indicate
success when a command is sent.
The system parameters of Cipher-510 are stored in flash memory and are changed immediately
when the setting commands are received.
S01ppnn
Format
S01ppnn
S01 : command identifier
pp : 2-digit station ID
nn : 2-digit setting value
00 : reserved
01 : stand alone
10 : slave
11 : master
Usage
Set line connection setting of station pp.
S03ppn
Format
S03ppn
S03 : command identifier
pp : 2-digit station ID
n : 1-digit setting value
0 : disabled
1 : enabled
Usage
Set the on-line printing setting of station pp.
S12ppabcdef
Format
S12ppabcdef
S12 : command identifier
- 43 -
510 T&A User's Manual
pp : 2-digit station ID
abcdef : 6-digit setting value
a : Code39
b : Code128
c : Interleave 25
d : Industrial 25
e : Codabar
f : UPC/EAN
Each digit can be 0 for disable or 1 for enable.
Usage
Set the bar code symbology setting of station pp.
S13ppn
Format
S13ppn
S13 : command identifier
pp : 2-digit station ID
n : 1-digit setting value
0 : disabled
1 : enabled
Usage
Set the prefix code setting of station pp.
S14ppn
Format
S14ppn
S14 : command identifier
pp : 2-digit station ID
n : 1-digit setting value
0 : ID entry from keyboard not allowed
1 : ID entry from keyboard allowed
Usage
Set the ID entry from keyboard setting of station pp.
S18ppn...n
Format
S18ppn...n
S18 : command identifier
pp : 2-digit station ID
- 44 -
510 T&A User's Manual
n...n : new master card ID, up to 20 characters
Usage
Set the master card ID setting of station pp.
S19ppn...n
Format
S19ppn...n
S19 : command identifier
pp : 2-digit station ID
n...n : new password, up to 6 digits
Usage
Set the password setting of station pp.
NWppnnhhmmddd
Format
NWppnnhhmmddd
NW : command identifier
pp : 2-digit station ID
nn : 2-digit (01 - 16) indicates the entry number of the relay output
timetable desired
hh : hour of the starting time
mm :minute of the starting time
ddd : relay activate duration in seconds (1 - 909) or 0 (entry undefined)
Usage
Set the setting of relay output timetable entry of station pp.
DWppnnhhmmxxyyw
Format
DWppnnhhmmxxyyw
DW : command identifier
pp : 2-digit station ID
nn : 2-digit (01 - 16) indicates the entry number of the automatic-shiftchange timetable desired
hh : hour of starting time
mm : minute of starting time
xx : hour of ending time
yy : minute of ending time
w : working shift type (1 - 4) or 0 (entry undefined)
- 45 -
510 T&A User's Manual
Usage
Set the setting of the automatic-shift-change timetable entry of station pp.
FWppnn
Format
FWppnn
FW : command identifier
pp : 2-digit station ID
nn : 2-digit ID length setting from 01 to 99 or 00 to disable the ID
length checking
Usage
Set the ID length setting of station pp.
VWppn….n
Format
VWppn….n
FW : command identifier
pp : 2-digit station ID
n…n : new company code setting up to 30 characters
Usage
Set the company code for ID entry qualification of station pp.
Lnpp
Format
Lnpp
L : command identifier
n : 1-digit setting value
0 : resume normal operation
1 : lock the station
pp : 2-digit station ID
Usage
Set the station lock setting of station pp.
- 46 -
510 T & A User’s Manual
RS232 Command Listing
The RS232 commands are tabulated below for quick look-up. Please refer to the section
RS232 Command for detail description on each command.
Data Management Commands
Format
Usage
READ
Read 1 record of data
REMOVE
CLEAR
X
Remove the record just
read
Initialize memory
on-line stations inquiry
TR
System time
TWyymmddhhnn
System time
Inquire System Parameter Setting Commands
Format
Usage
G01pp
Line connection
G03pp
On-line printing
- 47 -
Return
OVER : buffer is
empty
Kppyymmddhhnnabcq..
.q
where,
K:"K", identifier
of
510
a:"0"
b:working shift
(1-4)
c:prefix code (09)
q...q:employee ID
NEW:done
OVER:buffer empty
DONE:done
aabb..pp
each 2-digitss
represent one
station ID
yymmddhhnn
yy:year
hh:hour
mm:month
nn:minute
dd:day
ss:second
Yy:year
hh:hour
Mm:month nn:minute
dd:day
ss:second
Return
00:reserved,
10:slave
01:stand
alone,11:master
0:disable,
1:enable
510 T & A User’s Manual
G12pp
Barcode symbologies
G13pp
G14pp
G18pp
Prefix code
ID code keyboard entry
Master card
G19pp
Password
NRppnn
Relay output timetable
DRppnn
Automatic shift change
timetable
FRpp
VRpp
ID length
Get current company
code
Program system Parameter Commands
Format
Usage
S01ppnn
Line connection
S03ppn
On-line printing
S12ppABCDEF
Barcode symbologies
- 48 -
ABCDEF
A:Code 39
B:Code 128
C:Interleave 25
D:Industrial 25
E:Coda-Bar
F:UPC/EAN
0:disable, 1:enable
0:disable, 1:enable
0:disable, 1:enable
nn..nn,
current master card
nn..nn,
current password
Hhmmdd
nn:entry number
from 01 to 16
hh:starting hour
mm:starting minute
ddd:duration
hhmmxxyyw
nn:entry number
from 01 to 16
hh:starting hour
mm:starting minute
xx:end hour
yy:end minute
w:working shift
from
1 to 4
nn:ID length
n…n:current company
code
Parameter
00:reserved,
10:slave
01:stand alone,
11:master
0:disable,
1:enable
A:Code 39
B:Code 128
C:Interleave 25
D:Industrial 25
E:Coda-Bar
F:UPC/EAN
510 T & A User’s Manual
S13ppn
S14ppn
S18ppnn..nn
S19ppnn..nn
NWppnnhhmmdd
DWppnnhhmmxxyyw
FWppnn
VWppn…n
Lnpp
0:disable, 1:enable
0:disable, 1:enable
Prefix code
ID code keyboard entry 0:disable, 1:enable
nn..nn:master card,
Master card
up to
20 haracters
nn..nn
:
password,
Password
up to
6 digits
Set relay output timetable Nn:entry number
from 01 to 16
Hh:starting hour
Mm:starting minute
Ddd:duration
Nn:entry number
Set automatic shift
from 01 to 16
change timetable
hh:starting hour
mm:starting minute
xx:end hour
yy:end minute
w:working shift
from
1 to 4
nn:ID length
ID length
allowed,
from 0 to 99
n…n:company code
Set company code
up to 30 characters
0:unlock, 1:lock
Station lock
- 49 -
510 T & A User’s Manual
System Parameters List
System parameters for setup mode are listed below according to their parameter numbers.
No. Meaning
format
Value
00:reserved
01 Line connection
bb
01:stand-alone
10:multi-station
slave
11:multi-station
master
0:disable,
03 Printer enable/disable
b
1:enable
000:9600, 100:2400
06 RS232 baud rate
bbb
001:19200,101:1200
010:9600, 110:600
011:4800, 111:300
00,01:not used
07 RS232 parity
bb
10:even
11:odd
0:7, 1:8 bits
08 RS232 data bits
b
0:1, 1:2 bits
09 RS232 stop bits
b
01-99
11 Station ID
bb
A:Code 39
12 Enable bar code type
ABCDEF
B:not used
C:Interleave 25
D:Industrial 25
E:Codabar
F:UPC/EAN
0:disable,
1:enable
0:no, 1:yes
13 Prefix enable
b
0:disable,
14 ID keyboard entry
b
1:enable
18 Master Card
none, scan card master card ID up
to
only
20 characters
up to 6 digits
19 Password
d..d
12-digit system
20 System time
yymmddhhnn
time as
yy:year
mm:month
dd:day
hh:hour
nn:minute
ss:second
nn:entry number
21 Relay output timetable
nnhhmmddd
from 01 to 16
hh:hour
mm:minute
ddd:duration in
- 50 -
510 T & A User’s Manual
22 Automatic shift change
timetable
23 ID length
24 station lock
seconds
from 1 to 999
nnhhmmxxyyw nn:entry number
from 01 to 16
hh:starting hour
mm:starting minute
xx:end hour
yy:end minute
w:working shift
from
1 to 4
0-99
nn
0:unlocked,
b
1:locked
- 51 -
510 T & A User’s Manual
Packing
Standard Packing :
•
This user's manual
•
The Cipher-510 main unit
•
Power Adaptor (110VAC or 220VAC)
•
RS232 Cable
•
Default System Master Card (1234567890)
Optional Accessories :
•
Barcode Slot Reader or Magnetic Card Reader
•
Operational Backup Battery
•
WAND
- 52 -
510 T & A User’s Manual
Physical Specification
Dimension
Weight
Power Supply
Power Consumption
Temperature
261 mm (L) X 125 mm (W) X 100 mm (H)
About 1kg, excluding the battery pack and the slot-type reader.
DC 10-15V, 12V (typical)
3 VA (max.), exculding the slot-type reader.
Operation : -5℃ to 45℃
Storage : -20℃ to 70℃
Humidity Operation : 15% to 90%
Storage : 5% to 95%
- 53 -
Cipher-510
Programmable
Terminal
User’s Guide
CipherLab Co., Ltd.
V1.0
1. Packing
This packing includes:
(1)
This User's Guide
(2)
The User’s Manual Disk
(3)
The Cipher-510 main unit
(4)
Power Adaptor (110VAC or 220VAC)
(5)
RS232 Cable
(6)
Default System Master Card (1234567890)
1
2. Components
LED Indicator
LCD Display
Barcode/Magnetic
Card Reader
Membrane
Keypad
Keyboard Port
LCD View
Angle
Power Switch
WAND Port
DC Jack
for Power
Input
RS-232/
RS-485
RS-232
Digital IO
Port
Port
Port
2
3. Installation
3.1. Power Source
The Cipher-510 can be powered from 2 sources: the external +12V or
operation backup battery. If line power was down, the 1400mAh NiCd
batterypack then took the place to provide the system power.
3.2. RS-232 Connection
The RS-232 connection between master station and the host
computer is made through the phone jack connector located at the
rear panel of Cipher-510. Besides the pin assignments of the RS232
port, both the hardware setting and the software setting should be
checked before any physical connections are made between
Cipher-510 and the host computer.
3
3.3. RS-485 Connection
The RS-485 ports are used to connect multiple Cipher-510s. Every
Cipher-510 station is connected to the RS485 bus line in a daisy
chain style (no branches allowed). The bus line starts from the female
DB9 connector of master station. The female DB9 connector is
always for connecting an RS-485 cable to the next 510, and the male
DB9 connector is for connecting an RS485 cable from the previous
station.
3.4. WAND Port
This port is used to connect an external WAND or barcode slot.
3.5. External Keyboard Port
Besides the built-in keypad, an external PC/AT keyboard can be
attached for handy data entry.
4
3.6. Serial Port For Printer & Digital I/O port
The Cipher-510 provides 2-digitsal inputs and 2-digitsal outputs for
controlling and monitoring external devices. These inputs and outputs
are photo-isolated and share the same DB-25 connector as the
COM3 (RS-232C/DIO is marked on the housing). A serial printer can
also be directly connected to the COM3 port for on-line printing.
3.7. Change Mounting Style
The Cipher-510 can be in desktop mounting style or in wall mounting
style.
Wall Mount
Desk Top Mount
5
4. Programming System Parameters
The system parameters of Cipher-510 can be programmed manually
or by RS232 commands.
4.1. Manually programming
1. Power on the Cipher-510 and scan the master card. Now
Cipher-510 is waiting for entry of the password. However, if the
password was set to none, this message will not be shown and
this step is simply ignored. The system manager must key in the
password now. If the password is correctly entered, Cipher-510
will be in the System Management mode.Under this mode, 4
major tasks can be done as follows,
(1) Setup
a. Press the ENTER key and now the Cipher-510 is in the
setup mode and is ready to accept system parameter
modification. The Cipher-510 will show the name of
parameter on the upper side of the display and the original
setting value on the lower side.
1. Line
Connection:
=Master
b. Press ENTER key then you can change the setting value
of this parameter. Use the” ” and “ ”key for selecting a
new setting value or type in a new value via numeric keys.
Then press ENTER key to conclude the new setting value.
1. Line
Connection:
-><Single>
c.
Instead of key in new value, simply press the ” ” or “ ”key
will leave this setting unchanged and fine out another
parameter. This is a handy way to simply peek the current
6
settings. Note that the backspace (Shift+7) key and the
clear key can be used for handy editing.
d. After all the system parameter modification are completed,
the F1 key must be pressed to update these modifications
and save the new settings into the program memory.
System will restart with the new settings. If F2 key instead
of F1 key is pressed, all modifications of the system
parameters will be discarded and retain the original settings.
e. Followings are the system parameters,
(a) Line Connection Setting
(b) On Line Printing Setting
(c) Prefix Code Setting
(d) Keyboard Entry Setting
(e) Station Lock Setting
(f) Station ID Setting
(g) Master Card Setting
(h) Password Setting
(i) Time Setting
(j) Timer Fine Tune Setting
(k) ID Length Setting
(l) Barcode Type Setting
(m) COM1 Setting
(n) COM3/Aux Device Setting
(o) Alarm Table Setting
(p) Workshift Table Setting
(q) LCD Backlight Setting
(r) Buzzer Volume Setting
(s) Max Station ID Setting
(t) Year Format Setting
(2) Self-test
7
This mode provides a simple but yet efficient way for
diagnostic. Press ENTER key for executing the following
items test one by one,
a. Flash test
b. SRAM test
c.
Beeper test
d. LCD test
e. LED test
f.
DI & DO test
g. COM1 test
h. COM2 test
i.
COM3 test
j.
485 test
k.
ADC test
l.
Calendar test
m. Reader test
n. Keypad test
o. AT Keyboard test
p. Shutdown test
(3) Initialize System
This is used to set all system parameters to their default value
and initialize the file systems. Care should be taken, as this will
destroy all data stored in the memory.
(4) Flash Clone
This is used to copy the program in FLASH memory to another
terminal. Usually it is used for diagnostic or software update.
4.2. RS232 Command
Each communication transaction starts from the host side and ends
with an echoed message from the Cipher-510. The carriage return
8
(hex0d) is used as the delimiter/terminator of each command or
message. If any format error occurred, the station would echo a NAK
message. All these commands are summarized as following table.
1. Data Management Commands
Format
READ
REMOVE
CLEAR
X
Usage
Read 1 record of
data
Remove the
record just read
Initialize memory
on-line stations
inquiry
TR
System time
TWyymmddhhnn
System time
Return
OVER : buffer is empty
Kppyymmddhhnnabcq...q
where,
K:"K", identifier of 510
Yymmddhhnn:date & time
a:"0"
b:working shift (1-4)
c:prefix code (0-9)
q...q:employee ID
NEW:done
OVER:buffer empty
DONE:done
aabb..pp
each 2-digitss represent one
station ID
yymmddhhnn
yy:year
hh:hour
mm:month
nn:minute
dd:day
ss:second
yy:year
hh:hour
mm:month nn:minute
dd:day
ss:second
2. Inquire System Parameter Setting Commands
Format
G01pp
Usage
Line connection
G03pp
G12pp
On-line printing
Barcode
symbologies
Return
00:reserved,
10:slave
01:stand alone,11:master
0:disable, 1:enable
ABCDEF
A:Code 39
B:Code 128
C:Interleave 25
9
G13pp
G14pp
G18pp
G19pp
NRppnn
DRppnn
FRpp
VRpp
D:Industrial 25
E:Coda-Bar
F:UPC/EAN
0:disable, 1:enable
Prefix code
0:disable, 1:enable
ID code keyboard 0:disable, 1:enable
entry
Master card
nn..nn,
current master card
Password
nn..nn,
current password
Relay output
Hhmmdd
timetable
nn:entry number from 01 to
16
hh:starting hour
mm:starting minute
ddd:duration
Automatic shift
hhmmxxyyw
change timetable nn:entry number from 01 to
16
hh:starting hour
mm:starting minute
xx:end hour
yy:end minute
w:working shift from
1 to 4
ID length
nn:ID length
Get current
n…n:current company code
company code
3. Program system Parameter Commands
Format
S01ppnn
Usage
Line connection
S03ppn
S12ppABCDEF
On-line printing
Barcode
symbologies
Parameter
00:reserved,
10:slave
01:stand alone, 11:master
0:disable, 1:enable
A:Code 39
B:Code 128
C:Interleave 25
10
D:Industrial 25
E:Coda-Bar
F:UPC/EAN
0:disable, 1:enable
S13ppn
Prefix code
0:disable, 1:enable
S14ppn
ID code keyboard 0:disable, 1:enable
entry
S18ppnn..nn
Master card
nn..nn:master card, up to
20 haracters
S19ppnn..nn
Password
nn..nn : password, up to
6 digits
NWppnnhhmmdd Set relay output
Nn:entry number from 01 to
timetable
16
Hh:starting hour
Mm:starting minute
Ddd:duration
DWppnnhhmmxxy Set automatic
Nn:entry number from 01 to
yw
shift change
16
timetable
hh:starting hour
mm:starting minute
xx:end hour
yy:end minute
w:working shift from
1 to 4
FWppnn
ID length
nn:ID length allowed,
from 0 to 99
VWppn…n
Set company
n…n:company code
code
up to 30 characters
Lnpp
Station lock
0:unlock, 1:lock
11