1
© Copyright July, 1996 Adept Technology, Inc.
ALL RIGHTS RESERVED
This material is the property of Adept Technology, Inc.,
and contains confidential information. No part of this
publication may be reproduced, published, stored in a
retrieval system, or disclosed to others without prior
written permission from Adept Technology, Inc.
The use of general descriptive names, trade names,
trademarks, etc., in this manual, even if they are not
especially identified, does not mean that such names, as
understood by the Trade Marks and Merchandise Marks
Act, may accordingly be used freely by anyone.
The material contained herein is subject to change without
notice.
Table of Contents
Using this Manual
Manual Conventions
Notation
viii
xi
Chapter 1: Introduction to the SIL Language
SIL Language Overview
SIL Compared to Pascal
The SIL Programming Environment
Entering SIL Commands
Extended Types
The Object System
Concurrency
The SIL Runtime Model
Environments
Values
Expressions
Terms
Statements
Definitions
Globals
Types
Functions and Procedures
Variable Declarations
Storage Model
1-1
1-2
1-2
1-3
1-4
1-5
1-6
1-7
1-9
1-10
1-12
1-12
1-14
1-19
1-19
1-20
1-21
1-21
1-23
Chapter 2: The Basics
Accessing Help
Procedures and Functions
Defining Procedures and Functions
Local Environments
Nested Definitions
Recursive Functions and Procedures
Developer’s Guide
(7/96)
2-1
2-2
2-3
2-6
2-7
2-8
i
Table of Contents
Closures
Polymorphism
General Information
Polymorphism Tricks
Input/Output
Reading from the Keyboard
Writing to the Screen
Reading and Writing to a File
EOF
Symbols
Identifiers
Useful Symbol Operations
Intern
Concatenation
i_tsetq
id2string
2-10
2-11
2-11
2-12
2-13
2-13
2-16
2-16
2-18
2-19
2-20
2-20
2-20
2-21
2-21
2-21
Chapter 3: SilTools Geometry
Understanding SilTools Geometry
Geometric Terms
Shape
Frame
Geometric Units
Position
Cartesian Description
Cylindrical Description
Spherical Description
Orientation
Yaw-Pitch-Roll
Euler Angles
Equivalent Angle-Axis
Poses
Geometric Operators
3-1
3-1
3-2
3-2
3-3
3-4
3-5
3-6
3-7
3-8
3-10
3-12
3-13
3-16
3-17
Chapter 4: Data Types
Lists
List Types
ii
4-3
4-4
SilTools
Table of Contents
Other List Operations
Destructive List Operations
List Recursion and Iteration
Arrays
sarrays
Strings
String Comparisons
String Conversions
Other Operations on Strings
lstrings
Records and lrecords
4-5
4-5
4-6
4-8
4-11
4-12
4-14
4-14
4-15
4-15
4-17
Chapter 5: Classes
Object-Oriented Terminology
Classes
Inheritance
Views
Changing Views
The as_view Operator vs. the to_view Operator
Multiple Inheritance
Using apply on Views
View Manipulation
Abstract Classes
Installation of Methods
Using Methods Instead of apply
C++
Additional Methods Primitives
5-1
5-2
5-4
5-9
5-12
5-13
5-14
5-16
5-17
5-19
5-21
5-23
5-23
5-23
Chapter 6: Programming the User Interface
The mnode Class
Widgets
Appearance
Behavior
Top Panel
Item Panel
Menu
Simple Widget Programming
Developer’s Guide
(7/96)
6-1
6-1
6-1
6-3
6-4
6-4
6-5
6-6
iii
Table of Contents
Handlers
Monitors
Footers
Displaying Panels
Advanced Widget Programming
Shape Fields and Graphics Tools
Shape Fields
Graphics Tools
Shape-Click Tools
Group Tools
General Tools
Making Shape Fields and Graphics Tools Work
Tool Sets and Tool Bodies
Binding a Mouse Button
Controlling which Tools are Active
Tool Set and Tool Body Methods
Specifying Tool Actions for Graphics Tools
Other gtool Methods
Obtaining Additional Information
Widget Toggles
Examples
Graphical Picking
Groups
File Browsing
Requestor and Message Panels
Pop Up Boxes
Annotated Types
Online Help
Installing Panels
Adding a Panel into the Pulldown Menus
Adding a Panel into the Quick Access
Adding a Panel into the Tool Bar
Making a Panel Operational
Customizing the Application
The Menu Bar
Customizing the Logo
Customizing the Layout
iv
6-7
6-8
6-10
6-10
6-11
6-11
6-11
6-14
6-14
6-15
6-15
6-15
6-15
6-17
6-17
6-17
6-17
6-18
6-19
6-20
6-21
6-22
6-24
6-25
6-26
6-26
6-27
6-28
6-29
6-29
6-29
6-29
6-30
6-31
6-31
6-31
6-31
SilTools
Table of Contents
Customizing the Start Up Screen
6-33
Chapter 7: Vision
Chapter 8: Modeling Using SIL Commands
The model Data Type
Modeling Constructors
Curves
Conics
Surfaces
Cap
Facet
Plane Surface
Grid Surface
Surface of Revolution
Tube as rvsurf
Funnel as rvsurf
Tabulated Cylinder
Rational B-Spline Surface
Coons Surface
Geometric Constructors
Conic Constructors
Bezier Curve Constructor
Bezier Patch Constructor
Conic Surface Constructors
Evaluating Parametric Shapes
Parametric Curves
Parametric Surfaces
Wireframe Models
Volume Models
Cylinder
Block
Pipe
Cone
Frustum
Model Operators
The invert Operator
Developer’s Guide
(7/96)
8-1
8-1
8-2
8-3
8-4
8-4
8-4
8-5
8-5
8-6
8-6
8-7
8-7
8-7
8-8
8-9
8-9
8-10
8-11
8-11
8-11
8-11
8-12
8-12
8-13
8-13
8-13
8-13
8-13
8-14
8-14
8-14
v
Table of Contents
The glue Operator
The moveto Operator
The imoveto Operator
The moveby Operator
IGES Conversions
Converting IGES Files to SilTools Models
Converting SilTools Models to IGES files
Modeling Examples
8-14
8-16
8-16
8-16
8-16
8-17
8-18
8-19
Chapter 9: Advanced Data Types
System-Defined Types
ntype
Type Expressions
lispobs
lispob Operations
Represented Types
Universals
Applying Procedures
Applications
Casting
Efficiency Considerations
SIL Constants
C Data Types
C Records and C Arrays
C Strings
C Constants at Build Time
9-1
9-2
9-2
9-4
9-5
9-6
9-7
9-8
9-11
9-12
9-13
9-14
9-15
9-15
9-17
9-19
Chapter 10: Concurrency
Temporal & Instantaneous Commands
The Scheduler
Tickers
Semaphores
Pipes
Processes and tclosures
vi
10-1
10-3
10-6
10-6
10-10
10-12
SilTools
Table of Contents
Chapter 11: Working with SIL Code
Protection
Code Organization
The Cim Tree Structure
Loading SIL Code
Creating a New Product
Compiling SIL Code
Creating New Versions
Including Modules and Products in the Product Administration
Panel
Adding New Modules
Adding New Products
Dependency Management
Modules
umodules
“if” Syntax
“Support Only” Builds Areas
Application Solutions Header Module
Patching in Interpreted Code
Debugging
Debugging in Menu Mode
Calling C Code from SIL
Sample .c and .h Files
Passing Data Types to C
11-1
11-2
11-3
11-5
11-5
11-7
11-10
11-11
11-11
11-12
11-12
11-12
11-13
11-14
11-14
11-15
11-15
11-16
11-22
11-22
11-23
11-27
Appendix: Using SilTools in a Non-English Environment
Using SilTools in a Non-English Environment (SGI only)
Localizing SilTools Panels
Localizing SilTools Panels at Build Time
A-1
A-1
A-2
Index
Developer’s Guide
(7/96)
vii
Using this Manual
Using this Manual
Manual Conventions
The following sections describe conventions which have been used in
this manual to denote specific concepts.
For the following, this typeface is used:
■ booleans
■ variables
■ statements
■ object names
■ commands
■ operators
Example: mk_rctcurve (pts: darray of pnt3dr; n: integer); is an
operator.
The SIL Prompt
The SIL prompt is shown by: SIL>. When you see the prompt, it means
that the code following it can be entered exactly as shown. If the line
following the SIL> prompt line is in this font, this is the result of the
command. Example:
SIL> monthly_salary(team1_leader);
3541.666748
In this example, you would enter monthly_salary(team1_leader); at the
SIL> prompt. After you press <RETURN>, 3541.666748 would be
displayed in the shell window.
viii
SilTools
Manual Conventions
SIL Syntax
Sections showing syntax of more than one line have a box around them.
The code sometimes contains variables indicated by <> symbols.
function f(x:A;<a1>:<type1> ....):<result-type>;
var …
begin
…
end;
SIL Code Examples
The examples are printed in gray boxes. They include explanatory text
and code. The code may be entered as shown.
Example 1.1
Assignment statements:
x := sin(y); x := x + 1, table[6] := 0; employee.salary := x;
Procedure calls:
writeln('hello', '...', 'world');
deposit(account, 50.00);
Rules
Rules are shown with a dark gray title bar and a box around the rule.
Rule 1.1
<sequence> := begin <statement>; …; <statement> end;
Windows
Windows that are part of the display are indicated in Italics. Examples:
Quick Pick Window and Graphics Window.
Developer’s Guide
(7/96)
ix
Using this Manual
Filenames
This typeface is used for filenames. Example: default.sil is a
file.
Keys
Keyboard keys are indicated by the “<>” symbols enclosing the key in
capital letters in THIS TYPEFACE. Example: <RETURN> is a key.
The Top Bar
Pulldown menus from the top bar are indicated with bold letters in This
Typeface. Example: File is a pulldown menu.
Panels
Panels are indicated with This Typeface. Example: Collision Detection
is the title of the panel that is displayed when you choose Collision
Detection… from the Utilities pulldown menu.
Pulldown Selections and Commands
Selections from the pulldown menus, commands and command buttons
are indicated with Italics in this Typeface. Examples: Install… is a selection
from the Layout menu, Apply is a command.
Toggle Choices
Toggle choices are shown with a ◆ symbol in front of the label.
Example: ◆ Checks is a toggle choice.
Switches
Switches are shown with a ❏ symbol in front of the label. Example:
❏ Show Reference Frame.
x
SilTools
Notation
Fields and Messages
The label and the information in the field are in this typeface. Example:
Edge Length displays 1.0 in its field.
Messages, such as instructions and error messages that pop up or are
displayed in the panels, are quoted using this typeface. Example:
Pick any edge of an object.
Notation
This manual uses simplified grammatical rules (which resemble BNF)
to describe syntactic forms. This section describes these rules
completely.
These rules use the following form:
<A> ::= exp
where <A> is a non-terminal symbol and exp is a string of terminal and
non-terminal symbols. Interpret the above rule to mean that all
occurrences of the non-terminal symbol <A> can be replaced by the
string exp. The goal of a rule such as that described above is to derive
syntactically valid strings of non-terminal symbols by repeatedly
applying all available rules to a given string until all non-terminal
symbols have been replaced.
Five conventions are associated with the rules used in this manual.
These conventions provide readers with a means of denoting specific
types of symbols and of writing rules in an abbreviated fashion.
1. Rules with the same left-hand side:
<A> ::= exp1
<A> ::= exp2
<A> ::= exp3
can be rewritten in a single line as
<A> ::= exp1 | exp2 | exp3
Developer’s Guide
(7/96)
xi
Using this Manual
2. Rules with the same right-hand side:
<A1> ::= exp
<A2> ::= exp
<A3> ::= exp
can be rewritten in a single line as
<A1>, <A2>, <A3> ::= exp
3. Rules in which one right-hand side is a substring of another:
<A> ::= ac | abc
can be rewritten as a single rule:
<A> ::= a[b]c
Here [b] indicates that the string b is optional.
4. Recursive forms can be written with rules such as
<A> ::= e | e<A>
or
<A> ::= e…e
Here, e…e means that A can be replaced by a string of one or
more e’s.
5. A non-terminal symbol is any character string enclosed by
angle brackets (<>):
<parameter list>
<function application>
<etc>
xii
SilTools
Notation
All other character strings are terminals.
We can describe all numerals with the following set of rules:
<numeral> ::= [-]<non-zero digit>[<digit> … <digit>] | 0
where
<non-zero digit> ::= 1 | 2 | 3 | 4 | 5 | 6 | 7 | 8 | 9
<digit> ::= 0 | <non-zero digit>
The numeral -204 can then be derived as follows:
<numeral>
-<non-zero digit><digit><digit>
-2<digit><digit>
-20<digit>
-20<non-zero digit>
-204
Developer’s Guide
(7/96)
xiii
Chapter 1
Introduction to the
SIL Language
Although the SilTools menus provide most of the commands you need, you can
also create your own commands by writing programs in a language called SIL.
Using the SIL language, you can develop your own SilTools applications which
take advantage of the capabilities that SIL offers. SilTools, in fact, is a SIL
application. This manual explains how to program in the SIL language. To use
this manual to write your own programs requires some previous programming
experience.
SIL is a powerful general-purpose programming language that lies at the heart
of SilTools and supports advanced programming methods such as objectoriented programming, concurrent programming, and meta-programming.
This chapter provides an overview of the SIL language, including a simplified
model of SIL’s runtime environment and the storage model.
SIL Language Overview
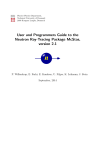
The layers of SIL implementation are arranged in the following fashion:
Devices
Objects
Concurrency
Metaprogramming
Extended Types
Polymorphic Interactive Pascal
Figure 1-1
Developer’s Guide
(7/96)
The SIL language
1-1
Introduction to the
SIL Language
SIL Language Overview
Introduction to the SIL Language
SIL Compared to Pascal
SIL and Pascal share many syntactic features. Programmers familiar
with Pascal, but new to SIL, can get started by treating SIL as an
interactive implementation of Pascal. SIL syntax is a superset of Pascal
syntax, and all of the control structures have their usual Pascal
meanings—basic data types such as reals, integers, booleans, and
records have standard behavior. The difference between the two
languages emerges when examining pointer types—SIL maintains
pointer structures in a Lisp or SmallTalk-like heap, so that pointer
management is different from (and simpler than) Pascal.
Still another feature which distinguishes SIL from Pascal is its
polymorphism. SIL is polymorphic in the sense that the same symbol
may be used to denote functions of differing input types. For example,
the function double may be defined both for reals and points, without
conflict. This is known as static polymorphism (SIL supports other
kinds as well). Because the decision of which function variant to use is
made at compile time, no performance slowdown occurs.
The SIL Programming Environment
The SIL programming environment, like that of Lisp or SmallTalk, is
interactive. Any legal expression can be typed or cut and pasted into the
SIL> prompt, including new functions, type definitions, or global
assignments. Typing or pasting in expressions results in these new
entities being added to the current programming state. In Text Mode, the
mouse buttons have different functions (such as cutting and pasting
text), which are defined by the operating system.
Uncompiled SIL code is executed by a fast pseudo-code based
interpreter. It is possible to compile SIL code, also; to do this, the code
is translated first into C and then to binary using the host machine’s C
compiler. The performance of compiled SIL code is similar to that of
corresponding code written directly in C (or Pascal). Interpreted and
compiled code may be freely mixed—compiled functions may be
replaced at will by modified interpreted variants, allowing fast bug
fixing and testing.
1-2
SilTools
SIL uses a generation-scavenging garbage collection algorithm. Even
for very large applications, garbage collects are fast (less than one
second) and infrequent enough that you will not be able to detect them,
as long as you are working on standard UNIX workstation hardware
(such as Sun SPARCstations). See “Storage Model” on page 1-23.
Entering SIL Commands
To access the SIL language, you must have a product running. The
“Starting SilTools” section in Chapter 2 of the SilTools User’s
Manual explains how to start a product.
The SIL Window can be used to enter SIL language commands while
retaining access to the menus and panels. The SIL Window is
displayed under the Graphics Window.
Figure 1-2
The SIL Window
You can also change to Text Mode to enter SIL language commands.
In Text Mode, you have full editing capability and direct access to
the operating system.
Change to Text Mode by selecting Exit Menus from the File pulldown
menu. The menus are disabled and the SIL> prompt is displayed in
the shell window that you used to start SilTools.
Figure 1-3
Developer’s Guide
(7/96)
Shell window example
1-3
Introduction to the
SIL Language
SIL Language Overview
Introduction to the SIL Language
Enter menus(); at the SIL> prompt to restore access to the menus.
If the system has become disabled, enter r(); at the Error>
prompt to reset the system.
Extended Types
The SIL type system uses the Pascal typing structure as a starting
point and expands on it. First, SIL provides types which are
dynamically allocated, and automatically collected from a heap.
These types include dynamic lists, arrays, strings, trees, and a
special type, lispobs (SIL data objects), which is shortened to ob.
All SIL data are of type ob. SIL permits C-style casting; in
particular, any SIL expression can be cast to ob and back, which
allows typed and untyped styles of programming to be freely mixed.
SIL also includes metatypes: types which range across language
entities rather than across the usual sorts of data. The most important
metatype is ntype. All types are ntype. All SIL data tagged by type
is type universal. As with ob, any SIL expression can be cast to
universal and back.
The apply operator provides runtime or late-binding polymorphism.
If some or all of the expressions e1.. en are of type universal, then
apply("f,e1 .. en) will search at runtime for a variant of f whose input
types match the types of e1 .. en.
NOTE
1-4
Chapter 9, “Advanced Data Types” provides detailed
information about the above concepts.
SilTools
The Object System
The definition of a class in SIL is very similar to a Pascal (or SIL)
record definition:
type <new-class> = class
superclass:<class1>;
superclass:<class2>;
…
<instance-var-1>:<type1>
<instance-var-2>:<type2>
…
end;;
Rather than introducing a special syntax for passing messages, SIL
uses ordinary function-application syntax. For example, if x is an
object, and you want to send it the message f with additional
arguments a1 .. an, you would enter f(x,a1 .. an). Also, to define a
method f for a class A, you would use ordinary function-definition
syntax:
function f(x:A;<a1>:<type1> ....):<result-type>
var …
begin
…
end;
In SIL, as in any object-oriented language, an object usually belongs
to several classes—if it belongs to a class A, it will also belong to
each of the superclasses of A, and their superclasses, and so forth.
Internally, an object is represented in SIL by a linked list of “views”,
and one view exists for each class to which the object belongs. A
view is a record structure containing the values of instance variables
for its class, and a few words of object-system overhead. A SIL
object can be visualized as a property list, with one property for each
class to which the object belongs.
Developer’s Guide
(7/96)
1-5
Introduction to the
SIL Language
SIL Language Overview
Introduction to the SIL Language
SIL provides direct and flexible access to the views of an object. The
function views(x:A) returns the view list of any object of any class A.
It is possible to edit view lists by adding or removing members.
View lists admit “object mixins”, rather than just “class mixins”. For
example, to endow an object with both color and weight attributes,
simply splice color and weight views onto that object—it is not
necessary to define a class which mixes color and weight in advance.
SIL provides both early-binding (compile-time) and late-binding
(runtime) mechanisms for method selection. For example, let B be a
subclass of A, and suppose that f is a method for A but not B, and that
e is an expression of type B. In the expression f(e), e will inherit the
method f from A. This inheritance, or method selection, occurs at
compile time, so that no runtime overhead is induced (this is like
ordinary method selection in C++).
On the other hand, in the following expression,
apply("g,e);
the views of the object e will be searched at runtime until one to
which g applies is found (this will occur if e is of universal type and
its runtime value is an object, also). This is known as “late binding”,
which is the scheme used in SmallTalk and Objective C. SIL also
provides the equivalent of the virtual function facility in C++.
NOTE
Chapter 5, “Classes” provides detailed information about
the above concepts.
Concurrency
SIL supports concurrent execution of multiple tasks within one
“state” or data space. The SIL implementation provides its own
scheduler. Procedures intended for concurrent execution are
indicated by using the keyword task rather than the keywords
function or procedure. Tasks may include any code which would be
legal in procedure or function, and may include primitives for
synchronization.
1-6
SilTools
To introduce new threads of computation, use the start operator. If f
is a task, then
start(“f,<arg1> … <argn>)
is an expression which will cause the execution of f on the given
arguments to start as a separate concurrent thread. The start
expression evaluates to an object of type activation (corresponding
to, for example, the process class in SmallTalk, or the thread type in
the BSD UNIX lightweight process facility). The activation is a
handle to the ongoing computation of f. SIL provides various
synchronization primitives, all of which rest on two basic primitives:
the semaphore, and the delay. A delay is a suspension for a given
amount of time. In this case, time is measured by the “real world
clock”, or by an internal simulated clock, depending on the
application.
NOTE
Chapter 10, “Concurrency” provides detailed information
about the above concepts.
The SIL Runtime Model
This section contains the following topics:
➢ Environments
➢ Values
➢ Expressions
■ Terms
■ Statements
■ Definitions
Developer’s Guide
(7/96)
1-7
Introduction to the
SIL Language
The SIL Runtime Model
Introduction to the SIL Language
SIL is an interpreted language*. This means that an expression is read
from a file or the keyboard, and is passed to the SIL interpreter which
then computes the value of the expression. The computed value is
passed to a printer which writes it to a file or the screen, and the cycle
repeats. This sequence in SIL is illustrated below:
repeat
write('SIL> ');
{the prompt prompts}
exp := read_and_parse(); {the reader reads}
val := value_of(exp); {the interpreter evaluates}
writeln(val)
{the printer prints}
until false
To compute the value of an expression, the interpreter must be able to
look up the values associated with any symbolic names that might occur
in the expression. For example, to evaluate the expression
2 * sin(x + pi)
the interpreter must look up the values associated with the names sin, x,
and pi. These associations, called bindings, are stored in symbol tables
called environments that reside in the SIL virtual memory space.
Figure 1-4 shows a representation of the relationships between the
components of the SIL runtime model.
Expressions
Reader
Values
Interpreter
Symbols &
Definitions
Printer
Values
Virtual
Memory
Figure 1-4
The SIL runtime model
* Compilation is also possible (see “Loading SIL Code” on page 11-5).
1-8
SilTools
Environments
Environments are either permanent or temporary. The permanent
environment is called the global environment. The global environment
contains bindings for
■ All type names
■ Function/procedure names
■ Global variables
Local environments contain bindings for
■ The parameters of a function/procedure
■ The local variables of a function/procedure
Local environments may be considered temporary extensions of the
global environment which are created when a function/procedure is
called, and destroyed when the function/procedure terminates.
Some expressions modify an environment when they are evaluated by
the interpreter. For example, definitions create new bindings in the
global environment while assignment statements change the value
associated with a symbol in an existing binding.
Example 1.2
Entering the statement
x == 2;
defines x as a global variable with type integer and value 2. If x had a
previous type and value, then this is replaced. The assignment statement to
define x is:
x := 2;
which can be entered directly or can appear inside of a SIL program,
assumes that x already has some associated integer value. In this case the
old value is replaced by 2.
Developer’s Guide
(7/96)
1-9
Introduction to the
SIL Language
The SIL Runtime Model
Introduction to the SIL Language
Values
Values, or data objects, are the scalars and data structures such as
numbers, strings, records, and arrays that inhabit the computer’s
memory and represent abstract entities in the problem domain. The
generic term used in SIL to describe all of these objects is lispob (which
was derived from LISP OBject).
Lispobs may be classified into data types, or, to put it the other way
around, a data type can be viewed as a collection of similar lispobs.
Knowing the data type of a lispob is important. For example, this
information is used to compute the amount of memory space required to
store the lispob or to detect inconsistencies in a SIL program.
SIL data types fall into one of three broad categories:
■ System-defined types:
integer, real, boolean, string, …
■ Constructed types:
list types, array types, function types, …
■ User-defined types:
record types, classes, …
1-10
SilTools
Introduction to the
SIL Language
The SIL Runtime Model
Arrays
Lists
Constructed
Functions
Procedures
Types
Scalartypes
integer
real
boolean
string
Metatypes
ntype
Supertypes
lispob
universal
System-Defined
Records
User-Defined
Classes
Figure 1-5
NOTE
Developer’s Guide
(7/96)
Data type classifications
Chapter 4, “Data Types”, Chapter 5, “Classes”, Chapter 9,
“Advanced Data Types” and “Procedures and Functions”
on page 2-2 explain the data types in detail.
1-11
Introduction to the SIL Language
Expressions
NOTE
This section describes features in SIL which are identical
to Pascal, so you may want to skim, or even skip, this
section if you know Pascal.
There are three types of SIL expressions: terms, statements, and
definitions. This is expressed as Rule 1.2.
Rule 1.2
<expression> ::= <term> | <statement> | <definition>
Terms
There are three types of terms in SIL: constants, variables, and
function applications. This is expressed as Rule 1.3.
Rule 1.3
<term> ::= <constant> | <variable> | <function application>
Terms represent values (lispobs), although some function
applications will also modify an environment as a side effect. The
general form of a function application is
<operator>([<term>, … , <term>])
where <operator> is the name of a function. The terms appearing
inside of the parentheses are referred to variously as the inputs,
arguments, operands, or actual parameters. Notice that operands can
also be function applications.
Example 1.3
Constants:
Variables:
Applications:
1-12
2, -1.1, pi, "a_symbol, 'a string', nil, true, false
x, room_temperature, part35
sin(pi), max(2, x), mod(trunc(sin(x)), 50)
SilTools
In addition to the general form of a function application, there are
some special forms. Most notable is the case of infix operators,
which use the form
<term> <operator> <term>
Other examples include special syntax for accessing fields of
records and components of arrays, as illustrated in Example 1.4.
Example 1.4
x + y, x / y, x and y, x > y, x = y
infix operators:
-x, not x
unary operators:
array components: table[x]
employee.salary, employee.spouse.salary
field selectors:
table[employee_id].salary
mixed:
In fact, all of these forms can be expressed in the general prefix form
above. For example, you could rewrite
employee.salary
as
salary(employee)
The term
x+5
can be rewritten as
plus(x, 5)
and so on.
Evaluating a term containing multiple special operators can be
ambiguous. For example, the term
5-3+2
might evaluate to 0 or 4 depending on which operation is performed
first. Similarly, the term
not true or true
Developer’s Guide
(7/96)
1-13
Introduction to the
SIL Language
The SIL Runtime Model
Introduction to the SIL Language
might evaluate to true or false depending on which operation is
performed first. Of course, you can dictate the order of evaluation by
inserting parentheses at appropriate places in terms. In the absence
of parentheses, the interpreter uses precedence rules similar to those
used by Pascal to decide the order of evaluation.
For example,
unary operations, - and not, are always performed first
and
*, /, and are performed before +, -,
and or
Statements
Generally, a statement alters an environment. Statements can be
grouped into atomic statements and compound statements:
Rule 1.4
<statement> ::= <atomic statement> | <compound statement>
Atomic statements are assignment statements and procedure
applications. The form of an assignment statement is
<variable> := <term>
The form of a procedure application (also known as a procedure call)
is the same as that of a function application:
<operator>([<term>, … , <term>])
where <operator> names a procedure instead of a function.
1-14
SilTools
Assignment statement form varies. For instance, the left-hand side
of the := symbol can be a term that references a record field or an
array component.
Example 1.5
Assignment statements:
x := sin(y), x := x + 1, table[6] := 0; employee.salary := x
Procedure calls:
writeln('hello', '...', 'world');
deposit(account, 50.00);
Compound statements are built up from atomic statements using
statement constructors. There are three categories of statement
constructors: conditionals and case statements, sequences, and
iterations (see Rule 1.5).
Rule 1.5
<compound statement> ::= <conditional> | <case> |
<sequence> | <iteration>
Sequences are groups of statements that are combined into a single
statement by bracketing them between the key words begin and end.
Rule 1.6
<sequence> ::= begin <statement>; …; <statement> end
The format of a conditional statement is expressed in Rule 1.7.
Rule 1.7
<conditional> ::= if <test> then <action1> [else <action2>]
where <test> is a Boolean-valued term and <action1> and <action2>
are arbitrary statements. Note that the else clause is optional.
Developer’s Guide
(7/96)
1-15
Introduction to the
SIL Language
The SIL Runtime Model
Introduction to the SIL Language
If <test> evaluates to true, then <action1> is evaluated, otherwise
<action2> is evaluated.
Example 1.6
If x and y are real-valued variables, then the following statement
assigns the absolute value of x to y:
if x >= 0 then
y := x
else
y := -x;
A typical programming error occurs when <action1> is itself a
conditional statement with no else clause. For example, consider the
statement
if test1 then if test2 then writeln('hello') else writeln('bye');
If test1 fails, should bye be written or not? The problem is that
ambiguity arises when determining whether else is part of the outer
conditional statement or the inner statement. In this situation, the
convention is to group the else clause with the outer if statement. We
can group it with the inner statement by inserting begin and end
statements:
if test1 then
begin
if test2 then
writeln('hello')
else
writeln('bye')
end;
The case construct in SIL uses the following form:
case <variable> of
<value>[,<value>,…,<value>]:<statement>;
…
<value>[,<value>,…,<value>]:<statement>;
[else: <statement>;]
end;;
1-16
SilTools
Introduction to the
SIL Language
The SIL Runtime Model
Example 1.7
case numkids of
0:writeln('childless');
1,2,3:writeln('small family');
4,5,6:writeln('mid-sized family');
else:writeln('big family');
end;;
The else clause is optional.
There are several types of iteration statements: repeat, while, and
for. The repeat and while statements behave similarly. The syntax for
these statements is expressed in Rule 1.8.
Rule 1.8
<iteration> ::= <while> | <repeat> | <for>
<repeat> ::= repeat <actions> until <condition>
<while> ::= while <condition> do <action>
<actions> ::= <action>; …; <action>
where <action> is an arbitrary statement and <condition> is a
Boolean-valued term.
In the repeat statement, <action> is repeatedly evaluated until
<condition> becomes true. Since <condition> is evaluated after each
evaluation of <action>, <action> will be evaluated at least once, even
if <condition> is initially true. On the other hand, the while statement
evaluates <action> until <condition> becomes false. In this case
<condition> is evaluated before each evaluation of <action>; so, if
<condition> is initially false, then <action> will never be evaluated.
Developer’s Guide
(7/96)
1-17
Introduction to the SIL Language
Example 1.8
A repeat statement can be used to check the validity of a user input:
repeat
writeln('do you want to continue? (y/n)');
readln(response);
valid := (response = 'y') or (response = 'n')
until valid
An example of while:
while i >= 0 do
begin
writeln(square root of ', i, ' = ', sqrt(i));
i := i - 1
end
The for statement has two possibilities:
■ Iteration by incrementing or decrementing an integer valued
loop control variable
■ Iteration through a list:
Rule 1.9
<for> ::=
for <lcv> in <list> [while <condition>] do <statement> |
for <lcv> := <start> [down]to <stop> [while <condition>] do
<statement>
where <list> is a list-valued term, <start> and <stop> are integervalued terms, and <condition> is a Boolean-valued term. <lcv> (loop
control variable) is an arbitrary variable.
In both types of for statements, it is not necessary to declare the loop
control variable <lcv>. The while <condition> is used to terminate a
loop before <lcv> reaches its final value. In the first for statement,
<lcv> successively takes on each value in <list> and evaluates
<statement>. See “Lists” on page 4-3 for examples of this. In the
second kind of for statement <lcv> is initially set to <first>, and
<statement> is evaluated. Thereafter, <lcv> is incremented or
1-18
SilTools
decremented depending on which key word (to or downto) is used.
After each increment/decrement, <statement> is evaluated. After
<lcv> reaches the value, <stop> (unless the while clause is used),
control passes to the next statement.
Example 1.9
This statement accumulates the sum of all prime numbers between 100
and 1000.
accum==0
for i := 100 to 1000 do
if prime(i) then
accum := accum + i;
This for statement finds the largest prime below max:
found==false;
for i := max downto 0 while not found do
begin
solution := i;
found := prime(solution)
end
Definitions
SIL uses five categories of definitions:
Rule 1.10
<definition> ::= <global variable definition>|
<variable declaration>|
<type definition>|
<procedure definition>|
<function definition>
Globals
The syntax for defining a new global variable or re-defining an
old global is
<variable> == <term>
Developer’s Guide
(7/96)
1-19
Introduction to the
SIL Language
The SIL Runtime Model
Introduction to the SIL Language
This statement assigns the value of <term> to <variable>, even if
<variable> was not previously declared or was assigned a value
of a different type.
Example 1.10
x == 22;
assigns the value 22 to the variable x.
x == 'hello world';
changes the value of x to the string hello world.
Types
To define new data types, use the following syntax:
type <type definition>; … ; <type definition>;;
where
<type definition> ::= <type name> = <type>
In this case, <type> is a term that evaluates to a data type. Notice
the extra semicolon at the end of the declaration. This tells the
interpreter not to expect more type definitions.
Example 1.11
We can define several types in a single type definition:
type
years = integer;
dollars = real;
employee = record
age: years;
salary: dollars;
name: string
end;
employee_table = darray of employee;;
1-20
SilTools
Functions and Procedures
The format of function and procedure definitions follows Pascal
syntax (illustrated in Example 1.12). “Procedures and
Functions” on page 2-2 defines functions and procedures in
detail.
Example 1.12
A procedure definition:
procedure display_employee(e: employee);
begin
writeln(e.name);
writeln(' salary = ', e.salary);
writeln(' age = ', e.age);
end;
A function definition:
function payroll(et: employee_table): dollars;
var {local variables}
total: real;
num_employees: integer;
begin
num_employees := length(et) - 1;
total := 0.0;
for i := 0 to num_employees do
total := total + (et[i].salary as_type real);
payroll := total as_type dollars
end;
Variable Declarations
The format of a variable declaration is
var <variable declarations>; … ; <variable declarations>;;
where <variable declarations> is a list of variables followed by a
type expression:
<variable declarations> ::= <variable list> : <type>
Variable lists are variables separated by commas:
<variable list> ::= <variable>, …, <variable>
Developer’s Guide
(7/96)
1-21
Introduction to the
SIL Language
The SIL Runtime Model
Introduction to the SIL Language
In the global environment, be sure to place a double semi-colon
at the end of the variable declaration so that the interpreter will
not expect more variable declarations.
Technically, a variable declaration is not a definition (in the
sense that a definition associates a value with a name). Instead,
a variable declaration associates a type with a name. The type
information is needed by the interpreter to evaluate other
definitions which refer to the name before the value is known
(this is known as forward referencing and will be discussed in
the next section). In the case of simple types, the declaration
attempts to compute an initial value of the appropriate type, and
assign it to the name. Again, notice the extra semicolon at the
end of the declaration.
Example 1.13
Several variables can be declared in a single declaration:
var
x, y, z: integer;
a, b, c: real;
i, j, k: darray of integer;;
SIL will initialize integers to 0, reals to 0.0, and arrays to length 0
arrays. You should not, however, depend on this—you should
always initialize your own variables.
1-22
SilTools
Introduction to the
SIL Language
Storage Model
Storage Model
Most types of SIL data are stored in a memory area called the heap.
Allocation and reclamation of storage in the heap is managed
automatically by an algorithm called a garbage collector. The design of
the heap and its management is similar to that used in modern
implementations of Lisp and SmallTalk. The only pieces of data that are
not stored in the heap are the values of local variables of type integer,
real, or record. This data is kept in another structure called the stack.
Any SIL data value other than an integer, real, or record is called a
heapval. Integers, reals, and records are called stackvals.
All SIL data, except integers and reals, include a word called the tag.
The tag indicates the layout of the fields making up the data. Consider
the type
type rri_lrec= lrecord real1: real; real2: real; int1: integer; end;;
with
rriv == mk_rri_lrec(2,3,4);
Then the datum representing the value rriv has the format
<tag | 2.0 | 3.0 | 4>
When a stackval appears as a field of a record or lrecord, its own fields
are embedded within the record or lrecord.
Example 1.14
type rri_rec = record real1,real2: real; int1: integer; end;;
type i_rri_rec = lrecord f1: integer; f2: rri_rec; end;;
i_rri_v == mk_i_rri_rec(99,mk_rri_rec(5,6,7));
Then the format of i_rri_v is
<tag | 99 | tag | 5.0 | 6.0 | 7 >
Developer’s Guide
(7/96)
1-23
Introduction to the SIL Language
When a heapval appears as a field of a record or lrecord, the heapval
datum is not embedded in the record, but rather represented by a pointer,
as in Example 1.15.
Example 1.15
type i_rri_lrec = lrecord f1: integer; f2: rri_lrec; end;;
rriv2 == mk_rri_lrec(11,12,13);
i_rri_v2 == mk_i_rri_lrec(17,rriv2);
The format of i_rri_v2 is
<tag | 17 | [pointer to rriv2]>
1-24
SilTools
Chapter 2
The Basics
Accessing Help
This chapter describes some of the basic features of the SIL language, including
on-line help, procedures, functions, polymorphism and input/output.
The Basics
Accessing Help
SIL includes a simple help facility:
help <name>;
The help command prints out all of the variants of the given name, their
types, and the name of the file in which they were defined. Example 2.2
shows part of the information printed out for the plus command in a
SilTools state.
Example 2.1
SIL> help plus;
type = FUNCTION(INERTIA_MATRIX, INERTIA_MATRIX,
INERTIA_MATRIX) from file:
~/cim/builds/nbot_ops37/s/v_inertia.si
protection: 0
type = FUNCTION(JV,JV,JV) from file:
~/cim/builds/nbot_typ26/s/v2mech2.sil
protection: 0)
type = FUNCTION(JVR,JVR,JVR) from file:
~/cim/builds/nbot_typ26/s/v2mech2.sil
protection: 0)
type = FUNCTION(AV,AV,AV) from file:
~/cim/builds/nbot_typ26/s/v6mech.sil
protection: 0)
type = FUNCTION(GCOORD,GCOORD,GCOORD) from file:
~/cim/builds/device8/s/d2gcoord.sil
protection: 0)
Developer’s Guide
(7/96)
2-1
The Basics
The help command also prints out type definitions as illustrated in
Example 2.2.
Example 2.2
SIL> help point;
type POINT = record
XC:REAL;
YC:REAL;
ZC:REAL;
end;;
from file:
~/cim/builds/device8/s/d2gcoord.sil
protection: 0)
Procedures and Functions
This section contains the following topics:
➢ Defining Procedures and Functions
➢ Local Environments
➢ Nested Definitions
➢ Recursive Functions and Procedures
➢ Closures
NOTE
2-2
This section and “Local Environments” on page 2-6
describe features in SIL which are identical to Pascal, so
you may want to skim, or even skip, these sections if you
know Pascal.
SilTools
Procedures and Functions
Defining Procedures and Functions
NOTE
Tasks, processes, and closures will be discussed in later
chapters.
The primary difference between a procedure and a function is that a
function returns a value, whereas a procedure operates purely by side
effect. The syntax for defining procedures and functions is
procedure <operator>([<formal parameters>]);
[var <local variables>]
<procedure body>;
function <operator>([<formal parameters>]): <type>;
[var <local variables>]
<function body>;
The optional formal parameters and local variable declarations in the
following code are sequences of variable declarations:
<local variables>::=
<variable declarations>; …; <variable declarations>;
<formal parameters> ::=
<variable declarations>; …; <variable declarations>;
The procedure body is an arbitrary begin/end statement:
<procedure body> ::= begin <statement>; …; <statement> end
A function body is also a begin/end statement, but requires the presence
of a return statement which has the form
<operator> := <term>;
This causes the function to return the value of <term> when the function
completes execution.
Developer’s Guide
(7/96)
2-3
The Basics
SIL can be used to define several types of programs. The most common
programs are procedures and functions, but SIL also supports tasks,
processes, and closures.
The Basics
Unlike global variable declarations, local variable declarations do not
require an extra semicolon. Examples 2.3 and 2.4 illustrate the use of
simple functions and procedures.
Example 2.3
The following are examples of some basic math functions:
function square(x: real): real;
begin
square := x * x
end;
function average(x, y: real): real;
begin
average := (x + y)/2
end;
function absolute_value(x: real): real;
begin
if x >= 0 then absolute_value := x
else absolute_value := -x
end;
Example 2.4
Here are some simple procedures for manipulating a global variable called
count. Unlike the functions in Example 2.3, which compute the value of
some mathematical function at a certain input, the procedures below have
no return values. Instead they modify count or write messages to the
screen:
count == 0;
procedure inc_count();
begin
count := count + 1
end;
continued on next page
2-4
SilTools
Procedures and Functions
Example 2.4
(continued)
The Basics
procedure dec_count();
begin
count := count - 1
end;
procedure clr_count();
begin
count := 0
end;
procedure show_count();
begin
writeln('count = ', count)
end;
procedure dispatch(cmmd: string);
begin
case cmmd of
'inc' : inc_count();
'dec' : dec_count();
'clr' : clr_count();
'show': show_count();
else : error('unrecognized command: ', cmmd)
end
end;
Note the use of the error procedure in Example 2.4. The error procedure
prints its arguments and returns control to the top-level control loop
instead of the function/procedure that called dispatch. This is useful
because an error in dispatch probably means that the
function/procedure calling dispatch will also have an error, as will its
caller, its caller’s caller, etc., up to the top-level control loop.
Developer’s Guide
(7/96)
2-5
The Basics
Local Environments
When a function/procedure is called, the body of the function/procedure
is evaluated by the interpreter in a local environment which contains the
bindings of the formal parameters to the actual parameters. For example,
the local environment created by the call average(2, 3) is
symbol
x
y
value
2
3
The interpreter then executes the body relative to this environment:
begin
average := (x + y)/2
end;
When the interpreter encounters a name which is not bound in the local
environment, such as count in the body of the procedure inc_count, it
attempts to look up the value in the global environment. Variables
occurring in function/procedure bodies that are not bound in the local
environment are called free variables.
In addition to parameter bindings, the local environment contains
bindings of local variables.
Example 2.5
The procedure application foo(1,2,3), where foo is defined by
procedure foo(x, y, z: integer);
var
a, b, c: integer;
e: darray of integer;
begin
…
end;
continued on next page
2-6
SilTools
Procedures and Functions
Example 2.5
(continued)
sets up the local environment.
value
1
2
3
0
0
0
undefined
The Basics
symbol
x
y
z
a
b
c
e
Note that a, b, and c are initially assigned 0 values. Generally, when the
type of a local variable is simple, the var declaration will attempt to
determine initial values for them. For more complex types, like records
and arrays, the locals are left uninitialized.
Several points should be made here. First, the bindings in a local symbol
table are accessible inside of the function/procedure body only. Second,
the local environment is destroyed when the interpreter finishes
evaluating the body of the function/procedure. When the
function/procedure is called again, a new local environment is created.
Nested Definitions
SIL does not permit nested definitions. The only exception to this rule
is in the case of variable declarations which can occur inside of
procedure/function definitions. This is a significant departure from
Pascal which allows type and function/procedure definitions to be
nested inside of other function/procedure definitions.
Because SIL does not permit nested definitions, all user-level support
function/procedures are defined in the global environment and can be
called from the top-level control loop just like their user-level client.
Developer’s Guide
(7/96)
2-7
The Basics
Recursive Functions and Procedures
A recursive function (or procedure) is a function which calls itself.
Recursive functions can cut through complex programming problems
by repeatedly dividing a problem into smaller versions of itself.
Because a recursive function calls itself, the system must know
something about the function before the function is defined. This can be
accomplished by using what is known as a forward reference.
Example 2.6
The standard example of a recursive function is the factorial function
which returns the product of all positive integers less than or equal to its
argument:
{forward reference …}
var fact: function(integer, integer);;
function fact(n: integer): integer;
begin
if n < 0
then error('input to fact must be non-negative')
else if n = 0
then fact := 1 {by convention …}
else fact := n * fact(n - 1)
end;
A function type, and therefore variable declaration, has the form
function(<output type>, <input type 1>, …, <input type n>)
2-8
SilTools
Procedures and Functions
Example 2.7 is a traditional example of a recursive function.
Example 2.7
Euclid's method for computing greatest common divisors:
The Basics
{forward reference …}
var gcd: function(integer,integer,integer);;
function gcd(x, y: integer): integer;
begin
if y = 0 then gcd := x
else gcd := gcd(y, mod(x,y))
end;
NOTE
mod(x, y) = the remainder of x/y
When gcd(15, 12) is called, this local environment is created:
symbol
x
y
value
15
12
But before the interpreter finishes evaluating the body of this call, and
before the local environment is discarded, the call gcd(12, 3) is made.
This call sets up the following local environment:
symbol
x
y
value
12
3
Before this environment is discarded, the call gcd(3, 0) is made and this
local environment is created:
symbol
x
y
value
3
0
At this point, we have three distinct local environments created by three
distinct calls to the same function.
Developer’s Guide
(7/96)
2-9
The Basics
Closures
Closures are entities in SIL which allow functions to be manipulated as
data to be passed to functions, inserted in data structures, etc.
function shorter(x,y:string):boolean;
begin
shorter := length(x) < length(y);
end;
shorterc == mk_closure("shorter,function(boolean,string,string));
The shorterc variable’s value is the function shorter. Its type is
closure(boolean,string,string)
The least function is used as follows:
function least(x:list of string;y:closure
boolean(string,string)):string;
var rs:string;
begin
if null(x) then error('attempt to apply least to an empty list of
strings');
r := car(x);
for i in cdr(x) do if y(i,rs) then rs := i;
least := rs;
end;
least finds the least member of x according to the ordering given by y:
Example 2.8
SIL> least(list('ab','abcd','e','hello'),shorterc);
e
Note that
least(list('ab','abcd','e','hello'),shorter);
would not work. shorter is a function, not a data value. Besides, if there
were more than one variant of shorter, you could not easily determine
which version is meant.
2-10
SilTools
Polymorphism
Polymorphism
General Information
The Basics
Consider the following SIL code:
function twice(x:integer): integer;
begin
twice := x + x;
end;
function twice(x:string): string;
begin
twice := x * x;
end;
In Pascal, these two definitions could not coexist, but they can in SIL
because of a feature called polymorphism. A polymorphic typing
system permits one name, such as twice, to name several objects at the
same time as long as the objects have distinct types, and as long as a
selection of which object is meant by the name can be made based on
the context in which the name appears.
We call objects having the same name variants of the name.
When SIL encounters a name applied to a list of arguments, as in
twice('hello!');
it looks through the function variants of twice to find one whose input
types match the types of the arguments. In this case, the second version
of twice above is selected. A name can have a data variant as well as
function variants. For example:
twice == 'twice';
can be added without disturbing the meanings of twice as a string or
integer function. Only one such data variant is allowed.
Developer’s Guide
(7/96)
2-11
The Basics
Polymorphism Tricks
You can define your own variants of system-defined functions. This
introduces some interesting possibilities. For example, the parser parses
infix operators to prefix operators. By defining custom variants of these
prefix operators, you can take advantage of the infix syntax (see
Example 2.9).
Example 2.9
The parser parses infix operators like + and * to plus and times. Defining
your own polymorphic variants of these enables you to call them using the
infix operators:
function plus(x, y: list of integer): list of integer;
begin
plus := append(x, y)
end;
SIL> list(1,2,3) + list(4,5,6);
[LIST: 1,2,3,4,5,6]
The printer in the read/eval/print loop of the SIL control loop is called
tprint. Defining your own variant of tprint causes your printer to be
invoked each time SIL prints one of your objects (see Example 2.10).
Example 2.10
type point = record
xc,yc,zc:real;
end;;
procedure tprint(x:point);
begin
write('[xc:',xc(x),',yc:',yc(x),',zc:',zc(x),']');
end;
and now:
SIL> xx == mk_point(1,2,3);
SIL> xx;
[xc:1.000000,yc:2.000000,zc:3.000000]
2-12
SilTools
Input/Output
Input/Output
This section contains the following topics:
The Basics
➢ Reading from the Keyboard
➢ Writing to the Screen
➢ Reading and Writing to a File
➢ EOF
Presenting SIL I/O capabilities consists mainly of listing conventions
which, because of their simplicity, need no explanation. For this reason,
this section contains a series of annotated examples. These examples
will serve to demonstrate how to use the I/O conventions, and in what
context.
Reading from the Keyboard
Example 2.11
Assume that the following declarations are made:
var a:integer; b:string;;
The read command instructs the interpreter to assign the next value it
reads to the variable argument of the read procedure (=> indicates input by
the user in absence of prompt):
SIL> read(a);
=> 37
SIL> a;
37
More specifically, read(x) causes the next token in the input stream to be
read in. The type of x must be string, integer, real, id, or lispob. If the
token can be interpreted as a data item of the kind indicated by the type
of x, then x will be assigned this value; otherwise, an error will occur.
Any token can be interpreted as a string or lispob. The obvious
Developer’s Guide
(7/96)
2-13
The Basics
restrictions apply to integers and reals. IDs must follow the SIL rules for
IDs (alphabetic character followed by a sequence of non-delimiters).
Reading a token as a lispob and a string may yield different results.
Example 2.12
var aa :string;;
SIL> read(aa);
=>123
results in aa being assigned the string 123.
SIL> aa == nil;
SIL> read(aa);
=> 123
results in aa being assigned the integer 123 cast as a lispob. (see “lispobs”
on page 9-4 for more information).
Finally, we note that a quoted string as in
'hello there'
is read as a single string-valued token.
The readln command reads one token from the input, and then discards
the rest of the line (if any) on which the token appears.
In addition to the read and readln procedures, the following functions
are available:
■ read_char() reads just one character, and returns its ASCII
code.
■ read_token() reads one token, and returns it as a lispob.
■ read_line() reads an entire line, and returns it as a string,
independent of what may appear in the line.
2-14
SilTools
Input/Output
Example 2.13 shows examples of read and readln.
Example 2.13
SIL> a == 23;
TRUE
The Basics
SIL> b == "b;
TRUE
SIL> begin readln(a);readln(b);
end;
23 45
abc
ok
SIL> a;
23
SIL> b;
ABC
SIL> var a:string;;
TRUE
SIL> read(a);
=> 'hello goodbye'
ok
SIL> a;
hello goodbye
More than one item can be read from a line:
SIL> a==23;
TRUE
SIL> b==2.3;
TRUE
SIL> begin read(a);read(b);end;
=> 1 2
ok
SIL> a;
1
SIL> b;
2.00000
Developer’s Guide
(7/96)
2-15
The Basics
Writing to the Screen
Example 2.14
Assume that we assign values to the following variables:
a := 9;
b := 'the value of a is ';
The writeln statement causes the interpreter to print the values of its
arguments on the screen followed by a carriage return and a line feed:
SIL> writeln(a);
9
OK
The write statement suppresses the carriage return/line feed:
SIL> begin write(b); writeln(a) end;
the value of a is 9
OK
Reading and Writing to a File
Example 2.15
ASCII files are organized into lines. One line is specified as the current
line. To perform file I/O, follow these steps.
Step 1: Declare a variable of type text:
var data : text;;
text is the data type of an ASCII file.
Step 2: The statement
data := mk_file('/people/me/my_data.txt');
associates the pathname /people/me/my_data.txt to the
text variable data.
continued on next page
2-16
SilTools
Input/Output
Example 2.15
(continued)
Step 3: The procedure:
open(data,'output')
The Basics
allows us to write to the file with pathname
/people/me/my_data.txt.
The procedure:
open(data, 'input')
allows us to read from the file with pathname
/people/me/my_data.txt.
A text variable cannot be simultaneously open for input and
output.
WARNING The arguments to open are case sensitive.
Step 4: Writing to a file. Assume that data is open for output. The procedure
writeln(data,a);
writes the value of a to the current line of the file assigned to data,
and advances the current line of data to the next line.
write(data,a);
writes the value of a to the next line without changing the current
line.
Step 5: Reading from a file. Assume that data is open for input. The
procedure
readln(data,a);
assigns the next token to the variable a, and advances the current
line to the next line. The procedure:
read(data,a);
assigns the next token to a, but does not advance current line.
Step 6: After any I/O session the file must be closed. The procedure:
close(data)
closes data and resets its current line to the first line.
Developer’s Guide
(7/96)
2-17
The Basics
EOF
Example 2.16
Assume that data is declared, created, and opened for output as in
Example 2.15. The statement
SIL> for i := 1 to 20 do writeln(data, i * i);
writes the squares of the first 20 integers to data. Assume that data is
subsequently closed and re-opened for input.
SIL> while not eof(data) do begin readln(data,a);
writeln(a) end;
1
4
9
16
25
36
49
64
81
100
121
144
169
196
225
256
289
324
361
400
Additional operations on files are
read_char(<text>)
read_token(<text>)
read_line(<text>)
2-18
SilTools
Symbols
Symbols
This section contains explanations and examples of the following
topics:
The Basics
➢ Identifiers
➢ Useful Symbol Operations
■ Intern
■ Concatenation
■ i_tsetq
■ id2string
A symbol is a name. Constants, variables, type names, and
function/procedure names are examples of symbols.
SIL features symbols that not only name data objects (lispobs), but are
data objects themselves. In this way, a symbol can be passed to a
function/procedure as a parameter, returned from a function as a value,
or can be named by another symbol (which might be a variable or a
constant).
Example 2.17
pi names the real 3.141598
integer names the data type integer
Assume the following definitions:
x == 0;
procedure foo();
begin
writeln('hello world')
end;
Then x names the integer 0 and foo names the procedure defined above.
Developer’s Guide
(7/96)
2-19
The Basics
Identifiers
The SIL data type of all symbols is called id (which is short for
IDentifier). Of course, SIL expressions must distinguish between
use and mention of an id. To make this distinction, precede all
mentions of an id with double quotes (").
Example 2.18
Assume the symbol x names the lispob 0:
x == 0;
Next, the symbol y names the symbol x:
y == "x;
Notice that in this expression we are using the symbol y, but
mentioning the symbol x; thus we precede x by double quotes.
We can keep going and let the symbol z name the symbol y, and so on:
z == "y;
The following terms all have value 0:
x, value_of(y), value_of(value_of(z))
Useful Symbol Operations
The following section contains descriptions and examples of
commonly-used symbol operations.
Intern
To promote a string to a symbol, use the following construction:
intern(<string>)
This constructs and returns a symbol with print name <string>.
2-20
SilTools
Symbols
Concatenation
To concatenate two (or more) symbols and return a new symbol:
<symbol1> * <symbol2> * …
Example 2.19
The Basics
SIL> "cat * "fish;
CATFISH
i_tsetq
To assign a lispob <value> of type <type> to <symbol> from
inside of a program, use
i_tsetq(<symbol>, <value>, <type>)
id2string
To get the print name of an id, use
id2string(<symbol>)
Example 2.20
SIL> id2string(“CATFISH)
CATFISH
Developer’s Guide
(7/96)
2-21
Chapter 3
SilTools Geometry
Understanding SilTools Geometry
This chapter explains the geometric terms used in SilTools and contains
instructions for manipulating geometry with SIL commands instead of the
menus. These instructions are provided for programmers who need a fairly
detailed guide for performing geometric manipulations.
Spatial geometry or simply, geometry* is the means of describing how
objects are situated in the region of three-dimensional space being
simulated.
With SilTools, geometric descriptions are used to construct and locate
simulated objects. SilTools uses those same geometric descriptions to
perform kinematic transformations on the simulated objects for moving
them around the simulated space.
Geometric Terms
The language used in this manual and when speaking about SilTools
entities contains terms like coordinate system, frame, pose, and
reference system. The following items explain the distinctions between
these terms.
■ All shapes have a pose.
■ Frame shapes are a special kind of shape (which also possess
a pose).
■ The current reference frame is some shape’s pose.
■ Frame shapes are physical objects in the simulated world,
and can usually be picked with the mouse like any other
shape.
■ Poses can be displayed, but are ephemeral—they cannot be
selected.
* Chapter 2 of Introduction to Robotics by John J. Craig (Addison-Wesley, 1989)
provides detailed information on the concepts in this chapter.
Developer’s Guide
(7/96)
3-1
SilTools Geometry
Understanding SilTools Geometry
SilTools Geometry
Every point on an object has a fixed location relative to its pose. When
you manipulate objects, you only need to be concerned with their poses.
NOTE
“Poses” on page 3-16 describes poses.
Shape
To simulate objects in a three-dimensional space, SilTools
manipulates a data structure in which all simulated objects are
represented by a type called shape.
To handle multiple shapes, SilTools arranges all shapes in the
simulated world in a tree structure. The root of this tree is a special
shape which lacks any associated geometry and is called world.
Frame
SilTools provides a special kind of shape called a frame which is
used primarily for teaching desired positions of objects (e.g., via
points in a path along which another shape will move). The
geometry of a frame shape is shown on the right-hand side of Figure
3-1—one axis looks like an X, one like a Y, and the Z axis looks like
a pointer. Because a frame is also a kind of shape, it has a pose which
lies coincidently with the frame’s geometry.
Frame
Pose
Figure 3-1
3-2
Coordinate frames
SilTools
Understanding SilTools Geometry
Geometric Units
To specify positions and orientations, you need a way of specifying
lengths and rotations.
The default unit for length in SilTools is centimeters. All other units of
length are based on this default and are easily defined.
Example 3.1
To use the meter (100 centimeters) as your default unit. This unit is defined
with a SIL const declaration:
To express a length in meters rather than in centimeters, the length is
simply multiplied by the constant. For instance, a length of 5 meters would
be written as
5 * meters
Some units of length are already pre-defined as global constants in
SilTools. They are inch (2.54 centimeters), foot (30.48 centimeters),
mm (0.1 centimeters), and mil (0.00254 centimeters).
The default unit for rotation is degrees. The size of a rotation is the
number of degrees in the swept angle. Positive (+) rotations are taken
to be counter-clockwise looking down the positive axis of rotation
toward the plane of rotation. Negative rotations are clockwise. A
pre-defined constant rad (180/pi degrees) is provided for working in
radians.
The following equation returns a value of 180:
pi * rad;
Developer’s Guide
(7/96)
3-3
SilTools Geometry
const meter:=100;
SilTools Geometry
Position
A position is a property of points that describes a point’s location
relative to some known reference frame. The position of the point is at
X, Y, Z in Cartesian coordinates. In SilTools, the units of position are
specified by centimeters by default (but can be changed easily to the
units of your choice).
Position
(X,Y,Z)
•
z
(0,0,0)
y
Figure 3-2
x
Position
For example, every point on an object has a position relative to the frame
of that object. Every frame has a position relative to some other frame
determined by the location of its origin (a point) in that frame. A
convenient way to depict position is with a vector pointing from the
reference frame’s origin to the positioned point.
Position Vectors
Z
Z obj
Y obj
X
Figure 3-3
Y
X obj
Position vectors
A point’s position is specified by its reference frame coordinates.
SilTools provides three useful coordinate descriptions: Cartesian,
cylindrical and spherical.
3-4
SilTools
Understanding SilTools Geometry
Cartesian Description
The most common is the Cartesian description where the point’s
coordinates are its X, Y, and Z distances from the reference frame’s
origin.
Z
Cartesian
coordinates
•
z
y
X
Y
SilTools Geometry
Figure 3-4
x
Cartesian coordinates
Use the type crt to construct a Cartesian position using this
command and syntax:
mk_crt(<xc>,<yc>,<zc>);
or
mk_point(<xc>,<yc>,<zc>);
Developer’s Guide
(7/96)
3-5
SilTools Geometry
Cylindrical Description
Another type of position is the cylindrical description in which the
point’s coordinates are its angular distance from the X axis
measured counter-clockwise in the XY plane of the reference frame,
its radius normal to the Z axis, and its height along the Z axis.
Z
Y
Z
Theta
X
Figure 3-5
Radius
Cylindrical coordinates
Use the type cyl to construct a cylindrical position using this
command and syntax:
mk_cyl(<rad>,<theta>,<zc>);
3-6
SilTools
Understanding SilTools Geometry
Spherical Description
The final description is spherical, in which the point’s coordinates
are its radius from the origin of the reference frame, its angular
distance from the X axis (longitude), and its angular distance from
the XY plane (latitude).
Z
X
SilTools Geometry
•
Y
Figure 3-6
Spherical coordinates
Use the type sph to construct a spherical position using this
command and syntax:
mk_sph(<rad>,<lng>,<lat>);
Developer’s Guide
(7/96)
3-7
SilTools Geometry
Orientation
Orientation is a property of objects that describes how the object’s frame
is aligned relative to a reference frame. Orientation is specified in terms
of rotations of the object’s frame about the axes.
Reference Frame Copy
Reference Frame
Z
Z obj
z
Y obj
x
X
Figure 3-7
y
Y
X obj
Orientation
With the two frames initially coincident, the rotations are performed in
a specific order to arrive at the stated orientation. Using a copy of the
reference frame is important to prevent inadvertent position changing.
That is, if the rotations are conducted about the axes of the reference
frame itself, the position and the orientation will change.
Figure 3-8
3-8
Frame rotated about Y axis
SilTools
Orientation
Using SilTools, there are three main ways to specify the rotations that
describe the orientation of a frame:
■ Sequential rotations of the frame about the fixed X, Y, and Z
axes of the reference frame copy (called yaw-pitch-roll).
■ Sequential rotations about the X, Y, and Z axes of the
frame’s new orientation after each successive rotation
(called Euler angles).
■ A single rotation of the frame about a generalized axis
Within the Euler and fixed representations, there are 24 combinations
for specifying orientations. Use the input representation from the
following list which matches your situation, and the SIL function
to_frame, to convert general orientations to SilTools frames.
xyz_fixed
xyz_euler
xzy_fixed
xzy_euler
yxz_fixed
yxz_euler
Developer’s Guide
(7/96)
yzx_fixed
yzx_euler
zxy_fixed
zxy_euler
zyx_fixed
zyx_euler
xyx_fixed
xyx_euler
xzx_fixed
xzx_euler
yxy_fixed
yxy_euler
yzy_fixed
yzy_euler
zxz_fixed
zxz_euler
zyz_fixed
zyz_euler
3-9
SilTools Geometry
pointing out from the origin of the reference frame copy
(called equivalent angle-axis).
SilTools Geometry
Yaw-Pitch-Roll
In SilTools terminology, yaw, pitch, and roll refer to rotation about the
X, Y, Z axes (in that order) about a fixed reference frame. In the case of
robot end-effectors, the Z axis points outward along the centerline of the
flange. Therefore, the roll of the wrist always occurs about the Z axis of
the tool or mounting flange (see Figure 3-9).
Mounting Flange
Tool
Z
Figure 3-9
Roll
Yaw-Pitch-Roll
Yaw-pitch-roll is convenient for describing the orientation of any
object’s frame. The rotations are performed sequentially about the axes
of the initial orientation of the frame and always performed in this order:
1. Yaw (about X).
2. Pitch (about Y).
3. Roll (about Z).
The order in which the rotations are performed is important. In general,
a rotation about x followed by a rotation about y followed by a rotation
about Z (yaw-pitch-roll) will not produce the same orientation as a
rotation about Z, then about Y, then about X (roll-pitch-yaw).
3-10
SilTools
Orientation
Figure 3-10 shows the difference between a yaw-pitch-roll of (90,90,90)
and a roll-pitch-yaw of (90,90,90).
Roll-Pitch-Yaw (90, 90, 90)
Z Z REF
Y Z REF
Y
Y
X
X
Y
X REF
X Z REF
X
Y REF
Z
X REF
Y REF
Z
X REF
Y REF
SilTools Geometry
Z
YAW
PITCH
ROLL
Yaw-Pitch-Roll (90, 90, 90)
Y Z REF
Z
Z
X
Y
ROLL
PITCH
YAW
Z REF
Y Z REF
Z
X
X REF
Z
Y REF
Y REF
X REF
X
Figure 3-10
X REF
Y REF
X
Roll-Pitch-Yaw vs. Yaw-Pitch-Roll
For mnemonic reasons the rotations will always be performed in the
order in which they are specified. Because X-Y-Z is a familiar order,
yaw-pitch-roll is only used in SilTools for rotations about the (fixed)
axes of the reference frame copy. Because all three rotations are defined
relative to the same initial frame orientation, these rotations are relative
to fixed axes. This is a key point since Euler angles are rotations which
are not relative to fixed axes.
The geometric type provided by SIL for describing yaw-pitch-roll
orientations is ypr (yaw-pitch-roll). You may construct a yaw-pitch-roll
orientation with the command
mk_ypr(<yaw>,<pitch>,<roll>);
Developer’s Guide
(7/96)
3-11
SilTools Geometry
Euler Angles
Euler (pronounced “oiler”) angles are named after a Swiss
mathematician, Leonhard Euler (1707-1783), who contributed many
important theorems to the science of kinematics. Like yaw-pitch-roll,
Euler angles describe orientation by sequential axis rotations. The
difference is that the rotations are not about the axes of the fixed
reference frame copy as they are with yaw-pitch-roll rotations; they
occur about the new axes of the frame after each rotation.
In general, any series of three rotations in which each successive
rotation is about one of the new X, Y, or Z axes is a set of Euler angles.
For example, one commonly used convention is Z-Y-Z Euler angles. An
orientation given in Z-Y-Z Euler angles is the result of first rotating the
frame about the Z axis of the reference frame copy with which it is
initially coincident, then rotating about the new Y axis and, finally,
rotating about the new Z axis. Many six degree of freedom robots have
wrists which emulate this Z-Y-Z orientation.
The geometric type provided by SIL for describing Z-Y-Z Euler angle
orientations is zyz (Z axis, Y axis, Z axis). A Z-Y-Z Euler angle
orientation may be constructed with the command
mk_zyz(<rotz1>,<roty>,<rotz2>);
Another Euler angle set is X-Y-Z. An orientation given in X-Y-Z Euler
angles is the result of first rotating the frame about the X axis of the
reference frame copy with which it is initially coincident, then rotating
about the new Y axis and, finally, rotating about the new Z axis.
The geometric type provided by SIL for describing X-Y-Z Euler angle
orientations is xyz (X axis, Y axis, Z axis). You may construct an X-Y-Z
Euler angle orientation with the command
mk_xyz(<rotx>,<roty>,<rotz>);
As with yaw-pitch-roll, the order in which the rotations are performed is
crucial in describing orientations using either set of Euler angles.
3-12
SilTools
Orientation
Equivalent Angle-Axis
One of Euler’s theorems states that any orientation may be achieved
with an appropriate rotation of the frame about a general axis through
the origin of the reference frame copy. This is called the equivalent
angle-axis rotation.
The equivalent axis of rotation may be represented as a unit vector from
the origin of the reference frame copy. The formula for finding a unit
vector from a set of XYZ Cartesian coordinates through which the
positive axis of rotation passes is
where u is the desired unit vector, a is the Cartesian point in vector form,
and
a
is the vector magnitude of a.
For instance, a unit vector through the Cartesian point (1,1,1) is
------3-, ------3-, ------3-
3 3 3
A unit vector through the point (1,2,0) is
------5-, 2---------5-, 0
5
5
A unit vector along the X axis is simply (1,0,0). The equivalent angleaxis representation is constructed by multiplying the unit vector of the
equivalent axis by the equivalent angle.
The geometric type provided by SIL for describing equivalent angleaxis orientations is aax (equivalent angle-axis). You may construct an
equivalent angle-axis orientation with the command
mk_aax(<xeq>,<yeq>,<zeq>);
Developer’s Guide
(7/96)
3-13
SilTools Geometry
a
u = ----a
SilTools Geometry
Although it is not easy to determine the appropriate general axis and
proper rotation to produce a desired orientation, the equivalent angleaxis representation is useful for producing complex orientations when
you know both the axis and amount of rotation. Consider the antenna in
Figure 3-11.
Z
30°
Y
30°
Z
X
Y
90°
X REF
X
Figure 3-11
Angle-axis orientation
The Z axis of the dish’s frame is normal to the dish at its center, and is
tilted 30 degrees from vertical in its YZ plane. To rotate the dish 90
degrees while maintaining the same tilt, you must determine the unit
vector of rotation along the vertical axis in the dish’s frame (which is
0,sin30,cos30). Next, multiply the vector by the desired rotation of 90.
The resultant orientation (with respect to the initial orientation) is
[0,45,77.9] as aax
When orientations involve only a single rotation about the X, Y, or Z
axis of the reference frame copy, it makes no difference whether you
describe them using yaw-pitch-roll, X-Y-Z Euler angles, or equivalent
angle-axis. For example, the following commands each describe the
same orientation:
[0,70,0] as ypr;
[0,70,0] as xyz;
[0,70,0] as aax;
3-14
SilTools
Orientation
Figure 3-12 illustrates that this is not the case for orientations involving
more than one principle axis rotation.
Yaw-pitch-roll (90,90,90)
Z REF
Y
Y REF
X REF
Z
SilTools Geometry
X
X-Y-Z Euler (90,90,90)
X
Z REF
Y
Z
X REF
Y REF
Equivalent angle-axis (90,90,90)
Z REF
Y
X
X REF
Figure 3-12
Developer’s Guide
(7/96)
Z
Y REF
Orientations with multiple axis rotations
3-15
SilTools Geometry
Poses
Every shape (including World) has an associated local reference frame
which is called its pose. The pose of the World is the master reference
system, and every other shape in the World tree has a pose which is
specified relative to the World pose. When you select a reference frame
using the menus, the pose of some shape is always selected. The default
reference frame is the pose of the World and may sometimes be called
the Universe coordinate system.
In SilTools, a pose is described using six values that combine its position
and orientation (x, y, z, yaw, pitch, roll).
Pose
Z
z
X
Y
y
x
Figure 3-13
Pose
Describing position and orientation is simply a matter of combining a
position and orientation using the geometric type pose. The general
form of the command is
mk_pose(<position>,<orientation>);
where <position> and <orientation> may be any of the types described
above. Either or both position and orientation may be specified. If you
omit position, it is assumed to be (0,0,0). Likewise, if you omit
orientation, it is assumed to be (0,0,0).
For added convenience, a pose may be specified with six numbers. The
first three indicate the Cartesian position, and the last three indicate the
yaw-pitch-roll orientation:
mk_pose(<xc>,<yc>,<zc>,<yaw>,<pitch>,<roll>);
3-16
SilTools
Geometric Operators
This Cartesian yaw-pitch-roll description is the default of poses used in
SilTools.
Example 3.2
Some examples specifying poses are
mk_pose(mk_sph(1,2,3),mk_ypr(90,0,30);
mk_pose(position_1,mk_xyz(30,45,0));
mk_pose(table_orientation);
mk_pose(30,50,74.2,90,90,0);
show(<pose>);
The specified pose will be displayed as a frame whose origin is the point
specified by the position component of the pose, and whose axes
represent the orientation component of the pose. Poses displayed with
the show command remain visible as frames only temporarily—they
disappear the next time the graphics display is updated.
Geometric Operators
All positions, orientations, and poses are absolute. In other words, the
assumed reference is the Universe frame whose pose is the null
(absolute) pose described in Cartesian and yaw-pitch-roll terms as
(0,0,0,0,0,0).
You may find it convenient to think of poses in relation to reference
frames other than the Universe frame. For instance, given a pallet full of
parts, it is easier to specify the poses of those parts relative to the frame
of the pallet rather than to the Universe frame, especially if the absolute
pose of the pallet is unknown beforehand.
Developer’s Guide
(7/96)
3-17
SilTools Geometry
As an aid in visualizing poses, they can be displayed as frames using the
show command:
SilTools Geometry
Example 3.3
Use the geometric operator rel to specify a reference frame. The general
command form of the rel operator is
<geometric type>rel<pose>;
where the argument preceding rel can be any position, orientation, or pose,
and the argument following rel must always be a pose. The value returned
is always an absolute position, orientation, or pose computed from the two
arguments. For example, consider a pose of (1,2,3,0,0,0). A position (1,3,2)
relative to this pose would be the position (2,5,5) in the Universe frame.
That is,
mk_crt(1,3,2)rel
mk_pose(1,2,3,0,0,0);
returns the Universe position (2,5,5).
Returning to the pallet example, suppose you have defined a pose called
pallet_pose to represent the pose of the pallet frame relative to the
Universe. To place a part on a corner of the pallet four inches in from both
sides, you would construct the pose as follows:
part_pose:=mk_pose(4*inch,4*inch,0,0,0,0) rel pallet_pose;
Assume that the reference frame of the pallet is at the corner. SilTools
computes the pose of the part in the frame of the Universe, but you need
only specify its pose relative to the pallet pose. If you do not use rel, use
the following:
part_pose:=mk_pose(4*inch,4*inch,0,0,0,0);
SilTools assumes that you mean 4 inches along the X axis and 4 inches
along the Y axis of the Universe.
Sometimes you know the poses of two frames relative to the Universe,
but would like to know the pose of one in the frame of the other. For this,
you use the in_frame operator:
<geometric type>in_frame<pose>;
3-18
SilTools
Geometric Operators
where the argument preceding in_frame can be any absolute position,
orientation, or pose (relative to the Universe), and the argument
following in_frame is a pose relative to the Universe. The value returned
is always a position, orientation, or pose with the pose specified after the
in_frame operator as its reference instead of the Universe.
Example 3.4
Consider a pose of (1,2,3,0,0,0) and a position (3,2,1). This position in the
frame of the given pose would be (2,0,-2). That is,
mk_crt(3,2,1)in_frame mk_pose(1,2,3,0,0,0);
The in_frame operator is useful if you need to rearrange components of
a simulated workcell without changing their poses relative to one
another.
Example 3.5
Suppose you have defined conveyor and robot poses relative to the
Universe such that the robot can pick parts off the conveyor. And suppose
you need to reposition both the robot and conveyor to make room for a new
machine, but don’t want to change the conveyor’s position relative to the
robot. Using in_frame you may find the conveyor’s position in the frame
of the robot:
conv_in_robot:=conveyor_pose
in_frame robot_pose;
After you have defined the robot’s new pose relative to the Universe, the
new pose for the conveyor relative to the Universe is
con_new_pose:=conv_in_robot rel robot_new_pose;
No matter where you decide to put the robot, the new conveyor pose
relative to the Universe is always the value of conv_in_robot relative to
the new pose of the robot. Poses created using in_frame are almost always
used later as the first argument in a rel statement.
Developer’s Guide
(7/96)
3-19
SilTools Geometry
returns the absolute position (2,0,-2).
SilTools Geometry
Example 3.6
To illustrate the difference between rel and in_frame, suppose you want to
retract the tool of a robot 20 cm along its own Z axis. If the present pose of
the tool is called tool_pose and the retracted pose is called retract_pose,
the command to compute the retracted pose is
retract_pose:=mk_pose(0,0,-20,0,0,0)rel tool_pose;
Now you can command the robot to move its tool to retract_pose and the
tool will appear to retract. If you use the following command instead:
retract_pose:=mk_pose(0,0,-20,0,0,0) in_frame tool_pose;
the pose (0,0,-20,0,0,0) is assumed to be relative to the Universe, and the
computed pose is very different from what you intended.
Note that rel and in_frame are inverse operations. For two poses a and b:
a rel b in_frame b;
and
a in_frame b rel b;
both return the pose a.
3-20
SilTools
Chapter 4
Data Types
This chapter describes the basic data types, including lists, arrays, records,
strings.
Types
Constructed
Arrays
Lists
System-Defined
Integers
Figure 4-1
NOTE
Reals
Strings
User-Defined
Booleans
Records
Classes
Basic SIL data types
The complete SIL data type structure is shown in Figure
1-5, “Data type classifications” on page 1-11.
Constructed types are built from existing types using type constructors.
Some type constructors are list_of, array_of, function and procedure.
■ list_of(integer) is the type of all integer lists.
The base type of the type list_of(integer) is integer. Notice
that list_of(list_of(integer)) is another constructed type with
base type list_of(integer). list of integer is the alternative
syntax for list_of(integer).
Lists are described on page 4-3.
■ array_of(integer) is the type of all arrays of integers
(regardless of size).
The base type in this case is integer. darray of integer is the
alternative syntax for array_of(integer).
Arrays are described on page 4-8.
Developer’s Guide
(7/96)
4-1
Data Types
Constructed Types
Data Types
■ function(real, integer, integer) is the type of all functions
that take two integer inputs and return a real output. Integer
division is a function in this type.
■ procedure(real, integer) is the type of all procedures which
expect a real-valued and integer-valued input.
NOTE
Procedures and functions are described on page 2-2.
System-Defined Types
SIL system-defined types include the basic scalar types: integer, real,
boolean, string. Strings are described on page 4-12.
User-Defined Types
User-defined types are created by type definitions:
type <name> = <type expression>;;
Any kind of type expression can be used in a type definition.
Example 4.1
type
age = integer;
height = real;
name = string;;
Two of the most commonly-used of these types, records and lrecords,
are described on page 4-17. Classes are described in Chapter 5,
“Classes”.
4-2
SilTools
Lists
Lists
This section contains the following topics:
➢ List Types
➢ Other List Operations
➢ Destructive List Operations
➢ List Recursion and Iteration
A dynamic list is a sequence of objects, all of the same type, which can
grow and shrink during program execution. You can define and
manipulate dynamic lists using the traditional Lisp operations: car, cdr,
and cons. Examples 4.2 and 4.3 demonstrate the use of the list operator
as well as car, cdr, and cons.
In the list creation process, applying the list operator to any number of liketyped operands creates and returns the list consisting of the operand values.
For example, the function call
list(88, -3, 0, 10 + 2)
creates the list
[88, -3, 0, 12].
Developer’s Guide
(7/96)
4-3
Data Types
Example 4.2
Data Types
Example 4.3
The car, cdr, and cons operators may be used in the following fashion:
Assume we have defined the global variable l1 by:
l1 == list(88, -3, 0, 10 + 2);
The function application
car(l1)
returns 88, the head of l1. While the call
cdr(l1)
returns the tail [-3, 0, 12] of l1. This does not modify the value of l1 which
is still the list [88, -3, 0, 12]. The function call
cons(100, l1)
returns a new list with head = 100 and tail = l1.
List Types
The base type of a list is the type of the members of the list. The list
operations ensure that the base type of a list is well-defined. For
example, the call
list(1, 2, 'hello world')
results in a type mismatch error, since all of the arguments are not of the
same type. This seems fairly straightforward until we consider empty
lists (lists with 0 members). What is the base type of an empty list? To
solve this problem in SIL, you need to declare the base type whenever
you create an empty list. A call to the empty list constructor has the form
emptylist(<type>)
where <type> is any type expression and indicates the base type of the
empty list returned by this call. Of course, you must be able to determine
whether or not a list is empty. To check whether or not a list is empty,
use the predicate
null(<list>)
which returns true if <list> is an empty list (of any base type).
4-4
SilTools
Lists
Other List Operations
Besides the basic list operations introduced in “List Types” on page 4-4,
SIL provides many other list operations. Example 4.4 illustrates some of
these other list operations.
Example 4.4
Assume l1 and l2 are lists of the same base type. When this is true,
l1 * l2
returns the result of appending l1 to l2.
length(l1)
returns the length of l1.
reverse(l1)
returns the result of reversing l1.
select(l1, i)
returns the i-th element of l1.
NOTE select(l1, 0) = the first element of l1.
select(l1, length(l1) - 1) returns the last element of l1.
l1 := reversip(l1); reverses a list. The function reversip does not
allocate any new memory to perform the reverse operation and is more
efficient.
All of the list operations discussed above are non-destructive functions.
This means that they return a value without modifying their inputs as a
side effect. By contrast, set_car and set_cdr are procedures which
redefine the car and cdr of their first argument (illustrated in
Example 4.5).
Example 4.5
Assume l1 is the list [22, 33, 44, 44]. When this is true, the procedure call:
set_car(l1, 0)
modifies l1 by replacing the 22 with 0. The procedure call
set_cdr(l1, list(4, 4, 4))
modifies l1 by replacing the tail of l1 with [4, 4, 4].
CAUTION
Developer’s Guide
(7/96)
Exercise caution when using destructive operations.
Programs that destructively modify a global list may create
unpredictable results in other programs which reference
this list.
4-5
Data Types
Destructive List Operations
Data Types
List Recursion and Iteration
The most effective method of demonstrating the use of list recursion is
through the use of an example:
Example 4.6
Consider the following two methods for adding up a list of integers. With
the recursive method, we first forward reference our function:
var sum1: function(integer, list of integer);;
We decide to return 0 if the input list is empty. We use the null predicate
test for this.
function sum1(l: list of integer): integer;
begin
if null(l) then sum1 := 0
else sum1 := car(l) + sum1(cdr(l))
end;
4-6
SilTools
Lists
To write an iterative algorithm with the same functionality, a special
iterative control structure would be used which enables you to iterate
over lists (illustrated in Example 4.7).
Example 4.7
function sum2(l: list of integer): integer;
var accum: integer;
begin
accum := 0;
for k in l do
accum :=k + accum;
sum2 := accum
end;
Data Types
The statement
for k in l do
accum := k + accum;
NOTE k, the loop control variable, does not need to be declared.
is equivalent to
while not null(l) do
begin
k := car(l);
l := cdr(l);
accum := k + accum
end;
In Example 4.8, we change sum2 to take an arbitrary number of integers
as input and return their sum. This is slightly different from Example 4.5
where sum1 expects a single list as input.
Example 4.8
Change sum2 by typing
make_fexpr('sum2');
Call sum2 as follows:
SIL> sum2(1,2,3,4,4);
14
SIL> sum2(31,32,33);
96
Developer’s Guide
(7/96)
4-7
Data Types
Arrays
Like lists, SIL arrays are also dynamic. This means that arrays can be
created during program execution. The call
array_create(<type>, <integer>)
returns an array of base type <type> indexed from 0 to <integer>. As in
Pascal, if v is an array and i is a valid index, then v[i] is an expression
whose value is the element of v with index i, and v[i] := <term> sets the
index i component of v to be the value of <term>. As with lists, the type
of <term> must match the base type of v, or a type mismatch error will
result.
Example 4.9
Here is a typical declaration of an array:
var v: darray of integer;;
Notice that no memory is allocated to v by this declaration (how long
should v be?) Thus, the expression v[0] causes an error.
Next, allocate memory for v with
v := array_create(integer, 10);
Finally, fill v with
for i := 0 to 10 do
v[i] := square(i);
Example 4.10
This example presents an implementation of a 2D array.
type
row_vector = darray of real;
matrix3x3 = darray of row_vector;;
row_size == 3;
continued on next page
4-8
SilTools
Arrays
Example 4.10
(continued)
row0 == array_create(real, 2);
row1 == array_create(real, 2);
row2 == array_create(real, 2);
for i := 0 to 2 do
begin
row0[i] := i * 0.1;
row1[i] := 1 + i * 0.1;
row2[i] := 2 + i * 0.1
end;
mat1 == array_create(darray of real, 2);
mat1[0] := row0;
mat1[1] := row1;
mat1[2] := row2;
procedure matrix_set(m: matrix3x3; row, col: integer; val: real);
begin
m[row][col] := val
end;
Example 4.11
This example demonstrates dynamic resizing of an array.
type
employee = record
name: string;
age: integer;
salary: real
end;;
continued on next page
Developer’s Guide
(7/96)
4-9
Data Types
function matrix_select(m: matrix3x3; row, col: integer): real;
begin
matrix_select := m[row][col]
end;
Data Types
Example 4.11
(continued)
number_of_employees == 0;
employee_table == array_create(employee, 100);
procedure add_new_employee(ne: employee);
var
temp: darray of employee;
len: integer;
begin
len := length(employee_table);
{if full, then double length of employee_table … }
if (len <= number_of_employees) then
begin
temp := array_create(employee,
2 * number_of_employees);
{write employee_table to temp … }
for i := 0 to (number_of_employees - 1) do
temp[i] := employee_table[i];
{temp becomes new employee_table … }
employee_table := temp
end;
{add new employee to table … }
employee_table[number_of_employees] := ne;
number_of_employees := number_of_employees + 1
end;
Since all SIL arrays are indexed starting with 0, number_of_employees
always indexes the next available slot in employee_table.
NOTE The length function that applied to lists also applies to arrays.
4-10
SilTools
sarrays
Unlike Pascal, SIL functions can return arrays as values (illustrated in
Example 4.12).
Example 4.12
init_table_size == 100;
function make_employee_table(): darray of employee;
begin
make_employee_table := array_create(employee,
init_table_size)
end;
An sarray is a dynamically-allocated array, which can grow and shrink
during program execution. You can add items to the sarray, and the
sarray will automatically resize itself to fit the new elements. As with
standard arrays, if s is an sarray and i is a valid index then s[i] returns
the ith element of the sarray, and s[i] := <term> sets the index i
component of s to be the value of <term>. Also, like arrays, <term> must
match the base type of s, or a type mismatch error will occur.
The command
emptysarray(<type>)
returns a new sarray.
The command
sarray_create(<type>, <integer>);
returns an sarray with some number of elements already allocated.
Developer’s Guide
(7/96)
4-11
Data Types
sarrays
Data Types
Example 4.13
add(s,e);
add(s,e,i);
add(s1,s2);
add(s1,s2,i);
remove(s,e);
{ add element e to the end of sarray s }
{ add at index i }
{ append s2 to the end of s1 }
{ insert at index i}
{ remove element e from sarray s, shifting
following elements down }
remove_at_index(s,i);
{ remove at index i}
remove(s,i,j);
{ remove between index i and j }
clear(s,i);
{ remove after index i, if i = -1 then remove all
elements }
Strings
This section contains explanations and examples of the following
topics:
➢ String Comparisons
➢ String Conversions
➢ Other Operations on Strings
➢ lstrings
Strings are dynamic in SIL.
Example 4.14
The definition
msg == 'hello';
assigns the length 5 string hello to the variable msg. Later, we can reassign
msg’s value by
msg := 'goodbye';
4-12
SilTools
Strings
In the above example, we assign a length 7 string (goodbye) to the same
variable. Memory allocation for the additional characters is handled
automatically. Of course shorter strings can be assigned to msg:
msg := 'bye';
Example 4.15 illustrates other string operations.
Example 4.15
Assume the following definitions:
dirname == '/cim/project';
filename == 'smith';
We can use infix * to concatenate strings:
pathname == dirname * '/' * filename;
SIL> pathname;
/cim/project/smith
We can convert to uppercase by using
uc_pathname == uppercase(pathname);
SIL> uc_pathname;
Developer’s Guide
(7/96)
Data Types
/CIM/PROJECT/SMITH
Similarly, the lowercase operator converts uppercase strings to
lowercase.
4-13
Data Types
String Comparisons
In SIL, users make lexicographical comparisons using the syntax:
<string> < <string>
Example 4.16
employee1 == 'smith, j.';
employee2 == 'smith, z.';
employee3 == 'smithers, a.';
then
SIL> employee1 < employee2;
TRUE
SIL> employee1 < employee3;
TRUE
Additionally, we can compare strings using: <=, >, >=, =, and <>.
The match operator compares strings that may contain wildcards:
Example 4.17
SIL> match('smith*', 'smith, j.');
TRUE
String Conversions
A string composed of numerals can be converted to an integer by
string_to_integer<string>)
Conversely, an integer can be converted to a string by
integer_to_string(<integer>)
Similarly, we can convert reals to strings and back with
real_to_string(<real>)
and
string_to_real(<string>)
4-14
SilTools
Strings
Other Operations on Strings
The function
indx(x:string;n:integer):integer;
extracts the nth character from the string, and returns its ASCII code.
The following function:
setindx(x:string;n,v:integer);
will set the nth character to v (ASCII). indx and setindx start at zero (that
is, indx(x,0) is the first character in the string). The function
mk_string(n:integer):string;
returns a string of length n + 1.
Strings can, of course, be used to describe things other than sequences
of textual characters. For example, digitized images with 8 bits per pixel
can be represented by strings. Strings can be as large as will fit in the
process space of the computer running SIL. For some applications,
strings of several megabytes of length will be needed.
Here are some other operations:
function copy(x:string):string;
function substring(x:string;n,m:integer):string;
function length(x:string):integer;
substring(x,n,m); returns the substring of x, of length m, starting
at the nth character.
lstrings
Consider the following assignments:
x := 'abcdffg';
x := substring(x,2,3)
Developer’s Guide
(7/96)
4-15
Data Types
A string is represented internally as a contiguous array of bytes. indx and
setindx give direct access to this representation.
Data Types
These assignments result in the value of x being 'bcd'. The SIL
interpreter will construct a new three-character string for the second
assignment. Repeated assignments like these can result in an inefficient
consumption of memory. To combat this problem, SIL provides an
lstring which can be defined as follows:
lstring = lrecord
length:integer;
contents:string
end;;
The length of the contents field of an lstring is called its capacity. The
idea behind this is that only the first length (<lstring>) characters of
contents (<lstring>) are meaningful. The remainder of contents
(<lstring>) is “spare storage” which may be used if the lstring grows in
length. For now, we just list some of the primitive operations on lstrings.
None of these except copy allocates new memory—they all re-use
existing storage.
Primitive operations on lstrings:
function mk_lstring(x: string): lstring;
function mk_lstring(x: string; n: integer): lstring;
function copy(x: lstring): lstring; { Allocates a new string }
function substring(x: lstring; n,m: integer): lstring;
function select(x: lstring; n,m: integer): lstring;
function equal(x: lstring; y: string): boolean;
function select(x: lstring; y: integer);
procedure lowercase(x: lstring);
procedure concat_onto(y: string; x: lstring);
function lstr_to_str(x: lstring): string;
function to_lstring(x: string): lstring;
procedure float2lstr(y: real; ls: lstring);
function find(cnx: string; lnx: integer; cny: string; lny: integer):
integer;
function find(x: string; y: string): integer;
function find(x: lstring; y: string): integer;
function find(x: lstring; y: lstring): integer;
procedure concat_onto(x: lstring; n: char);
4-16
SilTools
Records and lrecords
Example 4.18
x:= mk_lstring('abcdffg');
x:=substring(x,2,7)
will allocate no new storage.
Records and lrecords
This section describes the user-defined types records and lrecords.
Records are always defined within the scope of a type definition at the
top level. The syntax follows Pascal:
Data Types
type
<name> = record
<field>, … <field>: <type>;
…
<field>, … <field>: <type>
end
where <field> and <name> are identifiers.
Example 4.19
The definition
type
employee = record
name, boss: string;
age: integer;
salary: real
end;;
defines a new data type called employee. Objects of type employee are 4tuples consisting of 2 strings followed by an integer and a real.
Developer’s Guide
(7/96)
4-17
Data Types
Unlike Pascal records, defining a record in SIL automatically defines a
constructor function that enables you to create records in a single
statement. The name of the constructor function adds the prefix mk_ to
the name of the record (illustrated in Example 4.20).
Example 4.20
The statement
empl1 == mk_employee('smith', 'jones', 29, 30000.00);
defines empl1 to be an object of type employee with the indicated field
values. We can access the fields of empl1 as follows:
empl1.boss;
or
salary(empl1);
and we can alter the fields of empl1 as follows:
empl1.age := 30; {happy b'day!!}
or
dset_age(empl1, 30);
SIL provides a special syntax for constructors. The following constructor:
[<expression>...<expression>] as <type>;
is equivalent to
mk_<type> [<expression>...<expression>]
For example,
empl== ['smith; 'jones', 29, 30000.00] as employee;
Unlike Pascal, SIL functions can return records as values. A simple
example is the definition of a customized constructor. Defining
customized constructors is a good technique if several fields have
standard default values (see page 4-19).
function mk_employee(name: string; age: integer): employee;
begin
mk_employee := mk_employee(name, 'jones', age, 30000.00)
end;
4-18
SilTools
Records and lrecords
lrecords
Record parameters are passed by value. This means that a
function/procedure that is passed a record as an input actually makes a
private copy of the record input before it modifies any of its fields.
Example 4.21
procedure change_salary(empl: employee; amt: real);
begin
empl.salary := salary(empl) + amt
end;
Assume that
empl1 == mk_employee('smith', 'jones', 29, 30000.00);
We attempt to give Smith a little raise:
change_salary(empl1, 20000.00);
But the following week Smith is disappointed to find no change in his
paycheck:
SIL> empl1.salary;
In SIL, records are used to represent non-mutable entities such as
vectors, complex numbers, etc. In Example 4.22, a record is used to
represent a complex number.
Example 4.22
type
complex = record
rpart, ipart: real
end;;
z == mk_complex(1, 2);
In this case, z is the complex number 1 + 2i, and z is non-mutable in the
sense that modifying a field of z modifies the identity of z. By contrast,
modifying Smith’s salary in Example 2.4 does not modify Smith’s
identity—he/she is still the same person, just richer.
Developer’s Guide
(7/96)
4-19
Data Types
30000.00
Data Types
In SIL, lrecords are used to represent mutable structures like employees.
An lrecord is just a pointer to a record—lrecord parameters are passed
by reference rather than by value. This means that a function/procedure
only gets a pointer to an lrecord, not a private copy.
Example 4.23
Defining an lrecord follows the same syntax as defining a record:
type
employee = lrecord
name, boss: string;
age: integer;
salary: real
end;;
In every other respect, records and lrecords are syntactically
indistinguishable. Thus, we can proceed as before:
procedure change_salary(empl: employee; amt: real);
begin
empl.salary := salary(empl) + amt
end;
empl1 == mk_employee('smith', 'jones', 29, 30000.00);
change_salary(empl1, 20000.00);
This time Smith can go ahead with those sudden secret travel plans:
SIL> empl1.salary;
50000.00
4-20
SilTools
Chapter 5
Classes
Object-Oriented Terminology
This chapter describes classes, objects, inheritance, how objects are viewed
relative to each other, and how to manipulate the views.
Object-Oriented Terminology
The advantage of inheritance is that you don’t have to build the object B
from the ground up. By declaring B to be a specialization of A, the
properties of A automatically become properties of B. This can be a huge
time-saver if A is a system-defined object with lots of useful, but lowlevel, properties. For example, B might be a tin can with physical
properties such as weight, material, pressure, etc., whereas A might be a
cylinder with geometric and graphical properties such as tangent plane
at a point, boundary representation, mouse selectable, etc. Clearly, a
scientist or engineer simulating a tin can should be expected to define
the domain-specific properties of the tin can, like weight and pressure,
but should not be expected to define the lower-level properties of a
cylinder, even though these properties are necessary for displaying and
manipulating the tin can in simulation. Because SilTools provides a type
(class) cylinder, our scientist/engineer need only define A to be a
cylinder, and declare B to be a specialization of A.
Developer’s Guide
(7/96)
5-1
Classes
An object is similar to an lrecord. Wherever an lrecord might be used,
an object can also be used. Thus, objects can be used to represent entities
with mutable properties such as devices, people, factories,
organizations, etc. The main feature that distinguishes objects from
lrecords is inheritance. Briefly, two objects, A and B, belonging to
different types (classes), can be related in such a way that all properties
of A are also properties of B. We say that B inherits A’s properties.
Logically, we can interpret this to mean that B is a specialization of A
(or A is a generalization of B), since B may have additional properties
apart from those inherited from A.
Classes
Classes
The definition of a class in SIL is very similar to a Pascal (or SIL) record
definition:
type <new-class> = class
superclass:<class1>;
superclass:<class2>;
…
<instance-var-1>:<type1>
<instance-var-2>:<type2>
…
end;;
Example 5.1 introduces the concept of class using object-oriented
terminology.
Example 5.1
Here is an example of a class definition:
type employee = class
name: string;
ssn: integer;
salary: real;
end;;
As with records and lrecords, the constructor mk_employee is
automatically defined:
jones == mk_employee('jones', 558112937, 30000.00);
smith == mk_employee('smith', 443991875, 42500.00);
In this example, employee is a class, while jones and smith are objects,
and 'jones', 558112937, and 30000.00 are attributes of the object jones.
continued on next page
5-2
SilTools
Classes
Example 5.1
(continued)
We can write functions or procedures that operate on employee objects like
any other data types:
function monthly_salary(e: employee): real;
begin
monthly_salary := salary(e)/12
end;
standard_rate == 0.07;
procedure grant_standard_raise(e: employee);
begin
e.salary := salary(e) + standard_rate * salary(e)
end;
In the parlance of object-oriented terminology, we call monthly_salary,
and grant_standard_raise methods. In SIL, sending a message to an
object is the same as applying a function symbol to a list of arguments. For
example, some object-oriented languages would regard the identifier
monthly_salary as a message which, when sent to an object, invokes the
method monthly_salary. In this case, the syntax might look like
The advantage of send_message is that it provides a way to implement
polymorphism (because the same message could be interpreted in different
ways by different objects). Because SIL is already a polymorphic
language, we can abandon send_message and simply apply methods
directly to objects:
monthly_salary(jones)
or equivalently
jones.monthly_salary.
Developer’s Guide
(7/96)
5-3
Classes
send_message(jones, "monthly_salary)
Classes
Example 5.1
(continued)
Thus
SIL> monthly_salary(jones);
2500.000000
SIL> grant_standard_raise(jones);
OK
SIL> monthly_salary(jones);
2675.000000
Inheritance
Example 5.2 introduces the principles of inheritance. In this example,
we will continue to use the material from Example 5.1.
Example 5.2
For now, assume
account == string;
project == string;
We introduce a new class which is a subclass of the employee class defined
earlier:
type manager = class
superclass: employee;
leader_of: project;
staff: list of employee;
end;;
5-4
SilTools
Inheritance
The class manager is a subclass of employee because, conceptually, all
managers are employees.
Example 5.3
We can make managers out of employees as follows:
team1_leader == mk_manager(smith, 'release V', list(jones));
As you might expect, we can define new methods, and apply them as
before:
function staff_size(m: manager): integer;
begin
staff_size := length(staff(m))
end;
procedure remove_from_staff(m: manager; e: employee);
var
new_staff: list of employee;
begin
new_staff := emptylist(employee);
for x in staff(m) do
if name(x) <> name(e) then new_staff := cons(x, new_staff);
m.staff := new_staff
end;
and so
SIL> staff_size(team1_leader);
1
SIL> remove_from_staff(team1_leader, jones);
ok
Classes
SIL> staff_size(team1_leader);
0
Developer’s Guide
(7/96)
5-5
Classes
In Example 5.3, team1_leader specializes smith; therefore, all employee
methods can be applied to team1_leader without explicitly coercing or
casting team1_leader to the class employee. This process is called
inheritance because team1_leader inherits all methods and attributes of
smith:
Example 5.4
SIL> monthly_salary(team1_leader);
3541.666748
In addition, the attributes of smith can be accessed through
team1_leader:
Example 5.5
SIL> ssn(team1_leader);
443991875
SIL> name(team1_leader);
smith
Because all managers are employees, it always makes sense to apply
employee methods to managers. But because some employees are not
managers, it does not always make sense to apply manager methods to
employees:
Example 5.6
SIL> staff_size(smith);
error: type mismatch in application of the
operator STAFF_SIZE
5-6
SilTools
Inheritance
Example 5.7 illustrates how the above method can be followed to add
more classes, objects, and methods:
Example 5.7
type
sales_person = class
superclass: employee;
accounts: list of account;
end;
programmer = class
superclass: employee;
projects: list of project;
languages: list of string;
boss: manager;
end;;
procedure add_to_staff(p: programmer; m: manager);
begin
p.boss := m;
p.projects := cons(leader_of(m), projects(p));
m.staff := cons(p, staff(m));
end;
Thus, if jones is a programmer working for smith, then we can set this up
as follows:
var default_manager: manager;;
programmer2==mk_programmer(jones, emptylist(project),
list('lisp', 'c', 'pascal'),
default_manager);
Classes
add_to_staff(programmer2, team1_leader);
SIL> projects(programmer2);
[LIST: release V]
SIL> name(boss(programmer2));
smith
SIL> name(programmer2);
jones
Developer’s Guide
(7/96)
5-7
Classes
Example 5.8
We can define subclasses of subclasses:
type
student_programmer = class
superclass:programmer;
school: string;
gpa: real;
end;;
In this case, student_programmer is a subclass of programmer, but
because programmer is a subclass of employee, we can infer that
student_programmer is also a subclass of employee. For example,
suppose jones is a Stanford student working for the summer:
student1 == mk_student_programmer(programmer2,
'stanford', 2.9);
All programmer2 attributes can be accessed through student1:
SIL> student1.languages;
[LIST: lisp,c,pascal]
SIL> student1.projects;
[LIST: release V]
but also, all attributes of jones can be accessed through student1:
SIL> SIL> student1.name;
jones
SIL> SIL> student1.salary;
32100.00
Similarly, employee and programmer methods can be applied directly to
student1:
SIL> monthly_salary(student1);
2675.00
5-8
SilTools
Views
Example 5.9
We can derive methods for student programmers in the expected way:
min_gpa == 3.0
function
is_good_lisp_programmer(s:student_programmer):boolean;
begin
is_good_lisp_programmer:=member('lisp',languages(s)) and
(gpa(s) > min_gpa)
end;
Thus
SIL> is_good_lisp_programmer(student1);
FALSE
As expected, these methods cannot be applied to generalizations of
student1:
SIL> is_good_lisp_programmer(smith);
error: type mismatch in application of the
operator IS_GOOD_LISP_PROGRAMMER
Views
This section contains the following topics:
Classes
➢ Changing Views
➢ The as_view Operator vs. the to_view Operator
Preceding sections showed how objects can be related to each other
through specialization/generalization. This section defines a new
relation between objects, called referential equivalence, that extends
specialization/generalization.
Developer’s Guide
(7/96)
5-9
Classes
Example 5.10
In this example, we define a new subclass of employee unrelated to the
other subclasses:
type foreign_employee = class
superclass: employee;
visa_status: string;
languages: list of string;;
end;;
Assume Bob Wong is a new foreign student programmer hired by the
company. This is how we might define the relevant objects representing
Bob:
1. As an employee:
wong == mk_employee('Wong', 667213344, 25000.00);
2. As a foreign employee:
f_emp12== mk_foreign_employee(wong,'student visa',
list('English', 'Cantonese'));
3. As a programmer:
programmer5==mk_programmer(wong,
list(leader_of(team1_leader)),
list('pascal', 'lisp', 'c'), team1_leader);
4. As a student:
student9 == mk_student_programmer(programmer5,
'Berkeley', 3.2);
Example 5.10 defined the student programmer (student9), the
programmer (programmer5), the foreign employee (f_emp12), and the
employee (wong). In fact, all of these objects represent the same person
(dynamic entity), but from different points of view. For this reason,
objects are sometimes referred to as views.
5-10
SilTools
Views
Wong
programmer5
f_emp12
student9
Two objects are referentially equivalent if they are both views of the
same entity. Clearly, if object A generalizes object B, then A and B are
referentially equivalent. But two objects can be referentially equivalent
without one generalizing the other. In our example, f_emp12 and
student9 are referentially equivalent, but neither generalizes the other.
The list of all views referentially equivalent to an object is given by the
function views. The views function returns a list of universals (objects,
like any other SIL data, can be cast to and from universals). The list of
classes to which these views belong is given by the function classes.
This is a list of ntypes. The class of an object is given by the function
my_class.
Example 5.11
The list of all views of an object is given by the views function:
[LIST:[UNIVERSAL:[Berkeley,3.200000]
OF_TYPE STUDENT_PROGRAMMER],
[UNIVERSAL: [[LIST: release 4.3],
LIST: Pascal,Lisp,C],
<smith>] OF_TYPE PROGRAMMER]
[UNIVERSAL: [student visa,
[LIST: English,Cantonese]]
OF_TYPE FOREIGN_EMPLOYEE],
[UNIVERSAL: [Wong,667213344,25000.000000]
OF_TYPE EMPLOYEE]]
continued on next page
Developer’s Guide
(7/96)
5-11
Classes
SIL> views(wong);
Classes
Example 5.11
(continued)
The list of all classes of views of an object is given by classes:
SIL> classes(wong);
[LIST:STUDENT_PROGRAMMER,PROGRAMMER,
FOREIGN_EMPLOYEE,EMPLOYEE]
The function my_class returns the class of a view:
SIL> for i in views(wong) do writeln(my_class(i));
STUDENT_PROGRAMMER
PROGRAMMER
FOREIGN_EMPLOYEE
EMPLOYEE
Changing Views
“Object-Oriented Terminology” on page 5-1 showed how methods and
attributes of an object A can be used by specializations of A without
specifically coercing to the class of A. Because referentially equivalent
objects represent the same entity, we would like all views of A (i.e., not
just the specializations of A), to be able to use the methods and attributes
of A. Doing this requires changing views using the as_view or to_view
infix operator:
<object> as_view <class>
<object> to_view <class>
Example 5.12
As stated before, we can’t apply student programmer methods to
programmers:
SIL> is_good_lisp_programmer(programmer5);
error: type mismatch in application of the
operator
IS_GOOD_LISP_PROGRAMMER
continued on next page
5-12
SilTools
Views
Example 5.12
(continued)
But since we know that programmer5 is just another view of student9,
we can apply is_good_lisp_programmer if we first change views:
SIL> is_good_lisp_programmer(programmer5 as_view
student_programmer);
TRUE
Similarly, we can access the attributes of f_emp12 through student9 by
first changing views:
SIL> languages(student9 as_view foreign_employee);
[LIST: English,Cantonese]
The as_view Operator vs. the to_view Operator
When <object> has no view in <class>, <object> as_view <class>
generates an error message while <object> to_view <class> returns a null
object which can be tested for using the nul predicate (illustrated in
Example 5.13).
Example 5.13
SIL> programmer5 as_view sales_person;
error: attempt to change to incompatible
view:
SALES_PERSON
SIL> thing == programmer5 to_view sales_person;
TRUE
Classes
SIL> nul(thing);
TRUE
Developer’s Guide
(7/96)
5-13
Classes
Multiple Inheritance
Example 5.1 on page 5-2 shows a class having several superclasses
(student_programmer which had programmer and employee as
superclasses). In this situation, however, it was possible to identify one
of these superclasses, programmer, as the immediate superclass of
student_programmer. This means that all other superclasses of
student_programmer were also superclasses of programmer.
In SIL, it is possible to define a class with two immediate superclasses.
For example:
Example 5.14
type chinese_c_programmer = class
superclass: foreign_employee;
superclass: programmer;
years_c_experience: integer;
end;;
c_c1 == mk7_chinese_c_programmer(f_emp12, programmer5, 2);
The network of views representing Bob Wong is depicted as follows:
Wong
programmer5
student9
f_emp12
c_c1
Of course, the methods and attributes of programmers and foreign
employees can be used by c_c1 without explicitly changing views:
SIL> visa_status(c_c1);
student visa
SIL> projects(c_c1);
[LIST: release 4.3]
5-14
SilTools
Multiple Inheritance
Multiple inheritance can be used only when the superclasses given for a
new class were derived from some common ancestor.
Ambiguity
Accessing the language attributes of c_c1 causes some ambiguity. It is
unclear whether to expect programming languages or spoken languages
to be returned.
In this example, methods are applied to the second generalization before
the first:
Example 5.15
SIL> languages(c_c1);
[LIST: Pascal,Lisp,C]
There is no satisfactory rule for deciding how to make messages less
ambiguous. Ambiguous messages should be avoided or you should
explicitly change views. For example:
Example 5.16
SIL> languages(c_c1 as_view foreign_employee);
[LIST: English,Cantonese]
Classes
IMPORTANT
It is our experience that the availability of as_view and
to_view, combined with the dangers of multiple
inheritance, makes multiple inheritance an unsatisfactory
choice for most applications.
Developer’s Guide
(7/96)
5-15
Classes
Using apply on Views
“Views” on page 5-9 showed how the methods and attributes of an
object can be accessed by any referentially equivalent object by
performing the appropriate view change (using to_view or as_view).
When using to_view or as_view, the class of the new view must be
known in advance. An expression like
foo(student9 to_view cadr(views(x))
where x is a variable will cause an error. We can put off the view change
until runtime by using apply:
apply("<method>, <object>, <expression>… <expression>);
Example 5.17
SIL> apply("monthly_salary, programmer5);
[UNIVERSAL: 2083.333252 OF_TYPE REAL]
The apply operator scans the list of views in the reverse order in which
the views were created, searching for an object that can respond to the
desired method. Thus apply implements late binding of methods to
messages—the method is determined at runtime, not compile time.
Runtime denotes the time at which code executes, while compile time
denotes the time at which code is read in—whether or not it will be
compiled or interpreted. The apply operator searches views of its first
argument. If the first argument is a universal which, at runtime, turns out
to be an object, the view search will still take place.
5-16
SilTools
View Manipulation
The applyn operator works in the same way as apply, but returns a
failure indicator when no method is found, rather than generating an
error. Use is_fail to test for failure.
NOTE
apply provides the kind of late binding which underlies the
SmallTalk and Objective C object systems. An alternative SIL
late binding mechanism which resembles the C++ virtual
function facility is described in “Abstract Classes” on page 5-19.
We recommend this mechanism over using apply. The reasons
for this are explained in “Using Methods Instead of apply” on
page 5-23.
View Manipulation
Two simple operators are provided for directly manipulating the views
of an object: splice and remove_this_view.
The splice operator simply appends the views of object1 onto those of
object2. So, object1 and object2 are unified—they become referentially
equivalent. object1 may not be spliced onto object2 if any view of
object1 has the same class as a view of object2.
The splice operator works like this:
splice(<object1>,<object2>);
Example 5.18
Classes
type chess_player = class
rating: real;
uscf_chapter: string;
end;;
Then, if student9 is a chess player as well as a student and an employee,
we can add this data as follows:
splice(mk_chess_player(1700,'san francisco'),student9);
Developer’s Guide
(7/96)
5-17
Classes
In Example 5.18, chess playing and employment are non-interacting
properties, so there is no need to define a class of chess-playing
employees since you can splice chess data as needed onto individual
students who play chess.
The remove_this_view operator works like this:
remove_this_view(<object>);
For example, if student9 in Example 5.18 gives up chess:
Example 5.19
After issuing this command, student9 will no longer have a
chess_player view:
remove_this_view(student9 as_view chess_player);
The remove_this_view operator will generate an error if the class of any
other view of the object is a subclass of the class of the view being
removed. If this restriction were not observed, objects with dangling
superclass pointers would result.
A view which has been removed should not be referenced after its
removal. For example:
Example 5.20
chs==mk_chess_player(1700,'san francisco');
splice(chs,student9);
remove_this_view(chs)
The resulting value of chs is a “dead view”, which should not be
referenced in subsequent code.
5-18
SilTools
Abstract Classes
Abstract Classes
This section describes the abstract class facility. Topics in this section
include
➢ Installation of Methods
➢ Using Methods Instead of apply
➢ C++
➢ Additional Methods Primitives
The abstract class facility provides the same sort of functionality as C++
virtual functions—you can define abstract classes whose methods can
be implemented by a variety of concrete classes. The facility is more
flexible than anything available in C++ in that it allows dynamic
modification of the implementing classes and methods of an abstract
class. Abstract classes can also be spliced on to pre-existing concrete
classes, allowing abstractions to be layered onto existing bodies of
concrete code.
Example 5.21 introduces abstract classes by showing a conventional
example—an “abstract stack” class.
Example 5.21
NOTE
Classes
type astack = class
push: method(ob,ob);
ipop: method(ob);
empty: method(boolean);
on_underflow: method(ob);
end;;
This example will be continued on the next page, after the following
information.
The method fields are slots which hold operators on astack, just as
ordinary fields of a class hold data. The usage
method(<return_type>,<input_type1>,… <input_typen>)
Developer’s Guide
(7/96)
5-19
Classes
specifies a “method” which can be applied to inputs of types astack,
<input_type1>…<input_typen>, and will return the given return type.
So, for example, push takes an astack and an ob, and returns an ob. The
first argument to any method is the class for which the method is
defined, so it need not be specified explicitly. It is for this reason that we
write method(ob,ob) rather than the redundant method(ob,astack,ob).
Now, the method slots in a class definition are filled by ordinary SIL
functions which take a view of the astack as first argument. For
example, the operator installed in the push slot will be a procedure
which takes a view of an astack as its first argument, and an ob as its
second. The intent of this should become clear as we proceed with this
example.
Example 5.21
(continued from previous page)
Now, we define the concrete class lstack:
type lstack = class
superclass:astack;
goods:list of ob;
end;;
Here are some of its methods:
procedure push(x:lstack;y:ob);
begin
x . goods := cons(y,x . goods);
end;
function pop(x:lstack):ob;
begin
if null(goods(x)) then pop := nil else
begin
pop := car(goods(x));
x .goods := cdr(goods(x));
end;
end;
function empty(x:lstack):boolean;
begin
empty := null(goods(x));
end;
5-20
SilTools
Abstract Classes
Installation of Methods
Installation of methods is done using the following primitives. If a is a
particular astack, which is also an lstack, we can set the method push
in a to be push on the lstack:
a == mk_astack();
l == mk_lstack(a,emptylist(ob));
set_method(a,"push,"push,list(lstack,ob));
That is, when push is called on a, it “delegates” the work to the push
variant on lstack. So,
push(a,x);
is equivalent in effect to
push(a as_view lstack,x);
Example 5.22
a == mk_astack();
l == mk_lstack(a,emptylist(ob));
function pop(x:astack):ob;
begin
if empty(x) then
begin
if method_defined(x,"on_underflow) then on_underflow(x);
pop := nil;
end
else pop := ipop(x);
end;
As illustrated above, the operator
method_defined(x:<any type>;y:id);
determines whether the given method has been installed in x.
Developer’s Guide
(7/96)
5-21
Classes
set_method(a,"push,"push,list(lstack,ob));
Classes
The following operator makes an astack with the lstack
implementation:
function mk_lstack(): astack;
var a: astack; l: lstack;
begin
a := mk_astack();
l := mk_lstack(a,emptylist(ob));
set_method(a,"push,"push,list(lstack,ob));
set_method(a,"ipop,"pop,list(lstack));
set_method(a,"empty,"empty,list(lstack));
mk_lstack := a;
end;
Note that no method is assigned to on_underflow. A user of astack is
free at any time to execute a set_method to install a method for
underflow. For example:
Example 5.23
a1 == mk_lstack();
a2 == mk_lstack();
procedure yell(x:astack);
begin
error('stack underflow!!!');
end;
set_method(a2,"on_underflow,"yell,list(astack));
Then
SIL> pop(a1);
ok
SIL> pop(a2);
stack underflow!!
Error>
Consider what we have done in Example 5.23. astack is abstract,
because no aspect of its implementation is specified. We have given one
concrete implementation (lstack), but there could be many others. Code
that makes use of astacks will work with any concrete implementation.
5-22
SilTools
Abstract Classes
Using Methods Instead of apply
In earlier versions of SilTools, you needed to use this kind of code to
implement abstract classes in SIL:
procedure pop(x: astack);
begin
apply("pop1,x);
end;
Here, the manner of pop done depends on the views that x has at
runtime. Using methods instead of apply has two advantages:
1. Invoking a method is faster than performing an apply—it
only involves a couple of pointer chases to find the
implementation of a method rather than a search.
2. The method style gives the builder of an object control of the
methods installed into the object’s abstract views because
this installation is done by explicit uses of set_method.
As a result, the user of astack need not worry about views being added
later that might have a rogue pop operator.
C++
On the whole, abstract classes are both the cleaner and the more efficient
alternative.
Additional Methods Primitives
The following are more primitives for methods.
pmethods(x:<any_type>);
prints out the methods currently installed in x. This is useful for
debugging.
Developer’s Guide
(7/96)
5-23
Classes
SIL abstract classes and their methods resemble C++ classes with virtual
functions, but are considerably more flexible. On the other hand, the SIL
apply construct resembles normal messaging in objective C or
SmallTalk.
Classes
define_method(astack,lstack,"ipop,"pop);
Instead of installing a method into any particular astack, the preceding
use of define_method defines a standard method to use for ipop for any
object that is an astack implemented by an lstack. For astack a:
use_methods(a,lstack);
installs all of the standard methods for astack associated with lstack
into a.
An advantage of use_methods is that it saves space by just putting a
pointer to a block of methods associated with the lstack class into a.
Instead of needing two words per method in a, this requires just three
words for the whole collection of methods.
Usually, the method machinery is used to install the methods of a
concrete class into the method store of an abstract view; so use_methods
is the typical primitive to use rather than the more direct and low level
set_method construct.
For example, our implementation of lstacks might include the
following:
Example 5.24
define_method(astack,lstack,"push,"push);
define_method(astack,lstack,"empty,"empty);
define_method(astack,lstack,"pop,"pop);
function mk_lstack();
var a:astack,l:lstack;
begin
a := mk_astack();
l := mk_lstack(a,emptylist(ob));
use_methods(a,lstack);
end;
When the abstract and concrete methods have the same name, you need
not repeat the name in the set_method or define_method construct. For
example:
define_method(astack,lstack,"push);
5-24
SilTools
Abstract Classes
is equivalent to
define_method(astack,lstack,"push,"push);
and
set_method(a,"push,list(lstack));
is equivalent to
set_method(a,"push,"push,list(lstack));
Finally
define_methods(astack,lstack);
means that the standard astack methods associated with lstack are those
operators on lstack with the same names as the astack methods. So:
define_methods(astack,lstack);
is equivalent to
define_method(astack,lstack,"push);
define_method(astack,lstack,"empty);
The pop method does not get installed by define_methods because ipop
is the abstract method name, while pop is the implementation name.
Rule 5.1
Methods can be declared to be tasks rather than procedures by using the
keyword tmethod rather than method.
Example 5.25
To turn a robot into a movable entity without rewriting the original
code:
type movable_entity = class
move:tmethod(ob,point);
end;;
continued on next page
Developer’s Guide
(7/96)
5-25
Classes
To remember the argument order for the above primitives, an easy rule is:
Abstract information always precedes the concrete information in
the argument order.
Classes
Example 5.25
(continued)
task move(x:robot;y:point);
begin
moveto(select(x,"linkn),y);
end;
function mk_movable(r:robot):movable_entity;
var mv:movable_entity;
begin
mv := mk_movable_entity();
splice(mv,r);
set_method(mv,"move,list(robot,point));
mk_movable := mv;
end;
Example 5.25 shows how abstract classes can be added onto existing
objects. This means that old SIL classes can be given new and cleaner
abstract interfaces without rewriting the old code.
This is one of the many differences to C++. In C++, an abstract class
must be designed before its implementation (which must be a derived
class). This prevents the kind of retrofitting shown above.
Here is another simple working example:
Example 5.26
{ the abstract class:character stream }
type cstream = class
mode:id; { "closed,"input,"out,"append }
peeked_char:integer;
open:method(ob,string);
close:method(ob);
get:method(integer);
put:method(ob,integer);
end;;
continued on next page
5-26
SilTools
Abstract Classes
Example 5.26
(continued)
function mk_cstream():cstream;
begin
mk_cstream := mk_cstream("closed,0);
end;
{ a concrete character stream : files }
type file_cstream = class
superclass:cstream;
file_of:text;
end;;
procedure open(x:file_cstream;md:string);
begin
open(file_of(x),md);
x . mode := intern(md);
end;
procedure close(x:file_cstream);
begin
close(file_of(x));
x . mode := "closed;
end;
function get(x:file_cstream):integer;
begin
get := read_char(file_of(x));
end;
define_methods(cstream,file_cstream);
Developer’s Guide
(7/96)
Classes
function mk_file_cstream(x:string):cstream;
var cs:cstream;
begin
cs := mk_cstream();
mk_file_cstream(cs,mk_file(x));
use_methods(cs,file_cstream);
mk_file_cstream := cs;
end;
5-27
Chapter 6
Programming the
User Interface
The mnode Class
The user interface consists of background panel, Graphics Window, top bar
(menu bar), tool bar, Quick Access and Quick Pick Window. In addition to this,
many panels provide custom functionality to a product.
The mnode Class
This section describes the mnode class. The word mnode comes from
“node in the menu tree.” mnode is an abstract class, and is the class of
all screen items (widgets). Actual widgets are built by subclassing
and/or splicing an mnode. To use the information in this chapter
effectively, you should be familiar with widgets. Refer toChapter 7,
“Customizing the Menu Interface” in the SilTools User’s Manual,
available from SILMA, Division of Adept Technology, Inc.
Widgets
There are two aspects of widgets: appearance and behavior. Every
widget has a panel view for visual representation.
Appearance
Appearance is defined as how the widget will be displayed on the
screen. There are two categories: container widgets (widgets with
children) and primitive widgets (leaf widgets).
Widget Kind
Description
top_panel_kind
Main top-level window (top panel).
item_panel_kind
Secondary top-level window (item panel).
top_bar_kind
Top bar menu (menu).
lmenu_kind
Pulldown menu (menu).
Table 6-1
Developer’s Guide
(7/96)
Container widgets
6-1
Programming the
User Interface
Table 6-1 describes the kinds of container widgets.
Programming the User Interface
Widget Kind
Description
xcontainer_kind
Lower-level window (subpanel).
xscroller_kind
Scrollable lower-level window (scroller).
Table 6-1
Container widgets (continued)
Table 6-2 describes the kinds of primitive widgets.
Widget Kind
Description
xbutton_kind
Push button (command button, panel button,
menu button, message button, and select
button).
xswitch_kind
Two-state toggle (switch).
xchoice_kind
Multiple-state toggle (choice).
xtoggle_kind
Multiple-state toggle (toggle).
xcombo_kind
Multiple-state toggle (combo).
xfield_kind
For alphabetic/numeric input (field).
xslider_kind
For numeric input (slider).
xlist_kind
Multiple-entry selector (list).
xtext_kind
To display textual data (text).
xcanvas_kind
To display graphic data (canvas).
xlabel_kind
To display static text (label).
xseparator_kind
To separate other widgets (separator).
Table 6-2
6-2
Primitive widgets
SilTools
The mnode Class
Behavior
Behavior is defined as how the widget will respond to user actions.
There are several types of widget behavior:
active
Sensitive to keyboard/mouse input.
passive
Insensitive to keyboard/mouse input.
monitored Having a value of certain type associated to it such that
changes in the widget value, by code or as result of
certain user action, can be monitored.
handled
Can accept one or more handlers to respond to certain
user actions.
entried
Having an sarray of lstring as its entries and its value
being the ordering of one of its entries.
All monitored widgets have a ucap view of simple type (boolean,
integer, real, or lstring) to store its value and to monitor changes in
its value, except fields whose ucap view is of type numstring.
There are many kinds of widgets, each having its own appearance
and behavior.
Operations on any kind of widget usually work directly on its
mnode view. However, there are some widget operations which
work only on its panel view.
There are two types of operations working on mnode view:
general
Work on all or more than one kinds of mnodes.
specialized Work on only a single kind of mnodes, names of such
operations usually include name of the widget kind.
Developer’s Guide
(7/96)
6-3
Programming the
User Interface
All operations on panel view work on all kind of mnodes.
Programming the User Interface
Top Panel
Top panel is top-level container mnode whose existence is independent
of other panels.
A top panel can be pushed, popped, or iconized independently of other
top panels.
Each top panel must belong to some module and is identified by the
name of its module together with its name.
Top panel can interact with WM though WM handlers. Currently, four
kinds of WM handlers are defined:
"activate
Left mouse button is clicked inside panel the first time
after cursor moves into it.
"move
Panel is moved interactively.
"resize
Panel is resized interactively.
"quit
Panel is to be closed using panel WM menu.
Named handlers defined for top panel:
"popup
Called right before the panel is seen on the screen.
A top panel, besides its own widgets, can include a menu bar at the top
for pulldown menus. A top panel can include menus as its only children;
such a top panel, called a top bar, shows only the menu bar for pulldown
menus.
Item Panel
Item panel is top-level container mnode which is logically dependent on
a top panel or another item panel, called its owner or parent.
An item panel is always displayed on top of its owner, cannot be
iconized, and will be dismissed when its ancestor top panel is iconized
or dismissed.
Each item panel must belong to some module and is identified by the
name of its module together with its name.
6-4
SilTools
The mnode Class
An item panel can interact with WM though WM handlers. Currently,
four kinds of WM handlers are defined:
"activate
Left mouse button is clicked inside panel the first time
after cursor moves into it.
"move
Panel is moved interactively.
"resize
Panel is resized interactively.
"quit
Panel is to be closed using panel WM menu.
Named handlers defined for item panel:
"popup
Called right before the panel is seen on the screen.
An item panel can have built-in command buttons shown at the bottom
of the panel, called footers, to be used as the action area for those panels
whose widgets do not cause immediate actions.
Menu
Menu is a container mnode for menu items.
There are two kinds of menus:
menu bar
Always displayed at top of a top panel.
pulldown menu Popped up when a menu button is activated.
A pulldown menu can include the following kinds of mnode as its
children:
• Menu button
• Command button
• Panel button
• Switch
Developer’s Guide
(7/96)
6-5
Programming the
User Interface
• Separator
Programming the User Interface
Simple Widget Programming
Panels created using the Visual SIL Window are saved in the file system
under
~/cim/gui/panels/<module>/<name_of_panel>.<version>
NOTE
Using the Visual SIL Window is described in Chapter 7,
“Customizing the Menu Interface” in the SilTools User’s
Manual, available from SILMA, Division of Adept
Technology, Inc.
The file ~/cim/builds/<versioned_area>/panels lists the
panels to be included in the given area. When a build is done, the panels
indicated in the panels file are loaded in.
For example, in the itest area, there is a panel named test_panel.
The ~/cim/builds/itest1/panels file contains a line:
test_panel.5. The file containing the panel is in
~/cim/gui/panels/itest/test_panel.5.
This panel was saved under the name test_panel (5 is the version
number).
A panel is represented in SIL by a value of type mnode.
NOTE
See “The mnode Class” on page 6-1 for more information
on mnodes.
You can access all panels using pathname syntax in the following way:
<module_name>$<panel_name>
This is a SIL expression whose value is the given panel. For example,
the test panel is
itest$test_panel
6-6
SilTools
Simple Widget Programming
The components of a panel, such as containers and other widgets, can be
selected by pathname as in this example:
Example 6.1
itest$test_panel["test_container]["test_toggle]
is the test panel component named test_toggle (a toggle widget)
which resides inside a container.
The behavior of a panel is specified by giving SIL callbacks for its
widgets. There are two kinds of callbacks: handlers and monitors.
Handlers
A widget, such as a button, which records an action has a handler. The
handler is set with this procedure:
set_handler(mn:mnode;i:id);
The handler should take an mnode as input—it will be called with the
mnode that generated the event.
Example 6.2
Developer’s Guide
(7/96)
6-7
Programming the
User Interface
Suppose that
my_panel["my_button]
is a button. Then,
procedure announce_click(x:mnode);
begin
writeln('Button ',name(x),' was clicked');
end;
set_handler(my_panel["my_button],"announce_click);
will cause
Button MY_BUTTON was clicked
to be printed when the button is pressed.
Programming the User Interface
Monitors
Widgets, such as sliders and text fields, which record a value entered by
the user, have a kind of callback called a monitor. A monitor is very
close to a handler: it is a SIL procedure taking an mnode as input that is
run whenever a new value is entered in a widget.
add_monitor(mn:mnode;h:id);
adds a monitor to mn.
Example 6.3
Suppose that
my_panel["my_number_field]
is a field which accepts real numbers, Then
procedure announce_number(x:mnode);
begin
writeln('Number field ',name(x),' has value ',
field_real_value(x)));
end;
add_monitor(my_panel["my_number_field], "announce_number);
will cause
Number field MY_NUMBER_FIELD has value 6.28
to be printed when the number 6.28 is entered into the field widget.
Optionally, filters may be added to a field such that only certain legal
values may be entered. The filter function is called before the value is
accepted by the widget and returns TRUE or FALSE indicating whether
the value is legal. If the filter returns FALSE, the value will not be
accepted and the field’s monitors not called.
set_field_filter(mn:mnode;h:id);
adds a filter to mn.
6-8
SilTools
Simple Widget Programming
You need to reset the field’s value in case the filter rejects the new value,
or else the illegal value will remain in the field’s display. You can also
notify the user that a illegal value was entered by displaying an
information box.
Example 6.4
Continuing Example 6.3:
function filter_less_than_two(x:numstring) : boolean; var ok :
boolean;
begin
ok := TRUE;
if(real_of(x) < 2.0) then
begin
init_field_val(my_panel["my_number_field],
field_real_value(my_panel["my_number_field]));
info_dialog(list(make_prompt('Value must be >= 2'),
make_prompt('thank you.')));
ok := FALSE;
end;
filter_less_than_two := ok;
end;
set_field_filter(my_panel["my_number_field],
"filter_less_than_two);
displays
Value must be >= 2
thank you.
in a pop up box when the number 1.3 is entered into the field widget. The
field will reset to show its previous value.
Each kind of widget has an accessing function that allows the current
value to be read, as in this example:
Example 6.5
function slider_value(x: mnode): integer;
Developer’s Guide
(7/96)
6-9
Programming the
User Interface
reads the current value of a slider.
Programming the User Interface
The SIL code implementing handlers and monitors and also the code
which hooks them to their widgets will typically appear in the same code
module where the panel’s code resides.
Footers
Footers behave like push buttons, executing an action when the button
is clicked. However, footers are automatically laid out across the bottom
of a panel, and cannot be manipulated like other visual elements. To
associate an action with a footer command, use
set_footer_handler(pn : mnode; ft : id; hd : id);
This function adds a handler to the footer ft in panel pn.
Displaying Panels
For testing, it is often useful to be able to install a panel constructed by
the Visual SIL Window without having to do a build. This can is done by
using
load_panel(module_name: string; panel_name: string);
The panel may then be displayed by calling
put_up(mn: mnode);
The panel may be removed from the display by calling
bring_down(mn: mnode);
6-10
SilTools
Advanced Widget Programming
Advanced Widget Programming
This section describes how to program shape fields and graphics tools
(gtools). Shape fields and graphics tools (gtools) are powerful interface
elements, allowing graphical shape picking and general graphics
operations in panels respectively. The Move Object panel is a good
example of shape fields and gtools in action. The shape field at the top
of the panel picks the object to move, and gtool linked to a container
performs the actual move function graphically.
Before using the information on shape selectors, selector widgets need
to have been created using the Visual SIL Window. Graphics tools can
only be created by programming.
NOTE
Using the Visual SIL Window is described in Chapter 7,
“Customizing the Menu Interface” in the SilTools User’s
Manual, available from SILMA, Division of Adept
Technology, Inc.
Shape Fields and Graphics Tools
Shape Fields
Shape fields are widgets that enable shape picking inside panels.
gtools differ from shape fields in that they support more general
interactive graphics operations.
There are two kinds of shape fields: global_browser_kind and
global_getob_kind.
This is the kind for shape processors, which are “wired” to
the middle mouse button (this is also called speedup). The
selector widget “binds” a mouse button (always the middle
button) whenever the selector is active. That is, when this
selector is up and active, selecting an object in either the
Developer’s Guide
(7/96)
6-11
Programming the
User Interface
global_browser_kind
Programming the User Interface
Quick Pick Window or Graphics Window automatically
changes the selector’s value—there is no need for the user to
click the selector.
global_getob_kind
This is the kind for shape selectors, which borrows the
mouse temporarily. Clicking on the selector widget puts the
interface into getob mode. In getob mode, the user must
select a shape or cancel. The left mouse button is always
used for selecting.
NOTE
global_getob_kind should not to be confused with
the shape_selector object mentioned below.
Both shape processors and shape selectors have an option that
enables the user to select more than one object, if desired. If this
option has been added to the shape field, the widget looks different:
Multi-Pick Shape Processor
Figure 6-1
NOTE
Multi-Pick Shape Selector
Multiple-object shape fields
“Groups” on page 6-24 provides additional commands
used in multiple-object shape selection.
The value of a shape field can either be a shape or a string. The
function shape_field_has_shape is used to test for which one it is.
Two accessor functions are used to get the appropriate value:
shape_field_shape_value for a shape and
shape_field_string_value for a string. If more than one shape was
selected, the group shape is returned.
The shape_selector class provides a way of indicating a shape by
abstracting the common functionality of the shape fields. As a
special case, a shape field is hooked up slightly differently than other
widgets.
6-12
SilTools
Advanced Widget Programming
To run an action whenever a shape (or shapes) is selected, set the
shape selector’s iexecute method. iexecute method, if any, is called
when the value of the shape field is changed. Note that the execute
method, if set, should take an mnode as argument.
To add a filter to the shape field, set the shape selector’s ifilter
method. ifilter method, if any, determines which shapes are legal
selections. If no filter method is defined, a default filter is used
which screens out shapes which are internal parts of a compacted
model.
If a value for a shape field is picked in the Graphics Window, the
value returned is the nearest ancestor which satisfies the filter.
Again, if no filter is specified, the tree is climbed to the nearest
ancestor which is not a component of a compacted model.
A shape field is created by first creating a selector widget using the
Visual SIL Window, and then applying either global_getob_kind or
global_browser_kind to add the shape selection functionality. In
each case, a shape_selector view is spliced onto the selected
mnode.
To create a shape field, use
mk_shape_field(selector_widget: mnode, knd: integer,
bt: button): mnode;
left_button
middle_button
To add highlighting such that the shape field’s value is shown
graphically, use
When a shape is deleted from the World, a shape field which
previously had the shape as current value may substitute it with
another.
Developer’s Guide
(7/96)
6-13
Programming the
User Interface
function mk_hl_shape_field(selector_widget: mnode):
hl_shape_selector;
Programming the User Interface
To add re-initialization if shape is deleted, use
function mk_initializing_shape_field(selector_widget: mnode,
a_closure: closure (ob)):
initializing_shape_selector;
The initializing_shape_selector has a reinit closure, which when
called should return the new value:
initializing_shape_selector.reinit: shape closure(ob);
To add the multiple-selection option, use
function set_supports_multi(selector_widget: mnode,
is_multi: boolean);
Graphics Tools
Graphics tools (gtools) are entities which support general graphics
operations and can respond to mouse activity within the
Graphics Window. gtools assign meaning to a click or drag in the
Graphics Window, but not the Quick Pick Window. By convention,
gtools are always bound to the left mouse button. While there is no
widget associated with the gtool, they can easily be added to a panel,
and hooked up much in the same way as shape selectors.
There are three kinds of gtools: shape-click tools, group tools and
general tools.
Shape-Click Tools
Tools whose action is determined only by the position of the
mouse when the button is released. Such a tool will fill in the
shape_of field with the shape under the mouse. A shape-click
tool is created with the constructor
function mk_shape_click_gtool(name: id): gtool;
The operation to access a shape-click tool is
function is_shape_click_gtool(gt: gtool): boolean;
6-14
SilTools
Advanced Widget Programming
Group Tools
Tools that act on a group defined by dragging. Here, the tool is
activated when the mouse is released and the group_of is filled
in with the shapes within the 2D box indicated by the drag. A
group tool is created with the constructor
function mk_group_gtool(name: id): gtool;
The operation to access a group tool is
function is_group_gtool(gt: gtool): boolean;
General Tools
Tools that do all their own computations (that can act in
whatever manner the programmer sees fit when the mouse is
pressed, dragged and released). A general tool is created with the
constructor
function mk_general_gtool(name: id): gtool;
The operation to access a general tool is
function is_general_gtool(gt: gtool): boolean;
Making Shape Fields and Graphics Tools Work
A tool set attachment must be added to each panel which has a shape
field or gtool wired to the mouse. These shape fields and gtools are
generally called tools.
Only one tool set may be active at a time and tool sets are always
associated with panels—clicking the mouse button with the cursor
in the panel activates the panel’s tool set and changes the border
color. Tools are active only when their tool set is active. In the
simplest case, a tool set can hold two tools which bind both mouse
buttons. Because a panel may have many tools which need to be
wired and there is only one mouse, tool bodies support switching of
Developer’s Guide
(7/96)
6-15
Programming the
User Interface
Tool Sets and Tool Bodies
Programming the User Interface
tools within a tool set. Tool bodies are holders for one or more shape
selectors or gtools, which bind one or both of the mouse buttons.
Tool bodies are always associated with container widgets, often
overlaid such that only one is visible at a time. In a typical scenario,
a panel consists of a switch, a set of operations, where selecting an
operation causes a particular container to appear and its tool body to
be activated. Each tool set has, at most, one current tool body, which
will be activated when the tool set is, and the tool set can bind one
or both of the mouse buttons as default, if the current tool body does
not.
Example 6.6
The move tool set includes a shape_field which determines
which shape will be moved. The tool set has many tool bodies, one
of which is the XY tool_body. The tool set in this case binds the
middle button, and the XY body binds the left button. In particular,
clicking the middle mouse button in the Graphics Window or the
Quick Pick Window updates shape_field field to that shape.
Clicking (or dragging) the left mouse button causes the current
shape_field shape to jump (or drag) to the location on the XY
plane over which the mouse is clicked (or held down).
In general, browser shape fields should be used only in cases where
an operation is primarily graphical in nature, meaning that the mouse
will remain in the graphics views for the duration of the operation.
Because a tool set takes over the current mouse binding when active
(even if it does not contain tools which bind the mouse buttons), a
panel which does not have browser shape fields or gtools does not
need, nor should have, a tool set.
To turn a panel into a tool set, use
mk_tool_set(mn: mnode)
To turn a container into a tool body, use
mk_tool_body(mn: mnode, ts: tool_set)
6-16
SilTools
Advanced Widget Programming
Binding a Mouse Button
The bind_button command is used to add a tool to either a tool body
or the tool set as the default tool.
function bind_button(mn: mnode;
bt: integer;
shs shape_selector);
where bt is always the middle_button (2).
function bind_button(mn: mnode; gt: gtool);
Controlling which Tools are Active
This procedure activates the given body; that is, this body will
replace the current body (if any):
set_body(ts: tool_set, tb: tool_body)
Tool Set and Tool Body Methods
Two methods are called when the tool set and tool body are activated
and deactivated:
at_activate
called when the tool set or tool body is activated.
at_deactivate
called when the tool set or tool body is deactivated.
Specifying Tool Actions for Graphics Tools
The action taken by each kind of tool is specified by defining its
execute method.
For a shape-click tool, the execute method will be run when the
mouse button is released.
When the execute method is run, the following occurs:
the click occurred.
■ The previous pos is copied into last_pos.
Developer’s Guide
(7/96)
6-17
Programming the
User Interface
■ The pos field is filled in with the screen coordinates where
Programming the User Interface
■ The shape_of field is filled in with the shape selected by the
click.
The predicate method of the tool determines which shapes are
available for selection by a shape-click tool.
A group tool is similar to a shape-click tool, but will show a box on
the screen when the mouse is dragged, and fills in the group_of field
when the mouse is released with the group of shapes in the box. It
will also set the shape_of field to the group shape representing the
group.
In the case of a general tool, the execute method is run whenever the
mouse button is pressed, released, or moved while pressed. pos and
last_pos, and action fields are filled in. The values of the action
field are
buttonpress
buttonrelease
motionnotify
leavenotify The mouse cursor was moved out of the
Graphics Window while the mouse button remained
pressed.
enternotify The mouse cursor returned to the Graphics Window
while the mouse button remained pressed.
Other gtool Methods
Two methods are called when a gtool is activated and deactivated:
6-18
at_activate
called when the gtool is activated.
at_deactivate
called when the gtool is deactivated.
SilTools
Advanced Widget Programming
Obtaining Additional Information
If you would like more information about the results of using the shape
field or gtool, you can use this function after the pick is made:
get_pick_extended_info(): pick_extended_info;
Detailed information on the result of the pick will be returned.
The structure of the pick_extended_info lrecord includes the following
fields:
Variable
Type
Meaning
something_selected
boolean
Was anything selected?
selected_object
object
The selected object.
point_was_selected
boolean
Was a vertex selected?
selected_vertex
point
Coordinates of the
selected point.
seg_was_selected
boolean
Was a line segment
selected?
selected_seg
seg
The selected line
segment.
facet_was_selected
boolean
Was a facet selected?
selected_facet_point
point
The point selected on the
facet.
selected_facet_normal
dir3dr
The normal to the
selected facet.
selected_screen_point
pnt2di
The screen coordinates of
the mouse selection.
Developer’s Guide
(7/96)
Graphical-picking global variables
6-19
Programming the
User Interface
Table 6-3
Programming the User Interface
Widget Toggles
A common use of the toggle is to switch between distinct but related
operations. To conserve panel space, multiple container widgets are
overlaid beneath the toggle. Adding a monitor to the toggle enables the
container to be initialized when it’s displayed. Selecting an operation
with the toggle displays a specific container that has all widgets needed
to perform the operation. The widget toggle associated with a list of
container widgets automatically displays the appropriate container.
widget_toggle is a subclass of toggle_mnode, associating a container
widget with each toggle item, such that selecting a toggle item causes
the associated container to be displayed and the remaining containers to
be hidden. If these containers are in the tool_body class, selecting the
toggle item will activate the associated tool_body.
mk_widget_toggle(mn: toggle_mnode, cnts: list of mnode);
To install new container widgets, use this procedure:
install_new_widget_toggle_entries(mn: mnode,
cnts: list of mnode);
To add container widgets, use this procedure:
add_widget_toggle_entry(mn: mnode, cnts: mnode);
add_widget_toggle_entry(mn: mnode, cnts: mnode,
index: integer);
To remove container widgets, use this procedure:
remove_widget_toggle_entry(mn: mnode, cnts: mnode);
remove_widget_toggle_entry(mn: mnode, index: integer);
The common panel organization has a toggle widget at top, under which
multiple container widgets are stacked on top of each other, with only
one being visible at a time.
6-20
SilTools
Advanced Widget Programming
Examples
Example 6.7 illustrates simple shape picking and adding a shape field to
a panel.
Example 6.7
panel = itest$test1
selector widget = sw
init_test1()
{
mk_shape_field(sw, global_getob_kind, left_button);
mk_hl_shape_field(sw);
set_method(sw as_view
shape_selector, "ifilter, "monitor_filter,
list(mnode, shape));
{monitor_filter determines whether shape is valid. Returns
TRUE/FALSE}
set_method(sw as_view
shape_selector, "iexecute, "execute_function,
list(mnode));
{execute_function looks to shape_field_value(mnode),
which is an ob, and sees if the value is a string or shape, then
performs some action}
Developer’s Guide
(7/96)
6-21
Programming the
User Interface
}
Programming the User Interface
Example 6.8 illustrates speedup shape picking and adding a shape
speedup field.
Example 6.8
panel = itest$test2
selector widget = sw
init_test2()
{
test2_tool_set:= mk_tool_set(panel);
mk_shape_field(sw as_view field_button,
global_browser_kind, middle_button);
mk_hl_shape_field(sw);
set_method(sw as_view
shape_selector, "ifilter, "monitor_filter,
list(mnode, shape));
{monitor_filter determines whether shape is valid. Returns
TRUE/FALSE}
set_method(sw as_view
shape_selector, "iexecute, "execute_function,
list(mnode));
{execute_function looks to shape_field_value(mnode),
which is an ob, and sees if the value is a string or shape, then
performs some action}
bind_button(panel,middle_button,sw as_view
shape_selector);
}
Graphical Picking
The preceding section explained how to add graphics picking to a panel.
This section explains how to enable the user to perform a graphics pick
without using a panel that has been displayed from the menus. This
facility is included primarily to support older (pre-Release V) versions
of SILMA software.
6-22
SilTools
Graphical Picking
To prompt the user to select an object from the Graphics Window or
Quick Pick Window, use the function
get_graphics_pick(message: string): boolean;
When this function is executed, a pop up box is displayed. The pop up
box instructs the user to pick an object by clicking on one in the
Graphics Window or the Quick Pick Window. After the pick is made,
you can obtain information about the graphics pick by using the function
described in “Obtaining Additional Information” on page 6-19.
The get_graphics_pick function returns TRUE if something is selected,
and FALSE if the user aborts by clicking the Cancel selection in the pop
up box.
A more powerful version of the command is
get_graphics_pick(message: string; screening_function: id):
boolean;
This command applies the screening_function to each object that a user
selects, and returns only when this screening function returns true.
Example 6.9 requires the user to pick until a frame or the teacher is
selected (or the selection is aborted).
Example 6.9
var pick: boolean;;
function is_frame_or_teacher(x: object): boolean;
begin
is_frame_or_teacher := is_frame(x) or is_teacher(x);
end;
Developer’s Guide
(7/96)
6-23
Programming the
User Interface
pick := get_graphics_pick('Pick a frame.',
"is_frame_or_teacher);
Programming the User Interface
Groups
The grouping mechanism provides a way to perform the same
operations on more than one shape at a time. A group is treated by the
user interface as a shape, even though its members are not a part of the
World shape tree. There are several ways to create a group; for example,
you can create one by clicking and dragging a rubber band object in the
Graphics Window or using the Create/Edit Group panel.
If you are planning on using multiple-object shape selectors, you should
first familiarize yourself with the information in “Shape Fields and
Graphics Tools” on page 6-11 on how to enable a shape field to select
groups of shapes, then use the commands in this section.
This command determines if an object is a group shape:
is_group(object:model):boolean;
This command returns the members of a group, treated as a list of
pathnames.
value(gr: group):list of pathname;
wlkup(pathname) can be called on each element to get the shape.
A group can be created by calling a short set of API functions.
This command constructs a group that the user can select in the
Quick Pick Window, and edit from the Create/Edit Group panel:
mk_group(name:id; members:list of pathname):group;
This command constructs a group that will not appear to the user in the
user interface:
mk_tmp_group(name:id;members;list of pathname):group;
This command must be called after mk_group or mk_tmp_group:
add_group(gr:group);
6-24
SilTools
File Browsing
This command deletes a group:
delete_group(gr:group);
File Browsing
The file browser is a panel which enables the user to browse the file
system and select a file. To activate the file browser, use the function:
where
mn is an optional argument that specifies which panel the file
browser will appear next to on the screen, and this can be nil.
ttl is a title shown at the top of the file browser.
nm is a label for the kind of entity the file will select (e.g., cell,
movie).
sd is a subdirectory to search when the current directory is a library.
ext is a file extension to search for.
fn is the name of a function to call once a selection has been made.
This function will be passed two strings: the first specifies the name
of the file, and the second specifies the full pathname.
flgs are flags which can set various options:
ib_file_save
An additional text field prompts the user to
enter a new filename.
ib_file_no_save_list
The file browser will not show the file contents
of the current directory.
ib_file_no_lib The user will not be given the option of
changing directory.
ib_file_save_confirm
Prompts the user to confirm his selection if the
file already exists. This is used only when
ib_file_save is set.
Developer’s Guide
(7/96)
6-25
Programming the
User Interface
procedure ib_pop_file(mn: mnode; ttl: string; nm: string; sd:
string; ext: string; fn: id; flgs: integer);
Programming the User Interface
Example 6.10
This example illustrates how to save data collected from a simulation:
procedure save_my_data(filename: string; pathname: string);
begin
{ This is where I save it }
end;
ib_pop_file(mymodule$mypanel,'Save Simulation Data',
'simulation data','data','sim_data', "save_my_data,
ib_file_save + ib_file_save_confirm);
Requestor and Message Panels
Pop Up Boxes
Pop up boxes are modal panels which prevent the user from taking
further action until the pop up box is dismissed. Pop up boxes can
display messages, present choices, and request information.
make_prompt(string): intf_prompt;
info_dialog(list of intf_prompt);
Display a message for the user to acknowledge.
make_prompt(message: string):intf_prompt;
Constructs an intf_prompt.
info_dialog(message: list of intf_prompt);
Displays a message in a pop up box that the user must acknowledge.
Program execution is halted until the user clicks OK.
6-26
SilTools
Requestor and Message Panels
sure(list of intf_prompt): boolean;
Presents the user with a yes or no choice.
sure(message: list of intf_prompt):boolean;
sure():boolean;
Displays a message in a pop up box, and presents the user with an
option of selecting OK or Cancel. Program execution is halted until a
selection is made. The function returns when either selection is chosen.
NOTE This is also called a confirmation requestor.
get_a_string(list of intf_prompt): anno_string;
Requests a string from the user. The user is given the option of
cancelling the selection. anno_string ia defined in the following
section. Additional similar functions are also described in the
following section.
NOTE
Additional functions are documented in the SilTools
Command Reference, available from SILMA, Division of
Adept Technology, Inc.
Annotated Types
Annotated types are useful when a function can return a value or “no
value”, such as the case of get_a_string where a user can either enter a
string or cancel.
anno
A boolean that records whether or not a value was
entered.
val
A value (if one was entered).
Developer’s Guide
(7/96)
6-27
Programming the
User Interface
Annotated types include anno_string, anno_boolean, anno_integer,
and anno_real. These types are defined as records that have two fields:
Programming the User Interface
The following functions return an annotated value:
get_a_real(message:list of intf_prompt):anno_real;
get_a_real():anno_real;
get_an_integer(message:list of intf_prompt):anno_integer;
get_an_integer():anno_integer;
get_a_boole_tf(message:list of intf_prompt):anno_boole;
get_a_boole_tf():anno_boole;
get_a_boole_yn(message:list of intf_prompt):anno_boole;
get_a_boole_yn():anno_boole;
get_a_boole(message:list of intf_prompt):anno_boole;
get_a_boole():anno_boole;
get_a_string(message:list of intf_prompt):anno_string;
get_a_string():anno_string;
Pops up a message in a pop up box prompting the user to input a value.
Program execution is halted until the user enters the value or cancels
the selection.
Online Help
A panel may have a help file available online. Pressing the <HELP> key
while the cursor is on the panel will display the help information. To set
help, use
set_help(mn: mnode; file: string);
where file is a relative pathname from ~/cim/gui/help.
The help file is an ASCII text file. Formatting should be kept simple and
every paragraph placed in a single line. Since the help text will wrap
around to the next line automatically, you do not need to be concerned
about the size of the Help Window.
6-28
SilTools
Installing Panels
Installing Panels
Adding a Panel into the Pulldown Menus
A panel may be added to a product by editing the top bar panel for that
product. This can be accomplished using the Visual SIL Window by
loading and editing in the current top bar panel then saving the revised
panel into a new file and updating the build area where the top bar panel
resides.
Adding a Panel into the Quick Access
A panel may be added into the Quick Access using the Visual SIL
Window, or during initialization by calling
create_rolodex_mnode_nm(mn:mnode);
NOTE
If a panel will be used as a tool set, it should first be made
into a tool_set, before adding it to the Quick Access.
Adding a Panel into the Tool Bar
A panel may be added into the tool bar using the Visual SIL Window, or
during initialization by first calling
create_toolbar_mnode(mn: mnode; bid : id; pict : string);
where bid is an id given to the new button to be created and added into
the tool bar and pict is the relative pathname of the icon pixmap. All
pixmaps and bitmaps should reside under the ~/cim/gui/icons
directory.
To make the panel appear in the tool bar, call
Developer’s Guide
(7/96)
6-29
Programming the
User Interface
add_panel_to_toolbar(tm : toolbar_mnode);
Programming the User Interface
Example 6.11
aaa==create_toolbar_mnode(itest$test1,"test1,'test_icon');
sets itest$test1’s icon to ~/cim/gui/icons/test_icon.
add_panel_to_toolbar(itest$test1 to_view toolbar_mnode);
Making a Panel Operational
All panels belong to a particular build area, so code associated with
making a panel work should be placed in that same build area. The first
step in making a panel operational is to “hook up” a panel by adding
monitors and handlers, setting methods, and initializing the state of the
widgets. This is done in the initialize method of the panel, which can be
set using the Visual SIL Window or calling set_method in-line the SIL
file.
Example 6.12
procedure init_test_panel(mn: mnode);
begin
add_monitor(mn["toggle],"test_toggle_monitor);
...
end;
set_method(itest$test_panel, "initialize, "init_test_panel,
list(mnode));
The next step is to optionally set the at_pop method of the panel. Setting
the at_pop method both initializes the panel for use the first time and
every time it is brought up. The at_dismiss method may also be set and
will be called each time the panel is brought down.
6-30
SilTools
Customizing the Application
Customizing the Application
The Menu Bar
The menu bar is specified in each product’s top_init.sil file. Set the
top_bar variable to be the menu’s panel.
Customizing the Logo
The logo is a small panel which contains a button with the product’s
logo. When the button is pressed, an action may take place.
To change the product’s logo, use
set_label_icon(ikern$logo["command]; pixmap_file: string);
By default, a small panel pops up with text inside. To change this text,
use
install_new_list_entries(ikern$logo_info["list],
entries: sarray_of(lstring));
To change the action that occurs when the button is pressed, use
set_handler(ikern$logo["command],id);
REMINDER
All icons should be placed under the
cim/gui/icons directory.
Customizing the Layout
save_r_current_layout();
Developer’s Guide
(7/96)
6-31
Programming the
User Interface
A product may save the location and size of certain panels to be restored
each time the product is started. To create a new layout, arrange the
panels inside the product then call
Programming the User Interface
This must be done for every screen geometry on which this product will
be run.
To add more information to the settings, i.e. save the position of new
panels a new layout constructor must be written. The layout constructor
must be of the type function(setting);.
Taking no arguments, this function must return a setting object. The
function to create a new setting is
std_mk_layout_settings(nm : id, ls : list of setting);
The functions to create a specific setting include the following:
mk_panel_geom_setting(nm : id; panel :id; pos : id; xt : id);
where nm is the name of the setting, panel is the name of the panel,
pos and xt are the names of the global variables which optionally may
be set when the layout is restored. If no such global variables, exist nil
may be substituted.
mk_panel_pos_setting(nm : id; panel :id; pos : id);
Similar to mk_panel_geom_setting except only the pos and not the
extent of the panel is saved.
mk_global_var_setting(nm : id);
where nm is the name of a global SIL variable. The value of this
variable will be saved and restored.
6-32
SilTools
Customizing the Application
Example 6.13
function mk_test_layout_settings():setting;
begin
mk_test_layout_settings :=
std_mk_layout_settings("test_layout, list(
mk_panel_geom_setting("test1_geom,
"itest$test1,nil,nil),
mk_panel_geom_setting("test2_geom,
"itest$test2, "test2_pos, "test2_xt),
mk_panel_pos_setting("test3_pos, "itest$test3,
"test3_pos),
mk_global_var_setting("test_var)));
end;
the_layout_constructor := "mk_test_layout_settings;
To relocate the Quick Access, you need to add the following code to
top_init.sil:
base_rolodex.top_init := [newx, newy] as pnt2dr;
base_rolodex.top_loc := [newx, newy+8] as pnt2dr;
moveto(ikern$rolodex,base_rolodex.top_init);
where newx and newy is the new location of the Quick Access.
Customizing the Start Up Screen
The start up screen is displayed while the menus are initializing. The
start up screen can be configured in the file
cim/templates/<product>/startup.msg.
FONT <STRING>
Sets the font. Example: FONT -adobehelvetica-bold-r-normal--12120-75-75-p-70-iso8859-1}
TEXTCOLOR <STRING>
{Sets the text color. Example: TEXTCOLOR
blue}
Developer’s Guide
(7/96)
6-33
Programming the
User Interface
The format is as follows:
Programming the User Interface
FOREGROUND <STRING>
{Sets the foreground color for all monochrome
bitmaps}
BACKGROUND <STRING>
{Sets the background color for all monochrome
bitmaps}
TEXT LEFT <X-COORD> <Y-COORD> <STRING>
{Writes text left justified starting at X, Y.
Example: TEXT LEFT -200,-100
This is a test product}
TEXT RIGHT <X-COORD> <Y-COORD> <STRING>
{Writes text right justified ending at X, Y}
TEXT CENTER <X1-COORD> <X2-COORD> <Y-COORD> <STRING>
{Writes text centered between X1 and X2 at Y}
IMAGE PLACE <X-COORD> <Y-COORD> <LOGO FILE>
{Shows image as location X, Y. Example:
IMAGE PLACE START START
test_logo}
IMAGE CENTER <X1-COORD> <Y1-COORD> <X2-COORD> <Y2COORD> <LOGO FILE>
{Shows image centered between X1, Y1 and
X2, Y2}
COORD: START, END
6-34
{The edge of the screen}
-number
{Offset from the lower right corner}
number
{Offset from the upper left corner}
STRING
{$ = (R)
@ = (C)
% = TM}
LOGO FILE
{A bitmap or pixmap from the
cim/gui/icons/logo directory}
SilTools
Chapter 7
Vision
Additional SIL functionality is provided for “auto-level”. This function
automatically keeps the camera horizontal (views never become upside-down
or sideways)—the camera will always have a horizontal horizon.
This procedure installs a new camera into the workcell:
procedure install_cam();
The camera is installed, automatically named and painted. Cameras are
painted a <color> and automatically named cam_<color>.
This procedure sets the target for a specified camera:
procedure target(c,targ: string);
where c is the camera and targ is the target.
This function returns the target for a specified camera:
function target(c: string):string;
where c is the camera.
This procedure sets the tracking status of a specified camera:
procedure tracking(c:string; op:boole);
where
c is the camera.
op = true switches tracking on and op = false switches tracking off.
This function returns the tracking status of a specified camera:
function tracking(c:string):boole;
where
c is the camera.
Developer’s Guide
(7/96)
7-1
Vision
SIL functions can be installed inside user programs to perform the same actions
as selecting the Vision panel selections. Using SIL functions in this way enables
users to create programs for simulating vision or even choreographing their
simulations. In the case of choreography, the cameras can be hidden so that the
camera ring is not visible when enabling vision.
Vision
This function sets the focal length for a camera:
procedure focal(c:string; fl:real);
where
c is the camera.
fl is the focal length.
This function returns the focal length of a camera:
function focal(c:string):real;
where c is the camera.
This procedure sets the auto-level status of a specified camera:
procedure autolevel(c:string; op:boole);
where
c is the camera.
op = true switches auto-level on and op = false switches auto-level
off (default).
This function returns the auto-level status of a specified camera:
function autolevel(c:string):boole;
where c is the camera.
This procedure activates vision in the current view:
procedure vision(c:string; op:boole);
where
c is the camera that will have vision enabled for it.
op = true switches vision on and op = false switches vision off.
This function provides information about the tracking status:
function is_tracking():anno_shape;
Returns if the camera in the current window is tracking, and what the
target is (provided vision is switched on in the current view).
Returns [false, empty_shape] if vision is switched off.
7-2
SilTools
Vision
This function provides information about where the lens is located:
function is_mounted():anno_shape;
Returns TRUE (provided vision is switched on). The shape that is
returned is the object the lens is affixed to.
To find out which “camera” has vision switched on, use
label(parent(is_mounted().val));
Developer’s Guide
(7/96)
7-3
Vision
7-4
SilTools
Chapter 8
Modeling Using
SIL Commands
The model Data Type
The model Data Type
All SilTools models, both rigid and structured, are represented
internally with the same data type: model. The model data type is a data
structure with fields for the following:
1. The name of the model. This name is used during a
simulation to refer to the model and its components. Names
are always given as strings.
2. Its kind (rigid or structured).
3. The model body.
4. The color of the body.
5. Pointers to the model’s submodels (if any).
Modeling Constructors
Because SilTools models are represented by their boundaries (which are
in turn limited to vertices, edges, and facets), you will need only a few
basic constructors to build even the most complex models. For
convenience, you may build more sophisticated constructors out of
these basic ones. SilTools provides some of these more sophisticated
constructors—you can create the others using the following examples as
guides.
The World coordinate frame is the base coordinate system used by all
the modeling constructors. For this reason, all geometric values
specified in the constructors are absolute values. Most constructors
Developer’s Guide
(7/96)
8-1
Modeling Using
SIL Commands
Creating models using the menus and panels is usually the most efficient way
to create models. You can also, however, create models using the SIL language.
The first part of this chapter describes how to create models using SIL
commands. The last part of this chapter provides examples of models.
Modeling Using SIL Commands
return models centered on the origin of the World coordinate frame.
They may be transformed to new locations with the moveto and moveby
commands.
Operator
mk_point(<xc>,<yc>,<zc>)
Resulting Shape
Cartesian point
Curves
Operator
mk_rctcurve (pts : darray of pnt3dr)
rctcurve
mk_rctcurve (pts : darray of pnt3dr; n : integer)
rctcurve
n
use [0.. n] points as input
mk_rctcurve (p,q : pnt3dr)
mk_circle (r : real)
centered
p
circle
circle
radius
angle in degrees [0..360.0]
arc (r : real)
r
circle
radius
angle in degrees [0..360.0]
resolution
arc (r,a : real)
r
a
circle
circle defined w.r.t the frame
arc (r,a : real; res : integer)
r
a
res
circle
center
mk_circle (radius : real; f : frame)
f
rctcurve
at origin
mk_circle (radius : real; p : pnt3dr)
8-2
Resulting Shape
circle
radius
SilTools
Modeling Constructors
Conics
a-x coefficients, b-y coefficients
mk_ellipse (a,b: real)
ellipse
mk_parabola (a: real)
parabola
mk_hyperbola (a,b : real)
Operator
mk_rbspline (knts,wghts : darray of real;
cpts: darray of pnt3dr)
knts
wghts
cpts
knts
wghts
cpts
mk_pcurvelist(pcs : list of pcurve)
mk_pcurve (p : pnt3dr)
Developer’s Guide
rbspline
rbspline
Resulting Shape
pcurvelist
pcurve
point
mk_pcurve (p : seg3dr)
p
Resulting Shape
knots
all weights equal to 1.0
control points
Operator
p
hyperbola
knots
rational part of the point called “weights”
control points
mk_rbspline (knts : darray of real;
cpts : darray of pnt3dr)
(7/96)
Resulting Shape
Modeling Using
SIL Commands
Operator
pcurve
line segment
8-3
Modeling Using SIL Commands
Surfaces
Cap
angle
0 to 360 degrees creates partial cap
The edge of a partial cap starts at x = <radius>, y = 0,
sweeps counter clockwise <angle> degrees around the
Z axis, and has an additional edge to close the polygon
resolution
number of facets in cap (if omitted, c_circ_res is used)
Operator
Resulting Shape
mk_cap(<radius>[,<angle>]);
circular polygon
mk_cap(<radius>[,<angle>,<resolution>]);
circular polygon
Facet
The first three points establish the plane of the facet, and all points
specified subsequent to them must lie in that plane. Order the points
in the counterclockwise direction looking toward the facet from its
outside. This establishes the direction of the facet’s normal.
Operator
8-4
Resulting Shape
facet(list(<point1>,<point2>,<point3>
[,...,<pointn>]));
convex planar
polygon
facet(array(<point1>,,<point2>,<point3>
[,...,<pointn>]));
convex planar
polygon
SilTools
Modeling Constructors
n
normal
d
distance to origin
sz
extents
pl
plane structure
Operator
Resulting Shape
mk_plsurf (n : dir3dr; d,sz : real)
plsurf
mk_plsurf (n : dir3dr; d : real)
plsurf
mk_plsurf (pl : plane)
plsurf
Grid Surface
g
point grid
ng
normal grid
Operator
mk_gsurface (g,ng : grid)
Resulting Shape
gsurface
(makes grid gsurface)
mk_gsurface (g : grid)
gsurface
(makes grid gsurface for which normals are
calculated automatically)
psurf_to_gsurf (z : psurface)
gsurface
(generates discrete grid surface out of psurface)
crvs1,crvs2
first, and second curve list
Operator
mk_rsurf (crvs1,crvs2 : list of pcurve)
Resulting Shape
rsurf
Be sure that pcurves are oriented correctly to avoid twisted ruled
surfaces.
Developer’s Guide
(7/96)
8-5
Modeling Using
SIL Commands
Plane Surface
Modeling Using SIL Commands
Surface of Revolution
crvs
generatrix curves
theta
angle revolution in rad
ax
axis of revolution
Operator
Resulting Shape
mk_rvsurf (crvs: list of pcurve; theta: real)
rvsurf
mk_rvsurf (crvs : list of pcurve)
rvsurf
mk_rvsurf (ax: seg3dr; crvs: list of pcurve;
theta: real)
rvsurf
mk_rvsurf (ax : seg3dr; crvs : list of pcurve)
rvsurf
Tube as rvsurf
r
radius of tube
a
angle revolution in degrees (0 to 360)
h
height of tube
ur
resolution in circular direction (if omitted, c_circ_res is
used)
Operator
8-6
Resulting Shape
tube
(r,a,h: real; ur: integer)
rvsurf
tube
(r,a,h : real)
rvsurf
tube
(r,h: real)
rvsurf
SilTools
Modeling Constructors
r1,r2
first, and second radii of funnel
a1
angle revolution in rad
h
height of tube
ur
resolution in circular direction
Operator
Resulting Shape
funnel (r1,r2,a1,h : real; ur : integer)
rvsurf
funnel (r1,r2,a1,h : real)
rvsurf
funnel (r1,r2,h : real)
rvsurf
Tabulated Cylinder
endpt
endpoint of generatrix
base
directrix
Operator
mk_tcsurf (endpt: pnt3dr; base: list of pcurve)
Resulting Shape
tcsurf
Rational B-Spline Surface
knts1,knts2
u, v knots
cpts
control points
wghts
rational part of control points (weights)
Operator
mk_rbsurf (knts1,knts2,wghts: darray of real;
cpts: darray of pnt3dr)
rbsurf
mk_rbsurf (knts1,knts2 : darray of real;
cpts : darray of pnt3dr)
rbsurf
Developer’s Guide
(7/96)
Resulting Shape
8-7
Modeling Using
SIL Commands
Funnel as rvsurf
Modeling Using SIL Commands
d1,d2
degrees in the u, v directions
fno
is a “formno” gives a simple description of what type of
surface this really is, such as cylinder, sphere, etc.
coefs
coefficients of spline surf
Operator
Resulting Shape
mk_bsurf (fno,d1,d2: integer;
knts1,knts2: darray of real;
coefs: darray of pnt3dr)
rbsurf
mk_bsurf (d1,d2: integer;
knts1,knts2 : darray of real;
coefs: darray of pnt3dr
rbsurf
Coons Surface
sg1,sg2,sg3,sg4
line segment boundaries
pc1,pc2,pc3,pc4
pcurve boundaries
k
specifies the type: 0 for linear and 1 for cubic
Operator
Resulting Shape
mk_cnsurf (sg1,sg2,sg3,sg4: seg3dr; k: integer)
cnsurf
mk_cnsurf (pc1,pc2,pc3,pc4 : pcurve; k :
integer)
cnsurf
The next variants for surfaces ensure that if any rectilinear curve is
revolved about an axis or if any cylinder is built on a rectilinear curve,
the subdivision that is generated will respect the vertices of the curve
and not “round” them. Note that a shape is returned and not one of the
surface types. The subshapes of this shape are the rectilinear (dsurface)
and/or smooth (psurface) pieces of the shape. The variables with_top
and with_bottom give the resultant shape a top or bottom, respectively.
Note that the axis of rotation is along the Z-axis of the World coordinate
system.
8-8
SilTools
Modeling Constructors
Resulting Shape
mk_rvsurf_shape (pc: pcurve; theta: real;
with_bottom,with_top: boolean)
shape
mk_rvsurf_shape (pc: pcurve; theta: real)
shape
mk_rvsurf_shape (pc: pcurve)
shape
mk_rvsurf_shape (pcs : list of pcurve; theta : real;
with_bottom,with_top : boolean)
shape
mk_rvsurf_shape (pcs : list of pcurve; theta : real)
shape
mk_rvsurf_shape (pcs : list of pcurve)
shape
mk_rvsurf_shape (ax : seg3dr; pcs : list of pcurve;
theta : real; with_bottom,
with_top: boolean)
shape
mk_rvsurf_shape (ax: seg3dr; pcs: list of pcurve;
theta: real)
shape
mk_rvsurf_shape (ax :seg3dr; pcs : list of pcurve;
with_bottom,with_top: boolean)
shape
mk_rvsurf_shape (ax: seg3dr; pcs: list of pcurve)
shape
Modeling Using
SIL Commands
Operator
Geometric Constructors
Conic Constructors
Let z be of type conic2dr (structure has general conic coefficients).
Let tp be an integer from {hyperb_type,elips_type,parab_type}.
NOTE
Developer’s Guide
(7/96)
The next mk_ellipse and mk_hyperbola function below
use type
conic_data = tuple_of(frame,real,real,integer).
8-9
Modeling Using SIL Commands
Operator
Resulting Shape
mk_ellipse(z,tp)
ellipse
mk_ellipse(z)
ellipse
mk_hyperbola(z,tp)
hyperbola
mk_hyperbola(z)
hyperbola
mk_parabola(z,tp)
parabola
mk_parabola(z)
parabola
Operator
Resulting Shape
mk_circular_arc (center,begpt,endpt: pnt2dr;
zt: real)
circle
mk_circular_arc (center,begpt,endpt : pnt2dr)
circle
Bezier Curve Constructor
We string together Bezier curves defined by four successive points.
If necessary, some points at the end are duplicated.
Operator
mk_pspline (p0,p1,p2,p3: pnt3dr)
Resulting Shape
pspline
p0 - p3 are the control points of the Bezier curve
mk_psplines (pts: darray of pnt3dr)
pspline
Similar to mk_psplines, except here the resulting curve has
continuous tangent vectors.
Operator
8-10
Resulting Shape
mk_pspline (pts : darray of pnt3dr; n : integer)
pspline
mk_pspline (pts : darray of pnt3dr)
pspline
SilTools
Modeling Constructors
Bezier Patch Constructor
Resulting Shape
mk_psurf (cpts: darray of pnt3dr)
psurf
cpts [0..15] is an array of control points for the Bezier patch.
g(u,v) = [1 u u*u u*u*u] B S Bt [1 v v*v v*v*v]t
Conic Surface Constructors
Operator
Resulting Shape
ellipsoid (a,b,c: real; sdiv: integer)
shape
ellipsoid (a,b,c : real)
shape
These functions construct the ellipsoid of “dimension” a, b, and c
about origin.
Evaluating Parametric Shapes
Use the commands in this section (through page 8-14) to evaluate
points, tangents and normals of parametric curves and parametric
surfaces.
Parametric Curves
Given a parametric curve pc and a parametric variable t, the
command for evaluating the point on the parametric curve at t is
pnt:= eval_at(pc, t);
where pnt is the point on the parametric curve pc at t.
The command for evaluating the tangent of the parametric curve at
t is
tangt:= tangent_at(pc, t);
where tangt is the tangent of pc at t.
In SilTools, each shape has a frame known as its seg_pose.The
seg_pose of a shape is the frame that locates the shape from its
default location to a desired location in the workcell.
Developer’s Guide
(7/96)
8-11
Modeling Using
SIL Commands
Operator
Modeling Using SIL Commands
For example, the seg_pose of a surface of revolution is at the pose
of the World when it is created. However, when the surface of
revolution is moved to another location, the seg_pose is no longer
at the pose of the World. Note that both eval_at() and tangent_at()
evaluate points and tangents at the default location. Therefore, if a
parametric shape is moved to a new location, and you wish to
evaluate both the point and tangent with respect to this new location,
use the following syntax instead:
pnt:= seg_pose(pc) * eval_at(pc, t);
tangt:= ornt(seg_pose(pc)) * tangent_at(pc, t);
Parametric Surfaces
Given a parametric surface ps and parametric variables u and v, the
command for evaluating the point on the parametric surface at [u,v]
is
pnt := eval_at(ps,u,v);
The command to evaluate the normal at [u,v] is
nrm := normal_at(ps, u, v);
Considerations regarding seg_pose with parametric surfaces are
similar to those regarding seg_pose with parametric curves. The
syntax to evaluate points and normals on a parametric surface ps in
absolute World coordinates is
pnt := seg_pose(ps) * eval_at(ps, u, v);
nrm := ornt(seg_pose(ps)) * normal_at(ps, u, v);
Wireframe Models
Operator
chain(list(<point1>,<point2>[,...,<pointn>));
8-12
Resulting Shape
open chain
SilTools
Modeling Constructors
Volume Models
resolution
number of facets in circumference of the cylinder
(if omitted, c_circ_res is used)
angle
between 0 and 360 creates partial cylinder
Operator
cylinder(<radius>,[<angle>],<height>,
[<resolution>]);
Resulting Shape
cylinder
Block
Operator
block(<length>,<width>,<height>);
Resulting Shape
block
Pipe
radius1
outside radius
radius
inside radius
resolution
number of trapezoidal prisms in the pipe
(if omitted, c_circ_res is used)
Operator
pipe(<radius1>,<radius2>,<height>
[,<resolution>]);
Resulting Shape
cylindrical
volume model
with inside and
outside radius
Cone
resolution
specifies the number of triangular facets in the
circumference of the cone (if omitted, the value of the
global variable c_circ_res is used)
Operator
cone(<radius>,<height>[,<resolution>]);
Developer’s Guide
(7/96)
Resulting Shape
cone
8-13
Modeling Using
SIL Commands
Cylinder
Modeling Using SIL Commands
Frustum
radius1
base radius
radius2
top radius
resolution
specifies the number of trapezoidal facets in the
circumference of the frustum (if omitted, the value of
the global variable c_circ_res is used)
Operator
frustrum(<radius1>,<radius2>,<height>
[,<resolution>]);
Resulting Shape
truncated cone
Model Operators
In addition to the model constructors, SilTools provides a number of
functions which you may apply to models in order to change their
characteristics. These functions are called model operators. A list of
the model operators and a brief description of each follows.
The invert Operator
The invert operator returns a model whose facets face in the direction of
their original direction. This has the effect of turning the model “inside
out.”
invert(<shape>);
The glue Operator
The glue operator is used to convert a workcell model into a rigid model.
glue('<model_name>');
where <model_name> is the name of a model existing in the workcell.
8-14
SilTools
Model Operators
If the model or any of its children are parametric shapes, glue will
remove the parametric information about these shapes. For this reason,
models which have been glued require less memory space, since
SilTools keeps only the discrete information about the shapes—this
significantly increases the efficiency of workcell simulation.
You can use glue for shapes which do not exist in the workcell, also
glue('<name>',<shape1>[,...,<shapeN>]);
This version of glue returns a rigid shape <name> whose body is the
combination of the bodies of <shape1> through <shapeN>.
IMPORTANT
DO NOT use this command if any of the shapes from
<shape1> through <shapeN> exist in the workcell.
When this version of glue is invoked, SilTools defines a reference frame
for the resulting shape, and places it on the shape at the same place as
the World coordinate frame. This makes it seem as though an invisible
copy of the World coordinate frame were included with the shape when
it is glued. Because a rigid shape only has one reference frame, any rigid
shapes which are subsequently glued lose their reference frames.
The glue operator makes no attempt to resolve duplicate elements of the
body shape which results. SilTools does not glue models with dissimilar
body types (wireframe or surface) together; the resulting glued object
will consist of two parts: a glued surface and a glued wireframe.
Developer’s Guide
(7/96)
8-15
Modeling Using
SIL Commands
A workcell model may be an object tree which has several child objects.
If an object tree is glued, SilTools replaces the tree structure of the object
tree with a rigid model. Therefore, you do not have access to any of the
children individually once the model is glued.
Modeling Using SIL Commands
The moveto Operator
The moveto operator returns a model which is <model> moved to the
absolute coordinates <goal>. <goal> may be either a position
(orientation is unchanged), an orientation (position is unchanged), or a
complete pose. Note that moveto does not redefine the reference frame
of the returned model (the reference frame goes with the model).
moveto(<model>,<goal>);
The imoveto Operator
The imoveto operator is similar to moveto, but does not move the object
along a straight line path towards the goal. imoveto instantaneously
places the object at the goal without consuming any simulated time.
The moveby Operator
The moveby operator is similar to moveto, but the model value that
moveby returns is <model> moved by the specified <increment>. The
increment may be a position (orientation is unchanged) and orientation
(position is unchanged), or a complete pose. Note that the <increment>
specified causes an incremental move along or about the axes of the
World coordinate frame, not the axes of the <model>’s reference frame.
moveby(<model>,<increment>);
IGES Conversions
Although you use the CAD Interfaces panel (displayed by selecting
Import/Export… from the Modeling pulldown menu) for your IGES to
SilTools or SilTools to IGES conversions, you can also do so using SIL
language commands.
IMPORTANT
8-16
You must have the IGES interface installed in your
product.
SilTools
IGES Conversions
Converting IGES Files to SilTools Models
There are four variants for the iges_to_model function:
<filename>
is a string giving the pathname of the IGES file to be
converted.
<model name> is a string which names the converted model.
<level list>
is an integer list specifying the levels of the IGES file to
be converted.
iges_to_model();
If you do not specify a <filename> in this variant,
SilTools will prompt you for it. If you specify a
<filename>, the converted model receives the product
identification name from the globals section of the IGES
file, and SilTools processes all IGES entity levels.
iges_to_model([<filename>]);
iges_to_model(<filename>,<model name>[,<level list>]);
This variant specifies a level list which will be the only
level converted. Specifying a level list prevents SilTools
from converting all levels. SilTools will return the
model value type.
iges_to_model(<filename>,<model name>);
This variant reads all entities and converts all levels.
Developer’s Guide
(7/96)
8-17
Modeling Using
SIL Commands
You may convert IGES model files to SilTools models with the
iges_to_model function. The variants for this function are listed below.
Modeling Using SIL Commands
Converting SilTools Models to IGES files
In order to convert a SilTools model to an IGES file, the model you wish
to convert must be in the SilTools product that you are using. If it is not
already there, you can bring it into the product with the following
function:
restore(<filename>);
where the <filename> must be a string. Note that restore is a function
which returns the value of the model, so it must be assigned a model
variable type in order to make use of the returned model.
The command to convert a model to an IGES file is:
model_to_iges(<model>[,<filename>]);
where <model> is the variable containing the value of the model to be
converted. If you do not specify a <filename>, SilTools will prompt you
for it during the conversion routine.
After you enter the model_to_iges command, SilTools displays a list of
IGES global default parameter values, and asks you if any are to be
changed. If you answer yes, the program steps through these parameters
one at a time and asks for changes. If you answer no, SilTools prompts
you for the name of an IGES file, and converts the model, writing to this
file.
8-18
SilTools
Modeling Examples
The following examples illustrate the use of some of the models
constructors described above and demonstrate several useful modeling
concepts. You are not limited to using SIL commands to create these
examples—all of these models could haven been built using the panels.
Example 8.1
Link
The code to create link 1 of the Adept robot is shown below. One way to
model this link is to create surfaces of the top and bottom faces and another
of the perimeter. You may combine these three surfaces to create a volume
model.
To begin, the points which are the vertices of the individual facets between
the rounded ends of the link are
p1==mk_point(0,radius1,0);
p2==mk_point(0,-radius1,0);
p3==mk_point(side_length,-radius2,0);
p4==mk_point(side_length,radius2,0);
p5==mk_point(0,radius1,height);
p6==mk_point(0,-radius1,height);
p7==mk_point(side_length,-radius2,height);
p8==mk_point(side_length,radius2,height);
The interior of the bottom surface is
interior==facet(list(p1,p2,p3,p4));
The rounded ends of this surface are
end1_cap==moveto(mk_cap(radius1,180),mk_ypr(0,0,90));
end2_cap==moveto(mk_cap(radius2,180),
mk_pose(side_length,0,0,0,0,-90));
A face is made up of these three surfaces:
face1==glue(interior,end1_cap,end2_cap);
face2==copy(face1);
(continued on next page)
Developer’s Guide
(7/96)
8-19
Modeling Using
SIL Commands
Modeling Examples
Modeling Using SIL Commands
Example 8.1
Link
(continued)
Now you may use this face to create the top and bottom faces of the link by
inverting it (bottom) and translating it (top).
top_face==moveto(face2,mk_crt(0,0,height));
bottom_face==invert(face1);
The rounded facets for the outside surface are
end1_surf==moveto(tube(radius1,180,height), mkypr(0,0,90));
end2_surf==moveto(tube(radius2,180,height),
mk_pose(side_length,0,0,0,0,-90));
The front and back facets between these two ends are
front==facet(list(p5,p8,p4,p1));
back==facet(list(p3,p7,p6,p2));
The perimeter is
perimeter==glue(front,back,end1_surf,end2_surf);
Finally, link 1 is
link1_body==glue(top_face,bottom_face,perimeter);
add('link1',link1_body);
8-20
SilTools
Modeling Examples
Example 8.2
Open Box
The block constructor creates a model of a block. A constructor for an
open box could be written as follows:
Modeling Using
SIL Commands
function openbox(x,y,z:real):shape
var pt1,pt2,pt3,pt4,pt5,pt6,pt7,pt8:point;
bottom,left,right,front,back, outside,inside: shape;
begin
pt1:=mk_point(0,0,0);
pt2:=mk_point(x,0,0);
pt3:=mk_point(x,y,0);
pt4:=mk_point(0,y,0);
pt5:=mk_point(0,0,z);
pt6:=mk_point(x,0,z);
pt7:=mk_point(x,y,z);
pt8:=mk_point(0,y,z);
bottom:=facet(list(pt4,pt3,pt2,pt1));
left:=facet(list(pt1,pt2,pt6,pt5));
right:=facet(list(pt3,pt4,pt8,pt7));
front:=facet(list(pt2,pt3,pt7,pt6));
back:=facet(list(pt4,pt1,pt5,pt8));
outside:=glue(bottom,left,right,front,back);
inside:=copy(outside)
inside:=invert(inside);
openbox:=glue(outside,inside);
end;
The parameters <x>, <y>, <z> define the length, width, and height of the
box respectively, and it is open at the top. Note that the box has both an
inside and outside so that it can be viewed from the inside.
For example, if you wished to create an open box with dimensions of
[5, 5, 5], you would use the following:
box==openbox(5,5,5);
add('openbox',box);
Developer’s Guide
(7/96)
8-21
Modeling Using SIL Commands
Example 8.3
Grid Surface
The following creates a grid surface.
procedure hercules();
var gr: grid;
nrows: integer;
ncols: integer;
j: integer;
temp:real;
parent_shp: shape;
comp_shp: gsurface;
comp_shp2: gsurface;
begin
nrows:=6;
ncols:= 17;
gr:= mk_grid(nrows, ncols);
for j:= 0 to 16 do
begin
temp:= float(j);
gr[0,j]:= mk_point(0.0, 2.25*temp, 9.0) * inch;
gr[1,j]:= mk_point(7.395, 2.25*temp, 9.0) *inch;
gr[2,j]:= mk_point (9.0,2.25*temp,7.395)*inch;
gr[3,j]:= mk_point(9.0,2.25*temp,-7.395)*inch;
gr[4,j]:= mk_point(7.395, 2.25*temp, -9.0) *inch;
gr[5,j]:= mk_point(0.0, 2.25*temp, -9.0)*inch;
end;
comp_shp:= mk_gsurface (gr);
comp_shp2:= mk_gsurface(gr);
moveto(comp_shp2, mk_ypr(0,0,180.0));
moveto(comp_shp2, mk_point(0,36.00*inch,0.0));
parent_shp:= mk_empty_shape();
add('hercules',parent_shp);
add('side1',comp_shp);
adopt('hercules', 'side1');
add('side2', comp_shp2);
adopt('hercules','side2');
end;
8-22
SilTools
Modeling Examples
Example 8.4
Hollow Cylinder
The following creates a hollow cylinder using mk_rsurf (ruled surface).
Modeling Using
SIL Commands
function hollow_cyl(radius, height: real): shape;
var circle1, circle2: pcurve;
outside, inside: shape;
begin
circle1:= circle(radius) as_type pcurve;
circle2:= circle(radius) as_type pcurve;
moveto(circle2, mk_crt(0,0,height));
{Create a ruled surface}
outside:= mk_rsurf(list(circle1), list(circle2));
inside:= copy(outside);
inside:= invert(inside);
{Note, by calling glue, the parametric informations of the ruled
surface is destroyed.}
hollow_cyl:= glue(outside, inside);
end;
To create a hollow cylinder into the workcell:
temp== hollow_cyl(<radius>, <height>);
add('<name>', temp);
Example 8.5
Sphere
The following creates a sphere using mk_rvsurf (surface of revolution.):
function sphere(radius: real): shape;
var arc_shp: pcurve;
begin
arc_shp:= arc(radius, 180.0) as_type pcurve;
moveto(arc_shp, mk_ypr(0.0,90.0,0.0));
sphere:= mk_rvsurf(list(arc_shp));
end;
To create a sphere in the workcell:
temp== sphere(<radius>);
add('<name>',temp);
Developer’s Guide
(7/96)
8-23
Modeling Using SIL Commands
Example 8.6
Bottle Shape
The following creates a bottle shape using mk_rsurf and mk_rvsurf.
cir1==circle(1.0) as_type pcurve;
cir2==circle(1.0) as_type pcurve;
moveto(cir1, mk_crt(0.0,0.0,11.0));
moveto(cir2, mk_crt(0.0,0.0,10.0));
ruled_surf1== mk_rsurf(list(cir2), list(cir1));
cir3 == circle(3.0) as_type pcurve;
moveto(cir3, mk_crt(0.0, 0.0, 7.0));
ruled_surf2 == mk_rsurf(list(cir3), list(cir2));
pt1== mk_point(0.0,0.0,0.0);
pt2== mk_point(0.0,3.0,.0.0);
pt3== mk_point(0.0,3.0,7.0);
ary== mk_array(pt1, pt2, pt3);
pcrv== mk_rctcurve(ary) as_type pcurve;
revsurf== mk_rvsurf(list(pcrv));
bottle == mk_empty_shape();
add('bottle',bottle);
name(ruled_surf1,'neck');
name(ruled_surf2,'shoulder');
name(revsurf,'body');
add_below(ruled_surf1, bottle);
add_below(ruled_surf2, bottle);
add_below(revsurf, bottle);
paint('bottle', green);
8-24
SilTools
Chapter 9
Advanced Data Types
System-Defined Types
This chapter describes supertypes, metatypes, SIL constants and C data types.
SIL system-defined types include the basic scalar types: integer, real,
boolean, string. But SIL also provides some fairly exotic types. For
example, internal representations of SIL expressions and their
components are also ordinary SIL data objects which can be
manipulated by SIL programs the same way that scalars can. These are
called metaobjects, and the types to which they belong are called
metatypes.
Another category of useful system-defined types is the supertypes. If
we think of types as sets of values, then all types can be regarded as
subsets of the supertypes. The two supertypes are lispob and universal.
System-Defined
Types
Scalartypes
string
integer
Metatypes
boolean
Figure 9-1
NOTE
Developer’s Guide
(7/96)
real
ntype
Supertypes
lispob
universal
System-defined type classifications
“Strings” on page 4-12 describes strings. The complete
SIL data type structure is shown in Figure 1-5, “Data type
classifications” on page 1-11.
9-1
Advanced Data Types
System-Defined Types
Advanced Data Types
ntype
The type ntype, the “type of all types”, can be defined grammatically by
<ntype> ::= <dtype> | <polymorphic type>
<dtype> ::= <primitive type> | <constructed type>
<primitive type> ::= <user defined type> | <atomic type>
<atomic type> ::= <scalar type> | <metatype> | <supertype>
<scalar type> ::= integer | boolean | char | string | real
<metatype> ::= id | sconst | ntype | tform | iform | net | event | …
<supertype> ::= universal | lispob
<constructed type> ::= array_of(<dtype>) | list_of(<dtype>)
| sarray_of(<dtype>)
| closure(<return type>,<input type>,...,<input type>)
| tclosure(<return type>,<input type>,...,<input type>)
<polymorphic type> ::= function(<return type>,<input
type>,...,<input type>)
| procedure(<input type>,...,<input type>)
| task(<return type>,<input type>,...,<input type>)
<input type> ::= <dtype>
<return type> ::= <dtype>
Notice that ntype appears to be a member of itself. However, it is really
the syntactic expression ntype that is a member of the data type ntype,
so Russell’s paradox is avoided.
Type Expressions
An interesting feature of SIL is that type expressions like integer and
list_of(array_of(real)) are data objects themselves. Thus, we can create
and evaluate expressions like
foo == integer or foo = integer
All type expressions are ntype. This may seem a little paradoxical (i.e.,
can we define the type of all types that are not members of themselves?)
until you realize that type expressions are just syntactic entities that
evaluate to types.
9-2
SilTools
Type Expressions
An integer predicate type is any type of the form
function(boolean, integer, …, integer)
The following is a predicate that determines if a type is an integer predicate
type:
function integer_predicate_type(tp: ntype): boolean;
var temp: boolean;
begin
temp := is_function(tp) and (result_type(tp) = boolean);
if temp then
for i in input_types(tp)
while temp do
temp := (i=integer);
integer_predicate_type := temp
end;
The following is a partial list of the primitive operations on ntype. The
names of the functions are self-documenting:
function is_primitive (n:ntype):boolean;
function is_reptyp (n:ntype):boolean;
function is_array (n:ntype):boolean;
function is_list (n:ntype):boolean;
function rep_of(n:ntype):ntype; { assumes n is represented type }
function list_subtype(x:ntype):ntype;
function subtype(x:ntype):ntype;
function subtypes(x:ntype):list_of_ntype;
function mk_list_type(x:ntype): ntype;
function mk_array_type(x:ntype): ntype;
function is_function (n:ntype):boolean;
Assume x = result type, y = input types:
function mk_function_type(x:ntype;y:list_of_ntype): ntype;
{ assumes a real function type is the input: }
function is_task(x:sconst):boolean;
function is_closure(x:sconst):boolean;
function is_tclosure(x:sconst):boolean;
function input_types(x:ntype):list_of_ntype;
function result_type(x:ntype):ntype;
Developer’s Guide
(7/96)
9-3
Advanced Data Types
Example 9.1
Advanced Data Types
lispobs
The type lispob is the SIL type whose values include all SIL values
(lispob was derived from LISP OBject).
Any expression can be as_typed to lispob, and a lispob can be
as_typed to any type. So, lispobs offer a kind of escape from the usually
strong typing of the SIL type system into a domain of untyped data
similar to that of Lisp. The type *char plays a similar role in C to that of
lispob in SIL, in that it is conventionally used to designate a “raw
pointer” to data of unspecified type. So,
(3 as_type lispob) as_type integer;
is a legal SIL expression with value 3. An as_type from lispob,
although always legal as a SIL expression, may generate problems at
runtime if the format of the lispob datum does not agree with that
required by the type to which it is being cast. For example,
aa == ('a' as_type lispob) as_type rri_lrec;
will result in a value which SIL “thinks” is an rri_lrec, but is really a
string. The consequences of such a miscast can be serious. For example,
aa . f1 := 4.5;
will smash the memory location just after the tag in aa with 4.5, since aa
is really a string, whose first word past the tag is a length field. Filling
this field with the bits for 4.5 results in a corrupted string data structure,
and this in turn will generate garbage collection errors. So, you should
be very careful when using as_type, just as the C programmer needs to
exercise care when using the C cast operation.
When a heapval (i.e., a value which is not a record, nor an integer or
real) is as_typed to the type lispob, this amounts only to a compile time
assertion of type—it does not induce any actual runtime operation.
When a stackval is as_typed to lispob, it is copied into the heap.
The constant NIL of type lispob can be used to represent a null or
undefined value for any lispob type. The predicate
null(x: lispob): boolean;
9-4
SilTools
lispobs
tests for equality to NIL.
nul(x: <type>): boolean;
for any <type> is equivalent to
null(x as_type ob);
So, for example,
nul(nil as_type rri_lrec);
will return TRUE.
Advanced Data Types
lispob Operations
Pair constructor:
function cons(x, y: lispob): lispob
cons(x, y) = (x . y)
Pair selectors:
function car(x: lispob): lispob
car((x . y)) = x
function cdr(x: lispob): lispob
cdr((x . y)) = y
These operations will be familiar to Lisp programmers, as will the
following abbreviations for common compositions of car and cdr:
cadr(x) abbreviates car(cdr(x))
caddr(x) abbreviates car(cdr(cdr(x)))
cddr(x) abbreviates cdr(cdr(x))
etc.
Pair mutators:
procedure set_car(x, y: lispob) changes car(x) to y
procedure set_cdr(x, y: lispob) changes cdr(x) to y
Predicates (used to test for equality between two lispobs):
function eq(x, y: lispob): boolean
Developer’s Guide
(7/96)
9-5
Advanced Data Types
Here are some operations that use the tag of a lispob datum to extract
some basic information.
function is_real(x: lispob): boolean
function is_integer(x: lispob): boolean
function is_string(x: lispob): boolean
function is_pair(x: lispob): boolean
Finally, ob is short for lispob, i.e., ob == lispob.
Represented Types
Suppose that we want to introduce a new type called degree to be used
in representing angles. This can be done with the declaration
type degree = real;;
degree is a new type that is distinct from real, but its data values are
represented by reals. Another syntax for the same declaration is
real represents degree;
Initially, no operations are defined on degree, since it is a new type.
Since real and degree have the same format for their data, as_type can
be used to get back and forth between real and degree (illustrated in
Example 9.2).
Example 9.2
function plus(x,y:degree): degree;
begin
plus := ((x as_type real) + (y as_type real)) as_type degree;
end;
SIL> (34.0 as_type degree) + (350.0 as_type degree);
24.0
9-6
SilTools
Universals
Universals
All SIL data tagged by type is type universal. As with lispob, any SIL
expression can be cast to universal and back.
Consider the following situation. A robot can assemble three types of
parts:
A dispatch procedure identifies the part and invokes the appropriate
assembly routine. But how do we define the dispatch routine? If we
assume that the part is a parameter to dispatch, how can we know which
type it will be?
procedure dispatch(part: ???_part);
We could declare part to be a lispob:
procedure dispatch(part: lispob);
but then we would not have any way of figuring out the type of the part
later when we need to call the proper assemble procedure. One solution
to this dilemma is to use universals. A universal is a type tagged lispob
implemented as a SIL type:
type universal = lrecord
value_of: lispob;
type_of: ntype
end
Like any other records, universals can be constructed either by using the
automatically-defined constructor: mk_universal or by using as_type.
Assume var u: universal;; then
u := 3 as_type universal;
is equivalent to
u := mk_universal(3 as_type lispob, integer)
Developer’s Guide
(7/96)
9-7
Advanced Data Types
procedure assemble(part: top_part);
procedure assemble(part: middle_part);
procedure assemble(part: bottom_part);
Advanced Data Types
Furthermore, as_type can be used to cast u back to an integer. Assume:
var n: integer;;
then
n := u as_type integer;
If u were not an integer, the above statement would generate an error.
Applying Procedures
To write a dispatch procedure using universals, we need to answer one
more question: assuming that all parts will be represented as universals,
how do we apply the appropriate assemble procedure? This is
accomplished with the apply operator:
function apply(op: id; arg1, arg2, … :): universal
where op is the name of an operator, and arg1, arg2, … are the
arguments to op.
For example:
Example 9.3
apply("plus, 3 as_type universal, 4 as_type universal)
will return 7 tagged as a universal, while
apply("plus,[1,2,3] as point as_type universal,[2,4,6] as point
as_type universal)
will return the point [3,6,9] as a universal.
9-8
SilTools
Applying Procedures
Another example:
Example 9.4
function twice(x:universal):universal;
begin
twice := apply("plus,x,x);
end;
will double any type of input.
The arguments to apply need not all be universals. For example, the
following arguments used with apply would be successful:
apply("plus, 3 as_type universal, 4)
The apply operator provides what is called late binding. Late binding
means that the decision as to which variant of a function is designated
by a function name is made at the latest possible moment—when the
function application is actually being executed. Ordinary function
application in SIL is of the early binding style: the selection of variant
is made at the earliest possible time—when the code is read in. Early
binding has the advantage of being efficient, since the variant selection
effort happens only once before the code is executed. Late binding,
however, provides the flexibility of allowing the same code to treat
various types of inputs. In object-oriented terminology, variant selection
is referred to as binding of methods to messages—hence the names early
binding and late binding. Among object-oriented languages, C++ uses
early binding for all but virtual functions, while SmallTalk and
Objective C always employ late binding.
We are now ready to write dispatch:
procedure dispatch(part: universal);
begin
apply("assemble, part)
end
Developer’s Guide
(7/96)
9-9
Advanced Data Types
The apply operator will generate an error if no appropriate variant is
found.
Advanced Data Types
A call to dispatch would look like
dispatch(part as_type universal)
Example 9.5
Assume there are three variants of a procedure foo:
procedure foo(x: integer);
begin
writeln('inside integer variant of foo')
end;
procedure foo(x: string);
begin
writeln('inside string variant of foo')
end;
procedure foo(x: boolean);
begin
writeln('inside boolean variant of foo')
end;
SIL> apply("foo, 3 as_type universal);
inside integer variant of foo [UNIVERSAL:
NIL OF_TYPE LISPOB]
SIL> apply("foo, 'arf' as_type universal);
inside string variant of foo [UNIVERSAL:
NIL OF_TYPE LISPOB]
When no variant can be found:
SIL> apply("foo, 4.1);
error: no variant available for universal
apply of FOO
9-10
SilTools
Applications
The applyn operator works in a similar fashion, but it returns a failure
indicator when no variant is found. The function is_fail determines
whether or not a universal value indicates failure.
Example 9.6
SIL> u == applyn("foo, list(4.1 as_type universal));
SIL> is_fail(u);
Applications
Applications are entities that remember a function and a list of
arguments. They are similar to closures, with the added feature of an
argument list that can be stored and passed to the function when the
application is executed.
Example 9.7
procedure write_stars(x:integer);
var
i : integer;
begin
for i :=1 to x do
writeln('*****');
end;
myapp == mk_application("write_stars,list(3 as_type universal));
and now
SIL> execute(myapp);
*****
*****
*****
Developer’s Guide
(7/96)
9-11
Advanced Data Types
TRUE
Advanced Data Types
This function constructs an application:
function mk_application(fn : id; args : list of universal) :
application;
An application contains the identification (id) of a function and the
arguments to be passed to it when executed.
This function executes an application:
function execute(app: application):universal;
The application function is called with the included arguments.
Casting
In SIL, an expression’s type can be modified by the as_type operator.
The effect of this operator is analogous to that of the C cast primitive—
it asserts that the value of the expression should be treated as belonging
to a specified type, whatever the type originally assigned to the
expression may have been. The syntax is
<expression> as_type <type>
This has a similar meaning to the C syntax
(<type>)expression
Not all as_types are legal. The rule (which has a few exceptions given
later) is that the data format of the value to be cast must agree with the
data format of the type to which it is being cast. Another restriction is
that a record cannot be cast to an lrecord, nor an lrecord to a record
(illustrated in Example 9.8).
Example 9.8
type type_a = lrecord xc: real;yc: real;zc: integer;end;;
Then any value of type type_a can be legally as_typed to the rri_lrec
given above, but not to rri_rec, nor to i_rri_lrec.
9-12
SilTools
Efficiency Considerations
Efficiency Considerations
In this chapter, we have introduced several ways of applying a functionlike object to a list of inputs. There are substantial differences in
efficiency between the various kinds of applications. The ranking, from
fastest to slowest, is
1. “Ordinary” function application (e.g., twice(4)). This is the
fastest of all, and, when compiled, is equivalent in efficiency
to a C function application.
2. Closure application (e.g., shorterc('a','ab')). This is almost
exactly as fast as ordinary function applications—it is
equivalent to the application of an indirect function in C. The
only overhead is chasing a pointer to a function.
3. Application of an sconst, as in
apply(vp,list(2 as_type ob,3 as_type ob))
The application itself is just as fast as a closure application.
However, in this example, there is some overhead for the
casting to lispob.
4. Application of an id to a list of universals, as in
apply("plus,3 as_type universal,4);
This could be considerably more expensive than the other
kinds of apply, because it involves searching at runtime
through the variants of plus for one that works.
Developer’s Guide
(7/96)
9-13
Advanced Data Types
In this section, we consider the efficiency of casting (as_type), and of
the various kinds of applications of function-like objects to their inputs.
Most casting is free, in the sense that it results in no runtime code.
Casting of integers, reals, and records (but not lrecords) to lispob
requires copying the object in question into the “heap”. lrecords, strings,
ids, and booleans are already in the heap, so can be cast to lispob for
free. Casting to universal requires adding a type tag (except in the case
of objects—see “Object-Oriented Terminology” on page 5-1).
Advanced Data Types
SIL Constants
All SIL definitions have internal representations called sconsts (SIL
constants). An sconst is like a descriptor which contains type, name,
and value fields for the defined object.
Because SIL is a polymorphic language, a single id x can be the name of
several sconsts. However, only one of these sconsts can represent a
non-function type. This sconst is the data variant of x; the other sconsts
are the function variants of x. The following operators help locate an
sconst using an id:
function data_variant(x:id): sconst;
function has_data_variant(x:id): boolean;
function function_variants(x:id): list of sconst;
function has_function_variant(x:id): boolean;
Because two function variants with the same name must have distinct
input types, a name and a list of input types uniquely specify an sconst
for a function variant. We can fetch this sconst with
function find_variant(x: id; intps: list of ntype): sconst;
More generally, an id and a type specify an sconst which can be fetched
by
function find_variant(x: id; tp: ntype): sconst;
If there is no variant of the indicated type, a special sconst,
undefined_sconst is returned. To test for undefined_sconst
function is_undefined(x:sconst):boolean;
This function applies the given sconst to the given arguments:
apply(op:sconst:a:list of lispob);
9-14
SilTools
C Data Types
For example:
Example 9.9
SIL> vp==find_variant("plus,list(integer,integer))
SIL> apply (vp,list(3 as_type ob, 4 as_type ob))
C Records and C Arrays
Any SIL record or lrecord includes a tag word at the beginning for use
by the garbage collector. Any SIL array or string has such a tag word
too, as well as a length field. The crecord facility in SIL allows records
and arrays to be declared without including these additional tag words
and length fields. The main motivation for this is to allow direct
manipulation by SIL code of any C data structure.
The syntax of a crecord declaration is just like that of a record or
lrecord:
type erb = crecord
xc: integer;
yc: real;
end;;
This is identical in effect to the C declaration:
struct erb { int xc; double yc; }:
then
new(erb);
returns a value of type
^erb
i.e., pointer to erb, which is equivalent to the C type *erb.
Developer’s Guide
(7/96)
9-15
Advanced Data Types
C Data Types
Advanced Data Types
The usual SIL syntax can be used to select and set the fields of an erb:
ee == new(erb); ee . xc := 56; ee .yc := 5.4 + ee . xc;
Similarly, a carray is an array without tag or length fields. A carray can
be created with
cc == carray_create(integer,10);
The “^” syntax can be used to make a pointer, as in
aa == ^(ee . xc);
or
aa == ^cc[4];
The type of aa is ^integer. The only legal arguments to ^ are fields of
crecords and entries in carrays. Pointers are de-referenced as follows:
aa^;
then
aa^ := aa^ + aa^;
will double the integer value pointed to by a.
crecords and carrays can be built from the primitive types cchar,
cshort, integer, real, sreal or from other crecords or carrays, but not
from other SIL types. For example,
type oo == crecord my_ob:lispob; my_point:point; end;;
is illegal twice over.
9-16
SIL Type
Identical to C Type
cchar
char
cshort
short
sreal
float (single precision real)
integer
int
real
double
SilTools
C Data Types
The types cchar, cshort, and sreal should appear only as the subtypes
of carrays, pointers, or crecords, as in
type noo = crecord
my_char: cchar;
my_sreal: sreal;
my_thing: carray_of(cshort);
end;;
Alignment is done as in C—each type is aligned to an even multiple of
its length.
Advanced Data Types
cchars and cshorts when extracted turn into SIL integers, and sreals
into SIL reals (illustrated in Example 9.10).
Example 9.10
nn == new(noo);
nn . my_char := 45; { use an integer, not a char or cchar }
nn . my_char;
{ returns an integer }
C Strings
There are a couple of utilities for going back and forth between SIL
lstrings and C strings.
REMINDER
An lstring is a string (called the contents) together
with an associated length which specifies the part of
the contents in use. See “lstrings” on page 4-15 for
more information.
The type cstring is defined just to be a synonym for carray_of(cchar).
The following operations are provided:
function to_cstring(x: lstring): cstring;
This first checks that the contents string of x is static (does not get
moved around by the garbage collector) and null-terminated. If either of
these conditions is violated, a new contents which is tenured and
null-terminated is generated and set up as the contents part of x. The
cstring returned is a pointer to the “raw” (untagged) contents of x. So,
Developer’s Guide
(7/96)
9-17
Advanced Data Types
the cstring will occupy the same storage as the contents of x, and will
be null-terminated. Since the storage for the resulting cstring cannot be
freed, this function should be used only to create permanent cstrings.
The following function statically allocates a brand-new null-terminated
cstring with capacity equal to that of x, and copies x into it. Since the
storage for the resulting cstring cannot be freed, this function should be
used only to create permanent cstrings.
function mk_cstring(x: lstring): cstring;
REMINDER
The capacity of an lstring is usually bigger than its
current length.
The following function dynamically allocates a brand-new nullterminated cstring with capacity equal to that of x, and copies x into it.
The storage for the resulting cstring can be freed with free_cstring.
function new_cstring(x: lstring); cstring;
This procedure frees the x cstring, which has been created dynamically
by new_cstring:
procedure free_cstring(x: cstring);
This procedure copies c to x, stopping at a null in c, or the capacity of x,
whichever comes first:
procedure copyto(x: lstring;c: cstring);
The following procedure copies x into c. Since c has no length
indication, this can be dangerous—if c was allocated to be shorter than
the current length of x, then the memory after c’s length allocation will
be deleted.
procedure copyto(c: cstring;x: lstring);
The print function for cstrings will print characters until a null is hit, or
the limit max_cstring_print_length is reached.
max_cstring_print_length is initially 100.
9-18
SilTools
C Data Types
If you want to allocate an lstring to be passed to C, you may wish to use
function mk_static_lstring(x: string;n: integer): lstring;
or
function mk_static_lstring(x: string): lstring;
Either of the above functions are used to construct lstrings that are
already static and null terminated.
procedure mk_static(x: lstring);
C Constants at Build Time
NOTE
“Builds” are described in Chapter 11, “Working with
SIL Code”.
C data structures cannot be safely created at build time (except as
described below). For example, if you compile a file in which the line
aa == mk_cstring('abc');
appears, and then start up the resulting state, aa will contain garbage.
This is because starting a state almost always moves the heap, so that the
pointer that is the value of aa is no longer valid. To get around the
problem, use this construct instead:
cstring_constant(aa,'abc');
This has exactly the same effect as
aa == mk_cstring('abc');
except that cstring_constant records the need to reset aa when a state
starts up, making it safe for use in compiled code.
Developer’s Guide
(7/96)
9-19
Advanced Data Types
This procedure will cause the contents of x to become static and null
terminated (if they are not already):
Chapter 10
Concurrency
Temporal & Instantaneous Commands
This chapter explains how to use SIL for concurrent execution of multiple tasks
within one “state” or data space.
Temporal & Instantaneous Commands
SIL maintains a global variable called clock which measures the passing
of simulated time. Certain SIL commands cause clock to be advanced
when they are called. Commands that consume simulated time are called
temporal. Non-temporal commands are called instantaneous. A block
of instantaneous commands is called an instantaneous block.
All SIL function and procedure calls are instantaneous. Therefore, no
temporal commands can be called in the body of a function or
procedure. Procedures intended for concurrent execution are indicated
by using the keyword task rather than the keywords function or
procedure. Tasks may include any code which would be legal in a
procedure or function, and may include primitives for synchronization.
The syntax for defining a task is similar to the syntax for defining
functions and procedures:
task <name>([<formal parameters>])[: <type>];
[<local variable declarations>]
<task body>;
where <task body> is either a procedure or function body, depending on
whether or not a return value is indicated.
IMPORTANT
Developer’s Guide
(7/96)
Do not confuse simulated time with real time. For
example, calling a procedure containing an infinite
loop will consume an infinite amount of real time, but 0
seconds of simulated time!
10-1
Concurrency
Temporal commands are useful in simulations that model time. For
example, SilTools commands that move or operate simulated kinematic
devices, like machines or tools, are temporal.
Concurrency
Of course, calling any temporal command from inside of a task will
cause the task to consume simulated time. Therefore, tasks which call
temporal commands are themselves temporal commands. In fact, the
body of a task can be viewed as being composed of several
instantaneous blocks separated by calls to temporal commands.
instantaneous block
temporal command
instantaneous block
temporal command
instantaneous block
Figure 10-1
Typical control flow for a task
Delay
The simplest way to consume simulated time from inside of a task is to
call the most primitive temporal command:
delay(<seconds>)
When called from inside of a task foo, delay will cause foo to suspend
itself until the clock has advanced the indicated number of seconds.
10-2
SilTools
The Scheduler
Example 10.1 defines a temporal command.
Example 10.1
In this example, a new temporal command, notify, is defined.
task notify(msg: string);
begin
for i := 1 to 4 do
begin
delay(2.0);
writein(msg, ' at clock = ', clock);
end
end;;
The Scheduler
The body of a task can be viewed as a sequence of blocks consisting of
a sequence of instantaneous commands terminated by a temporal
command. The Scheduler is a SilTools program that simulates
concurrent execution of tasks by interleaving the execution of blocks
from two or more tasks. Tasks wait in the run queue to have their next
block executed. The terminating temporal command of a block suspends
or reschedules (i.e., places at the end of the run queue) the current task,
and returns control to the scheduler which begins executing the next
block from the next task in the run queue. This continues until all tasks
are suspended and the run queue is empty. Since clock never advances
during execution of these instantaneous blocks, the blocks have
executed concurrently in simulated time. Since all tasks are now
suspended, everything that could possibly happen in that simulated
instant has happened and the clock advances.
Developer’s Guide
(7/96)
10-3
Concurrency
The notify command will consume eight simulated seconds each time it is
called. Assume clock = 10.0 when notify('hi') is called:
hi at clock = 12.0
hi at clock = 14.0
hi at clock = 16.0
hi at clock = 18.0
Concurrency
Delayed tasks (i.e., tasks that have suspended themselves for a specific
length of time) wait in a queue of delayed tasks prioritized by wake up
times. When all tasks are suspended and the run queue is empty, the
scheduler advances clock to the wakeup time of the next task on the
delay queue and resumes execution of this task.
Start and Run
Although a single task can be executed by calling it in the same manner
as a function or procedure, it will not work when executing many tasks
concurrently. To do this, you need to first place the tasks to be executed
in the run queue by using the start command:
start("<task> [, <arg>, …, <arg>]);
where <arg>, …, <arg> are optional arguments to <task>.
Example 10.2
In this example, assume t1, t2, and t3 are tasks which accept integers.
SIL>begin
start("t1,0);
start("t2,1);
start("t3,2);
end;
adds t1, t2, and t3 to the run queue with the given inputs. In Text Mode,
run();
initiates their concurrent execution.
NOTE
The behavior of tasks run differs slightly depending on if you are
programming using the menus or in Text Mode. When using the
menus, the Scheduler is active whenever tasks have been
started or called. In Text Mode, the Scheduler is activated only by
explicitly calling a task or executing the following command:
run();
The start command may be used at the top level or within a task.
Use the run command only at the top level.
10-4
SilTools
The Scheduler
Example 10.3
task foo1();
begin
writeln('foo1 sleeping at ',clock);
delay(2.0);
writeln('foo1 waking at ',clock);
end;
Concurrency
task foo2();
begin
writeln('foo2 calling foo1 at ',clock);
foo1();
writeln('foo1 returned at ',clock);
delay(1.0);
writeln('foo2 starting foo1 at ',clock);
start("foo1);
writeln('foo2 sleeping at ',clock);
delay(1.5);
writeln('foo2 waking at ',clock);
end;
Then foo2(); results in the following output:
foo2 calling foo1 at 0.000000
foo1 sleeping at 0.000000
foo1 waking at 2.000000
foo1 returned at 2.000000
foo2 starting foo1 at 3.000000
foo2 sleeping again at 3.000000
foo1 sleeping at 3.000000
foo2 waking at 4.500000
foo1 waking at 5.000000
If the global flag
NOTE
Developer’s Guide
(7/96)
sched_verbose
is set to true, then the scheduler will print out a very detailed
account of its activities—one descriptive line for every task call,
start, return and delay.
10-5
Concurrency
Tickers
Tickers are instantaneous commands that run at regular intervals during a
simulation. Care must be taken when writing a ticker—if it is computationally
intensive, or runs too often, the simulation may slow considerably.
Tickers are useful for gathering data during a simulation, and for applying rules
and laws to the simulated environment.
This function constructs a ticker which runs an application at the given interval
of the simulation clock:
function mk_ticker(app : application; intv : real):ticker;
where app is an application to run, and intv is the time interval at
which to run.
NOTE
Applications are described in “Applications” on page 9-11.
These procedures start and stop a ticker:
procedure activate(tck : ticker);
procedure deactivate(tck : ticker);
Semaphores
The basic synchronization mechanism in SIL is the semaphore. Other
methods of synchronization, such as pipes and process lines, are
available, but they all depend on semaphores. semaphore is a SIL type,
with the following operations:
wait(<semaphore>);
signal(<semaphore>);
value(<semaphore>):integer;
new_semaphore():semaphore;
10-6
SilTools
Semaphores
A semaphore s with value n may be thought of as representing n units
of some resource. The wait(s) operation, when executed by a task, is a
request for one unit of the resource. If the value of the semaphore is
greater than 0, then the value is simply reduced by 1, and the wait
returns. If, however, the value is 0 when wait(s) is executed, the task
which executes the wait is suspended until some other task makes a unit
of the resource available. If other tasks are already waiting for the
resource (that is, have executed wait(s)), then our task is added to the end
of a queue associated with the semaphore.
The command signal(s) adds a unit of resource to the semaphore. If there
is a queue of tasks waiting for the resource, the first element of the queue
is resumed. If no tasks are waiting, the value of the semaphore is
incremented.
Suppose that two factory robots, P1 and P2 are moving parts to a location
L from which two other devices C1 and C2 are removing them for
processing. Assume further that parts can be stacked at L (for simplicity in
this example, we assume that the number of parts which can be stacked is
unlimited). Synchronization between tasks which simulate these devices
can be achieved using semaphores, as in the code shown in this example.
Assume that P1_puts_part is a task which P1 can execute to put a part at
the location, and then retract from the location. Similarly, assume that
C1_gets_part is a task which C1 executes to get a part from the location.
Finally, assume similar capabilities for P2_puts_part and C2_gets_part.
We assume that it is dangerous to execute more than one of these tasks at
the same time because of the potential for collisions.
We use two semaphores:
• parts_at_L which represents the availability of parts at L.
• L_is_clear which represents the proposition that L’s vicinity is clear
of obstructions that may cause a collision.
continued on next page
Developer’s Guide
(7/96)
10-7
Concurrency
Example 10.4
Concurrency
Example 10.4
(continued)
L_is_clear represents the “resource” of clear space around L, of which
there is only one unit. L_is_clear is called a binary semaphore. A binary
semaphore is one whose value never exceeds one, and which typically
represents a proposition which is either true or false. The following code
uses semaphores to ensure that our four devices will properly synchronize
their activities:
parts_at_L == new_semaphore();
L_is_clear == new_semaphore();
signal(L_is_clear); { initially, L is clear}
task P1();
begin
while true do
begin
wait(L_is_clear);
P1_puts_part();
signal(parts_at_L);
signal(L_is_clear);
end;
end;
task P2();
begin
while true do
begin
wait(L_is_clear);
P2_puts_part();
signal(parts_at_L);
signal(L_is_clear);
end;
end;
continued on next page
10-8
SilTools
Semaphores
Example 10.4
(continued)
task C2();
begin
while true do
begin
wait(parts_at_L);
wait(L_is_clear);
C2_gets_part();
signal(L_is_clear);
end;
end;
In Example 10.4, value(parts_at_L) will always be the number of parts
at L. Note that a little thought is required to verify the correctness of even
this simple example. Suppose that when C1 waits for parts_at_L, a part
is available. In the course of waiting for L to be clear, however, that part
is taken away. Such an occurrence would represent a failure of
synchronization. This scenario will not occur, since when C1 waits for
parts_at_L, the execution of the wait decrements parts_at_L. This
decrement, in effect, reserves a part for C1 which no other task can take
away.
Developer’s Guide
(7/96)
10-9
Concurrency
task C1();
begin
while true do
begin
wait(parts_at_L);
wait(L_is_clear);
C1_gets_part();
signal(L_is_clear);
end;
end;
Concurrency
Exercise
Suppose that only N parts will fit at L. Modify the code in Example 10.2
to satisfy this constraint.
Hint: introduce a semaphore L_space_available which represents the
number of parts (in addition to the parts already there) that can be put at L
(so that value(L) + value(L_space_available) = N).
Pipes
Pipes are used for communication between tasks. A pipe of type
pipe(<type>) is a structure of the form:
pipe =lrecord
messages: queue of <type>;
waiters: queue of tasks
end;
Example 10.5
An integer pipe is a structure of the form:
pipe = lrecord
messages: queue of integer;
waiters: queue of tasks
end;
Tasks can either place messages at the end of the messages queue of a
pipe, or remove messages from the front of the messages queue. If a
task tries to remove a message when the messages queue is empty, then
the task suspends itself on the waiters queue of the pipe until a message
arrives. Note that messages does not have specific tasks as destinations.
To create a pipe of type <type> we use the new_pipe command:
p == new_pipe(<type>);
10-10
SilTools
Pipes
To place a message <msg> of type <type> in p we use signal:
signal(<msg>, p)
If the waiters queue is empty, then signal simply adds <msg> to the
messages queue of p. If the waiters queue is not empty, the messages
queue will be empty, and signal wakes up the first task on the waiters
queue and personally delivers <msg>.
The wait command returns the next message in a pipe, if there is one.
Otherwise, it will suspend the current task and add it to the waiters
queue. Both wait and signal are temporal commands that return control
to the scheduler when they complete.
Example 10.6
p==new_pipe(integer);
Concurrency
task sender(n:integer);
begin
for i := 1 to n do
begin
delay(1);
signal(i, p);
end;
end;
task receiver();
var w: integer;
begin
while true do
begin
w := wait(p);
writeln('at ',clock,' received ',w);
end;
end;
start("sender, 10);
start("receiver);
run();
Developer’s Guide
(7/96)
10-11
Concurrency
Processes and tclosures
When a task places a message in a pipe there is no guarantee as to which
task will receive this message, since any task can extract messages from
any pipe. Alternatively, a task can have private pipes. While any task
can place a message in a private pipe, only the owner task can extract
messages from the pipe.
Tasks with private pipes are, for the purpose of compatibility with
pre-4.2 releases, called processes. Processes are parameterless tasks
that do not return values. The syntax for defining a process is a little
different from the syntax used for defining tasks:
process <name>([<private pipes>]);
[<local variable declarations>]
<task body>;
where
<private pipe> ::= <pipe name>[, <pipe name>, …, <pipe
name>]: <type>
and
<private pipes> ::= <private pipe>, …, <private pipe>
The key word process alerts the task-defining machine that the
parameters are to be interpreted as private pipes rather than parameters.
SIL provides a variant of signal for sending a message <msg> to a
private pipe <ppipe> owned by process <proc>:
signal(<proc>, <ppipe>, <msg>)
SIL also provides a variant of wait for removing messages from a private
pipe. The command
wait(x)
10-12
SilTools
Processes and tclosures
causes the current process (i.e. the one calling wait) to suspend itself if
the pipe x is empty. When a message arrives in x the process will
resume. If x is not empty, then the first value in x is assigned to the
parameter x and can be referenced that way until the next time wait(x) is
executed.
Just as with public pipes, wait will return the first value stored in a pipe
or suspend itself if the pipe is empty.
Example 10.7
process whoop(x: integer);
begin
wait(x);
writeln(x)
end;
process dedoo(y: integer);
begin
signal(whoop, x, 10)
end;
SIL> run(whoop, dedoo);
Developer’s Guide
(7/96)
Concurrency
10
10-13
Concurrency
tclosures
A tclosure is to a task what a closure is to a function: a passable data
item whose value is a task rather than a function.
Example 10.8
task delay_and_print(x:integer);
begin
delay(x);
writeln('delayed for ',x,' at ',clock)
end;
delayc == mk_closure("delay_and_print,task(lispob,integer));
task five_times(x:tclosure(lispob,integer);n:integer);
begin
for i := 1 to 5 do x(n);
end;
clock := 0;
five_times(delayc,4);
This yields the output
delayed for 4 at 4.000000
delayed for 4 at 8.000000
delayed for 4 at 12.000000
delayed for 4 at 16.000000
delayed for 4 at 20.000000
Notice that the type of a task with no return value is task(lispob,integer),
and that the type of delayc is tclosure(lispob,integer).
10-14
SilTools
Chapter 11
Working with SIL Code
Protection
This chapter explains how to load, compile, and debug code and how your SIL
code is protected.
Protection
In order to keep users from overwriting system code, each SIL entity
(global, function, task, etc.) is assigned an integer protection level. The
global
current_authorization
controls the protections assigned to SIL entities. Any attempt to redefine
an entity with protection level greater than that defined by
current_authorization will result in an error. Resetting the value of an
existing global with the symbol
:=
does not require any authorization; however, resetting this type and
value with this symbol
==
does require adequate authorization. System functions generally use a 0
as their protection level. The default value of current_authorization is
-1. You can set authorizations to the level you wish by using
Working with SIL Code
current_authorization := <level>
Developer’s Guide
(7/96)
11-1
Working with SIL Code
Code Organization
The SilTools environment provides facilities for compiling and linking
in SIL code. These facilities make use of a well-defined directory
structure for storing the various files relevant to the system. The
procedures used to compile are more complex than those used to load
interpreted code, partly because the underlying structure has been set up
to support the maintenance of multiple versions of compiled code. You
should understand this structure before compiling your code.
All files having to do with SilTools reside under a master directory
called cim. The collection of all SilTools files and directories (that is,
all the files and directories under cim) is referred to as the cim tree. The
cim tree may be located anywhere in a UNIX file system. All SilTools
users should have a $CIM environment variable whose value is the
pathname of the cim tree. It is also helpful to have a link from the home
directory to the cim tree called ~/cim. The following information
assumes that ~/cim points at the cim tree.
Code in SilTools is divided into modules. A module is simply a
grouping of related code. The source code for SilTools itself is spread
throughout approximately 100 modules—one for 2D geometry, one for
3D geometry, one for menu handling, etc. Each module may have an
unlimited number of versions. The SilTools tree structure is set up so
that different versions of the same modules share files.
Each module and each of its versions has a name. There are no hard and
fast rules for naming the module and its versions, but the usual
convention is
<module name>
with a version being named
<module name><version#>
For instance, the fifteenth version of the module geom is called geom15.
11-2
SilTools
Code Organization
The Cim Tree Structure
The following sections describe the major subdirectories of cim:
~/cim/templates
This directory contains all the SilTools’ products. A product
contains an executable version of a CimStation state.
Usually, a product is started by using the Product Administration
panel, which is displayed by entering sspa in a shell window.
To start the product <product>, you can also use the following
commands:
SIL> cd ~/cim/templates/<product>
SIL> start
Each product contains a umodules file. The umodules file
specifies which modules are included in the product and which
versions of those modules should be used.
Each line of the umodules file contains a module name followed by
a version name.
For example, the umodules file of a product might consist of the
two lines:
This signifies that version 3 of the press code is to be included in this
product.
~/cim/sil/<modules>
All SIL code resides in this directory. The notation <modules>
indicates that there is one subdirectory of ~/cim/sil for each code
module.
~/cim/mccode/<modules>
All C code resides in this directory, including both C code generated
from SIL and C code written “by hand.”
Developer’s Guide
(7/96)
11-3
Working with SIL Code
conveyor conveyor2
press press3
Working with SIL Code
~/cim/mhfiles/<modules>
The header (.h) files for C code generated from SIL are stored in
this directory.
~/cim/actions/<modules>
This directory contains auxiliary information needed for SIL code.
It is generated automatically by the translator, and need not concern
the user.
~/cim/builds/<versions>
There is one subdirectory of ~/cim/builds for each version of a
module. Each version directory under ~/cim/builds has the
following files:
sil_files A file listing the names of SIL files in the module.
c_files
A file listing the names of hand-written C code.
s
A link to ~/cim/sil/<my module>
mc
A link to ~/cim/mccode/<my module>
mh
A link to ~/cim/mhfiles/<my module>
a
A link to ~/cim/actions/<my module>
For example, the following directories might exist in the press
module:
~/cim/sil/press
~/cim/mccode/press
~/cim/mhfiles/press
~/cim/actions/press
along with three versions:
~/cim/builds/press1
~/cim/builds/press2
~/cim/builds/press3
A few other directories may be present in any cim tree, but they are
immaterial to the users of this manual.
11-4
SilTools
Loading SIL Code
Loading SIL Code
SIL files should be named with a .sil extension. To load a file
containing SIL code, use this syntax:
SIL> sil_load(<pathname>);
For instance,
SIL> sil_load('~/mysil/application1.sil');
A shorter form is
SIL> ld(<pathname-without-extension>);
For example,
SIL> ld('~/mysil/application1');
sil_load commands may appear inside of files loaded using sil_load.
This allows you to set up initialization sequences of arbitrary
complexity—a master initialization file might load a series of files
which in turn load other files, and so forth.
The following is a step-by-step description on how to create a new
product.
1. Enter this command in a shell window:
newproduct <product>
This script will create the following:
directory ~/cim/templates/<product> file
~/cim/templates/<product>/top_init.sil file
~/cim/templates/<product>/base* file
~/cim/templates/<product>/umodules directory
~/cim/gui/help/<product>
Developer’s Guide
(7/96)
11-5
Working with SIL Code
Creating a New Product
Working with SIL Code
top_init.sil contains special initializing information for
a product, base* are the layout configurations for the
product. umodules, initially empty, lists the modules
comprising the product. ~/cim/gui/help/<product> is
a directory to hold online help files.
2. Create at least one new module, so there is a place to put
code specific for this product. To do this, enter:
newmodule <module> <first version>
newmodule creates directories for the module as well as the
first build area to include in the new product.
3. Add the following line to the file
~/cim/templates/<product>/umodules:
<module> <first version>
4. Copy the top bar panel from ~/cim/gui/panels/mgui
into the new module’s panel area by entering
cp ~/cim/gui/panels/mgui/top_bar
~/cim/gui/panels/<module>/top_bar
The top bar panel may then be customized using the Visual
SIL Window for the new product.
5. Add the top bar to the new build area by editing the file
~/cim/builds/<first version>/panels and adding
the line
top_bar
When the product is built, the new top bar will be included.
6. Edit the product’s top_init.sil, replacing the line
top_bar := ibase$top with top_bar :=
<module>$top_bar
When the product is built, the new top bar will replace the
default.
11-6
SilTools
Compiling SIL Code
7. Copy the file ~/cim/gui/help/mgui/help.sil into the
new help directory by entering
cp ~/cim/gui/help/mgui/help.sil ~/cim/gui/help/<product>
8. Edit the file ~/cim/gui/help/<product>/help.sil to
add online help for panels new to the product. Online help is
optional. The help files should be placed in the
~/cim/gui/help/<product> directory.
9. Edit the top_init.sil file and add the line
ld('~/cim/gui/help/<product>/help');
10.Once all code has been written and the SIL code has been
compiled, enter
scope_out <product>
11.For each module which contains new code, use
remake <module> <product>
to execute the second stage of compilation from C to binary.
To build the product, which will create the new executable and
heap_file, call
rbuild <product> base
Compiling SIL Code
This section contains descriptions of the procedures used to create a
module of SIL and C code, to compile this code, and to create a product
which includes the code. Suppose that the module in question is to be
called ted. If no version of ted exists, the following command creates
a completely new module, with one version: ted1.
>newmodule ted ted1
Developer’s Guide
(7/96)
11-7
Working with SIL Code
Do not use sspa to build products with SilTools, as it was not designed
to work in a development environment.
Working with SIL Code
The newmodule command automatically sets up all the directories listed
at the top of the page:
~/cim/mccode/ted
~/cim/sil/ted
~/cim/mhfiles/ted
~/cim/actions/ted
and
~/cim/builds/ted1
The newmodule command also sets up the s, mc, mh links in the
~/cim/builds/ted1 directory.
Example 11.1
Suppose that two SIL code files have been written (file1.sil and
file2.sil) and two C code files (cfile1.c and cfile2.c) for
ted’s application. The former files should be placed in the
~/cim/sil/ted directory, and the latter in the ~/cim/mccode/ted
directory.
To indicate that these are the files that make up the module ted, we create
the files sil_files and c_files in ~/cim/builds/ted1, with
the following contents:
sil_files:
file1
file2
c_files:
cfile1
cfile2
Example 11.1 shows how each of sil_files and c_files is a
two-line text file giving the names of the files to be included—without
their .sil or .c extensions.
Compiling the code is a two-step process. First, the SIL code is
translated to C, and then compiled to binary. The first step is
accomplished with a SIL command, and the second step with a shellwindow command.
11-8
SilTools
Compiling SIL Code
The SIL command
SIL> compile_area(<module>,<version>);
compiles all of the SIL files in the given version of the given module.
For example:
SIL> compile_area('ted','ted1');
compiles the SIL files for ted. To compile an individual SIL file, use
SIL> compile(<module>,<version>,<file>);
For example:
SIL> compile('ted','ted1','file1');
If we are executing these commands in a product which already includes
version ted1 of the module ted, the version information is not
necessary. In this case, the commands are
SIL> compile_area(<module>);
and
SIL> compile(<module>,<file>);
For example:
SIL> compile_area('ted');
SIL> compile('ted','file1');
>remake <module> <product>
This remakes the given module for inclusion in the given product. The
version used is determined from the versions file in the product.
NOTE
The first module must be included in the product’s
umodules file and the scope_out script must be run.
For example:
>remake ted tedsproduct
Developer’s Guide
(7/96)
11-9
Working with SIL Code
Once the SIL files are compiled, the second stage of compilation (from
C to binary) is accomplished via the following shell command:
Working with SIL Code
In this example, the remake command also compiles any code included
in c_files. In our example, these files are called cfile1 and cfile2.
Whenever SIL code is re-compiled from SIL to C, the next remake done
on the module re-compiles the newly-generated C code. However,
editing a hand-written C code file will not, by itself, force remake to
re-compile that file.
To re-compile a file, add the name of the modified C file to the end of
~/cim/builds/<version>/new_c_code. The next time the
module is remade, the code file in question will be re-compiled.
Finally, to rebuild a product, use
>rbuild <product>
For example:
>rbuild tedsproduct
Again, to create a completely new product, use
newproduct <product>
After these products and files have been created, and the relevant
compiles and remakes have been done, the rbuild command will
complete the process. After rbuild is finished, the start command starts
up the product. The rbuild command may be used repeatedly on the
same product as modifications are made and compiled into that product.
Creating New Versions
This section describes the process of adding new versions of a module
to the original module. For example, suppose we wish to add
enhancements to the ted module without disturbing the working
version ted1. A new version of module ted may be created using
>newversion ted ted2
11-10
SilTools
Including Modules and Products in the Product Administration Panel
This command will set up the directory ~/cim/builds/ted2, with
contents that are initially identical to those of ted1. Suppose next that
we create a new version of our file1.sil SIL file, and call it
file1_2.sil. This new version should be placed in ~/cim/sil/ted
(the same directory in which file1.sil resides). To compile it, use:
SIL> compile('ted','ted2','file1_2');
To include file1_2.sil in ted2, you can simply edit
~/cim/builds/ted2/sil_files to mention file1_2 instead of
file1. To include ted2 instead of ted1 in tedsproduct, we edit its
version file ~/cim/templates/tedsproduct/versions. The
following command:
>remake ted tedsproduct
will remake ted2, and
>rbuild tedsproduct
will rebuild the product with ted2.
Including Modules and Products in the Product
Administration Panel
Adding New Modules
All the available modules should be listed in the Available Modules list in
the Create Product panel (which is displayed by selecting Create… from
the Products pulldown menu in the Product Administration panel).
Modules may be made available for use in the Product Administration
panel by editing the file cim/options/versions and adding the line:
<module> <version>
A module should be listed only once.
Developer’s Guide
(7/96)
11-11
Working with SIL Code
The Product Administration panel is used to create and start new
products. The panel is displayed by entering sspa in a shell window.
Working with SIL Code
Adding New Products
All the available products should be listed in the Select Product to Start
list in the Product Administration panel. Products may be made available
to be built in the Product Administration panel by creating an application
solution module (appsol), which should contain the following files:
1. supmodules (lists the modules to be included in the
product).
2. top_init.sil.
3. welcome.msg.
4. startup.msg.
5. layout files.
6. appsol (marking the module as an appsol).
The appsol can then be used in the Product Administration panel by first
editing the file cim/options/versions and adding the line
<module> <version>
Again a module should be listed only once.
Dependency Management
SilTools has a mechanism for handling dependencies between modules
(build areas) which ensures that dependent and supporting modules are
included during product creation.
Modules
Two files can be created and placed in the cim/build/<mybuild>
directory to supply information about any dependencies in the mybuild
build area. These two files are
supmodules This file specifies the build areas that must come before
the mybuild build area when creating a product.
11-12
SilTools
Dependency Management
comodules
This file specifies the build areas that must also be
included when the mybuild build area is included in a
product (when the order is unimportant).
Both supmodules and comodules have the same syntax. Modules
listed in the supmodules file (within the cim/build/<mybuild>
directory) will be linked in before the mybuild build area during
product creation. A simple example of a supmodules or comodules
file is
robot
paint paint14
arc
In this example, no version is specified for robot. Therefore, the
current version for robot will be used (listed in
cim/silspec/versions). For paint, paint14 is indicated. Since
no version is specified for arc, the current version is used (listed in
cim/options/versions).
umodules
For example, to create a product with appsup11, the current version of
rkintf, arcweld7, and the current version of paint, the umodules
file would read
appsup appsup11
rkintf
arcweld arcweld7
paint
To set up your product with a umodules file:
1. Create a directory for your product
(cim/template/<mytemplate>).
2. Create the umodules file.
Developer’s Guide
(7/96)
11-13
Working with SIL Code
umodules is a file which can be used to specify all modules to be
included in a product. The umodules file (which resides in
cim/templates/<mytemplate> area) has syntax like the
supmodules and comodules files.
Working with SIL Code
3. Use the ncreate_template script (by entering
ncreate_template template_name) to create your product.
While creating a product, ncreate_template calls the scope_out
script. The scope_out script reads the umodules file, does the
dependency checking and writes the traditional modules and versions
files to your product area.
Using the umodules file is helpful when you want to remake an
existing product and want to change the version of one of the modules
you include, or make an addition or deletion.
“if” Syntax
supmodules, comodules and umodules files can also use if syntax.
An example of this syntax is
robot robot13
paint
spot spot14
if arc
mybuild mybuild12
appsup
fi
In this example, robot version 13 is specified, the current version of
paint is specified, and spot version 14 is specified. Then, the if block
indicates that if (any version of) arc is included in the build, then
mybuild version 12 and the current version of appsup should also be
included.
“Support Only” Builds Areas
A builds area which is used only as a supporting module for some other
builds area(s) can be marked so that it is not offered to the user as an
option when using the Product Administration panel (sspa script) to
create a product. To mark a builds area as “support only,” create an
empty directory in the supporting module build area with the name:
support_only.
11-14
SilTools
Patching in Interpreted Code
Application Solutions Header Module
If your project involves a number of builds areas, you can create an
application solutions header module.
To do this, make an entry in the cim/options/versions file and
create a directory in the cim/builds directory (such as
MYPROJECT1.0). Within that directory, create an empty file called
appsol, and a comodules and/or supmodules file.
When you use the Product Administration panel to create a product, and
you select your application solution (MYPROJECT1.0), all of the
comodules and supmodules files from the builds areas which
comprise the application solution will be read.
Based on the information that is read, the Product Administration panel
will create a new modules file and write it to your product area. All the
components of the application solution will be included in this newly
created modules file. Various initialization files and start_up.msg
will also be copied from the application solution (MYPROJECT1.0) to
your product area.
SIL allows interpreted versions of functions to overwrite their compiled
versions. For instance, suppose that a function, teds_function, has
been compiled into a product. If we wish to test a modification to this
function, we can load or paste in a new version of code for the function,
and the new code will take effect immediately. That is, whenever
teds_function is called by any other function in the system (whether
compiled or interpreted), it is the most recently-loaded version that is
called—not the original compiled version. The process of overwriting
compiled with interpreted code for a function is called patching the
function. The ability to patch code is very useful, since it allows code to
be enhanced, tested, and debugged without going through a compile and
link cycle.
Developer’s Guide
(7/96)
11-15
Working with SIL Code
Patching in Interpreted Code
Working with SIL Code
Debugging
Whenever possible, debugging should be done with SilTools in Text
Mode. Catching errors while still using the menus and panels is
discussed at the end of this section.
REMINDER
Text Mode is obtained by selecting Exit Menus from
the File pulldown menu. In Text Mode, the menus and
panels are disabled and the SIL> prompt is displayed
in the shell window you used to start the session.
When an error occurs while running SIL in Text Mode, an error message
is printed, along with the following prompt instead of the SIL prompt:
Error>
The Error> prompt indicates that an error break has occurred. During an
error break, any SIL command is legal. In addition, the call stack
becomes accessible for examination. The call stack is a data structure
which describes the function which was running when the error
occurred, and the sequence of function calls which led to the function
invocation. The call stack also contains the values of all local variables
in the functions on the stack.
This SIL command is used to examine the stack by printing a trace back:
Error>
11-16
tb();
SilTools
Debugging
Example 11.2 shows a typical function, function call, error message and
trace back.
Example 11.2
Consider the functions:
function blow_up(x:string):string;
var z:string;
begin
z := ";
for i := 1 to 10 do begin z := x * z;error('blow up error');
end;
blow_up := z;
end;;
function calls_blow_up(x:string):string;
var y:string;
begin
y := x * x
calls_blow_up := blow_up(y * '_blow_up');
end;;
Then
SIL> calls_blow_up('bang');
Error>
continued on next page
Developer’s Guide
(7/96)
11-17
Working with SIL Code
error: blow up error
("SIL break")
"in nSIL_error"
"r(); to return"
Working with SIL Code
Example 11.2
(continued)
Using the command tb(); gives these results:
Error>
0
1
2
3
4
5
tb();
I_TEVAL(LISPOB)
I_TEVAL1(LISPOB)
PM_EXECUTE(IFORM)
CALLS_BLOW_UP environment:
ARG X = bang
Y = bangbang
G3_CALLS_BLOW_UP = <NULL S_T_R>
BLOW_UP environment:
ARG X = bangbang_blow_up
Z = bangbang_blow_up
I = 1
_S_33 = 1
_S_34 = 10
G2_BLOW_UP = <NULL S_T_R>
POST_ERROR_FUN()
The numbers in the 0 column are the indices of the stack frames, and are
called frame numbers. These numbers are used to refer to frames in
commands described in the succeeding pages. The values of all local
variables, including parameters, are printed (parameters, however, are
labeled ARG).
In Example 11.2, the frames numbered 0, 1, 2, and 5 designate system
functions, while 3 and 4 are the frames of the user functions
CALLS_BLOW_UP and BLOW_UP.
The tb command works for both interpreted and compiled code. When
it is used with compiled code, however, only function names (and not
local values) are available. To see the values of local values in the
compiled code for a function, we can patch in its source code, and the
local values for that function will be available to tb and other stack
examination facilities. This means we do not need to regenerate the error
using interpreted code to see local values—patching the function into
the existing error break is adequate.
11-18
SilTools
Debugging
If tb is given an integer argument, only the specified number of frames
above the debug frame will be printed. For example, the following tb
command, with its argument, would only print frames 4 and 5 from
Example 11.2:
Error>
tb(2);
The command:
Error>
tbn();
is identical to tb, except that it prints no local or parameter values. The
example below illustrates the use of the tbn command:
Example 11.3
Error>
0
1
2
3
4
5
ok
tbn();
I_TEVAL(LISPOB)
I_TEVAL1(LISPOB)
PM_EXECUTE(IFORM)
CALLS_BLOW_UP(S_T_R)
BLOW_UP(S_T_R)
POST_ERROR_FUN()
The following command returns the value of the given variable in the
given frame as a universal:
Error>
ev(<variable name>,<frame number>);
Example 11.4
Error>
ev(y,3);
[UNIVERSAL: bangbang OF_TYPE STRING]
The debug_frame variable is initially set to the frame number of the
function in which the error occurred. The following commands are
equivalent:
Error>
Error>
Developer’s Guide
(7/96)
ev(<variable name>);
ev(<variable name>,debug_frame);
11-19
Working with SIL Code
For example:
Working with SIL Code
You are free to reset debug_frame, thus changing the behavior of the
single argument variant of ev.
In our example, the error was caused by an explicit SIL error statement.
Other errors arise from the usual UNIX error conditions: access
violations, arithmetic errors, interrupt signals, etc. Regardless of the
source of the error, the behavior of the error break is the same.
The command
Error>
r();
returns control to the top level SIL loop; that is, it exits the error break
and cleans up the stack. Continuing from the error along the same course
of computation that caused the error is not possible. However, you can
include statements in your code which will cause a pause break (a
break with behavior identical to an error break but one from which
computation can be continued using the go command. This command is
ppause(x:string);
Using the command and argument above results in x being printed out
when the pause break is entered. Example 11.5 provides an extended
example of ppause.
Example 11.5
procedure test_pause(n:integer);
begin
for i := 1 to n do ppause('testing');
end;
SIL> test_pause(20);
pausing at testing
go; to continue
continued on next page
11-20
SilTools
Debugging
Example 11.5
(continued)
Pause>
0
1
2
3
4
ok
tb();
I_TEVAL(LISPOB)
I_TEVAL1(LISPOB)
PM_EXECUTE(IFORM)
TEST_PAUSE environment:
ARG N = 2
I = 1
_S_39 = 1
_S_40 = 2
PPAUSE(S_T_R)
Pause>
Pause> go;
pausing at testing
go; to continue
Pause> tbn();
0 I_TEVAL(LISPOB)
1 I_TEVAL1(LISPOB)
2 PM_EXECUTE(IFORM)
3 TEST_PAUSE(INTEGER)
4 PPAUSE(S_T_R)
ok
Pause>
ev(i,3);
[UNIVERSAL: 2 OF_TYPE INTEGER]
Pause>
go;
Pause>
Working with SIL Code
ok
r();
Restarting…
Unwinding stacks…
Debug version of SIL
SIL>
Developer’s Guide
(7/96)
11-21
Working with SIL Code
Debugging in Menu Mode
This section discusses debugging code which causes errors while you
are still using the menus and panels. The SIL flag
to_text_mode_on_error
controls what happens when an error condition is encountered in Menu
Mode. When the flag is set to true, any error encountered by the system
will cause SilTools to switch to Text Mode automatically, and display
the ERROR> prompt. This flag is useful when tracking bugs. The
default setting of the flag is false. When it is set to false, errors are
reported, but panels stay up and no error prompt results.
Calling C Code from SIL
This section describes how C code can be called from SIL. Topics in this
section are
➢ Sample .c and .h Files
➢ Passing Data Types to C
REMINDER
The procedure for including hand-written C code in a
module was discussed in “Loading SIL Code” on
page 11-5.
The following command imports the given C function and assigns it the
given SIL type:
c_import("<function name>,<type>);
For example:
c_import("foo,map(integer,integer));
will import a C function foo on integers. After that process is complete,
foo can be treated just like any other SIL function on integers—it can be
called freely from SIL code, as in
SIL> for i := 1 to 10 do writein('foo of '<i,' = ',foo(i));
11-22
SilTools
Calling C Code from SIL
The only restriction is that the SIL file in which the c_import occurs
must be compiled—not interpreted. Furthermore, patching over a
compiled c_import will prevent it from functioning thereafter.
Importing a C function into SIL is quite simple. For integers and reals,
only a c_import command is needed. One restriction exists: all C
functions imported into SIL must obey the “reals last” rule which
requires real parameters to appear after parameters of other types in the
parameter list. lrecords or arrays can be used to pass structured data
back and forth to C. C code may read values from these lrecords and
arrays, and stuff new values into them as a way of returning structured
data. Alternatively, the types described in “C Data Types” on page 9-15
may be used to create data structures in SIL which are identical to C data
structures, and can be freely shared between SIL and C code. The only
style of sharing which will not work is to attempt to build SIL data
structures like lrecords and SIL arrays in C code. This is because all
structured data in SIL needs to be allocated in a way that is consistent
with garbage collection methods in SIL, so simple C mallocs will not do.
NOTE
SIL integers correspond to the C type int, and SIL reals
correspond to the C type double).
Of course, in many applications, the task will be to interface to an
existing body of C code, rather than to write new C code for use with
SIL. In the former case, unless it is very simple, wrappers written in C
will be needed for transporting data between SIL and the application.
Sample .c and .h Files
The remaining issue is what C declarations should be given to inputs
from SIL. SIL provides a facility for automatically generating such
declarations. Namely, whenever a SIL file which contains c_imports is
compiled, sample .c and .h files are generated. These sample .c and
.h files contain these declarations, and samples of their use. The sample
files are placed in
~/cim/mccode/<filename>_sample.c
Developer’s Guide
(7/96)
11-23
Working with SIL Code
Interfacing to Existing C Code
Working with SIL Code
and
~/cim/mhfiles/<filename>_sample.h
These sample files are meant to be copied to your own files (with
different names so that they will not be overwritten), where the function
bodies will be filled in.
IMPORTANT
The include line in the .c file which mentions the
sample .h file should be changed.
Alternatively, the sample files may be used solely as documentation.
The types which will appear in the sample .h file will include all those
referenced in the c_import commands—not just those that happen to be
defined in the file containing the c_import commands.
Example 11.6
Suppose that the following types have been defined:
type lpoint = lrecord
xc,yc,zc:real;
end;
type point = record
xc,yc,zc:real;
end;;
Suppose further that the file ~/cim/sil/ted.sil has the contents
c_import("cfun1,map(integer,point,real));
c_import("cfun2,map(lpoint,lpoint,real));
c_import("cfun3,map(integer,darray of real, list of ob,
darray of lpoint,
darray of point));
The following sample files would be generated:
11-24
SilTools
Calling C Code from SIL
Example 11.6
(continued)
~/cim/mhfiles/ted/ted_sample.h:
/* SAMPLE .h FILE */
struct point {
integer typenum_field;
real xc;
real yc;
real zc;
};
typedef struct point *pointp;
struct lpoint {
integer typenum_field;
real xc;
real yc;
real zc;
};
typedef struct lpoint *lpointp;
typedef real *real_array;
typedef lpointp *lpointp_array;
typedef struct point *point_array;
============= END OF FILE
=====================
Working with SIL Code
continued on next page
Developer’s Guide
(7/96)
11-25
Working with SIL Code
Example 11.6
(continued)
~/cim/mccode/ted/ted_sample.h:
/* SAMPLE .c FILE */
#include "compiled.h"
#include "precomp.h"
#include "e2c.h"
#include "ted_sample.h"
#include "postcomp.h"
integer cfun1(a0,a1)
point a0;
real a1;
{
/* FUNCTION BODY */
}
lpointp cfun2(a0,a1)
lpointp a0;
real a1;
{
/* FUNCTION BODY */
}
integer cfun3(a0,a1,a2,a3)
real_array a0;
lispob a1;
lpointp_array a2;
point_array a3;
{
/* FUNCTION BODY */
}
============= END OF FILE====================
11-26
SilTools
Calling C Code from SIL
Passing Data Types to C
Passing Records to C
Records, as well as lrecords, can be passed to C. Records are passed
by reference, even though they are passed to SIL functions by value.
No problems will arise from passing records to C, but attempting to
return values in records, rather than lrecords, is discouraged.
A SIL lrecord or record type <type> generates a corresponding
struct declaration of the same name, and defines <type>p to be the
type of pointer to this type. <type>p is the type assigned to incoming
arguments from SIL. Since passing of records and lrecords to C is
identical, the type lpoint and point generate C declarations of
identical structure. Notice, however, that an array of points and an
array of lpoints differ—the former is given by a pointer to a point
and the latter by a pointer to a pointer to an lpoint.
The SIL type string is passed to C as stringob (discussed further in
the “Protecting the Data Space when Passing Strings” on
page 11-32). The rest of the SIL types (excluding the ones already
mentioned) are passed simply as lispob. The sample C file starts
with a few includes. These inclusions bring in various basic
definitions associated with the underlying implementation of SIL in
C. It is here that the types stringob, lispob, real and integer are
defined.
Passing a SIL Array
A SIL array is passed to C as a pointer to some header information
used in SIL—not to the beginning of the array itself. The first
element of the array is arrived at by using the macro ARRAY_BODY,
and its length by array_length.
Developer’s Guide
(7/96)
11-27
Working with SIL Code
Passing Other SIL Types
Working with SIL Code
Example 11.7 provides a more complete example, in which
functions for doubling an lpoint and for doubling an array of points
are imported.
Example 11.7
First import the file (ted2.sil):
c_import("double_it,map(integer,lpoint));
c_import("adouble_it,map(integer,darray of point));
Compilation of this file yields the sample files shown below.
~/cim/mhfiles/ted/ted2_sample.h:
/* SAMPLE .h FILE */
struct lpoint {
integer typenum_field;
real xc;
real yc;
real zc;
};
typedef struct lpoint *lpointp;
struct lpoint {
integer typenum_field;
real xc;
real yc;
real zc;
};
typedef struct point *pointp;
typedef struct point *point_array;
============= END OF FILE====================
continued on next page
11-28
SilTools
Calling C Code from SIL
Example 11.7
(continued)
~/cim/mccode/ted/ted2_sample.h:
/* SAMPLE .c FILE */
#include "compiled.h"
#include "precomp.h"
#include "e2c.h"
#include "ted2_sample.h"
#include "postcomp.h"
integer double_it(a0)
lpoint a0;
{
/* FUNCTION BODY */
}
Next, the sample files are copied to files renamed cted2:
~/cim/mccode/ted/ted2_sample.c is copied to
~/cim/mccode/ted/cted2.c and
~/cim/mhfiles/ted/ted2_sample.h is copied to
~/cim/mhfiles/ted/cted2.h.
continued on next page
Developer’s Guide
(7/96)
11-29
Working with SIL Code
integer adouble_it(a0)
point_array a0;
{
/* FUNCTION BODY */
}
============= END OF FILE=====================
Working with SIL Code
Example 11.7
(continued)
cted2.h does not need modification. Filling in the code for
cted2.c yields:
#include "compiled.h"
#include "precomp.h"
#include "e2c.h"
#include "cted2.h"
#include "postcomp.h"
integer double_it(a0)
lpoint a0;
{
a0 -> xc = 2 * a0 -> xc;
a0 -> yc = 2 * a0 -> yc;
a0 -> zc = 2 * a0 -> zc;
}
integer adouble_it(a0)
point_array a0;
{
point_array a0_goods;
integer ln,i;
in = array_length(a0);
a0_goods = (point_array)ARRAY_BODY(a0);
for (i=0;i<ln;i++)
double_it(&(a0_goods[i]));
}
============= END OF FILE====================
This is C code which actually doubles the entities in question. To
install this work in the ted2 version of the module ted, add the
following line to ~/cim/builds/ted2/sil_files:
ted2
and the line
cted2
to ~/cim/builds/ted2/c_files
continued on next page
11-30
SilTools
Calling C Code from SIL
Example 11.7
(continued)
After a remake and rbuild, the imported C code is available:
SIL> double_it(mk_lpoint(1,2,3));
2184488
SIL> ll == mk_lpoint(1,2,3);
TRUE
SIL> ll
[LTUPLE: 6.000000,4.000000,6.000000]
SIL>
NOTE
double_it returns a “garbage value” because the code for
double_it did not bother to execute a return. This is harmless.
SIL> aa == array_create(point,4);
TRUE
SIL> for i := 0 to 4 do aa[i] := [i,i,i] as point;
ok
SIL> aa;
[ARRAY: [TUPLE:
0.000000,0.000000,0.000000],[TUPLE:
1.000000,
1.000000,1.000000],[TUPLE:
2.000000,2.000000,2.000000],[TUPLE:
3.000000,3.000000,3.000000],[TUPLE:
4.000000,4.000000,4.000000]
Working with SIL Code
SIL> adouble_it(aa);
11612136
SIL> aa;
[ARRAY: [TUPLE:
0.000000,0.000000,0.000000],[TUPLE:
2.000000,
2.000000,2.000000],[TUPLE:
4.000000,4.000000,4.000000],[TUPLE:
6.000000,6.000000,6.000000],[TUPLE:
8.000000,8.000000,8.000000]
Developer’s Guide
(7/96)
11-31
Working with SIL Code
Protecting the Data Space when Passing Strings
As mentioned earlier, SIL strings are passed to C with the type
stringob. SIL strings differ from C strings in that they include a
header which consists of a type tag and a length, and are not
necessarily null terminated—the length field in the header
determines how long the string is, not the first occurrence of a nul in
the sequence of bytes which make up the string. The C function
strlen will return the length of a stringob, while STRING_BODY
will yield a pointer to the beginning of the string itself. The functions
l2c_str and c2l_str convert back and forth between the SIL and C
representations of strings: l2c_str converts from SIL to C strings,
and c2l_str should only be used to return a single value directly to
SIL, as in
return c2l_str(<a C string>);
If c2l_str is not used in this fashion, the data space of SIL may be
corrupted.
11-32
SilTools
Appendix
Using SilTools in a NonEnglish Environment
Using SilTools in a Non-English Environment (SGI only)
Using SilTools in a Non-English Environment (SGI only)
1. Specify the desired locale in ~/.lang (e.g. ja_JP.EUC). Refer to
the SGI documentation for further information.
2. Log out and log in again so that the environment variable $LANG is
set to the desired locale (e.g. ja-JP.EUC).
3. Add the following line into top_init.sil (if it does not exist):
international_release := true;
4. For Japanese, edit the X application resource file Cimstation to
change all fontList resources as follows:
Cimstation*fontList:
*-helvetica-bold-r-*--14-*;--mincho-*--14*;*--14-*:
Cimstation*XmText.fontList:
7x14;--mincho-*--14-*;*--14-*:
Cimstation*XmRowColumn.XmCascadeButton*fontList:
*-helvetica-bold-r-*--14-*;--mincho-*--14-*;*--14-*:
Cimstation*XmMenuShell*XmRowColumn*fontList:
*-helvetica-bold-o-*--14-*;--mincho-*--14-*;*--14-*:
and add the following resource:
Cimstation*XmText.columns:
10
5. Start SilTools. The user should be able to enter local language into
text fields.
Localizing SilTools Panels
2. Generate the localization header file to_localize under the
template directory and the localization data files under
~/cim/gui/locales/to_localize by executing the SIL
command:
SIL> to_localize();
Developer’s Guide
(7/96)
Appendix-1
Using SilTools in a
Non-English
Environment
1. Start SilTools.
Using SilTools in a Non-English Environment
The file to_localize simply contains the names of data files
generated. Each generated data file corresponds to a panel that needs
to be localized:
3. Quit SilTools.
4. Use a text editor to localize those data files and save them under
~/cim/gui/locales/<local_laguage> where
<local_language> is the name of the local language, e.g.
~/cim/gui/locales/japanese.
5. Set the environment variable CIM_LOCALE to the local language,
e.g.
% setenv CIM_LOCALE japanese
6. Restart SilTools to create a localized version of the heap_file and
the localization process is done. Actually, whenever SilTools is
brought up, it checks the environment variable CIM_LOCALE and
the localization header file to_localize in the template area. If
both exist and to_localize is newer than heap_file, localization
will be done for those data files under
~/cim/gui/locales/$CIM_LOCALE, which are listed in
to_localize. Thus partial localization can be done by editing
to_localize before restarting SilTools.
Localizing SilTools Panels at Build Time
The localization can also be done at build time by setting the
environment variable CIM_LOCALE and creating the header file
to_localize in the relative build area before rebuilding a template.
At build time, SilTools checks the environment variable CIM_LOCALE
and the localization header file to_localize in the template area. If
both exist, localization will be done for those data files under
~/cim/gui/locales/$CIM_LOCALE, which are listed in
to_localize.
Appendix-2
SilTools
Index
A
aax geometric type 3-13
abstract class facility 5-19–5-27
astack 5-19
C++ 5-23
concrete classes 5-19
method, see method
actions directory 11-4
actions, tool 6-17
activate procedure 10-6
add_group command 6-24
add_monitor procedure 6-8
add_panel_to_toolbar command 6-29
add_widget_toggle_entry procedure 6-20
ambiguity 5-15
anno_ types 6-28
annotated types 6-27
announce_click procedure 6-7
announce_number procedure 6-8
appearance 6-1
application solutions 11-15
applications 9-11
apply operator 1-4, 9-8–9-11
failure testing 5-17
method, using instead 5-23
view changing and 5-16
applyn operator 5-17, 9-11
arc operator 8-2
ARRAY_BODY macro 11-27
array_of constructor 4-1
arrays 4-8–4-10, 11-23
2D 4-8
array_create command 4-8
carray 9-16
components 1-13
creating 4-8
integer 4-1
is_array function 9-3
length operator 4-10
mismatch error 4-8
passing to C 11-27
resizing, dynamic 4-9
sarray 4-11
Developer’s Guide
(7/96)
Index
Index
syntax for 4-8
as_type operator 9-4, 9-6, 9-12
efficiency of 9-13
as_view operator 5-13, 5-16
ASCII code 4-15
ASCII file 2-16
assignment statements 1-14
atomic statements 1-14
authorization 11-1
autolevel procedure 7-2
B
base_rolodex.top_init command 6-33
Bezier curve 8-10
Bezier patch 8-11
bind_button command 6-17
binding time 5-16
bindings 1-8, 2-6, 2-7
early 1-6, 9-9
late 1-6, 5-16, 9-9
block operator 8-13, 8-21
block, adding 8-13, 8-21
boolean type 4-2, 9-1
break, pause 11-20
bring_down command 6-10
bug tracking 11-22
build area 6-30
build time 9-19
builds directory 11-4
C
C compiler 1-2
.c files 11-23
C language
arrays 9-16
build time 9-19
calling C code from SIL 11-22–11-31
carrays 9-16
cast primitive 9-12
char type 9-4, 9-16
compiling 11-7
crecords 9-15
cstring_constant constructor 9-19
INDEX-1
Index
data structures 9-19
data types 9-15–9-19
double type 9-16
*erb type 9-15
float type 9-16, 11-23
int type 9-16, 11-23
pointer 9-16
records 9-15
short type 9-16
strings 9-17
copying 9-18
creating 9-18
mk_static_lstring function 9-19
null-terminated 9-18
printing 9-18
c_import command 11-23
call stack 11-16
camera programming 7-1–7-3
cap, adding 8-4
capacity 4-16
car operator 4-4, 9-5
carat (^) 9-16
case construct 1-16
casting 5-11, 9-12, 9-13
cdr operator 4-4, 9-5
chain operator 8-12
$CIM environment variable 11-2
cim tree 11-2
circle, adding 8-2, 8-10
class 1-5, 5-2
abstract, see abstract class facility
C++ 5-23
inheritance 5-6
superclasses 5-14
clock variable 10-1, 10-3
close command 2-17
closures 2-10, 9-13
is_closure function 9-3
code
modules 11-2
organization 11-2
comodules file 11-12, 11-14, 11-15
syntax 11-13
INDEX-2
compile command 11-9
compile time 5-16
compile_area command 11-9
compiling SIL code, see SIL: code:
compiling
compound statements 1-14, 1-15
concatenation 2-21
concurrency 1-1, 1-6, 10-1–10-14
conditional statement 1-15
cone operator 8-13
cone, adding 8-9, 8-13
confirmation requestor 6-27
cons operator 4-4
const declaration 3-3
constants 1-12, 9-14
variants 9-14
constructed types 1-10, 4-1
contents 9-17
Coons surface 8-8
coordinate system (CS) 3-1
copyto procedure 9-18
Create/Edit Group panel 6-24
create_rolodex_mnode_nm command 6-29
create_toolbar_mnode command 6-29
crecord 9-15
crt type 3-5
current_authorization global 11-1
curve, adding 8-11
cyl type 3-6
cylinder operator 8-13
cylinder, adding 8-13, 8-23
cylinder, tabulated 8-7
D
data
fields 1-23
tag 1-23
data types
annotated 6-27
boolean type 9-1
C data types, see C
cchar type 9-16
closure type 2-10
SilTools
constructed types 1-10, 4-1
cshort type 9-16
defining new 1-20
integer predicate 9-3
integer type 9-1, 9-16
lispob, see lispob
lists 4-4
lpoint type 11-27
metatypes 9-1
mismatch error 4-8
model data type 8-1
new 9-6
ntype, see ntype
pipe 10-10
point type 11-27
pose 3-16
real type 9-1, 9-16
represented types 9-6
is_reptyp function 9-3
scalar 4-2, 9-1
semaphore type 10-6
shape 3-2
sreal type 9-16
string type 9-1, 11-27
symbols 2-20
system-defined 1-10, 4-2, 9-1
tclosure type 10-14
type expressions 9-2
<type>p 11-27
universal, see universal type
user-defined 1-10, 4-2
data variant 2-11
data_variant operator 9-14
deactivate procedure 10-6
debug_frame variable 11-19
debugging 11-16
call stack 11-16
error break 11-20
Error> prompt 11-16
patching a function 11-18
pause break 11-20
ppause command 11-20
to_text_mode_on_error flag 11-22
Developer’s Guide
(7/96)
trace back 11-16
define_method command 5-24–5-25
definitions 1-12, 1-19
delay command 10-2
delayed tasks 10-4
delete_group command 6-25
dependencies 11-12–11-15
dispatch 2-5
dispatch procedure 9-7
dispatch procedure 9-9
dynamic list 4-3
E
early binding, see bindings: early 9-9
early-binding mechanisms 1-6
ellipse, adding 8-3, 8-10
ellipsoid operator 8-11
empty lists 4-4
emptysarray command 4-11
end effectors 3-10
environments
global 1-9
local 1-9, 2-6
EOF 2-18
equivalent angle-axis 3-9, 3-13–3-15
erb type 9-15
error break 11-16, 11-20
error procedure 2-5
Error> prompt 11-16
Euler angles 3-9, 3-12
see also geometry
ev command 11-19, 11-20
execute function 9-12
F
facet
adding 8-4
facet operator 8-4
field selectors 1-13
file
.sil extension 11-5
ASCII 2-16
.c files 11-23
INDEX-3
Index
Index
Index
compiling 11-9
directories and organization 11-2
.h files 11-4, 11-23
header 11-4
initialization 11-5
loading 11-5
reading 2-16, 2-17
writing to 2-16
file browser 6-25
filter function 6-8
find_variant function 9-14
focal procedure 7-2
footers 6-5, 6-10
for statement 1-17, 1-18
forward referencing 1-22, 2-8
frame 3-2
frame numbers 11-18
free variables 2-6
free_cstring procedure 9-18
frustrum operator 8-14
frustum, adding 8-14
function
application syntax 1-5
definition 1-21
definition syntax 1-5
is_function function 9-3
recursive 2-8, 2-9
syntax for 2-3
system-defined 2-12
function applications 1-12
function constructor 4-1
function_variants function 9-14
funnel operator 8-7
funnel, adding 8-7
G
garbage collection 1-23, 9-15
general tools, see gtools
generation-scavenging algorithm 1-3
geometry
definition 3-1
equivalent angle-axis 3-9, 3-13–3-15
INDEX-4
Euler angles 3-9, 3-12
Z-Y-Z 3-12
frame 3-2
orientation 3-8
pose 3-1, 3-16
position 3-4–3-7
Cartesian description 3-5
cylindrical description 3-6
spherical description 3-7
roll-pitch-yaw 3-10
terms 3-1
units 3-3
yaw-pitch-roll 3-9, 3-10–3-11
get_a_boole_tf function 6-28
get_a_boole_yn function 6-28
get_a_real function 6-28
get_a_string function 6-28
get_an_integer function 6-28
get_graphics_pick function 6-23
get_pick_extended_info function 6-19
getob mode 6-12
global environment 1-9
global_browser_kind shape field 6-11, 6-13
global_getob_kind shape field 6-12, 6-13
globals 1-19
gluing objects 8-15
go command 11-20
graphics tools, see gtools
Graphics Window, selecting objects in the
6-23
grid surface, adding 8-5, 8-22
group tools, see gtools
groups 6-24
gtools 6-11, 6-14–6-18
activating 6-18
deactivating 6-18
general tools 6-15, 6-18
group tools 6-15, 6-18
mouse movement 6-17
mouse, wiring 6-15
shape-click tools 6-14, 6-17
tool actions 6-17
SilTools
H
.h files 11-4, 11-23
handler 6-7, 6-31
has_data_variant function 9-14
has_function_variant function 9-14
heap 1-4, 1-23, 9-13, 9-19
heapval 1-23
help command 2-1
help files 6-28
help files, adding 11-7
home directory 11-2
hyperbola, adding 8-3, 8-10
I
I/O 2-13
ASCII files 2-16
EOF 2-18
files, reading & writing to 2-16
read command 2-13
read_char function 2-14
read_line function 2-14
read_token function 2-14
readln command 2-14
i_tsetq operator 2-21
ib_pop_file procedure 6-25
id 9-14
id2string operator 2-21
identifiers 2-20
ifilter method 6-13
IGES
converting a model to a file 8-18
converting with text 8-17
imoveto command 8-16
importing
C functions 11-23
in_frame operator 3-18
infix operators 1-13
syntax 2-12
info_dialog function 6-26
inheritance 5-1, 5-4, 5-6
multiple 5-14
init.sil file 11-5, 11-6
initialization file 11-5, 11-6
Developer’s Guide
(7/96)
initializing_shape_selector command 6-14
input/output, see I/O
input_types function 9-3
install_new_list_entries command 6-31
install_new_widget_toggle_entries
procedure 6-20
instantaneous block 10-1
instantaneous commands, see tasks
integer
constructor 4-1
data type 4-1
division 4-2
is_integer operator 9-6
pipe 10-10
stackval 1-23
string, converting to 4-14
integer type 4-2, 9-1
integer_predicate_type function 9-3
intern constructor 2-20
interpreted code 11-15
interpreter, SIL 1-8, 1-14, 2-6, 2-13, 4-16
invert operator 8-14
is_array function 9-3
is_closure function 9-3
is_fail function 5-17, 9-11
is_frame_or_teacher function 6-23
is_function function 9-3
is_general_gtool operator 6-15
is_group command 6-24
is_group_gtool operator 6-15
is_integer operator 9-6
is_list function 9-3
is_mounted function 7-3
is_pair operator 9-6
is_primitive function 9-3
is_real operator 9-6
is_reptyp function 9-3
is_shape_click_gtool operator 6-14
is_string operator 9-6
is_task function 9-3
is_tclosure function 9-3
is_tracking function 7-2
is_undefined function 9-14
INDEX-5
Index
Index
Index
non-destructive functions 4-5
iteration statement 1-15, 1-17
iterative algorithm 4-7
J
Japanese language A-1
K
k variable 4-7
keyboard, reading from 2-13
L
label command 7-3
language, non-english A-1
late binding, see bindings: late 9-9
late-binding mechanisms 1-6
lcv, see variables: loop control
least function 2-10
link 8-19
Lisp 1-2
lispob 1-4, 9-4, 11-27
casting 9-4, 9-13
definition 1-4, 1-10, 9-4
operations on 9-5–9-6
pair
constructor 9-5
mutators 9-5
selector 9-5
symbols 2-19
testing for equality 9-5
list operator 4-3
list_of constructor 4-1
list_subtype function 9-3
lists 4-3–4-7
car operator 4-4
cdr operator 4-4
cons operator 4-4
destructive operations 4-5
dynamic 4-3
empty 4-4
is_list function 9-3
iteration 4-7
length operator 4-5
INDEX-6
null command 4-4
operations 4-5
recursion 4-6
reverse operator 4-5
select operator 4-5
set_car procedure 4-5
set_cdr procedure 4-5
type 4-4
load_panel command 6-10
local environment 1-9, 2-6, 2-7
local variable declarations 2-4
logo 6-31
lowercase operator 4-13
lpoint type 11-27
lrecords 4-20, 9-12, 11-23
heapval 1-24
objects, compared to 5-1
passing to C 11-27
stackval 1-23
syntax for 4-20
lstack 5-24
lstrings 4-15, 4-16, 9-17
mk_static_lstring function 9-19
M
make_prompt function 6-26
match operator 4-14
memory allocation 4-13
memory area 1-23
Menu Mode 11-16, 11-22
message
displaying a message in a pop up box
6-26
send_message command 5-3
messages 10-12
messages queue 10-10, 10-11
meta programming 1-1
metaobjects 9-1
metatypes 1-4, 9-1
method
definition 5-3
method, abstract class
SilTools
apply, using method instead of 5-23
define_method command 5-24–5-25
fields 5-20
pop method 5-23
primitives 5-23
push method 5-20
set_method command 5-24
task, declaring as 5-25
tmethod 5-25
underflow 5-22
mk_aax command 3-13
mk_application function 9-12
mk_array_type function 9-3
mk_bsurf operator 8-8
mk_cap operator 8-4
mk_circle operator 8-2
mk_circular_arc operator 8-10
mk_cnsurf operator 8-8
mk_crt command 3-5
mk_cstring function 9-18
mk_cyl command 3-6
mk_ellipse operator 8-3, 8-10
mk_file command 2-16
mk_function_type function 9-3
mk_general_gtool constructor 6-15
mk_global_var_setting command 6-32
mk_group command 6-24
mk_group_gtool constructor 6-15
mk_gsurface operator 8-5
mk_hl_shape_field command 6-13
mk_hyperbola operator 8-3, 8-10
mk_initializing_shape_field command 6-14
mk_list_type function 9-3
mk_panel_geom_setting function 6-32
mk_panel_pos_setting command 6-32
mk_parabola operator 8-3, 8-10
mk_plsurf operator 8-5
mk_point command 3-5
mk_point operator 8-19
mk_pose command 3-16
mk_pspline operator 8-10
mk_psurf operator 8-11
mk_rbspline operator 8-3
Developer’s Guide
(7/96)
mk_rbsurf operator 8-7
mk_rctcurve operator 8-2
mk_rsurf operator 8-23, 8-24
mk_rvsurf operator 8-6, 8-23, 8-24
mk_rvsurf_shape operator 8-9
mk_shape_click_gtool constructor 6-14
mk_shape_field command 6-13
mk_sph command 3-7
mk_static procedure 9-19
mk_static_lstring function 9-19
mk_string operator 4-15
mk_ticker function 10-6
mk_tmp_group command 6-24
mk_tool_body command 6-16
mk_tool_set command 6-16
mk_universal constructor 9-7
mk_widget_toggle function 6-20
mk_xyz command 3-12
mk_ypr command 3-11
mk_zyz command 3-12
mnode class 6-1, 6-6
mnode view 6-3
see also panels and widgets
mnode view 6-3
model data type 8-1
model operators 8-14
modeling
constructors 8-1–8-11, 8-19–8-24
examples 8-19
IGES file, converting to 8-18
IGES models, converting with text 8-17
link example 8-19
wireframe 8-12
module
creating a new 11-7, 11-11
definition 11-2
version, creating a new 11-10
monitors 6-8
mouse button 6-14
binding 6-17
programming object selection 6-11
wiring 6-15
moveby command 8-16
INDEX-7
Index
Index
Index
moveto command 8-16
multiple inheritance 5-14
my_class function 5-11
N
names 2-11
ncreate_template command 11-14
nested definitions 2-7
new_cstring function 9-18
new_pipe command 10-10
newmodule command 11-6, 11-8
newproduct command 11-5, 11-10
NIL 9-4
notify command 10-3
ntype 1-4, 9-2
is_primitive function 9-3
primitive operations 9-3
nul 5-13
null list 4-4
null predicate 9-4
null terminated 5-13
O
ob, see lispob
object
casting 5-11
data 9-1, 9-2
definition 5-1
gluing 8-15
metaobjects 9-1
naming 2-11
referred to as views 5-10
selecting 6-23
selecting, see shape fields
terminology 5-2
object-oriented programming 1-1
object-oriented terminology 5-2
open procedure 2-17
operators 1-13
orientation, see geometry
INDEX-8
P
pair
constructor 9-5
is_pair operator 9-6
mutators 9-5
selectors 9-5
panels 6-1
build area 6-30
buttons 6-7
displaying 6-10
file browser 6-25
footers 6-5, 6-10
help files 6-28
item 6-4
layout 6-31
logo 6-31
monitors 6-8
pop up boxes 6-23, 6-26
pulldown menu 6-5
Quick Access 6-29, 6-33
removing from display 6-10
testing 6-10
tool bar 6-29
tool set, turning a panel into 6-16
top 6-4
top bar 6-5, 6-29, 11-6
widgets, see widgets
WM handlers 6-4
parabola, adding 8-3, 8-10
parametric curve 8-11
parametric surface 8-12
Pascal 1-2, 1-4, 1-14, 1-21
patching a function 11-15, 11-18
pause break 11-20
pcurve, adding 8-3
pcurvelist, adding 8-3
pick_extended_info lrecord 6-19
pipe operator 8-13
pipes 10-10
adding 8-13
creating 10-10
messages queue 10-10, 10-11
private 10-12
SilTools
waiters queue 10-10, 10-11
pitch, see geometry
plane surface, adding 8-5
plus function 2-12, 9-6, 9-8, 9-13
point
adding 8-2
point type 11-27
pointer 9-16
pointer management 1-2
polygon
circular 8-4
convex planar 8-4
polymorphism 1-2, 2-2–2-12, 5-3
pop up boxes 6-23, 6-26
pose, see geometry
position, see geometry
ppause command 11-20
predicates 9-5
printer 2-12
procedure
applications 1-14
call 1-14
definition 1-21
recursive 2-8
syntax for 2-3
procedure constructor 4-1
process 10-12
syntax for 10-12
product
building 11-7
creating 11-5–11-7, 11-10, 11-11
help file, adding 11-7
rebuilding 11-10, 11-11
support only 11-14
umodules file, including 11-13
Product Administration panel 11-11, 11-12,
11-15
programming methods 1-1
protection 11-1
pseudo-code 1-2
pspline, adding 8-10
psurf_to_gsurf operator 8-5
pulldown menu 6-5
Developer’s Guide
(7/96)
Index
Index
put_up command 6-10
Q
Quick Access 6-29, 6-33
Quick Pick Window, selecting objects from
6-23
R
rational B-spline surface 8-7
rbspline, adding 8-3
rbuild command 11-7, 11-10
rctcurve, adding 8-2
read_char() function 2-14
read_line() function 2-14
read_token() function 2-14
readln, read commands 2-13, 2-14, 2-17
real time 10-1
real type 4-2, 9-1
reals
is_real operator 9-6
reals last rule 11-23
stackval 1-23
records 4-17–4-20
casting 9-12
constructor 4-18
customized 4-18
crecords 9-15
defining 4-17
heapval 1-24
lrecords 4-20, 9-15
mk_ prefix 4-18
passing to C 11-27
stackval 1-23
syntax for 4-17
recursive functions 2-8, 2-9
reference system 3-1
referential equivalence 5-9, 5-11
rel operator 3-18
remake command 11-9, 11-10
remove_view operator 5-17
remove_widget_toggle_entry procedure
6-20
rep_of function 9-3
INDEX-9
Index
repeat statement 1-17
result_type function 9-3
roll, see geometry
rotation 3-3
ruled surface 8-23
run command 10-4
run queue 10-4
runtime 5-16
Russell’s paradox 9-2
rvsurf shape 8-6
S
sarray 4-11
sarray_create command 4-11
save_my_data procedure 6-26
save_r_current_layout command 6-31
scalar types 4-2, 9-1
sched_verbose global 10-5
Scheduler 10-3
sconst 9-13, 9-14
undefined_sconst 9-14
scope_out script 11-14
screen, writing to 2-16
seg_pose frame 8-11
selector, see shape fields
semaphore 10-6–10-9
semicolon, use of 1-20, 2-4
send_message command 5-3
sequences 1-15
set_body procedure 6-17
set_car procedure 9-5
set_cdr procedure 9-5
set_field_filter command 6-8
set_footer_handler command 6-10
set_handler command 6-31
set_handler procedure 6-7
set_help command 6-28
set_label_icon command 6-31
set_method command 5-25
set_supports_multi function 6-14
shape data type 3-2
shape fields 6-11
creating 6-13
INDEX-10
filtering the selection 6-13
getob mode 6-12
global_browser_kind 6-11
global_getob_kind 6-12
highlighting 6-13
mouse, wiring 6-15
multi-pick 6-12, 6-14, 6-24
multiple-object selection 6-12, 6-14,
6-24
reinitializing 6-14
shape processors 6-11
shape selectors 6-12
types of 6-11
value 6-12
shape fields, see widgets: shape fields
shape, adding 8-9, 8-24
shape_field_has_shape function 6-12
shape_field_shape_value function 6-12
shape_field_string_value function 6-12
shape_selector class 6-12
shape-click tools, see gtools
shorter function 2-10
shorterc variable 2-10
show command 3-17
signal command 10-7, 10-11, 10-12
SIL
arrays, see arrays
class 1-5, 5-2
code
calling C code from 11-22–11-32
compiling 11-2, 11-7–11-11
rbuild command 11-10
remake command 11-10
debugging, see debugging
importing C functions 11-23
interpreted 11-15
recompiling 11-10
definitions 1-19
environment 1-2
expressions 1-2, 1-12
help 2-1
implementation 1-1
interpreted language 1-8
SilTools
interpreter 1-14, 2-6, 2-13, 4-16
statements 1-14
terms 1-12
type system 1-4
uncompiled code 1-2
SIL I/O 2-13
sil_load command 11-5
simulated time 10-1
sleeping tasks 10-4
slider_value function 6-9
SmallTalk 1-2, 1-6, 1-7, 5-23
spatial geometry, see geometry
speedup 6-11
sph type 3-7
sphere, adding 8-23
splice operator 5-17
sspa script 11-7, 11-11
stack 1-23, 11-16
stackvals 1-23
start command 10-4, 11-10
start up 9-19
start up screen 6-33
statements 1-12, 1-14
atomic 1-14
compound 1-14, 1-15
conditional 1-15
constructors 1-15
iteration 1-17
static 9-17
static polymorphism 1-2
std_mk_layout_settings function 6-32
storage 1-23
string type 4-2, 9-1, 11-27
strings 4-12–4-17
capacity 4-16
comparisons 4-14
comparisons, lexicographical 4-14
concat_onto procedure 4-16
conversions 4-14
copy function 4-16
copying 4-15
Developer’s Guide
(7/96)
cstrings 9-17
copying 9-18
creating 9-18
printing 9-18
equal function 4-16
find function 4-16
float2lstr function 4-16
indx operator 4-15
integer_to_string command 4-14
intern constructor 2-20
is_string operator 9-6
length 4-13
lowercase operator 4-13, 4-16
lstr_to_str function 4-16
lstrings 4-15, 4-16, 9-17
match operator 4-14
memory allocation 4-16
mk_lstring function 4-16
mk_static_lstring function 9-19
null-terminated 9-18
operations 4-13, 4-15
real_to_string command 4-14
select function 4-16
setindx operator 4-15
string_to_integer command 4-14
string_to_real command 4-14
substring function 4-16
symbol, changing a string to 2-20
to_string function 4-16
uppercase operator 4-13
struct declaration 11-27
subtype function 9-3
supertypes 9-1
supmodules file 11-12, 11-14, 11-15
syntax 11-13
support only builds area 11-14
sure function 6-27
surface of revolution 8-6, 8-23
symbols 2-19–2-21
concatenation 2-21
data type 2-20
i_tsetq operator 2-21
id 2-20
INDEX-11
Index
Index
Index
id2string operator 2-21
identifiers 2-20
operations 2-20
string, changing to a symbol 2-20
system-defined types 1-10, 4-2, 9-1
T
tag 1-23
task 1-6
tasks 10-1
clock variable 10-3
communication 10-10
control flow 10-2
defining 10-1
delayed 10-4
instantaneous blocks 10-2
instantaneous commands 10-1, 10-3
is_task function 9-3
messages 10-12
pipes 10-10
messages queue 10-10, 10-11
private 10-12
waiters queue 10-10, 10-11
processes 10-12
run queue 10-3
placing tasks in 10-4
Scheduler 10-3
signal command 10-7, 10-11, 10-12
start command 10-4
synchronization 10-6
tclosure type 10-14
temporal commands 10-1, 10-2
defining 10-3
delay command 10-2
notify command 10-3
wait command 10-12
wait operator 10-7, 10-11
tb command 11-16, 11-18, 11-19
tbn command 11-19
tclosure 10-14
is_tclosure function 9-3
tclosure type 10-14
temporal commands, see tasks
INDEX-12
terms 1-12
Text Mode 1-3, 10-4, 11-16, 11-22
tickers 10-6
time 10-1
commands, see tasks
simulated 10-1–10-4
tmethod 5-25
to_cstring function 9-17
to_frame function 3-9
to_localize command A-1
to_text_mode_on_error flag 11-22
to_view operator 5-13, 5-16
token 2-13
tool bar 6-29
tool body 6-16
activating 6-17
binding a mouse button 6-17
deactivating 6-17
tool set 6-15
activating 6-17
binding a mouse button 6-17
deactivating 6-17
tool_body class 6-20
tools (graphical), see gtools
top bar 6-1, 6-5, 11-6
tprint 2-12
trace back 11-16, 11-18, 11-19
tracking function 7-1
tube operator 8-6
tube, adding 8-6
type definitions 2-2
type expressions 9-2
<type>p type 11-27
U
ucap view 6-3
umodules file 11-6, 11-13
unary operators 1-13, 1-14
undefined_sconst 9-14
underflow, method for 5-22
universal type 1-4, 9-7, 11-19
casting to 9-13
Universe coordinate system 3-16
SilTools
uppercase operator 4-13
user-defined types 1-10, 4-2
V
variable declarations 1-21
variables 1-12
declarations 2-3
defining 1-9
free 2-6
global 1-9, 1-19
local declaration 2-4
loop control 1-18, 4-7
variants 2-11, 9-14
version
creating a new 11-10
views 5-9–5-13, 5-17
as_view operator 5-13, 5-16
changing 5-12
definition 1-5
manipulating 5-17
mnode view 6-3
referential equivalence 5-11
remove_this_view operator 5-17
splice operator 5-17
to_view operator 5-13, 5-16
ucap view 6-3
views function 5-11
vision commands 7-1–7-3
vision procedure 7-2
Visual SIL Window 6-6, 6-13, 11-6
W
wait command 10-12
wait operator 10-7, 10-11
waiters queue 10-10, 10-11
while statement 1-17
widgets 6-1
actions 6-17
appearance 6-1
behavior 6-3
buttons 6-7
container 6-1, 6-16
fields 6-8
Developer’s Guide
(7/96)
filters 6-9
graphical tools, see gtools
gtools 6-14–6-18
see also gtools
handlers 6-7
monitored 6-3
monitors 6-20
operations 6-3
panel, see panel
primitive 6-2
shape fields, see shape fields
sliders 6-8, 6-9
text fields 6-8
tool actions 6-17
tool body 6-16
tool set 6-16
ucap view 6-3
widget toggles 6-20
see also panels and mnode class
wireframe models 8-12
WM handlers 6-4
write statement 2-16
writeln, write commands 2-17
X
xyz geometric type 3-12
Y
yaw, see geometry
yaw-pitch-roll, see geometry
Z
Z-Y-Z Euler angles 3-12
zyz geometric type 3-12
INDEX-13
Index
Index