1
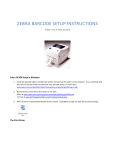
STS HARDWARE INSTALLATION Confidential STS HARDWARE INSTALLATION HARDWARE OPTIONS Several hardware options are available from GigaTrak that can work with STS. Enhanced speed, performance durability, and environment are qualities to consider before choose a handheld terminal or printer. GigaTrak can assist you in selecting alternate hardware options based on screen size, processor performance, durability, keypad design, and more. [Date] Batch Handheld PDAs o The Windows Mobile/CE handheld functions as the data collection device for the check out items. These devices connect to the USB port of your computer and use Microsoft Active Sync (for Windows XP) or Windows Mobile Device Center (for Windows Vista & higher) to communicate. Application files are included for software loading. Mobile licensing is provided with each unit purchased from GigaTrak. Wireless Handheld PDAs o The wireless handhelds act the same as a batch handheld computer, but add in WIFI using 802.11 technologies. Many different manufacturer systems with varying options are available. Zebra Label Printer o The zebra printer uses a standard USB, Serial, or Parallel printer cable. Connect the printer to your PC and power the printer. You must install the printer driver as though it is a standard Windows printer. A print driver CD is included and should assist you with installation. Updated drivers may also be downloaded from the manufacturer’s website. Note: The printing preferences for the Zebra print driver have several configuration options that must be set. Most importantly, you must set up the default “Print Size” to match the label size being used. Also, ensure the setting for “Media Type” is set to Thermal Transfer if you are using a ribbon. Your label design format in STS should then match the size of the label used. See the Printer Driver Configuration section that follows. Labels and Ribbons o There are dozens of labeling options available. Preprinted labels are commonly used to provide a more durable option for labeling parts and equipment. When printing your own, labels are available in varying sizes, material types (paper, poly, etc.), and adhesives. Ribbon types are specific to the label media being used. UPS Power Supplies and Equipment Protection o Through our partnerships, GigaTrak has the ability to offer an extended line of products to protect your computer equipment and ensure years of operation. STS Hardware Installation 1 Confidential ZEBRA PRINTER CONFIG URATION Each Zebra printer provided with our software systems offers excellent performance at a reasonable price. For documentation, Zebra includes both quick installation and a full user’s manual on the CD provided with the printer. The challenge is that print driver setup information is more difficult to find and first-time users need to understand the unique issues to configure the driver properly. CONFIGURATION Zebra’s print driver is standard across most of their desktop and tabletop products. Familiarize yourself with the driver by opening the Printers and Faxes option on the StartSettings Menu and highlighting the Zebra Print Driver. By right-clicking the driver, you can then select Properties and the dialog box will appear as shown. To proceed, select the “Printing Preferences” option button shown on the General tab of the box. Make sure to change the paper size to match that of the label inserted into the Zebra Printer. Note: If the label size you have is NOT listed, you must manually create a user-defined label that matches the exact size being used in the printer! Also, set the “Media Type” option to either Direct (direct thermal labels with no ribbon) or Thermal Transfer (standard labels that require a ribbon). LP desktop printers are direct ONLY. TLP printers can do either mode. Be careful! We recommend that you do not change any other settings! Read the Zebra manual for any questions. Click the “Apply” button to save you setting changes and then exit. For other printer brands and models, GigaTrak will provide supplementary information with the systems provided. [Date] STS Hardware Installation 2 Confidential ZEBRA TLP2824 PLUS PRINTER DRIVER CONFIG URATION Each Zebra printer provided with our software systems offers excellent performance at a reasonable price. For documentation, Zebra includes both quick installation and a full user’s manual on the CD provided with the printer. The challenge is that print driver setup information is more difficult to find and first-time users need to understand the unique issues to configure the driver properly. CONFIGURATION Zebra’s Plus Series print driver is new in 2010 and different than prior drivers. Familiarize yourself with the driver by opening the Printers and Faxes option on the Start-Settings menu and highlighting the “ZDesigner TLP 2824 Plus” print driver. OPTIONS TAB By right-clicking the driver, you can then select the Printing Preferences… option. The screen at the right is displayed. The first tab shown is the “Options” tab. Settings The settings section should be set with the default “No. Of Copies” = 1. Speed and Darkness should be adjusted to improve the print quality of the barcode. A slower speed typically improves the overall quality. Darkness should be adjusted up or down to ensure the print quality is the highest. Too low of setting may produce a faded looking barcode while too high will overheat and cause the barcode lines to bleed over into one another. A good quality barcode should look like the one shown below. GigaTrak *AB12345* AB12345 Paper Format Generally, use the default settings of “inch” and “portrait”. Size It is crucial to set the Size to exactly match the size of label inserted into the printer. The example shown uses the default GigaTrak label size of 2” x 1” as shown in the example above. Remember to change the label size any time you change the roll of labels to a new size of label. Unprintable Area Leave the default settings as they are. All should be set to 0.00 unless a specially formatted label is used. [Date] STS Hardware Installation 3 Confidential ADVANCED SETUP TAB By selecting the Advanced Setup Tab, several other settings are available: Media Settings This option is dependent on the type of label being used. Select the “Direct Thermal” option if the label is specially coated and prints directly without the use of a ribbon. Use “Thermal Transfer” with all labels that require a ribbon when printing. Most label types include rolls with labels separated by a “gap”. Labels with gaps are usually perforated in between each label for easy tear-off. Some rolls of labels are continuous or have a black mark on the back side of the label liner indicating the start of each label. Make sure to set the “Media Types” accordingly. NOTE: LP desktop printers are Direct ONLY. TLP printers can do either mode. Device Options Unless your printer and labels have the need for special settings, leave this alone. Refer to the Zebra Users Guide for further information. Position Adjustment Unless you are having printing alignment issues, leave these settings alone. Refer to the Zebra Users Guide for further information. Cutter Selected models of this Zebra printer are available with an installed cutter. GigaTrak does not use a cutter as a standard printer option. “Never” is typically the appropriate setting. Calibrate The “Calibrate” function is critical when first setting up a printer with a new type of barcode label. Calibrate adjusts the sensor for the gaps between labels to properly sense when the next label is aligned. Should you get more than one label for each print request, it is best to first run calibrate before proceeding further. If you change label types, we recommend that you re-calibrate each time. Be Careful! The printer driver clearly offers many more settings and features. We recommend that you do not change any other settings! Read the Zebra manual for any questions. Click the “Apply” button to save your setting changes and exit. [Date] STS Hardware Installation 4 Confidential WINDOWS CE/MOBILE HA NDHELD INSTALLATION (BATCH) The latest in handheld computer technology adds new power and flexibility in collecting data. Microsoft Windows Mobile and CE platforms are now the industry standard and offer a more standardized platform for all users. “Batch” handheld computers store data in memory and must be docked to a PC workstation to download the data on a periodic basis. For Windows XP, ActiveSync provides the communications between your Windows PC workstation and the handheld computer. Those with Vista and Windows 7 PCs must use Microsoft’s Mobile Device Center. Each of these applications is free from Microsoft’s website. NOTE: Use alternate instructions for other brands and models of the handheld computer terminal. MICROSOFT ACTIVESYNC INSTALLATION (WINDOWS XP) As noted, Microsoft ActiveSync provides the communications between your Windows PC workstation and the handheld computer. Follow the instructions below to perform the installation BEFORE you plug the USB cable into the handheld. Locate a copy of the latest version of ActiveSync for your computer system. The correct version is available from Microsoft’s WEB site. Version 4.5 is the latest from Microsoft as of this printing. Look for the installation file (i.e. activesync_setup.msi) and run it. We recommend that you follow the installation instructions and accept the standard default settings during your install. Leave ActiveSync running to install and connect your handheld computer. NOTE: Some users may connect multiple handheld computers to a single PC. If this is the case, it is best to setup your PC to recognize each handheld as a “Guest”. This avoids having ActiveSync loading shared data from your Outlook and other PC applications. To set all connected handhelds as a Guest, please double-click and run the provided “GuestOnly.reg” file. It will instantly update your system for future connections. MICROSOFT WINDOWS MOBILE DEVICE CENTER INSTALLATION (WINDOWS VISTA OR 7) Locate a copy of the latest version of Windows Mobile Device Center for your computer system. The correct version is available from Microsoft’s WEB site. Look for the installation file (i.e. drvupdate-x86.exe or drvupdate-amd64.exe) and run it. We recommend that you follow the installation instructions and accept the standard default settings during your install. CONNECTING AND INSTALLING YOUR HANDHELD COMPUTER PLEASE, refer to the installation procedures included with your handheld BEFORE proceeding further. Below, we will provide general instructions for installation of the handheld – our standard handheld computer provided with our system bundles. Other handheld options are available and will likely follow similar steps for installation. [Date] STS Hardware Installation 5 Confidential BEFORE connecting the handheld computer to a host USB port for the first time, you may need to install the USB driver provided with the handheld computer on your PC. This will likely be include on a CD-ROM or downloaded from the WEB. Complete the driver installation as instructed during the installation procedure. (NOTE: Some handheld models may not require a driver to be loaded. Refer to the installation instructions.) Connect the USB cable to your PC and the handheld or docking station (if provided). Windows will locate the hardware and complete the installation. Once the connection is complete, you should be able to see the handheld computer on your PC via ActiveSync or Mobile Device Center. [Date] STS Hardware Installation 6