1
User manual
XPhone UC Commander
11/2012
Contents
1
Help
7
2
Introduction
8
2.1
2.2
2.3
2.4
What is XPhone UC?
What is XPhone UC Commander?
System requirements
About the manual
8
8
8
10
3
Installation and start-up
11
3.1
3.2
3.2.1
3.2.2
3.2.3
3.2.4
3.2.5
3.2.6
3.2.7
Installation on a workstation
First start-up by the user
Starting the application without logging on
Filling in the logon screen
Entering the IP address and port
Changing passwords
Storage location for configuration and operational data
Upgrade from an earlier version to XPhone UC Commander
Restricted functions using workstation templates
11
11
11
11
11
12
12
12
13
4
Programme interface
14
4.1
4.2
4.2.1
4.2.2
4.2.3
4.2.4
Views
Tabs
Calls
Favourites
Contacts
Fax, Voicemail, Text message
14
15
16
16
16
17
4.3
Operation
17
5
Making calls with XPhone UC Commander
18
5.1
5.1.1
5.1.2
Dialling
Manual phone number entry
Contact search
18
18
18
5.2
5.3
5.4
5.5
5.6
5.7
5.7.1
5.7.2
5.7.3
5.7.4
Accepting calls
Terminating / disconnecting calls
Transferring / redirecting calls
Display parties on hold
Consultation and swap hold
Conference calls
Expanding a call to a conference
Preparing conferences
Conference calls from favourite lists
Ending conference calls
19
19
19
19
20
20
20
20
21
21
5.8
5.9
5.10
5.11
5.11.1
5.11.2
5.11.3
Call forwarding and Do not disturb
Leaving a message*
Personal calls
Boss/secretary features
Boss/secretary functions for the boss's office
Boss/secretary functions for the secretary
Boss/secretary workgroups with more than two employees
21
21
22
22
23
23
24
5.12
5.13
Multiline applications
Settings for telephony
24
24
6
Presence management
27
6.1
6.2
6.3
6.4
Information on configuration with presence management templates
Using profile templates
Configuring profile templates
Importing Microsoft Outlook / Lotus Notes appointments
27
27
29
32
7
Team features
34
7.1
7.2
7.3
'Favourites' view
Team features
Instant messages
34
34
35
8
Connecting databases
37
8.1
8.2
8.3
8.3.1
8.3.2
8.3.3
8.3.4
8.3.5
8.3.6
8.3.7
8.3.8
8.3.9
8.3.10
Personal address book
Creating new databases
Linking existing databases
Linking XPhone Virtual Directory
Linking Access databases
Connecting ODBC data sources
Linking LDAP directories
Linking Microsoft Outlook contact folders
Linking Lotus Notes address books
Linking MAPI address books
Linking a Windows Address Book (Outlook Express)
Linking Telefonbuch Deutschland
Linking the TwixTel phone book for Switzerland
37
37
37
37
37
38
38
39
39
40
40
40
41
8.4
8.5
8.6
8.7
8.8
8.9
8.9.1
8.9.2
8.9.3
8.9.4
8.9.5
Creating field links
Moving and deleting address books
Searching for address book entries
Free-text search
Full text search
Searching using search criteria
Defining search criteria
Entering search criteria
Manual phone number id (inverse search)
Adapting address book columns
Sorting search results
41
42
42
43
43
43
43
44
44
44
44
8.10
8.11
8.12
8.13
8.14
8.15
8.16
8.17
8.18
8.19
Searching in Das Telefonbuch Deutschland
Searching in the TwixTel phone book for Switzerland
Optimizing the Lotus Notes contact search
Copying contacts to the speed dial list
Scheduled calls
Creating call lists
Copying contact data records to other address books
Creating new address book entries
Copying a new phone number
Printing the address book view
45
45
46
46
46
47
47
47
47
48
9
Caller ID
49
9.1
9.2
9.3
9.4
9.5
The caller ID function
Caller ID via popup
Caller ID via contact data record
Caller ID via tooltip
Deactivating caller ID
49
49
49
50
50
10
Call journal
52
10.1
10.2
10.3
10.4
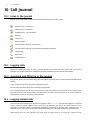
Icons in the journal
Logging calls
Searching and filtering in the journal
Logging missed calls
52
52
52
52
10.5
10.6
10.7
10.8
10.9
10.10
10.11
Dialling from journals
Editing journal entry statuses
Creating alerts and call reminders
Recycle bin
Archiving journals
Compact journal
Keeping journals in Microsoft Outlook
53
53
53
53
53
54
54
11
Fax, Voicemail, Text message
55
11.1
11.1.1
11.1.2
11.1.3
11.1.4
11.1.5
Fax functions in XPhone UC Commander
Composing new faxes
Fax toolbar and editing options
Scheduling
Preview
Sending faxes
55
55
55
57
58
58
11.2
11.2.1
11.2.2
Fax functions in Microsoft Word
Faxing with XPhone UC
XPhone fax merge
58
58
58
11.3
11.3.1
11.3.2
Fax functions in other Windows applications
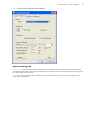
Fax options in other Windows applications
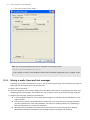
Mixing e-mails, faxes and text messages
59
60
62
11.4
11.4.1
11.4.2
Fax integration with outside applications
Using control characters to send faxes
Example of a fax with control characters
63
63
64
11.5
11.5.1
11.5.2
XPhone UC SMS
Composing new text messages
Text message options
65
65
66
11.6
11.6.1
11.6.2
XPhone UC Voicemail
Remote access
Remote access functions
66
66
67
12
Collaboration
70
12.1
12.1.1
12.1.2
12.1.3
12.1.4
Internal screen sharing
Features of internal screen sharing
Starting sessions for internal screen sharing
Licensing and activating internal screen sharing
Internal screen sharing function
70
70
70
70
71
12.2
12.2.1
12.2.2
12.2.3
12.2.4
FastViewer Instant Meeting
FastViewer Instant Meeting features
Starting sessions for FastViewer Instant Meeting
Licensing and activating FastViewer Instant Meeting
Testing FastViewer Instant Meeting
72
72
72
73
74
13
XPhone UC Settings
75
13.1
13.2
13.3
13.4
13.5
13.6
13.7
13.8
13.9
Call forwarding
Voicemail greetings
Voicemail settings
Fax
Text message
Mailbox
Changing passwords
Language
Logging off
75
75
76
77
77
78
78
78
78
14
XPhone – Mobile Control
79
14.1
14.2
14.3
Mobile line in XPhone UC Commander
Mobile client start-up
Mobile Client settings
79
79
79
15
Combining CTI with other applications
82
15.1
15.2
15.2.1
15.2.2
15.2.3
15.2.4
15.2.5
15.2.6
Dialling via URL log handler
XPRun
Registering / Deregistering
Info dialogue
Making calls
Compact view
Call manager
Forwarding another protocol handler's call to XpRun
82
82
82
82
82
83
83
83
15.3
15.4
Rules engine
Hotkey features
83
84
16
CTI messaging wizard
86
16.1
16.2
16.3
16.4
16.5
16.6
16.7
16.8
16.9
16.10
Function of the messaging wizard
Activating messaging features
Creating custom messaging templates
Transferring your contact data to messaging templates
Installing sample templates
Modifying existing messaging templates
Removing messaging templates
Accessing messaging features
Notification of a missed call
E-mail call alerts
86
86
86
87
87
87
87
88
88
88
17
Integration in Microsoft Outlook
89
17.1
17.2
17.3
17.4
17.5
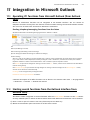
Operating CTI functions from Microsoft Outlook (from Outlook 2010)
Starting search functions from the Outlook interface from Outlook 2010)
Accessing Microsoft Outlook elements from XPhone UC Commander
Journaling in Microsoft Outlook
Starting the XPhone client and Microsoft Outlook simultaneously
89
89
90
91
91
© Copyright C4B
All rights retained.
This manual, or parts thereof, may not be copied or distributed in any form or for any reason without
express written permission from C4B Com For Business AG. The information in this documentation may
be subject to change without prior notice.
No guarantee. This manual is provided to you in its present form. C4B Com For Business AG does not
accept liability for the exactness or usage of this manual. The user has sole responsibility for the use of
the manual and the information it contains. The manual may contain technical or other inaccuracies or
typographic errors.
This manual is based on: XPhone Unified Communications 2011, as of November 2012
Microsoft®, Windows®, Word®, Excel®, Access® and Outlook® are registered trademarks of the
Microsoft Corporation.
Notes® is a registered trademark of the Lotus Development Corporation.
HICOM®, HiPath®, Optiset® and OptiPoint® are registered trademarks of Siemens AG.
Das Telefonbuch Deutschland: Copyright © TVG Telefon- und Verzeichnisverlag GmbH & Co. KG
TwixTel Telefonbuch Schweiz is a product of Twix AG
XPhone® is a registered trademark of C4B Com For Business AG.
Other hardware and software names referred to in this documentation are trade names and/or brands
of the respective manufacturers.
HELP
7
1 Help
The operation of XPhone UC Commander is intuitive and has been designed as simply as possible –
should you however require help for a specific action, assistance is provided by the online help. Cross
references to related subjects and additional information are set up in the form of hyperlinks, enabling
you to go straight there at a click of your mouse. Explanations, practical tips, notes, warnings and
examples are highlighted by coloured icons.
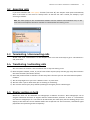
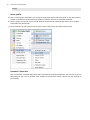
Searching for a subject in the contents
a) Go to ?.
b) Select Contents.
c) A split window opens. The left-hand view displays the table of contents.
d) Select the chapter that relates to your search.
e) The chapter contents appear in the right-hand window.
f) Use the arrow keys to scroll through the help.
Searching for a subject in the index
You can enter search terms in the index function and then open the corresponding entries.
a) Go to ?.
b) Select Index.
c) A split window opens. The left-hand view displays the index in alphabetical order.
d) Enter your search term in the field.
e) Press Return to confirm. The explanation relating to your search term appears in the right-hand
window.
Context help
Context help is a context-sensitive function that displays explanations on the individual areas of the
XPhone UC Commander window.
a) Go to ?.
b) Select Context help.
c) A question mark appears next to the mouse cursor. Go to the section of the XPhone UC Commander
window for which you require information.
d) Click on this area. A tooltip containing the explanation appears.
8
INTRODUCTION
2 Introduction
2.1 What is XPhone UC?
XPhone UC provides a range of communications solutions for mid-sized and large businesses in one
single product. The XPhone UC solutions can be used individually or in combination. All the products are
equipped with the XPhone Server integrated telephony and administration software by default. The
following products are currently available:
XPhone UC Commander for the provision of UC functions on the Windows desktop
XPhone UC Team Panel for perfect team communication and wherever a good overview of the team is
required.
XPhone UC Web for using CTI functions via a web interface. A special variant permits mobile access via
your smartphone with an Internet connection.
Key information
The XPhone UC products offer a large range of functions by default. You can only take full advantage of
these functions if they are supported by the PBX and telephone driver used by your company. In some
cases, you may not be able to use all the functions described here.
Functions that are not available are normally hidden automatically.
Note: some functions are only available in combination with other XPhone UC products. These
functions are indicated by an asterisk (*).
2.2 What is XPhone UC Commander?
XPhone UC Commander is part of the XPhone UC product family, which combines communication
solutions designed to meet the requirements of mid-size and large companies.
XPhone UC Commander is a client server CTI application that can control all telephone functions through
an intuitive graphical user interface. Powerful interfaces make it possible to access all linked databases
directly. The system identifies callers the moment the phone rings, and presents all the caller data on
your monitor before you even take the call.
As an option, XPhone UC Commander can manage the dispatch of fax and text messages as well as the
receipt of voicemail.
There are numerous additional functions that simplify daily work processes. The system can be used to
streamline and improve internal communication processes and communication with customers and
partners. The software also has an integrated rule engine that can automate other applications and
routine tasks triggered by telephone events or execute them as a custom command. The XPhone UC
Commander messaging functions are designed to smoothly integrate the software into daily work
processes.
XPhone UC Commander can also be used in combination with other XPhone UC products, e.g. with
XPhone Virtual Directory.
2.3 System requirements
XPhone UC Commander offers a large range of functions by default. You can only take full advantage of
these functions if they are supported by the PBX and telephony driver used by your company. In some
cases, you may not be able to use all the functions described here.Due to the way XPhone UC
INTRODUCTION
9
Commander is programmed, functions are hidden if they are not supported by your driver or PBX
configuration.
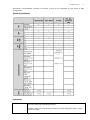
System requirements
Annotation
Clients
4) Microsoft Office Word XP / 2003 / 2007 / 2010 and Lotus Notes 6.x / 6.5 / 7.x / 8.x
for cover sheet and messaging functions.
Outlook / Notes: for CTI integration (optional) and UM integration (other e-mail
clients via SMTP).
10
INTRODUCTION
PBX
XPhone UC solutions are suitable for use with all PBX systems offering a CTI interface which is compatible
with the XPhone UC Server. The functions provided in the clients are also restricted by the range of
telephony functions available in this CTI interface. For an overview of compatible PBX systems, see
www.c4b.de http://www.c4b.de.
2.4 About the manual
Structure
This manual guides you through the functions provided by XPhone UC Commander. Individual
procedures are listed step by step, enabling you to follow the instructions immediately. There are also
hints on how to get the best out of different functions.
Formatting
Functions, buttons, dialog windows and menus are printed in coloured letters, making them easy to
recognize. Icons from the user interface are indicated by <<>> where they appear in the text.
Chapters marked with an * describe the combined use of several XPhone Unified Communications
solutions.
INSTALLATION AND START-UP
11
3 Installation and start-up
3.1 Installation on a workstation
The products are normally installed centrally by the administrator. For the details of this process, see
the XPhone UC manual for administrators.
Local installation at the workstation is also possible. Please note that to install locally, you need
administrator rights for the PC in question.
3.2 First start-up by the user
The user logs on to the workstation with a password and starts XPhone UC Commander / XPhone UC
Team Panel for the first time. The following options are available, depending on the existing IT
environment:
3.2.1
Starting the application without logging on
The XPhone UC Commander / XPhone UC Team Panel interface is pulled up and the application is
immediately ready for use. This is the case if the administrator has activated integrated Windows logon
on XPhone Server. For this to work, the user must log on to a Windows domain when starting the PC.
3.2.2
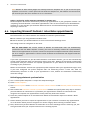
Filling in the logon screen
Under certain circumstances – if there is no Windows domain available for user authentication, for
example – the administrator sets up the integrated XPhone Server logon method. In this case, a logon
screen appears first. The user has to enter different types of information depending on the system
configuration:
Enter name and password: If your user data has already been set up in XPhone Server, you only need
to enter your logon name and password. You can get this information from your administrator. The
logon process is repeated each time the application is started.
Create your own user account: If your user data has not yet been entered on the server and if the
administrator has activated plug and play logon, you can create your own user account. If the
administrator has activated plug and play mode, you will see the additional New user... button. Click
this button to enter your user account data. You will then face various scenarios that depend on the
environment used in your company.
If your administrator has planned for you to log on to XPhone Server via your Windows user logon,
you only need to enter your first name and last name.
If the administrator also allows access to XPhone Server from outside a Windows domain (this
could require the use of XPhone UC Web, for example), activate this check box and enter the logon
name you wish to use and a password of your choice.
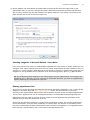
Hint: if using XPhone UC Web, you can also use a Windows domain logon if your company uses IIS
(Internet Information Server) as its web server (instead of the XPhone web server) and Microsoft
Internet Explorer. Ask your administrator for more information.
If the administrator only plans to use the integrated XPhone Server logon, you need to generate a
user account by entering your first name, last name, the logon name you wish to use and a
password of your choice.
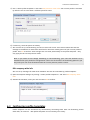
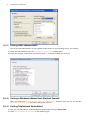
3.2.3 Entering the IP address and port
Generally, the administrator specifies an IP address that is automatically preassigned to your
workstation. You need this IP address to connect the XPhone UC Commander and the XPhone UC Server.
12
INSTALLATION AND START-UP
If no address has been preassigned or if you wish to log on to another CTI server, you have to enter the
IP address and port manually. In this case, contact your administrator. To retrieve the entry screen
directly, click on the XPhone UC logon icon
in the icon tray at the bottom right of your screen.
3.2.4 Changing passwords
If the administrator specified a password, you should change your password when you first start up the
product for security reasons.
a) To do this, click on the XPhone UC logon icon
in the icon tray at the bottom right of your screen.
b) Enter your new password and confirm it by entering it again.
Note: if you have forgotten your password, the administrator can reset the settings on XPhone UC
Serve to reactivate your original password. Please note that if your are using XPhone UC Commander
with the Windows domain logon, there is no need for a separate authentication on the server.
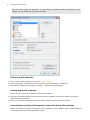
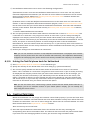
3.2.5
Storage location for configuration and operational data
XPhone UC Commander uses the following directories to store the configuration locally:
Local application data for all users, e.g.:
C:\Documents and Settings\All Users\Application data\XPhone40
Templates subdirectory: contains all messaging template files (letter, fax, e-mail)
User's application data directory
Call journal file: xphone40.CDB
Personal address book: Personal address book.mdb.
Control file for rules: (Tools->External applications) xphone.rdb
Index files for call number ID (.idx file extension)
Program directory, e.g.:
C:\Program Files\XPhone40
XPhone UC Commander programme files
Common files, e.g.:
C:\Program Files\Common files\C4B
Program components required by several products.
3.2.6
Upgrade from an earlier version to XPhone UC Commander
If an older version is already installed on the workstation, you should only uninstall it before installing
XPhone UC Commander if you do not want to import the earlier configuration for XPhone UC
Commander.
To upgrade the product, all you need to do is execute the XPhone UC Commander setup program on the
workstation. You need administrator rights to do this. You do not however need to enter any license
numbers at the client as licensing is controlled by XPhone UC Server.
If the administrator has not set up any server-based configuration, the configuration data from a
version already installed is imported the first time the program is started. The older version can then be
uninstalled.
Rollback:
If you wish to continue to use the previous version, uninstall both XPhone UC Commander and the
previous version. Install the previous version again. If you manage fax and voicemail messages in your
client, you will then have to change the name of the fax directory. Please note that all other programs
such as XPhone CTI Team V3 or XPhone UC Team Panel need to be uninstalled first before the previous
INSTALLATION AND START-UP
13
version is re-installed.
Rename directory C:\Users\<User>\AppData\Local\XPhone40 as C:\Users\<User>\AppData\Local\XPhone30.
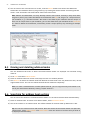
3.2.7
Restricted functions using workstation templates
XPhone UC 2011 makes it possible for the administrator to allow or block certain functions for users in
the applications. This means that fewer functions may be available for the user than actually installed
or used in a previous version of XPhone UC.
14
PROGRAMME INTERFACE
4 Programme interface
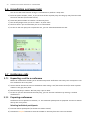
4.1 Views
Fullscreen
The user can select either fullscreen or compact view. The fullscreen is divided into
Call manager (top left)
Info manager (lower right)
View for call journal, favourites, contacts, fax / voicemail / text message
Depending on the license, more or fewer views can be available.
Compact view
XPhone UC can also be used in a reduced view, i.e. compact view. Depending on the line status, all
telephone functions and additional functions are available in context. The advantage of this view: the
window is small and does not distract from the running application, but all telephony functions are
immediately available. You can also find contacts in this view, and a compact journal lists the most
recent 20 calls.
PROGRAMME INTERFACE
The views are changed using the designated buttons
changed using hotkeys (default F11 and shift F11).
and
15
. Alternatively, the view can also be
4.2 Tabs
Several tabs are visible in the right-hand section of the window in the full view:
a) Calls
b) Favourites
c) Contacts
d) Fax, voicemail, text message
Tip:
If you click New messages in the Info Manager, the relevant tab for the corresponding context
opens.
Example: You have received new voicemails and click "2 new voicemails" in the Info Manager and
16
PROGRAMME INTERFACE
the Fax, voicemail, text messagetab opens automatically.
4.2.1
Calls
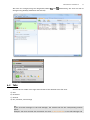
The call journal is shown in the Calls tab.
All calls taking place in the past 90 days are shown in the default view. You can execute actions for
individual entries by marking either the contact followed by using the Call, Contact, Actions buttons or
by calling the requisite action directly via the context menu (right-click).
The calls which are currently visible are shown in the top right-hand area. This is All calls by default.
The journal display can be filtered accordingly using this drop down list so that only Pending calls,
Completed calls, Missed calls or the Recycle bin are shown, for example.
Use the search field on the right to browse the call journal. The search is performed even as you type
with the result that you may not even need to enter the full name or phone number.
Use Tools->Options to change the configurations for the call journal if necessary to enable calls to be
deleted after 30 days, for example.
4.2.2
Favourites
The Favourites view contains contacts with whom communication is frequent. The view comprises:
Contacts in one of your teams: Teams are formed by the administrator and cannot be edited by the
user.
Myfavourites: contacts you have added to the Favourites view from one of your address books. Please
note that you can only add contacts entered in an address book. The contact data is imported to the
view when the contact is added. The display data is re-synchronized with the address books when
you execute the Data synchronization function which can be found under the Favourites button.
Recent contacts: this display group is automatically filled with the last 50 contacts whose phone
numbers can be assigned to a contact and who are not in one of your teams or My favourites.
Contacts can be added to My favourites from various other views:
Journal if the caller has been identified.
Contact view
Call manager if contact data is available.
Contacts are added via the Add to favourites menu item in the contact's Context or Action menu.
Tip: Drag & drop the contacts into the desired group in the Favourites view. Please note that
contacts cannot be added to teams.
4.2.3 Contacts
The Contacts tab enables you to search for contacts in all or certain linked address books and shows
them accordingly. Search criteria can be defined on the basis of which the address books are searched.
You can specify the columns to be shown and in which order. Change the default display by
right-clicking a column header followed by selecting the corresponding action.
PROGRAMME INTERFACE
17
See Data base connection "Connecting databases" starting from page 37 for a description of how to
create or link new address books.
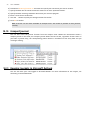
4.2.4 Fax, Voicemail, Text message
Incoming voicemails and faxes as well as outgoing text messages and faxes are managed in the Fax,
voicemail, text message tab. You can also create and send new faxes and text messages here. Thanks to
the icons, it is obvious at a glance what type of UM message is involved. Only certain messages can also
be shown via the "All messages, inbox, outbox, archive" filter.
A detailed description of the UM functions is available under Unified Messaging functions "Fax,
Voicemail, Text message".
Note: Under certain circumstances, your administrator may lock some functions with the result that
you may not avail of all of the functions described.
4.3 Operation
You can operate the compact view (call manager) using
keyboard commands:
Use the arrow keys to move to functions on the right or left. Use the up and down arrow keys to
switch between areas within the window. Press the return key to activate a function.
ESC always jumps back to the call manager entry field.
Clicking F2-F5 switches the views.
If a view is activated via the TAB, the display list is active. Use the scroll wheel for scrolling. Typing
characters triggers a focus on the entry field. Press ESC to exit the entry field. The focus returns to
the list. Pressing ESC again triggers the same action as in 2.
You can navigate with TAB inside the views.
Mouse click: All functions can also be triggered by mouse click.
When the application is started, the call manager entry field is always active.
Tip: The selected function is displayed and explained at the bottom of the window. Tool tips also
explain the selected function.
Changing views / Calling applications
You can set a default view.
a) Open the Tools menu item and select Options.
b) Go to General and use the Preferred view drop down menu to select the default view.
Telephony functions, advanced functions
For the telephony and advanced function icons and their meaning, see the XPhone UC short guide.
18
MAKING CALLS WITH XPHONE UC COMMANDER
5 Making calls with XPhone UC
Commander
5.1 Dialling
5.1.1
Manual phone number entry
You can use the keyboard to enter phone numbers in the entry field of the call manager (compact
view). Press the return button or click the green receiver to dial the number.
5.1.2
Contact search
It is far more convenient to search for the phone number in the connected databases and then dial
automatically.
a) Enter the name or part of the name of the recipient into the entry field of the call manager (compact
view). You do not need to move the cursor to the entry field. If you are viewing the telephony window,
you can begin entering the number.
b) Press the enter button or click <<Search>> to start the search. The action dialog opens.
c) The search results are displayed directly in the window. If a contact has more than one phone number,
you can use the arrow keys on your keyboard to scroll through the numbers.
d) If the search results contain more than one contact for your search term, you can
use the arrow keys to scroll to the required search result or
click on the number next to the XPhone UC Commander entry field; this number is a link and
shows the total number of contacts found. The link takes you to the search window listing all the
search results.
e) Select the required number from the search results and begin dialling by clicking the number or
<<Dial>>.
f) Click <<Delete>> to remove the search term from the entry field. You can also use the arrow keys on
your keyboard to activate this button.
For information on finding a contact in fullscreen view, see Searching for address book entries.
Hint: If you do not want to start the call immediately, you should activate Prepare before closing
the window. The phone number is transferred to the entry field and you can dial at any point in
time. You can also prepare several calls.
MAKING CALLS WITH XPHONE UC COMMANDER
19
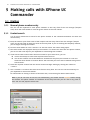
5.2 Accepting calls
If you have activated the Caller popup function (see Caller ID), the compact view opens automatically
when a call comes in. You can use <<Accept call>> to take the call. This is useful, for example, if you
are using a headset.
Hint: The caller popup is the recommended default view for inbound and outbound calls, as this
view makes all telephone functions available in context before and during a call.
5.3 Terminating / disconnecting calls
To end a call, click <<Disconnect>> in the compact view or use the arrow keys to go to <<Disconnect>>
and press enter.
5.4 Transferring / redirecting calls
You can redirect or transfer a call to someone else at any time during a call.
a) Enter the phone number, name, or part of name of the required party into the grey entry field and start
the search function (see Contact search).
b) Select the phone number to transfer it to the entry field. Of course you can also select external phone
numbers.
c) The call only begins once you click <<Redirect call>> or press enter.
d) The first caller is put on hold while you are dialling or connecting.
e) You can also redirect your party without speaking to the agent you are redirecting to.
5.5 Display parties on hold
XPhone UC users can be combined into workgroups on XPhone UC Server. These workgroups can be
assigned additional functions to support internal communication processes. If there is a consultation
call within a workgroup or if a call needs to be redirected, the called party sees the waiting party in the
display at the same time as her coworker before she accepts the call. This saves time, streamlines agent
preparation and provides greater transparency.
20
MAKING CALLS WITH XPHONE UC COMMANDER
5.6 Consultation and swap hold
You can use the same function to begin a consultation or perform a swap hold.
a) Enter the phone number, name, or part of name of the required party into the grey entry field and start
the search function (see Contact search).
b) Select the phone number to transfer it to the entry field.
c) The call only begins once you click <<Dial>> or press enter.
d) The first caller is put on hold while you are in consultation.
e) As soon as the new party has accepted the call, you can alternate between the calls.
5.7 Conference calls
5.7.1
Expanding a call to a conference
XPhone UC Commander enables you to initiate and process conference calls easily. You can expand a call
to a conference call at any time.
a) Use the search function to select an additional caller during a call (see Contact search) or enter a phone
number in the grey entry field.
b) Dial the new party's number. The first party is put on hold.
c) As soon as you are connected to the new party, you can start the conference by clicking <<Initiate
conference>>.
5.7.2
Preparing conferences
Conferences can be planned in advance, i.e. the individual participants are prepared and can be dialled
one by one in any order.
Selecting individual participants
a) Find the desired participant (see section on Contact search).
b) Activate the Prepare function to enter the number in the entry field. The call is not started.
MAKING CALLS WITH XPHONE UC COMMANDER
21
c) Now click on <<Prepare call>>. A second entry field opens via which you can search for the next
participant.
d) Start participant selection in any order.
Entering several participants from the journal or address book list
a) Go to the XPhone UC Commander full view (see section on Operation) and open the respective journal,
contact or favourites view.
b) Select the respective participants by holding the CTRL key and clicking from a journal or address book
view.
c) Use the drag & drop function to enter your selection in the area under the entry field.
d) Start participant selection in any order.
5.7.3 Conference calls from favourite lists
If you have recurring conferences with the same participants, you can save these in your favourites list.
You can then call them at any time without having to find and select the participants again.
a) Go to the <<Favourites>> view. Drag individual contacts or an entire group into the call manager.
b) Start participant selection in any order.
5.7.4 Ending conference calls
Removing individual participants from a conference call
You can disconnect individual participants by clicking <<Remove conference participant>>. This way,
you always have an overview of the participants still taking part in the conference call.
Ending the complete conference call
Clicking on <<End conference>> ends the conference call.
5.8 Call forwarding and Do not disturb
You can also forward calls to other participants, for example if you are away. You can restrict call
forwarding to internal and/or external callers. If you do not want to be disturbed for a period of time
during the working day, you can use the 'Do not disturb' function. Callers hear an busy tone while your
line is still free.
a) Click on <<Call forwarding/Do not disturb>>.
b) Specify the calls you wish to be forwarded or activate Do not disturb.
c) Specify the number to which you wish to forward calls. The drop down list shows the most recent
forwarding destinations.
Hint: You can also forward calls to other external numbers, e.g. your home office. This will not
result in any extra charge to the caller.
5.9 Leaving a message*
You can change your presence status in XPhone UC Commander and leave messages.
The advantage: you can check a coworker's location and availability at any time without contacting
them directly. Callers can get reliable updates about the availability of agents who are out of the office.
22
MAKING CALLS WITH XPHONE UC COMMANDER
This is how to enter a company message:
Click the header above the call manager and select <<Company-wide info>>. This information can be
seen by all of your colleagues in the company and remains valid even after the date has expired.
How to change your presence status
Select a presence profile. The presence profile changes your status and switches to call forwarding if
necessary.
Your colleagues will then see the message in the CTI client when a call is forwarded or picked up or
when the person is called. To show a message, you may need to activate the detailed view for the call.
Do this by clicking the
symbol in the call display.
5.10 Personal calls
If personal calls are usually made with a different prefix code at your office, you can make separate
settings for that code. The administrator must have configured the corresponding prefix code in the
PBX.
a) Open Extras -> Telephone.
b) Enter your prefix code for personal calls in the Dialling parameters. These calls are now marked as
personal calls in the journal and are then no longer logged anywhere else, e.g. in the Microsoft Outlook
journal (see Journaling in Microsoft Outlook).
c) Activate personal calls by clicking <<Personal call>>.
5.11 Boss/secretary features
The boss-secretary working relationship walks a fine line between confidentiality and transparency in
order to deliver optimal results without hassle. This can be done easily with the special boss/secretary
features provided by XPhone UC Commander. To set up a boss/secretary configuration, the employees
have to be created in boss/secretary workgroup on XPhone Server (see the XPhone Unified
Communications manual for administrators).
MAKING CALLS WITH XPHONE UC COMMANDER
23
Note: A boss/secretary workgroup configured on XPhone Server can include more than one boss or
secretary as required. It is also possible to belong to more than one workgroup at the same time.
5.11.1
Boss/secretary functions for the boss's office
See secretary's calling status
Bosses can see not only their own line but also a compact view of the secretary's line, including the
current calling status (free, busy, internal/external call) and any active call forwarding. Bosses cannot
see who the secretaries are currently talking to.
See forwarded calls
If the boss line is forwarded to the secretary, the boss workstation displays all incoming calls and
identifies the callers. The boss can pick up calls that have not been accepted by the secretary. Once the
calls are taken by the secretary, they cannot be picked up. However, the caller is still identified at the
boss workstation. Answered calls are recorded in the boss workstation journal and flagged accordingly.
Connection: see parties on hold before accepting call
(see Display parties on hold)
Configure call forwarding for secretary
If secretarial tasks are to be performed by a third person (illness, holiday, etc.), the boss workstation
can be used to set up call forwarding for the secretary and store a message*, if necessary. To do this,
follow the instructions in in Call forwarding and Do not disturb.
Note: the boss/secretary function can also be combined with the multiline function for boss
workstations with more than one telephone. In this case, it is also possible to carry out confidential
calls without the secretary seeing that the boss is on the telephone.
5.11.2
Boss/secretary functions for the secretary
See boss's calling status
The boss's line is also displayed in the CTI client at the secretary's workstation. In addition to the calling
status, the client also shows whether calls are being forwarded to the secretary or to another extension.
Detect forwarded calls
If an inbound call is intended for the boss's line, the system will not only display the caller data
displayed, but also information about the original called party (see Caller ID via popup).
Discretion: calling party not visible for calls to the boss
The secretary cannot see whe the boss is talking to during call signalling or ongoing calls. If the boss
makes a consultation call to the secretary during a call, the secretary does not see the party on hold.
This ensures maximum confidentiality.
Configure call forwarding for the boss's line
Call forwarding can be set for the boss's phone from the secretary workstation along with a message*.
To do this, follow the instructions in Call forwarding and Do not disturb.
Note: if call forwarding has been set, all calls made to boss/secretary workgroup members are
24
MAKING CALLS WITH XPHONE UC COMMANDER
displayed in the call journal to seamlessly track every call made during the member's absence.
5.11.3
Boss/secretary workgroups with more than two employees
A boss/secretary workgroup can have any number of bosses and/or secretaries.
Secretary-secretary authorizations
Secretary employees see coworkers' calling statuses and can configure call forwarding and leave
messages* for one another. Waiting parties are displayed before calls are transferred in consultation
calls and regular transfers.
Boss-boss authorizations
Bosses see the calling statuses of all their peers. However, they can only set call forwarding and leave
messages* for their own line. Waiting parties are not displayed in consultation calls and transfers.
Hint: additional XPhone UC Commander functions improve communications between the boss's
office and the secretary. For example, if a secretary picks up a call for the boss's office, he or she
can pull up the boss's calendar and enter an appointment or write an e-mail call alert (see
Integration in Microsoft Outlook and CTI integration in Lotus Notes).
5.12 Multiline applications
XPhone UC can control up to five telephones simultaneously from one workstation. All the CTI features
are available in the Commander graphical user interface for every telephone. Calls on all lines are
recorded in the journals and users can see at any time which call is being made on which line. Together
with a Mobile Control license, certain mobile devices can also be operated using the multiline function.
Individual lines can be assigned a particular confidentiality status if required so that these lines are not
visible to any other users in the workgroup, such as another team member or a secretary. These settings
must be made on the XPhone UC Server.
When using the boss/secretary function, additional lines are shown in the call manager for which only
restricted control and journal functions are available for security reasons.
Tip: The entry field for the contact search is only visible for one line. Clicking the name of the line
switches the entry field.
NB: The top line shown in the call manager is of special significance. All control functions (e.g.
dialling) for which no line info is possible are performed on this line. For example: Hotkey dialling,
Dialling from external applications (Outlook/Notes), Clicking on hyperlinks (e.g. in journal and
contact view). The top line is referred to as the primary line. It can be selected via the Telephony
settings function.
5.13 Settings for telephony
Special settings can be specified for telephony via the call manager. The top line displays a combined
receiver/arrow symbol:
MAKING CALLS WITH XPHONE UC COMMANDER
25
Use this symbol to go to the following settings:
Primary line selection
The primary line is the line for which all control functions are executed when the line cannot be
indicated, e.g. hotkey dialling, dialling from external applications (Outlook/Notes), clicking on
hyperlinks in the journal / in contacts etc.
The primary line is always shown as the top line. Select the device for the primary line with which you
prefer to work in a certain situation (e.g. in the office / home office / on the road).
Certain functions such as the forwarding function dependent on presence status, for example, do not
work on the primary line but rather on a user's so-called main line. The main line is marked by an
asterisk in the selection list. The user cannot change this line - only the administrator can do this. The
primary line is normally the first line assigned to a user in the server configuration.
Set up call via company
The primary line can be used to set up calls to any phone if allowed by the PBX (transit communication).
The person called is shown the phone number of the main line (usually the main line is on your office
phone, i.e. its number is displayed).
Do this by entering any phone number. The main line dials your number first. As soon as you answer,
the connection is set up with the desired party. If you call from one external connection to another, two
trunk lines are occupied for the duration of the call.
Incoming calls to your main line are displayed in the call manager and can be picked up by clicking the
connection currently in use.
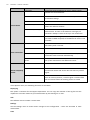
Settings for mobile phones
If you use the XPhone Mobile Control product, additional settings are shown here.
Caller pop-up on mobile phone - For calls to mobile : A pop-up is to be displayed for incoming calls
on your mobile phone (caller ID via XPhone Virtual Directory).
Caller pop-up on mobile phone - For internal calls to office phone: Internal calls to your office phone
(main line) are shown in parallel on your mobile phone (twinning function). Caller ID is via XPhone
Virtual Directory. If your PBX is enabled correspondingly, the call can be transferred from your office
phone to your mobile phone.
Caller pop-up on mobile phone - For external calls to office phone: Similar to above but only for
external calls to your office phone.
Show mobile phone journal in XPhone UC: The mobile phone journal is automatically scanned and
displayed in the XPhone UC applications journal.
26
MAKING CALLS WITH XPHONE UC COMMANDER
PRESENCE MANAGEMENT
27
6 Presence management
XPhone UC shows you immediately when and whether other team members are available. Each possible
presence status has profile templates which show you which colleagues are unavailable, have a
meeting (and how long it lasts), are on holiday or have just left their workstation for a few minutes.
XPhone UC specifies various profile templates by default which you can edit or extend to include
additional profiles. You can also set up rules to automatically activate your profile templates when
certain conditions are met. Learn more on how to Configure presence profiles.
If you enter your meetings in Microsoft Outlook or Lotus Notes, you can synchronize XPhone UC with your
calendar. Your meetings are then automatically imported to XPhone UC. This can be done in all cases or
only in special cases. Learn more on how to Synchronize Microsoft Outlook/Lotus Notes calendar.
6.1 Information on configuration with presence management
templates
Please note that your administrator may have restricted the configuration settings described below.
The administrator can configure the calendar synchronization and the profile templates that are
available to the user, which means that users can automatically get settings from XPhone Server. It is
also possible to disable individual user settings.
6.2 Using profile templates
XPhone UC Team Panel comes with nine default profile templates for indicating your current presence
status:
<<Available>>
<<Unavailable>>
<<Meeting>>
<<Be right back>>
<<Break>>
<<Off Sick>>
<<On Holiday>>
<<Out of Office>>
<<Do Not Disturb>>
<<Home Office>>
Each of these profiles can be supplemented by additional time information, e.g. 30 minutes or 2 hours.
XPhone UC Commander automatically returns to its original state when this period ends.
All the members of your team(s) can see your presence status and the selected time period.
Note: Your administrator can restrict the available profile templates and time periods in the central
28
PRESENCE MANAGEMENT
settings.
Select profile
a) Click <<Select profile template>> on the left or uppermost edge of the team panel or click the presence
section in the XPhone UC Commander to display a selection list with all available templates.
b) Select a profile and specify a time period. XPhone UC Commander automatically returns to its original
state when this period ends.
c) All the members of your team(s) can see your presence status and the selected time period.
Presence / Team info
You can also add call forwarding and/or team messages to the profile templates. This is useful if you are
forwarding all your calls to another team member, but still want certain, special calls put through to
you anyway.
PRESENCE MANAGEMENT
29
a) Click <<Select profile template>> and select Edit presence / team info. Your current profile is activated
by default. You can also select a different presence status.
b) If necessary, enter the period of validity.
c) You can also set up call forwarding and save a team info as well. Your team members will see this
message in the XPhone UC Team Panel interface for the entire validity period of your current presence
profile. Press OK to confirm. These changes are not saved permanently in the profile template - they
only apply for the current presence status.
Note: If you select Do not change forwarding in Call forwarding, your calls will continue to be
forwarded after your profile has changed back. Select one of the other call forwarding options if you
only want your calls to be forwarded while the current presence profile is active.
Edit company-wide info
You can set up messages for other team members that are not controlled by profile templates.
a) Open the template dialogue by clicking <<Select profile templates>> and select Edit company-wide
info.
b) Activate the checkbox, enter your text and select OK to confirm.
6.3 Configuring profile templates
Profile templates can be customized by automatically associating them with call forwarding and/or
team infos, for instance. New profile templates can be created just as easily.
30
PRESENCE MANAGEMENT
Note: You can change the behaviour of your presence templates either permanently in this
dialogue, or only temporarily in Edit active profile.
Resorting profile templates
a) Click <<Select profile template>> and select Profile templates.
b) Use the arrow keys to change the order in which the profile templates are displayed.
c) Remember to confirm your changes by clicking OK before exiting the dialogue.
Creating new profile templates
You can create an unlimited number of new profile templates.
a) First select a default template on which to base the new template, and then click New. This will not
delete the default template.
b) Give your new profile template a name and define it more precisely as described below.
Automatically controlling call forwarding / team infos with profile templates
XPhone UC Commander helps you improve your availability in many different ways: profile templates
can be linked with call forwarding and team infos.
PRESENCE MANAGEMENT
31
Profile templates can be automatically activated depending on certain user behaviour.
Profile templates are controlled via the appointments in your Microsoft Outlook or Lotus Notes calendar.
Option 1: Linking profile templates to call forwarding and/or team infos
You may want to link certain profile templates to call forwarding and/or a message.
Example:
If you don't want to be disturbed, you can have a colleague take all your calls. You simply associate the
<<Do Not Disturb>> profile with call forwarding to your colleague's phone.
a) Open the template dialogue by clicking <<Select profile template>> and select Profile templates.
b) Now select the Do Not Disturb profile in the Profile Templates dialogue.
c) Click Call forwarding and configure the call forwarding.
d) You can also save a message to be shown to colleagues when you don't want to be disturbed.
e) Confirm by clicking OK.
Option 2: Activating profile templates automatically
You can simplify things by configuring your profile templates (with call forwarding and/or team infos) to
activate automatically whenever certain conditions are met.
Example:
You want call forwarding to your voicemail box whenever you shut down your PC and leave the office.
Then, when you come to the office in the morning and boot up your PC, you want call forwarding to
turn off again automatically. You want the call forwarding to voicemail to be in place even when you're
away from the office for a longer period of time.
a) Open the template dialogue by clicking <<Select profile template>> and select Profile templates.
b) Go to Activate profiles automatically, and click Options in When program starts, when program ends....
c) Activate the When program starts, When program ends and When there is no user activity checkboxes
and specify when to set your status to inactive.
32
PRESENCE MANAGEMENT
Note: XPhone UC Team Panel judges user activity based on computer use. If you do not use your
keyboard or mouse for a certain period of time with the computer on, the software will assume that
you have left your desk for a moment or are in a discussion.
Option 3: Activating profile templates scheduled in calendar sync:
Profile templates can also be automatically activated by appointments in your groupware calendar. see
"Importing Microsoft Outlook / Lotus Notes appointments" This can be activated via the Outlook/Notes
calendar or via the calendar sync between XPhone UC Server and Microsoft Exchange Server without
requiring a client to run.
6.4 Importing Microsoft Outlook / Lotus Notes appointments
The administrator can chosse between two methods of calendar synchronization.
Local calendar sync using Outlook and Notes Client
Central calendar sync between XPhone UC Server and Microsoft Exchange Server
This setting cannot be configured on the client.
Note for Lotus Notes: The current version of XPhone UC Commander does not automatically
synchronize with the Notes calendar. Instead, you have to manually activate the synchronization
button in the appointment list (can be accessed in the presence template selection menu) whenever
you set or change a appointment. A future version of XPhone UC Commander will support automatic
synchronization.
If you enter appointments in your Microsoft Outlook or Lotus Notes calendar, you can also automatically
control profile templates with call forwarding and/or team infos. XPhone UC Commander automatically
synchronizes with your calendar and imports appointments to your XPhone UC Commander interface
according to your preferences.
XPhone UC Commander activates the appropriate profile template when your appointment begins. And,
if you have configured the profile template with call forwarding and/or a team info, both are
automatically activated. As soon as your appointment is over, XPhone UC Commander automatically
resets the settings.
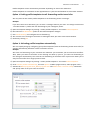
Activating appointment synchronization
a) Click <<Select profile template>> to open the template dialogue.
b) Select Profile templates
c) Click Calendar options under Scheduled in Outlook / Notes calendar in the Activate profiles automatically
section.
d) Then activate the Automatic calendar synchronization checkbox and specify how many days in advance
you want XPhone UC Commander to synchronize your appointments. XPhone UC Commander also
recognizes and imports new appointments shortly after they have been entered.
e) Select the profile template to be activated when XPhone UC Commander imports an Outlook / Notes
appointment.
f) Decide whether you want to import all appointments in your calendar or whether only appointments
are to be shown which you have assigned to a certain category when entering in Outlook / Notes.
g) Next, decide what you want XPhone UC Commander to do if the meetings weren't created by you, but
were generated when you accepted someone else's meeting request.
PRESENCE MANAGEMENT
33
h) Specify whether you want XPhone UC Commander to import the text from the subject line in your
appointment entry. If you don't activate this option, XPhone UC Commander discreetly indicates that
you are away, showing only the text entered in the profile template. If the option is activated, every
team member will be able to read the subject line.
Selecting categories in Microsoft Outlook / Lotus Notes
If you have selected the "Only use Outlook/Notes appointments that contain a profile template in the
'Category' field" option, XPhone UC Team Panel only shows appointments to team members if they are
assigned to a certain category. When XPhone UC Commander is installed, it automatically integrates new
categories in your groupware client's selection list in the following format: @xxx, e.g. @Out of Office.
Tip: Set the Meeting profile template as the default profile for your appointments, and configure call
forwarding for it. That way, all your calls will be forwarded whenever you have an appointment
without requiring any intervention on your part.
Viewing appointment lists
To see a list of all the upcoming appointments imported to XPhone UC Commander, click <<Select profile
template>> and then select the Show appointment list option. The appointment list contains a
summary of the appointments imported from the Groupware calendar system and which appointments
are still active. Appointments can be deleted permanently or activated/deactivated temporarily here.
Appointment lists are useful if you wish to view, delete or activate appointments for another team
member (and you have the permissions to do so).
Please note that when the software re-synchronizes with Outlook or Notes, the inactive appointments
are not overwritten, since this could mistakenly re-activate them. This function is used when you do
not want certain Outlook or Notes appointments used in presence management. If an appointment has
been saved by a representative, this is also visible in the appointments list.
34
TEAM FEATURES
7 Team features
XPhone UC facilitates collaboration with colleagues by means of a range of practical functions such as:
Displaying presence information
Setting presence statuses and info messages for representatives
Fast call forwarding
Showing when a user is Available again
Operation is via the Favourites view.
7.1 'Favourites' view
The Favourites view contains contacts with whom communication is frequent. The view comprises:
Contacts in one of your teams: Teams are formed by the administrator and cannot be edited by the
user.
Myfavourites: contacts you have added to the Favourites view from one of your address books. Please
note that you can only add contacts entered in an address book. The contact data is imported to the
view when the contact is added. The display data is re-synchronized with the address books when
you execute the Data synchronization function which can be found under the Favourites button.
Recent contacts: this display group is automatically filled with the last 50 contacts whose phone
numbers can be assigned to a contact and who are not in one of your teams or My favourites.
Contacts can be added to My favourites from various other views:
Journal if the caller has been identified.
Contact view
Call manager if contact data is available.
Contacts are added via the Add to favourites menu item in the contact's Context or Action menu.
Tip: Drag & drop the contacts into the desired group in the Favourites view. Please note that
contacts cannot be added to teams.
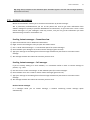
7.2 Team features
The Favourites view makes it possible to execute certain functions on other contacts. Do this by opening
the Context menu for an entry in Favourites:
Presence functions - Setting presence status, Viewing appointment list, Setting team info, Setting
company-wide info message.
Transferring calls - If a call is assigned to your number, it can be directly transferred to one of your
favourites.
Available again - XPhone UC indicates the renewed availability of contacts who were on the phone or
unavailable.
TEAM FEATURES
35
Tip: Drag & drop contacts to be indicated upon "Available again?" into the Info manager (bottom
left section of screen).
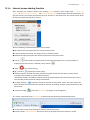
7.3 Instant messages
XPhone UC Commander enables you to contact team members by instant message.
This is particularly usefulwhenever you are on the phone and need to get some information from
another colleague as quickly as possible. With XPhone UC Commander, all you have to do is click <<Send
instant message>> in your colleague's team key actions, and you can get the information you need
without having to make a consultation call.
Sending instant messages - Favourites view
a) Open the Favourites view in XPhone UC Commander.
b) Right-click on the colleague's entry to open the Context menu.
c) Click <<Send instant message>>. A new window opens for instant messages.
d) Check whether your colleague can receive instant messages (green IM icon).
e) Type your message in the editing field of the message window and press Enter to send the instant
message.
f) The message window now shows the text that you have sent.
Sending instant messages - Call manager
If you are already talking to a team member, it is sometimes useful to send an instant message in
parallel, e.g. a link.
a) Click the IM icon in the call manager. A new window opens for instant messages.
b) Check whether he or she is able to receive instant messages (green IM icon).
c) Type your message in the editing field of the message window and press Enter to send the instant
message.
d) The message window now shows the text that you have sent.
Receive instant messages
If a colleague sends you an instant message, a window containing his/her message opens
automatically.
36
TEAM FEATURES
The contents of the message window is deleted as soon as you close XPhone UC Commander.
CONNECTING DATABASES
37
8 Connecting databases
8.1 Personal address book
XPhone UC Commander installs a personal address book if so selected during setup in the assistant and
the administrator has not designated any server-controlled configuration. This is a Microsoft Access
database. The personal address book is ready for use and does not need to be configured.
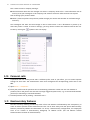
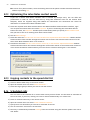
8.2 Creating new databases
a) Open Tools -> Address books.
b) Select the option Link new address book to an empty database. A new empty database is created. This
database is created as an Access database in the user directory (Application data -> XPhone UC
Commander) of the user who is logged on, and can now be filled.
8.3 Linking existing databases
a) Open Tools -> Address books.
b) Click New address book and select the option Link already existing database to the new address book.
c) Enter a name for the address book.
d) Determine the database type in the drop down list that appears.
8.3.1 Linking XPhone Virtual Directory
a) Select Virtual Directory. The Properties for address book window opens.
b) If you have activated the Primary Commander address book client interface option in XPhone Virtual
Directory for the XPhone UC Commander Client Interface, activate the Use primary client interface
checkbox. The settings for the server connection are automatically imported from XPhone Virtual
Directory.
c) In the Data source field, select whether the contact data is to be searched for in all data sources or only
in a certain data source. All data sources are searched by default.
d) Click <<Test connection>> to check whether XPhone UC Commander is able to set up a connection to
XPhone Virtual Directory.
e) Confirm with OK. You have added XPhone Virtual Directory as an address book.
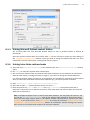
8.3.2 Linking Access databases
a) Select Access database. A dialog window opens.
b) Enter the required address database and confirm with OK. The Properties for address book window
opens.
c) If the database consists of multiple tables, select the required table from the Table drop down menu.
d) Now link the fields for your database. For more detailed instructions, see the following section on
Creating field links On page 41.
Hint: If the contact data and phone numbers are in different tables in your database, you should
create a query that assigns the fields to one another. Phone numbers must be in one field and may
not be separated into two different fields.
38
CONNECTING DATABASES
8.3.3
Connecting ODBC data sources
ODBC interfaces enable access to different database formats, such as SQL, MySQL, Oracle and so on. This
requires a specific ODBC driver that is supplied by the manufacturer or the database or by another
manufacturer. ODBC drivers are proprietary and are configured according to the instructions of the
manufacturer. Once you have installed the ODBC driver on the PC, you must create a system DSN in
Control Panel -> Administrative Tools -> Data Sources (ODBC).
a) Once you have successfully created the system DSN, you can select the data source you created from the
Machine Data Sources tab in the Data Sources (ODBC) database type in XPhone UC Commander.
b) You will then see the Properties for address book window. Select the required table or query from Table
and make the field links here. For more detailed instructions, see the following chapter Creating field
links On page 41.
Note: If you create a database through an ODBC data source at a model workstation, you must
ensure that the ODBC data source is created as the system DSN on the target workstations as well
before importing the configuration. The system DSN is not deployed to the workstations through the
sample configuration; you have to create it manually. If no standard ODBC driver is available from
your operating system (e.g. Oracle databases), an additional ODBC driver must be installed on the
system.
8.3.4
Linking LDAP directories
LDAP (Lightweight Directory Access Protocol) is a protocol that supports a directory service. Unlike data
bases, LDAP directories are based on a tree structure, such as Novell Groupwise or Microsoft Active
Directory.
a) Select this file type. You can now access a number of predefined settings from the Configuration drop
down menu.
b) Complete the settings in the listed fields. The settings for the server address and the ports are
individual.
c) Go to the Base DN field and define the areas of the LDAP structure that are to be accessed. If necessary,
you can change the default field assignments in the Field link tab, but you will not usually need to do
this.
If you use the Save password option for authentication with name/password, the programme encrypts
the password and files it in the Windows registry. This process only offers limited security. You should
not therefore use passwords here which are also used elsewhere (e.g. for domain login).
CONNECTING DATABASES
39
8.3.5 Linking Microsoft Outlook contact folders
You can link public and local Microsoft Outlook folders as well as personal folders to XPhone UC
Commander.
Select the required contact folder and confirm with OK. You do not need to make any more settings in
the Properties for address book window, unless you wish to change the default field links. For more
information, read the next chapter, Creating field links On page 41.
8.3.6 Linking Lotus Notes address books
a) Select the value Lotus Notes address book as the database type. The Properties for addess book window
opens.
b) Use Change to select the required Notes address book.
c) You can link local address books and address books from the Domino server to XPhone UC Commander.
Read the next chapter, Creating field links On page 41, if you want to change the default field links.
If a message appears telling you that not all components are available for connection to the database
when you select the Lotus Notes address books database type, you should proceed as follows:
a) Open Control Panel-> System->Advanced->Environment Variables.
b) Select the variable Path from the bottom section and click Edit.
c) Enter the path to the notes.ini and notes.exe files, e.g. c:\lotus\notes and separate them with a
semicolon. If these files are in different directories, enter both paths one after the other and separate
them with a semicolon (;).
Hint: If multiple employees access a central Lotus Notes database, this may delay the caller ID. You
can use the XPhoneSearchPhoneNumber view for the address book template to avoid these delays.
Select the Lotus Notes address book in the XPhone Unified Communications interface and open
Properties in the context menu. Go to Other settings and select the check box Usethis view for caller
identification: XphoneSearchPhoneNumber. XPhone UC Commander searches through the contact
data records in the indexed view instead of in the entire database.
40
CONNECTING DATABASES
8.3.7 Linking MAPI address books
You can use the MAPI interface to access global address books on your Exchange server, for example.
a) Select the MAPI database type. The Properties for addess book window opens.
b) Select the required address book and confirm with OK; no further settings are required.
8.3.8 Linking a Windows Address Book (Outlook Express)
When you select the Windows Address Book -> Outlook Express database type, you see the window
Properties for address book. No further settings are required.
8.3.9 Linking Telefonbuch Deutschland
a) You may only use editions of Das Telefonbuch Deutschland starting in Spring 2006.
b) Select Das Telefonbuch Deutschland as the database type.
CONNECTING DATABASES
41
c) Das Telefonbuch Deutschland can be used in the following configurations:
a) Workstation version: Insert the Das Telefonbuch Deutschland CD in a local drive. You only need to
install Das Telefonbuch Deutschland if you also want to use the software contained on the CD. Provide
the drive letter of the CD-ROM drive in Directory with the phone book data in XPhone. Remove the
checkmark from Network/intranet version.
b) Network version: Install Das Telefonbuch Deutschland on a PC that other users can access over the
network. In the Das Telefonbuch Deutschland installation program, select Workstation/network version.
Use the license code that you received with Das Telefonbuch Deutschland. Then share the installation
directory in the network. Enter the shared directory in Directory with the phone book data in XPhone,
for example:
\\<Server>\TVG\DasTelefonbuch Deutschland.
d) You can specify whether this address book should be excluded from a search in All address books. This
is advisable as it could take a very long time to search so much data. If you are mostly searching for
employees and company contacts from your other linked address books in the call manager, you may
delay the searches unnecessarily if you additionally search the Das Telefonbuch Deutschland CD. For this
reason, this option is activated by default. To search through the data on the Das Telefonbuch
Deutschland CD, select this address book and search only in it. If you have only saved a few contacts in
personal address books and are mainly interested in the Das Telefonbuch Deutschland data, you should
deactivate this option.
e) Confirm your settings and restart XPhone UC Commander.
Hint: you can use advanced searches in Das Telefonbuch Deutschland: if employees from another
company call and present their full caller ID (number with extension), Das Telefonbuch Deutschland
recognizes the underlying basic phone number and correctly identifies the company in its database.
8.3.10 Linking the TwixTel phone book for Switzerland
a) Select TwixTel phone book for Switzerland as the database type.
b) Specify the directory for the TwixTel data in the next dialog (e.g. \\yourserver\TwixTel).
c) You can also specify whether this address book should be excluded from a search of "All address
books". This is advisable as it could take a long time to search all this data. If you are mostly searching
for employees and company contacts from your other linked address books in the call manager, you
may delay the searches unnecessarily if you additionally search the TwixTel CD. For this reason, this
option is activated by default. To search through the data on the TwixTel CD, select this address book
and search only in it. If you have only saved a few contacts in personal address books and are mainly
interested in the TwixTel data, you should deactivate this option.
Hint: you can also search for a contact using a phone number with the linked phone book CDs. If,
for example, you see an unknown number on your mobile phone's display, you can identify the
caller using the inverse search.
8.4 Creating field links
XPhone UC Commander can only assign the individual contact fields properly if you link the fields when
you connect the database. Microsoft Outlook and Lotus Notes databases already have default field links
in XPhone UC Commander. You can of course change the default links for Microsoft Outlook and Lotus
Notes address books in the Properties for database window.
There are two ways to link the fields:
a) Select the required XPhone UC Commander field in this window and link it by activating the
corresponding check box in the database field. You should at least link name and phone number fields.
If you wish to use the messaging module in future, you must also assign all address fields.
42
CONNECTING DATABASES
b) You can also use the visual wizard. To do this, click the Wizard button and connect the XPhone UC
Commander and database fields by drag and drop, by holding the mouse button and linking the two
values. A red connection line shows which fields have been linked.
Note: XPhone UC Commander can only identify contact data records correctly if they have been
assigned a primary key: Select the XPhone UC Commander field ID1 and assign it to a unique field in
your database, e.g. a customer number. The values in this field of your database must be unique. If
there are no unique fields in your database, you can link fields from your database to the ID1 ID2 ID3
etc. fields in XPhone UC Commander, and thereby create a unique primary key consisting of multiple
fields.
8.5 Moving and deleting address books
You can determine the order in which the linked address books are displayed and searched during
caller ID.
a) Go to Tools and select Address books.
b) Select an address book and use the arrow keys to move it to another position.
c) Click Remove to remove an address book from XPhone UC Commander. This only deletes the link, not the
original data source. You can also delete Microsoft Access databases completely.
Hint: If a caller is identified from a linked phone book CD, you can copy the entry and transfer it to
one of your own address books by clicking <<Open contact>>.
8.6 Searching for address book entries
You can search for contacts in individual address books or in all linked address books simultaneously.
a) Select an address book. To search in all address books, select All address books.
b) You see all contacts in an address book. The default number of contacts listed by XPhone UC is 100.
Tip: You can also view more than 100 contacts. Move the mouse to the column header and open the
context menu. Select Select column and Search fields. Enter the number of contacts that you wish to
be displayed simultaneously.
CONNECTING DATABASES
43
8.7 Free-text search
Joint use of XPhone UC Commander and XPhone Virtual Directory permits a free-text search in the
address books which are linked. If only XPhone Virtual Directory address books are linked to the XPhone
UC Commander, the free-text search is also possible via All address books.
The free-text search enables several search terms to be entered which are searched for in all fields
indicated by XPhone Virtual Directory. The search term entered is broken down into individual search
terms. Spaces and commas are used to separate the individual words.
Hits in at least one field require that all search terms are found in a word on the left. A word is
recognized as such if it is at the beginning of a field or preceded by a space.
The search performance can be influenced by
entering the "*" symbol ahead of a search term. In this case, the search term may also be within a
word (i.e. the flush left feature is not a must)
entering the "-" symbol ahead of the search term. In a hit, no word in a field may start with this
search term.
entering the "-*" symbol ahead of the search term. In a hit, no word in a field may contain this
search term.
The search does not take consideration of upper/lower case letters.
If a blank search term is entered, all of the contacts are returned until the maximum number of hits set
is reached.
Example: Search for all contacts containing the term 'kramer' but not containing the term 'mün'.
Entry: 'kramer -mün'. This entry would be used to search for all contacts called "Kramer" who do
not live in "Munich", for example.
The free-text search is activated in the Contact view under the Options button or Tools/Options/Contact
search.
8.8 Full text search
A full-text search can be performed even if XPhone Virtual Directory is not used. Depending on the
address book type, the search performance can however be restricted.
a) Select an address book. Search all address books by selecting All address books.
b) Activate the Full-text search checkbox and enter any search term. All fields (including note fields) of the
contacts in the selected address book are searched through.
c) Click the desired phone number in the search result to start a call.
8.9 Searching using search criteria
8.9.1 Defining search criteria
a) Click Search under the entry field in the top right-hand area of the full view.
b) The mask which opens offers the following setting options:
Visible columns: Specify the contact fields that should always be displayed. Use the arrow keys to
change the display order.
Search fields: Specify the criteria you want to search for in the contact data records. You can enter as
many criteria as you wish. Specify the order of search criteria using the arrow keys.
44
CONNECTING DATABASES
If the free-text search is activated, it is not necessary to specify the search criteria as all of the fields
indicated are searched by the XPhone Virtual Directory.
8.9.2 Entering search criteria
If you know that your search term is located in a specific database field, it is advisable to search by
search criteria. To do this, you must first specify the criteria you want to search for in the address
book(s). You can define different search criteria for each linked address book, and these settings are
retained until you change them.
a) Enter your search term(s) in the entry field. You can refine the search by specifying multiple search
criteria. Use commas (,) to separate search criteria from one another. You do not need to enter a space
after the comma. Please enter the search criteria in the order you defined earlier (see Defining search
criteria).
b) Start the search by clicking Start search or pressing Enter.
Example: You have defined last name, first name, company as search criteria. To find Carsten Müller
from the Mustermann company, carry out the search as follows:
Müller:
returns all contact data records whose last name is Müller
Müller,Carsten:
returns all contact data records whose last name is Müller and whose first
name is Carsten
,Carsten:
,,Mustermann:
returns all contact data records whose first name is Carsten
returns all contact data records whose company name is Mustermann
Müller,,Mustermann: returns all contact data records whose last name is Müller and whose
company name is Mustermann
No search criteria are used when a free text search is activated.
8.9.3
Manual phone number id (inverse search)
a) If you wish to check whether a phone number exists in a connected database, or to which contact it
belongs, enter it into the entry field.
b) Now click on <<Prepare call>>. If a linked contact database contains a corresponding contact data
record, XPhone UC Commander automatically completes the data.
8.9.4
Adapting address book columns
You can change the width of the columns in the search results. Move the mouse over the column
header and use the context menu to open the Rename columns function in order to change the column
name. The function described in Defining search criteria is also available in the context menu.
You can change the order of the columns using drag & drop.
8.9.5
Sorting search results
The search results are sorted by the column you selected most recently. You can, however, change the
order. There are two ways of doing this
Sort by columns. To do this, click on the column header. The search results are sorted alphabetically
by this column.
Grouping function:
a) Move the mouse to the column header and open the context menu.
CONNECTING DATABASES
45
b) Activate the Group field function. An additional line appears above the search result.
c) Pull the column header that you wish to sort the search results by into this line.
8.10 Searching in Das Telefonbuch Deutschland
The Das Telefonbuch Deutschland search engine behaves differently in some aspects than the search
engine for the other address books. The following is a list of hints for a successful search:
Search by city name
The search engine first checks whether there is a city that corresponds exactly to the name in the city
field. If this is the case, the search is only carried out in this city, e.g. Mannheim.
If the city is not unique, e.g. Frankfurt, the search engine searches through all cities that start with
Frankfurt. The results return contacts from Frankfurt am Main and Frankfurt Oder.
The search only restricts itself to a city if at least one field relating to a city is filled in; otherwise, the
search engine searches through the whole of Germany.
Field conditions
Post Code: You must enter at least 2 characters when searching for a post code (e.g. 80).
City: You must enter at least 2 characters when searching for a city (e.g. Ma).
First name: You can not search for a first name without entering a last name.
Search for phone number
To search for a phone number, enter the dialling code and the phone number without brackets and
without a preceding +49.
Please note that for legal reasons you can only search for a phone number if the owner of that number
has not forbidden this type of search.
Additional names
Additional names are not indexed and are therefore not found in combination with a city search.
Example: A subscriber has the following entry:
Müller, Carsten and Schmidt, Britta; Musterstr. 1, 12345 Musterstadt
In this case, Britta Schmidt is an additional name. If you search for Müller,Carsten or Müller,Carsten,Musterstadt or Schmidt,Britta,
the search will return this entry; if you search for Schmidt,Britta,Musterstadt it would not return this entry.
The search engine returns no more than 75 hits. If the required entry is not returned, you should
refine the search term.
Phonetic search
The phonetic search also returns results that sound the same but are spelled differently; if you search
for Meier, the search will also return Maier, Meyer or Mayr.
Full text search
You can only do a full text search in the Last name field.
8.11 Searching in the TwixTel phone book for Switzerland
The TwixTel phone book for Switzerland search engine behaves differently in some aspects than the
search engine for the other address books. The following is a list of hints for a successful search
The search engine does not return any hits if it finds more than 999 hits. You should refine the
search term.
A full text search searches in names, categories and industry information.
46
CONNECTING DATABASES
To search for a phone number, enter the dialling code and the phone number without brackets and
without a preceding +41.
8.12 Optimizing the Lotus Notes contact search
If you use a central Lotus Notes database that is accessed by multiple users, this can affect the
performance of caller ID. You can avoid this by using two additional views for the address book
template, which are supplied along with XPhone UC Commander and concentrate the search for
information in selected Lotus Notes database fields.
a) Select the required Lotus Notes address book in the XPhone Unified Communications interface, right
click to open the context menu and select Properties. If you are connecting the Lotus Notes address
book at this time, the Properties window opens automatically when you specify in New address book
that you wish to link to an existing Lotus Notes contact folder.
b) Click on Other settings.
c) Select the check box Use this view for caller identification: XphoneSearchPhoneNumber. XPhone Unified
Communications now searches through the contact data records in the indexed view instead of in the
entire Lotus Notes database when a call comes in.
d) Activate the check box Use this view to find a contact by e-mail address: XphoneSearchEmail. XPhone
Unified Communications now searches through the contact data records in the indexed view instead of
in the entire Lotus Notes database when you search for the contact matching the e-mail address.
8.13 Copying contacts to the speed dial list
a) Mark an address book entry in the search results.
b) Open the Context menu and select Add to favourites....
c) Select the target group to which you wish to add the contact.
8.14 Scheduled calls
You can create a call reminder for a contact data record you have found. You will then be reminded of
the call on time; if you wish, dialling can even be started automatically at a certain time.
a) Select an address book entry in the search results.
b) Open the context menu and select Create scheduled call/alert.
c) Specify when and how often you wish to be reminded of the call.
d) You can also add a note on this call reminder.
e) The entry is automatically attributed Pending status and marked using the calendar symbol. This note is
also shown.
CONNECTING DATABASES
47
f) To activate or deactivate the call reminder, open or close the corresponding option in Tools ->Scheduled
call reminder.
8.15 Creating call lists
If you wish to make several calls in succession, you can create a call list.
a) Select the respective contacts in your address book list by holding the Ctrl key and clicking the
individual contacts.
b) Use the drag & drop function to enter the entries in the Pending journal folder or open the context
menu and click Other functions and select Create scheduled call/alert.
c) Enter the desired time. When the specified time arrives, XPhone UC opens the call reminders for each
contact in sequence.
d) All scheduled calls are automatically listed in your Pending journal. Once you have made a successful
call, the status is changed to Completed. This way, you can always tell which parties you were not able
to reach. You can also call the party from the call reminder directly.
8.16 Copying contact data records to other address books
XPhone UC enables you to copy contact data records from one address book to another. The original
format of the contact data is of no importance. Please note that changes to the original contact are not
automatically made in the copy.
a) Select an address book entry
b) In the context menu, select Other functions/Copy to>.
8.17 Creating new address book entries
You can create a new address book entry from a call or journal entry if the contact is not already saved.
The entry is automatically saved in the original data source.
a) Select the journal entry or click on <<Create new contact>> and select the address book from the drop
down list.
b) The XPhone UC Commander entry window opens. Enter the required contact data. The phone number
has already been initialized. If you selected a Microsoft Outlook contact folder, the original Outlook
contact window opens.
c) When you save the new address book entry it is stored in the original data source.
8.18 Copying a new phone number
You can copy a new phone number directly from a call or a journal entry to an existing address book
entry.
a) Select the entry from the journal and open the context menu with the right mouse button.
b) Now click on Assign phone number. The action dialog opens. Enter the name you are searching for into
the entry field Search term.
c) Click on Start search to call up the required address book entry. All phone numbers for that entry are
displayed.
d) Specify whether you are replacing an existing number or want to add a number to the entry.
48
CONNECTING DATABASES
8.19 Printing the address book view
Go to File -> Print to print the current address book view.
CALLER ID
49
9 Caller ID
9.1 The caller ID function
When the telephone rings, XPhone UC Commander identifies the caller using the received phone
number. This is only possible if there is an address book entry for this contact and the address book is
connected to XPhone UC Commander. The advantage is that this information is available to you before
you begin the call, and that you can prepare yourself for that caller. There are different ways of viewing
information on the caller.
Open Tools -> Options.
You can now set the type of caller ID and the conditions. There are three types of caller ID that can
also be used together. They are described in the following section.
9.2 Caller ID via popup
a) Go to Tools> Options and select Caller popup.
b) Configure the conditions for caller ID via caller popup.
Hint: The caller popup is similar to the compact view and is the recommended default setting for
caller ID, as you can access all available telephone functions before the call begins.
Display caller ID
The name of the caller is displayed as default. You can also specify whether additional information is
displayed. You can select all existing database fields. Customized database fields are also available.
a) Go to Tools -> Options and select Call manager
b) Go to When calling: Display detailed view of caller's data and select whether the additional information
is to be displayed. If this check box is not selected, you can get the information by clicking on the +
icon in the popup.
c) You can now specify the information that is to be displayed about the caller. Use the arrow buttons to
specify the order in which the fields are displayed.
Hint: You can also open the corresponding contact data record by mouse click from this view.
Display called ID
If calls were forwarded or picked up, XPhone UC Commander can display the called ID as well as the
caller ID; the called ID shows who the caller was actually calling. This only works if an address book
containing the phone numbers of employees is linked to XPhone UC Commander.
a) Go to Tools -> Options and select Call manager
b) Use the Called party check box to specify whether you wish to see the information on the person who
was originally called.
c) Once you have activated the check box, select the information on the called ID that you wish to see. Use
the arrow buttons to specify the order in which the fields are displayed.
9.3 Caller ID via contact data record
a) Go to Tools ->Options and select Caller popup.
b) Configure the conditions for the opening of the contact data record.
50
CALLER ID
Hint: XPhone UC Commander always accesses the original database entry. Changes made in this
view are saved in the original data source.
Opening Microsoft Outlook / Lotus Notes contacts
XPhone UC Commander contains add-ons for integration in Microsoft Outlook or Lotus Notes. (see
Integration in Microsoft Outlook and CTI Integration in Lotus Notes). If you use the Outlook add-on or
Notes add-on and the contact data record for the caller is saved in a Microsoft Outlook or Lotus Notes
contact folder, that folder opens automatically if you configured this option in caller ID. Please note
that this option only works if the following requirements are met:
a) The contact must exist in a Microsoft Outlook or Lotus Notes contact folder. The phone number of the
caller must be entered in one of the phone number fields in this contact data record.
b) The Last name field in the contact window may not be empty. Check this by opening the contact and
clicking on Last name.
c) The contact folder containing the contacts of prospective callers must be linked to XPhone UC
Commander.
d) Go to XPhone UC Commander and select the option Tools -> Address books->New address book.
e) Enter the name that XPhone UC Commander should display for the address book in the New address
book window. Select Use existing database from the lower part of the window and then select the
option Outlook contact folder or Notes contact folder. The next window is where you select the contact
folder you wish to connect to. You can confirm the next window, Properties for address book..., without
making any other entries by pressing OK.
9.4 Caller ID via tooltip
The caller tooltip is the discreet version of caller ID. A tooltip containing the selected information on the
caller appears next to your cursor.
a) Open Tools -> Options.
b) Open the Caller tooltip and specify the conditions for the appearance of a tooltip.
c) Specify the information you wish to see. If you select the Default option, you will see the last name and
phone number of the caller.
d) If you wish to see additional information, select the corresponding database fields. Use the arrow
buttons to specify the order in which the fields are displayed.
9.5 Deactivating caller ID
You can deactivate caller ID and called ID (see Caller ID via popup) for individual address books.
a) Go to Tools and select Address books.
b) Click Caller ID...
c) Select the address books for which you wish to deactivate the
Caller
Called party
ID and press OK to confirm.
Hint: If you have connected Das Telefonbuch Deutschland and/or the TwixTel phone book for
CALLER ID
Switzerland, caller ID may take longer than usual. You should deactivate caller ID for these address
books if you wish callers to be identified from your connected address books.
51
52
CALL JOURNAL
10 Call journal
10.1 Icons in the journal
Calls in the journal feature symbols to facilitate explanation of the call status:
Outbound call – Connected
Inbound call - Connected
Outbound call - No connection
Ringing
Missed call
Call in progress
Call has been picked up or redirected
Call has been picked up or redirected, destination unknown
Call waiting
Other calls
Scheduled call
10.2 Logging calls
XPhone UC Commander logs all calls in journal folders. The arrow icon next to the call entry shows
whether the call was inbound or outbound (see also the XPhone UC Commander ShortGuide).
10.3 Searching and filtering in the journal
The journal shows all calls made using your telephones (provided they can be monitored by XPhone UC
Server).
It also includes calls made while your computer was off.
You can limit the selection of calls shown by setting filters.
It is possible to enter one or more search terms in the entry field at the top right of the Journal view.
The search covers the contact fields associated with a phone call (last name, first name, company,
department) as well as notes and phone number.
10.4 Logging missed calls
Calls that you missed during an absence are logged in the Missed calls journal and flagged as <<Missed
calls>>. Calls are always logged, even if your PC is not switched on. This is also true if your calls are
forwarded to another phone, provided the forwarding destination is another team member's line. In
addition to this, you can also see if and who picked up the call. (see also the XPhone UC ShortGuide)
New missed calls are also indicated the next time you boot your PC or when you return to your
CALL JOURNAL
53
workstation in the form of
a red exclamation mark in the corresponding journal icon
a tool tip in the icon tray at the bottom right of your screen
an entry in the info manager (bottom left of screen).
10.5 Dialling from journals
You can return the call by double-clicking the journal entry. If you do not reach the party under the
number in the journal, you can use the context menu to call an alternative phone number. This is only
possible if the additional phone numbers were saved in the contact data record.
10.6 Editing journal entry statuses
Select an entry in the journal and select Mark as completed or Mark as pending in the entry's Context
menu.
10.7 Creating alerts and call reminders
XPhone UC can remind you of important phone calls.
a) Select the entry from the journal and open the context menu with the right mouse button.
b) Select Create scheduled call/alert.
c) Alternatively, you can also select an address book entry and the Create scheduled call/alert option in the
context menu.
d) Enter your comments in the text field. You have saved a note on your entry.
e) Activate the Call reminder check box to start an automatic call reminder and specify when and how
often you wish to be reminded.
f) The symbol to the left of the journal entry has changed. If you have saved a note, the note symbol will
appear in the second-last column. The alert is also shown in the journal and can be edited.
10.8 Recycle bin
XPhone UC Commander saves call entries for 90 days as default before attributing them Recycle bin
status. You can however specify how long the call entries are to be saved.
a) Open Tool -> Options.
b) Select Call journals
c) Specify when the journal entries are to be moved to the Recycle bin folder.
Hint: Empty your journals regularly to prevent XPhone UC from being overloaded with unnecessary
data. If you wish to save entries for longer periods of time, you can archive them (see section on
Archiving journals).
10.9 Archiving journals
You can archive your journal entries in an external file. This is saved in the CSV format and can be
imported into Microsoft Excel or Microsoft Access among others.
a) Open File -> Archive call journal.
54
CALL JOURNAL
b) Activate the Archiving function on check box and specify the call entries you wish to archive.
c) Specify whether the call entries should be created in an Excel-optimized format.
d) Specify whether archiving should be done when you close the program.
e) Enter a name for the archive file.
f) Click the … button to specify the storage location for the file.
g) Press OK to confirm.
Hint: A CSV file can be made available to multiple users. This makes it possible to save journals
centrally.
10.10 Compact journal
You can also access the journal function from the compact view. XPhone UC Commander shows a
compact journal in this view; the compact journal shows the last 20 calls, regardless of their status. If
you select a journal entry, the corresponding phone number is transferred to the entry field and you
can begin dialling.
10.11 Keeping journals in Microsoft Outlook
You can also have your calls logged in Microsoft Outlook. For more information on this subject, see
Journaling in Microsoft Outlook.
FAX, VOICEMAIL, TEXT MESSAGE
55
11 Fax, Voicemail, Text message
11.1 Fax functions in XPhone UC Commander
11.1.1
Composing new faxes
Selecting recipients
Faxes can be sent to one or several recipients. There are two ways to select recipients:
a) Click the New button and select New fax. The XPhone Fax dialogue opens. Click the Search button. The
XPhone UC Commander Contact selection form opens. Find a recipient by entering the name or part
thereof or the fax number. The XPhone UC Commander Contact selection form finds all the contacts
stored in address books linked to XPhone UC Commander. Select the desired contact and select the
contact's fax number on the Fax tab as only then can the recipient information be imported to the fax
dialogue.
b) In XPhone UC Commander, select the desired contact on the Calls, Favourites or Contacts tab. Click
Actions and select Actions -> Fax. Select a template; the XPhone Fax dialogue opens and the Subject &
Message is activated. The recipient information has been entered (if maintained for the selected
contact). If several fax numbers are available, you will be requested to select one or more.
If you want to send the fax to someone on whom no contact information has been entered in your
databases, enter the corresponding data in the Recipient details section as otherwise the recipient
information stays blank on the fax cover sheet. Once you select a recipient with sufficient contact
information from your contact databases, the data from the contact data record is entered in the fax
header; you can leave the fields empty.
Entering text
The text you enter in the fax form's subject and message fields appears on the fax cover sheet, not in
the actual fax message. A cover sheet is only generated if you have selected a template in the
drop-down list.
In the drop-down list, you can choose between No cover sheet and various cover sheet templates. If
you do not select a cover sheet, any information in the Subject & Message tab is ignored.
If you want to send the fax to someone on whom no contact information has been entered in your
databases, click Edit recipient details to enter the corresponding data as otherwise the recipient
information stays blank on the fax cover sheet. Once you select a recipient with sufficient contact
information from your contact databases, the data from the contact data record is entered in the fax
header; you can leave the fields empty.
Attaching files
Insert the file you want to fax in the fax form using the Attachments button. The file can have any
format; for more information, see System requirements for XPhone Unified Messaging). The outbound
file is immediately rendered and converted to .tif format, enabling you to check the appearance of the
fax in the preview section before sending it (see section on Preview). Depending on the size of the
outbound file, this may take a while.
11.1.2
Fax toolbar and editing options
Various fax settings can be made via the toolbar in the top section of the open XPhone fax dialogue.
The cover page can not be edited for a newly created fax: only file attachments or faxes which have
already been received can be edited.
56
FAX, VOICEMAIL, TEXT MESSAGE
Stamp note
Insert stamp note:
A stamp note can be inserted on a fax received or a fax generated with file attachment. Double-click
the inserted "stamp" to edit the text. Functions for rotating or changing the size of the stamp are
available with the "corner marks" or "green dot" above them.
Edit default stamp:
Default stamps can also be newly defined and edited via the dialogue which opens. An individual text
can be entered and/or the spacers used.
Insert default stamp:
If default stamps have already been defined, they are listed first and can be inserted in a fax already
received or in a new fax with file attachment. The order can be changed via the Edit button.
Insert text note
By positioning and holding the left mouse button, the size of the text field can be specified. The
position and size can also be varied later via the "corner marks". A text field can be edited by
double-clicking.
Highlight
Parts of a fax can be highlighted in colour. The respective area can be selected again by positioning and
holding the left mouse button. The position and size of the highlighted text can also be varied later via
the "corner marks". Please ensure that the colour can only be shown in the fax dialogue. Later in the
fax, the highlighted area is only highlighted by a grey frame.
Zoom
Page width is preassigned by default as the zoom factor. This can be changed to Full page, Page height
and various percentage zoom factors.
Rotate
File attachments can be rotated 90° clockwise.
Delete page(s)
Individual pages (including several at once) or all pages can be deleted.
Add file
A file browser opens via which one or more files can be added. One or more files can also be inserted
FAX, VOICEMAIL, TEXT MESSAGE
57
into the fax via Drag & Drop.
Save as new file
A fax can be saved anywhere as a new file in PDF or TIFF format.
Print
Opens the default print dialogue via which the printer and settings can be selected.
Select cover page
The preview for all cover pages available is shown here and from which you can make a selection.
Select the requisite cover page for the fax which is then imported directly for the new fax. Your default
cover page is preselected automatically (where available) and is also shown in the preview. If you select
No cover page, any texts entered in the Messages tab are ignored in the fax message.
11.1.3
Scheduling
Click the Options button in the fax form (toolbar) to specify the transmission time and priority of the fax
or printing settings.
Priority tab
Depending on the configuration by the administrator, you can decide the priority level for sending fax
documents.
Choose between High, Normal and Low, whereby Normal is the default value.
Transmission time tab
The possibility of being able to determine a certain fax transmission time is a very convenient feature.
This enables you, for example, to prepare multiple faxes and send them at a later time. Choose one of
the following options:
As soon as possible: The fax is sent as soon as the server load permits, generally immediately.
Economy rate: If your company uses an economy rate, the administrator can define the best times to
send faxes (e.g. at night) and store this information on the server. If this option is activated, the fax
is automatically sent during the specified time frame. You no longer have to worry about sending the
faxes at the most cost-effective time. If you select this option but no economy rate schedule is stored
on the server, the fax will be sent As soon as possible.
Leave in the outbox (send manually later): The fax is not sent automatically but merely saved in the
XPhone UC Commander fax outbox. To send the fax, go to the Fax, Voicemail, Text message tab, select
the respective fax and select Actions -> Send again.
Date/Time: The fax is sent automatically at the specified time without requiring you to do anything.
Sender tab
Your sender information is shown as transmitted to the recipient.
58
FAX, VOICEMAIL, TEXT MESSAGE
Advanced tab
Via the Open print settings button, you can open the fax printer driver print settings such as paper
format, orientation or resolution.
11.1.4
Preview
A convenient fax preview function is available in the XPhone Fax dialogue. Depending on the size of the
attached document, conversion into .tif format may take some time. When the conversion is done, the
fax is displayed in the preview window exactly as the recipient will receive it.
Note: You can no longer edit the rendered fax document. If you need to carry out further changes,
edit the original document (e.g. in Word), delete the fax document from the fax form and attach
the original document again.
11.1.5
Sending faxes
In the XPhone Fax dialogue, click Send fax. The fax is sent to the XPhone Server and from there to the
recipient. The fax sent is saved in XPhone UC Commander. To show the faxes saved, click the Fax,
Voicemail, Text message tab in XPhone UC Commander and select Outbox from the drop-down list.
Depending on the options you have selected in the XPhone UC Settings for Fax under E-mail
confirmation (see section on Fax), you will receive a confirmation e-mail in your Outlook inbox after it
has been sent, possibly with the fax document attached.
11.2 Fax functions in Microsoft Word
11.2.1
Faxing with XPhone UC
If you have a document open in Microsoft Word which you would like to send as a fax to individual
recipients, click File -> XPhone Fax. This opens the XPhone Fax dialogue.
The document in Word is immediately rendered and converted into .tif format enabling you to check
the appearance of the fax before sending and remove individual pages if necessary. Depending on the
size of the outbound file, this may take a while. Depending on the options you have selected in the
XPhone UC settings for fax under E-mail confirmation (see section on Fax), you will receive a
confirmation e-mail in your Outlook inbox after sending the fax, possibly with the fax document
attached.
If necessary, edit the Sending options as described in the section on Sending options see "Scheduling".
Select one or more recipients and enter a text for the cover page as described in the section on
Composing new faxes.
The fax can then be sent as described in the section on Sending faxes.
11.2.2
XPhone fax merge
To use fax merge in Microsoft Word, you must
have the main document open
have a data source which contains the names and addresses to be used for the fax merge
insert fax merge fields in the Word document which serve as spacers for the data from the data
source.
FAX, VOICEMAIL, TEXT MESSAGE
59
create the fax merge document by inserting data from the data source into the fax merge fields in
the main document.
If you start the fax merge without the above steps being performed successfully, you will receive the
"The active document is not a mail merge source" error message.
The Microsoft Word fax merge manager guides you through the process. If necessary, consult the
Microsoft Word help function for these steps.
As soon as the fax merge document has been created, you can start the fax merge by clicking the Send
fax merge button in the Transmissions tab. The Sending fax merge dialogue appears. The following
setting options are available:
General tab
Select the Fax number from field: to be used from the drop-down list and enter a Subject. You can
prioritise the fax (analogue to the e-mail process) and select the transmission time. Fax options and
transmission options (Outlook 2010).
Cover page tab
The cover page can be selected from the drop-down list if authorised by the administrator. Assign first
names, surnames, company names, departments and phone numbers to the respective fields offered in
the drop-down lists. A preselection has already been made. If a cover page has been selected, a
message text must be entered. If you have not selected a cover page, the fields listed above can not be
completed.
Sender tab
Where available, your sender data is shown as sent to the recipient.
11.3 Fax functions in other Windows applications
Faxing in the application
Installation of XPhone Unified Messaging adds an additional printer driver in the Printers and Faxes
folder in the Windows Control Panel. This printer driver can be used in any Windows application even if
the additional buttons are not present as in Microsoft Outlook and Word.
All Windows applications that support document printing access this folder.
a) Open a file in any Windows application, e.g. a table in Microsoft Excel or a web page in Microsoft
Internet Explorer.
b) Go to File -> Print. This print dialog may vary slightly from application to application, but the basic
functionality is always the same. Select XPhone Fax from the list of available printers.
c) If necessary, make other settings such as paper format, resolution etc. For more information, see Fax
options in other Windows applications. As a rule, you will not have to change anything.
d) Click Print. The Outlook fax form opens; the Preview tab is activated. Proceed as described in the
chapter Faxing with XPhone.
Faxing the file directly
Instead of faxing a file from an application, you can fax it directly from Windows Explorer.
a) In Windows Explorer, navigate to the file you want to fax.
b) Right-click the file. In the context menu select Send to -> XPhone Fax.
60
FAX, VOICEMAIL, TEXT MESSAGE
c) The Outlook fax form opens; the Preview tab is activated. Proceed as described in the chapter Faxing
with XPhone.
11.3.1 Fax options in other Windows applications
Define fax options for all Windows application in the Windows Control Panel. These settings can be
overwritten with the settings in the individual Windows applications. The settings options in the Control
Panel are the same as in the individual Windows applications.
a) Right-click XPhone Fax in the Printers and Faxes folder in the Windows Control Panel to open the
context menu.
b) Select Printing Preferences... in the context menu.
If desired, before sending the fax you can edit your fax settings and define them individually for the
document to be faxed (see step c) in Fax functions in other Windows applications). To do so, click
Settings in the application print dialog. You have the following settings options in the Print Preferences
dialog:
Layout / Resolution tab
Paper Format: Select a paper format from the list. As a rule, fax paper is the correct choice.
Orientation: Choose between portrait and landscape format.
Fax Resolution: Choose between normal and high.
Graphic Resolution: This setting determines the quality and size of the generated .tif file. Choose the
highest possible resolution for graphics. Note, however, that the document is not faxed with these
values but rather with those defined under Fax resolution (normal or high), so the resolution may be
lowered again.
Printer DPI: Some applications (e.g. Microsoft Excel or Word) save the printer resolution in the document
itself. The printer will then use those settings. If the option "Printer DPI" is activated, however, the
system will use the settings from the printer driver, and not the settings in the document.
FAX, VOICEMAIL, TEXT MESSAGE
61
Default: This resets all settings to their defaults.
Advanced settings tab
Colour matching: Deactivate colour matching for black/white mode. The slider sets the threshold value defining when a colour
value becomes white or black. Activate colour adjustment for grey level mode. The slider regulates the lightness of the grey levels.
For a darker result, move up the slider.
Options: If you want to apply or suppress control characters in your fax document, activate or deactivate the options for the
various control character types.
62
FAX, VOICEMAIL, TEXT MESSAGE
Default: This resets all settings to their defaults.
Note: The name of the XPhone fax printer is defined in the registry under
HKEY_LOCAL_MACHINE\SOFTWARE\C4B\Printers
. If you change its name in the Windows Control Panel, Windows applications can no longer access
it.
11.3.2
Mixing e-mails, faxes and text messages
A message can be sent simultaneously as an e-mail, fax and text message. The restrictions that apply to
faxes and text message services must be observed.
a) Open a new e-mail form.
b) Select the recipients in the various categories as described in the sections on Composing new faxes and
Composing new text messages. The recipient list now contains e-mail, fax and text message recipients.
c) Compose your message, adding any attachments.
E-mail recipients receive an e-mail with your message as e-mail text and any attachment in the
original format.
Fax recipients receive a fax comprising the default fax cover sheet with your message (provided
you have selected a fax cover sheet template, see section on Sending options see "Scheduling")
and any attachment as an actual fax document.
Recipients of text messages will receive the first 160 characters of the message (incl. subject).
Attachments cannot be transmitted. Your message may be interrupted mid-sentence.
FAX, VOICEMAIL, TEXT MESSAGE
63
11.4 Fax integration with outside applications
It is possible to operate XPhone UC Fax directly from the printing function of another application via an
application interface. This is worth doing if you want order confirmations or delivery notes to be sent
directly from an operational ERP system. XPhone UC Fax remains hidden from the user in this case. The
XPhone UC Fax printer must be configured so that the document can be sent.
11.4.1 Using control characters to send faxes
Control characters are used to send the document created by the application; these control characters
contain, for example, the fax number of the recipient. Control characters are similar to merge fields and
can be embedded anywhere in the document. The preferred location for control characters is at the end
of the document, where they cannot affect its formatting.
Note: In order for control characters to be processed, you have to make the required settings in the
fax printer; go to Options in Advanced settings and set the necessary check marks.
Control characters have a specified syntax consisting of the following elements:
Prefix
Suffix
Field contents
Recommended procedure
The field contents usually contain a variable from the controlling application. The syntax is structured as
follows:
Prefix: @@~~
Field contents: XPSEL_Fax=<Fax number>
Suffix: ~~
Example:@@~~XPSEL_Fax =08912345678~~
Note: We recommend this method as it ensures reliable transmission from other applications. To
hide the control characters from the recipient on the sent document, you can create the control
characters in white font, or store the information on a separate page added to the end of the
document. If this is not possible, you can select one of the following alternatives. Please note that
the methods described below may not work reliably unless control characters and field contents are
transferred in a string (e.g. in the case of spaces, format changes etc.).
Alternative 1: Field contents are partially printed
In this case, the syntax is structured as follows:
Prefix: ##**
Field contents: XPSEL_Fax=<Fax number>
Suffix: **
Example:##**XPSEL_Fax =08912345678**
Result: The prefix and suffix are removed, the fax document only shows: 08912345678. Please only
use this method if you can ensure that the control character syntax does not contain format changes,
line breaks or similar.
64
FAX, VOICEMAIL, TEXT MESSAGE
Alternative 2: Field contents are not printed
In this case, the syntax is structured as follows:
Prefix: ##~~
Field contents: XPSEL_Fax=<Fax number>
Suffix: ~~
Example: ## ~~XPSEL_Fax =08912345678~~
Result: The prefix, suffix and field contents were removed completely and do not appear in the
document. Please only use this method if you can ensure that the control character syntax does not
contain format changes, line breaks or similar.
Insert additional field names
Fields other than the mandatory fax number of the recipient can be transmitted to XPhone UC Fax by
means of control characters. They include the recipient's name, company and department. This
information is included in the cover page.
See the annex for a list of available field names.
Sending faxes with subjects from third-party applications
To add a subject to the document, the document must contain a control character with the following
field contents:
subject=<Subject>
Example: @@~~subject=Invoice No. 1234~~
Note: The subject is also entered and displayed in the journal.
Hiding/showing the fax dialog
Fax transmission will begin immediately without user intervention, provided the document contains a
fax number and a control character with the following field contents:
mode=silent
Example: @@~~mode=silent~~
To display the fax prior to transmission, the document should contain a control character with the
following field contents. This is the default setting if no mode is specified.
mode=interactive
Example: @@~~mode=interactive~~
11.4.2
Example of a fax with control characters
Hint: Control characters are best placed at the end of the document.
This example uses the following control characters:
Name
subject
Meaning
Subject line
xpsel_fax
Recipient's fax number
xpdb_name
Recipient's last name
FAX, VOICEMAIL, TEXT MESSAGE
xpdb_vorname
Recipient's first name
xpsnd_lastname
Sender's last name
xpsnd_firstname
Sender's first name
65
Other possible control characters:
Name
mode
Meaning
Fax controller for automatic fax transmission
Value: silent | interactive
SendDateTime=Immediate
Immediate transmission (default)
SendDateTime=Retain
Fax is retained in outbox until sent manually
SendDateTime=LowCost
Transmission at economy rate configured on the
server
SendDateTime=20100808153000
Transmission on a certain date + time
(YYYYMMDDhhmmss)
SendDateTime=172000
Transmission at a certain time on current day
(hhmmss)
##~~subject=Test Steuerzeichen~~
##~~xpsel_fax=12345~~
##~~xpdb_name=Walker~~
##~~xpdb_vorname=Werner~~
##~~xpsnd_lastname=Huber~~
##~~xpsnd_firstname=Otto~~
##~~mode=interactive~~
11.5 XPhone UC SMS
11.5.1
Composing new text messages
You can compose a new text message via File ->New text message in XPhone UC Commander.
The text message dialogue serves towards generating a text message. It is broken down as follows:
Recipient selection (top)
Message and sending options (bottom)
Selecting the recipient
Specify the recipient of a text message using the entry field for contact data (top). The data can be
entered manually or imported from the address book via the To...
button.
Do this by entering the name or mobile number in the search field and clicking Start search. A list of the
66
FAX, VOICEMAIL, TEXT MESSAGE
contacts found appears. Click the mobile number or select the contact and click the Text message button
to import the contact to the text message dialogue.
A recipient must have at least a text message number; all other fields are optional.
An additional recipient number can be entered directly without any blanks or searched for and
imported via To....
Recipients can be removed from the list of recipients via "X"
.
Message
Enter the message to be sent. The number of remaining characters is shown at the bottom of the entry
field.
11.5.2
Text message options
Sending options
Specify the following here:
When the message is to be sent (As soon as possible, Leave in the outbox, Time).
Sender
Your sender information is listed here as received by the recipient. You can change or remove your
mobile number.
Other settings
Via XPhone UC settings, you can make additional setting such as confirmation messages by e-mail.
11.6 XPhone UC Voicemail
XPhone UC is a very powerful service. During your absence, it allows
you to play a message for your callers
your callers to leave you a message
your callers to be connected to your representative
you to listen to, control and configure your voicemail box from any telephone
you to obtain an overview of e-mails in your inbox from any telephone by
having your e-mails read aloud via Text-to-Speech enabling you to react
you to have an e-mail overview faxed to you.
If you are out of the office, you can configure your phone in such a way that all incoming calls are
forwarded to the voicemail dial-in number. Your administrator will provide you with this number.
Setting up the forwarding function automatically activates the voicemail functions. Inbound calls no
longer make your phone ring; instead, they are routed directly to the voicemail box. Depending on how
you set up your voicemail box (see "XPhone UC UM settings"), callers will hear a system text or a
personal greeting, can leave a message or be connected to your representative etc. You can then check
your voicemail box and e-mail inbox remotely.
11.6.1
Remote access
Remote access enables you to perform a number of functions and is possible from any telephone
connection. To use this function you require a touch tone telephone to enter your PIN or to navigate
through the menu.
FAX, VOICEMAIL, TEXT MESSAGE
67
There are various ways of initiating remote access.
Calling the voicemail dial-in number
Your administrator will provide you with the voicemail dial-in number. This is the same number you
forward calls to when you activate your voicemail box.
Dial the voicemail dial-in number from any telephone.
When prompted to enter your extension, enter it using the telephone keypad and conclude your
entry with the pound key >>#>>.
When prompted to enter your PIN, enter it using the telephone keypad and conclude your entry with
the pound key >>#>>. This is the PIN you defined in the menu Change voicemail PIN in the XPhone
UM settings (see Changing voicemail PINs see "Voicemail settings").
XPhone UM Voicemail now tells you whether you have any new voicemails and plays them back for
you.
If you call the voicemail dial-in number from your work phone, the system recognises you and you go
directly to the voicemail menu without entering your PIN. If you have activated the option Always
request PIN entry in the Voicemail menu in the XPhone UM settings (see Voicemail see "Voicemail
greetings"), you will be asked for your PIN even if you are calling from your extension. This option
improves security and can be activated if desired.
Calling your extension
Instead of the voicemail dial-in number, you can also call your extension directly. First, though, you
have to activate call forwarding from your extension to the voicemail dial-in number and ensure that
calls are not forwarded to anyone else at your company.
Dial your extension number from any telephone.
Wait until you hear your personal greeting.
You can press the star key <<*>> to interrupt the greeting while in progress.
When prompted to enter your PIN, enter it using the telephone keypad and conclude your entry with
the pound key >>#>>.
XPhone UM Voicemail now tells you whether you have any new voicemails and plays them back for
you.
Calling from a direct extension number
You can specify a direct extension number in the Voicemail menu in the XPhone UM settings (see
Voicemail see "Voicemail greetings"). When you call the voicemail dial-in number (see above) from this
telephone number (e.g. your mobile phone or your current number at a hotel), you go directly to your
voicemail box without being asked for your PIN.
To do this, you have to be calling from a phone that presents its caller ID. Otherwise, you cannot be
identified and will be asked for your extension and PIN.
If you have activated the option Always request PIN entry in the Voicemail menu in the XPhone UM
settings (see Voicemail see "Voicemail greetings"), you will be asked for your PIN even if you are calling
from your direct extension number. This option improves security and can be activated if desired.
11.6.2
Remote access functions
If you have set up remote access to your voicemail box, you can do more than just listen to inbound
voicemails. You can choose from a variety of functions depending on the rights you are granted by your
administrator. The system can go through each menu item and explain its functions, actions and which
68
FAX, VOICEMAIL, TEXT MESSAGE
keys activate them. Press the <<0>> key to get help at any time and repeat all your options.
11.6.2.1
Voicemail menu
Directly after dialling in to your voicemail box, you will find yourself in the main menu. The following
options are available here:
Managing your greetings (Greetings menu item)
Check which one of your greetings is active and change it if you wish. You can select one of your
greetings configured in the Voicemail menu in XPhone UC Settings (see section on Voicemail see
"Voicemail greetings") or create a new greeting. What's more, you can record your name and activate or
deactivate special greetings depending on the settings made by your administrator.
Listening to voicemails (Voicemails menu item)
You can listen to your new and archived voicemails. Additional options may also be available such as
Read caller number aloud (5), Return call immediately(6) or Delete message (9).
Settings
If XPhone UC Settings is not yet set up in the Voicemail menu, you can activate or deactivate (1) text
message notification of incoming voicemails here and change the number for text message notification
(2). You can also change the PIN specified in the XPhone UC Settings Voicemail menu for remote access
to the voicemail box (3) or enable your telephone for direct access if you have not already configured
this setting via XPhone UC Settings (4).
Listening to e-mails (E-mails menu item, not always available) (requires Text-to-Speech)
You can have the e-mails in your Microsoft Outlook outbox read aloud. You can choose whether you
wish to only have newly received e-mails read aloud or all of the e-mails in your inbox. You may have
other options available such as deleting e-mails or forwarding by fax etc.
You can also reply to e-mails by dictating your message to your voicemail box. Your reply is recorded as
a wave file (.wav) and sent to the original sender as an e-mail with an attachment.
Note: The system can only access e-mails in the Microsoft Outlook inbox. If you have a rule that
distributes inbound e-mails to different folders, those e-mails cannot be retrieved remotely.
FAX, VOICEMAIL, TEXT MESSAGE
69
70
COLLABORATION
12 Collaboration
XPhone UC Commander offers the possibility of Web collaboration, i.e. collaboration by several people
via "screen sharing". A distinction is made between free screen sharing which is purely internal (see
Internal screen sharing) and FastViewer Instant Meeting (see FastViewer Instant Meeting).
12.1 Internal screen sharing
XPhone UC Commander includes free screen sharing functions for in-company (1-1) usage. The function
is automatically available and without additional licenses for XPhone UC Office users as of Windows
Vista.
12.1.1
Features of internal screen sharing
Start Web conference via Instant Messaging or request screen sharing
Set up session without entering session numbers
In-company 1-1 use (for XPhone UC users)
12.1.2
Starting sessions for internal screen sharing
Internal screen sharing can be started "spontaneously" by Instant Message (IM) in that just one internal
contact is selected, Actions/Context menu (right-click) opened and either "Share my screen" or "Request
screen sharing" is selected. The instant message window opens for both participants and the session
invitation (yellow bar) is shown. The session can only be set up once the participant has clicked the
Accept button.
12.1.3
Licensing and activating internal screen sharing
No special license is required for internal screen sharing. Screen sharing is available for XPhone UC Office
users as of Windows Vista.
In order to activate the screen sharing function, the user must be assigned the Collaboration template
(see Server Manual) with authorisation for "Integrated screen sharing and remote control in the
Intranet". This enables the user to invite to and participate in screen sharing or even remote control
other users.
COLLABORATION
12.1.4
71
Internal screen sharing function
After selecting one internal contact and opening Actions/Context menu (right-click) -> Share my
screen... or Request screen sharing..., the Instant Message (IM) window opens for both participants. To
start the session, the invited participant must click "Accept" in the yellow area. The session panel opens
for the participant who shares his screen:
Then the following information/functions is/are visible:
the name of the participant who can see the shared screen
if several screens are linked, the screen which is currently visible
whether the other participant has remote control over the shared screen
"Pause"
The shared screen goes black for the other participant and a "pause symbol" is
displayed until the session is resumed ("Play" button
"Stop"
)
to end screen sharing
to fold or
expand the session panel
"Activate control" to allow the other participant remote control over the shared screen (status
message at top changes to "Active remote control")
"Deactivate control" to withdraw remote control by the participant over the shared screen. This is
also possible via the Alt+Pause hotkey combination.
"Change direction"
initiates a change in direction of the shared screen. The panel closes; the
other participant must confirm the change in direction by clicking "Accept" in the IM window in the
yellow area.
"Instant message"
causes the IM window to appear in the foreground.
As a viewer, expansion of the IM window is shown with the following information/functions:
"Screen from" name of the participant who has shared his screen
Presence status, Instant Message status and name of participant who has shared his screen
72
COLLABORATION
"Call" lists all of the phone numbers available for calling the participant
"Actions" offers all of the possible functions such as "Send e-mail" or "Send text message" (see
Actions under Favourites or Contacts).
"Screen sharing" opens the menu for internal screen sharing
"Change direction"
initiates a change in (viewing) direction of the shared screen. Expansion of
the IM window closes, the other participant must confirm the change in direction by clicking "Accept"
in the yellow area in the IM window.
"Original size"
expands the screen shown to the original size within the screen sharing window.
The screen section can be shifted using the scroll bar.
"Full page view"
expands the screen sharing window to the viewer's full page.
"End full page view"
reduces the screen sharing window to the previous size of the IM window
with screen sharing expansion.
"End session"
ends screen sharing.
12.2 FastViewer Instant Meeting
FastViewer is designed for use inside and outside the company. C4B offers an interface for integrating
FastViewer (Modul fastcom.exe) in XPhone UC Commander.
Note: The documentation scope of FastViewer Instant Meeting outlined in the XPhone UC
Commander manual is restricted to an introduction to a FastViewer session (screen sharing). For
general usage of FastViewer Instant Meeting, please refer to the FastViewer manual:
http://portal.fastviewer.com/documents/de/docs/Handbuch_v31.pdf.
Please note that C4B does not offer any support in the usage or administration of FastViewer
Instant Meeting.
12.2.1
FastViewer Instant Meeting features
Start a Web conference via Instant Messaging or request screen sharing
Set up session without entering session numbers
Set up Web conference with several persons from XPhone UC Commander (ad hoc)
Send invitations to external contacts by e-mail from XPhone UC Commander
Invite participants to a current FastViewer session from XPhone UC Commander
Use of the central or in-company FastViewer server
12.2.2
Starting sessions for FastViewer Instant Meeting
A spontaneous session can be started for "internal" users via Instant Message (IM) by selecting one or
more internal contacts (max. ten for screen sharing), opening Actions/Context menu (right-click contact)
and selecting "Session invitation to ... (IM)" or "Remote control rights from ... (IM)" via "FastViewer
Instant Meeting".> (FastViewer remote control is only possible when just one contact has been
selected.) The instant message window opens on both sides and the session invitation (yellow bar) is
shown. To enable a session to be set up, the participant must Accept the invitation in the IM window.
Another possibility for starting spontaneous sessions is to send invitations by e-mail in which one or
several contacts are highlighted (max. 100 contacts for screen sharing, incl. external users), open
Actions/Context menu (right-click contact) and via "FastViewer Instant Meeting",> select "Send session
invitation (e-mail)" or "Request remote control rights (e-mail)" for just one contact. The e-mail with
the template text, the contact's e-mail address and the invitation (left) open and need to be sent
manually (press the "Send" button in the e-mail form) and possibly individualised.
COLLABORATION
73
A session can also be planned in advance with a FastViewer license (see Collaboration template in the
Server Manual) by right-clicking a contact in the context menu and opening the Conference planner in
FastViewer Instant Meeting. NB: A planned session does not mean that a license is also reserved for
the planned time. There can be overlaps as the conference planner also has a license. For an exact
description of the Conference planner, please refer to the FastViewer manual under
http://portal.fastviewer.com/documents/de/docs/Handbuch_v31.pdf.
TIP: If you have linked the Virtual Directory (VDir) as the address book in Outlook, you can insert all
of the VDir contacts you need in the session invitation e-mail opened in the Conference planner.
Participants can also be invited to an existing session at a later stage. This can be done by either
selecting the participants in XPhone UC Commander, Actions/Context menu (right-click contact) ->
FastViewer Instant Meeting -> "Invite 'xxx' to screen sharing session 12345 (IM)" or "Invite 'xxx' to
screen sharing session 12345 (e-mail)", or you can use the FastViewer session panel and invite the
participant(s) by e-mail via the "Invite" button.
To avoid overlaps by FastViewer sessions (owing to multiple licenses), a reminder function is available
which reminds you to end open sessions after a certain period of time.
A detailed description of all FastViewer Instant Meeting functions is available in the FastViewer
Manual http://portal.fastviewer.com/documents/de/docs/Handbuch_v31.pdf.
12.2.3
Licensing and activating FastViewer Instant Meeting
FastViewer Instant Meeting is available for XPhone UC Office users as of Windows XP.
In order to activate the FastViewer Instant Meeting functions, the user must be assigned the
Collaboration template with authorisation to "Link to the Web conference solution FastViewer Instant
Meeting". This enables the user to invite to or participate in FastViewer Instant Meeting or remotely
control other users.
Full functional scope of FastViewer Instant Meeting requires a special "Instant Meeting" license from
FastViewer or OpenScape.
Note: Fastviewer or OpenScape licenses can be procured from the respective partner and are not
distributed or supported by C4B.
12.2.3.1
Fastviewer demo mode
Without a license, FastViewer Instant Meeting (screen sharing) can be used with full functions but
limited to a period of five minutes.
Please note that a session can however only be planned with a valid license (Conference planner).
12.2.3.2
Licensed Fastviewer mode
In licensed mode, the full functions of FastViewer Instant Meeting (screen sharing) can be used without
any time restrictions incl. Conference planner.
74
12.2.3.3
COLLABORATION
Licenses and features
Integration is only possible with the "Instant Meeting license" from FastViewer or OpenScape.
Information on the features offered by FastViewer is provided at www.fastviewer.de.
12.2.4
Testing FastViewer Instant Meeting
In XPhone UC Commander, a "test tool" is provided under Start -> All programmes -> XPhone UC ->
Tools -> Logging & Tools -> Tools -> <Test> XOFV. This enables you to find out what authorisations you
have for FastViewer Instant Meeting (e.g. host session or participate only), what license is used and
whether the system requirements check was successful or errors arose during testing (e.g. network or
Internet connection interrupted).
XPHONE UC SETTINGS
75
13 XPhone UC Settings
You can define the basic behaviour of the various Unified Messaging services in the XPhone UC settings
web interface. Some of these settings can later be overwritten on a case-by-case basis for individual
faxes or text messages. Call up the UC settings in your e-mail client via Settings for XPhone UC or in
XPhone UC Commander via File -> UM settings.
At various points, you will be requested to enter phone numbers in entry fields. The following
telephone number formats are supported:
089123456
089 123456
(089)123456
(089) 123456
089-123456
089 - 123456
089/123456
089 / 123456
004989123456
0049 89 123456
+4989123456
+49 89 123456
+49(89)123456
+49 (89) 123456
170 (where internal telephone number length = 3)
etc.
You must always enter the complete area code with a leading zero (e.g. 089 for Munich). If a country
code is provided, it must be preceded by + or 00 (e.g +49 or 0049 for Germany). The country code, area
code and telephone number can be separated by characters and spaces; there are no restrictions on
their type or number. Internal company extensions are recognised as such if they correspond to the
length of internal phone number defined in XPhone UC Server under Settings -> CTI -> Dialling
parameters -> Properties (e.g. 170, where length of internal phone number = 3).
13.1 Call forwarding
This menu is only available if you use Unified Messaging in conjunction with XPhone UC Commander and
an active telephone line is assigned to you. Like the CTI client, this feature enables you to distinguish
between internal and external inbound calls and to forward them to other numbers or to your
voicemail box. Click Set call forwarding to save your settings.
13.2 Voicemail greetings
Greeting text
Select the greeting for your callers in your absence. You can choose between one or more centralised
greetings and (depending on the configuration by your administrator) several personal greetings
designed by you.
Via the Playback button, you can listen to the respective greeting. Click Edit to change the greeting.
The greeting text appears in the bubble below once it has been entered accordingly. If your name is
used in a greeting, you can record it (again) via the Edit button.
Special greetings
Special greetings can be provided by the administrator in order to avail of company-wide greetings for
particular occasions such as bank holidays or company holidays, for example. Once they are activated,
they temporarily replace the greeting activated by you.
76
XPHONE UC SETTINGS
To activate or deactivate special greetings, set or remove the checkmark at Special greetings can
temporarily replace your own greeting. The administrator can also however restrict this configuration
option.
Click Save to import the changes.
13.3 Voicemail settings
E-mail forwarding
If you wish to send copies of your voicemails to an e-mail address, select whether they are to be sent to
your e-mail address or another address. It is possible that your administrator offers a restricted version
of this configuration.
Text message notification
Activate the option Text message alert when a voicemail message is received if you want to be notified
by text message of incoming voicemails.
Additionally, activate the option Even if no new voicemail message was left if you want to receive a text
message every time you miss a call, even if the caller did not leave a message. If this option is
deactivated, you will only receive a text message if the caller left a message.
It is possible that your administrator offers a restricted version of this configuration.
E-mail notification
Activate the option E-mail alert when new voicemail is received (without voicemail attachment)if you
want to receive notification by e-mail as soon as a new voicemail is received.
Additionally, activate the option Even if no voicemail message was left if you want to receive an e-mail
even if the caller did not leave a message.
It is possible that your administrator offers a restricted version of this configuration.
Remote access
Activate the option Allow remote access if you want to listen to and configure your voicemail box from
any telephone. Most of the options that can be configured in the XPhone UC settings can also be edited
remotely. If this option is deactivated, you can no longer access and configure your voicemail box by
telephone.
Specify which telephone number is to be used as your direct access number. When you call the
voicemail dial-in number from this telephone number, you go directly to your voicemail box without
being asked for your PIN. The default setting is the mobile phone number listed in your contact data.
You can also specify any other number for this setting (e.g. your current number at a hotel). To do this,
you have to be calling from a phone that presents its caller ID. If caller ID is deactivated on the phone,
you will be asked for your PIN just like when calling from any other connection.
Activate the option Always request PIN entry if for safety reasons you always want to be asked for your
PIN when calling your voicemail box, even when calling from a direct access number.
XPHONE UC SETTINGS
77
Change voicemail PIN
Use the Change PIN button to change the PIN you use for remote access to your voicemail box. First
enter the old PIN, then enter the new one twice.
13.4 Fax
Set the basic settings for faxing in the Fax menu item. Some of these settings can be overwritten on an
individual basis for each fax when it is created. See Fax options for more information.
Header: This is where you can define a default header that appears on all faxes. It is written at upper
left in the small line that also contains the sender ID.
You can write in a text or specify variables in this field. If you use variables in the header, the variables
will be replaced by the user data stored in the XPhone server when the fax is sent out. The system uses
the following placeholders:
<<name>> is replaced by the value in the 'Last name' field
<<firstname>> is replaced by the value in the 'First name' field
<<company>> is replaced by the value in the 'Company' field
<<custom1>> is replaced by the value in the 'Custom1' field
<<custom2>> is replaced by the value in the 'Custom2' field
<<custom3>> is replaced by the value in the 'Custom3' field
<<custom4>> is replaced by the value in the 'Custom4' field
It is also possible to combine text and variables (e.g. "Fax from <<last name>>").
Text message notification: Activate Delivery notification as text message if you want to be notified of
inbound faxes by text message. Please note that activating this option may incur added costs for your
company.
If desired, you can arrange to receive a confirmation e-mail by activating one or more options under
E-mail confirmation. This confirms that the data was received by the remote device. You can change
these settings individually whenever you create a fax.
Confirm if sending was successful
Confirm if sending failed
Attach fax copy to confirmation message
Cover page: Here you can define a Default cover page that is attached to every fax. You can change this
cover page individually whenever you create a fax.
13.5 Text message
Set the basic settings for using text message functions in the Text message menu item. Some of these
78
XPHONE UC SETTINGS
settings can be overwritten individually whenever you create a text message. See Text message options.
Phone numbers
Under Sender phone number you decide which number should be displayed as the sender number to
people who receive your text messages. If you select Mobile phone number master data, the system
will present the mobile number in your contact data to the recipient. The system will always present
the latest number, even if it is changed in your contact details. Alternatively you can enter any other
sender number.
Under Notification phone number you set the number where you want to receive text message
notifications.
If desired, you can arrange to receive a confirmation e-mail by activating one or more options under
E-mail confirmation. You can change these settings individually whenever you create a text message.
Confirm if sending was successful
Confirm if sending failed
This confirms that the text message provider has received the text message. It does not confirm that the
provider has also forwarded it to the recipient. This confirmation e-mail cannot be considered a
delivery confirmation.
13.6 Mailbox
This is where you provide the Unified Messaging services with the password for your e-mail inbox
(Microsoft Exchange, IMAP, Notes Domino etc.). This is the password used by your e-mail client (e.g.
Microsoft Outlook) to call up your e-mails. It is generally your Windows password. Your current mailbox
password must be stored here in order for the Unified Messaging services to access your mailbox, for
instance to retrieve voicemails, etc. Each time your mailbox password is changed (due to company
policies, etc.), you must also change the password here. Enter the new password twice and click Save.
13.7 Changing passwords
Here you can change the password that you use to access your XPhone UM settings. First enter the old
password, then the new one twice.
13.8 Language
Edit the language of the XPhone UC Settings interface. Select a language from the list and click Save. The
change is immediately visible.
13.9 Logging off
When you log off the XPhone UM settings interface, you are asked whether you want to close the
browser window. For security reasons, we recommend closing the window so no other users can see
your data. But you can also leave the browser window open if you want to visit another website.
XPHONE – MOBILE CONTROL
79
14 XPhone – Mobile Control
14.1 Mobile line in XPhone UC Commander
The XPhone UC Commander can use your mobile line just like any other office landline provided that
you have been configured as a user for Mobile Control by your administrator and have the
corresponding license. You can dial using the call manager, prepare calls, search for contacts in linked
address books and utilize convenient CTI features such as Hold, Swap hold and Conference calls if your
mobile phone provider supports these functions.
To ensure that the mobile line is activated in XPhone UC Commander, the Mobile Control software must
be installed on your mobile phone and connected to XPhone UC Server.
To safely link the mobile device with XPhone UC Server, the device must be registered with the server
upon initial start-up.
More information on settings is also provided in the section on Settings for telephony.
14.2 Mobile client start-up
Start-up only requires installation of the client software on the mobile device and once-off registration
with your XPhone UC Server.
During start-up, your administrator unlocks the Mobile Control function for you on the XPhone UC
Server.
If the administrator has not selected any other method of client installation (e.g. deployment via
Blackberry® Enterprise Server), you will receive a text message with a download link for the client
software. After downloading, installation and starting the software, it is ready for registration with your
XPhone UC Server.
This requires:
a transaction code
your XPhone UC login password
Your transaction code is provided via an e-mail automatically generated from your XPhone UC Server.
After entering the registration data followed by successful registration, the client asks whether you wish
to be connected to the XPhone UC Server. In this case, the login password must be entered again. This
password is saved in coded form on the device to prevent login without any additional entries. Enter
twice to prevent an incorrect password from being saved.
14.3 Mobile Client settings
After installation, the program is stored in your mobile phone's installation directory and is ready for
use following registration.
If the XPhone Mobile Control application is opened, the following configuration entries are visible:
80
XPHONE – MOBILE CONTROL
Control element
Current status
Server connection
Status
Description
Connected
Connection with the XPhone UC Server, Mobile Control
possible via the Commander
Connected – Schedule
Connection with the XPhone UC Server set up on the basis
of schedule settings
Disconnected
No connection to XPhone UC Server.
Disconnected, Schedule
No connection to XPhone UC Server as current time is not
within the defined schedule
Disconnected, Battery
Disconnected as the battery level has fallen below the
defined level. As soon as the mobile is recharged, an
automatic attempt is made to set up a new connection
Disconnected, Error
Disconnected following an error, usually network problems
(no UMTS or WLAN reception) or the XPhone UC Server is not
available
On
The connection remains active until you disconnect it or
the battery level is too low
Off
No connection is set up
Schedule
Depending on the time defined in the schedule, the
connection starts and ends automatically
<Your current access
point>
Here you can select the access point via which you wish to
set up the connection to the XPhone UC Server
Off
The XPhone UC Commander cannot dial via the mobile line
On, Silent
The XPhone UC Commander can be used to dial the mobile
line but the mobile end device does not emit any control
signal
On, Play sound
The XPhone UC Commander can be dialled via the mobile
line. For security reasons, a control signal is emitted from
the end device before the dialling process is started
Remote telephony
control
In the Options menu, the following functions are available:
Display log
This option is intended for the Support department. You can copy the contents of the log file into the
clipboard to send the content to your administrator by text message or e-mail.
Info
The software version number is shown here.
Settings
Use the Settings menu to make various changes to the configuration - these are described in more
detail below.
Close
XPHONE – MOBILE CONTROL
81
This closes the window and returns to the previous menu item. This does not result in disconnection.
XPhone Mobile Control - Settings menu
Connections
The connection settings contain information on UMTS host & port and WLAN host & port, and are
specified by the administrator. They should only be changed in co-ordination with the administrator.
Schedule
You can define the schedule when XPhone Mobile Control is to be automatically started and ended.
Enter the start and end times here as well as the weekdays on which XPhone Mobile Control is to be
started. Save your changes.
Options
You can edit the following settings:
Language - Choose between German and English
Stop on battery level - As soon as the battery level falls below the value defined here, the connection
is ended.
Connection on start-up - Define what XPhone Mobile Control should do when the mobile end device
is switched on. The options available are On, Off, Schedule.
Send location to server - Activates or deactivates transmission of the mobile phone cell function.
Currently not used.
Protocol level - Configure the logging level. This setting is intended for product support.
Password
The password saved on the device can be changed here. This setting does not change the login
password for the XPhone UC Server.
Server registration
This function enables you to renew your server registration. This is necessary when the device is
transferred to another person, for example.
Reset
Resets all settings to the default specified by the administrator. This does not have any influence on
server registration.
82
COMBINING CTI WITH OTHER APPLICATIONS
15 Combining CTI with other
applications
15.1 Dialling via URL log handler
External applications can utilise the XPhone UC Commander dialling function if notation via URLs is used
for dialling.
The Commander implements the following URL handlers:
tel: - The number is dialled when the URL is executed.
phone: - The number is imported to the Commander call manager.
A web application dials by clicking the following hyperlink, for example:
<a href="tel:0049891234567">0049891234567</a>
15.2 XPRun
XpRun serves as an interface between the XPhone Client and other applications. Numerous XPhone
features can be accessed from individual applications.
XpRun is registered as protocol handler (see mailto on automatically calling the default e-mail client).
XpRun is installed with XPhone UC by default.
The feature to be executed is called and communicated to XpRun via the command line interface as a
parameter.
XpRun calls are all performed from the Execute window for tracking reasons. But calls can also be made
from a html page, for example.
15.2.1 Registering / Deregistering
XpRun needs to be registered to ensure that it can be called from other applications. As XpRun is a
component of the XPhone UC client setup, it is automatically registered during setup.
If however manual registration is necessary, XpRun must be called using the -Register parameter. The
default location of XpRun is C:\Programme files (x86)\Common files\C4B\AppBridge. In this case, the call
is:
C:\Programme files (x86)\Common files\C4B\AppBridge\XpRun.exe -Register
If deregistration would appear to be necessary, you can use the -Unregister parameter to do so.
15.2.2 Info dialogue
Call XpRun without parameters to obtain an overview of the call convention:
xprun:
15.2.3
Making calls
Transferring a phone number as a parameter triggers direct dialling of the phone number indicated.
xprun: +49(89)840798 160
The phone number is dialled immediately. The country code does not necessarily have to be indicated
along with the phone number; when calling an extension (e.g. 160), indicating this number is
sufficient.
COMBINING CTI WITH OTHER APPLICATIONS
15.2.4
83
Compact view
If you wish to open XPhone UC Commander in the compact view, a verb with the allocated phone value
must be transferred to XpRun. If the compact view is to be filled with contacts, the data field (e.g.
name) and its value (e.g. walker) can be transferred as additional parameters.
xprun:verb=phone;name=walker
This means that XPhone searches for all contacts called "walker" and then shows them in the compact
view.
15.2.5
Call manager
The call manager is called via the action verb. Just like calling the compact view, optional search
parameters (e.g. search for contacts called "walker") can be indicated.
xprun:verb=action;name=walker
15.2.6
Forwarding another protocol handler's call to XpRun
If when calling another protocol handler, the call is to be forwarded to XpRun, this forwarding can be
performed using the "-Register <Name_of_protocol handler>" command. If, for example, when calling
mailto instead of the default e-mail client XpRun is called, the following call should be performed:
xprun: -register mailto
Finally, when calling mailto:0898407980,the participant whose phone number is 0898407980 is called
instead of a new e-mail.
Undo this change using the following command:
xprun: -unregister mailto
15.3 Rules engine
XPhone UC enables you to create self-defined actions which are implemented by mouse click and/or
assign rules to telephone events. If such an event (e.g. a call from a specified phone number) occurs,
the application checks for suitable rules and carries out the action assigned to the event.
Note:
Sample rules are already available after installation but they are deactivated. You can activate these
or even adapt them as required.
Rules comprise three elements: Time, condition and action.
Time
Show as action in menu
a) First enter a text for the menu entry.
b) Go to Advanced to define the position and, if necessary, the graphic for the entry. The menu entry can
be displayed at the following positions:
Calls, Contacts, Call manager
Call manager
Calls
Contacts
Main screen ->Tools
c) Use the Load button to allocate a graphic provided that it complies with the following conditions
Size: 16x16px
Format: png, 24 Bit
84
COMBINING CTI WITH OTHER APPLICATIONS
Execute automatically when
Select an entry from the drop down list for the time at which the rule is to be executed. For inbound
calls, for example, this can be as soon as the phone rings (Inbound: Start ringing) or as soon as the
XPhone programme starts.
Condition
a) Specify whether the action/rule is to be executed alwaysor only when certain conditions prevail.
b) If the action/rule is only to be active under certain conditions, use Define to configure when this is the
case (e.g. when a certain company calls).
c) If the conditions are to be encapsulated, please activate the Advanced check mark.
Action
The following commands can be linked with telephone events:
Execute a URL
Execute a programme
Execute a script (VBS)
Copy into the clipboard
Send an e-mail
Send a DDE command
Test output
Play sound
Execute a server command.
Depending on the command selected, you may need to enter various additional parameters.
Tip: If you create a test output menu item, for example, all of the parameters for the selected
journal entry will be displayed with their corresponding values.
15.4 Hotkey features
Triggering telephony functions using hotkeys
XPhone UC Commander enables you to use telephony functions from almost all Windows applications
directly without calling the telephony application. For this purpose, you can create hotkeys that trigger
events. This is especially useful if you are working in another application and wish to dial a number in
that application, or if, for some reason, you do not wish to show the XPhone UC Commander window
while you are working in the other application. The following functions can be triggered using hotkeys:
Dial: Select a phone number in another application, e.g. Microsoft Excel or an internet page, and
then press the hotkeys for Dial to begin dialling. It does not matter if the phone number contains
special characters such as spaces or brackets.
Accept: You can accept calls by pressing the corresponding hotkeys
Disconnect: You can use hotkeys to disconnect calls.
Start contact search: If you wish to determine whether a contact is already stored in your address
books, select the name and press the corresponding hotkeys to search all databases connected to
XPhone UC Commander for this contact.
Changing views using hotkeys
XPhone UC Commander offers two views: Fullscreen view and compact view. You can use hotkeys to
COMBINING CTI WITH OTHER APPLICATIONS
85
switch between these two views, or to show one of the views (see Operation).
Defining hotkeys
You can define the hotkeys, if any, you wish to use.
a) Open Tools-> Options.
b) Open System hotkeys.
Here you can define
the hotkey functions you wish to use
the hotkeys you wish to use The default combinations are ALT + F12 for telephony functions and F11 /
Shift + F11 for the views. To define a new combination, proceed as follows:
a) Click the corresponding entry field.
b) Now press the buttons you wish to define as the hotkey.
You can use Hand off hotkey to application to specify whether Windows or XPhone UC Commander
should manage the hotkeys you defined:
Disabled (default): The configured hotkeys are managed by Windows. If an XPhone UC Commander
hotkey is detected, the operating system sends a message to the CTI application. The other
applications are not informed when these hotkeys are used. The is the preferred method. In some
system environments, this method is blocked, e.g. by anti-virus programs.
Enabled: XPhone UC Commander monitors all key activities and reacts to the defined hotkeys. The
active application receives messages regarding the keys you pressed. Only activate this option if the
default method is unreliable in your environment.
86
CTI MESSAGING WIZARD
16 CTI messaging wizard
16.1 Function of the messaging wizard
The abilities of XPhone UC Commander consist of far more than telephone support. You can use the
integrated messaging functions to make your work processes noticeably more efficient, and to create
e-mails, faxes, letters, order confirmations and so on directly from a call, or from an entry in a journal
or address book. You access your templates directly, whether they are saved locally or centrally. XPhone
UC Commander is connected to existing data bases and uses field functions to enter the required
contact data automatically, including the salutation and your sender information.
You can link up to 30 templates each for e-mails, faxes, letters. You can save additional template files
and transfer them to the selection list if required.
XPhone UC Commander installs template files into the Windows application data directory for all users.
In Windows XP, standard users are only assigned read permissions. Only the main users and
administrators have write permissions. This means that standard users are unable to change templates.
There are two ways of enabling standard users to modify templates:
The administrator changes the user permissions for standard users for the XPhone UC Commander
directory in the application data directory for all users (default: C:\Documents and Settings\All
Users\Application Data\XPhone40\Templates) so that they also have write permissions.
Note: The application data directory is not visible in the default Windows Explorer setting.
In Tools -> Options -> Messaging, the user configures the messaging template directory to be the
user's own application data directory (default: C:\Documents and Settings\<User>\Application
Data\XPHONE40\Templates) and copies the template files (*.dot and *.txt) to that location.
16.2 Activating messaging features
a) Go to Tools ->Options and select the Messaging tab.
b) Switch the messaging wizard features on or off by activating / disabling the check box.
16.3 Creating custom messaging templates
a) Go to Tools -> Options -> Messaging. Select a template type, e.g. Letter.
b) Click Add and choose whether you wish to open an empty template or edit an existing template. Select
the option Existing template if you wish to connect a template that is saved locally or centrally.
c) Specify the directory in which you wish to create the template.
d) Specify the file name and template name, or select the template you wish to edit. A Word document
opens and the dialog window with the XPhone UC Commander fields appears. Now adapt the document
to your specifications and enter your texts.
e) Position the required fields.
f) If you wish to copy an existing document manually to a template directory in XPhone UC Commander,
you must specify the document name in Microsoft Word in the Title field (under File -> Properties ->
Summary )as you wish it to appear in XPhone UC Commander. The Category field must contain
XPhone;Letter for letter templates and XPhone;Fax for fax templates. The Word document must be saved
as a .dot file.
CTI MESSAGING WIZARD
87
16.4 Transferring your contact data to messaging templates
As well as the contact information, you can also have your sender data entered in your templates
automatically. To do this, you must fill in your personal business card once:
a) Go to Tools -> Options and select Messaging.
b) Click on My contact details and enter your contact details.
c) Add the corresponding field functions to the template if you wish the sender information to be
transferred to your template. The prefix XPABS indicates the fields for the sender information.
d) Select the template (see Modifying existing messaging templates) and click Edit.
e) Now enter the fields in the template. Your contact data is now entered automatically.
Hint: It is advisable to have your own contact details entered automatically if central templates are
used by multiple users.
16.5 Installing sample templates
First, check whether the messaging samples have already been installed on your computer:
a) Go to Tools -> Options and select Messaging.
b) Click the Letter button to modify an existing letter template.
c) If no templates are displayed, it means that they have not been installed. You can install these
templates very easily:
d) Click the Windows Start button on the bottom left of the screen and open the Control Panel.
e) Double-click the Add or Remove Programs folder and select XPhone UC Commander.
f) Click the Change button. The installation wizard appears.
g) Click the Next button.
h) Activate Change program and then click Next. The XPhone UC Commander software components are
displayed in a structure tree.
i) Open the Messaging examples drop down menu.
j) Select the option This feature, and all subfeatures, will be installed on the local hard drive.
k) Click Install and then Finish.
l) Exit the Control Panel. The messaging templates have now been installed.
16.6 Modifying existing messaging templates
a) Go to Tools ->Options and select the Messaging tab.
b) Click the Letter button to modify an existing letter template.
c) Select the template and click Edit.
d) The template opens. Edit the template and save the changes.
Hint: If you create a new template in the workgroup directory or modify a template stored there,
these settings affect everyone who uses the same workgroup directory.
16.7 Removing messaging templates
a) Go to Tools -> Options and select Messaging.
b) Click the Letter button to delete an existing letter template.
c) Select the template and click Delete.
88
CTI MESSAGING WIZARD
d) Specify whether you want to remove the template from the directory or delete it completely.
16.8 Accessing messaging features
You can call the messaging features
a) from a call (caller popup) by using <<Actions>>
b) from an entry in the journal or the address book.
16.9 Notification of a missed call
a) You can have an e-mail sent to you (or a colleague) to inform you of calls received in your absence. You
can only use this feature if the CTI software was started on your computer and is running in the
background.
b) Open Tools -> Options.
c) Select the Messaging tab and click Missed calls. The Out of office message window opens.
d) Activate the Send e-mail check box. If you are using the Outlook or Notes add-on, you can also select
the option of placing it in your own inbox.
e) Enter your e-mail address and/or one or more other e-mail addresses in the Recipient entry field.
f) Specify whether you wish to be notified of internal calls.
g) Select a template from the Template used drop down menu.
16.10 E-mail call alerts
You want to inform a colleague of a conversation you had with a customer. To do this, you can send an
e-mail call alert containing all relevant information on the contact, e.g. name, company, phone
number, and the date and time of the call. You can access this feature
via the context menu in journal entries
directly from the caller popup during the conversation
Hint: If a call was forwarded or picked up by a colleague, the e-mail address of the dialled party is
automatically added to the address field in the e-mail call alert.
INTEGRATION IN MICROSOFT OUTLOOK
89
17 Integration in Microsoft Outlook
17.1 Operating CTI functions from Microsoft Outlook (from Outlook
2010)
XPhone UC Commander functions can be integrated in the Outlook interface. You can control all
telephone functions directly from this familiar interface without leaving the Microsoft Outlook window.
You can access all data bases connected to XPhone UC Commander.
Starting telephony/messaging functions from the inbox
The XPhone ribbon offers the following messaging functions in Outlook as a whole:
Call
New fax (see Writing a new fax)
New text message (see Writing a new text message)
Open UC settings (see XPhone UM settings see "XPhone UC Settings")
Presence settings
Select an e-mail in your inbox (or any other element such as contact, task or appointment). The names of the persons involved
(e.g. e-mail sender or other recipients) are listed by clicking the <<Call>> button and, if contact data is found, the available
telephone numbers are shown in the additional menu. Click a number to open the respective contact.
Click New fax to open the fax dialogue for creating a new fax. Via the To... button, contacts can be selected and file attachments
inserted via Drag & Drop.
Click New text message to open the text message dialogue for creating a new text message. Via the Text message to... button,
contacts can be selected or entered manually.
UC settings can be easily opened by clicking the button.
Functions for calendar synchronisation are offered.
A detailed description of all Office functions can be found in the manual under Start -> All programmes
-> XPhone UC -> Manuals -> Outlook User Manual
17.2 Starting search functions from the Outlook interface from
Outlook 2010)
The XPhone ribbon integrated in Microsoft Outlook offers the Find contact function via the Call button.
An entry window opens in which all address books linked with XPhone UC Commander can be browsed.
a) Enter a name or part of a name in the entry field and press the Enter key.
b) XPhone UC Commander opens and shows all of the search results.
90
INTEGRATION IN MICROSOFT OUTLOOK
Tip: You can use the entry field to browse all linked address books, regardless of their data base
format.
17.3 Accessing Microsoft Outlook elements from XPhone UC
Commander
Creating an e-mail call alert
You can create an e-mail call alert to inform a colleague about a call. (see also E-mail call alert see
"E-mail call alerts"). You can access this function from
a call (caller popup)
a journal entry
Hint: If you picked up a call for a colleague, or if the call was forwarded to you, the e-mail address
of the dialled party is automatically added to the address field in the e-mail call alert.
Opening Microsoft Outlook contacts
You can access the Microsoft Outlook contact data record corresponding to the caller from
a call (caller popup or compact view)
an entry in the journal or the address book.
Creating appointments and tasks
You can use the action dialog to access other Microsoft Outlook elements from a call or from an entry in
a journal or address book. You can, for example, open your calendar and enter an appointment during
a call. You can also create tasks in the action dialog.
a) Go to Tools -> Options and select the Outlook Add-On tab.
b) Go to Actions and select the check box Display in actionmenu: Appointment, journal entry, task.
Hint: If you picked up a call for a colleague, or if the call was forwarded to you, the name of the
dialled party is automatically added to the address field.
Accessing another user's calendar
If a call was forwarded or you picked it up for another colleague, you can also open the calendar of the
dialled party. This only works if you have an Exchange server. Access by others must also be enabled in
that calendar. If you have write permission, you can make an appointment for that colleague.
Opening a journal entry
If you keep a journal in Microsoft Outlook, you can open the corresponding journal entry from a call. For
more information, read Journaling in Microsoft Outlook.
INTEGRATION IN MICROSOFT OUTLOOK
91
17.4 Journaling in Microsoft Outlook
a) Go to the fullscreen view (see Operation).
b) Go to Tools > Options and select Outlook Add-On.
c) Select the check box Activate journaling for calls made.
d) Now specify the calls you wish to log in the Microsoft Outlook journal (you can also choose other
database formats). You can change this selection at any time by clicking Change. You can specify a
separate journal folder for each connected database. This makes sense if, for example, you wish callers
saved in your personal address book to be entered in your personal Microsoft Outlook journal, but do
not want callers from a company address book to be logged there, or wish them to be logged in a
central Microsoft Outlook journal on the Exchange server.
Microsoft Outlook contact folders offer the additional option of displaying all calls to and from a certain
contact in the Activities tab. To do this, you must assign the Outlook journal to the corresponding
Outlook contact folder in Microsoft Outlook.
a) Go to Microsoft Outlook and select the required Microsoft Outlook contact folder in the Microsoft Outlook
folder list.
b) Right-click to open the context menu.
c) Select Properties and then Activities. Specify the folder group, so the folders that are connected to each
other. The default journal folder is the Microsoft Outlook journal. If you wish to keep your journal in a
different folder, e.g. a subfolder, you must create a new folder group. Click New.
d) Enter a name for the folder group and then select the journal folder that you earlier selected for logging
in XPhone Unified Communications, and then confirm your selection.
17.5 Starting the XPhone client and Microsoft Outlook
simultaneously
If the Microsoft Outlook add-on is installed, the XPhone client always accesses Outlook functions, even
if you have not yet started Microsoft Outlook. For this reason it is advisable to start Microsoft Outlook
before starting the XPhone client.
If you have configured the XPhone client and Microsoft Outlook to start automatically when Windows
starts, e.g. by adding the programs to the Startup folder, this may result in conflicts because of the
different starting times of these programs. You can avoid these conflicts by going to Tools -> Options ->
Outlook Add-On and activating the options Start XPhone client with Outlook and Exit XPhone client with
Outlook. This way, the XPhone client and Microsoft Outlook are always started in the correct order.