1
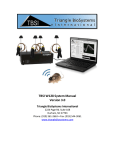
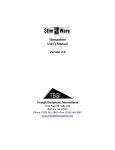
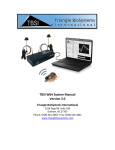
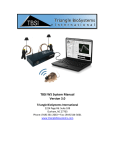
Video Tracking Software User’s Manual Version 1.0 Triangle BioSystems International 2224 Page Rd. Suite 108 Durham, NC 27703 Phone: (919) 361-2663 • Fax: (919) 544-3061 www.trianglebiosystems.com OptiMap™ User’s Manual Table of Contents Document Overview ................................................................................................................................. - 2 Shipped items list ...................................................................................................................................... - 2 Software & Hardware Installation ............................................................................................................ - 2 System Requirements .................................................................................................................. - 2 - OptiMap™ Installation ................................................................................................................. - 2 - Saving & Loading Files ............................................................................................................................... - 3 Saving Files ............................................................................................................................................ - 3 Loading Files.......................................................................................................................................... - 3 Intensity Detection.................................................................................................................................... - 4 Video Settings ........................................................................................................................................... - 4 Framerate.............................................................................................................................................. - 4 Resolution ............................................................................................................................................. - 4 Video Calibration ...................................................................................................................................... - 4 Live Mode.............................................................................................................................................. - 4 Exposure: .............................................................................................................................................. - 5 Threshold: ............................................................................................................................................. - 5 Auto Find LEDs ...................................................................................................................................... - 5 Convert Length:..................................................................................................................................... - 6 Offline Mode ......................................................................................................................................... - 6 Video Recording ........................................................................................................................................ - 7 Data Editing ............................................................................................................................................... - 8 Interval Selection .................................................................................................................................. - 8 Past & Future Data Persistence ............................................................................................................ - 9 Data Adjustment ................................................................................................................................... - 9 Data Interpolation Function.................................................................................................................. - 9 Switch LEDs ........................................................................................................................................... - 9 Offline Data Tracking ............................................................................................................................ - 9 Document history ................................................................................................................................... - 10 - Version 1.2 -1- 8/2013 OptiMap™ User’s Manual Document Overview This document will demonstrate how to use the TBSI OptiMap™ video tracking software. The program has the capability to detect and follow intense light sources in changing light conditions and to distinguish the colors of these light sources (both online and offline); calculate head orientation/velocity and distance traveled; and detect and interpolate lost data based on local movement patterns. The system requires the use of a Windows compatible video camera. TBSI recommends the Logitech HD Webcam C270 for this purpose. Once the camera’s drivers have been installed on the computer, OptiMap™ (either as part of NeuroWare© or a stand-alone application) will automatically detect the device and assume control over its functionality. Shipped items list Logitech C270 camera Optimap Installation CD (if stand-alone license) Collapsible camera monopod Camera clamp Software & Hardware Installation System Requirements The recommended minimum PC requirements are as follows: At least 3.0 GHz Dual Core Processor 4 GB RAM 100 MB of free hard drive space (1) USB 2.0 port Windows XP OS (64 bit) Service Pack 2 or later, Windows 7. Logitech HD Webcam C270* (included with OptiMap™ purchase) *Future support of Logitech C920 HD scheduled Q1 2014 OptiMap™ Installation OptiMap™ is available as a module within the TBSI NeuroWare© software or as a stand-alone application. If you have purchased NeuroWare© without also purchasing the OptiMap™ video tracking license, you will be able to view and record videos within the module, but you will not Version 1.2 -2- 8/2013 OptiMap™ User’s Manual be allowed to save any data. Please refer to the NeuroWare© manual provided on our website for more details concerning installing and running the NeuroWare© program. The Logitech HD Webcam C270 is a plug-and-play USB 2.0 device. Your computer will prompt you for driver installation when you plug in the camera for the first time. After these drivers have finished installing, you will be able to launch OptiMap™, after which the program will automatically detect and control the hardware. To install and run OptiMap™: 1. Insert the OptiMap™ installation disc into your computer. If you are installing the NeuroWare/OptiMap software combo, please refer to the NeuroWare manual for complete installation instructions. 2. Navigate to the OptiMap folder within the installation disc and double click MCRInstaller.exe, then follow the prompts to install the MCR Library. You could be required to restart your computer after installation is complete. 3. Copy the OptiMap.exe file and the graphics folder to the same directory in your computer. You can now run OptiMap by double-clicking the executable file. Make sure your webcam is installed and plugged in before launching the program. 4. The OptiMap™ tab can be found at the top right of the NeuroWare © program. Click this tab and then click the Start OptiMap button if you would like to run OptiMap™ from NeuroWare© to synchronize neural data with video tracking data. Saving & Loading Files Saving Files Before initiating any recording, you should choose a file directory to which you will save your data: File -> Recording Directory… There are two different types of files that can be saved by OptiMap™: Calibration Settings: File -> Save -> Calibration Recorded Video and Data: File -> Save -> Data Loading Files You can load calibration settings and video files for offline tracking. Videos that were not recorded using OptiMap™ are acceptable for use within the software, but they may yield less ideal results than those that were. Calibration Settings: File -> Load -> Calibration Version 1.2 -3- 8/2013 OptiMap™ User’s Manual Recorded Video and Data: File -> Load -> Data Intensity Detection OptiMap™ scans incoming video data and detects sources of intense light, regardless of the source’s color. The program then identifies the color of the light source and stores its color value and location (in pixels) into a list visible on the control panel. This detection method is ideal for experiments that involve dynamic environmental lighting. Video Settings The recommended video camera can collect up to 30 frames/second at a resolution of 640x480p. These are the default settings upon launching OptiMap™. These settings may be changed to reduce the amount of data to be saved. Framerate To set the video camera’s framerate: Video -> Framerate Resolution To set the video camera’s resolution: Video -> Resolution Note: Changing the video resolution will reset any workspace variables defined during calibration. Be sure to decide on a resolution before defining your workspace. Video Calibration Live Mode In a live video recording, you should first click on the CALIBRATE tab. Click the Auto Calibrate button to have the program adjust the camera’s light exposure and the light intensity threshold to their optimal levels – this will identify any LEDs within the frame. The camera will take between 10-20 seconds to calibrate. Do not adjust any of the controls or light sources during this time. Once the calibration has finished, you can manually adjust the Exposure and Threshold sliders to fine-tune the video settings to your requirements. Version 1.2 -4- 8/2013 OptiMap™ User’s Manual Exposure: Move the Exposure slider to the right to decrease the exposure, and to the left to increase. If the exposure is too high, light reflections will be misinterpreted as LEDs. Threshold: Move the Threshold slider to the right to reduce the LED sensitivity. If the Threshold is too low, light reflections will be misinterpreted as LEDs. Adjust both sliders to find the appropriate balance of visible video without false LED sensing. Auto Find LEDs In addition to the Auto Calibration process, LEDs can be identified automatically by clicking the Auto Find LEDs button (this will not adjust the camera settings) or manually by clicking the Manual Selection button. After the light sources have been identified, they will appear in a list (see picture below). The coordinates are in parentheses to denote the current locations in the video (or to alert you of lost tracking). Selected items in the list will be visible on screen, and they can be deleted by pressing the 'delete' or 'backspace' keys. Note: Optimap™’s LED detection works by finding areas on the screen that are more intense than the defined threshold. Therefore, the threshold should be set so that the LEDs are the only objects that exceed its intensity setting. Cross-sectional intensity (x and y) can be visualized by dragging the threshold slider. If the background environment is too bright to distinguish LEDs by intensity, lowering the exposure of the camera can help. Lowering the exposure also improves OptiMap™'s ability to identify colors. If an LED is badly saturating, the color it emits will appear white to the camera, and therefore indistinguishable from other saturating LEDs. Version 1.2 -5- 8/2013 OptiMap™ User’s Manual Convert Length: The Convert Length button is important for converting the video’s pixels into two dimensions of distance (x,y). You will need to place a ruler or some object of known length in the camera’s frame for reference. Follow the instructions that appear above the video to calibrate the proportions of your workspace. A window will appear asking you to specify a length (in cm). After this step has been completed, all pixel units listed in the LEDs box will be converted to centimeter units. To outline your experiment’s boundaries or define subspaces within the frame, select the type of space you wish to create from the drop-down menu in the Workspace section. Next, click the New Subspace button. Draw the new subspace on the video frame, resize if needed, and click Finished when complete. Offline Mode You can also calibrate a video that has already been recorded. All controls function similarly to the Live Mode except that the exposure control is disabled. To switch between calibration modes, use the Calibration Mode menu at the top of the screen. Calibration variables can be saved and loaded within mode or across modes. Version 1.2 -6- 8/2013 OptiMap™ User’s Manual Video Recording Once you have completed calibrating your video and workspace, click on the RECORD tab. If you haven’t done so yet, you should take a moment to confirm your save directory. Click the “…” button to launch a folder browsing window. Once you have chosen a save location, you can click the START button to start recording your video and data. If OptiMap™ was launched from NeuroWare©, clicking START will not immediately start a recording, but queue the program to start when NeuroWare© begins recording. During the recording process, you can change your Persistence and Data Density. Persistence: This number changes how many seconds each data point will persist in the viewing window before disappearing. Data Density: This number changes the number of data points shown per second. Other viewing options include toggling the video feed, data points, and data paths. The head velocity, head orientation, and total distance traveled are obtained using averages of position values recorded from the light source(s) on the animal’s head. Version 1.2 -7- 8/2013 OptiMap™ User’s Manual Data Editing Once your recording is complete, click on the EDITOR tab to assess the collected data and adjust any points that may have been lost or obscured. Important: To toggle the visibility of each light source’s data in the viewing screen, simply select it in the listbox. You can Ctrl+click multiple items in the listbox to show those data sets simultaneously. Press the 'delete' or 'backspace' keys to delete selected items. Interval Selection This function is useful for adjusting multiple data points simultaneously (ex. animal obscures light source(s) while remaining still). For videos and data collected with the OptiMap™ software: Use the “<<” and “>>” buttons to scan through and select frames in which one or more LEDs were not detected. The program will cycle through missing data points for only the light sources selected in the listbox. OR Use the Set First and Set Last buttons along with the slider below the video to manually select time intervals for data adjustment. Use the slider to scan the video, then click the Version 1.2 -8- 8/2013 OptiMap™ User’s Manual appropriate Set Time button to define the beginning and end of your time interval. You can also type in the times manually. Past & Future Data Persistence The past and future persistence can be set individually. Past data points are denoted with “◄” and the future data points are denoted with “►”. The current frame’s data points are surrounded by a large, colored circle. Data in the past or future that is marked as “lost” by the program is denoted with “x” while edited data is denoted with “■”. Data Adjustment A single data point in a single frame can be moved easily to a new location. Just click and hold the data point within the circle, drag the point to its new location, then release. This function can be performed multiple times for every data point in every frame. Only the most recent positions will be saved in the new data file. Data Interpolation Function To allow the program to adjust particular data points automatically, navigate to a frame interval containing missing data and click the Interpolate Data button. The program will perform a three dimensional (x, y, time) smoothing interpolation to adjust the positions of missing data with the selected interval. Switch LEDs Sometimes LED colors are misinterpreted by the program which results in the identities of a pair of LEDs becoming switched. Instead of dragging each LED marker to its correct position, click the Switch LEDs button to quickly exchange the locations. This button is only active when two LEDs are selected in the list box. Offline Data Tracking The program will disable the Record tab if you load OptiMap™ without connecting your camera to your PC or if you manually switch the program to its Offline Video mode. Once you load a video that was not recorded with the OptiMap™ software, the Calibrate tab will then be enabled and converted to its offline calibration mode; it will have the same functionality as it does during a live video feed except that the Camera Exposure slider will be disabled and the frame slider from the Editor tab will appear beneath the video. In the Calibrate tab, you should choose a frame using the frame slider, preferably one showing distinct light sources in the most common lighting conditions for that file. You can then use the calibration buttons to locate the light sources either automatically or manually. Adjust the Version 1.2 -9- 8/2013 OptiMap™ User’s Manual threshold slider to optimize the light detection. You can also define the workspace and length conversion at this time – any frame in your video file can be used to do this. Once you have finished calibrating the video, it’s time to return to the Record tab. The Track button will automatically scan the entire video file for the light sources that you found in the Calibration tab. If you are not satisfied with the tracking results (ie. not enough video frames were properly tracked), return to the Calibrate tab and readjust your detection settings, then click Track again. After successful tracking, you can proceed with adjusting your data as needed. Document history V1.1 initial release V1.2 Update camera compatibility and exposure controls 8/2013 Version 1.2 - 10 - 8/2013