Download 6th Planet
Transcript
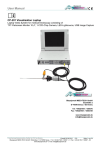
„Snake Scope“
flexible Endoscope , 30fps (VGA)
PX-1078
DEU
FRA
Index of nhAltSVERzEiChniS
Index of Contents
Security advice and und Guarantee ....................................................... 3
Your new endoscope........................................................................................... 4
Features ......................................................................................................................... 4
System Requirements..................................................................................................... 4
Included in Delivery..................................................................................................... 4
Technical Details .................................................................................................................. 4
Software-Installation......................................................................................... 5
Connection and Hardware Installation.............................................................. 6
Operation.......................................................................................................... 7
Snapshot-Function ................................................................................................. 7
Focus-Function .......................................................................................................... 8
User Program .................................................................................................. 8
Problem solution ........................................................................... 10
Security advice and Guarantee
•
This User manual should familiarize you with the functions of the product.
Please keep it save so you can check it anytime you need it.
You get 1 years guarantee for this product at correct use. Please note the
general terms and conditions.
Don´t change or rebuild the product because this affects the product safety.
Warning: Risk of injury!
Never open the product by yourself without authority
Never try to repair the product by yourself.
Treat the product very carefully. Crushes and strokes can damage the product.
The product is very sensitive against wetness and heat
Never use the product for medical purposes.
we assume no liability. Errors and technical changes excepted.
•
•
•
•
•
•
•
•
Important note for disposal
Don´t throw this electronical device into your consumer waste. Please contact your
local waste collection place.
They will give you all details about all the disposal and costs for that.
6
DEU
ihR nEUES EnDoSkoP
Your new endoscope
Dear Customer,
thank you for buying the digital endoscope with flexible swans neck. It helps you to take
pictures from places that are difficult to arrive. You can also find again lost things or just
use it as a webcam.
Please read this instruction very carefully to make sure that you use your endoscope
correctly.
Features
•
•
•
•
•
Snapshot-Function
Magnetic Part
Waterproof Camerahead
LED-light for photographs in darkness
Power Supply by USB
System Requirements
•
•
•
•
•
Pentium III 200 MHz
32 MB RAM
40 MB free memory on HD
CD- or DVD-ROM drive
Windows 98/Windows ME/Windows 2000/Windows XP/Windows Vista
Included in Delivery
1 x flexible Endoscope
1 x Magnetic Part
1 x Software- and Driver-CD
1 x Manual
Technical Details
• Length of USB-Cable (USB 1.1): 2 m
• swiveling swan neck: 88 cm
• resolution: 640 x 480 pixel
• picture rate: 30 fps
• environmental temperature: 0°C - 45°C
• storage temperature: -10°C - 60°C
DEU
7
Software Installation
1.
Put the CD into the CD-or DVD-Drive of your computer . If the SetupAssistant doesn´t start automatically please open the„Telescope DRIVER“.
2.
Assure yourself that the Endoscope is connected to the computer
and click „OK“.
3. Wait a few seconds until the Message „The Installation of AIT Driver is
finished“ appears and click „Finish. The Software is now installed on your computer.
8
DEU
AnSChlUSS UnD
hARDwARE-inStAllAtion
Connection and Hardware Installation
1.
Put the CD into the CD-or DVD-Drive of your computer
2.
3.
Connect the endoscope to the USB-Port of your computer .
Your computer opens the „Assistans for the search of new hardware“.
Please choose “Install Software automatically” and click “Next”.
4. Windows opens a Messag that says the program failed the Windows-LogoTest. This message just means that Windows doesn´t know the software. You
can go on with the installation by clicking “next”.
5.
Click „Finish“ to finish the installation. You can use the endoscope now.
bEDiEnU
Operation
After you connected the endsocope to the USB-Port of your computer you can use it as usuall
webcam. Click “start”, “Desktop” , “VGA SoC PC-Camera” to open a window – you can see the
shootings within this window. Other programms like Instant Messengers know the endoscope as
well.
Snapshoot-Button
Focus-Controll
Snapshoot-Function
When you press the Snapshot-Button on the endoscope, you can take a photo and
the program “SnapShot Reader” opens automatically to show the photo.
The „SnapShot Reader“ helps you to overwork your photos and save them.
•
File
Save
Save the photo.
Exit (X)
Exit the program
•
Rotate Orientation
you can turn the photo arround.
•
Help
Click on „About Snapshot Reader (A)…“to see Name, Copyright and Serial
of the program. .
Focus-Function
You can control the focus by the control-button on the endoscope. Start the
user program to change some more options. (see above)
User Program
To change some options and to take photos please start „AMCAP“-Software. You can
find a link to the program on your desktop after you´ve finished the installation.
If there is no link you can create one if you click “Start”, “All Programs”, “AIT Telescope
Driver”, “AMCap”. You can find a lot of different features of the software.
•
File
Set Capture File…
Make a AVI-File to store exposures on the camera.
Allocate File Space…
Save Captured Video…
Exit
Choose how much Memory-Space you can use for
the photographs.
Choose where you want to store the videofiles.
Close the program
DEU
bEDiEnUnG
13
•
Devices
Choose here, which connected device should work together with the program.
Choose „VGA SoC PC-Camera“, if the endoscope should work with the programm.
•
Options
Preview
Decide if you want to see a preview of the picture within the program.
Audio Capture Filter…
You can open a window to adjust the Audio
Options
14
DEU
Video Capture Filter
Video Capture Pin…
Open a window to adjust brightness, contrast etc. Click “advanced options” to
adjust special filters and backgrounds.
Please note: The function „face pursuit“ is shown in the menu but the endoscopes
chipset doesn´t support this function.
Open a window to adjust Single-Picture-rate, colour range and picture size.
•
Capture
Start Capture
Make a photograph.
Set Frame Rate
Adjust the frame rate
Set Time Limit
•
Set a time limit for the photographs
Help
Click „about“ to see the name, copyright and serial of the program.
löSUnG möGliChER PRoblEmE
Problem solution
The picture is not clear – clear the camera lense with a soft and dry towel.
There are black bars on the picture.
Delete possible disturbing sources from the camera.
The picture is too bright or too dark and has very low contrast.
Adjust the settings to change conrast, brightness etc.
The computer doesn´t notice the USB-Device.
1. Check that the device is turned on.
2. Check that the computer achieves the system requirements.
3. If there is no window that says „new removable device“ you can check the USB-Device on your
desktop –there should be written „Removable Device“
4. Disconnect the device from your computer and re-boot the system. Connect the device again
5. If you connected the device to an USB-Hub please try to connect it to the computer
directly.
6. USB-Devices need a lot of energy. Please check that your USB-Port
provides enough energy and if not, try to connect it through an USB-Hub.If
you have an Y-Cable you can try to use a second USB-Port to provice more
energy.
7. Check that the correct driver are installed
8. Make sure that the device is connected to the same USB-Port that you used when you
installed the hardware-driver.
9. Uninstall the hardware-driver and install them again.
10. C h e c k t h a t t h e US B- P or t wor k s c or r e c t l y.
11. Check that the USB-Port is activated in the BIOS of your computer
12. Deaktivate the„Legacy-USB“ Function in your BIOS
13. If you don´t usean USB-Device for a while, windows will deactivateit. Pleasereconnect thedeviceand
connect it again
14. Windows has problems to recognize the USB-Port when your Motherboard uses
an AMD 754 chipset. Please install the “Bus Master Drivers” or connect the customer
service.
Each time you connect the device with the USB-Port, windows tries to reinstall it again.
1. Check that you use the correct Hartware-driver.
2. Make sure that the device is connected to the same USB-Port that you used when you
installed the hardware-driver.
3. Uninstall the hardware-driver and install them again.
The filetransfer is very low
1. Check that your USB-Port supports USB 2. You need the following service packs
for USB 2.0 - Windows XP: Servicepack 1 (or higher)
- Windows 2000: Servicepack 4 (or higher)
2. Make sure that you just use one USB-Device at the same time to transfer the files. .
3.
Check that USB 2.0 is activated in the BIOS-Settings
The computer doesn´t start any more or works very slow. The more USBDevices you connect to the computer, the more time it needs to start and
work. Wait until the boot process is finished before you connect the
USB-Devices. If you don´t use the USB-Device please reconnect it.
You can´t transfer files on the USB-Device
1. Check that there is enough free memory space on your USB-Device. Delete
Files you don´t need or transfer them to your computer.
2. Re-Format the USB-Device with FAT32
Note: If you re-format the Device you will delete all saved files


