1
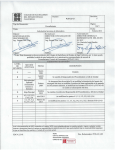
2012 NAPLAN Participation and Registration (PAR) Website User Manual Phase 1 CONTENTS INTRODUCTION 3 LOG-ON 3 HOME PAGE 4 STATEMENT OF COMPLIANCE 5 SCHOOL DETAILS 6 SCHOOL CONTACTS 7 ADD A SCHOOL CONTACT 8 EDIT A SCHOOL CONTACT 8 DELETE A SCHOOL CONTACT 8 STUDENT MANAGEMENT 9 ADD A NEW STUDENT’S DETAILS 10 EDIT A STUDENT’S DETAILS 11 SEARCH FOR A STUDENT 11 RECORD A STUDENT AS EXEMPT, WITHDRAWN OR DELETED 11 VISITING STUDENTS 12 ROLL CLASSES 13 ADD A ROLL CLASS 13 EDIT A ROLL CLASS 13 MOVE STUDENTS FROM ONE ROLL CLASS TO ANOTHER 14 PRINT OR SAVE THE LIST OF STUDENTS 15 PRINT ORDER 16 CONFIRMATION 17 FORMS 18 WEBSITE SUPPORT 19 APPENDIX: INSTALLING THE PRINT CONTROL 20 2 INTRODUCTION A secure website has been established for schools to register details of all students participating in the National Assessment Program Literacy and Numeracy (NAPLAN) tests. These student details are required to facilitate smooth administration of the testing program. The student Registration and Participation (PAR) website is at: www.naplanpar.nsw.edu.au Each school can only access and amend the details of their own students. Schools were provided with their usernames and passwords in a letter included in the package containing the Handbook for Principals. If the username and password have not been received please contact the help desk on 1800 665 627. The website will be open to schools by sector: Open Close NSW Government 5 March 2012 9 March 2012 NSW Catholic 12 March 2012 16 March 2012 NSW Independent 26 March 2012 30 March 2012 ACT (All Schools) 19 March 2012 23 March 2012 In the registration phase (Phase 1), schools will be able to add new students and edit student details. Schools can allocate students into classes according to their arrangements for administering the NAPLAN tests, e.g. normal roll classes. Schools are able to select the order that the test books are printed in. This will enable test books to be sorted and delivered as per each school’s test administration requirements. * Note that you will need to allow for pop-ups on your internet browser. LOG-ON To log-on to the secure website: go to www.naplanpar.nsw.edu.au. enter the Username and case-sensitive Password for your school. Note that if you enter incorrect details three times, you will be locked out of the website and will need to contact the help desk on 1800 665 627. There are links on the log-on screen to the PAR Manual and to the contact details for support. The website HOME PAGE will open. 3 HOME PAGE This screen consists of a main menu on the left and a table of steps to follow in the middle. Both perform the same function. Important PAR updates and messages will scroll across the top of the screen in red. The PAR website follows a logical sequence. 1. 2. 3. 4. 5. 6. Statement of Compliance School Details School Contacts Student Management Print Order Confirmation Navigation through these steps is possible only after the Principal has completed the Statement of Compliance. To move to a different screen you can: Click Next at top or bottom of the screen or Click the link on the main menu on the left or Click the link in the table on the Home screen. You can return to the Home screen at any time by clicking on the Home button on the main menu. The Next button, located at the top and bottom right hand corner of each screen, allows you to move to the next step. 4 STATEMENT OF COMPLIANCE Principals are required to acknowledge that they have read and understood the National Protocols for Test Administration (Part A) and the Jurisdictional information (Part B) of the Handbook for Principals. The Statement of Compliance must be completed before any registration information can be entered. All fields marked with a red asterisk are mandatory. To complete: Click in the check box after reading the Handbook for Principals. Enter the Principal’s Name in the text box. Enter the Principal’s email address in the text box. Click on the Submit button to continue to the next step or Back to access the previous screen. A link is available to the Handbook for Principals. Once the Statement of Compliance has been agreed to, the other functions of the website will be enabled. 5 SCHOOL DETAILS After completing the Statement of Compliance, the school’s details can be viewed by clicking on School Details on the main menu or School Details on the Home screen. All fields marked with a red asterisk are mandatory. The school’s phone, fax and email address can be edited. The school address details cannot be edited and are greyed out. If you need to make changes to the school address details, please contact your testing authority. For NSW Schools: Contact Teresa Elliott on (02) 9707 6223 For ACT Schools: Contact Ken Gordon on (02) 6205 9498 Click Save before clicking the Next button or click Back to go to the previous screen. 6 SCHOOL CONTACTS The School Contacts screen allows you to enter the names of the staff at your school who are authorised to receive NAPLAN test material. If possible, at least three staff members should be nominated. Schools are also required to nominate the main contact person for each year level. The year level contacts will also be included in email dispatches to the school regarding NAPLAN. To view the School Contacts for your school: click on School Contacts on the left of your screen. This will display a list of your school’s contact details. 7 a) ADD A SCHOOL CONTACT To add a new School Contact for your school: Click on Add Contact button in the middle of the School Contacts screen. This will display a list of fields to be completed. Enter the contact’s First Name and Last Name. Select the contact’s role from the drop down list of options. If the contact is going to be the main contact person for the year level, click the check box for the year level. You can select only one primary contact for a year level. To complete the process: click Add. A pop-up text indicates that the process has been successful. b) EDIT A SCHOOL CONTACT To edit a school contact: click on the Edit button next to the name on the School Contacts table. The Edit Contact screen will open. Update any details for the contact. Click the Save button. c) DELETE A SCHOOL CONTACT To delete a school contact: Click the Delete button next to the name on the School Contacts table. The Delete Contact screen will open. Click the Delete button. A pop-up text indicates that the process has been successful. Click Back to go back to the School Contacts screen. 8 STUDENT MANAGEMENT The Student Management screen lists all students uploaded to the PAR website. These details need to be checked for accuracy and edited where necessary. Students can be added and deleted and roll class allocations can be changed. If a roll class is not shown in the drop down menu, you will need to add a new roll class. (see p 13). To check the student details: In the Sort table select the Year level, Test type and Roll Class that you want to check. Then click Search. This will display a list of the enrolled students and their details. The Proposed Status for all students will default to Participant. Click on the headings at the top of each column to sort the student details in different ways. Where there are more than 50 students in a cohort, ~ click on the page numbers at the bottom of the student list. or ~ click the check box next to Display all students at the top of the student list. Uncheck this box to return to the default number of students. 9 a) ADDING AND DELETING STUDENTS ADD A NEW STUDENT’S DETAILS To add a new student’s details: Click Add Student on the Student Management screen. Enter the details of the new student. Click on Add at the bottom of the screen. Click Back to return to the list of student details. Once the student has been added, their name will appear on the student list. If the student’s SRN is not known, enter 000000000 (nine zeros). Click on What’s this? For more information 10 EDIT A STUDENT’S DETAILS Schools will be able to change an individual student’s details by clicking on Edit next to each student entry. To edit a student’s details: Click on Edit next to the student’s name on the list. This will display a screen containing the details for the individual student (see below). New details can be entered in or selected from drop down options. Edit the student’s details and then click Update to save the changes. Click Back to return to the list of students. SEARCH FOR A SPECIFIC STUDENT To view the student details: In the Sort table enter the student’s name into the First Name and Last Name boxes and click Search. If the name exists, the list will display the student/s matching the name. If the name does not exist the message ‘This student is not found’ will be displayed. Click on Student Management to return to the student list. RECORD A STUDENT AS EXEMPT, WITHDRAWN OR DELETED Select the relevant option from the Proposed Status drop down list next to each student. If Exempt or Withdrawn is selected, the student’s record will be highlighted in colour to indicate that a consent form must be completed. The relevant forms can be downloaded from the link at the bottom of the Student Management screen or from the Forms screen on the main menu. 11 VISITING STUDENTS If a student is visiting your school to complete the NAPLAN tests from another school in NSW or interstate, tick the Visiting Student check box in the Add new student screen. The details you need to enter for Visiting Students are: Student SRN - If the student’s SRN is not known, enter 000000000 (nine zeros) First name Last name Date of birth Gender Year level If the student’s home school is in NSW or ACT, click on the name of the school in the drop down list. If the student’s home school is in another state or territory (if other than NSW or ACT), enter in the Comments box the student’s state and home school. Once a visiting student has been added in Student Management they will appear in red font within the student list. 12 b) ROLL CLASSES ADD A ROLL CLASS You can create a new roll class if you wish to re-group the students. Click Add roll class. Enter the roll class name. Select the Year level from the drop down list. Click Add to create the new roll class. Click Return to take you back to the Student Management screen. The list of roll classes will show the number of students currently listed. EDIT A ROLL CLASS Once the roll class is created, the name can be edited, by clicking on the Edit roll class link on the Student Management screen. There is the option to delete a roll class if desired. Select a roll class from the drop down list in the Sort table. In the Edit table, click Edit Roll Class. Next to New Roll Class Name, enter the new name. Click Update roll class name. 13 MOVE A STUDENT OR GROUP OF STUDENTS FROM ONE ROLL CLASS TO ANOTHER Click the check box at the beginning of the row containing the name of the student/s you wish to change. Select the new class from the Move to roll class drop down list in the Edit table. The roll class information will be updated for the selected students. MOVE ALL STUDENTS FROM ONE ROLL CLASS TO ANOTHER Click the check box in the column header at the top of the list of student names. Select the new roll class from the Move to roll class drop down list In the Edit table. The roll class information will be updated for the selected students. 14 c) PRINT OR SAVE THE LIST OF STUDENTS Note: Depending on your computer, the print function may require you to do a simple installation of an ActiveX control. If the installation is required see the Appendix. You can print and/or save the list of students by clicking on Print/Save. To print: Click Print/Save on the Student Management screen. When the report screen appears select the Year Level, Test Type and Roll Class from the relevant drop down lists. Click View Report (on the right hand side). After the report is generated, click on the print icon . To save: Click Print/Save on the Student Management screen. When the report screen appears select the Year Level, Test Type and Roll Class from the relevant drop down lists. Click View Report. Select your preferred export format from the Select a format drop down list. Click Export and Save the document to the desired location. 15 PRINT ORDER The print order must be selected before student details can be overprinted onto the test books. The print order selected from the drop down lists will be the order in which the test books are printed in. The order selected will apply to all test types. To select the print order for a year level: Click Print Order on the main menu. In the table, select the Print Order from the drop down list for each year level. Click on the Next button to move to the Confirmation screen. The print order can be either: Alphabetical by Surname (which is the default), or Roll Class, Alphabetical by Surname. 16 CONFIRMATION After checking your students’ records and making necessary amendments, confirm that all information is accurate. This is required for the overprinting of student details onto the test books. The print order that you selected on the Print Order screen will be displayed in the table. CORRECT INFORMATION DISPLAYED When the student details for a Year level are accurate: Click on Confirmation on the main menu bar on the left of the screen. Click the box next to the Year level that you want to confirm. The date and time of confirmation will be shown. Once confirmation for each year level has been received the online student registration process is complete. A pop up text indicates that the process is complete. Completing the process means that student details will be electronically sent to the printing contractor for the overprinting of student information onto the test books. INCORRECT INFORMATION DISPLAYED Once all cohorts have been confirmed, the Student Management screen will be greyed out. If you need to make any further amendments, please untick the relevant box on the Confirmation screen and click on Student Management to go back. The list of students is now re-enabled for editing, however, the updates may not be shown on the overprinted test books. Once you have confirmed your data, the table on the Home screen is updated, showing the Print Order as Complete and Confirmation as Complete. Once confirmation for each year level has been received, the online student registration process is complete. The test books will then be sent to the print queue for overprinting. Schools that do not confirm their student details by the due date (Government schools by 9 March and Non-government by 30 March) will be contacted by EMSAD. 17 FORMS The Forms screen contains links to documents and forms for use during the NAPLAN period. Each form can be downloaded and saved as a PDF document. Completed forms for exemptions, withdrawals and special provisions must be kept at the school for future reference. 18 WEBSITE SUPPORT The toll-free help desk number (1800 665 627) and the contact details for your testing authority can be found in the Contact Us screen. The help desk should be contacted for all technical queries and will be available from 8am to 4pm (local time), Monday to Friday. For NAPLAN testing related queries please contact your testing authority. Government schools General (02) 9707 6221 (02) 9707 6215 Fax (02) 9707 6235 Catholic schools Karen Ferrante (02) 9707 6228 Email: [email protected] Independent Schools Teresa Elliott (02) 9707 6223 Email: [email protected] ACT Schools Ken Gordon (02) 6205 9498 Fax: (02) 6205 8353 Email: [email protected] 19 APPENDIX: INSTALLING THE PRINT CONTROL For the printing of school class lists from the Student Management screen, you will need to install an Active X control. If the installation is required you will see the following message displayed on the top of the screen in a yellow bar – “This site may require the following ActiveX control: ‘SQL Server Reporting Services 2008’ from ‘Microsoft Corporation’. Click here to install ...” When you are prompted to install the Active X control, you will presented with the following image. Click on the Install button to install the software. 20