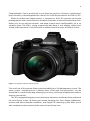
1
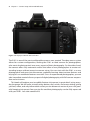
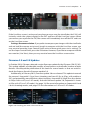
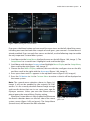
14
Chapter 1 – Camera Setup and Control Reference
Preview button: The Preview button is fully programmable and can accept
tasks listed in the Appendix. You can find instructions for how to assign a task
to the Preview button on page 301. Its factory default task is Preview, which
lets you see the depth of field for the current aperture setting as you look at the EVF or
Live View screen.
Shutter button: The Shutter button is primarily used to release the camera’s
shutter to take a picture (full press). It is also used to initiate autofocus (half
press). The autofocus function can be relegated to the AEL/AFL button instead of the Shutter button for back-button focusing, as described on page 282.
Sequential shooting/Self-timer/HDR button: This button allows you to
control the camera’s high dynamic range (HDR) system, along with the Sequential shooting frames-per-second rate (fps) and self-timer. Press the button and turn the Front Dial to control the HDR system. Press the button and turn the Rear
Dial to control the Sequential shooting fps rate or to select the self-timer. There is a limited
amount of programmability for these two buttons, tied in with the Lever functions in the
Custom Menu, as described on page 319.
Next let’s consider each of the cameras four dials and what they do.
Dials
Diopter adjustment dial: The Diopter adjustment dial changes the optical
power of a lens that's located in front of the camera’s EVF so that you do not
strain your eye when you are looking into the viewfinder. It works sort of like
a pair of glasses to bring the image you see on the EVF into sharper focus for your eye;
however, it does not correct for astigmatism. If you look into the EVF and feel eyestrain or
get a headache after using it, you should adjust the Diopter adjustment dial until the view
is comfortable for you. You may have to use a different diopter setting for each eye.
Front Dial: The Front Dial changes the aperture setting when the camera is
set to Manual (M) mode on the Mode Dial. In other modes it is usually used to
set +/- Exposure compensation. You can also use the Front Dial to zoom in and
out of images displayed on the rear monitor. The Front Dial is sometimes used to select a
single item from a list of items, such as subfunctions in the camera’s menus. The Front Dial
has a measure of programmability, as described on page 309 under the Custom Menu’s
Dial Function. You can change which dial (Front or Rear) does what, and which direction
you turn it to accomplish its task.
Mode Dial: The E-M1 is a multimode camera. It has a Mode Dial on top that
allows you to change how the camera works. You can select from modes that
turn your camera into a fully automatic (iAUTO), point-and-shoot camera, or
a fully manual (M), user-controlled camera, or various modes in between. In addition to