1
Web Site Customization User Manual – Splash Screen
About This Manual
Purpose of this Document:
The purpose of this document is to provide a “how to” for customizing the splash screen of your Web
site. This document assumes that you have already logged into your Administration Site and have
navigated to the Edit Area. If you find any discrepancies within this document, please notify ICED's
Development Team at [email protected].
What does this customization feature change?
As stated in the purpose, this feature will allow you to create a Splash Screen for your Web site. The
splash screen will be the introduction screen to your Web site and can contain text, graphics, or both.
Please follow the steps below to customize your Specials page:
1. Make sure you are logged into your Administration Site.
2. Once you are logged in, make sure that the “Splash Screen” box is checked on the Page
Customization section. Once you have selected “Splash Screen”, click the Update Information
button. This will redirect you to the “Select an Area to Edit” section.
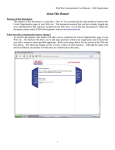
3. Once you have been redirected to the “Select an Area to Edit” section, click on the “Edit Splash
Screen” link. This link will direct you to the Splash Screen edit page.
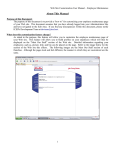
4. Once you have been navigated to the Splash Screen edit page you will be able to add text and images
to your splash screen.. Please note that you can also use simple HTML tags to enhance the text you
provide. See the following image for more detailed instructions.
1
Web Site Customization User Manual – Splash Screen
Fields:
Splash Screen Text – text that will appear on your splash screen
Image – Image that will appear on your splash screen.
Helpful Hints:
The text boxes provided will allow you to utilize some basic HTML
type tag editing to add flair to your Services page. For more
information on HTML tags visit www.w3schools.com. Here are
some example tags you can utilize:
<b> - this will bold whatever is within the opening and closing tags.
For example:
<b>Hello</b> would render Hello on the page
<u> - this will underline whatever is within the opening and closing
tags. For example:
<u>Hello</u> would render Hello on the page
You can also combine tags. For example:
<b><u>Hello</u></b> would render Hello on the page.
5. Once you have entered the text and selected a graphic (not required), you can click the “Update Page”
button. Once you have received confirmation that the changes are successful, you can choose you go
“Back to Page Edit,” “Back to Customize Page,” or “Close Administration
Site.”
Conclusion:
If you have any questions regarding this manual, please contact the ICED Development Team at
[email protected].
2