1
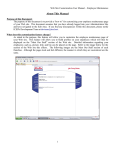
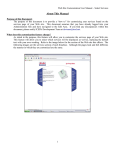
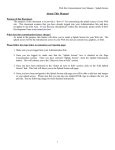
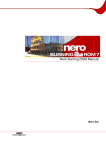
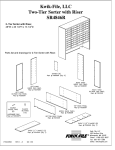
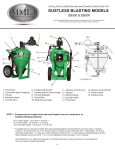
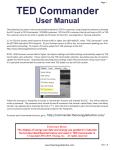
Web Site Customization User Manual – Edit Employment
About This Manual
Purpose of this Document:
The purpose of this document is to provide a “how to” for customizing the open positions found on the
Career Opportunities page of your Web site. This document assumes that you have already logged into
your Administration Site and have navigated to the Edit Area. If you find any discrepancies within this
document, please notify ICED's Development Team at [email protected].
What does this customization feature change?
As stated in the purpose, this feature will allow you to customize the Career Opportunities page of your
Web site. This feature will allow you to add open positions within your organization and will provide
you with a means to attract possible applicants. Refer to the image below for the section of the Web site
this effects. The following images are the services section of each franchise. Although the pages look
and feel different, the manner in which they are customized are the same.
1
Web Site Customization User Manual – Edit Employment
2
Web Site Customization User Manual – Edit Employment
Please follow the steps below to customize your Career Opportunities page:
1. Make sure you are logged into your Administration Site.
2. Once you are logged in, click the Update Information button. This will redirect you to the “Select an
Area to Edit” section.
3. Once you have been redirected to the “Select an Area to Edit” section, click on the “Edit
Employment” link. This link will direct you to the Edit Employment section.
4. Once you have been navigated to the Edit Employment page you will be able to add any open
positions you have at your center. Through this feature you can specify the position title and include
a brief description of the opportunity. Follow the instructions below for adding, editing, and deleting
positions.
Adding Open Position:
5. First, make sure you have followed steps 1 thru 4 mentioned above. Once you have followed the
above instructions you should see the following screen:
3
Web Site Customization User Manual – Edit Employment
6. From the screen above you will select Add Position from the drop-down box provided and click the
“Continue” button.
7. Once you have clicked the “Continue” button you will be navigated to a page with a form you will
use to create the position. Please refer to the following image for more information:
Field Details:
Store Code – This should reflect your store code (KK for Kwik Kopy)
Store Number – This should reflect your center number
Position – This will be the position name you are creating
Position Information – This will be any information you wish to specify regarding
the open position.
8. Once you have filled out the form shown in the image above, click the “Add Position” button to
create the position. After clicking the “Add Position” button you will be notified that the position
was created. From this point you can choose you go “Back to Page Edit,” “Back to Customize Page,”
or “Close Administration
Editing/Deleting a Position:
9. First, make sure you have followed steps 1 thru 4 mentioned above. Once you have followed the
above instructions you should see the following screen:
4
Web Site Customization User Manual – Edit Employment
10.From the screen above, you will use the drop-down box to select the position you wish to edit or
delete. Once you have selected the position, click the “Continue” button.
11.Once you have clicked the “Continue” button you will be navigated to a page with a form you will
use to edit or delete the position. Please refer to the following image for more information:
5
Web Site Customization User Manual – Edit Employment
Field Description:
Position – this is the current position name.
Info – This is the information you specified about the position.
12.Once you have filled out the form shown in the image above, click the “Update Employee” button to
edit the position or “Delete Employee” to remove the position. After clicking the “Update Employee”
or “Delete Employee” button you will be notified that the position was edited or removed. From this
point you can choose you go “Back to Page Edit,” “Back to Customize Page,” or “Close
Administration
Conclusion:
If you have any questions regarding this manual, please contact the ICED Development Team at
[email protected].
6