1
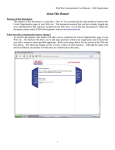
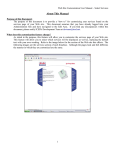
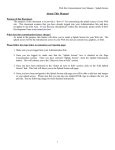
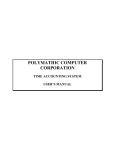
Web Site Customization User Manual – Employee Maintenance
About This Manual
Purpose of this Document:
The purpose of this document is to provide a “how to” for customizing your employee maintenance page
of your Web site. This document assumes that you have already logged into your Administration Site
and have navigated to the Edit Area. If you find any discrepancies within this document, please notify
ICED's Development Team at [email protected].
What does this customization feature change?
As stated in the purpose, this feature will allow you to customize the employee maintenance page of
your Web site. This feature will allow you to build profiles on your employees which will then be
displayed on the “Meet Our Staff” section of the Web site. Detailed information regarding your
employees; such as, picture, title, and bio can be placed on the page. Refer to the image below for the
section of the Web site this effects. The following images are the Meet Our Staff section of each
franchise. Although the pages look and feel different, the manner in which they are customized are the
same.
1
Web Site Customization User Manual – Employee Maintenance
2
Web Site Customization User Manual – Employee Maintenance
Please follow the steps below to customize your employee maintenance page:
1. Make sure you are logged into your Administration Site.
2. Once you are logged in, make sure that the “Employee Maintenance” box is checked on the Page
Customization section. Once you have selected “Employee Maintenance”, click the Update
Information button. This will redirect you to the “Select an Area to Edit” section.
3. Once you have been redirected to the “Select an Area to Edit” section, click on the “Employee
Maintenance” link. This link will direct you to the Employee Maintenance.
4. Once you have been navigated to the Employee Maintenance page you will be able to accomplish the
following task(s):
• Add an Employee
• Select an Employee to edit or delete.
3
Web Site Customization User Manual – Employee Maintenance
Adding an Employee:
The following steps will walk you though adding an employee to the Meet Our Staff page of your Web
site.
1. At this point you should be viewing the screen displayed above.
2. To add an employee, make sure “Add Employee” is selected in the drop-down box provided and click
“Continue.”
3. You will then be directed to a form that has a few fields you will need to fill out. The following
figure explains each field in detail.
Fields
Store Code - This field represents your franchise brand code (KK for Kwik Kopy)
Store Number - This field should reflect your center number, if it does not contact
ICED.
Name - This field will hold the entire name of the employee.
Title - This field will hold the title of the employee.
Employee Information - This field will hold the bio of the employee or any other
information you wish to display.
Image - This will hold the image of the employee (it is not required). Simply
browse to the location of the file to upload it.
4. Once you have completed the above mentioned form, clicking “Add Employee” will add the
employee's information to the “Meet Out Staff” section of your Web site. Once you have received
confirmation that the employee has been added you may go “Back to Page Edit, “Back to Customize
4
Web Site Customization User Manual – Employee Maintenance
Page”, or “Close Administration Site.”
Editing or Delete an Employee:
The following steps will walk you though editing an employee on the Meet Our Staff page of your Web
site.
1. At this point you should be viewing the screen displayed in task 4 of customize employee
maintenance page.
2. To edit an employee, use the drop-down box to select the employee you wish to edit or delete and
click “Continue.”
3. You will then be directed to a form that has a few fields you will need to fill out. The fields for
editing an employee are the exact same as adding an employee (see the figure in task 3 of Adding an
Employee).
4. Once you have made your changes to the employee, click “Update Employee” to confirm the updates.
If you are deleting the employee, simply click “Delete Employee” and the employee will be removed
from the Meet Our Staff section of your Web site.
5. Once you have updated or deleted your employee you will be notified that the action was successful.
From this point you can choose to go “Back to Page Edit, “Back to Customize Page”, or “Close
Administration Site.”
Conclusion:
If you have any questions regarding this manual, please contact the ICED Development Team at
[email protected].
5