1
When the installation is complete, you will see a new
C:\Program Files\HomePod\Audio Server\ directory as shown
below and a new entry in Start
Menu->Programs->HomePod->Audio Server->HomePod Audio
Server.
Note: An audio file, such as an MP3 file, is a file that may
include music, speech, narrative, or audio book content.
The term “audio server” is used to describe a computer on
your network that contains audio files that will be served to
the HomePod.
The audio collection stored on your computer is recognized by
the HomePod as an “Audio Server”. Each computer with audio
content requires that the HomePod Audio Server Software be
installed and running to make the audio collection available to
the HomePod.
Message alerting JRE installation
HomePod Audio Server is based on Java. For Windows PC’s
(98/Me/2000/XP), the installer will alert you to install or upgrade
Java (JRE) if you haven’t already.
On the PC, insert the HomePod CD and run the HomePod Audio
Server->Setup.exe.
Windows Installation
Click Yes to install Java Runtime Environment (JRE) into your
PC. The process may take a few moments. Let it run to
completion without interrupting the process. If your PC already
has Java installed and you don’t want to upgrade to the latest
version, then click No.
Digital Surround
System
SOFTWARE INSTALL
Wi-Fi (802.11b/g) Access Point or Wireless Router
Macintosh G3 or Pentium III PC
Mac OS 9/X or Windows 98/Me/2000/XP
A small server program, called HomePod Audio Server, must be
installed on each computer that contains audio files that you
want to play through the HomePod. Use the HomePod CD and
follow instructions below to complete the software installation.
1.
2.
3.
HomePod System Diagram
USB Drive
HomePod
Built-in Speakers
Home Stereo
One HomePod Unit
Power Adapter
Remote Control
Ethernet Cable
Stereo Audio Cable
Installer CD
Quick Start Guide (this document)
User Manual
System Requirements:
1.
2.
3.
4.
5.
6.
7.
8.
Package Contents:
Your HomePod can be placed anywhere in the house or office
where the wireless network has coverage. The audio files stored
on your computer can then be played through HomePod’s
built-in stereo speakers, attached headphones, home stereo
system, or a high-end digital surround sound system.
Computer
(Mac/PC)
Music Files
Store Here
Access Point
Headphone
Note: The terms “wireless router”, “access point”, and
“base station” are sometimes used interchangeably in this
manual. Wireless router is a device that combines the
functions of an access point plus a switching hub. Base
station is a common term used in the Mac community to
refer to an access point.
Most of the time, HomePod will be used in a wireless
environment. A typical wireless network setup involves a
computer connected to a wireless router (or an access point) to
form a wireless network. HomePod would then connect
wirelessly to this same network.
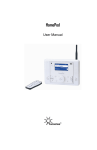
Thank you for purchasing HomePod. HomePod streams digital
audio files stored on your computer, over the local network
(either by wired Ethernet or over a wireless Wi-Fi network).
INTRODUCTION
Quick Start Guide
Macsense HomePod
This Quick Start Guide is designed to facilitate easy installation
of the HomePod. Please read the entire document to ensure a
successful installation and proper usage.
One HomePod can access audio content from multiple
computers around the home or office. Conversely, multiple
HomePods can simultaneously access content from the same
computer.
Contents of the Windows HomePod Audio Server folder
HomePod Audio Server configuration for Windows
To launch the Windows HomePod Audio Server configuration
program, double-click on the HomePod Audio Server icon or
select Start->Programs-> HomePod->Audio Server->HomePod
Audio Server.
SOFTWARE CONFIGURATION
HomePod Audio Server folder content for Mac
When the installation is complete, you should see a new
“HomePod” folder in the Applications folder.
You will need to have the administrator password in order to
proceed with the installation. Follow the instructions on screen to
complete the installation.
On the Mac, insert the HomePod CD and run the HomePod
Audio Server.pkg installer.
Macintosh Installation
When you click on the Audio Folders icon on the left, you will be
presented with two “Add” options on the right:
An Audio Folder is any directory that contains audio files (such
as MP3 files). This is the most generic way of configuring the
Audio Server to locate your audio files. By specifying an Audio
Folder, all the audio files in that directory (including any
subdirectories) will become part of your collection. You can
specify more than one Audio Folder, and all the contents will be
combined into one collected and recognized by the HomePod.
Configuring Audio Folders
Once you have named you audio collection, you need to define
the contents of your collection. There are two ways to define
which audio files you want included in your collection: by Audio
Folders or by iTunes Audio Library. Other methods will be
added to HomePod Audio Server in the future. If you are using
iTunes to manage your audio collection, proceed to the
Configuring iTunes Audio Library section.
Click on the HomePod icon in the left side frame to bring up the
main server controls. This window allows you to monitor and
configure the server settings. The “Audio Server Name” field
defines a specific name for your audio collection that will be
displayed on the HomePod. Examples of some good names are,
“John’s Audio Collection”, “Bedroom Collection”, or “Living
Room Audio Library”.
Server Control
The window is divided into three frames. The icons in the left
side frame can be selected to view different configuration
settings in the right side frame. The bottom frame contains help
information for each configuration option. Closing the application
will minimize the window to the task tray. You can double-click
on the tray icon to open the configuration window again.
The HomePod Audio Server Configuration application allows
you to set up and control your audio collection. From this
application, you can define the audio content to be shared,
name your audio collection, and start or stop the server. Once
your audio server is configured and started, your library will
recognized by the HomePod.
Note: The HomePod Audio Server program for PC and Mac
are identical in function and user interface, so screen shots
will be used interchangeably in this manual.
HomePod Audio Server configuration for Mac
To start the HomePod Audio Server program on the Mac, go to
the Applications menu and double-click on the HomePod Audio
Server icon.
After the configuration is complete, click the HomePod icon on
the left side frame to return to the main server control frame.
Press the “Start” button to activate the Audio Server.
To share an iTunes Music Library with the HomePod, the iTunes
program need not be running.
Click on the “Select…” icon to locate and open the “iTunes
Music Library.xml” file in the iTunes folder. The .xml file contains
the complete index to the iTunes Music Library songs and
playlists.
Configuring iTunes Music Library
When you click on the iTunes Audio Library icon on the left side
frame, you will see a “Select…” icon on the right:
If you are using Apple’s iTunes software to manage your audio
files, then you should select this method as the preferred way of
configuring your audio collection so that the HomePod shares
the iTunes song and playlist information.
Configuring iTunes Audio Library
After the configuration is complete, click the HomePod icon on
the left frame to return to the server control frame. Press the
“Start” button to activate the Audio Server.
To add an Audio Folder, click on the “Add Audio Folder…” icon
and locate the folder that contains your audio files. This may be
your C:\My Documents\My Audio\ directory, or any folder with
your audio files that you'd like to include in your collection. The
path to the folder you just added will be listed on the right frame.
You can also configure the Audio Server to recognize your
existing playlists. To add your playlists, click on the “Add
Playlist Folder…” and select the top level folder that contains
your playlist files (.M3U).
Configuring Audio Folders
HomePod will automatically detect and list any Audio Servers
found on the network, listing one line for each audio library. If no
BASIC OPERATIONS
If you still have trouble finding an Audio Server, refer to the
Troubleshooting section in the Appendix section of the manual.
Also review the Wireless Settings Page details in the Web
Configuration section of the manual.
If the HomePod is unable to find any Audio Servers even though
they are running, try the following: Turn off HomePod. Connect
the HomePod to the router by a wired Ethernet cable, and then
turn on the HomePod again. When HomePod reaches the main
screen, go to Network Settings and locate its IP Address. Once
the IP is known (say 192.168.1.3), open a browser on any
computer on the network and log into HomePod, e.g. type
http://192.168.1.3/ in the browser. Once you are at the
configuration screen, go to the Wireless Settings tab and look for
the SSID field. Change the SSID from the default value of “ANY”
to the exact name of your access point (you can get the SSID of
your access point by logging into your access point). Click Save
and then disconnect the Ethernet cable and reboot HomePod. In
a multi-access point environment, setting the SSID to match
your access point will help HomePod connect to it much more
easily.
Make sure that you have already set up a wireless router or
access point (base station) to form your wireless 802.11 b/g
network. Your computers and HomePod must be in the same
domain as the router (e.g. all must be in 192.168.1.x). Confirm
that the DHCP server on the access point is running so that your
computers and HomePod can automatically obtain IP addresses
automatically (this is usually on by default). If you have WEP
encryption enabled in the access point, turn it off for now; you
can turn it back on later after the HomePod is running smoothly.
Next, plug in the power adapter and turn on the HomePod. The
boot up process will take about 20 seconds, after which
HomePod should discover any Audio Servers that have been
activated.
Wireless Setup
Before turning on the HomePod, connect it to your network with
the enclosed Ethernet cable. HomePod can be connected to a
wireless router or a switching hub. Next, plug in HomePod and
turn it on. The boot up process will take about 20 seconds, after
which HomePod should discover any Audio Servers that have
been activated.
Wired Setup
There are two ways to connect the HomePod to your network,
wired (with an Ethernet cable) or wirelessly (through Wi-Fi).
When HomePod is first powered up, it will try to detect if an
Ethernet cable is attached. If it is, the Ethernet connectivity will
have priority over wireless connectivity. If an Ethernet cable is
not connected to the HomePod at startup, the HomePod’s
wireless connection will be activated. For most users, HomePod
will be used in a wireless environment so the Ethernet port need
not be used. Follow the instruction below for each connection
setup.
HOMEPOD SETUP
button. Press
button when
To jump to the previous preset station, click the PREV
button.
•
HomePod includes a built-in web configuration page that you
can access from any browser (Internet Explorer, Apple Safari,
AOL Netscape, etc.) on a computer connected to the network.
You can set many of the advanced functions using this
WEB CONFIGURATION
To adjust the frequency of the tuner, rotate the dial right and
left.
To jump to the next preset station, click the NEXT button.
•
•
To start FM Radio, at the main menu, scroll to "FM Radio"
and press ENTER button.
•
FM Radio buttons:
button while a
• To repeat a song or list of songs, press the
song is playing. If an individual song was selected, the Loop
function will repeat that one song over and over. If the playing
song is part of playing list, then the whole list of songs will
repeat once completed.
• To shuffle a list of songs, while a list of songs is playing in the
button. Press
again to exit
play mode, press the
shuffle mode.
Shuffle/Loop Mode Buttons
• If you’re using the built-in speaker or the headphones port, to
button; to decrease the
increase the volume, press the
button.
volume, press the
• To jump to the beginning of a song while it is playing, press
button.
the
• If you are playing a collection of songs (such as an album or
button to skip to the next.
random play mode) press the
• To pause a playing song, press the
again to resume play.
button or the
• To play a song, press the
the song is highlighted on the list.
Functional Buttons
010404
180-00333-006
We upgrade firmware periodically to include support on new
functions and bug fixes. Remember to check website for the
latest updates.
http://www.macsense.com/homepod/
Register your product online to be informed of the latest product
upgrades and promotions.
http://www.macsense.com/registration/
For additional information in solving problems with your
HomePod, contact Macsense Tech Support.
Technical Support Hours: 9am – 4:30pm PST
Phone: 1-800-642-8860 x100 (Free Support)
Email: [email protected]
Web: http://www.macsense.com/knowledgebase
CONTACT
For instructions on how to use the web-config pages, please
refer to the manual.
When prompted for a username and password, leave username
blank and type "admin" as the password. "admin" is the default
password and can be changed after the first time you log into the
device. Make sure to note your new password if you change it.
Launch your browser and type in the IP address of the
HomePod; e.g. if your HomePod's IP address is 192.168.1.3,
then type "http://192.168.1.3" in your browser (to obtain
HomePod’s IP address, navigate to Settings:Network
Settings:Network Info).
Press the
button to select an item in the list, or press the
button to come out of a list.
To access the web configuration page:
Use the rotating dial to navigate up and down any list.
configuration.
The audio library is organized as a tree structure.
Content Navigational Buttons
Use the following buttons on the HomePod to control and
navigate the content on the HomePod.
Main Menu
libraries are detected, then the first line will display “Searching
button to refresh the list of
for Audio Servers”. Click the
Audio Servers.