1
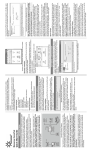
User’s Manual
Fast Ethernet CardBus
(MPC-200)
acsense
R
1
Table of Contents
Chapter 1 Introduction . . . . . . . . . . . . . . . . . . . . . . . . . . . . . . . . . . . .1
Features . . . . . . . . . . . . . . . . . . . . . . . . . . . . . . . . . . . . . . . . . . . . . .1
Network Interface . . . . . . . . . . . . . . . . . . . . . . . . . . . . . . . . . . . . . . .1
Driver support . . . . . . . . . . . . . . . . . . . . . . . . . . . . . . . . . . . . . . . . . .1
Physical characteristics . . . . . . . . . . . . . . . . . . . . . . . . . . . . . . . . . . .1
Installing the Fast Ethernet CardBus Card . . . . . . . . . . . . . . . . . . . . .2
Chapter 2 Getting Started . . . . . . . . . . . . . . . . . . . . . . . . . . . . . . . . . .3
Installing the Fast Ethernet CardBus Card . . . . . . . . . . . . . . . . . . . . .3
LED Indicators . . . . . . . . . . . . . . . . . . . . . . . . . . . . . . . . . . . . . . . . . .4
Readme file . . . . . . . . . . . . . . . . . . . . . . . . . . . . . . . . . . . . . . . . . . . .4
Chapter 3 Driver Installation for Mac OS . . . . . . . . . . . . . . . . . . . . . .5
System Requirements . . . . . . . . . . . . . . . . . . . . . . . . . . . . . . . . . . . .5
Installation . . . . . . . . . . . . . . . . . . . . . . . . . . . . . . . . . . . . . . . . . . . . .5
Software Installing . . . . . . . . . . . . . . . . . . . . . . . . . . . . . . . . . . . . . . .5
AppleTalk Setup . . . . . . . . . . . . . . . . . . . . . . . . . . . . . . . . . . . . . . . . .6
TCP/IP Setup . . . . . . . . . . . . . . . . . . . . . . . . . . . . . . . . . . . . . . . . . .7
Ejecting the Fast Ethernet CardBus Card . . . . . . . . . . . . . . . . . . . . . .7
Appendix A Specification . . . . . . . . . . . . . . . . . . . . . . . . . . . . . . . . . . .9
Appendix B Assignment . . . . . . . . . . . . . . . . . . . . . . . . . . . . . . . . . . . .11
RJ-45 Connector . . . . . . . . . . . . . . . . . . . . . . . . . . . . . . . . . . . . . . . .11
i
Introduction
Chapter 1 Introduction
This manual describes how to operate the Fast Ethernet CardBus Card. The Fast
Ethernet LAN PC Card is a Credit-card sized Ethernet Card which works with any computer, notebook, sub-notebook or Macintosh PowerBook G3 series, or Card Reader that supports CardBus slots.
CardBus is a function and performance extension of the PC Card (PCMCIA) standards. The CardBus interface is a 32-bit wide and Bus-mastering allowable device. It
enhanced the overall system throughput.
This Fast Ethernet CardBus Card could be connected to either 100Mbps Fast Ethernet
or 10Mbps Ethernet network.
¥ For operating in a 100Mbps (100BASE-TX) Fast Ethernet network, a Category 5
unshielded twisted pair (UTP) cable or Category 1 shielded twisted pair (STP) cable
should be used.
¥ For operating in a 10Mbps (10BASE-T) Ethernet network, a Category 3,4, or 5
(UTP) cable or Category 1 shielded twisted pair (STP) cable could be used.
Features
¥ CardBus form factor for CardBus equipped portable PCs
¥ IEEE 802.3 for 10BASE-T and IEEE 802.3u for 100BASE-TX compliant
¥ Automatically negotiates 10Mbps or 100Mbps connection speeds, depending on
speed of the network
¥ Provides full-duplex to enhance throughput
¥ Offers high performance 100Mbps networking via 32-bit, PCI CardBus slot
¥ Complies to PC Card 1995 CardBus standards
¥ Switch-less design and software configurarble card setting
¥ 68-pin connector for attachment to PC's CardBus slot, and 15-pin flat connector to
media coupler
¥ 3.3V low power consumption
¥ LEDs monitoring indicators
Network Interface
¥ RJ-45 to connect with 10BASE-T hub, 100BASE-TX Hub, or Switch Hub
Physical Characteristics
¥ Standard Conformance: IEEE 802.3 for 10BASE-T
IEEE 802.3u for 100BASE-TX
¥ Host Interface: PC Card 95 CardBus Standard
¥ Ethernet Data Speed: 10Mbps and 100Mbps (Auto-Negotiation)
1
Introduction
¥ Bus Width: 32 bits
¥ Power: 3.3 V
¥ Temperature: 0ûC~60ûC/ 32ûF~140ûF (Std. Operating)
¥ Humidity: 10% to 90%
¥ Distance: 100m from Hub to Node
¥ Dimensions: 86mm x 54mm x 5 mm
Installing the Fast Ethernet CardBus Card
You will be installing the Fast Ethernet CardBus Card in your computer. If you are
having trouble locating the slot, refer to the user's manual of your computer or consult the
manufacture of your computer.
Gently slide the PC Card into the CardBus PC Card slot. Make sure the Card is firmly
seated in the socket and you are ready to setup and install the network drivers.
For a connection to a Fast Ethernet network, use a Category 5 unshielded twisted pair
(UTP-5) or Category 1 shielded twisted pair (STP-1) cable with a RJ-45 connector to
connect with a 100Mbps port of hub or switch.
For a connection to a 10BASE-T Ethernet network, use a Category 3,4 or 5 (UTP) or
(STP) 1 cable with a RJ-45 connector to connect with a 10Mbps port of a hub or switch.
2
Getting Started
Chapter 2 Getting Started
Installing the Fast Ethernet CardBus Card
You will be installing the Fast Ethernet CardBus Card in CardBus slot of your computer.
If you have trouble locating the slot, please refer to your computer's user manual or
consult the dealer of your computer.
Follow the procedure below to install the Fast Ethernet CardBus Card.
1. Turn off the host computer.
2. With the card's 68 pin connector facing the PCMCIA CardBus slot, gently slide the
PC Card into the CardBus slot. Make sure the card is firmly seated in the socket
3. Plug the Ethernet adapter cable to the 15-pin connector on the Fast Ethernet
CardBus Card as in the following figure below.
4. Connect your Ethernet adapter cable to the network using a RJ-45 cable.
5. Power on your notebook computer.
6. Now you are ready to install your communication software as described in the
following chapters.
3
Getting Started
LED Indicators
¥ 100 LED: This LED is used to indicate the Ethernet speed: The green light
indicates a connection with a 100BASE-TX Fast Ethernet network.
¥ Link/Act LED: This LED is used to indicate the network activity. It is blinking when
the PC Card is transmitting or receiving packets from network. It is
also lit when indicating a Link to a network.
README
There is one file named Readme on driver diskette which provides the information
about this Driver Diskette's contents and installation guide. This file is located in the root
directory of the diskette.
4
Chapter 3 Driver Installation for Mac OS
Chapter 3 Driver Installation for Mac OS
System Requirements
¥ Mac OS version 8.1 or above.
¥ Macintosh G3 PowerBook Series.
¥ Card and Socket Service 3.0.
¥ Open Transport 1.3 or above
Installation
Before your computer system can recognize your Fast Ethernet CardBus Card, it is
necessary to run some software to enable it. This section gives a brief overview of the
installation process.
Software Installation
1. Make sure that the system extensions are left on before installing the driver.
2. Insert the FastEther CardBus driver diskette into the floppy drive.
3. Double-click the Installer icon. The Easy Install dialog box then appears
5
Chapter 3 Driver Installation for Mac OS
4. Click the Install button. The Installer will install the appropriate driver to your computer.
5. Click the Restart button when installation is completed.
AppleTalk Setup
¥ Open the AppleTalk control panel
¥ Select FastEther Card from the pop-up menu.
Optional: The Current Zone pop-up menu will be active if zones are available.
6
Chapter 3 Driver Installation for Mac OS
¥ Close the control panel when you have finished.
¥ To confirm the change of network connections, click OK.
TCP/IP Setup
¥ Open the TCP/IP control panel.
¥ Select FastEther Card from the pop-up menu.
.
¥ Set up TCP/IP configuration according to the situation of your network environment.
¥ Close the control panel when you have finished.
¥ To confirm the change of network connections, click OK.
Ejecting the FastEther Card
¥ Open the AppleTalk control panel
¥ Select an AppleTalk connection other than FastEther Card, (e.g. IRTalk, LocalTalk,
Printer Port, or Modem Port).
¥ Close the control panel and wait for a few seconds.
7
Chapter 3 Driver Installation for Mac OS
¥ Drag the FastEther Card icon that appears on the desktop to the Trash.
¥ Then the FastEther Card will eject automatically.
8
Specification
Appendix A Specifications
¥ Network standard: 10Mbps IEEE 802.3 10BASE-T Ethernet
100Mbps IEEE 802.3u 100BASE-TX Fast Ethernet
¥ Type II PCMCIA, Hot Plug-and-Play Fast Ethernet CardBus Card, supports Full
Duplex 10BASE-T and 100BASE-TX communication
¥ Complies with 32-bit PCI Card Bus specification.
¥ For Windows 3.x and Windows 95, Windows 98 ,and Windows NT operation system.
¥ Support for Network and Communication Device Class OnNow requirements for
Microsoft PC97 and PC98 specification, including all wake-up events.
¥ Pattern matching with VLAN support.
¥ Link change.
¥ Magic Packet with SecureON.
¥ Supports RJ-45 (STP-1/UTP-3,4,5) media connectivity.
¥ Supports the legacy mode: including sleep, snooze, normal and CLKRUN.
¥ Contains on chip: PCS and scrambler/de-scrambler for 100BASE-TX.
¥ Fully compliant with ANSI 8802-3 and 10BASE-T.
¥ Support IEEE 802.3 auto-negotiation algorithm of full-duplex and half-duplex operation for 10Mbps and 100Mbps (NWAY).
¥ Automatically negotiates 10Mbps or 100Mbps connection speed.
¥ Integrated large transmit and receive FIFOs provide packet buffering for longer
latency.
¥ Integrated an on chip: DMA with programmable burst size, providing low CPU utilization.
¥ Provides 3.3 volt lower power CMOS design devices design.
¥ LEDs for diagnostics and monitoring use.
9
Assignment
Appendix B Pin Assignment
RJ-45 connector
The RJ-45 connector is used to connect with a hub or switch, RJ-45 regular ports can
be attached to any devices which use a standard network interface (e.g., a workstation,
server, bridge or router). RJ-45 up-link ports can be cascaded to a station port on similar
networking devices (e.g., another switch or hub). Use unshielded twisted-pair (UTP) or
shielded twisted-pair (STP) cable for RJ-45 connections: 100½ Category 3, 4 or 5 cable for
10 Mbps connections or 100½ Category 5 cable for 100 Mbps connections. Also be sure
that the length of any twisted-pair connection does not exceed 100 meters (328 feet).
Schematics for straight cable are shown as below.
11
Copyright
Copyright © 1998 by this company. All right reserved. No part of this documentation
may be reproduced in any form or by any means or used to make any directive work (
such as translation or transformation ) without permission from Macsense Connectivity,
Inc. . Macsense Connectivity, Inc. reserves the right to revise this documentation and to
make changes in content sometimes without obligation among Macsense Connectivity, Inc.
to provide notification of such revision or change.
FCC Warning
This equipment has been tested and found to comply with the limits for a Class B digital device, pursuant to Part 15 of the FCC Rules. These limits are designed to provide reasonable protection against harmful interference in a residential installation. This equipment
generates, uses and can radiate radio frequency energy and, if not installed and used in
accordance with the instructions, may cause harmful interference to radio communications.
However, there is no promise that interference will not happen in a particular installation. If
this equipment does cause harmful interference to radio or television reception, which can
be determined by turning the equipment off and on, the user is encouraged to try to correct
the interference by any of the following measures:
¥ Reorient or move the receiving antenna.
¥ Increase the distance between the equipment and receiver.
¥ Connect the equipment into an outlet on a circuit different from the one which the
receiver is connected to.
¥ Consult the dealer or an experienced radio/TV technician for help.
You may use unshielded twisted-pair (UTP) or shielded twisted-pair (STP)cable for RJ45 connections.
CE Declaration of Conformance
This equipment complies with the requirements relating to electromagnetic compatibility, EN 55022/95 Class B. This meets the essential protection requirements of the
European Council Directive 89/336/EEC on the approximation of the laws of the Member
Status relating to electromagnetic compatibility.
You are now cautioned that changes or changes not expressly approved by the party
responsible for compliance could void your authority to operate the equipment.
Trademarks
All companies, brands, and product names are trademarks or registered trademarks of
their respective companies. Specifications are the subject to be changed without prior
notice.
12