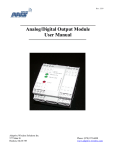
Download Combined Analog/Digital Output Module
Transcript
Combined Analog/Digital
Output Module
User Manual
XYR 5000 Line
34-XY-25-07
Rev. 3
11/04
User Manual
Honeywell Industrial Wireless
Combined Analog/Digital Output Module
Combined Analog/Digital
Output Module
Models A Option, B Option
and C Option
Versions 1.57 or later
!
•
•
Important Information to the User
Changes or modifications not expressly approved by the manufacturer may void
the user’s authority to operate the equipment.
If the Wireless Management Toolkit (RF Server) software is shutdown, the RS485 network MUST be physically disconnected from the PC as the serial port is
no longer being controlled by the software and may disrupt communications
between the Base Radio(s) and Combined Analog/Digital Output Module(s).
Honeywell Inc.
Industrial Measurement and Control
2500 West Union Hills Drive
!
Copyright 2004 by Honeywell International Inc.
Rev. 3– 11/28/2004
While this information is presented in good faith and believed to be accurate, Honeywell disclaims the implied warranties of merchantability and
fitness for a particular purpose and makes no express warranties except as may be stated in its written agreement with and for its customers.
In no event is Honeywell liable to anyone for any indirect, special or consequential damages. The information and specifications in this document
are subject to change without notice.
Phoenix, AZ 85027
Honeywell® and TotalPlant ® are U.S. registered trademarks Of Honeywell International Inc.
Other brand or product names are trademarks of their respective owners.
Rev. 3
11/04
User Manual
I
About This Document
Revision Notes
The following list provides notes concerning all revisions of this document.
Doc ID
Rel ID
Date
Notes
34-XY-25-07
Rlse. 0
12/03
1st issue of document.
34-XY-25-07
Rev. 1
02/04
2nd issue of document.
34-XY-25-07
Rev. 2
06/04
Reformatted layout, updated technical information.
34-XY-25-07
Rev. 3
09/04
Updated configuration information and figures.
Contacts
World Wide Web
The following lists Honeywell’s World Wide Web sites that will be of interest to our industrial automation and control customers.
Honeywell Organization
WWW Address (URL/e-mail)
Corporate
http://www.honeywell.com
Industrial Measurement and Control
http://content.honeywell.com/imc/
International
http://www.honeywell.com/Business/global.asp
Field Instruments
http://www.honeywell.com/imc
Technical Assistance Center
[email protected] (e-mail)
Telephone
Contact us by telephone at the numbers listed below.
Organization
United States and Canada
Phone Number
Honeywell Inc.
Industrial Automation and Control
1-800-343-0228
1-800-525-7439
Global Technical Support Center
1-800-423-9883
Asia Pacific
Honeywell Asia Pacific Inc.
Hong Kong
(852) 8298298
Europe
Honeywell PACE
Brussels, Belgium
[32-2] 728-2111
Latin America
Honeywell Inc.
Sunrise, Florida U.S.A.
(305) 364-2355
Sales
Service
Honeywell Industrial Wireless
Combined Analog/Digital Output Module
Table of Contents
Section 1: Introduction____________________________________1
1.1: Using This Manual
1.2: About the Device
1.3: Unpacking
1.4: Software Compatibility
1
2
2
2
Section 2: In a Hurry? ____________________________________3
Section 3: Installation_____________________________________4
3.1: Electrical Installation
4
3.1.1: Electrical Specifications
3.1.2: Wiring Power and Communications
3.1.3: “Daisy-Chaining” Multiple Modules
3.1.4: Terminating Analog/Digital Output Modules
3.1.5: Wiring Analog Output Loops
3.1.6: Wiring Digital Output Loops
4
4
5
6
7
7
Section 4: Configuring the RS-485 Address ___________________8
Section 5: Configuring the Quad Analog Output Loops _________9
5.1: Getting Started
5.2: Trimming the 4-20mA Loop Outputs
5.3: Mapping Transmitters to Analog Outputs
9
10
10
Section 6: Configuring the Eight Digital Output Loops_________12
6.1: Getting Started
6.2: Mapping Transmitters to Digital Outputs
12
13
6.2.1: Monitoring Transmitter Process Values
6.2.2: Monitoring Transmitter Input Switches
6.2.3: Monitoring Transmitter Status
6.2.4: Monitoring Base Radio Status
14
15
16
16
Section 7: Technical Specifications _________________________17
Rev. 3
11/04
User Manual
III
Honeywell Industrial Wireless
Combined Analog/Digital Output Module
Table of Figures
3.1: Overall Wiring Schematic ................................................................................. 4
3.2: “Daisy-Chained” Network................................................................................. 5
3.3: Example of How to Wire “Daisy-Chained” Output Modules........................... 5
3.4: Example of End Unit Location.......................................................................... 6
3.5: Example of How to Properly Terminate an Output Module ............................. 6
3.6: Wiring an Analog Output Loop......................................................................... 7
3.7: Wiring a Digital Output Loop ........................................................................... 7
4.1: Output Device Utility ........................................................................................ 8
5.1: Example of How to Trim Loop Outputs.......................................................... 10
5.2: Example of Base & Output Devices View...................................................... 10
5.3: Example of Output Device Properties: Analog Loop Configuration .............. 11
6.1: Base & Output Devices View.......................................................................... 13
6.2: Output Device Properties Menu ...................................................................... 13
6.3: Monitoring Transmitter Process Values.......................................................... 14
6.4: Monitoring Transmitter Input Switches .......................................................... 15
6.5: Monitoring Transmitter Status ........................................................................ 16
IV Rev. 3
11/04
User Manual
Honeywell Industrial Wireless
Combined Analog/Digital Output Module
Section 1: Introduction
1.1: USING THIS MANUAL
This manual is designed to assist in installing, operating, and maintaining
Honeywell Models A Option, B Option, and C Option Output Modules.
The manual is broken into sections as follows:
Section 2: In a Hurry?
This section summarizes what must be done in order to get the device installed, configured and in operation quickly. However, it does not provide
detailed or how-to information to perform the tasks outlined.
Section 3: Installation
This section explains how to correctly wire power, communications, analog output loops and digital output loops. Also covered in this section is
how to “daisy-chain” multiple devices together on the same power and
communications supplies. Proper communications termination is also covered.
Section 4: Configuring the RS-485 Address
Because each Combined Analog/Digital Output Module must have a
unique RS-485 address before it is used in service, this section covers
how to set this address. Note that a different wiring setup is needed to perform the configuration, thus it is ideal that this be done prior to placing
the device in service.
Section 5: Configuring the Analog Output Loops
This section only applies if you have the Wireless Management Toolkit
software and you have purchased the Quad Analog Output Module (A
Option) or the Combined Analog/Digital Output Module (C Option).
This section covers the “mapping” of Transmitter inputs to one of the four
analog output loops provided. Ranging and trimming of these loops is also
discussed in this section.
Section 6: Configuring the Digital Output Loops
This section only applies if you have the Wireless Management Toolkit
software and you have purchased the Eight Digital Output Module (B Option) or the Combined Analog/Digital Output Module (C Option).
This section covers the use of various Transmitter parameters to control
the state of the digital output loops provided. The various modes of digital
operation is discussed in this section.
Section 7: Technical Specifications
This section explains the technical specifications that are associated with
this device, such as power characteristics, accuracy, and operating characteristics.
Rev. 3
11/04
User Manual
1
Honeywell Industrial Wireless
1.2: ABOUT THE DEVICE
Combined Analog/Digital Output Module
The Honeywell Combined Analog/Digital Output Module is a DIN rail
mountable device which allows the user to associate Transmitter outputs,
such as process variables, switch input values, and Transmitter status, to
4-20mA loops and/or Digital (Switch) Output loops. There are three versions of this device currently available: Quad Analog (four 4-20mA
loops), Eight Digital (eight digital (switch) loops), and the Combined Analog/Digital which has four 4-20mA loops as well as eight Digital Output
loops.
Each of the Transmitters’ outputs (e.g. 85°C, 100 PSI or Switch 1 Closed)
is received by the Base Radio and is then routed to the Analog/Digital
Output Module via an RS-485 connection. This “assigned” variable is
then converted to an industry standard Analog/Digital Output Module 420mA signal or digital output (depending on user configuration and type
of module purchased) within the Analog/Digital Output Module and output on the respective user defined loop.
The Analog/Digital Output Module allows the user to select which Transmitters and their respective variables are mapped to device via the Wireless Management Toolkit software.
The purpose of this manual is to help you install and maintain your Honeywell Analog/Digital Output Module. The manual is designed to cover
three products, but will mainly discuss the Analog/Digital Output Module
as it encompasses the use and design of the other two products.
1.3: UNPACKING
Remove the Packing List and check off the actual equipment received. If
you have any questions on your shipment, please call your Honeywell
Representative. Upon receipt of shipment, inspect the container for any
signs of damage in transit. Especially take note of any evidence of rough
handling. Report any apparent damage immediately to the shipping agent.
Please note that sometimes units are assembled with accessories when
shipped. Inspect the shipment carefully if you think that something is
missing. This is rare, as we take considerable care to pack units for shipment, but it does sometimes happen. Please give us a call and we may be
able to resolve this matter quickly over the phone.
NOTE
Please note that the carrier will not honor any claims for damage unless
all shipping materials are saved for their examination. If damage is found
during examining and removal of the contents, save the packing material
and the carton.
1.4: SOFTWARE
COMPATABILITY
Software for Honeywell is revised periodically. Internal device software
may contain portions that are not compatible with previous versions of the
Wireless Management Toolkit software.
To ensure software compatibility, Wireless Management Toolkit software
version 1.56.126 or later must be used. If you believe you are experiencing software compatibility issues please call Honeywell Technical Support
at 800-423-9883 or email [email protected].
2 Rev. 3
11/04
User Manual
Honeywell Industrial Wireless
Combined Analog/Digital Output Module
Section 2: In a Hurry?
This section summarizes what must be done in order to get the device installed, configured and in operation quickly. However, it does not provide
detailed or how-to information to perform the tasks outlined.
1. Wire 24VDC power to the Output Module (See side Diagram)
2. Wire WMT RS-485 communications to the Module (See side Diagram)
3. Place terminating resistor in terminal only if Module will be used as
an End Unit (see side Diagram)
4. With only one Analog/Digital Output Module on the RS-485 network
at a time, configure the RS-485 Address of each Analog/Digital Module via the Output Device Utility. (Only assign addresses between 3
and 32).
5. Once each Module has been given a unique address, re-wire the Modules in a daisy-chain with the Base Radio, making sure that the device
with the terminating resistor (could be Base Radio) is in the End Unit
location. (See Diagram below for daisy-chain wiring diagram).
6. Wire Analog Loops (L1...L4) if purchased (See side Diagram)
7. Wire Digital Loops (S1...S8) if purchased (See side Diagram)
8. Using Wireless Management Toolkit software trim all Analog Output
Loops (if purchased) via the Trim Wizard on each Output Module
9. Using Wireless Management Toolkit software map desired Transmitter Process Values to respective Analog Output Loops via the Data
Maps view.
10. Using Wireless Management Toolkit software configure Digital Output loops to monitor various Transmitter and Network parameters via
the Properties of each Output Module
Rev. 3
11/04
User Manual
3
Honeywell Industrial Wireless
Combined Analog/Digital Output Module
Section 3: Installation
In this section wiring instructions are discussed for the various setup capabilities of the Combined Analog/Digital Output Module. The subsections
are as follows:
3.1: ELECTRICAL
INSTALLATION
3.1.1: Electrical Specifications
3.1.2: Wiring Power and Communications
3.1.3: “Daisy-Chaining” Multiple Modules
3.1.4: Terminating Combined Analog/Digital Output Modules
3.1.5: Wiring Analog Output Loops
3.1.6: Wiring Digital Output Loops
3.1.1: Electrical Specifications
Warning
!
Remember to turn off all power BEFORE hooking up any wires!
!
Caution
•
2 Wire RS-485 Serial Communications Cable
Recommend Belden 3105A shielded and protected 22AWG or
equivalent
•
All output loops MUST be externally powered
1.
Remove the terminal blocks from the jacks on the Output
Module.
2. Secure the wire into the proper terminal blocks via the small standard
screws located on the top of the terminal blocks.
3. Plug the terminal blocks back into the proper jacks on the Output Module.
!
The 4-20mA Loop (on the Analog or Analog/
Digital Device only), labeled L1, L2, L3, and L4,
are NOT for a power supply; however they must
be externally powered. These connections are
only used for analog 4-20mA loop outputs. Placing incorrect power supply to these connections
can damage the Analog/Digital Output Module.
4 Rev. 3
11/04
24VDC Power Supply with 0.5 Amp minimum output
Recommend 22AWG Power Supply wire
Once you have located power and communications terminal blocks shown
in Figure 3.1, you can wire the Analog/Digital Output Module accordingly. The best way to wire the Module is to:
3.1.2: Wiring Power and
Communications
!
•
Figure 3.1: Overall Wiring Schematic
User Manual
Honeywell Industrial Wireless
Combined Analog/Digital Output Module
3.1.3: “Daisy-Chaining” Multiple
Output Modules
In order to allow the Base Radio to communicate to an Output Module the
user MUST daisy chain the Base Radio to the Analog/Digital Output
Module.
To do so, bring the RS-485 wires from the Base Radio to the Output Module terminal block labeled “RS485 from Base Radio” shown in the Figure
1: Overall Wiring Schematic. Then simply attach the outbound RS-485
cable (if needed for a PC or another Analog/Digital Output Module) to the
terminal labeled “For Daisy Chain Applications”.
!
Caution
!
Make sure only ONE power supply is routed to
an Output Module at any time! (Does not apply to
Loop Power Supplies)
Power may be supplied in daisy-chain form from a single power supply,
but be sure not to power a Module from two separate supplies. Doing so
will supply the Analog/Digital Output Module with 48VDC and destroy
the unit! The two GND and 24V connectors on the Module are connected
internally.
Shown in Figure 3.2, is a common daisy-chain network using three optional Honeywell Analog/Digital Output Modules. In this setup the output
from one Analog/Digital Output Module is the input to the next Analog/
Digital Output Module.
Figure 3.2: “Daisy-Chained” Network
Shown below in Figure 3.3, is an example of how to wire the Modules
together when using a daisy-chain setup with multiple Analog/Digital
Output Modules.
NOTE
The RS-485 communication setup is half duplex.
If one of the Output Modules in the daisy-chain
application is wired to an RS-485 to RS-232 converter, the A (Tx +) and B (Tx-) wires may need
to be crossed for correct operation. Please see the
converter’s user manual for further instructions.
Figure 3.3: Example of How to Wire “Daisy-Chained” Output Modules
Rev. 3
11/04
User Manual
5
Honeywell Industrial Wireless
3.1.4: Terminating Analog/Digital
Output Modules
Combined Analog/Digital Output Module
RS-485 is capable of maintaining communications over a maximum distance of approximately 3000 to 4000 feet. In most (and we recommend
all) situations the unit that comprises an “end” of an RS-485 network
should be terminated by a resistor wired across the A and B wires.
In the case of a daisy-chained application the end unit should be terminated. The end unit is the unit that is at the end of series of units. Note: a
PC is also an end unit, but the termination for this end unit is done within
the converter. In a multiple unit daisy-chain application the end unit is
shown in Figure 3.4 below:
Figure 3.4: Example of End Unit Location
Termination of an end unit is done by placing a resistor across the A and
B wires of the RS-485 cable. The value of this resistor should match the
characteristic impedance (Zo) of the RS-485 cable. The characteristic impedance (Zo) is published by the manufacturer of the RS-485 cable you
are using.
If you are using the Belden 3105A RS-485 wire recommended under the
Wiring RS-485 to the Base Radio section (of the Base Radio User’s
Guide) the value of the resistor should be a 120 ohm ¼ watt resistor.
To terminate an Output Module simply place one end of the resistor in the
open terminal block’s B slot and place the other end of the resistor in the
open terminal block’s A slot. Doing so will place the resistor across the A
and B wires as needed. An example of this is shown below in Figure 3.5.
Figure 3.5: Example of How to Properly Terminate an Output Module
6 Rev. 3
11/04
User Manual
Honeywell Industrial Wireless
3.1.5: Wiring Analog Output Loops
Combined Analog/Digital Output Module
Note that this section only applies if you have purchased an Analog Output Module (A Option) or the combination Combined Analog/Digital Output Module (C Option).
Because the Analog Module does not supply the loop power for each of its
four output loops (L1…L4); this must be supplied by an external power
supply and an optional current limiting resistor in series with the monitoring device as shown in the figure below:
Figure 3.6: Wiring an Analog Output Loop
3.1.6: Wiring Digital Output Loops
Note that this section only applies if you have purchased the Digital Output Module (B Option) or the combination Combined Analog/Digital Output Module (C Option).
Because the Digital Module is simply a Normally Open switch type operation, some excitation may need to be supplied to the digital loop in order
to determine the state of the digital loop, as shown in Figure 3.7 below.
The amount of power supplied to the loop is determined by the requirements of the device that is monitoring the state of the digital loop. The
power supply limits of the digital loops are 30VDC and 1A each. Each
digital loop is individually isolated.
Figure 3.7: Wiring a Digital Output Loop
NOTE
The de-energized state of all digital loops is NORMALLY OPEN. Consideration
should be given, as in the event of power loss to the device, all switches will
OPEN.
Rev. 3
11/04
User Manual
7
Honeywell Industrial Wireless
Combined Analog/Digital Output Module
Section 4: Configuring the RS-485 Address
Each Combined Analog/Digital Output Module has an RS-485 address.
These addresses must be set before the Combined Analog/Digital Output
Modules can be used in service.
NOTE
All Combined Analog/Digital Output Modules are
given an RS-485 Address of 3 at the factory. Thus,
if you have purchased more than one module, re addressing must be performed. Failure to do so
will prevent Wireless Management Toolkit from
properly communicating with these devices.
To set the RS-485 address for the Combined Analog/Digital Output Module, follow the instructions below. The factory default for all Modules is
Address 3:
1. Make sure Wireless Management Toolkit Software is installed on the
PC.
2. Wire and Connect an individual Combined Analog/Digital Output
Module to the PC via the RS-232 converter.
3. Run the Output Device Utility, which is found by navigating to the
following on the PC:
Start?
Programs?
Honeywell Wireless Manager?
Output Device Utility
Figure 4.1: Output Device Utility
You should see the following screen after performing these steps:
1. Select the COM Port that the Module is connected (Usually COM 1)
2. Then click Search for Device
3. Once the device is found, its current Baud Rate and RS-485 Address
will be displayed. Enter a new address from 3 to 32. (NOTE: Combined Analog/Digital Output Modules CANNOT share the same address if they reside on the same daisy-chain network)
4. Then click Set Address
5. Repeat all steps for subsequent devices. Note that all devices come
factory configured to Address 3, and will conflict unless all are
changed to different addresses.
8 Rev. 3
11/04
User Manual
Honeywell Industrial Wireless
Combined Analog/Digital Output Module
Section 5: Configuring the Analog Output Loops
In this section software configuration instructions are discussed for the
various setup capabilities of the Quad Analog Output Module. The subsections are as follows:
5.1: Getting Started
5.2: Trimming the 4-20mA Loop Outputs
5.3: Mapping Transmitters to Analog Outputs
This section only applies if you have the Wireless Management Toolkit
software and you have purchased the Quad Analog Output Module (A
Option) or the Combined Analog/Digital Output Module (C Option). If
this is not the case, please contact your Honeywell Sales Representative.
NOTE
All loops must be externally powered as the Analog/Digital Output Module does not supply the
loop power. See section 3.1.5 for more wiring
details.
There are four possible 4-20mA output loops available on each Combined
Analog/Digital Output Module. Each individual loop is configurable to a
Transmitter RF ID number.
For example: If Loop 1 on the Combined Analog/Digital Output Module
has been mapped to RF ID #1 and Input #1, then the Transmitter that has
been set to RF ID #1 will have its’ process variable from Input #1 output
on that 4-20mA loop.
The Module also has three indication lights:
•
•
•
5.1: GETTING STARTED
POWER OK – Indicates power is being supplied
RS485 LINK – Flashes every time the Output Module
receives an RS485 message from the Base Radio.
FAULT – Indicates loss of communication or sensor error
with one of the four mapped inputs when lit.
Once you have properly wired up the Base Radio and the Combined Analog/Digital Output Module(s), turn on the Transmitters, Base Radio and
Output Module. Make sure that the Transmitter(s) and Base Radio are
communicating properly (see respective User Guides for more details).
Then run the Wireless Management Toolkit (WMT) software.
Once you are connected to the WMT software, click on the Base & Output Devices icon in the left hand VIEWS pane. The top half of the view
will contain all the Base Radios on your network. The bottom half of the
view will contain all the Combined Analog/Digital Output Modules that
are on the network.
If you have connected the Analog/Digital Module but do not see it being
displayed, you may have to tell the software to look for new devices. The
software performs a new device search upon start-up of the RF Server,
however if devices are added after the RF Server is already running, they
may not be detected. To manually perform a new device search click Discover Devices, which is found under the File menu. The software will
inform the user when it is finished searching for devices via the Events
Log.
Rev. 3
11/04
User Manual
9
Honeywell Industrial Wireless
5.2: TRIMMING THE 4-20mA
LOOP OUTPUTS
Combined Analog/Digital Output Module
In order to make the 4-20mA loop read accurately, it must be trimmed to
match the device that is reading it. To trim one of the four analog loops on
the device, go to the Base & Device Outputs view in the WMT software.
Right-click on the Output Module you wish to trim. Then select the Trim
Wizard selection from the menu. Doing this will bring up the trim wizard
as shown in Figure 9:
Figure 5.1: Example of How to Trim Loop Outputs
As shown above, select the output loop you wish to trim from the drop
down box. These outputs correspond to loops L1+, L1 -, L2+, L2-… and
so on.
Once you have selected the output you wish to trim, click the Output
Trim button. This will take you through a set of steps that will trim that
particular output of the unit. Please note that you must have a way to read
the output of the unit as this is required when performing the trim functions.
5.3: MAPPING TRANSMITTERS TO ANALOG OUTPUTS
Any Transmitter’s input may be mapped or “linked” to an available output
loop on the Analog Output Module. This is done in the Base & Output
Devices view within the WMT software as shown in Figure 5.2:
NOTE
Transmitters are often referenced throughout the
software by two numbers, such as 1-4 in Figure
5.2. The first number refers to the Base Radio ID
and the second number refers to the Transmitter
RF ID.
Figure 5.2: Example of Base & Output Devices View
10 Rev. 3
11/04
User Manual
Honeywell Industrial Wireless
5.3 Continued
Combined Analog/Digital Output Module
To map a Transmitter input to a particular output loop click on the NEW
button. This will bring up the Output Device Properties. Select the appropriate Analog Loop number (corresponding to L# +/- on the Output Module) and select Enable. This will display the configuration screen as
shown in Figure 5.3.
First, select the desired Transmitter to be mapped in the Transmitter drop
box. The first number corresponds to the Base Radio ID. The second number corresponds to the Transmitter ID on that Base Radio.
Once the Transmitter is selected, select the Input Number. This refers to
the available inputs on the selected Transmitter. Please note that a Transmitter may only have one input.
Next, select the Output Module that should output the Transmitter value.
The number in parenthesis is the address of the Output Module. This number corresponds to the RS-485 Address values set via the Output Device
Utility (see the Setting the Analog/Digital Output RS-485 Address section
for more details).
After selecting the specific Output Module, select the loop or Output
Number. This number refers to the four available loops on the Output
Module. Number 1 corresponds to L1+ and L1- on the Output Module and
so on.
Figure 5.3: Example of Output Device
Properties: Analog Loop Configuration
NOTE
When an Analog/Digital device is configured the
configuration data is downloaded into the unit via
the RS-485 connection. This means that the software and PC can be completely separated from the
device and it will continue to operate in the way it
was last configured.
If the Wireless Management Toolkit software is
being run in Configuration Mode, the software
will ask the Combined Analog/Digital Output
Module how it is currently configured and display
this to the user.
If the Wireless Management Toolkit software is
being run in Management Mode, the software will
store the Combined Analog/Digital Output Module configuration data and display this stored data
to the user.
Rev. 3
11/04
In the Output Settings box, set the upper and lower output values (in Input Unit Values), and then select corresponding mA loop output values.
Note that this is a linear output from the lower range value (LRV, which is
4mA) to the upper range value (URV, which is 20mA). In the example in
Figure 11, we have selected the ultrasound input of Transmitter ID 01 and
mapped it to Output Loop 1. We then selected that 100 Counts would be
the URV and this would cause an output of 20mA on the output loop, and
we selected that 0 Counts would cause an output of 4mA on the output
loop. This would mean that if the Transmitter were reading 50 Counts of
ultrasound the output would be 12 mA (or half way between 4 and 20mA).
The Live Full Scale and Live Zero settings indicate the max./min. mA
level that the device will output. (Not including the Failsafe). For example, in Figure 5.3 we have set LiveFS to 20.5mA which means that if the
ultrasound level passed 100 Counts (the URV) the device would continue
to output until it read 103.25 Counts, which corresponds to 20.5mA. If the
value goes beyond 103.25 Counts the device would continue to only output 20.5mA.
There is also an option of enabling or disabling a failsafe output for the
analog loop. When the check box, located in the Output Failsafe box, is
checked, the failsafe output is enabled. This means that if a failsafe condition occurs, the output loop will no longer output the Transmitter value,
but instead output the mA source specified in the Failsafe Level box. Reasons for a failsafe condition are:
• Loss of RF communication between the Base Radio and Transmit•
ter.
Loss of RS-485 communication between the Base Radio and Output Module.
Transmitter Sensor Failure or System Failure.
Transmitter mapped input is disabled by user.
•
•
To finish and save all the selected settings simply click the OK button.
User Manual
11
Honeywell Industrial Wireless
Combined Analog/Digital Output Module
Section 6: Configuring the Eight Digital Output Loops
In this section software configuration instructions are discussed for the
various setup capabilities of the Eight Digital Output Module. The subsections are as follows:
6.1: Getting Started
6.2: Mapping Transmitters to Digital Outputs
6.2.1: Monitoring Transmitter Process Values
6.2.2: Monitoring Transmitter Input Switches
6.2.3: Monitoring Transmitter Status
6.2.4: Monitoring Fault Conditions
NOTE
All loops must be externally powered as the Analog/Digital Output Module does not supply the
loop power. See section 3.1.6 for more wiring
details.
This section only applies if you have the Wireless Management Toolkit
software and you have purchased the Eight Digital Output Module (B Option) or the Combined Analog/Digital Output Module (C Option). If this is
not the case, please contact your Honeywell Sales Representative.
There are eight possible digital output loops available on each Combined
Analog/Digital Output Module. Each individual loop is configured to a
Transmitter RF ID number and variable within that Transmitter.
For example: If Switch 1 on the Combined Analog/Digital Output Module
has been selected to monitor Transmitter Status, then the Transmitter(s)
that have been selected to be monitored will have their user selected status
variables collectively output as specified on that switch.
The Module also has three indication lights:
•
•
•
6.1: GETTING STARTED
POWER OK – Indicates power is being supplied
RS485 LINK – Flashes every time the Output Module
receives an RS485 message from the Base Radio.
FAULT – Indicates loss of communication or sensor error
with one of the eight mapped inputs when lit.
Once you have properly wired up the Base Radio and the Combined Analog/Digital Output Module(s), turn on the Transmitters, Base Radio and
Output Module. Make sure that the Transmitter(s) and Base Radio are
communicating properly (see respective User Guides for more details).
Then run the Wireless Management Toolkit (WMT) software.
Once you are connected to the WMT software, click on the Base & Output Devices icon in the left hand VIEWS pane. The top half of the view
will contain all the Base Radios on your network. The bottom half of the
view will contain all the Combined Analog/Digital Output Modules that
are on the network.
If you have connected the Analog/Digital Module but do not see it being
displayed, you may have to tell the software to look for new devices. The
software performs a new device search upon start-up of the RF Server,
however if devices are added after the RF Server is already running, they
may not be detected. To manually perform a new device search click Discover Devices, which is found under the File menu. The software will
inform the user when it is finished searching for devices via the Events
Log.
12 Rev. 3
11/04
User Manual
Honeywell Industrial Wireless
6.2: MAPPING TRANSMITTERS TO DIGITAL OUTPUTS
Combined Analog/Digital Output Module
Any combination of Transmitters and their respective inputs and outputs
may be mapped or “linked” to the various digital outputs on the Digital
Output Module. This is done in the Base & Output Devices view within
the WMT software as shown in Figure 6.1.
Figure 6.1: Base & Output Devices View
NOTE
The de-energized state of all digital loops is NORMALLY OPEN. Consideration should be given,
as in the event of power loss to the device, all
switches will OPEN.
To map the Transmitter(s), double-click on the appropriate Analog/Digital
Output Module or right-click and select Properties. Doing so will open
the Output Device Properties menu as shown in Figure 6.2.
Figure 6.2: Output Device Properties Menu
As seen in Figure 6.2, above, the switches all come in the disabled position from the factory. The disabled position is the normally open position.
Because these switches are normally open, the device will revert to open
position on all switches if a power loss occurs.
To enable a switch, select the intended mode for the switch in the respective drop box menu. Each of the switch modes available are outlined in the
following section along with configuration instructions.
Rev. 3
11/04
User Manual
13
Honeywell Industrial Wireless
6.2.1: Monitoring Transmitter
Process Values
About the Failsafe Setup
Once a switch has been enabled to operate in
a certain mode, a Failsafe Setup box will be
displayed on the bottom of Output Device
Properties screen, as shown in Figure 6.3.
The failsafe condition setting indicates
which state the switch will be set to, in the
event of a failsafe condition such as loss of
communications with the Base Radio. However, if the Output Device loses power the
switch will be in an OPEN state.
Combined Analog/Digital Output Module
The ’Monitor Transmitter Process Value’ mode is used to open and close
the switch output based on the value of the Transmitter’s process variable.
As shown in Figure 6.3, once the mode has been selected in the drop down
box, the following menu will appear:
Figure 6.3: Monitoring Transmitter Process Value
In the above example Switch 1 (S1+, S1-) is being setup to monitor the
process variable of the Transmitter with RF ID 02 and a Tag Name of
Loop 33. The Transmitter’s number two, or secondary process variable
has been set to be monitored via the Input # drop box. Since the unit being monitored is a Multi-Input Transmitter, the Threshold and Deadband
values are in whichever units the device has been configured to; in this
case mA.
The Threshold setting is the set point that if exceeded, the state of the
switch will change to state selected in the When condition occurs drop
box; in this case the switch has been set to open when the threshold is exceeded.
The Deadband setting is an additional margin about the threshold at
which the switch will be allowed revert to its original state. The value
entered in the Deadband box is the width of this deadband, and NOT a set
point. For example, with the above settings Switch number one would
open when the [second] input variable of Transmitter RF ID 02 is above 5
MA. Say this open switch turns on a discharging device of some sort and
the amperage begins to fall from the 5 mA it reached to 4 mA. The switch
will remain in the open state, and the discharging device will remain on,
even though the measured temperature has fallen below the threshold.
This is due to the deadband that was set. In this case the switch will not
close and turn off the discharging device until the amperage reaches 0.5
Volts. Once the amperage falls below 0.5 Volts, it must climb back above
the 5 Volt threshold to open the switch again.
14 Rev. 3
11/04
User Manual
Honeywell Industrial Wireless
6.2.2: Monitoring Transmitter
Input Switches
About the Failsafe Setup
Once a switch has been enabled to operate in
a certain mode, a Failsafe Setup box will be
displayed on the bottom of Output Device
Properties screen, as shown in Figure 6.3.
The failsafe condition setting indicates
which state the switch will be set to, in the
event of a failsafe condition such as loss of
communications with the Base Radio. However, if the Output Device loses power the
switch will be in an OPEN state.
Combined Analog/Digital Output Module
The ‘Monitor Transmitter Input Switches’ mode is used to open and close
the switch output based on the current state of the switch input being
monitored by a Transmitter(s). As shown in Figure 6.4 once the Monitoring of a Transmitter’s Input Switches mode has been selected in the drop
down box, the following menu will appear:
Figure 6.4: Monitoring Transmitter Input Switches
In the above example Switch 1 (S1+, S1-) is being set up to monitor the
switch inputs of the Transmitter with RF IDs 02 and Tag Name Loop 33.
The Transmitter’s Input Switch 1 and Input Switch 2 have been set to be
monitored via the respective check boxes. Note that in the list of Available Transmitters only online Transmitters are displayed. If it is desired
to have all possible Transmitters displayed, check the Show offline units
box.
Since we have chosen to monitor both input switches of the two Transmitters, we are allowed to enter two rules which will determine the state of
the output switch (Switch 1 on the Digital Output Module in this case).
The first rule pertains to the two input switches on EACH Transmitter.
The rule is asking whether the output switch (on the Digital Output Module) should open/close (depending on the user setting) when EITHER input switch closes on a Transmitter or if the output switch should open/
close only when BOTH input switches on a Transmitter close.
The second rule pertains to Transmitter(s) that are listed in the Selected
Transmitters box. The rule is asking if the output switch should open/
close when ANY Transmitter meets the first rule or if the output switch
should open/close only if ALL Transmitters meet the first rule. (In Figure
6.4 we are only monitoring one Transmitter so that is the only available
rule).
If we had chosen only to monitor Input Switch 1 OR Input Switch 2 and
not both, the first rule would have been unavailable. This means that only
the second rule would apply to respective monitored input switch.
Rev. 3
11/04
User Manual
15
Honeywell Industrial Wireless
Combined Analog/Digital Output Module
6.2.3: Monitoring Transmitter
Status
The monitoring of a Transmitter’s status mode is used to open and close
the switch output based on the current status of a Transmitter(s). As
shown in Figure 6.5, once this mode has been selected in the drop down
box, the following menu will appear:
About the Failsafe Setup
Figure 6.5: Monitoring Transmitter Status
Once a switch has been enabled to operate in
a certain mode, a Failsafe Setup box will be
displayed on the bottom of Output Device
Properties screen, as shown in Figure 6.3.
The failsafe condition setting indicates
which state the switch will be set to, in the
event of a failsafe condition such as loss of
communications with the Base Radio. However, if the Output Device loses power the
switch will be in an OPEN state.
6.2.4: Monitoring Base Radio
Status
In the above example Switch 1 (S1+, S1-) is being set up to monitor the
status of the Transmitters’ with RF IDs 1, 3 and 4. The Transmitters’ Sensor Overrange and Sensor Fault have been set to be monitored via the
respective check boxes.
If for any reason one of the selected conditions become true for ANY of
the Transmitters that are listed in the Selected Transmitters box, the output switch will open/close. The user must determine whether the output
switch should open or close based on the previous parameters. This is selected via the On above condition drop box.
The monitoring Base Radio status mode is used to open and close the
switch output based on the detection of a fault condition with the Base
Radio communications.
In this mode, the switch will open/close if for any reason the Base Radio
stops communicating on the RS-485 network to the Digital Output Module. The user must determine whether the output switch should open or
close based on the previous parameter. This is selected via the drop box.
16 Rev. 3
11/04
User Manual
Honeywell Industrial Wireless
Combined Analog/Digital Output Module
Section 7: Technical Specifications
Operating Characteristics
• Power Supply: 10-28 VDC 24 VDC typical
• Current Consumption: 10-26 mA 13.2 mA typical
• -40 °F to 185 °F (-40 °C to 85 °C)
• -40 °F to 284 °F (-40 °C to 140 °C) storage temperature
Analog Output Characteristics
• Number of Ports: 4
• Current Range: 3.1-23.5 mA
• Field Voltage: 12-30 VDC 24 VDC typical
• Isolation: 2200 Vrms (between field and logic)
• Compliance: 1000 Ohms Max @ 24 VDC; 500 Ohms Max @ 12 VDC
• Connector: Wire size 14 AWG MAX
Digital Output Characteristics
• Number of Channels: 8
• Maximum Current: 1 Amp
• On Voltage: 6-30 VDC
• A/C Frequency: N/A
• On Resistance: 15 mOhms 9 mOhms typical
• Isolation: 2200 Vrms (between field and logic)
• Connector: Wire size 14 AWG MAX
Accuracy
• Accuracy of 10 µA at 25°C (reference conditions)
• Ambient Temperature effect ±0.1% of reading per 18°F (10°C)
• Supply rejection less than 2 µA from 12-32 V
Physical Characteristics
• DIN Rail mounted
• 3.8” high X 1.8” wide X 4.4” deep (Quad Analog Output Module: A Option)
• 3.8” high X 2.7” wide X 4.4” deep (Eight Digital Output Module: B Option)
• 3.8” high X 2.7” wide X 4.4” deep (Combined Analog/Digital Output Module: C Option)
Fault (Fail-Safe) Condition
• Each output goes into fail safe in the event of a sensor failure, missing sensor, NO RF condi•
tion, RS-485 link down, Transmitter powered down
The Analog/Digital Output Module displays a fault indication if any enabled output goes into a
fail-safe condition
User Programmable Options
• Range (lower value range and upper value range) each output using Wireless Management
•
•
•
•
Rev. 3
11/04
Toolkit (WMT)
Trim each output using WMT
Enable or disable failsafe for each output
Failsafe output user selectable to 3.6mA, 23mA, or user specified value
Select RS-485 address with the Configuration Utility Program
User Manual
17
Honeywell Industrial Wireless
18 Rev. 3
11/04
Combined Analog/Digital Output Module
User Manual


