1
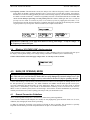
Model MFJ-249C
INSTRUCTION MANUAL
CAUTION: Read All Instructions Before Operating Equipment
MFJ ENTERPRISES, INC.
300 Industrial Park Road
Starkville, MS 39759 USA
Tel: 662-323-5869 Fax: 662-323-6551
VERSION 1A
COPYRIGHT
C
2014 MFJ ENTERPRISES, INC.
MFJ-249C Instruction Manual
HF/VHF SWR Analyzer
TABLE OF CONTENTS
1.0 INTRODUCTION................................................................................................................................................. 1
1.1
A Quick Word about Accuracy.......................................................................................................... 1
1.2
Typical Uses ...................................................................................................................................... 2
1.3
Frequency Range ............................................................................................................................... 2
2.0 POWER SOURCES .............................................................................................................................................. 2
2.1
External Power Supply ...................................................................................................................... 2
2.2
Using Internal Batteries ..................................................................................................................... 3
2.3
Using Rechargeable “AA” Type Batteries......................................................................................... 3
2.4
Using Conventional “AA” Drycell Batteries ..................................................................................... 3
2.5
“Power Saving” Mode (sleep mode).................................................................................................. 4
3.0 MAIN MENU AND DISPLAY ............................................................................................................................ 4
3.1
General Connection Guidelines ......................................................................................................... 4
3.2
Power-up Display .............................................................................................................................. 4
3.3
Main MODE descriptions .................................................................................................................. 5
3.4
Blinking “VOLTAGE LOW” display warning ................................................................................. 6
4.0 MAIN (OR OPENING) MODE ............................................................................................................................ 6
4.1
General Connection Guidelines ......................................................................................................... 6
5.0 ADJUSTING SIMPLE ANTENNAS ................................................................................................................... 7
5.1
Dipoles ............................................................................................................................................... 7
5.2
Verticals ............................................................................................................................................. 7
5.3
Tuning a simple antenna .................................................................................................................... 7
6.0 TESTING AND TUNING STUBS AND TRANSMISSION LINES................................................................... 8
6.1
Testing Stubs...................................................................................................................................... 8
6.2
Velocity Factor of Transmission Lines.............................................................................................. 8
6.3
Impedance of Transmission Lines or Beverage antennas .................................................................. 9
6.4
Adjusting Tuners................................................................................................................................ 9
6.5
Adjusting Amplifier Matching Networks .......................................................................................... 9
6.6
Testing RF Transformers ................................................................................................................... 10
6.7
Testing Baluns ................................................................................................................................... 10
6.8
Measuring Inductance and Capacitance............................................................................................. 10
Measure Capacitance ...................................................................................................................................... 11
Measure Inductance ........................................................................................................................................ 11
6.9
Resonant Frequency of Tuned Circuits.............................................................................................. 11
Testing RF Chokes.......................................................................................................................................... 12
7.0 TECHNICAL ASSISTANCE ............................................................................................................................... 12
ii
MFJ-249C Instruction Manual
1.0
HF/VHF SWR Analyzer
INTRODUCTION
Attention: Read Section-2.0 before attempting to use your analyzer. Incorrect power
supply voltages or excessive external voltage applied to the Antenna connector will
damage it!
Description
The MFJ-249C is a compact battery powered RF impedance analyzer that combines four basic circuits; a 50-ohm
bridge, eight-bit micro-controller, frequency counter, and a 0.53-230 MHz variable-frequency oscillator with
switched coverage of nine overlapping bands. These four sub-elements are integrated to provide a wide variety of
useful antenna and impedance measurements including coaxial cable loss and distance to an open or short. Although
designed primarily for analyzing 50-ohm antennas and transmission line systems, the MFJ-249C also measures RF
impedance from a few ohms to several hundred ohms. In addition, it functions as a discrete signal source (RF-Signal
Generator) and independent frequency counter.
1.1
A Quick Word about Accuracy
Inexpensive impedance meters have limitations. The main causes of measurement error are:
(1.) Signal ingress from external RF sources
(2.) Component limitations
(3.) Stray reactance from connectors, pc traces, and wires.
1.) Signal Ingress: Virtually all low-cost handhelds use simple broadband diode detectors. Unlike costly lab-grade
analyzers using frequency-selective receivers, broadband detectors admit out-of-band signals. Unfortunately, the
offending interference can't be filtered out using common low-pass or band-pass circuitry because the L/C elements
would act like lengths of transmission line and transform the impedance readings as a function of frequency.
Increasing generator power output can, in some instances, overpower interfering signals, but the current needed to
deliver the additional RF power greatly reduces battery life. In fact, over 70% of the analyzer's 150-mA current
drain is already allocated to the VFO and its amplifier stages for generating a low-harmonic level-amplitude test
signal.
Most RF-interference problems occur at lower frequencies and are caused by high-power AM-broadcast stations.
These signals couple efficiently into large antenna arrays and are especially problematic for 160-meter verticals. In
the event you encounter intense local interference, we recommend using the MFJ-731 Tunable Analyzer Filter. It is
designed to attenuate off-frequency signals between 1.8 and 30 MHz without introducing significant errors.
2.) Component Limitations: At very low voltage levels, diode detectors become nonlinear, a condition that
reduces accuracy. The MFJ-249C minimizes this problem by using special microwave zero-bias Schottky detectors
with linearity enhanced by compensating diodes. Using this technique, each analyzer is individually optimized to
provide the highest accuracy possible with both high and low impedance loads, making the A/D converter's 8-bit
resolution the analyzer's primary accuracy limitation.
3.) Stray Reactance: The length of electrical connections between components within the bridge circuit, and the
line between the bridge and antenna connector, may introduce inaccuracy at higher frequencies and when the load
impedance is very high or very low. However, the MFJ-249C minimizes this problem with careful pc layout and by
using low-capacitance microwave-grade surface-mount components with virtually no lead length.
While some analyzers may display misleading "exact readings" falling outside the reliable measurable range, the
MFJ-249C does not. Instead, it is programmed to generate a display warning for out-of-range results. For example,
if (Z > 650) appears on your display, it means the impedance being measured is greater than 650 ohms and outside
the reliable measurement range.
1
MFJ-249C Instruction Manual
1.2
HF/VHF SWR Analyzer
Typical Uses
The MFJ-249C may be used to adjust, test, or measure the following:
Antennas: ........................................SWR, impedance, resistance, resonant frequency, and bandwidth
Antenna tuners: .............................SWR, bandwidth, frequency
Amplifiers: .......................................Input and output matching networks
Coaxial transmission lines: ........SWR, velocity factor, loss, resonant frequency
Matching or tuning stubs: ...........SWR, resonant frequency, bandwidth
Traps:................................................Resonant frequency and approximate Q
Tuned Circuits:...............................Resonant frequency
Small capacitors: ...........................Value
RF chokes and inductors: ...........Self resonant frequency, series resonance, and value
Transmitters and oscillators: .....Frequency
The MFJ-249C as a non-precision signal source:
VFO output is leveled at approximately 3-Vpp, or around 20 milliwatts into a 50-ohm load. This signal is relatively
pure with harmonics better than -25 dBc (dB below the fundamental-frequency carrier). The internal source
impedance (Zo) is 50 ohms.
A more complete description of the MFJ-249C's features along with proper measurement methods can be found by
reading sections covering the particular measurement you wish to make. Consult the table of contents for various
applications.
1.3
Frequency Range
The MFJ-249C covers 0.53* to 230 MHz without frequency gaps using a precision reduction-drive VFO tuning
capacitor and two band switches. Bands of coverage are:
Main Switch: 155-230 MHz 113-155 MHz
Lower Range Switch:
4.7-11 MHz
67-113 MHz
28-67 MHz
11-28 MHz
2.1-4.7 MHz
1.0-2.1 MHz
0.53-1.0 MHz*
Lower Range
*Note that LF coverage may be shifted from 0.53-1.0 MHz down to 0.47 - 0.94 MHz for 600-Meter and
maritime frequency coverage. To retune, remove the cabinet and use a small hex wand (2-mm) to adjust
inductor L12 while watching the LCD frequency display.
2.0
POWER SOURCES
Please read this entire section before connecting your analyzer to any power source. Improper
connections or incorrect voltages may cause permanent damage to your analyzer!
2.1
External Power Supply
MFJ offers an optional power supply, the MFJ-1312D, that satisfies all external supply requirements. We
strongly recommend using this supply. If you use a different power source, note that the voltage output must be
greater than 11 volts and less than 16 volts when the analyzer is powered on and running (loaded power source).
The maximum voltage in Sleep Mode (unloaded power source) should never exceed 18 volts. AC adapters must be
well filtered and the plug must have a grounded sleeve and positive center lead. The ideal voltage-source
specification is 13.8 VDC at 150 mA. Confirm your supply can deliver this output level safely without overheating
or introducing excessive AC ripple.
2
MFJ-249C Instruction Manual
HF/VHF SWR Analyzer
Please read the battery installation instructions (Section 2.3) if you plan to install batteries. Never connect
external DC power if non-rechargeable batteries are installed and the battery charger is enabled. Permanent
damage could result!
+
-
+
2.1 mm
The MFJ-249C has a recessed 2.1 mm power jack located on the top-right-hand side of the unit. It is labeled Power
13.8 VDC. The jack's outside barrel contact is negative and the center pin is positive. Inserting a power plug into the
power jack automatically disables the internal batteries as a power source. However, the batteries will be trickle
charged if the charger circuit is enabled.
IMPORTANT WARNING: Reverse Polarity Or Excessive Voltage Can Damage Or Destroy The MFJ-249C.
Never Apply More Than 18 Volts, Never Use AC-output or Positive Ground Supplies!
2.2
Using Internal Batteries
Before installing batteries for the first time, check the position of the Charger Jumper. To gain access, remove the
eight screws securing the analyzer's back cover and separate it from the unit. Look for a 3-pin header with a small
black-plastic shorting plug that fits over two of its pins. It is located at the top of the main pc board near the OFFON switch and power connector. The shorting plug must be properly positioned for the type of battery you intend
to use (either rechargeable or non-rechargeable). While you have the analyzer's case removed, you may install
batteries into their tray -- or install them later by removing the battery-tray door that is attached to the rear of the
case with two screws.
2.3
Using Rechargeable “AA” Type Batteries
IMPORTANT WARNING: Do not use an external power sources that deliver less than 13.8 volts with
rechargeable batteries installed. If the external supply voltage is too low, the charger will not work properly and
batteries will eventually discharge. We recommend charging batteries with the MFJ-249C power switch off and
allowing enough charging time to establish full battery charge. A minimum of ten hours is recommended.
When using rechargeable batteries, your power source must deliver a minimum of 13.8 volts to meet the minimum
charge-voltage threshold. Typical charging current is 10-20 mA (trickle-charge rate). The charger circuit functions
any time external power is connected, even when the analyzer is turned off. Again, the MFJ-1312D supply fulfills
all power supply and charging requirements for the MFJ-249C and is recommended.
When using rechargeable batteries, the internal black plastic jumper must be set to the proper position. If it is not
set properly, the batteries will not charge. As described above, the jumper is located inside the analyzer, near the
external power jack on the back side of the circuit board.
For rechargeable batteries, set the jumper as shown below:
2.4
Using Conventional “AA” Drycell Batteries
Whenever possible, install a fresh matched set of high-quality alkaline batteries. Conventional zinc cells will work,
but alkaline batteries offer a lower risk of damage caused by leakage. Alkaline cells also provide longer running
time and superior shelf life. When using any non-rechargeable dry-cell battery, always remove them immediately
when they become weak to avoid damage from leakage. Also, never store your analyzer for extended periods
(longer than a month) with non-rechargeable batteries installed.
3
MFJ-249C Instruction Manual
HF/VHF SWR Analyzer
IMPORTANT WARNING: When Using Non-Rechargeable Batteries, The Analyzer's Internal Charging System
Must Be Defeated! To Defeat The Charger, Set The Internal Jumper To The Charger-Off Position, As Shown
Below:
2.5
“Power Saving” Mode (sleep mode)
The analyzer's current drain is normally around 150 mA, which places a moderate demand on the battery pack. You
can extend the analyzer's running time significantly by using the internal Sleep Mode power-saving function. In
Sleep Mode, the analyzer's RF-generator shuts down and battery drain drops to under 15 mA. Any time Sleep Mode
is activated, the analyzer operates with a two-minute inactivity window. During any 2-minute period, you must
actuate the Mode switch -- or adjust the frequency by more than 50 kHz -- at least once for the analyzer to remain
awake. Any time a two-minute inactivity period elapses, the power saving circuit automatically switches in. When
the analyzer goes to sleep, a blinking SLP message will appear in the display’s lower right corner, as shown below:
To reawake the unit, momentarily press either the Mode or Gate button.
To Disable Sleep mode:
(1.) Turn the analyzer off.
(2.) Press and hold the Mode button while reapplying power.
(3.) Continue holding the Mode button until the copyright message appears on the screen.
(4.) Release Mode. If Sleep Mode was disabled successfully, the message shown below will appear on-screen. The
Sleep Mode function becomes re-enabled anytime the analyzer is turned Off and On again.
3.0
MAIN MENU AND DISPLAY
IMPORTANT WARNING: Never Apply RF or any other external voltage to the Antenna port of this
unit. The MFJ-249C uses zero bias detector diodes that may be damaged by external voltages. Read
Section-2.0 before applying power! Incorrect supply voltages will also damage this unit.
3.1
General Connection Guidelines
1.) Antenna Jack: When making RF measurements, connect your Device Under Test (DUT) to the SO-239
connector located on the top of the case. You'll use this port for SWR and all other RF measurements excluding the
Frequency Counter function.
2.) Power connector: (2.1 mm type) is described in Section 2.0. Be sure to read Section-2.0 before operating your
unit. Using an incorrect power sources can permanently damage the analyzer.
3.) Frequency Counter Input: BNC connector used for frequency-counter functions only.
3.2
Power-up Display
After turning on the Power switch (or after applying external power with the switch on), a sequence of three
message screens appear on the display.
The first screen presents the analyzer's software version (VER).
4
MFJ-249C Instruction Manual
HF/VHF SWR Analyzer
MFJ-249C
VER 13.40
The second message shows the software copyright symbol.
MFJ-Enterprises
(c)
The third message provides a power-source check, displaying the internal battery or external power supply voltage
level along with a warning if the source is too low to support reliable operation.
The fourth and final power-up display is the working screen for the analyzer’s default operating mode, as described
in Section 3.2 (SWR, Impedance R&X).
The MFJ-249C has three (3) Basic Operating Modes that are used for conducting a variety of measurements. If you
tap (momentarily press) the Mode button, the analyzer steps to the next Mode selection. The three main modes and
their opening screens are described in Section-3.3 below:
3.3
Main MODE descriptions
Press the Mode switch to scroll through the analyzer's three operating modes. By "scrolling", we mean that each tap
of the mode switch will step the analyzer ahead to the next menu selection. Each new selection comes up on the
display with an Identifier Screen. After 3 seconds, the Identifier Screen is replaced by the mode's working screen.
The menu is circular, so after sequencing through all five choices, the sequence starts over. The three basic
operating modes are described in detail below:
1.) SWR Bargraph: The SWR Bargraph mode is the analyzers "default" mode because it is the one most frequently
used for routine antenna adjustments. The MFJ-249C will measure the standing wave ratio (SWR) of any load
referenced to 50 ohms. To measure the SWR of a 50-ohm coaxial line simply connects the line to the ANTENNA
connector. The display will show the selected frequency and the actual SWR in a numerical and a bar graph format.
The maximum numerical SWR displayed is 25. Any SWR adjustments have to be made at the antenna, since any
adjustments at the transmitter end of the feedline cannot affect the losses, nor the efficiency of the antenna system.
2.) Impedance Magnitude: This mode will provide magnitude of the impedance readings for the load connected
to the ANTENNA jack. The readings are the combination of the resistive and reactive parts of the load. The
magnitude of the impedance (Z) is the square root of the addition of square of the resistance (R) and the
reactance (X). By considering the definition of Z and by adjusting the TUNE knob until the lowest SWR
reading is obtained, it is possible to read the antenna’s pure reactance. The point of the lowest SWR is generally
the point of lowest reactance. For the SWR to be 1:1, the load must be an impedance of 50 ohms of pure
resistance (R=50) , with no reactance ( X=0).The top line of the working display shows the VFO Frequency in
MHz and the numerical SWR reading. The lower line displays the Resistive (R) impedance components for the
attached load. Pressing the MODE push button, from the SWR mode selection, the Magnitude of the
Impedance (Z) mode is enabled. It will display Z in a range from 0 to 650 ohms. If the impedance is greater
than about 650 ohms the message “(Z>650)” is displayed. The SWR value for the connected load will be
displayed in the LCD. The stray output capacitance (around 3pF) will be lower than 650 ohms at frequencies
higher than 60 MHz. This stray capacitance does not affect high frequency measurements considering the
connection of a transmission line.
5
MFJ-249C Instruction Manual
HF/VHF SWR Analyzer
3.) Frequency Counter: The third mode converts the analyzer into a discrete frequency counter. Connect the RF
source (DUT) to the BNC connector labeled Frequency Counter Input. As with many counters, the sensitivity
threshold for a locked-in reading gradually decreases with increasing frequency. The measurement threshold at
0.53 MHz is around 10 millivolts -- and this level gradually increases to around 200 millivolts at 230 MHz. The
"never exceed" limit for safe testing is 2-volts peak-to-peak. The counter's default gate time is 0.1 second, but
you may reset it to either .01 second (very fast) or 1.0 second (very slow) by tapping the Gate button. A 1.0second gate times provide increased frequency resolution (more digits to the right of the decimal point), and the
.01 gate provides very fast response with less resolution (see sample screens below):
IMPORTANT WARNING: Never apply more than two volts of peak voltage -- or any dc voltage -- to
the Frequency Counter BNC port.
3.4
Blinking “VOLTAGE LOW” display warning
If the external dc source or battery voltage drops below 11 volts, a blinking Voltage Low warning will come up on
the display. Pressing Mode during a low-voltage warning will disable it and allow you to continue testing.
Caution: Measurements made with supply voltages below 11 volts may not be as reliable.
4.0
MAIN (OR OPENING) MODE
IMPORTANT WARNING: Never apply RF or any other external voltages to the Antenna port of this
unit. This unit uses zero bias detector diodes that are easily damaged by external voltages over a few
volts. Also, confirm the power supply is correct, as described in Section-2.0, before operating this unit.
A basic understanding of antenna theory and transmission line behavior will be helpful for making the best use of
the data provided by your MFJ-249C. The ARRL Handbook and ARRL Antenna Book provide concise peerreviewed explanations that should suffice for most applications. When it comes to the finer points of antenna
design, there is (unfortunately) a fair amount of mis-information circulating on the web and over the airwaves.
When it comes to antenna systems, there's no black magic. Stick with the scientific fundamentals as presented by
credible professional sources, and everything your analyzer tells you should make sense!
4.1
General Connection Guidelines
When conducting SWR and Impedance measurements, follow these practical guidelines:
1.) If connector transitions (RF adapters) are needed, use only high-quality parts and check them over for wear,
oxidation, dirt, and tight pin contact before proceeding.
2.) Make all connection electrically secure and keep all leads as short as possible. This precaution is especially
important when measuring electrical components that are not part of a 50-ohm coaxial system.
6
MFJ-249C Instruction Manual
HF/VHF SWR Analyzer
3.) Always use good quality 50-ohm cable and connectors when making SWR measurements. Contaminated,
mismatched, or damaged cable will introduce significant error.
5.0
ADJUSTING SIMPLE ANTENNAS
Most antennas are tuned for operating frequency by varying the element length -- and most homemade verticals and
dipoles are very simple to adjust.
5.1
Dipoles
Because the dipole is a balanced antenna, it's always a good idea (and good engineering practice) to install a balun
at the feed point. A balun could be as simple as several turns of coax wrapped several inches in diameter or it could
be a complicated affair with many windings on a ferromagnetic core. A 1:1 Guanella "current" balun wound on a
toroid core made from material with the appropriate permeability is usually the most effective choice.
The height of a dipole above ground, as well as any surrounding objects, will influence the feed point impedance
and SWR. Typical residential heights usually result in minimum SWR readings below 1.5:1 when using 50-ohm
coaxial cable. In general, the only adjustment available for tuning a simple wire dipole is its length. If too long, it
resonates too low in the band. If too short, it resonates high. You may be able to improve the match (SWR) by
raising or lowering the element in relationship to ground. However, doing so may impact other parameters such as
the best take-off angle for distant or local contacts (TOA).
Anytime the antenna impedance and feedline impedance do not precisely match each other (as is usually the case),
the feedline will act like a transformer and modify the Impedance of the load placed at the opposite end. However,
if you use good-quality 50-ohm cable, the SWR should remain constant except for a small reduction caused by
resistive loss as the line is made longer. If changing the coax length by a relatively small amount changes SWR at
your test frequency, the feedline either has common-mode current flowing on the outer surface of the shield that is
detuning the antenna, or the feedline itself is not really 50-ohm cable. Common-mode current caused by conduction
typically occurs when no balun has been installed at the feed point to choke it off. Common-mode induction
currents may also result from other installation errors such as running the feedline parallel rather than perpendicular
to the radiating element. Repositioning the feedline may reduce unwanted inductive coupling.
5.2
Verticals
Verticals in the "monopole" class require a ground plane. To simplify installation and cut costs, manufacturers
sometimes (incorrectly) downplay the importance of an effective radial system. When installed over a good ground,
the impedance of a quarter-wave radiator may be quite low, with SWR running nearly 2:1. Ironically, over a poor
ground, minimum SWR for the same antenna could improve to 1:1. However, if the ground system is poor, antenna
performance will be compromised despite favorable SWR readings. Far better to install the best ground system
possible and configure a matching network at the base of the vertical element to match into a 50-ohm feed system.
Verticals tune the same as dipoles -- add length to lower the operating frequency and shorten to raise it.
Another class of verticals are considered "ground-independent" because they come with a counterpoise or rigid
radial system built into the design. These antennas are usually configured as multiband OCFDs (off-center fed
dipoles) with the longer leg being the dominant vertical radiator. Ground independent verticals tend to work more
efficiently when elevated well above ground rather than when installed in close proximity to it because of reduced
ground losses. Many use multiple resonators or traps and have a matching network at the feed point. Most groundindependent vertical elements are asymmetrical and require a highly effective baluns to prevent the feedline from
becoming part of the antenna system.
5.3
Tuning a simple antenna
To tune a basic dipole fed with 50-ohm coax, follow the steps outlined below:
1.) Momentarily short the center conductor and shield to bleed off static, then connect to the Antenna jack.
2.) Set the analyzer's band switches and VFO tuning for the desired band.
7
MFJ-249C Instruction Manual
HF/VHF SWR Analyzer
3.) Select any analyzer operating mode that will display SWR.
4.) Read the SWR and adjust the VFO tuning for minimum SWR. Write down the frequency.
5.) To re-tune your antenna accurately without a lot of cut-and-try, calculate a Scaling Factor.
5.) First, determine if the antenna needs to be shorter (higher in frequency) or longer (lower in frequency).
6.) To make it shorter ( higher), divide the present frequency by the desired frequency (scaling factor <1).
8.) To make it longer (lower), divide the desired frequency by the present frequency (scaling factor >1).
9.) Multiply the scaling factor by the present length to calculate the new length.
For example, suppose your 132-foot dipole has low SWR on 3.750 MHz and you want to move it to 3.900 MHz. It
needs to be shorter to tune higher, so you calculate the scaling factor: 3.750/3.900 = 0.95. Next calculate the new
length: 132 feet x .96 = 125.7 feet. Note that scaling only applies to full-size verticals and dipoles that don't use
loading coils, traps, stubs, resistors, capacitors, or capacitance hats. Antennas with these features should be adjusted
according to the manufacturer’s instructions.
6.0
TESTING AND TUNING STUBS AND TRANSMISSION LINES
6.1
Testing Stubs
The proper length of quarter and half wave stubs or transmission lines can be found with this unit and a 50Ω carbon
resistor. Accurate measurements can be made with any type of coaxial or two wire line. The line does not have to be
50 ohms. The stub to be tested should be attached with a 50Ω noninductive resistor in series to the center conductor
of the "ANTENNA" connector with a coaxial line. The shield should be grounded to the connector shell. For two
wire lines the 50Ω resistor connects in series between the ground shell of the PL-259 and one conductor. The other
conductor of the balanced line connects directly to the center pin of the connector. Coaxial lines can lay in a pile or
coil on the floor, two wire lines must be suspended in a straight line a few feet away from metallic objects or
ground. The lines must be open circuited at the far end for odd multiples of 1/4 wave stubs (i.e. 1/4, 3/4, 1-1/4, etc.)
and short circuited for half wave stub multiples ( like 1, 1-1/2, etc.). Connect the PL-259 to the "ANTENNA"
connector of the MFJ-249C and adjust the line or stub by the following method. For critical stubs you may want to
gradually trim the stub to frequency.
1. Determine the desired frequency and theoretical length of the line or stub.
2. Cut the stub slightly longer than necessary.
3. Measure the frequency of the lowest SWR. It should be just below the desired frequency.
4. Divide the measured frequency by the desired frequency.
5. Multiply the result by the length of the stub. This is the necessary stub length.
6. Cut the stub to the calculated length and confirm that it has the lowest SWR near the desired
frequency.
6.2
Velocity Factor of Transmission Lines
Velocity Factor of Transmission Lines
The MFJ-249C can accurately determine the velocity factor of any impedance transmission line. Measure the
velocity factor with the following procedure:
1. Disconnect both ends of the transmission line and measure the physical length of the line in feet.
2. Set up the line to measure 1/4 stubs as in the section on Testing and Tuning Stubs.
3. Find the lowest frequency across all the bands at which the lowest SWR occurs. The dip should occur slightly
below the 1/4 wavelength frequency.
4. Read the frequency from the frequency counter display. This is the 1/4 resonant wavelength frequency of your
transmission line. Note that you will get low SWR reading at all odd
multiples of 1/4 wavelength..
5. Divide 246 by the measured frequency. This gives you the free space 1/4 wavelength in feet.
8
MFJ-249C Instruction Manual
6.3
HF/VHF SWR Analyzer
Impedance of Transmission Lines or Beverage antennas
The impedance of transmission lines between 15 and 150 ohms can be measured with the MFJ- 249C, a 250 ohm
potentiometer, and an ohm meter. Lines of higher impedance can be measured with a higher resistance
potentiometer if a broad band transformer is used (see the section on testing transformers) to transform the line
impedance to approximately 50 ohms.
1. Measure the 1/4 wavelength frequency of the transmission line to be tested as in Testing and Tuning Stubs
section.
2. Terminate the far end of the transmission line with a non-inductive 250 ohm potentiometer.
3. Connect the transmission line to the MFJ-249C "ANTENNA" connector and set the analyzer
to the 1/4 wave frequency.
4. Observe the SWR as you vary the "TUNE" from end to end of the "FREQUENCY" range
selected.
5. Adjust the potentiometer until the SWR reading varies as little as possible, over the "TUNE"
range. Note that the value of the SWR is not important. Only the change in SWR as the
frequency is varied is important.
6. The value of the potentiometer will correspond closely to the line impedance.
Line Impedance Using a Potentiometer or Resistor Decade Box:
Limit these measurements to the HF region because stray reactance from a potentiometer or decade box could
become a significant source of error at VHF frequencies. Also, use only non-inductive resistances (no wire-wound
resistors). If needed, you may install a broadband transformer of know performance accuracy to extend the
measurement range.
1.) Connect the DUT to the Antenna connector.
2.) Terminate the far end with a potentiometer or resistance decade box.
3.) Adjust the analyzer's VFO frequency and note only the SWR change (SWR need not be low).
4.) Adjust termination resistance until SWR remains constant over the widest possible range.
5.) The resistance of the termination resistor is the line impedance (or surge impedance of the system).
6.4
Adjusting Tuners
The MFJ-249C can be used to adjust tuners. Connect the MFJ-249C "ANTENNA" connector to the tuner's 50 ohm
input and the desired antenna to the normal tuner output. This connection can be made with a manual RF switch to
facilitate rapid changeover.
WARNING: Always connect the common (rotary contact) of the switch to the tuner. The switch must connect
either the MFJ-249C or the station equipment to the tuner. The Station Equipment Must Never Be Connected To
The MFJ-249C.
1. Connect the MFJ-249C to the tuner input.
2. Turn on the MFJ-249C and adjust it to the desired frequency.
3. Adjust the tuner until the SWR becomes unity (1:1).
4. Turn off the MFJ-249C and re-connect the transmitter.
6.5
Adjusting Amplifier Matching Networks
The MFJ-249C can be used to test and adjust RF amplifiers or other matching networks without applying operating
voltages. The tubes and other components should be left in position and connected so that stray capacitance is
unchanged. A non-inductive resistor that equals the approximate driving impedance of the tube is installed between
the cathode of the tube and the chassis, or a resistor should be connected between the anode and the chassis that
equals the calculated plate impedance of the tube. The appropriate network can now be adjusted. The antenna relay
(if internal) can be engaged with a small power supply so that the coax input and output connectors are tied to the
networks.
9
MFJ-249C Instruction Manual
HF/VHF SWR Analyzer
CAUTION: The driving impedance of most amplifiers changes as the drive level is varied.
Do not attempt to adjust the input network with the tube in an operating
condition with the low level of RF from the MFJ-249C.
6.6
Testing RF Transformers
RF transformers that are designed with a 50 ohm winding can be easily and accurately tested with the
MFJ-249C.
The 50 ohm winding is connected through a short 50 ohm cable to the "ANTENNA" connector on the
MFJ-249C. The other winding(s) of the transformer is then terminated with a low inductance resistor that
is equal to the windings impedance. The MFJ-249C can then be swept through the desired transformer
frequency range. The SWR and bandwidth of the RF transformer can be measured.
6.7
Testing Baluns
To test balun performance, connect the analyzer Antenna jack to the balun's 50-ohm unbalanced input. Terminate
the balanced side with two equal-value load resistors connected in series to make up the required load impedance.
For example, to test a 200-ohm (4:1) secondary, use a pair of 100-ohm carbon (non-inductive) resistors in series, as
shown below in Fig A:
Fig A
A
50 Ohms
Unbal
Balun
Fig B
R1
B
C
50 Ohms
Unbal
Balun
R2
Clip Lead
R1
A
>
<
C
R2
Clip Lead
A properly designed current balun works best for maintaining current balance. It also has the highest power
capability and lowest loss for given materials. To evaluate the balun (DUT), measure SWR while connecting the
grounded clip lead to point A, B, and C. When functioning properly, a current balun will exhibit low SWR over its
entire operating range with the clip lead installed at any of those three positions.
A well designed voltage balun should show low SWR over its operating range with the clip lead installed at position
B, but show poor SWR with the clip lead is installed at A or C (note, however, that the SWR readings should
measure about the same whether connected to A or C). A voltage balun should also be tested using the
configuration shown in Fig B, with the resistors in parallel. If it is operating properly, SWR will be remain low with
the resistors connected from either output terminal to ground.
6.8
Measuring Inductance and Capacitance
F To measure capacitance or inductance you will need some standard value capacitors and inductors.
These should be collected and tested for accuracy. MFJ suggests the following sets of values:
Inductors: 330μH, 56 μH, 5.6 μH, .47 μH
Capacitors: 10 pF, 150 pF, 1000 pF, 3300 pF
Readings will be the most accurate if the standard test values used are between 0.5 μH to 500 μH to
measure capacitance or 10 pF and 5000 pF to measure inductance.
Take a component of unknown value and connect it in series with a standard component to make a series
LC circuit. Attach the series LC circuit to the "ANTENNA" connector in series with a 50 Ω resistor.
10
MFJ-249C Instruction Manual
HF/VHF SWR Analyzer
Measure Capacitance
1. Connect an unknown capacitor in series with the highest value standard inductor.
2. Connect the LC circuit to ANTENNA connector with a 50 Ω resistor in series.
3. Adjust the tune knob through the bands until you get the lowest SWR. If you do not get a low SWR,
change to the next inductor with a lower value and try again. Continue the process until you obtain
low SWR.
4. Solve this equation using F as the resonant frequency and L as the inductance of the standard
inductor,
1
. 00003948F2 L
F = MHz L = μH
C(pF) =
Measure Inductance
1. Connect an unknown inductor with the highest value standard capacitor in series.
2. Connect the series LC circuit to "ANTENNA" connector with a 50 Ω resistor in series.
3. Adjust the tune knob through the bands until you get the lowest SWR. If you do not get a low SWR,
change to the next smaller value standard capacitor and try again. Repeat the process until you get
low SWR.
4. Solve this equation using F as the resonant frequency and C as the capacitance of the standard
capacitor.
1
. 00003948F2 C
F = MHz C = pF
L( μH) =
6.9
Resonant Frequency of Tuned Circuits
The MFJ-249C can be used to measure the resonant frequency of tuned circuits by two methods. The
first method involves placing a 50 ohm resistor in series with the MFJ-249C "ANTENNA" connector.
The MFJ-249C connects through the resistor to the parallel tuned circuit. This circuit is for high
capacitance values.
Tune the MFJ-249C's frequency until the highest SWR is reached. This is the resonant frequency of the
load.
MFJ-249C
To
the MFJ-249B's
"ANTENNA"
connector
50 ohms
Hi - "C"
All leads should be short
For high inductance values a series LC circuit should be used to measure resonant frequency. The
inductor and capacitor should be connected in series through a 50Ω low inductance carbon resistor across
the "ANTENNA" connector on the MFJ-249C.
11
MFJ-249C Instruction Manual
HF/VHF SWR Analyzer
ToMFJ-249C
the MFJ-249B's
"ANTENNA"
connector
Hi - "L"
50 ohms
All leads should be short
Tune the MFJ-249C's frequency until the lowest SWR is reached. This is the resonant frequency of the
load.
An external diode detector and volt meter can also be used to measure the resonant frequency of circuits.
The maximum meter reading occurs at the resonant frequency.
50 ohm
1N34
To
the MFJ-249B's
MFJ-249C
"ANTENNA"
connector
.01
10K
Measure the voltage
between these points
with a Hi-Z meter
All leads should be short
Testing RF Chokes
Large RF chokes usually have frequencies where the distributed capacitance and inductance form a low
impedance series resonance. The troublesome series resonance can be detected by slowly sweeping the
frequency of the MFJ-249C over the operating range of the choke. Peaks in the voltage measured by the
RF voltmeter will identify the low impedance series-resonant frequencies.
choke
To
the MFJ-249B's
MFJ-249C
"ANTENNA"
connector
10K
1N34
.01
Measure the voltage
between these points
with a Hi-Z meter
All leads should be short
Refer to the section on measuring the inductance of RF chokes.
7.0
TECHNICAL ASSISTANCE
If you have any problem with your MFJ-249C, first check the appropriate section of this manual. If the manual does
not reference your problem and the problem isn't solved by reading the manual, you may call MFJ Technical
Service at 662-323-0549 or the MFJ Factory at 622-323-5869. We can serve you best if you have your unit,
manual, and all pertinent information about your difficulty handy so you can answer questions the technicians may
ask.
You can also send questions by mail to:
MFJ Enterprises, Inc.,
300 Industrial Park Road,
Starkville, MS 39759;
by FAX to 662-323-6551; or by e-mail to [email protected]. Send a complete description of your
problem, an explanation of exactly how you are using your unit, and a complete description of your station.
12
FULL 12-MONTH WARRANTY
MFJ Enterprises, Inc. warrants to the original owner of this product, if manufactured by MFJ Enterprises,
Inc. and purchased from an authorized dealer or directly from MFJ Enterprises, Inc. to be free from
defects in material and workmanship for a period of 12 months from date of purchase provided the
following terms of this warranty are satisfied.
1. The purchaser must retain the dated proof-of-purchase (bill of sale, canceled check, credit
card or money order receipt, etc.) describing the product to establish the validity of the warranty
claim and submit the original or machine reproduction of such proof of purchase to MFJ
Enterprises, Inc. at the time of warranty service. MFJ Enterprises, Inc. shall have the discretion to
deny warranty without dated proof-of-purchase. Any evidence of alteration, erasure, of forgery
shall be cause to void any and all warranty terms immediately.
2. MFJ Enterprises, Inc. agrees to repair or replace at MFJ's option without charge to the
original owner any defective product provided the product is returned postage prepaid to MFJ
Enterprises, Inc. with a personal check, cashiers check, or money order for $12.00 covering
postage and handling.
3. MFJ Enterprises, Inc. will supply replacement parts free of charge for any MFJ product under
warranty upon request. A dated proof of purchase and a $8.00 personal check, cashiers check, or
money order must be provided to cover postage and handling.
4. This warranty is NOT void for owners who attempt to repair defective units. Technical
consultation is available by calling (662) 323-5869.
5.
This warranty does not apply to kits sold by or manufactured by MFJ Enterprises, Inc.
5. Wired and tested PC board products are covered by this warranty provided only the wired
and tested PC board product is returned. Wired and tested PC boards installed in the owner's
cabinet or connected to switches, jacks, or cables, etc. sent to MFJ Enterprises, Inc. will be
returned at the owner's expense un-repaired.
6. Under no circumstances is MFJ Enterprises, Inc. liable for consequential damages to person
or property by the use of any MFJ products.
8. Out-of-Warranty Service: MFJ Enterprises, Inc. will repair any out-of-warranty product
provided the unit is shipped prepaid. All repaired units will be shipped COD to the owner. Repair
charges will be added to the COD fee unless other arrangements are made.
9.
This warranty is given in lieu of any other warranty expressed or implied.
10. MFJ Enterprises, Inc. reserves the right to make changes or improvements in design or
manufacture without incurring any obligation to install such changes upon any of the products
previously manufactured.
11. All MFJ products to be serviced in-warranty or out-of-warranty should be addressed to MFJ
Enterprises, Inc., 300 Industrial Park Rd, Starkville, Mississippi 39759, USA and must be
accompanied by a letter describing the problem in detail along with a copy of your dated proof-ofpurchase and a telephone number.
12. This warranty gives you specific rights, and you may also have other rights, which vary from
state to state.
Rev 04/08/2011
300 Industrial Park Road
Starkville, MS 39759
MFJ-249C Manual
Version 1A
Printed In U.S.A.