Download Instructions for installation and use
Transcript
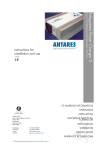
Integrated Power Charger 2
© 2004
24V & 12V VERSIONS FOR SPECIALIST VEHICLES
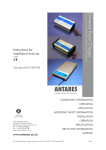
Instructions for
installation and use
CE MARKING INFORMATION
UNPACKING
APPLICATION
FM 37786
ISO 9001:2000
Antares (Europe) Limited
Chiltern Hill . Chalfont St Peter
Gerrards Cross . Bucks . SL9 9UQ . UK
Tel: +44 (0)1753 890888
Fax: +44 (0)1753 891260
email: [email protected]
web site http://www.antares.co.uk
IPC2 Power Charger User Manual, Part No 13130 issue 3
IMPORTANT SAFETY INFORMATION
INSTALLATION
OPERATION
SPECIFICATION
WARRANTY RETURN FORM
Page 1
CE MARKING - INFORMATION
Conditions of use for which CE mark applies
This equipment is intended to be used solely for professional purposes in commercial and light industrial
locations, powered from the low-voltage public mains supply.
Non approved conditions of use
This unit may be suitable for use in other applications, but it can only be supplied as a component in this
respect, for which the CE mark displayed on this manual does not apply. If the unit is used in this way, as a
component part to build a battery charging or similar apparatus, then this unit is supplied solely on the
condition that it is the responsibility of the manufacturer of the charging apparatus to ensure that the
apparatus complies with the requirements of the relevant legislation, and apply the CE marking should it be
required. In this case, this user manual does not apply, and reference should be made to Antares (Europe)
Limited for any information required for compliance with the legislation.
UNPACKING
Pack contents:
1 Antares Power Charger
1 Instructions for Installation & Use
APPLICATION
The Power Charger is suitable for use under shelter only. It must not be exposed to rain. It is suitable for a
wide range of applications on vehicles or in fixed locations, subject to the conditions of use stated above
under CE marking. It may be used as a stand alone high performance DC power supply, or as a fully
automatic multistage charger when connected to a battery. The charging characteristics of the standard model
are optimised for flooded and retained electrolyte lead acid batteries.
Please ensure that operation is confined to within the limits contained in the product specification given at the
end of this manual.
Suitable Battery Types:
The power charger is suitable for charging the following types of battery:
12 VOLT MODELS:
Flooded and retained electrolyte lead acid batteries of 12 volt rating, being made up from 6 cells connected in
a series configuration.
24 VOLT MODELS:
Flooded and retained electrolyte lead acid batteries of 24 volt rating, being made up from 12 cells connected
in a series configuration.
No attempt should be made to charge non-rechargeable batteries with this unit, as a hazard could result.
IMPORTANT SAFETY INFORMATION
1 Please read and observe the installation instructions, which contain further safety information.
IPC2 Power Charger User Manual, Part No 13130 issue 3
Page 2
2 WARNING: Explosive gasses may be generated by a battery on charge. To prevent ignition, allow time
for gasses to disperse before attempting to connect this unit to the supply battery.
3 Statutory Notice: The wires in the mains input lead are coloured in accordance with the following code:
Blue: Neutral
Brown: Live
Green/Yellow: Earth
If the colours of the wires in the mains lead of this equipment do not correspond with the markings in
your plug, proceed as follows:
The Blue wire must be connected to the terminal marked N or coloured Black.
The Brown wire must be connected to the terminal marked L or coloured Red.
The Green/Yellow wire must be connected to the terminal marked E or coloured Green.
THIS EQUIPMENT MUST BE EARTHED
4 Low Voltage Circuits
This equipment must be installed in such a way that high currents present in any battery circuits or other
output connections are prevented from flowing through the equipment mains lead. Such currents could
damage the integrity of the protective earth connection.
The incoming mains earth connects only to the Power Charger enclosure. Both the earth and enclosure
are isolated from all Power Charger output circuits, which helps the above requirement to be achieved.
The low output voltage from this unit does not present an electric shock hazard, but the high current
available can be hazardous by virtue of its potential heating effect, particularly if batteries are also
connected. The installation wiring must therefore be adequate for the currents involved, with suitable
protection from potential fault conditions. Accidental bridging of high energy circuits by users (eg by
jewellery) must be prevented.
INSTALLATION
Choosing a location
Choose a location where the unit will not be subjected to water spray, dust, or insect ingress. Filters are
available for the fan air intake, and must be fitted if a low dust environment cannot be provided.
Locations subjected to high temperature or vibration must be avoided if performance and reliability are not to
be impaired.
The power system may be mounted in any orientation, but ensure that there is sufficient clearance at each end
of the unit to allow air to enter and leave without undue restriction (15 to 20mm clearance is sufficient). Any
possibility of the air vents becoming accidentally obstructed should be prevented.
Ideally, the unit should be located in the same area as the load equipment or battery in order to minimise
voltage drop in the DC output leads, and also to ensure that the Power Charger temperature compensating
charge system samples air with the same temperature as the batteries. If a similar operating temperature
environment cannot be provided, then a remote temperature sensor is available as an option.
A range of extended output leads is available for situations where longer leads are required.
Integral flanges are provided for ease of mounting in situations where the unit needs to be secured to prevent
movement, such as in vehicles. Dimensional details and locations of the mounting holes are below.
IPC2 Power Charger User Manual, Part No 13130 issue 3
Page 3
Mounting
Integral flanges are provided for ease of mounting in situations where the unit needs to be secured to prevent
movement, such as in vehicles. Ideally, the mounting should make electrical contact with the vehicle
bodywork. Mounting hole locations are shown below.
100
100
50
205
9
50
9
130105-1
MOUNTING HOLES, DIAMETER 6.5mm
OVERALL HEIGHT 98mm
Connections
AC input supply
DC output ratings
AC mains
supply input
Main output
positive
Main output
negative
13.8 volt 1.5 amp
auxiliary float
output (if fitted)
130130-1
Mains Connection
This equipment is designed for connection to public low-voltage single phase AC mains supplies. It is built
to insulation class 1, and so must be earthed. The input voltage range for each model is given in the product
specification at the end of this manual.
The wires in the mains input lead are coloured in accordance with the following code:
Blue: Neutral
Brown: Live
Green/Yellow: Earth
The unit is equipped with a fuse in the input Live circuit only, located in the fuseholder inside the rear panel.
Rupture of this fuse is indicative of a unit fault; it is not a user serviceable item.
IPC2 Power Charger User Manual, Part No 13130 issue 3
Page 4
Earth leakage current is less than 1mA, which permits mains connection via an appropriate non-reversible
mains plug if desired. If a standard UK domestic plug is used, it should be fitted with a 10 amp fuse.
Local regulations, or regulations applicable to the intended application of this product, may override or
impose additional requirements, which must be taken into account. Attention is drawn to the requirement for
residual current circuit breakers in some vehicular applications.
Output Connections
WARNING: Explosive gasses may be generated by a battery on charge. To prevent ignition, allow time for
gasses to disperse before attempting to connect this unit to the supply battery.
The Power Charger is normally supplied with two flying leads for the main power output. The heavy gauge
red lead is the connection to system positive, and the black lead to negative. Positive, negative or isolated
chassis circuits may be connected. Be sure to disconnect the input supply before making or removing the
connections to the battery. If the auxiliary 13.8 volt float output is fitted, it is accessible at the 6.3mm blade
terminal at the AUX OUTPUT. Its negative is shared with the main output negative.
In battery charging applications, both the positive and negative leads should ideally be routed directly to the
battery terminals. This ensures that the Power Charger system responds only to the battery conditions,
without being disturbed by other connected equipment. The unit is suitable for permanent connection to the
battery.
If a temporary connection is made to an automobile battery whilst in situ, proceed as follows:
•
•
•
•
Ensure that the AC input supply is disconnected.
Then connect the appropriate output conductor to the battery terminal which does not connect
to the vehicle chassis (normally positive on negative earth vehicles), then connect the other
output conductor to the battery terminal which connects to the vehicle chassis.
Connect the AC input supply.
To stop charging, disconnect the AC input supply then remove the battery connections in
reverse order.
The leads may be shortened if required.
If longer leads are required, the leads supplied can be replaced or lengthened, using suitable cable, up to a
maximum extended length of around 5 metres. Suitable cable sets can be supplied by Antares (Europe)
Limited if required. Note that Power Charger units can be supplied to order with customer specified mains or
output cable lengths and terminations.
OPERATION
The Power Charger system is fully automatic in operation.
Three panel lamps show the operating condition of the unit:
CHARGE:
INPUT:
PROTECTION:
Green lamp - indicates that the battery is in the process of being fast charged.
Green lamp - This lamp illuminates once fast charging is complete, indicating
that the battery is being held on float.
Red indicates that the unit has shut down due to an external fault or internal
overheating. Recovery is automatic once the offending fault condition has been
cleared.
The Power Charger may be permanently connected to the battery, and continuously powered if required.
There is no reverse drain on the battery when mains is disconnected and the unit is comprehensively
protected from abuse or fault conditions. In vehicular applications, the engine may be started and run with the
Power Charger system connected.
IPC2 Power Charger User Manual, Part No 13130 issue 3
Page 5
SPECIFICATIONS
Model range & part numbers
90165 - 12 volt 40 amp, 230VAC
90166 - 12 volt 40 amp, 110VAC
90167 - 24 volt 20 amp, 230VAC
90168 - 24 volt 20 amp, 110VAC
90173 - 24 volt 15 amp, 230VAC
90174 - 24 volt 15 amp, 110VAC
90175 - 24 volt 15 amp, with auxiliary 12V, 230VAC
90176 - 24 volt 15 amp, with auxiliary 12V, 110VAC
90177 - 24 volt 20 amp, with auxiliary 12V, 230VAC
90178 - 24 volt 20 amp, with auxiliary 12V, 110VAC
90181 - 12 volt 30 amp, 230VAC
90182 - 12 volt 30 amp, 110VAC
Input specifications
Input voltage range:
230 volt models: 200 to 264VAC continuous, 275VAC intermittent.
110 volt models: 95 to 121VAC continuous, 126VAC intermittent.
Input frequency range:
45 to 66Hz
Inrush current:
230 volt models:
85 amps peak, 1.2 milliseconds
total inrush 0.1 amp-seconds
110 volt models:
39 amps peak, 5.2 milliseconds
total inrush 0.2 amp-seconds
Insulation class I; protective earth required, supplied via mains input cable.
Output specifications
Output voltage:
12 volt models:
Float voltage
Boost voltage
Temperature coefficient
13.7VDC at 20° C
14.2VDC at 20° C
-24mV/degC
24 volt models:
Float voltage
Boost voltage
Temperature coefficient
27.4VDC at 20° C
28.6VDC at 20° C
-47mV/degC
Aux 12volt output:
Float voltage
Charging current
13.8VDC
1.5 amps (typical)
Battery sensing threshold
12 volt models:
4.0 volts
24 volt models:
4.0 volts
The battery voltage must be higher than this threshold for charging to commence.
Climatic specifications:
Operating temperature range:
Full output power:
Reduced output power
(IPC2 is self limiting)
IPC2 Power Charger User Manual, Part No 13130 issue 3
-5°C to +30°C
+30° to +45°C
Page 6
Antares (Europe) Limited
Chiltern Hill
Chalfont St Peter
Gerrards Cross
Buckinghamshire
SL9 9UQ UK
www.antares.co.uk
Tel: +44 (0) 1753 890888
Fax: +44 (0) 1753 891260
q PRODUCT RETURNS FORM M
q ADVANCE REPLACEMENT RETURNS FORM
Date
(TICK BOX ABOVE TO INDICATE TYPE OF RETURN)
PLEASE USE THIS FORM TO ACCOMPANY RETURNS TO ANTARES (EUROPE) LIMITED. This will enable
us to expedite your repair/return more efficiently. If you have your own return form, please attach it to
this form. After receipt of your return we will either repair or replace the unit if within our warranty. If
outside our warranty, we will provide a written quotation for repair/replacement. Please note that in the
case of a ‘no fault found’ or the repair does not proceed, then a charge of £25 ex VAT and return
carriage (if required) is payable. Goods arriving without suitable paperwork will take longer to process.
Contact
Company Name
Delivery Address (for return)
Part Number
Serial Number
Product Description
Vehicle Type
Registration/your reference
Contact Fax
Contact Tel
Reason for return
(
(
(
(
(
(
(
)
)
)
)
)
)
)
Advance replacement returned for credit against invoice ..… RA ………
Incorrect supply
Please repair under warranty (Invoice date ……/……/……)
Please quote for repair
Please repair – purchase order attached ( )
Not required (note there may be a restocking charge)
Unit for reconditioning (advance replacement RA# ………………)
Description of observed fault and additional relevant information
continued on separate page ( )
IPC2 Power Charger User Manual, Part No 13130 issue 3
Form 040 Issue 8 26.07.04
Page 7


