1
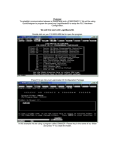
What's new in QD 3.60
QuickDesigner 3.60
Contents
What's new in QuickDesigner 3.60
1
Introduction ............................................................................................................................... 1
Software support for the 7.4”, 10.5” and 12.1” TFT Quick Panels............................................ 1
Serial Communication ............................................................................................................... 1
Ethernet Connectivity ................................................................................................................ 2
Compact Flash Project Back Ups .............................................................................................. 2
Back Light burnout Detection.................................................................................................... 2
Keypads for 7.4” and 10.5” Displays........................................................................................ 2
Improvements over Quick Designer 3.51 .................................................................................. 3
Basic Requirements ................................................................................................................... 3
Software Authorization.............................................................................................................. 4
Product Authorization using Email ............................................................................. 5
Product Authorization via Web Site ............................................................................ 6
Completing Product Authorization.............................................................................. 8
Help Menu ................................................................................................................................. 9
Product Authorization ................................................................................................. 9
QuickDesigner Support Web Page .............................................................................. 9
QuickDesigner Home Page : ....................................................................................... 9
Online Knowledge Base ............................................................................................ 10
Knowledge Base........................................................................................................ 10
Panel Editor Manual .................................................................................................. 10
Hardware Reference Manual ..................................................................................... 10
Protocol Troubleshooter ............................................................................................ 10
Download Troubleshooter ......................................................................................... 10
QuickPanel Error Codes ............................................................................................ 10
Quick Help ................................................................................................................ 10
Communication Help................................................................................................. 10
System Requirements for Modem Setup........................................................................... 11
Downloading with a Modem ................................................................................................... 11
Running HyperTerminal............................................................................................ 12
Modem Setup ............................................................................................................ 12
Run QuickDesigner ................................................................................................... 13
Addendum
Contents • i
What's new in QuickDesigner 3.60
Introduction
Following are the features supported by Quick Designer 3.60.
•
Software Support for the 7.4”, 10.5” and 12.1” TFT Quick Panels
•
Serial Communication
•
Ethernet Connectivity
•
Compact Flash Project Back-Ups
•
Back Light Burnout Detection
Software support for the 7.4”, 10.5” and 12.1” TFT Quick
Panels
• 4 Mbytes of Memory – More than twice the memory than previous models to give you more room for critical
applications.
• Agency Approvals – 24VDC unit comes with all the necessary industrial safety and performance approvals
including UL508, UL1604 Class I/Div 2, CAN/CSA-C22.2.
Quick Panel Type
Reference Part
Numbers
Model Numbers
7.4” TFT Panel
QPGCxDExxxx
2880061
10.5” TFT Panel
QPICxDExxxx
2880045/01
12.1” TFT Panel
QPLCxDExxxx
2880045/02
Serial Communication
•
Download to QuickPanel (all models): Support for up to 38.K Baud
Addendum
Contents • 1
•
QuickPanel SIO port to PLC (all QP3 and QP-Ethernet models): Support for up to and 115.2K using off-line mode
menu in the QuickPanel.
•
New Drivers in Quick Designer 3.60: Honeywell UMC serial driver
Ethernet Connectivity
•
Project Upload/Download
In Quick Designer 3.60 the Quick Designer projects can be uploaded and downloaded using Ethernet connectivity.
Communication to PLC – TCP/IP Protocols (Allen-Bradley, GE Fanuc SRTP & EGD, and Modicon)
•
Ethernet Drivers:
GE TCP IP Driver
AB TCP IP Driver
The AB TCP IP driver supports communications to PLC5, SLC500, and ControlLogix PLCs.
Compact Flash Project Back Ups
•
Project Upload/Download from and to the Ethernet Series QuickPanel
The project Uploads and Downloads using Compact Flash can be done using offline Mode from Panel. For more details
refer to Hardware reference Manual.
•
Project backup to the CF Card in the PC (PC adapter required)
This feature is available from Quick Manager GUI option. From project Menu select the Compact Flash Card. It will
show up a dialog with the options that can be done. Context Help is having all the details. For more details on using this
feature refer to Panel Editor Manual.
Back Light burnout Detection
For Detecting the Backlight status user can configure a Bit (Discrete) Type Tag -(Usually Internal Bit, Temporary bit
OR Output Discrete bit).
In project Setup menu, System dialog is used for specifying the tag, which will contain the Backlight Status Tag. After
back light burns, specified registers bit will set to 1.
For example – In case of GESNPX protocol you can configure %MBI#, %TBI#, %QI# discrete register as Backlight
status Tag. If Backlight burns Out the Specified Bit position will change the status from 0 to 1.
Other protocols will also take discrete type register. For more information on PLC tags refer to IOAddressing guide and
communication help.
Keypads for 7.4” and 10.5” Displays
Ethernet series Quick Panels can be used with the following Key pads.
Addendum
Model Number
HMI-KPN-401
Description
7.4" displays (QPGxxxE0000)
HMI-KPN-402
10.5" displays (QPIxxxxE0000)
Contents • 2
Features:
• 26 Programmable Keypads
• Numeric Keypad (Reserved Keys)
• Removable Legends
• Keypads can simulate panel operators
• Keypads can be assigned to screen operators
L3
R3
L2
R2
L1
R1
T0
T5
B0
B5
T1
T2
T3
T4
B1
B2
B3
1
2
3
4
5
6
BK
SP
7
8
9
ENTER
+/- 0
.
DONE
A0 A1 A2 A3
A4 A5 A6 A7
B4
Improvements over Quick Designer 3.51
In addition, this version also has the following features which is an improvement from Quick Designer 3.51
•
Mini Panels
Both the Mini panels - Quick Panel Mini Mono and Blue Mode Mono can now be designed for more than 5
panels and all the Panel Objects supported by the QPJ and QPK series QuickPanel now can be used.
•
SIO Baud rate (Serial Communication – 25 pin)
PLC and panel can communicate at higher baud rates 38400, 57600 and 115200-baud rate.
Basic Requirements
The basic requirements listed in the Readme file and in the user manual have been changed to reflect the system
requirements to adequately run QuickDesigner software.
1. Windows 95/98 or Windows NT 4.0 or Windows 2000 or ME Operating Systems
2. Pentium 133 MHz processor, 32Meg of RAM, 16X CD-ROM drive, 80 Meg of free space on the
hard drive, Mouse and Keyboard.
3. 800 x 600 Video Display, 16-bit Color.
4. IE 4.0 with SP2 or higher is required to install Quick Designer 3.60.
Addendum
Contents • 3
Software Authorization
When the setup program has finished adding QuickDesigner to your system, it will
display the following prompt.
Click OK to start the Product Authorization program. You can also start this program
from Quick Manager by selecting Help/Product Authorization, or from the
Start/Programs/Total Control Products/Product Authorization menu selection.
The main software dialog appears as follows. The Key Code button is used for
completing the authorization process with the key code received through e-mail.
Click the "Add" button to authorize a new product. You will be given several choices
for the authorization process.
Addendum
Contents • 4
Product Authorization using Email
To authorize the software via Email, select the Internet/E-mail option and click Next.
The program checks your system for Email functionality and displays the following
dialog.
If the Email option is chosen, the following data entry screen appears. You must
enter all items marked with an asterisk.
Click the Next button to continue. The next dialog is a summary of the items entered
above. Press the Back button to correct any information. Press the Authorize button
to send the Email to Total Control Products.
Addendum
Contents • 5
A confirmation dialog will appear. This lets you know that the Email is in the
process of being sent or has already been sent, and you should open the Email reply
to complete the authorization process.
Note that the "Close" button is disabled until the email is sent.
Product Authorization via Web Site
To authorize the software via Web Site, select the Internet option and click Next.
Addendum
Contents • 6
Change the option to Authorize through a web site, then click Next.
To authorize through a Web Site, click the Finish button. You must have Internet
access and be configured properly for this option to work.
The default web browser will then open, to the TCP Authorization web site. The
web page will contain a data entry page (see the sample in the Product Authorization
using Email section. After the form is submitted, you will be told that your key code
will be sent to you through Email.
Addendum
Contents • 7
Completing Product Authorization
After receiving the Email reply, start the Product Authorization program by going to
Start/Programs/Total Control Products and selecting Product Authorization. Click
the Software Keys button.
Select the "Key Code" button from the main software authorization dialog.
Enter the Key Code and click the Finish button.
You can use QuickDesigner software to create projects only for a limited time unless
it is properly authorized.
Addendum
Contents • 8
Help Menu
The Help menu now has selections for Product Authorization, Web support pages,
Knowledge Base documents, user manuals and links to troubleshooting guides.
Product Authorization
The Product Authorization procedure requires that you authorize QuickDesigner for
full use on your computer. Unauthorized versions can be used to create projects but
they cannot be downloaded to a QuickPanel display. You can authorize the software
via Phone/FAX or the Internet.
QuickDesigner Support Web Page
QuickDesigner support home page on the Total Control Products web site. You must
have a web browser installed to view these pages.
If the Users web browser is not IE or the path to the web browser is not correct the
following error dialog will be shown.
QuickDesigner Home Page :
QuickDesigner home page on the Total Control Products web site (www.totalcontrol.com). You must have a web browser installed to view these pages. See the
warning in Tech Support Web Page.
Addendum
Contents • 9
Online Knowledge Base
Online Knowledge Base page on the Total Control Products web site. You must have
a web browser installed to view these pages. See the warning in Tech Support Web
Page.
Knowledge Base
The Knowledge Base files may have been added to your system during installation.
These files can be found in the default directory Quick/Qd_kb.
Panel Editor Manual
User manuals in PDF format may have been added to your system during
installation. The Panel Editor manual contains all the information about Installation,
Software Authorization, QuickManager, QuickDesigner, QuickCourier, Tags,
Alarms, etc. When you click on this link, the manual is opened with Adobe Acrobat
Reader.
Hardware Reference Manual
User manuals in PDF format may have been added to your system during
installation. The Hardware Reference manual contains information about
QuickPanels, cable diagrams, cutout diagrams, bezels, option modules, keypads, and
maintenance procedures. When you click on this link, the manual is opened with
Adobe Acrobat Reader. Also available on Total Control Web-site.
Protocol Troubleshooter
A direct link to the Protocol Troubleshooting section of the Readme.hlp file.
Download Troubleshooter
A direct link to the Download Troubleshooting section of the Readme.hlp file.
QuickPanel Error Codes
A direct link to the QuickPanel Error Codes section of the Readme.hlp file.
Quick Help
In Quick Designer 3.60 version the Quick Help can be invoked from Help Menu of
Quick Manager Menu bar.
Communication Help
In Quick Designer 3.60 this help file can be invoked from Quick Manager Help
Menu. With this integration Comm.pdf , Communication Manual is no more
available. All the required information is now available in comm..hlp.
Addendum
Contents • 10
System Requirements for Modem Setup
HyperTerminal is used to connect and configure the modems. This allows changing modem parameters, and dialing the
remote modem, while in the command mode. Once Hyperterminal connects the modems, the program is disconnected to
leave the modems ready for communications.
QuickDesigner uses a program called Courier to communicate with QuickPanels. Courier must be forced to a fixed baud
rate. This is done by editing the COURIER.INI file found in the Quick folder. Change the AutoBaud setting to 9600.
See the sample file below. Note that the Port setting is set to serial port 2.
Downloading with a Modem
This application note describes a method of connecting a QuickPanel to a modem so
that files can be downloaded from a remote location. A diagram showing the
configuration is shown below.
Port 2
PC with QuickDesigner
Modem
Modem
NULL
Modem
Adapter
QUICKPANEL
HMI-CAB-C49 Cable
On one side of the modem link, a PC is connected to the modem through a serial
port. In this example Port 2 is used. A communications program called
HyperTerminal is used to establish modem connections. QuickDesigner Panel Editor
Software is used to send the project file to the modem.
On the other side of the modem link, a QuickPanel is connected to a modem with a
HMI-CAB-C49 cable and a Null Modem adapter. You may also need a 25-pin to 9pin adapter since the HMI-CAB-C49 cable has a 9-pin header. Depending on your
modem, you may also need gender changers.
Addendum
Contents • 11
[Settings]
CourierWindow = 16 63
Port=2
AutoBaud=9600
Running HyperTerminal
• Start the HyperTerminal Program.
• The Connection Description dialog appears. Enter a name and select an icon for
the connection.
• When the Phone Number dialog appears, select 'Direct to Com 2' in the Connect
using list box.
• When the Com2 Properties dialog box appears, set the parameters as:
9600 Baud
8 Data Bits
No Parity
1 Stop Bit
Flow control=None
Click Ok to enter parameters.
HyperTerminal is now in command mode. If your modem does not have
dipswitches, you can enter AT commands to change the settings of the modem.
Modem Setup
The next step is to setup the modems so that they will respond properly when
Courier starts the download process. The modems used in this application note are
from Multi-Tech Systems, Model MT1932ZDX. These modems are capable of
19.2Kbps.
The modems must be set to:
9600 Baud
Auto Answer
DTR Forced High (Ignore DTR)
The modem used in this note required sending command codes to the modem using
HyperTerminal. Your modem may have dipswitches for changing parameters. Here
is a list of the commands used in setup. These commands may be different for your
brand of modem.
AT$MB9600
AT$SB9600
AT&S1
AT&D0
Originate call at 9600 bps.
Set serial port to 9600 bps.
Let DSR follow CD.
Modem ignores DTR signal
Dial the remote modem using an AT command such as:
ATDT9,4862807
Once the modems are connected, a message similar to the following one should
appear.
CONNECT 9600 LAPM COMPRESSED
Addendum
Contents • 12
Use the Disconnect button on the HyperTerminal tool bar to disconnect
HyperTerminal. The modems should stay connected. If they do not, you must use
modem commands to change the communication parameters.
Run QuickDesigner
Start QuickDesigner. Select the project and click the download button. The file will
be sent through Port 2 to the local modem, then to the remote modem to the
QuickPanel. Once the project is loaded, the QuickPanel should restart with the new
project.
Addendum
Contents • 13